
You also want an ePaper? Increase the reach of your titles
YUMPU automatically turns print PDFs into web optimized ePapers that Google loves.
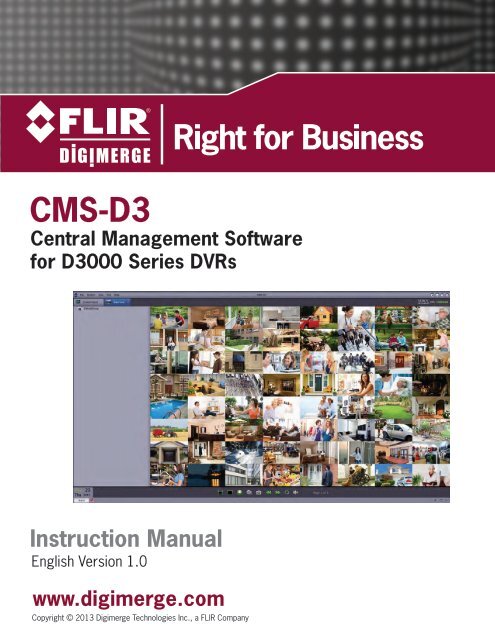
<strong>CMS</strong>-<strong>D3</strong> C<strong>EN</strong>TRAL MANAGEM<strong>EN</strong>T SOFTWARE<strong>CMS</strong>-<strong>D3</strong> is a central management software that allows you to view and manage multiple FLIR<strong>D3</strong>000 Series DVRs.System RequirementsYour system must meet the system requirements below:Minimum SpecificationCPURAMVideo Card 1NetworkHDDOperatingSystemCore 2 Duo 2.4 GHz or higher2 GB or higherDirectX® 9.0 compatible video cardNVIDIA GeForce 9500GT or higher; 512 MB video memory or higher1 Gigabit internal network recommended (including NIC, router/switch, and Cat 5e orhigher RJ45 cabling)512 MB or higher upload speed for remote connections1 GB free, excluding space required for recordingWindows® Vista Business, Enterprise, or Ultimate (32 bit or 64 bit)Windows® 7 Professional, Enterprise, or Ultimate (32 bit or 64 bit)Windows® 8, Windows® 8 ProfessionalDirectX® 9.1 and above requiredMac OS® 10.6 and above1. Make sure to install video card drivers provided by the manufacturer.1
Installing <strong>CMS</strong>-<strong>D3</strong>INSTALLING <strong>CMS</strong>-<strong>D3</strong>To install <strong>CMS</strong>-<strong>D3</strong>:• Download <strong>CMS</strong>-<strong>D3</strong> for free from www.digimerge.com. Extract the setup file and thendouble-click it.NOTE: You may receive installation warnings. This is normal. Accept the security warnings tocontinue.1. Follow the on-screen instructions to install the software.2. Click Finish to launch <strong>CMS</strong>-<strong>D3</strong>.Click Finish3. Click Login to login to the software. By default, a password is not required to log into <strong>CMS</strong>-<strong>D3</strong>.Click LoginNOTE: To open <strong>CMS</strong>-<strong>D3</strong> from the desktop, double-click the <strong>CMS</strong>-<strong>D3</strong> icon ( ).Adding DVRsAdding a DVR from the local area network (LAN)Once you open <strong>CMS</strong>-<strong>D3</strong>, you can add a DVR.Prerequisites:• DVR must have access to the local area network (LAN).To add a DVR to <strong>CMS</strong>-<strong>D3</strong>:2
1. When <strong>CMS</strong>-<strong>D3</strong> opens the first time, the Add Camera Wizard opens. Click Next.Click NextNOTE: If the Add Camera does not open, click Help>Open Wizard to manually open it.2. Click Add online device. The client software scans for DVRs on your network.Show Online Devices3. Click your DVR in the list and click Add Selected Device. The Add Device screen opens andpopulates the DVR’s IP Address, Port, and the number of channels.Click your DVR in the listNOTE: If your DVR does not appear in the list, click Exit>Add Device. Then, enter the local IPAddress of the DVR.4. Under Device Name, enter a name for your DVR of your choice (e.g. home, business, etc.).5. Under User Name, enter the DVR’s user name (default: admin).6. Under Password, enter the DVR’s password. By default, the password is left blank unless youhave enabled passwords in the system.3
11. Click and drag Default Group to the display grid.Adding a DVR using a DDNS addressIf you have DVR systems that have DDNS set up, you can add them to <strong>CMS</strong>-<strong>D3</strong>.Prerequisites• Create a DDNS account.• Enter the DDNS information into the DVR locally.• Port forward the required ports to the router.To add a DVR using a DDNS address:1. From the Control Panel tab, Click Group Device Management.Click Group Device Management2. Click Add Device.3. Configure the following:• Device Name: Enter a name for your DVR of your choice (e.g. home or office).5
Installing <strong>CMS</strong>-<strong>D3</strong>• IP Address: Enter the Domain Name from the confirmation email, followed by.myddns-flir.com. For example, if your Domain Name/URL Request is tomsmith, entertomsmith.myddns-flir.com.Enter a name for your DVREnter Domain Name/URL Request,followed by .myddns.flir.comEnter DVR’s Client Port (default: 9000)Enter DVR’s User Name (default: admin)Enter DVR’s Password (default: left blank)Click Add• Port: Enter the DVR’s Client Port (default: 9000).• User Name: Enter the DVR’s User Name (default: admin).• Password: Enter the DVR’s Password. By default the password is left blank unless passwordsare enabled on the DVR.4. Click Add.5. Click ImportAll. This adds all DVRs and cameras to the Default group.6. Click the Control Panel tab.7. Click Main View.Click Main View6
Installing <strong>CMS</strong>-<strong>D3</strong>8. Click and drag Default Group to the display grid.Result7
CONTROL PANELYou can access your DVRs, including live and recorded video and configuration through theControl Panel. You may open the Control Panel at any time by clicking the Control Panel tab.The menus available through the Control Panel are:• Main View: View live video from your cameras. For details, see “Main View” on page 9.• Remote Playback: Playback recorded video from your DVR. For details, see “RemotePlayback” on page 15.• Group Device Management: Manage DVRs and camera groups. Remotely configure DVRsettings. For details, see “Group Device Management” on page 18.• Local Log Search: Search for logs on your DVRs. For details, see “Local Log Search” onpage 21.• Account Management: Configure user accounts and passwords for the client software. Fordetails, see “Account Management” on page 23.• File Management: View or manage screenshots and recorded video files. For details, see“Remote Playback” on page 15.• System Configuration: Configure <strong>CMS</strong>-<strong>D3</strong> settings. For details, see “System Configuration”on page 28.8
Main ViewMAIN VIEWMain View allows you to view live video from your cameras.To access Main View:• From the Control Panel, click Main View ( ).110923 4 56 7 81. DVR/Camera List: Shows a list of all DVRs/camera groups and cameras connected to theclient software.• Camera groups are shown with an icon. DVRs are shown with an icon. Double clicka DVR or camera group expand the DVRs or cameras in it.• Cameras are shown with one of the following icons:Camera online, but not selected in live view.Camera online and selected in live view.Camera is offline (connection issue).• Click-and-drag cameras, DVRs, or camera groups to the display grid to open them.9
Main ViewTIP: You can click-and-drag cameras from different DVRs to create custom views.2. Hide DVR/Camera List: Click the arrow to hide/show the DVR/Camera List.3. Alarm: Click to show the Alarm Panel. The Alarm Panel shows a list of system alarms andevents, such as motion detection events.4. Clear Alarms : Click to clear all alarms from the list.5. Mute Alarm Sound : Click to mute/un-mute the audio alarms that are played when eventsoccur. To configure the alarm sounds that are played, see “Alarm Sound” on page 29.6. Main View Toolbar:• Full-Screen: Click to open the display grid in full-screen. Press ESC to exit full-screen.• Select Layout• Stop Live Display: Click to select a display grid layout.: Click to stop camera streaming on all channels.• Screenshot• Manual Record• Previous/Next: Click to save a screenshot of the currently selected channel.: Click to start/stop manually recording the currently selected channel.: Click to go to the previous or next camera or page.• Sequence• Volume: Click to configure Sequence mode.: Click to control volume.7. Page : When more cameras are opened than windows on the display grid, they areorganized into pages. The current page and total number of pages is shown at the bottom ofthe Main View tab.8. Alarm Panel Controls:• Auto-hide: Click to enable/disable alarm panel auto-hide.• Maximize Alarm Panel: Click to open the Alarm Panel in its own tab.• Show/hide Alarm Panel9. Camera Display: Click to select a channel. Hold the mouse over the channel to access theCamera Toolbar. The camera toolbar contains the following options:Hold the mouse over a channelto open the camera toolbar• Manual Record: Click to start/stop manual recording of the currently selected camera.10
Main View• Screenshot: Click to take a screenshot from the currently selected camera.• PTZ : Click to access PTZ controls. For details, see “Using PTZ Controls” on page 13.• Stop Live Display: Click to stop streaming the selected camera.• Digital Zoom : Click to enable digital zoom mode. The cursor will change to a icon.Then, click and drag on the camera picture to zoom in. Click again to zoom out.• Color Settings: Open the Color Settings menu for the selected camera.• Mute audio : Click to mute / un-mute audio from the selected camera. Audio-enabledcameras required (not included).10. CPU Status: Shows the level of CPU use on your computer.Using Multiple Windows or MonitorsYou can create additional <strong>CMS</strong>-<strong>D3</strong> windows. These windows can be used to monitor cameras onsecondary monitors.NOTE: Using secondary monitors increases the amount of required computing power. If youwould like to use this feature, it is recommended to have a computer that exceeds thespecifications listed in “System Requirements” on page 1.To open multiple windows:• Click an open tab and drag it outside of the main window. A secondary window opens withthe selected tab. You may now move that window to a secondary monitor.Click and drag the taboutside of the windowResult:TIP:To open additional LiveView tabs, click ControlPanel, then Live View. Thisallows you to monitordifferent cameras acrossmultiple monitors.11
Using Sequence ModeWhen Sequence Mode is activated, Main View will automatically cycle through pages every fewseconds. You can set Sequence Mode on one or all <strong>CMS</strong>-<strong>D3</strong> windows.To use Sequence Mode:1. Click to open Sequence Mode controls.2. If you want to use Sequence Mode only on the current window, click Current Main View. Then,select Independent for the current window to use a custom switch interval (dwell time) orSync with Global for the current window to use the same interval as other windows. Click Current Main View to useSequence Mode on the current windowORIf you want to use Sequence Mode on all windows, click Global Main View. Enable thecheckbox to force all Main View windows to use the same interval as other windows.Click Global Main View to useSequence Mode on all windows3. Use the slider to set the Switch Interval (dwell time).4. Click Start to start Sequence Mode.12
Using PTZ ControlsIf you have a PTZ camera, you can control remotely through the software.NOTE: You must connect the PTZ camera to the DVR and configure PTZ settings locally beforeyou can use PTZ controls. See the manual for your system for details.To control PTZ cameras:1. In Main View, hold the mouse over the PTZ camera to open the Camera Toolbar. Click toopen PTZ controls.PTZ ControlsOpen PTZ controlsUse the arrows to controlthe camera’s positionSet PTZ speedConfigure/call presetsAdjust zoom levelAdjust focusAdjust irisStart/stop PTZ cruiseUsing PTZ PresetsSet camera positionClick to accessPreset controlsGoto presetSave selected preset as current positionDelete selected presetSelect preset number13
Using PTZ CruiseWhen PTZ cruise is enabled, the camera will cycle through saved presets. You must save presetsto use PTZ cruise.To start / stop PTZ cruise:1. Click Cruise.2. Click to start the PTZ cruise. Click to stop the PTZ cruise.Click to open cruise controlsClick to stop cruiseClick to start cruise14
Remote PlaybackRemote Playback ControlsSelect DVR /camera groupSelect camerasfor playbackSelect file typeEnableSynchronousPlaybackSelectplayback dateSearch forvideoPrevioustime periodHold the mouse over a window toview window controlsClick to select playback timeNext time periodTimeline zoom inTimeline zoom outPause Slow Forward oneframePlay Stop FastforwardDigitalzoomScreenshotMuteDownloadvideoManual recordPlay all Stop all Fast Single Muteforward all channelPause all Slow all Full-screen Quadview16
Downloading Video FilesYou can download video files to your computer using Remote Playback.To download video files by file:1. Hold the mouse over the camera you would like to download video from. Click to open thedownload menu.Click to open download menu2. Check the files you would like to download and click Download. Wait for the files to download.Check the videofiles you wouldlike to downloadClick DownloadVideo files are saved in .264 format. To open downloaded video files in <strong>CMS</strong>-<strong>D3</strong>, see “Video Player”on page 26. If you want to covert video files to .avi, download the AVI converter fromwww.digimerge.com.17
GROUP DEVICE MANAGEM<strong>EN</strong>TThe Group Device Management menu is used to manage DVRs and camera groups. It is dividedinto the Device Panel and the Group Panel.The Device Panel (left side) allows you to add, modify, or delete DVR systems. It is also used toremotely configure DVR settings.You can use the Group Panel (right side) to set up camera groups. Camera groups organize DVRsand cameras together to simplify the management of multiple systems. You must add a camerato a camera group before you will be able to access it for live video or playback. You can addmultiple DVRs or cameras from different DVRs to a camera group. The DefaultGroup is createdby default, and you can create additional groups according to your needs.Add DVRmanuallyDVRCameraScan LANfor DVRsAdd groupModify groupDelete groupCamera groupDVRCameraAdd selected DVRor camera to groupAdd all camerasand DVRs to groupModifying DVRsYou can modify the name or connection information of DVRs in the Devices Panel.To modify a DVR:1. Hold the mouse over the DVR in the Devices Panel and then click .Click to modify a DVR2. Modify the DVR’s information and click Modify.Deleting DVRs18
Group Device ManagementYou can delete DVRs from <strong>CMS</strong>-<strong>D3</strong>.To delete a DVR:• Hold the mouse over the DVR in the Devices Panel and then click. Click Yes to confirm.Click to delete a DVRRemotely Configuring DVRsYou can configure DVR settings using the software.To remotely configure a DVR:• Hold the mouse over the DVR in the Devices panel and clickfor your DVR for details on available settings.. See the Instruction ManualClick to configure DVRsettingsCreating Camera Groups1. Under Group, click Add. Enter a name for your group and click Yes.Click Add2. To add cameras to your camera group, double click DVRs on the left side to see the camerasconnected to them. Then, click the cameras you would like to add and click Import. Or, clickImportAll to add all cameras from all DVRs.Double-click to expand DVRs;click to select camerasAdd selectedcameraAdd all camerasfrom all DVRs19
Modifying Camera GroupsYou can change the name of a camera group or delete cameras or DVRs from the camera group.Deleting cameras or DVRs from a group does not remove them from <strong>CMS</strong>-<strong>D3</strong>.To modify a camera group:1. Click the camera group on the left then click Modify.2. Enter a new name for the camera group and then click Yes.Click ModifyClick camera groupTo remove DVRs or cameras from a camera group:1. Click the DVR or camera to select it. Double click camera groups or DVRs to expand.2. Click Delete and then click Yes to confirm.Click DeleteClick camera or DVRDeleting Camera Groups• Click the camera group you would like to delete and click Delete. Click YesClick DeleteClick camera group20
Local Log SearchLOCAL LOG SEARCHThe Local Log Search allows you to search <strong>CMS</strong>-<strong>D3</strong> logs. By default, <strong>CMS</strong>-<strong>D3</strong> retains logs for upto one week. You may the log retaining time up to one month (for details, see “SystemConfiguration” on page 28).To search for logs:1. From the Control Panel, click Local Log Search ( ).2. Configure the following search options:• User Name: Select All Users to search for logs generated by all users or select a specificuser to see logs generated by that user.• Log Type: Select Alarm for motion detection alarms and system warning logs, Operation foroperations logs, such as configuration changes, or System for logs of user access to thesystem (e.g. log-ins and log-outs).• Minor Type: Select All to search for all logs in the Log Type you have selected or select aspecific type of log to search for.• Group: Select the DVR or camera group you would like to search for logs on or select AllGroups to search for logs from all DVRs and camera groups.• Start Time/End Time: Select the start and end time for your search.3. Click Search. All logs that meet your search parameters appear in the list.Configure searchparametersClick Search21
Backing up LogsYou can backup log search results to your computer hard drive or open saved log files in <strong>CMS</strong>-<strong>D3</strong>.To back up logs:1. Perform a search using the steps above.2. Click Backup.Click Backup3. Select a folder and enter a file name. Click Save.To open saved log files:1. Click View Backup.Click View Backup to opensaved log files2. Select a log file and click Open.22
Account ManagementACCOUNT MANAGEM<strong>EN</strong>TThe Account Management menu allows you to create user accounts for <strong>CMS</strong>-<strong>D3</strong>.The client software has the following types of user accounts:• Admin: The admin account is logged in by default when you first run the client software. Thisis a unique account that has full control over all software and DVR functions. The admin mayadd, modify, or delete any user account.• User: This is a standard user account. User accounts have only the permissions they are givenby the admin and cannot change software settings or change other user accounts. Users maychange their own password.To access Account Management:• From the Control Panel, click Account Management ( ).Enabling Passwords for the Admin AccountBy default, the password for the admin account is blank, and a password is not required to access<strong>CMS</strong>-<strong>D3</strong>. Creating a custom password for the admin account will make it so passwords arerequired to access the software.To create a password for the admin account:1. While logged in as the admin account, click the admin account in the list and then clickModify.Click ModifyClick the adminaccount2. Enter a Password for the admin account. Repeat the password under Confirm.3. Click Save to save the password.NOTE: Click to lock <strong>CMS</strong>-<strong>D3</strong>. You will need to enter the admin password to continue using<strong>CMS</strong>-<strong>D3</strong>. Or, click System>Switch User to login with a different user account. Please note thatthis does not log out the admin account until another account is logged in.Adding User AccountsNOTE: Only the admin account may create new user accounts.1. Click Add.Click Add2. Configure the following:• Under Password, enter a password for the user account. Repeat the password under Confirm.23
• In the bottom area, check the permissions you would like to assign to the user account.Configure UserName and PasswordSelectpermissions3. Click Save to create the user account.Modifying User Accounts1. Click the account you would like to modify and then click Modify.Click ModifyClick the account2. Edit the user account settings and permissions as needed and click Save when finished.NOTE: User accounts may only modify their own password. The admin may modify passwordsor permissions for any user account. You cannot change the User Name of an account.Deleting User Accounts• Click the account you would like to delete and then click Delete. Click Yes to confirm.Click DeleteClick the accountNOTE: Only the admin account may delete user accounts.24
Using File ManagementUSING FILE MANAGEM<strong>EN</strong>TUse File Management to access manual recordings and screenshots.To use File Management:1. From Control Panel, click File Management ( ).2. On the left side of the screen, click the camera group, DVR, or camera you wish to search.3. Click the Videos tab to search for manual video recordings or click the Pictures tab to searchfor screenshots.4. Set the Start Time and End Time for your search. The timestamps on manual recordings andscreenshots are based on the timestamps on the original video recordings, not when the fileswere saved.5. Click Search to search for files.6. Double-click to open files or use the controls on the bottom of the screen to delete or savefiles to a different location on your computer.Select Picture or VideoSet Start Time and End TimeSelect thecamera group,DVR, orcamera youwish to searchSearch forfilesDouble-click to open filesDelete fileClick to Save files toa different locationNOTE: Picture files are saved in .png format. Video files are saved in .264 format. If you wantto covert video files to .avi, download the AVI converter from www.digimerge.com.25
Video PlayerVideo Player ControlsCloseOpen filePauseSlowFrame-by-frameZoomMute/unmutePlayStopFastforwardScreenshot• To zoom in, clickand click-and-drag. Click again to zoom out.27
System ConfigurationSYSTEM CONFIGURATIONThe System Configuration menu allows you to configure settings for <strong>CMS</strong>-<strong>D3</strong>.To access System Configuration:• From the Control Panel, click System Configuration ( ).GeneralTo configure General options:1. Configure the following:• Language: Select the language.• Log Keeping Time: Select the amount of time the software will retain system logs.• Enable audio on multiple channels simultaneously: Check to allow the software to play audioon multiple channels at the same time.• Enable Auto-login: Check to enable auto-login. If Auto-login is checked, passwords will notbe needed to start the software.• Resume Live View Status: Check for the software to restore the last used view configurationafter opening.2. Click Save to save changes.28
System ConfigurationFileThe File sub-menu allows you to configure default save folders for screenshots and video files.You can also set up an alarm that activates when the disk space on your computer is low.To configure save folders:1. Click and then select the desired folder.2. Click Save to save changes.To configure alarm when computer disk space is low:1. Check Alarm when disk space is less than to enable an alarm if the disk space on a harddrive containing the one of the save folders is less than the amount specified.2. Configure the amount of disk space in MB that will trigger the alarm. The lowest you can setis 500MB.3. Click Save.Alarm SoundThe Alarm Sound menu allows you to configure the audio alerts that will play when events occur.You may use any .wav file as your audio alerts.Play audio alertClick to select audioalert (.wav file)Click Save29