
You also want an ePaper? Increase the reach of your titles
YUMPU automatically turns print PDFs into web optimized ePapers that Google loves.
22 | Rental Ski Binding<br />
SR 45<br />
A child and junior model, super convenient,<br />
“parent-free” operation.<br />
• Automatic toe and heel pieces accept child and adult<br />
boot sole dimensions, giving you full utilization of<br />
your child/junior ski inventory.<br />
• SINGLE CODE<br />
“b – o” (199-255 mm) standard, or “j–w/F” (231-287 mm)<br />
with spare part: 162 538).<br />
• “ONE TOUCH”- Hand lever adjustment of the heel.<br />
• Replaceable brake.<br />
• Easy to open, easy to close.<br />
• For skis, groups G3 & G4.<br />
• DIN range 0.75 up to 4.5.<br />
adjustment:<br />
Measure the boot with the Rental Boot Indicator and<br />
determine the single code.<br />
If the boot is already coded you can use the predetermined<br />
single code.<br />
For Sympro toes open the ONE TOUCH hand lever (pict 23)<br />
and slide the toe piece to the desired single code position<br />
on the track. This will center the boot on the ski. Release<br />
the lever and make sure that the lever snaps into place<br />
completely at the selected single code. It may be necessary<br />
to slightly slide the toe forward or backward.<br />
To adjust Sympro or Symrent heels to the desired SINGLE<br />
CODE use thumb and forefinger to push down on the<br />
ONE TOUCH hand lever and slide the heel piece to the<br />
correct single code setting. Release the lever and make<br />
sure that the heel piece locks in the selected position.<br />
Forward pressure should be correct.<br />
Verify that the indicator located at the rear end of the<br />
heel piece rests in the scribed area of the toothed lock<br />
with the boot inserted.<br />
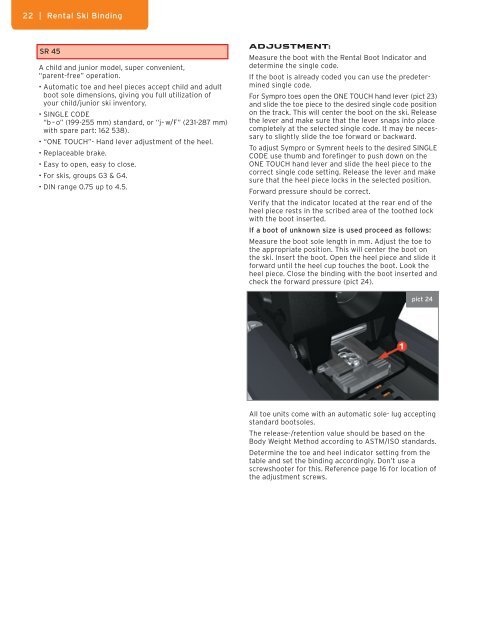
If a boot of unknown size is used proceed as follows:<br />
Measure the boot sole length in mm. Adjust the toe to<br />
the appropriate position. This will center the boot on<br />
the ski. Insert the boot. Open the heel piece and slide it<br />
forward until the heel cup touches the boot. Look the<br />
heel piece. Close the binding with the boot inserted and<br />
check the forward pressure (pict 24).<br />
pict 24<br />
All toe units come with an automatic sole- lug accepting<br />
standard bootsoles.<br />
The release-/retention value should be based on the<br />
Body Weight Method according to ASTM/ISO standards.<br />
Determine the toe and heel indicator setting from the<br />
table and set the binding accordingly. Don’t use a<br />
screwshooter for this. Reference page 16 for location of<br />
the adjustment screws.