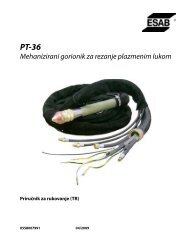
PT-36 Mechanized Plasmarc Cutting Torch Instruction Manual
PT-36 Mechanized Plasmarc Cutting Torch Instruction Manual
PT-36 Mechanized Plasmarc Cutting Torch Instruction Manual
- No tags were found...
Create successful ePaper yourself
Turn your PDF publications into a flip-book with our unique Google optimized e-Paper software.
section 5Maintenance5.3 <strong>Torch</strong> Front End Disassembly (for Production Thick Plate)DANGERHot <strong>Torch</strong> Will Burn Skin!Allow torch to cool before servicing.1. Remove the Shield Cup Retainer.NOTE:If the shield cup retainer is difficult to remove, try to screw the nozzle retaining cup tighter to relieve pressureon the shield cup retainer.2. Inspect mating metal surface of shield cup and shield cup retainer for nicks or dirt that might prevent thesetwo parts from forming a metal to metal seal. Look for pitting or signs of arcing inside the shield cup. Lookfor melting of the shield tip. Replace if damaged.3. Inspect diffuser for debris and clean as necessary. Wear on the top notches does occur, effecting gas volume.Replace this part every other shield replacement. Heat from cutting many small parts in a concentrated areaor when cutting material greater than 0.75" (19.1mm) may require more frequent replacement.cautionIncorrect assembly of the diffuser in the shield will prevent the torchfrom working properly. Diffuser notches must be mounted awayfrom the shield as illustrated.Diffuser<strong>Torch</strong> BodyNozzleShield CupNozzle Retaining CupShield Cup Retainer157


