PT-36 Mechanized Plasmarc Cutting Torch Instruction Manual
PT-36 Mechanized Plasmarc Cutting Torch Instruction Manual
PT-36 Mechanized Plasmarc Cutting Torch Instruction Manual
- No tags were found...

Create successful ePaper yourself
Turn your PDF publications into a flip-book with our unique Google optimized e-Paper software.
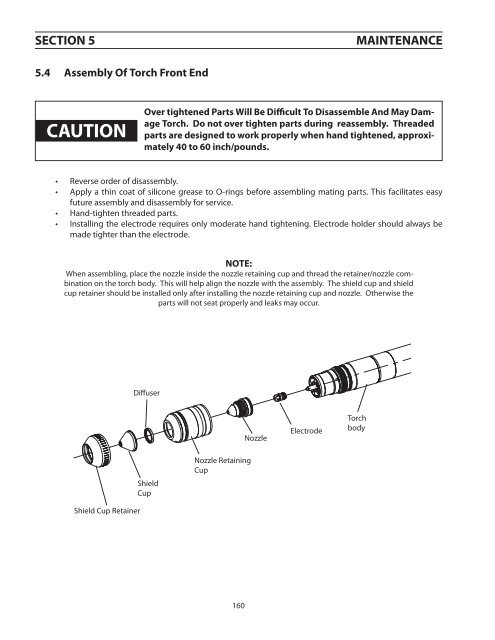
section 5Maintenance5.4 Assembly Of <strong>Torch</strong> Front EndcautionOver tightened Parts Will Be Difficult To Disassemble And May Damage<strong>Torch</strong>. Do not over tighten parts during reassembly. Threadedparts are designed to work properly when hand tightened, approximately40 to 60 inch/pounds.••••Reverse order of disassembly.Apply a thin coat of silicone grease to O-rings before assembling mating parts. This facilitates easyfuture assembly and disassembly for service.Hand-tighten threaded parts.Installing the electrode requires only moderate hand tightening. Electrode holder should always bemade tighter than the electrode.NOTE:When assembling, place the nozzle inside the nozzle retaining cup and thread the retainer/nozzle combinationon the torch body. This will help align the nozzle with the assembly. The shield cup and shieldcup retainer should be installed only after installing the nozzle retaining cup and nozzle. Otherwise theparts will not seat properly and leaks may occur.DiffuserNozzleElectrode<strong>Torch</strong>bodyShieldCupNozzle RetainingCupShield Cup Retainer160