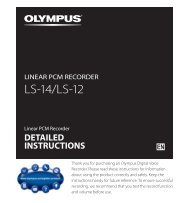
- Page 1: MULTI-TRACK LINEAR PCM RECORDERLS-1
- Page 5 and 6: Table of ContentsChapter 5About the
- Page 7: Safety precautions▌RecorderfWarni
- Page 12 and 13: Main Features1Main FeaturesEN12▌
- Page 14 and 15: Name of Each Part1Name of Each Part
- Page 16 and 17: Let's use LS-100!1Let's use LS-100!
- Page 18 and 19: Recording Tips for Each Instrument
- Page 20 and 21: Connection of the XLR/Standard Phon
- Page 22 and 23: Power Supply2Power SupplyInserting
- Page 24 and 25: Power Supply2Power SupplyNotes• A
- Page 26 and 27: How to Use the POWER/HOLD SwitchAct
- Page 28 and 29: Initial Settings before Using the R
- Page 30 and 31: Inserting and Removing the SD Card2
- Page 32 and 33: Chapter 3Recorder ModeEN32
- Page 34 and 35: Files and Folders▌FoldersIn the r
- Page 36 and 37: Before RecordingTo achieve a good r
- Page 38 and 39: Recording3▌Pausing the recordingP
- Page 40 and 41: Recording312Set the [Rec Mode] to [
- Page 42 and 43: Recording312Set the [Rec Mode] to [
- Page 44 and 45: 3RecordingEN44RecordingRecording us
- Page 46 and 47: 3PlaybackPlaybackPlaybackThis recor
- Page 48 and 49: PlaybackPlacing an index markAn ind
- Page 50 and 51: 3ErasingErasingErasing a File6You c
- Page 52 and 53:
Erasing▌Important Notes on Erasin
- Page 54 and 55:
What You Can Do in the Multi-Track
- Page 56 and 57:
Files and Folders▌Multi-Track scr
- Page 58 and 59:
Creating a Multi-Track Project6Stop
- Page 60 and 61:
Creating a Multi-Track Project3In 2
- Page 62 and 63:
Creating a Multi-Track Project84 Ou
- Page 64 and 65:
Erasing a Multi-Track Project/Track
- Page 66 and 67:
Chapter 5About the Tuner, theLissaj
- Page 68 and 69:
Using the tuner2 Adjust while looki
- Page 70 and 71:
About the Lissajous measurement3The
- Page 72 and 73:
Chapter 6MenusEN72
- Page 74 and 75:
How to set the menus5Press the +/
- Page 76 and 77:
List of menus▌Play Menu [Play Men
- Page 78 and 79:
List of menus▌LCD/Sound Menu [LCD
- Page 80 and 81:
Recording menu [Rec Menu]Recording
- Page 82 and 83:
Recording menu [Rec Menu]6Recording
- Page 84 and 85:
Recording menu [Rec Menu]6Microphon
- Page 86 and 87:
Recording menu [Rec Menu]Low cut fi
- Page 88 and 89:
Recording menu [Rec Menu]6Recording
- Page 90 and 91:
5Play menu [Play Menu]Press the +/
- Page 92 and 93:
File menu [File Menu]6File menuFile
- Page 94 and 95:
File menu [File Menu]6File menuMovi
- Page 96 and 97:
File menu [File Menu]6File menuProp
- Page 98 and 99:
File menu [File Menu]6File menuCD w
- Page 100 and 101:
File menu [File Menu]23Press the OK
- Page 102 and 103:
Metronome menu [Metronome Menu][Tem
- Page 104 and 105:
LCD/Sound menu [LCD/Sound Menu]LED
- Page 106 and 107:
LCD/Sound menu [LCD/Sound Menu][On/
- Page 108 and 109:
Device menu [Device Menu]6Device me
- Page 110 and 111:
Device menu [Device Menu]4Press the
- Page 112 and 113:
Device menu [Device Menu]6Device me
- Page 114 and 115:
Device menu [Device Menu]6Device me
- Page 116 and 117:
Device menu [Device Menu]Memory inf
- Page 118 and 119:
Using the recorder on your PCWhen c
- Page 120 and 121:
Using the recorder on your PCDiscon
- Page 122 and 123:
Using the recorder on your PCUsing
- Page 124 and 125:
Alarm message listMessage Descripti
- Page 126 and 127:
TroubleshootingSymptom Probable cau
- Page 128 and 129:
TroubleshootingSymptom Probable cau
- Page 130 and 131:
GlossaryGlossarySampling frequency
- Page 132 and 133:
SpecificationsBuilt-in microphoneDi
- Page 134 and 135:
Specifications4 MP3 formatRecording
- Page 136 and 137:
Technical assistance and supportThe