Megatouch FORCE Touchscreen Replacement
Megatouch FORCE Touchscreen Replacement
Megatouch FORCE Touchscreen Replacement
- No tags were found...
You also want an ePaper? Increase the reach of your titles
YUMPU automatically turns print PDFs into web optimized ePapers that Google loves.
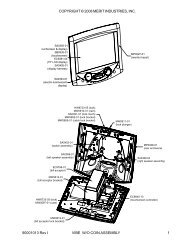
COPYRIGHT © 2004 MERIT INDUSTRIES, INC.back of the controller (see Figure 11)and secure the controller with the existinghardware. Also connect theMolex connector (orange and graywires) to the main power harness (afterrouting the wires through the cableclamps) and attach the ground screw.8. Reinstall the bezel on the game andfasten it with the 6 thumbnuts.9. Plug in and turn on the game.10. When the game is finished booting,press the CALIBRATE button.11. Close and lock the bezel, then calibratethe touchscreen.Fusion without electronics box<strong>Touchscreen</strong> Removal1. Turn off and unplug the game.2. Unlock and open the bezel.3. Disconnect the VGA monitor connectorand ground screw, the monitor controlboard connector, and the monitorpower connector and also remove thecables from the 2 clamps attached tothe monitor. See Figure 12.4. Remove the screws fastening thetouchscreen controller to the game anddisconnect the cable from the back ofthe controller. Then locate anddisconnect the Molex connector(orange and gray wires) running fromthe touchscreen controller cable to themain power harness. After disconnectingthe ground screw, pull thecables out of the clamps. See Figures12 and 13.5. Remove the 10 screws securing theplastic bezel to the wooden frame (seeFigure 12) and carefully remove thebezel from the game. Be careful notto damage the bezel with the coin cupduring removal.NOTE: Keep track of all hardwareremoved in the touchscreen replacementprocess.6. Place the bezel assembly upsidedownon a flat surface and removethe 10 screws fastening the LCDmonitor to the bezel (remember which2 screws also fasten cable clamps),then remove the monitor from thebezel. See Figure 14.NOTE: Be sure the glass is notscratched when setting the monitoraside.7. Note the orientation of the touchscreencable before removing the screen.Then use dental floss to carefully cutthe foam tape holding the touchscreento the monitor until you are able to completelyremove the screen. Once thetouchscreen is completely free fromthe monitor, remove any residual foamtape from the monitor with denaturedalcohol.<strong>Touchscreen</strong> Installation7. Clean the glass on the reverse side ofthe new touchscreen with the suppliedalcohol wipe, then cut pieces ofthe supplied 1/2” foam tape longenough to cover each edge of themonitor without overlapping. After thetape is in place on the monitor, peel offthe backing.8. Carefully place the touchscreen overthe monitor in the same manner as theold screen, making sure the screen isproperly and evenly aligned over theglass. Then clean the front of thescreen with the supplied alcohol wipe.13 MEGATOUCH <strong>FORCE</strong> TOUCHSCREEN REPLACEMENT PM0331-04


