DIGI KEYER II - microHAM
DIGI KEYER II - microHAM
DIGI KEYER II - microHAM
You also want an ePaper? Increase the reach of your titles
YUMPU automatically turns print PDFs into web optimized ePapers that Google loves.
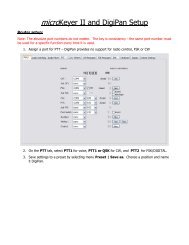
<strong>microHAM</strong> © 2010 All rights reservedMinimize: Clicking this will minimize Router to thesystem tray at the bottom right corner of theWindows Taskbar (the "System NotificationArea").TIP: When Router is minimized you can restore it by double-clicking on the Router tray icon. You canalso restore Router by double-clicking on the Router icon on the desktop or restarting Router from thePrograms menu.Exit: Clicking on this item will terminate Router.NOTE: when Router is terminated, application software will be unable to communicate with<strong>DIGI</strong> <strong>KEYER</strong> <strong>II</strong> and the radio.PRESET MENUThe requirements of each program are different and each one may handle radio control, CW and PTT in itsown way. In some cases what works for one application may not work properly with another. To getmaximum performance from CW Keyer, you may wish to customize the settings for each application.For easy switching among applications, Router supports up to 12user definable Presets. Different configurations can be stored inthese presets and recalled almost instantly simply by clicking on thepreset button.Each preset contains the settings for all devices connected to, andcontrolled by, Router. For example, if Router controls amicro<strong>KEYER</strong>, a <strong>DIGI</strong> <strong>KEYER</strong> <strong>II</strong> and a USB Interface, each presetremembers the settings for all devices including the assignment ofCOM ports and the contents of all sub-tabs except the FSK/CWMessages and DVK tabs.NOTE: Presets do not appear until they have been saved by theuser using Preset | Save as. Example configurations forseveral popular loggin and digital programs are availble inRouter's Help menu. Use “Help | Download Documents“ ifthe setup guides are not available or are incomplete.There are three ways to apply a preset once it is created:1. Click on Preset and select the desired preset from the pulldownmenu.2. Click on a preset button. To have buttons visible in Router, Preset | Show Buttons must bechecked. When the settings from a preset are applied, a green light located in the preset button islit. This green light is on ONLY when all settings in Router are same as those stored in the preset.14


