

Assembly Instructions - Swing-N-Slide
Assembly Instructions - Swing-N-Slide
Assembly Instructions - Swing-N-Slide
- No tags were found...

You also want an ePaper? Increase the reach of your titles
YUMPU automatically turns print PDFs into web optimized ePapers that Google loves.
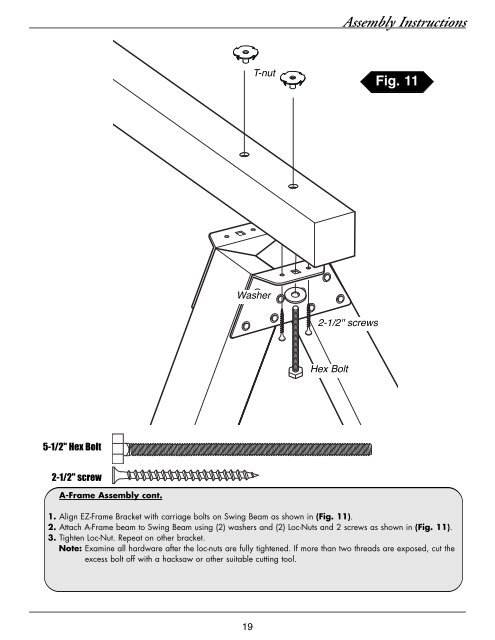
<strong>Assembly</strong> <strong>Instructions</strong>T-nutFig. 11Washer2-1/2'' screwsHex Bolt5-1/2'' Hex Bolt2-1/2'' screwA-Frame <strong>Assembly</strong> cont.1. Align EZ-Frame Bracket with carriage bolts on <strong>Swing</strong> Beam as shown in (Fig. 11).2. Attach A-Frame beam to <strong>Swing</strong> Beam using (2) washers and (2) Loc-Nuts and 2 screws as shown in (Fig. 11).3. Tighten Loc-Nut. Repeat on other bracket.Note: Examine all hardware after the loc-nuts are fully tightened. If more than two threads are exposed, cut theexcess bolt off with a hacksaw or other suitable cutting tool.19


