x series with advance micro - Sunbelt Transport Refrigeration
x series with advance micro - Sunbelt Transport Refrigeration
x series with advance micro - Sunbelt Transport Refrigeration
- No tags were found...

You also want an ePaper? Increase the reach of your titles
YUMPU automatically turns print PDFs into web optimized ePapers that Google loves.
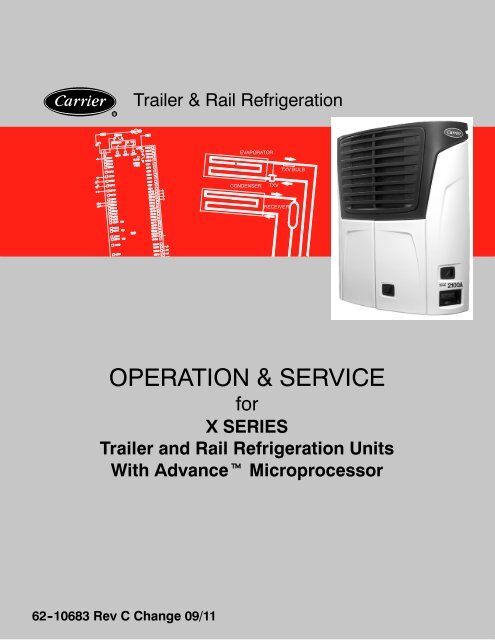
RTrailer & Rail <strong>Refrigeration</strong>EVAPORATORTXV BULBCONDENSERTXVRECEIVEROPERATION & SERVICEforX SERIESTrailer and Rail <strong>Refrigeration</strong> UnitsWith Advancet Microprocessor62 -10683 Rev C Change 09/11
OPERATION ANDSERVICE MANUALNOSEMOUNTTRAILER AND RAILREFRIGERATION UNITSWITH ADVANCE MICROPROCESSOR
1How to use this manualPlease take a few minutes to read this page. It explains the content and structure of this manual.This will make it easier for you to find the information that you need.Section 1 - Safety PrecautionsThis section contains the Safety Precautions, Safety Decals, and Microprocessorcautions. Read this section before working on the unit.Section 2 - Unit DescriptionThis section describes the unit listed in the Model Chart Table 2-1.Section 3 - OperationThis section shows you how to configure and operate the Carrier AdvanceMicroprocessor.Section 4 - Engine and Standby MotorThis section describes operation of the engine and the standby motor.Section 5 -Temperature ControlThis section describes the temperature control.Section 6 - Technician InterfaceThis section describes various testing and downloading functions available to atechnician.Section 7 - Message CenterThis section describes all the messages and alarms which can be displayed on theMessageCenter.Section 8 - Alarm TroubleshootingThis section provides information on the probable causes of the alarm codes given by the<strong>micro</strong>processor controller.Section 9 - ServiceThis section describes the service procedures for the unit .Section 10 - Unit TroubleshootingThis section provides information on the probable causes for unit troubleshooting.Section 11 - WiringThis section contains Electrical Schematics and Plug Information the model covered inthis book.11 10 9 8 7 6 5 4 3 2 111111111162--10683
TABLE OF CONTENTSPARAGRAPH NUMBERPageSAFETY PRECAUTIONS ..................................................................... 1-11.1 SAFETY PRECAUTIONS ............................................................. 1--11.2 SPECIFIC WARNING AND CAUTION STATEMENTS ..................................... 1--11.3 SAFETY DECALS .................................................................... 1--5UNIT DESCRIPTION .......................................................................... 2-12.1 INTRODUCTION ..................................................................... 2--12.2 GENERAL DESCRIPTION ............................................................. 2--22.3 CONDENSING SECTION ............................................................. 2--102.3.1 Condenser Coil ............................................................ 2--102.3.2 Engine .................................................................... 2--102.3.3 Alternator/Regulator ........................................................ 2--112.3.4 Compressor ............................................................... 2--122.3.5 Compressor Unloaders ..................................................... 2--122.3.6 Filter Drier ................................................................. 2--132.3.7 Receiver .................................................................. 2--132.3.8 Compressor Transducers and Sensors ........................................ 2--142.4 EVAPORATOR SECTION ............................................................. 2--142.4.1 Thermal Expansion Valve ................................................... 2--142.4.2 Heat Exchanger ............................................................ 2--142.4.3 Evaporator Coil ............................................................ 2--142.4.4 Evaporator Transducers and Sensors ......................................... 2--152.5 SYSTEM OPERATING CONTROLS AND COMPONENTS ................................. 2--152.5.1 Multiple Languages ......................................................... 2--152.5.2 Special Features ........................................................... 2--152.5.3 Component Description And Location ......................................... 2--162.5.4 Handling of PC Cards ....................................................... 2--222.6 OPTIONS ........................................................................... 2--222.6.1 Light Bar .................................................................. 2--222.6.2 Door and Remote Switches .................................................. 2--232.6.3 Out of Range Alarm ........................................................ 2--242.7 ENGINE DATA ....................................................................... 2--252.7.1 Lubrication System ......................................................... 2--252.8 ENGINE SCREW THREADS ........................................................... 2--262.9 ENGINE AIR SYSTEM ................................................................ 2--262.10 COMPRESSOR DATA ................................................................ 2--262.11 REFRIGERATION SYSTEM DATA ...................................................... 2--262.12 SAFETY DEVICES ................................................................... 2--272.13 COMPONENT RESISTANCE AND CURRENT DRAW ..................................... 2--282.14 REFRIGERANT CIRCUIT DURING COOLING ........................................... 2--292.15 REFRIGERANT CIRCUIT -- HEATING AND DEFROSTING ................................ 2--30i62--10683
TABLE OF CONTENTS (Continued)PARAGRAPH NUMBERPageOPERATION ................................................................................. 3-13.1 STARTING UNIT -- AUTO ............................................................. 3--13.2 MANUAL START -- GLOW AND CRANK -- IF EQUIPPED* ................................. 3--23.3 Unit Startup -- Self Test ................................................................ 3--33.4 PRETRIP ............................................................................ 3--43.5 CHANGING SET POINT .............................................................. 3--83.6 START-STOP OPERATION ............................................................ 3--93.7 CONTINUOUS RUN OPERATION ...................................................... 3--113.8 SLEEP MODE ON .................................................................... 3--123.9 SLEEP MODE OFF ................................................................... 3--133.10 DEFROST ........................................................................... 3--153.10.1 Manual Defrost ............................................................ 3--153.11 TRIP START ......................................................................... 3--163.12 VIEW ACTIVE ALARMS ............................................................... 3--173.13 VIEW INACTIVE ALARMS ............................................................. 3--183.14 UNIT DATA .......................................................................... 3--203.15 VIEW HOURMETERS ................................................................. 3--243.16 FUNCTIONAL CHANGE (PARAMETERS) ............................................... 3--253.17 LANGUAGE SELECTION ............................................................. 3--313.18 STOPPING UNIT ..................................................................... 3--323.19 DATA RECORDING ................................................................... 3--333.19.1 Microprocessor Information .................................................. 3--333.19.2 Data Recording ............................................................ 3--333.19.3 Sensor and Event Data ..................................................... 3--333.19.4 Data Downloading .......................................................... 3--343.19.5 DataRecorder Power-Up .................................................... 3--343.20 OPTIONS ........................................................................... 3--353.20.1 IntelliSet .................................................................. 3--353.20.2 DataTrakt for Advance Microprocessors ....................................... 3--373.20.3 Two-Way Remote Communication ............................................ 3--373.20.4 AutoFresh Air Exchange .................................................... 3--38ENGINE ..................................................................................... 4-14.1 INTRODUCTION ..................................................................... 4--14.2 ENGINE START--UP .................................................................. 4--14.2.1 Engine Cranking ...........................................................4--14.2.2 Variable Glow Time .........................................................4--14.2.3 Engine Running ............................................................4--34.2.4 Initial Engine Operation .....................................................4--34.3 RUNNING MODES ................................................................... 4--34.3.1 Start--Stop Mode ...........................................................4--34.3.2 CONTINUOUS RUN MODE .................................................4--54.4 SPEED CONTROL OVERRIDES ....................................................... 4--662--10683 ii
TABLE OF CONTENTS (Continued)PARAGRAPH NUMBERPageTEMPERATURE CONTROL ................................................................... 5-15.1 INTRODUCTION ..................................................................... 5--15.2 PERISHABLE AND FROZEN SET POINT RANGES ...................................... 5--15.3 PULLDOWN / PULL-UP MODE ........................................................ 5--25.4 HEAT MODE OPERATION ............................................................ 5--25.5 COOL MODE OPERATION ............................................................ 5--25.6 UltraFresh 3 TEMPERATURE CONTROL ................................................ 5--35.6.1 Heat/Cool/Null Switching Operation ...........................................5--35.6.2 Null Mode Operation ........................................................5--45.7 UltraFreeze TEMPERATURE CONTROL ................................................ 5--45.7.1 UltraFreeze Offset ..........................................................5--45.7.2 UltraFreeze Start/Stop ......................................................5--45.8 FreshProtectt SUPPLY AIR CONTROL .................................................. 5--55.9 CARGO PROTECT MODE ............................................................ 5--55.10 ENGINE SPEED OPERATION ......................................................... 5--85.11 DEFROST ........................................................................... 5--85.11.1 Evaporator Temperature Criteria For Defrost ...................................5--85.11.2 Defrost Initiation ...........................................................5--85.11.3 Normal Defrost Operation ...................................................5--95.11.4 Normal Defrost Termination ..................................................5--95.11.5 Normal Defrost Termination Sequence ........................................5--95.11.6 High Ambient Defrost Operation .............................................. 5--105.11.7 High Ambient Defrost Termination Sequence ................................... 5--105.11.8 High Ambient Defrost Termination ............................................ 5--115.11.9 High Ambient Defrost Termination Sequence ................................... 5--115.12 UNLOADER CONTROL OPERATION ................................................... 5--115.13 SV1 OPERATION : ................................................................... 5--115.14 SV2 OPERATION : ................................................................... 5--115.15 TEMPERATURE RANGE LOCK 1 & 2 ................................................... 5--125.16 ProductShield ........................................................................ 5--145.16.1 ProductShield Modes ....................................................... 5--145.17 UNLOADER CONTROL OVERRIDES ................................................... 5--185.18 MAXIMUM SUCTION OPERATING PRESSURE (COOL ONLY) ............................ 5--195.19 MAXIMUM OPERATING PRESSURE (MOP) OVERRIDE (HEAT AND DEFROST ONLY) ...... 5--195.20 SUCTION PRESSURE OPERATION .................................................... 5--20iii62--10683
TABLE OF CONTENTS (Continued)PARAGRAPH NUMBERPageTECHNICIAN INTERFACE ..................................................................... 6-16.1 PC MODE/DOWNLOAD PORT ......................................................... 6--16.2 MICROPROCESSOR CONFIGURATION AND TECHNICIAN TEST MODES ................ 6--26.2.1 Configuration Mode .........................................................6--36.2.2 Component Test Mode ...................................................... 6--126.2.3 Service Mode .............................................................. 6--136.3 PC SUPPORT SOFTWARE ............................................................ 6--146.3.1 ReeferManager And Reports ........................................................... 6--146.4 DOWNLOADING DATA WITH THE PC CARD ............................................ 6--166.5 INSTALLING NEW SOFTWARE ........................................................ 6--176.5.1 Software Version Numbers .................................................. 6--176.5.2 Using The Program PC Card ................................................ 6--186.5.3 Using ReeferManager to Install Software ...................................... 6--196.5.4 Troubleshooting Software Loading Problems ................................... 6--196.6 RE-SETTING PM (PREVENTATIVE MAINTENANCE) HOURMETERS ...................... 6--206.7 ADVANCE MICROPROCESSOR REPLACEMENT & CONFIGURATION SETUP ............. 6--226.7.1 Microprocessor Replacement ................................................ 6--236.7.2 Microprocessor Setup ....................................................... 6--246.7.3 Configurations Via Keypad .................................................. 6--256.7.4 Functional Parameters via Keypad ........................................... 6--256.7.5 DataRecorder Via ReeferManager PC Program ................................ 6--256.7.6 Engine And Switch-on Hourmeters Via ReeferManager PC Program .............. 6--266.7.7 Configuration/IntelliSet PC Card .............................................. 6--266.7.8 Microprocessor Final Checkout .............................................. 6--266.7.9 Replacing Display Bezel Assembly ........................................... 6--27MESAGECENTER ............................................................................ 7-17.1 MessageCenter MESSAGES ........................................................... 7--1ALARM TROUBLESHOOTING ................................................................. 8-18.1 INTRODUCTION TO ALARM TROUBLESHOOTING GUIDE ............................... 8--18.2 NOTES .............................................................................. 8--28.3 DRIVER/OPERATOR ALARMS ......................................................... 8--31 LOW FUEL LEVEL WARNING(for units <strong>with</strong> Low Fuel Level 0% to 100% Sensor / fuel level is displayed in Data list) .......... 8--31 LOW FUEL LEVEL WARNING(for units <strong>with</strong> Low Fuel Level switch/no fuel level display in Data list ......................... 8--42 LOW ENGINE OIL LEVEL ............................................................. 8--53 LOW COOLANT LEVEL ............................................................... 8--662--10683 iv
PARAGRAPH NUMBERTABLE OF CONTENTS (Continued)ALARM TROUBLESHOOTING (Cont)8.4 SHUTDOWN ALARMS ..................................................................... 8-711 LOW ENGINE OIL PRESSURE ........................................................ 8--712 HIGH COOLANT TEMPERATURE ...................................................... 8--813 HIGH DISCHARGE PRESSURE ....................................................... 8--913 HIGH DISCHARGE PRESSURE (Continued) ............................................. 8--1015 BATTERY VOLTAGE TOO HIGH ....................................................... 8--1116 BATTERY VOLTAGE TOO LOW ........................................................ 8--1117 HIGH COMP DISCHARGE TEMP ...................................................... 8--1217 HIGH COMP DISCHARGE TEMP (Continued) ........................................... 8--1318 LOW REFRIGERANT PRESSURE ..................................................... 8--1419 LOW FUEL SHUTDOWN(for units <strong>with</strong> Low Fuel Level 0% to 100% Sensor / fuel level is dsplayed in Data list) .......... 8--1519 LOW FUEL SHUTDOWN(for units <strong>with</strong> Low Fuel Level Switch / no fuel level display in Data list) ....................... 8--1520 MAXIMUM COMPRESSOR ALARMS ................................................... 8--1621 TECHNICIAN RESET REQUIRED ...................................................... 8--1627 HIGH SUCTION PRESSURE .......................................................... 8--1728 CHECK REFRIGERATION SYSTEM .................................................... 8--1829 CHECK HEAT CYCLE ................................................................. 8--188.5 START UP ENGINE ALARMS .............................................................. 8-1930 FAILED TO RUN MINIMUM TIME ...................................................... 8--1931 FAILED TO START -- AUTO MODE ..................................................... 8--2032 FAILED TO START -- MANUAL ......................................................... 8--2234 ENGINE FAILED TO STOP ............................................................ 8--2435 CHECK STARTER CIRCUIT ........................................................... 8--2536 CHECK COOLANT TEMPERATURE .................................................... 8--2737 CHECK LOW SPEED RPM ............................................................ 8--2838 CHECK HIGH SPEED RPM ............................................................ 8--3039 CHECK ENGINE RPM ................................................................ 8--3240 CHECK GLOW PLUGS ............................................................... 8--3441 ENGINE STALLED ................................................................... 8--358.6 WARNING / STATUS ALARMS ............................................................. 8-3751 ALTERNATOR NOT CHARGING ....................................................... 8--3753 BOX TEMP OUT-OF-RANGE .......................................................... 8--3854 DEFROST NOT COMPLETE .......................................................... 8--4055 CHECK DEFROST AIR SWITCH ....................................................... 8--4156 CHECK EVAPORATOR AIRFLOW ...................................................... 8--4257 CHECK REMOTE SWITCH 1 .......................................................... 8--4358 CHECK REMOTE SWITCH 2 .......................................................... 8--4459 DATALOGGER NOT RECORDING ..................................................... 8--4560 DATALOGGER TIME WRONG ......................................................... 8--4661 DOOR OPEN ........................................................................ 8--47PageChange 09/11v62--10683
TABLE OF CONTENTS (Continued)PARAGRAPH NUMBERPageALARM TROUBLESHOOTING (Cont)8.7 ELECTRICAL ALARMS .................................................................... 8-4871 BAD F2 OR F3 FUSE ................................................................. 8--4872 BAD F4 OR F6 FUSE ................................................................. 8--4878 CHECK SV1 CIRCUIT ................................................................ 8--4979 CHECK SV4 CIRCUIT ................................................................ 8--4981 CHECK FHR CIRCUIT ................................................................ 8--5082 CHECK REMOTE OUT-RANGE LIGHT ................................................. 8--5083 CHECK REMOTE DEFROST LIGHT .................................................... 8--5184 CHECK REMOTE ALARM LIGHT ...................................................... 8--5185 CHECK UL1 CIRCUIT ................................................................. 8--5286 CHECK UL2 CIRCUIT ................................................................. 8--5287 CHECK REMOTE HEAT LIGHT ........................................................ 8--5388 CHECK REMOTE COOL LIGHT ........................................................ 8--5389 CHECK REMOTE AUTO LIGHT ........................................................ 8--5490 AUTOFRESH AIR EXCHANGE RELAY .................................................. 8--5493 CHECK START UP BUZZER ........................................................... 8--5597 CHECK SV2 CIRCUIT ................................................................ 8--558.8 SENSOR ALARMS ........................................................................ 8-56121 CHECK AMBIENT AIR SENSOR ....................................................... 8--56122 CHECK RETURN AIR SENSOR ........................................................ 8--57123 CHECK SUPPLY AIR SENSOR ........................................................ 8--58125 CHECK COMP DISCH SENSOR ....................................................... 8--59126 CHECK FUEL SENSOR CIRCUIT ...................................................... 8--60129 CHECK ENG COOLANT SENSOR ..................................................... 8--61130 CHECK ENGINE RPM SENSOR ....................................................... 8--62132 CHECK DEFROST TERM 2 SENSOR .................................................. 8--64133 CHECK REMOTE TEMP SENSOR 1 .................................................... 8--65134 CHECK REMOTE TEMP SENSOR 2 .................................................... 8--66135 CHECK REMOTE TEMP SENSOR 3 .................................................... 8--6762--10683 vi
TABLE OF CONTENTS (Continued)PARAGRAPH NUMBERPageALARM TROUBLESHOOTING (Cont)8.9 PRETRIP ALARMS ........................................................................ 8-68P141 PRETRIP STOPPED BY USER ........................................................ 8--68P143 CHECK CLUTCH CIRCUIT ............................................................ 8--68P144 CHECK UL1 CIRCUIT ................................................................. 8--69P145 CHECK SPEED SOL CIRCUIT ......................................................... 8--70P148 CHECK SV1 CIRCUIT ................................................................ 8--71P150 CHECK SV4 CIRCUIT ................................................................ 8--72P151 CHECK GLOW PLUG CIRCUIT ........................................................ 8--73P152 CHECK FUEL SOLENOID CIRC ....................................................... 8--74P153 CHECK RETURN AIR SENSOR ........................................................ 8--75P154 CHECK SUPPLY AIR SENSOR ........................................................ 8--76P155 CHECK COOLANT TEMP SENSOR .................................................... 8--77P156 CHECK BATTERY VOLTS ............................................................. 8--77P157 CHECK BATTERY CURRENT .......................................................... 8--78P158 CHECK AMBIENT AIR SENSOR ....................................................... 8--79P160 CHECK DISCH TEMP SENSOR ........................................................ 8--80P162 CHECK AUTO FRESH AIR EXCHANGE SOLENOID (AFAS) CIRCUIT ...................... 8--81P164 CHECK UL2 CIRCUIT ................................................................. 8--82P165 CANNOT PUMP DOWN ............................................................... 8--83P174 CHECK LOW SPEED RPM ............................................................ 8--84P175 CHECK HIGH SPEED RPM ............................................................ 8--85P175 CHECK HIGH SPEED RPM (Continued) ................................................. 8--86P178 CHECK UL1 ......................................................................... 8--87P180 CHECK SUCTION MOD VALVE ........................................................ 8--88P181 CHECK SV4 VALVE .................................................................. 8--89P182 CHECK SV1 VALVE .................................................................. 8--90P191 CHECK UL2 ......................................................................... 8--91P192 CHECK SV2 CIRCUIT ................................................................ 8--92P194 HIGH SUCTION PRESSURE .......................................................... 8--93P195 LOW SUCTION PRESSURE ........................................................... 8--94P196 HIGH DISCHARGE PRESSURE ....................................................... 8--96P198 LOW DISCHARGE PRESSURE ........................................................ 8--97P200 CHECK UL1 CYLINDERS ............................................................. 8--98P201 CHECK UL2 CYLINDERS ............................................................. 8--99P202 HIGH SIDE LEAK ..................................................................... 8--99P203 CHK DISCHARGE CHECK VALVE ...................................................... 8--100P204 LOW SUCTION PRESSURE ........................................................... 8--101P205 CHK DEFROST TERM 2 SENSOR ..................................................... 8--102vii62--10683
TABLE OF CONTENTS (Continued)PARAGRAPH NUMBERPageALARM TROUBLESHOOTING (Cont)8.10 MAINTENANCE ALARMS ................................................................. 8 -103223 ENGINE MAINTENANCE DUE ......................................................... 8--103225 GENERAL MAINTENANCE DUE ....................................................... 8--103226 SERVICE SOON -- PM #1 DUE ........................................................ 8--104227 SERVICE SOON -- PM #2 DUE ........................................................ 8--104228 SERVICE SOON -- PM #3 DUE ........................................................ 8--105229 SERVICE SOON -- PM #4 DUE ........................................................ 8--105230 SERVICE SOON -- PM #5 DUE ........................................................ 8--1068.11 MICROPROCESSOR ALARMS ............................................................ 8 -107232 SETPOINT ERROR ................................................................... 8--107233 MODEL # ERROR .................................................................... 8--107237 FUNCTIONAL PARAMETERS ERROR .................................................. 8--108238 CONFIGURATIONS 1 ERROR ......................................................... 8--109242 DIS PRESS CALIBRATE ERROR ...................................................... 8--110243 SUCT/EVAP CALIBRATE ERROR ...................................................... 8--110246 EEPROM WRITE FAILURE ............................................................ 8--111248 CONF MODE / HP2 ERROR ........................................................... 8--111249 MICROPROCESSOR ERROR ......................................................... 8--112SERVICE .................................................................................... 9-19.1 MAINTENANCE SCHEDULE ........................................................... 9--19.2 PRETRIP INSPECTION ............................................................... 9--49.3 GRILLE INSERT REMOVAL ........................................................... 9--89.4 SURROUND REMOVAL ............................................................... 9--99.5 DOOR LATCH MAINTENANCE AND REPLACEMENT .................................... 9--109.5.1 Front Door Latch Cable Replacement ......................................... 9--109.5.2 Side Door Latch Cable Replacement .......................................... 9--109.6 PRIMING FUEL SYSTEM ............................................................. 9--119.6.1 Mechanical Fuel Pump ...................................................... 9--119.7 SERVICING FUEL PUMP ............................................................. 9--129.7.1 Mechanical Pump (See Figure 9--2) ........................................... 9--129.8 ENGINE SERVICE AND COMPONENTS ................................................ 9--129.8.1 Cooling System ............................................................ 9--129.8.2 Fuel Level Sensor .......................................................... 9--139.8.3 The RPM Sensor ........................................................... 9--139.8.4 Engine Oil And Oil Filter ..................................................... 9--149.8.5 Lube Oil Filters ............................................................ 9--149.8.6 Speed Control Solenoid And Linkage. ......................................... 9--159.8.7 Electronic Speed Control (ESC) .............................................. 9--169.8.8 Engine Air Filter ............................................................ 9--169.8.9 Engine Crankcase Breather ................................................. 9--179.8.10 Glow Plugs ................................................................ 9--1762--10683 viii
TABLE OF CONTENTS (Continued)PARAGRAPH NUMBERPageSERVICE (Cont)9.9 SERVICING AND ADJUSTING V-BELTS ................................................ 9--179.9.1 Belt Tension Gauge ......................................................... 9--179.9.2 Water Pump/Alternator/Crankshaft V-Belt ...................................... 9--189.10 FANSHAFT ASSEMBLY ............................................................... 9--219.10.1 Clutch Removal ............................................................ 9--219.10.2 Blower Wheel And Fanshaft Removal ......................................... 9--219.10.3 Fanshaft Installation ........................................................ 9--229.10.4 Blower Wheel Installation .................................................... 9--239.10.5 Clutch Installation .......................................................... 9--249.11 THERMOSTATIC EXPANSION VALVE .................................................. 9--249.11.1 Replacing Expansion Valve & Screen ......................................... 9--249.11.2 Checking Superheat ........................................................ 9--259.11.3 Measuring Superheat ....................................................... 9--259.11.4 Checking The Refrigerant Charge ............................................ 9--279.11.5 Partial Charge ............................................................. 9--279.11.6 Adding Full Charge ......................................................... 9--289.12 REPLACING THE COMPRESSOR ..................................................... 9--289.12.1 Removal and Replacement of Compressor .................................... 9--289.13 CHECKING COMPRESSOR OIL LEVEL ................................................ 9--309.13.1 To Check The Oil Level In The Compressor: ................................... 9--309.13.2 Adding Oil With Compressor In System ....................................... 9--309.13.3 Adding Oil To Service Replacement Compressor ............................... 9--309.13.4 To Remove Oil From The Compressor: ........................................ 9--319.14 COMPRESSOR UNLOADER VALVE ................................................... 9--319.14.1 Unloader Checkout Procedure ............................................... 9--319.14.2 Replacing Unloader Valve Internal Parts ....................................... 9--319.14.3 Unloader Coil Replacement .................................................. 9--329.15 REPLACING OR SERVICING CHECK VALVE ............................................ 9--329.15.1 To Service Check Valve ..................................................... 9--339.15.2 To Replace Check Valve .................................................... 9--339.16 CHECKING AND REPLACING FILTER-DRIER ........................................... 9--339.16.1 To Check Filter-Drier ........................................................ 9--339.17 CHECKING AND REPLACING HIGH PRESSURE CUTOUT SWITCH (HPS) ................. 9--339.17.1 Checking High Pressure Switch .............................................. 9--339.17.2 Replacing High Pressure Switch .............................................. 9--349.18 COMPRESSOR DISCHARGE PRESSURE TRANSDUCER (CDP) .......................... 9--359.18.1 Testing Compressor Discharge Pressure Transducer ............................ 9--359.18.2 Calibrating Compressor Discharge Pressure Transducer ......................... 9--359.18.3 Replacing Compressor Discharge Pressure Transducer ......................... 9--36ix62--10683
TABLE OF CONTENTS (Continued)PARAGRAPH NUMBERPageSERVICE (Cont)9.19 COMPRESSOR SUCTION PRESSURE TRANSDUCER (CSP) ............................. 9--379.19.1 Testing Compressor Suction Pressure Transducer .............................. 9--379.19.2 Calibrating Compressor Suction Pressure Transducer ........................... 9--379.19.3 Replacing Compressor Suction Pressure Transducer ........................... 9--379.20 Replacing Receiver Sight Glass Assembly Or Fusible Plug ...................... 9--389.21 SERVICING SOLENOID VALVES ....................................................... 9--389.21.1 Solenoid Valve -- SV2/SV4 .................................................. 9--389.21.2 Solenoid Valve -- SV1 ....................................................... 9--399.22 COMPRESSOR SUCTION MODULATION VALVE (CSMV) ................................ 9--419.22.1 Function .................................................................. 9--419.22.2 CSMV Diagnostics ......................................................... 9--419.22.3 Replacing The CSMV Power Head ........................................... 9--429.23 2 LIGHT BAR ........................................................................ 9--439.23.1 Light Bar Operation and Test ................................................. 9--439.24 CHECKING DEFROST OR HEATING CYCLE ............................................ 9--439.24.1 Hot Gas Solenoid Valve (SV1 & SV4) Heating and Defrosting .................... 9--439.25 DEFROST AIR SWITCH (DAS) ........................................................ 9--439.25.1 Testing The Defrost Air Switch And Circuit ..................................... 9--439.25.2 Checking Calibration Of Defrost Air Switch .................................... 9--449.26 EVAPORATOR COIL CLEANING ....................................................... 9--449.27 CONDENSER COIL CLEANING ........................................................ 9--459.28 MICROPROCESSOR SENSOR CHECKOUT ............................................ 9--459.29 UNIDRIVE TORQUE REQUIREMENTS ................................................. 9--479.29.1 Drive Gear ................................................................ 9--47UNIT TROUBLESHOOTING ................................................................... 10-110.1 DIESEL ENGINE ..................................................................... 10--110.1.1 Engine Will Not Start ....................................................... 10--110.1.2 Engine Starts Then Stops ................................................... 10--110.1.3 Starter Motor Malfunction ................................................... 10--210.1.4 Malfunction In The Engine Starting Circuit ..................................... 10--210.1.5 Miscellaneous Engine Troubleshooting ........................................ 10--310.2 ALTERNATOR (12 Volt DC) ............................................................ 10--362--10683 x
TABLE OF CONTENTS (Continued)PARAGRAPH NUMBERPageUNIT TROUBLESHOOTING (Cont)10.3 REFRIGERATION / TEMPERATURE CONTROL ......................................... 10--410.3.1 Unit Will Not Cool .......................................................... 10--410.3.2 Unit Runs But Has Insufficient Cooling ........................................ 10--410.3.3 System Will Not Pump Down ................................................ 10--410.3.4 Unit Operates Long Or Continuously In Cooling ................................ 10--410.3.5 Unit Will Not Terminate Cooling .............................................. 10--510.3.6 Unit Will Not Heat Or Has Insufficient Heating .................................. 10--510.3.7 Unit Will Not Terminate Heating .............................................. 10--510.3.8 Defrost Cycle Malfunction ................................................... 10--510.3.9 Abnormal Pressure ......................................................... 10--6a. Cooling ................................................................ 10--6b. Heating ................................................................ 10--610.3.10 Abnormal Noise ........................................................... 10--710.3.11 Control System Malfunction ................................................. 10--710.3.12 No Evaporator Air Flow Or Restricted Air Flow ................................ 10--710.3.13 Expansion Valve Malfunction ................................................ 10--710.3.14 Compressor Suction Modulation Valve (CSMV) Malfunction ..................... 10--810.3.15 Solenoid Valve Malfunction (SV1, 2 OR 4) .................................... 10--810.4 ELECTRONIC SPEED CONTROL TROUBLESHOOTING ................................. 10--810.4.1 Advance Microprocessor Troubleshooting Guide ............................... 10--1310.5 COMPRESSOR TROUBLESHOOTING GUIDE .......................................... 10--23WIRING SCHEMATIC ......................................................................... 11-1PLUGS USED WITH SCHEMATIC 62--10499 REV V (STANDARD ENGINE) ....................... 11--1PLUGS USED WITH SCHEMATIC 62--04102 REV -- (ESC ENGINE) ............................. 11--2PLUGS USED WITH SCHEMATIC 62--10300 REV A (ESC ENGINE) ............................. 11--2HC PLUG FOR ALL UNITS .................................................................. 10--3ADVANCE MICRO DISPLAY HARNESS CONNECTIONS ....................................... 10--4VOLTAGE TESTS .......................................................................... 10--4INDEX .............................................................................. Index 1xi62--10683
LIST OF ILLUSTRATIONSFIGURE NUMBERPageFigure 2-1. Front View Of Unit With Non ESC Engine ............................................. 2--3Figure 2-2. Curbside (Non ESC Engine) ......................................................... 2--4Figure 2-3. Roadside (Non ESC Engine) ......................................................... 2--4Figure 2-4. Front View Of Unit With Electronic Speed Control (Electronic Speed Control) .............. 2--5Figure 2-5. Curbside (Electronic Speed Control) .................................................. 2--6Figure 2-6. Roadside (Electronic Speed Control) .................................................. 2--6Figure 2-7. Evaporator Section -- Panels and Grille Removed ....................................... 2--7Figure 2-8. Control Box (Short Box) ............................................................. 2--8Figure 2-9. Control Box (Redesigned Tall Box) ................................................... 2--9Figure 2-10. Engine Speed Control Unit (ENSCU) ................................................ 2--10Figure 2-11. Alternator and Regulator ........................................................... 2--11Figure 2-12. Compressor Cylinder Head Unloaded ................................................ 2--12Figure 2-13. Compressor Cylinder Head Loaded .................................................. 2--13Figure 2-14. Control Module ................................................................... 2--16Figure 2-15 Display and Keypad ................................................................ 2--18Figure 2-16. Refrigerant Circuit During Cooling ................................................... 2--29Figure 2-17. Refrigerant Circuit During Heating And Defrost ........................................ 2--30Figure 3--1. AutoFresh Air Exchange ............................................................ 3--38Figure 3--2. AutoFresh in Closed Position ........................................................ 3--39Figure 3--3. AutoFresh in Open Position ......................................................... 3--39Figure 4--1. Auto Start Sequence .............................................................. 4--2Figure 5--1. Continuous Run Temperature Control Operating Sequence -- Perishable Range ............ 5--6Figure 5--2. Continuous Run Temperature Control Operating Sequence -- Frozen Range ............... 5--6Figure 5--3. Start-Stop -- Temperature Control Operating Sequence -- Perishable Range ............... 5--7Figure 5--4. Start-Stop -- Temperature Control Operating Sequence -- Frozen Range .................. 5--7Figure 5--5. Range Lock 1 ..................................................................... 5--13Figure 5--6. Range Lock 2 ..................................................................... 5--13Figure 6 --1. Display Module Assembly .......................................................... 6--27Figure 9--1 Grille Insert Removal And Door Latch Maintenance ..................................... 9--8Figure 9--2 Surround Removal ................................................................. 9--9Figure 9--3 Side Door Latch Lower Cable Removal ................................................ 9--10Figure 9--1. Priming Fuel Pump ................................................................ 9--11Figure 9--2. Mechanical Fuel Pump ............................................................. 9--12Figure 9--3. Fuel Level Sensor Wiring ........................................................... 9--13Figure 9--4. Fuel System Diagram .............................................................. 9--14Figure 9--5. Lube Oil Flow Diagram ............................................................. 9--15Figure 9--6. Speed Control Solenoid ............................................................ 9--15Figure 9--7. Electronic Speed Control Components ................................................ 9--16Figure 9--8. Frame Mounted Engine Speed Control Unit (ENSCU) .................................. 9--16Figure 9--9. DI -- Engine Crankcase Breather ..................................................... 9--17Figure 9--10 Belt Tension Gauge ................................................................ 9--18Figure 9--11. V-Belt Arrangement None ESC Engine .............................................. 9--18Figure 9--12. V-Belt Arrangement Electronic Speed Control Engine .................................. 9--19Figure 9--13. Removing V-Belt from Engine Adapter Drive Sheave .................................. 9--20Figure 9--14. Fanshaft Assembly ............................................................... 9--2262--10683 xii
LIST OF ILLUSTRATIONS (Continued)FIGURE NUMBERPageFigure 9--15. Blower Wheel And Nozzle Cover Assembly .......................................... 9--23Figure 9--16. Thermostatic Expansion Valve Bulb and Thermocouple ................................ 9--25Figure 9--17. Vacuum Pump Connection ......................................................... 9--26Figure 9--18. Pressure Switch and Sensor ....................................................... 9--28Figure 9--19. Compressor Drive Assembly ....................................................... 9--29Figure 9--20. Oil Level in Sight Glass ............................................................ 9--30Figure 9--21. Compressor ..................................................................... 9--31Figure 9--22. Unloader Valve ................................................................... 9--32Figure 9--23. Discharge Check Valve (Serviceable) Prior to S/N JAW90756460 ....................... 9--32Figure 9--24. Discharge Check Valve (Non-Serviceable) Beginning With S/N JAW90756460 ............ 9--32Figure 9--25. Hot Gas Check Valve (Non-Serviceable) ............................................. 9--33Figure 9--26. Typical Setup for Testing High Pressure Switch ....................................... 9--34Figure 9--27 Discharge Pressure Transducer Values .............................................. 9--35Figure 9--28 Suction Pressure Transducer Values ................................................ 9--37Figure 9--29. SV2/SV4 Solenoid Valves .......................................................... 9--38Figure 9--30. SV-2/SV-4 MARKING ............................................................. 9--39Figure 9--31. SV1 Solenoid Valve ............................................................... 9--40Figure 9--32 Suction modulation valve (CSMV) ................................................... 9--41Figure 9--33 CSMV Coil ....................................................................... 9--42Figure 9--34. Defrost Air Switch Test Setup ...................................................... 9--44Figure 9--35. Unidrive Torque Requirements -- Non ESC Engine .................................... 9--48Figure 9--36. Unidrive Torque Requirements -- Electronic Speed Control Engine ....................... 9--49Figure 10--1. ESC Diagnostic Tree -- 1 Long, 1 Short LED Code .................................... 10--9Figure 10--2. ESC Diagnostic Tree -- 2 Long, 1 Short LED Code .................................... 10--10Figure 10--3. ESC Diagnostic Tree -- 2 Long, 3 Short LED Code .................................... 10--11Figure 10--4. ESC Diagnostic Tree -- 2 Long, 7 Short LED Code .................................... 10--12Figure 10--5. Micro Diagnostic Tree -- Cond. 1 -- Start/Run-Off Switch On -- Unit Does Not Operate ...... 10--14Figure 10--6. Micro Diagnostic Tree -- Cond. 2 -- Start/Run-Off Switch On -- Unit Operates But Not Properly 10--15Figure 10--7. Micro Diagnostic Tree -- Cond. 3 -- Start/Run-Off Switch Off -- Unit Fails To Stop .......... 10--16Figure 10--8. Micro Diagnostic Tree -- Cond. 4 -- Unit Will Not Run In High Speed ..................... 10--17Figure 10--9. Micro Diagnostic Tree -- Cond. 5 -- Unit Will Not Run In Low Speed ...................... 10--18Figure 10--10. Micro Diagnostic Tree -- Cond. 6 -- Data Recorder Data Download ProblemsWhen Using ReeferManager and a Download Cable. Data File AnalysisProblems Using Reports ........................................................... 10--19Figure 10--11. Microprocessor Diagnostic Tree -- PC Card Problems ................................. 10--20Figure 10--12. Micro Diagnostic Tree -- Cond. 8 -- Programming Problems With PC Cards .............. 10--21Figure 10--13. Micro Diagnostic Tree -- Cond. 9 -- Programming Problems With MicroProgrammer ....... 10--22Figure 10--14 Compressor Diagnostics .......................................................... 10--26xiii62--10683
LIST OF TABLESTABLE NUMBERPageTable 2-1. Model Chart ...................................................................... 2--1Table 2-2. Additional Support Manuals ........................................................ 2--1Table 2-3. Field Effect Transistors ............................................................ 2--21Table 2-4 .Engine Data ..................................................................... 2--25Table 2-5. Compressor Data ................................................................. 2--26Table 2-6. <strong>Refrigeration</strong> System Data ......................................................... 2--26Table 2-8. Component Resistance and Current Draw ............................................ 2--28Table 3-1. Shutdown Alarms ................................................................. 3--19Table 3-3. Functional Parameters ............................................................. 3--26Table 4-1. Glow Time ....................................................................... 4--1Table4-3 SuctionMOP ..................................................................... 5--19Table 6-1 Connection Point Voltage .......................................................... 6--22Table 9-1. Maintenance Schedule ............................................................ 9--2Table 9-3. Belt Tension ...................................................................... 9--18Table 9-4. Compressor Discharge Pressure Transducer ......................................... 9--36Table 9-5. Compressor Suction Pressure Transducer ............................................ 9--36Table 9-6 CSMV Connections ............................................................... 9--41Table 9-7. Sensor Resistance (ENCT, RAT, SAT, ATT, DTT) ...................................... 9--45Table 9-8. Sensor Resistance (CDT) .......................................................... 9--46Table 9-9. R404A Temperature-Pressure Chart ................................................. 9--50Table 10-1. ENSCU LED Fault Chart .......................................................... 10--862--10683 xiv
SECTION 1SAFETY PRECAUTIONS1PARAGRAPH NUMBERPage1.1 SAFETY PRECAUTIONS ...................................................... 1--11.2 SPECIFIC WARNING AND CAUTION STATEMENTS .............................. 1--11.3 SAFETY DECALS ............................................................. 1--51
SECTION 1SAFETY PRECAUTIONS1.1 SAFETY PRECAUTIONSYour Carrier Transicold refrigeration unit has beendesigned <strong>with</strong> the safety of the operator in mind. Duringnormal operation, all moving parts are fully enclosed tohelp prevent injury. During all pre-trip inspections, dailyinspections, and problem troubleshooting, you may beexposed to moving parts. Please stay clear of all movingparts when the unit is in operation and when the unitmain power switch is in the START/RUN position.CAUTIONUnder no circumstances should anyone attemptto repair the Logic or Display boards.Should a problem develop <strong>with</strong> these component,contact your nearest CarrierTransicold dealer for replacement.CAUTIONUnder no circumstances should a technicianelectrically probe the processor at anypoint, other than the connector terminalswhere the harness attaches. Microprocessorcomponents operate at differentvoltage levels and at extremely low currentlevels. Improper use of voltmeters, jumperwires, continuity testers, etc. could permanentlydamage the processor.CAUTIONMost electronic components are susceptibleto damage caused by electrical staticdischarge (ESD). In certain cases, the humanbody can have enough static electricityto cause resultant damage to the componentsby touch. This is especially true ofthe integrated circuits found on the truck/trailer <strong>micro</strong>processor.Auto-StartYour refrigeration unit is equipped <strong>with</strong> Auto-Start inboth Start-Stop and Continuous Run modes. The unitmay start at any time when the START/RUN-OFFswitch (SROS) is in the START/RUN position. A buzzerwill sound for five seconds before the unit is started.When performing any check of the refrigeration unit(e.g., checking the belts, checking the oil), make certainthat the SROS is in the OFF position.Engine CoolantThe engine is equipped <strong>with</strong> a pressurized coolingsystem. Under normal operating conditions, the coolantin the engine and radiator is under high pressure and isvery hot. Contact <strong>with</strong> hot coolant can cause severeburns. Do not remove the cap from a hot radiator. If thecap must be removed, do so very slowly in order torelease the pressure <strong>with</strong>out spray.RefrigerantsThe refrigerant contained in the refrigeration system ofyour unit can cause frostbite, severe burns, or blindnesswhen in direct contact <strong>with</strong> the skin or eyes. For thisreason, and because of legislation regarding thehandling of refrigerants during system service, werecommend that whenever your unit requires service ofthe refrigeration system you contact your nearestCarrier Transicold authorized repair facility for service.BatteryThis unit is equipped <strong>with</strong> a lead-acid type battery. Thebattery normally vents small amounts of flammablehydrogen gas. Do not smoke when checking the battery.A battery explosion can cause serious physical harmand/or blindness.1.2 SPECIFIC WARNING AND CAUTIONSTATEMENTSTo help identify the label hazards on the unit and explainthe level of awareness each one carries, an explanationis given <strong>with</strong> the appropriate consequences:DANGER -- Warns against an immediate hazard whichWILL result in severe personal injury or death.WARNING -- Warns against hazards or unsafe conditionswhich COULD result in severe personal injury ordeath.CAUTION -- Warns against potential hazard or unsafepractice which could result in minor personal injury, orproduct or property damage.The statements listed below are specifically applicableto this refrigeration unit and appear elsewhere in thismanual. These recommended precautions must be understoodand applied during operation and maintenanceof the equipment covered herein.1--1 62-10683
WARNINGBeware of V-belts and belt driven componentsas the unit may start automatically.Before servicing unit, make sure theSTART/RUN-OFF switch is in the OFF positionor the unit is in Maintenance mode.Also disconnect the negative battery cable.WARNINGUNITS EQUIPPED WITH STAR-TRAK TWOWAY COMMUNICATION CAPABILITIES MAYHAVE THE ABILITY TO BE STARTED ORTURNED OFF REMOTELY REGARDLESS OFTHE SETTING OF THE START/RUN-OFFSWITCH.The unit is controlled locally and there canbe no two-way communication when theMode switch on the Remote MonitoringControl Box is in MAINTENANCE MODE.Therefore, when performing maintenanceon the unit, place the Mode switch in MAIN-TENANCE MODE. After the unit is serviced,return the Mode switch to REMOTE ON. (Referto Section 3.20.3 for more detailed informationon two-way communication.)WARNINGInspect battery cables for signs of wear, abrasionor damage at every Pre -Trip inspectionand replace if necessary. Also checkbattery cable routing to ensure that clampsare secure and that cables are not pinchedor chafing against any components.WARNINGUnder no circumstances should ether orany other starting aids be used to start engine.WARNINGDo Not Allow Configuration Jumper WireTo Touch Any Ground.WARNINGThe +5.0 VDC (terminal B) is common betweenthe Compressor Discharge PressureTransducer, the Compressor Suction PressureTransducer, and the RPM sensor. Ifthis circuit is shorted to ground (due to oneof the mentioned components being defective,or a worn wire) the MessageCenter willshow:SSuction Pressure: -14.7 PSIG (-1 Bar)SDischarge Pressure: 0 PSIG/BarSEngine RPM: 0.WARNINGKeep hands and arms away from unit whenoperating <strong>with</strong>out belt guard in place. Neverrelease a unit for service <strong>with</strong>out the beltguard securely tightened in placeWARNINGDo not start unit <strong>with</strong>out installing the evaporatorpanels as unit damage or body harmmay result.WARNINGDo not use a nitrogen cylinder <strong>with</strong>out apressure regulator. Cylinder pressure isapproximately 2350 psig (159.9 bar). Do notuse oxygen in or near a refrigerant systemas an explosion may occur. (SeeFigure 9 -26)WARNINGThe Compressor Discharge PressureTransducer does not have a Schrader valvein the connecting fitting. Any dischargepressure remaining in the compressor willbe released when removing the CDP.WARNINGCarrier Transicold does not recommend allowingthe compressor to pull less than 0PSIG/Bar at any time.62-106831--2
CAUTIONObserve proper polarity when installingbattery, negative battery terminal must begrounded. Reverse polarity will destroy therectifier diodes in alternator. As a precautionarymeasure, disconnect positive batteryterminal when charging battery in unit.Connecting charger in reverse will destroythe rectifier diodes in alternator.CAUTIONUse only ethylene glycol anti-freeze (<strong>with</strong>inhibitors) in system as glycol by itself willdamage the cooling system. Always addpre-mixed 50/50 anti-freeze and water to radiator/engine.Never exceed more than a60% concentration of anti-freeze. Use a lowsilicate anti-freeze meeting GM specificationsGM 6038M for standard life coolant oruse Texaco Havoline extended life coolantor any other extended life coolant which isDexcool approved and has 5/150 (5years/150,000 miles) on the label.CAUTIONWhen changing oil filters, the new filtersshould be primed (partially filled) <strong>with</strong> cleanoil if possible. If the filters are not primed,the engine may operate for a period <strong>with</strong> nooil supplied to the bearings.CAUTIONService Mode MUST be used whenever removingrefrigerant charge, refrigerant leakchecking or evacuating.CAUTIONThe display and MessageCenter may behavedifferently during the software loadingprocess, depending on the version of softwarecurrently in the controller. DO NOT IN-TERRUPT THE SOFTWARE INSTALLATIONPROCESS ONCE IT HAS STARTED.CAUTIONIt is important that communications betweenthe Micro and the computer are notdisturbed during the software loading process.If using a laptop computer, turn all energysaving features off. Turn off any screensaver, or any hard drive time out settings.CAUTIONBe certain that the clock you are using is accurate,and is showing the correct time.Also, some customers are located in differenttime zones from where the repair is beingmade. If you know what time zone theyuse, enter that time. If you don’t, then enterthe current time where you are located.CAUTIONDo not over -torque display screws. Torqueall screws to 11in -lbs (1.2 Nm).CAUTIONUnit uses R404A and POE oil. The use of inertgas brazing procedures is mandatory forall Carrier Transicold refrigeration units;otherwise compressor failure will occur.For more information Refer to TechnicalProcedure 98-50553-00 Inert Gas BrazingCAUTIONDo not get anti-seize oil/compound ontoclutch contact surfaces. Thoroughly cleanoff oil/compound <strong>with</strong> contact or brakecleaner if this occurs.1--3 62-10683
CAUTIONOnly a refrigerant drum containing R404ashould be connected to units covered bythis manual in order to pressurize the system.Any other gas or vapor will contaminatethe system, which will require additionalpurging and evacuation of the highside (discharge) of the system.CAUTIONDo not vapor charge R404A systems. Onlyliquid charging through the receiver outlet(King) valve is acceptable.CAUTIONDo not over tighten or damage the SV2 orSV4 enclosing tube assembly. Torque to17-ft pounds (2.4 Mkg). Also make sure allparts are placed on the enclosing tube inproper sequence to avoid premature coilburnout.CAUTIONWhen adding oil to the compressor, extremecare must be taken to ensure the hoseis immersed in the oil at all times. Otherwiseair and moisture will be drawn into the compressor.CAUTIONWhen removing the compressor cylinderhead leave two cylinder head bolts loose<strong>with</strong> threads engaged in the crankcase untilcylinder head is completely loosened toprevent any residual crankcase pressure.62-106831--4
1.3 SAFETY DECALS62-03958-00 Heat WarningONLY USED ON UNITS WITH TWO-WAYCOMMUNICATION CAPABILITIES1--5 62-10683
62-106831--6
OR1--7 62-10683
SECTION 2UNIT DESCRIPTION1PARAGRAPH NUMBERPage2.1 INTRODUCTION .............................................................. 2--12.2 GENERAL DESCRIPTION ...................................................... 2--22.3 CONDENSING SECTION ...................................................... 2--102.3.1 Condenser Coil ............................................................ 2--102.3.2 Engine .................................................................... 2--102.3.3 Alternator/Regulator ........................................................ 2--112.3.4 Compressor ............................................................... 2--122.3.5 Compressor Unloaders ..................................................... 2--122.3.6 Filter Drier ................................................................. 2--132.3.7 Receiver .................................................................. 2--132.3.8 Compressor Transducers and Sensors ........................................ 2--142.4 EVAPORATOR SECTION ...................................................... 2--142.4.1 Thermal Expansion Valve ................................................... 2--142.4.2 Heat Exchanger ............................................................ 2--142.4.3 Evaporator Coil ............................................................ 2--142.4.4 Evaporator Transducers and Sensors ......................................... 2--152.5 SYSTEM OPERATING CONTROLS AND COMPONENTS .......................... 2--152.5.1 Multiple Languages ......................................................... 2--152.5.2 Special Features ........................................................... 2--152.5.3 Component Description And Location ......................................... 2--162.5.4 Handling of PC Cards ....................................................... 2--222.6 OPTIONS .................................................................... 2--222.6.1 Light Bar .................................................................. 2--222.6.2 Door and Remote Switches .................................................. 2--232.6.3 Out of Range Alarm ........................................................ 2--242.7 ENGINE DATA ................................................................ 2--252.7.1 Lubrication System ......................................................... 2--252.8 ENGINE SCREW THREADS .................................................... 2--262.9 ENGINE AIR SYSTEM ......................................................... 2--262.10 COMPRESSOR DATA ......................................................... 2--262.11 REFRIGERATION SYSTEM DATA ............................................... 2--262.12 SAFETY DEVICES ............................................................ 2--272.13 COMPONENT RESISTANCE AND CURRENT DRAW .............................. 2--282.14 REFRIGERANT CIRCUIT DURING COOLING .................................... 2--292.15 REFRIGERANT CIRCUIT -- HEATING AND DEFROSTING ......................... 2--302
2.1 INTRODUCTIONWARNINGBeware of V-belts and belt driven componentsas the unit may start automatically.Before servicing unit, make sure the Start/Run -Off switch is in the OFF position or theunit is in Maintenance mode. Also disconnectthe negative battery cable.9SECTION 2UNIT DESCRIPTIONWARNINGUNITS EQUIPPED WITH REMOTE TWO WAYCOMMUNICATION CAPABILITIES HAVE THEABILITY TO BE STARTED OR TURNED OFFREMOTELY REGARDLESS OF THE SETTINGOF THE START / RUN-OFF SWITCH.The unit is controlled locally and there canbe no two-way communication when theMode Switch on the Remote MonitoringControl Box is in MAINTENANCE MODE.Therefore, when performing any work onthe unit place the mode switch in MAINTE-NANCE MODE. After the unit is serviced, returnthe mode switch to REMOTE ON.This manual contains Operating Data, Electrical Data and Service Instructions for the refrigeration units listed inTable 2-1.Additional support manuals are listed in Table 2-2.The model/serial number plate is located inside the unit on the frame as shown in Figure 2-3.Table 2-1. Model ChartAdvance ModelsR-404AEngine SpeedCompressor EngineKG LB High LowUltra XTC NDL-93NNUltra XTC Rail Edition NDL-93NR9.1 201700 1350Ultra XTC <strong>with</strong> Tier 2 Engine NDL-93VNCT4-134-DIUltima XTC NDL-93PN05G 41cfmUltima XTC Rail Edition NDX-93PR2200 1475Ultima XTC <strong>with</strong> Tier 2 Engine NDL-93RN 9.5 21X2 2100A and R NDL93SV2203-DI 1700 1350X2 2500A and R NDL93U ESC 2200 1450Table 2-2. Additional Support ManualsManual Number Equipment Covered Type of Manual62-10671 Ultra/Ultima XTC Parts List62-11171 X2 2100/2500 A AND R Parts List62-10646 Units With Advance Microprocessor Operator’s Manual62-10682 Units With Advance Microprocessor Easy To Run62-10295 Engine V2203-DI Parts List62-10863 Engine (Tier 2) Parts List62-11168 Engine (Electronic Speed Control) Parts List62-10301 Engine V2203-DI Workshop62-10865 Engine (Tier 2) Workshop62-11167 Engine (Electronic Speed Control) Workshop62-10299 Compressor Parts List62-11053 Compressor (05G TWINPORT)) Parts List62-02756 Compressor Service62-11052 Compressor (05G TWINPORT) Service2--1 62-10683
2.2 GENERAL DESCRIPTIONThe refrigeration units described in this manual areone-piece, self-contained, fully charged, pre-wired,refrigeration/heating nosemount diesel powered unitsfor use on insulated trailers or rail cars to maintain cargotemperatures <strong>with</strong>in very close limits.Automatic evaporator coil defrosting is initiated by eithersensing the air pressure drop across the coil <strong>with</strong> a differentialair switch or <strong>with</strong> the defrost timer in the <strong>micro</strong>processor.The control box includes manual switches, <strong>micro</strong>processor,fuses, and associated wiring. The unit can beequipped <strong>with</strong> an optional remote light bar which mountsseparately on the front roadside corner of the refrigeratedcompartment.The temperature controller is a solid state <strong>micro</strong>processor(Refer to Section 2.5). Once the <strong>micro</strong>processoris set at the desired temperature, the unit will operateautomatically to maintain the desired temperature <strong>with</strong>invery close limits. The control system automatically selectshigh and low speed cooling or high and low speedheating as necessary to maintain the desired temperature<strong>with</strong>in the refrigerated compartment.The auto Start--Stop operation provides automatic cyclingof the diesel engine, which in turn offers an energyefficient alternative to continuous operation of the engine<strong>with</strong> control of temperature by alternate cooling andheating of the supply air (evaporator outlet air). The autoStart--Stop feature is standard equipment.62-106832--2
9221232120645181719789 10 11 12 1314 15 161.2.Liquid line service valveHot Gas Solenoid Valve (SV4)3.4.Suction Modulation Valve (CSMV)High Pressure Cutout Switch (HPS)5.6.Discharge service valveUnloader solenoid valve7.8.Compressor Discharge Transducer (CDT)Compressor -- 05G9.10.Compressor sight glassSuction Pressure Transducer (CSP)11. Suction service valve12.13.Fuel filterEngine oil drain14.15.Starter motorLube oil fill and dipstick16.17.Lube oil filterOil Pressure Switch (OP)18.19.Mechanical fuel pumpFuel bleed valve20.21.Speed Control Solenoid (SCS)Water Temperature Sensor (WTS)22. Ambient Temperature Sensor (ATS)Figure 2-1. Front View Of Unit With Non ESC Engine2--3 62-10683
112323456456771. Condenser Pressure ControlSolenoid Valve (SV1)2.3.Defrost Air Switch (DAS)Filter Drier4.5.ReceiverReceiver sight glass6.7.Liquid Line Solenoid Valve (SV2)Battery locationFigure 2-2. Curbside (Non ESC Engine)1.2.Condenser / RadiatorRadiator fill neck3.4.Radiator overflow reservoirEngine air cleaner5.6.Alternator -- See Figure 2-11Model / Serial No. Location7. Control box -- See Figure 2-8Figure 2-3. Roadside (Non ESC Engine)62-106832--4
9232221123201945181716151467 891011 12 131.2.Liquid line service valveHot Gas Solenoid Valve (SV4)3.4.Suction Modulation Valve (CSMV)High Pressure Cutout Switch (HPS), Compres--sor Discharge Transducer (CDT) and UnloaderSolenoid Valve5.6.Discharge service valveCompressor -- 05G7.8.Compressor sight glassSuction Pressure Transducer (CSP)9.10.Suction service valveEngine oil drain11. Starter motor12.13.Lube oil fill and dipstickLube oil filter14.15.Mechanical fuel pumpEngine Oil Pressure Switch (ENOPS)16.17.Engine Speed Sensor (ENSSN)Fuel and Speed Actuator (FSA) and Alternator18.19.Fuel bleed valveEngine air cleaner20.21.Fuel filterEngine Speed Control Unit (ENSCU)2223.Water Temperature Sensor (WTSAmbient Temperature Sensor (AAT)Figure 2-4. Front View Of Unit With Electronic Speed Control (Electronic Speed Control)2--5 62-10683
1122345637451. Condenser Pressure ControlSolenoid Valve (SV1)2.3.Defrost Air Switch (DAS)Filter Drier4.5.Receiver sight glassReceiver6.7.Liquid Line Solenoid Valve (SV2)Battery locationFigure 2-5. Curbside (Electronic Speed Control)1.2.Condenser/RadiatorPressurized coolant system3.4.Control box -- See Figure 2-8Serial Port/Download Plug (SLP)5. Model/Serial No. LocationFigure 2-6. Roadside (Electronic Speed Control)62-106832--6
98765142 39CURBSIDE1.2.Evaporator fanExpansion valve3.4.Heat exchangerReturn Air Thermistor (RAT)5. Evaporator coil6.7.Defrost Termination Thermostat (DTT)Supply Air Thermistor (SAT)8.9.Nozzle coverAutoFresht Air Exchange (See Sections2.4.3 and 3.20.4Figure 2-7. Evaporator Section - Panels and Grille Removed2--7 62-10683
1211109876541231.2.Serial Port / Download Plug (SLP)Control module (Microprocessor)Refer to Section 2.5.33. Fuse (F1) 7.5 Amp4 Fuse (F10) 40 Amp -- Optional Auto Fresh AirExchange5. Fuse (F7) 5 Amp6.7.Fuse (F6) 15 Amp (Fuel Pump)Fuse (F8) 20 Amp (Optional Fuel Heater)8.9.AutoFresh Relay (AFAR)Fuse (F5) 80 Amp10.11.Fuel Heater Relay (FHR)Starter Solenoid Relay (SSR)12. Glow Plug Relay (GPR)Figure 2-8. Control Box (Short Box)62-106832--8
9111098765432121. Control Module (Microprocessor)Refer to Section 2.5.32. Fuse (F1) 7.5 Amp -- Located next to controlmodule3 Fuse (F10) 40 Amp -- Optional Auto Fresh AirExchange -- Location Only4.5.Fuse (F6) 15 AmpFuse (F8) 20 Amp (Optional Fuel Heater)6. Fuse (F7) 5 AmpFigure 2-9. Control Box (Redesigned Tall Box)17.8.AutoFresh Relay (AFAR) -- Location OnlyFuse (F5) 80 Amp9.10.Fuel Heater Relay (FHR) -- Location OnlyStarter Solenoid Relay (SSR)11.12.Glow Plug Relay (GPR)Glow Crank Switch (GCS) -- on side of box Ifequipped2--9 62-10683
2.3 CONDENSING SECTIONThe condensing section consists of anengine-compressor drive package, condenser fan,condenser/radiator coil, refrigerant controls, piping,wiring.The drive equipment includes the engine, clutch, aircleaner, muffler, coolant overflow bottle, and drive belts.<strong>Refrigeration</strong> components mounted in the condensingsection include the compressor, defrost air switch, suctionmodulation valve, filter drier, and receiver.2.3.1 Condenser CoilThe condenser coil is a tube in fin type and acts as a heatexchanger in which the compressed refrigerant gas islowered in temperature and condensed into a liquid. Airmovement over the condenser is provided by an electricmotor driven fan mounted in the condensing section.2.3.2 EngineThe diesel engine drives the compressor directlythrough a nylon drive gear and adapter. The adapteralso includes a V-belt sheave which drives the gearbox.The condenser/evaporator fan shaft is driven <strong>with</strong> aV-belt from the gearbox. The water pump V-belt drivesthe alternator.a. Engine Transducers and Sensors:1) Engine RPM Sensor (ENRPM) (Non ESC enginesonly)Non ESC Engines: Provides <strong>micro</strong>processor <strong>with</strong>engine RPM information to be displayed and recorded inthe DataRecorder. It is located on the rear of the enginein the flywheel housing.ESC Engines: Provides the ENSCU <strong>with</strong> the engineRPM information for speed control of the engine. TheENSCU then sends the information to the <strong>micro</strong>processorto be displayed in the unit Data List and then tobe recorded in the Data Recorder. It is located in the timingcase cover of the engine above the oil filter.2) Engine Oil Pressure Switch (ENOPS)This normally open switch allows the engine to operatewhen oil pressure is above 15 ¦ 2 PSIG (1.02 ¦ 0.1Bars). The switch will open and automatically stop theengine 5 seconds after pressure drops below 15 ¦ 2PSIG (1.02 ¦ 0.1 Bars). There is a 15 second delayafter the engine starts to allow the oil pressure to buildup before the <strong>micro</strong>processor looks at the input from thisswitch. The switch is located on the front of the enginebelow the fuel solenoid.3) Engine Oil Level Switch (ENOLS) (Optional)ENOLS sets off alarm when oil level is low. Located onthe oil pan next to the oil fill.4) Engine Coolant Temperature Sensor (ENCT)Provides <strong>micro</strong>processor <strong>with</strong> engine coolanttemperature information to be displayed and recorded inthe DataRecorder . The sensor is located on the starterside of the engine near the #4 Injector.5) Engine Coolant Level Sensor (ENCLS)(Optional)Sets off alarm when coolant level is more than 1 quartlow. Located in the coolant bottle.6) Engine Speed Control Unit (ENSCU) (ESC only)(See Figure 2-10)The ENSCU is mounted on the roadside frame behindthe upper door. (See Figure 2-4). It provides the RPMsignal to the <strong>micro</strong>processor. The unit has an alarm LEDincorporated <strong>with</strong>in it which is used to diagnose failures<strong>with</strong>in the ESC system. See Section 10.4 for informationon diagnosing failures.LEDFigure 2-10. Engine Speed Control Unit (ENSCU)7) Fuel and Speed Actuator (FSA) (ESC only)The FSA combines the fuel shutoff solenoid and speedcontrol solenoid into one component. Engine speed iscontrolled by varying rod position.8) Engine Speed Sensor (ENSSN) (ESC only)The ENSSN provides the RPM signal to the ENSCU forspeed control. It is located on the front of the engine inthe gear case cover.62-106832--10
92.3.3 Alternator/RegulatorElectrical power for the control system and for chargingthe battery is provided by the 12 VDC alternator.a. Alternator OperationCAUTIONObserve proper polarity when installingbattery. Negative battery terminal must begrounded. Reverse polarity will destroy therectifier diodes in alternator. As a precautionarymeasure, disconnect positive batteryterminal when charging battery in unit.Connecting charger in reverse will destroythe rectifier diodes in alternator.The alternator converts mechanical and magneticenergy to alternating current (AC) and voltage, by therotation of an electromagnetic field (rotor) inside a threephasestator assembly. The alternating current andvoltage is changed to direct current and voltage bypassing AC energy through a three-phase, full-waverectifier system. Six silicon rectifier diodes are used.The regulator is an electronic switching device. Itsenses the system voltage level and switches thevoltage applied to the field in order to maintain propersystem voltage.b. Integral Voltage Regulator Operation (12 VDC)The regulator is an all-electronic, transistorized device.No mechanical contacts or relays are used to performthe voltage regulation of the alternator system. Theelectronic circuitry should never require adjustment andthe solid state active elements used have provedreliable enough to warrant a sealed unit. The system istemperature compensated to permit the ideal chargingrate at all temperatures.YellowYellow12Red24Black31.2.D+ Emulation (Orange) -- Not Used on Advance#10-24 AC Terminal3.4.#10-24 Ground Screw1/4-20 Positive Output CableFigure 2-11. Alternator and Regulator2--11 62-10683
2.3.4 CompressorThe compressor assembly includes the refrigerant compressor,suction and discharge service valves, highpressure switch, and the suction and discharge pressuretransducers. The compressor draws refrigerantgas from the evaporator and delivers it to the condenserat an increased pressure. The pressure is such thatrefrigerant heat can be absorbed by the surrounding airat ordinary temperatures.2.3.5 Compressor UnloadersThe refrigeration compressor used is a 41 cfm model05G, equipped <strong>with</strong> unloaders as standard equipment.Unloaders are used as a compressor capacity control tounload the compressor during periods of reduced loads.This provides closer temperature control and reducespower required to operate the compressor; thusreducing fuel consumption.a. Major Working PartsS Solenoid and valve systemSSSpring loaded piston type bypass control valveSpring loaded discharge check valveb. Unloaded Operation (Figure 2-12)Pressure from the discharge manifold (Item 15) passesthrough the strainer (9) and bleed orifice (8) to the backof the piston bypass valve (7). Unless bled away, thispressure would tend to close the piston (6) against thepiston spring (5) pressure.With the solenoid valve (1) energized, the solenoidvalve stem (2) will open the gas bypass port (3).Refrigerant pressure will be bled to the suction manifold(10) through the opened gas bypass port. A reduction inpressure on the piston bypass valve will take placebecause the rate of bleed through the gas bypass port isgreater than the rate of bleed through the bleed orifice (8).When the pressure behind the piston has been reducedsufficiently, the valve spring will force the piston bypassvalve back, opening the gas bypass from the dischargemanifold to the suction manifold.Discharge pressure in the discharge manifold will closethe discharge piston check valve assembly (14)isolating the compressor discharge manifold from theindividual cylinder bank manifold.The unloaded cylinder bank will continue to operate fullyunloaded until the solenoid valve control device isde-energized and the gas bypass port is closed.42 35671111089121314151.2.Solenoid ValveValve Stem3.4.Gas Bypass PortSpring Guide5.6.SpringPiston7.8.Piston Bypass ValveBleed Orifice9.10.StrainerSuction Manifold11.12.Cylinder Discharge ValveValve Plate13.14.Cylinder Suction ValveDischarge Piston Check Valve Assembly15. Discharge ManifoldFigure 2-12. Compressor Cylinder Head Unloaded62-106832--12
9c. Loaded Operation (Figure 2-13)Discharge pressure bleeds from the discharge manifold(Item 15) through the strainer (9) and (8) bleed orifice tothe solenoid valve stem (2) chamber and then back ofthe piston bypass valve (7).With the solenoid valve (1) de-energized, the solenoidvalve stem will close the gas bypass port (3).Refrigerant pressure will overcome the bypass valvespring (5) tension and force the piston (6) forwardclosing the gas bypass from the discharge manifold tothe suction manifold (10).Cylinder discharge pressure will force open thedischarge piston check valve assembly (14).Refrigerant gas will pass into the compressor dischargemanifold.The loaded cylinder bank will continue to operate fullyloaded until the solenoid valve control device isenergized and the gas bypass port is opened. Refer toSection 5.12 for more information on Loaded Operation.4562 371111081291314151.2.Solenoid ValveValve Stem3.4.Gas Bypass PortSpring Guide5.6.SpringPiston7.8.Piston Bypass ValveBleed Orifice9.10.StrainerSuction Manifold11.12.Cylinder Discharge ValveValve Plate13.14.Cylinder Suction ValveDischarge Piston Check Valve Assembly15. Discharge ManifoldFigure 2-13. Compressor Cylinder Head Loaded2.3.6 Filter Drier2.3.7 ReceiverThe drier is a cylinder shell containing a drying agent Liquid refrigerant from the condenser drains into theand screen. It is installed in the liquid line, and functions receiver. The receiver serves as a liquid reservoir whento keep the system clean and remove moisture from the there are surges due to load changes in the system; as arefrigerant.storage space when pumping down the system and as aliquid seal against the entrance of refrigerant gas intothe liquid line.The receiver is provided <strong>with</strong> two sight glasses for theobservation of liquid level and a fusible plug.2--13 62-10683
2.3.8 Compressor Transducers and Sensorsa. Compressor Suction Pressure Transducer (CSP)Provides <strong>micro</strong>processor <strong>with</strong> suction pressureinformation to be displayed, recorded in theDataRecorder and used to control the refrigerationsystem. It cannot be calibrated. It is located near the oilpump on the compressor.b. Compressor Discharge Pressure Transducer(CDP)Provides <strong>micro</strong>processor <strong>with</strong> discharge pressureinformation to be displayed, recorded in theDataRecorder and used to control the refrigerationsystem. It can be calibrated. It is located on the centercylinder head of the compressor.c. Compressor Discharge Temperature SensorTransducer (CDT)Provides <strong>micro</strong>processor <strong>with</strong> compressor dischargetemperature information to be displayed, recorded inthe DataRecorder and used to control the refrigerationsystem. It is located on the center cylinder head of thecompressor.It will shut the unit down if center compressor headdischarge temperature reaches 310°F (154°C) for threeminutes or 350°F (177°C). If ambient temperaturesensor (AAT) is at 120°F(49°C) or higher, the CDT limitsare increased to 340°F (171°C) for three minutes.d. Compressor Suction Modulation Valve (CSMV)The CSMV opens and closes as required for capacitycontrol of the refrigeration system cooling cycle. It islocated in the suction line at the exit of the evaporatorpod.e. Ambient Air Temperature Sensor (AAT)AAT is a temperature control probe which provides the<strong>micro</strong>processor <strong>with</strong> ambient air temperature informationto be displayed, recorded in the DataRecorder andused to control the refrigeration system. It is locatedbehind the condenser grille.2.4 EVAPORATOR SECTIONThe evaporator fits into a rectangular opening in theupper portion of the front wall of the refrigeratedcompartment front wall. When installed, the evaporatorsection is located inside this compartment, and thecondensing section is outside.The evaporator assembly consists of an evaporator coil,an evaporator fan motor, a thermal expansion valve, aheat exchanger, a defrost termination sensor (DTT),supply (SAT) and return (RAT) air sensors (SeeFigure 2-7.2.4.1 Thermal Expansion ValveThe thermal expansion valve is an automatic devicewhich controls the flow of liquid to the evaporator accordingto changes in superheat to the refrigerant leavingthe evaporator. The thermal expansion valve maintainsa relatively constant degree of superheat in the gasleaving the evaporator regardless of suction pressure.Thus, the valve has a dual function; automatic expansioncontrol and prevention of liquid return to the compressor.2.4.2 Heat ExchangerThe heat exchanger is the tube in tube type and is connectedin the main suction line and liquid line. The coldsuction gas is used to cool the warm liquid refrigerant<strong>with</strong>in the heat exchanger. This results in greater systemcapacity and efficiency.2.4.3 Evaporator CoilThe unit evaporator is a tube and fin type. The operationof the compressor maintains a reduced pressure <strong>with</strong>inthe coil. At this reduced pressure, the liquid refrigerantevaporates at a temperature sufficiently low enough toabsorb heat from the air.Heating is accomplished by circulating hot gas directlyfrom the compressor to the evaporator coil. Solenoidvalves control the refrigerant circuit to operate theheating/cooling system.Automatic evaporator coil defrosting is initiated by eithersensing the air pressure drop across the coil <strong>with</strong> adifferential air switch or <strong>with</strong> the defrost timer in the<strong>micro</strong>processor.As perishable products respire, they consume oxygen(O 2 ) and give off carbon dioxide (CO 2 ). This willeventually cause the atmosphere <strong>with</strong>in a refrigeratedcompartment to have higher levels of CO 2 and lowerlevels of O 2. This may adversely affect the shelf life ofsome sensitive perishable products. When transportingthese products, it may be desirable to maintain normalatmospheric conditions (prevent the build up of CO 2 andthe depletion of O 2 ) by using fresh air exchange, inaddition to accurate temperature control. AutoFresh AirExchange provides the ability to control the amount offresh air <strong>with</strong>out the need for manual intervention whilein transit. AutoFresh Air Exchange can also be used tolower the humidity level <strong>with</strong>in a refrigeratedcompartment IF the ambient air has a lower humiditylevel.AutoFresh Air Exchange is a factory-installed option, asit requires a modified evaporator pod. (See Figure 2-7)When AutoFresh Air Exchange is operational and “ON”,two air ports open. The upper port allows fresh ambientair to enter while stale air exits through the lower port.AutoFresh Air Exchange is available for all setpoints ator above +28°F (-2.2°C). AutoFresh Air Exchange is notoperational when the setpoint is set below +28°F(-2.2°C) or when the unit is in Defrost, or when the unithas cycled off in Auto Start-Stop. (Refer to Section3.20.4 for more information on AutoFresh AirExchange.)62-106832--14
2.4.4 Evaporator Transducers and Sensorsa. Defrost Termination Temperature Sensor (DTT)The DTT is located on the curbside evaporator supportbracket above the coil. It senses the temperature of theevaporator and allows defrost initiation once the temperaturefalls below 40°F (4.4°C)b. Return Air Temperature Sensor (RAT)The RAT is a temperature control probe which provides<strong>micro</strong>processor <strong>with</strong> return air temperature informationto be displayed, recorded in the data recorder and usedto control the refrigeration system. It is located in thecenter of the return air grille.c. Supply Air Temperature Sensor (SAT)The SAT is a temperature control probe which provides<strong>micro</strong>processor <strong>with</strong> supply air temperature informationto be displayed, recorded in the data recorder and usedto control the refrigeration system. It is located in thesupply air nozzle.2.5 SYSTEM OPERATING CONTROLS ANDCOMPONENTSThe temperature controller is a Carrier TransicoldAdvance Microprocessor (Refer to Section 2.5.3 and 3).Once the <strong>micro</strong>processor is set at the desiredtemperature, the unit will operate automatically tomaintain the desired temperature <strong>with</strong>in very closelimits.The <strong>micro</strong>processor consists of two modules -- the controlmodule (See Figure 2-14) and the display and keypadmodule (See Figure 2-15). The control box includesmanual switches, a <strong>micro</strong>processor, fuses, andassociated wiring.Standard equipment includes an Auto Start-Stopfeature. This feature provides automatic cycling of thediesel engine, which in turn offers an energy efficientalternative to continuous operation of the engine <strong>with</strong>control of temperature by alternate cooling and heatingof the supply air (evaporator outlet air).92.5.1 Multiple LanguagesMessages in the MessageCenter can be displayed inEnglish, French, Portuguese or Spanish.Press and hold the Select Key for 6 seconds to view orchange the current language selection. See Section3.16 for more information on Language Selection.2.5.2 Special FeaturesThe following special features are incorporated into theCarrier Transicold Advance Microprocessor:S A MessageCenter which clearly displays allinformation in dot matrix form.S Unit Operation and Alarms are displayed in English(not in codes)S UltraFresh 3S Large LCD displayS Unit Data and Functional ParametersS Programmable Maintenance hourmetersS PM Hourmeters are resettable from the keypadS Bright LED alarm lightS Bright LED mode lightsS Fully automated PretripS Automated <strong>micro</strong>processor Self-testS DataRecorderS DataRecorder date and time can be set from thekeypadAuto Start-StopSS Trip Start to record date/time of trip inDataRecorder memoryS PC card functionality for downloading data,upgrading programming and setting upConfigurations. (Refer to Section 2.5.4.)S FETs (Field Effect Transistors) for switchingcomponents on and off, and checking circuitcurrentSSSSAutomatic Engine Starting. Manual engine startingexists in units built before April 2007.Functional Parameter locksAlarms are stored in <strong>micro</strong>processor memory forfuture referenceNew menu system to simplify keyboard andenhance functionality2--15 62-10683
2.5.3 Component Description And Locationa. Control ModuleThe control module is housed in the control box on thelower roadside (right) corner of the unit, just inside thelower roadside door. The control module containsreplaceable relays and fuses which are externallyaccessible. LEDs are located next to the three relaysplugged into the control module to indicate relayoperation. Additional LEDs indicate operation of theFETs (Field Effect Transistors).The control module includes the logic board, programmemory, FETs, PC card slot, and necessaryinput/output circuitry to interface <strong>with</strong> the unit.The logic board is located <strong>with</strong>in the control module, anddoes not contain any serviceable components.CAUTIONUnder no circumstances should anyone attempt to repair the Logic or Display boards. Should aproblem develop <strong>with</strong> either of these components, contact your nearest Carrier Transicold dealer forreplacement.CLUTCH RELAY (K3)QC5LED29F4 (7.5A)RUN RELAY (K2)QC4LED28F3 (7.5A)SPEED RELAY (K1)QC3LED27F2 (10A)GROUND STRAPRELAY POWERQC8 (12+ VDCPC CARD FAULT LED(RED)1MP (WHITE)PCCARD SLOTAUTOFRESH AIR RELAYDC CURRENTSENSORLED30 (GPR)LED31 (SSR)2MP (BLACK)6MP (DISPLAY KEYPADCIRCUIT)PC CARD STATUSLED (GREEN)5MP ( START/CRANK/GLOW CIRCUIT)MICROPROCESSORSTATUS LED(GREEN)3MP (GREY)4MP (NOT USED)QC2 (MICROPROCESSORGROUND)QC1 (SYSTEM POWER12+VDC)FET LEDsF1 (7.5A)Figure 2-14. Control Module62-106832--16
Figure 2-14 shows the control module. The controlmodule has three relays and four fuses that are useraccessible. There are three 7.5 amp fuses and one 10amp fuse.The PC card slot is also shown in Figure 2-14. This cardslot is used <strong>with</strong> all Carrier Transicold PC cards. The<strong>micro</strong>processor automatically detects the presence andtype of PC card inserted and responds accordingly. Thedifferent types of PC cards are:S Download PC card for downloading unit dataS Option PC card for installing optional softwareprogramsS Configuration PC card for setting the<strong>micro</strong>processor functions, configurations, andDataRecorder configurations.S Program PC card for upgrading the <strong>micro</strong>processorsoftware.There are three LEDs associated <strong>with</strong> the function of thePC card slot. These are:• A green Microprocessor Status LED which will blinksteadily once per second indicating that the<strong>micro</strong>processor is operating and will blink every 0.5seconds if there is no software or if it is loading software.• A green (PC) Card Status LED which comes onwhen there is a PC card inserted in the slot. This LEDwill:1) Blink every 0.5 seconds when data is being transferredto or from the PC card, and will be on steadywhen the operation is complete and the PC card maybe removed.2) During download, the light will blink once per secondand will blink every 1.5 seconds when the downloadis complete.9• A red (PC) Card Fault LED blinks if there is aproblem transferring data from the PC card that hasbeen plugged into the PC card slot. The red LED willcontinue to blink until the PC card is removed. The LEDwill also blink if there is an error reading the card. TheLED will blink every 0.5 seconds during a softwarechange -- either an upgrade or downgrade. It will blinkevery 1.0 seconds during data download to PC card. Itwill blink every 2.0 seconds when either the Program orConfiguration or Option cards is inserted and no actionis taken. Check the MessageCenter for description oferror.2--17 62-10683
. Display and KeypadMODE LIGHTSDISPLAY-20+34.1°FMessageCenterDOOR-20+34.1°FSTATUS OKDEFAULT MESSAGEMAYBEREPLACEDBYUSER DEFINEDMESSAGEDISPLAY and KEYPAD MODULEFigure 2-15 Display and Keypad62-106832--18
The Display and Keypad module is located for operatoraccess at the lower roadside corner of the unit.The display board is mounted in the Keypad and Displaymodule. The display board includes the LCD display,keypad, and keypad interface.The Display and Keypad module provides the user <strong>with</strong>a panel to view and control the functions of therefrigeration unit. The module consists of a switch,keypad, MessageCenter, and main display. Setpointsand other system information are selected using thekeypad. The previous figure shows the Display andKeypad module.DisplayThe main display has nine characters (sevenseven-segment characters and two nine-segmentcharacters), two decimal points, two commas, and adegree symbol. The display is used to provide the user asetpoint and refrigerated compartment temperature --either in degrees Centigrade or Fahrenheit. The commasymbols are used as the decimal indicators in Europe.When Metric Units is selected in the FunctionalParameters, the two comma icons are used instead ofdecimal points. When English Units is selected in theFunctional Parameters, decimal points are used.Temperature display is right justified, <strong>with</strong> unused digitsblank. A negative sign will be displayed for all setpointand refrigerated compartment temperatures belowZero. A positive sign will be displayed for all setpoint andrefrigerated compartment temperatures above0° which will not have a sign in front of it. The resolutionfor refrigerated compartment temperature in bothCentigrade and Fahrenheit is one-tenth degree.The user has the option as to whether to have thesetpoint displayed <strong>with</strong> a decimal or comma. Onlysetpoint is affected by this selection. All othertemperatures and pressures will continue to bedisplayed <strong>with</strong> either a decimal or comma. Refer toConfigurations Section 6.2.9Indicator LEDsThe display has six LEDs across the top to indicateoperation status. These indicators are:SSSSSSCool Indicator (Green) -- Turned on when the unitis in Cool mode.Heat Indicator (Amber) -- Turned on when the unitis in Heat mode.Defrost Indicator (Amber) -- Turned on when theunit is in Defrost mode.Start-Stop Indicator (Green) -- Turned on when theStart-Stop mode has been selected.Continuous Indicator (Green) -- Turned on whenthe Continuous mode has been selected.Alarm Indicator (Red) -- Off or flashes at a rate of0.5 seconds.NOTEWhen the unit is in PULSED NULL mode (fanonly), the mode indicators (COOL, HEAT andDEFROST) are all off.NOTEThere is an opening between the Alarm andStart-Stop LEDs that is not used at this time.2--19 62-10683
MessageCenterThe MessageCenter is used to show messages. Detailsof the messages are described in Section 7.1MessageCenter.Switch DescriptionsSTART / RUN -OFF Switch (SROS)START/RUN-OFF SwitchThe START/RUN-OFF switch is a 12 VDCinput to the <strong>micro</strong>processor. When placed inthe START/RUN position, this switchprovides power to the <strong>micro</strong>processor. The<strong>micro</strong>processor performs a self-test (allsegments of display are illuminated). Then setpoint and refrigerated compartmenttemperature are displayed. To stop the unit orremove power from the <strong>micro</strong>processor,place the SR0S to the OFF position.GLOW/CRANK Switch (GCS) (Removed from unitsbuilt after April 2007)The GLOW/CRANK switch is located on the back of thecontrol box and is easily reachable from under thecontrol box.GLOWCRANKNOTEThe GLOW/CRANK switch will energize theglow and crank circuits only when theSTART/RUN-OFF switch is in the RUN position,and after the <strong>micro</strong>processor has gonethrough the self-test.Key DescriptionsMANUALDEFROSTUP ARROW and DOWN ARROW KeysThese keys allow you to change thesetpoints or other displayed data of thesystem. They also allow you to scrollthrough the Unit Data list, FunctionParameters list, Alarm list, etc.EQUAL Key (ENTER)The EQUAL key is used for many things,including entering a setpoint, changing aFunctional Parameter, clearing alarms, andlocking the data menu.MANUAL DEFROST KeyThe MANUAL DEFROST key is used toinitiate a defrost cycle when the properconditions are met.ALARM LISTSTART-STOP/CONTINUOUSSELECTALARM LIST KeyThe ALARM LIST key allows you to view thealarms stored in the <strong>micro</strong>processor. Thealarm list is displayed in theMessageCenter. Pressing the ALARM LISTkey once displays the active alarm list. Eachsuccessive press cycles through the list tothe end. To view the inactive alarm list, Referto Section 3.13.START-STOP/CONTINUOUS KeyThis key allows you to change fromStart-Stop operation to Continuous Runoperation. In Start-Stop operation, when the<strong>micro</strong>processor is in Off-Cycle mode, theunit will not be running. During Off-Cyclemode, the <strong>micro</strong>processor monitorsrefrigerated compartment temperature,battery voltage and engine coolanttemperature and will restart the unit whenneeded.SELECT KeyPress the SELECT key to scroll through themenu selections. One of the five standardand one optional menu selections willappear in the MessageCenter when theSELECT key is pressed.The five standard selections are:•PRESS ↑↓ TO VIEW HOURMETERS--Displays the hours for individual hour meters.Refer to Section 3.15.•PRESS ↑↓ TO START PRETRIP -- Usedto initiate a pretrip. Refer to Section 3.4.•PRESS ↑↓ TO VIEW DATA -- DisplaysUnit Data. Refer to Section 3.14.•PRESS ↑↓ TO VIEW SETTINGS -- Displaysunit Functional Parameter settings.Refer to Section 3.16.•PRESS ↑↓ TO MARK TRIP START -- Thismenu selection is only used <strong>with</strong> the DataRecorder. It is used to record a Trip Startevent which is logged in the Data Recorder.This records the time and date of the beginningof the trip. Data can then be downloadedand reviewed by trip, making data reviewmuch easier. Refer to Section 3.11.•PRESS ↑↓ TO VIEW PRINT MENU -- Enablesthe user to use hand--held Strip Printprinter kit P/N 12--00543--10.The optional selection is:•PRESS ↑↓ TO VIEW INTELLISETS -- Referto Section 3.20.1.62-106832--20
Table 2-3. FIELD EFFECT TRANSISTORS (Transistors not listed are spares)9FETFET6FET7FET8FET9FET10FET12FET14FET15FET16FET17FET18FET21FET22FET23FETFET14FET15STANDARDDESIGNATIONAuto Fresh Air RelayAuto Restart LightHeat LightSV4SV1Fuel Heater Relay (FHR)Fault LightOut of Range LightDefrost LightCool LightBuzzer (B)SV2Rear unloader (UL2)Front unloader (UL1)LED LIGHT BAR OPTIONSDESIGNATIONFault LightOut--Of--Range Light2--21 62-10683
2.5.4 Handling of PC CardsPC cards can be used to upgrade software (Section6.5.2), download recorder data (Section 6.7.1, setconfigurations (Section 6.2.1) and FunctionalParameters (Section 6.7.7) and install optional features.While these cards are constructed for a ruggedenvironment, they are not intended to be stored in atechnician’s toolbox.The label on each card clearly states that the card is tobe handled <strong>with</strong> care -- not to be bent, dropped orexposed to impact. Heat, moisture and direct sunlightshould be avoided.PC cards are designed to be used in a wide temperaturerange of --40 to +185°F(--40to+85°C). When a PC cardis connected to an Advance <strong>micro</strong>processor orcomputer at temperatures outside this range, datatransmission between the card and the other devicemay not be performed correctly.Retention of programmed data for extended periods oftime requires a temperature range of --4 to +149°F(--20to +65° C). When PC cards are exposed totemperatures outside of this range for several days datacontained on the card may be damaged.PC cards should never be:• Dropped• Bent• Twisted• Squeezed• Submersed in any liquid• Exposed to electrostatic discharge• Exposed to intense ultraviolet light• Exposed to nearby magnetic or electromagneticfieldsLow X--Ray exposure, i.e. that experienced whilepassing through a security screen, should not harm thecard data. High X--Ray exposure, i.e. that experiencedin a medical or dental environment may damage thecard data. PC cards should not be kept in a shirt pocketcontained a pocket screwdriver <strong>with</strong> a magnetic end.PC cards should be kept in a hard plastic jewel casewhen not in use. Replacement cases P/N 58--50109--00are available from Carrier Transicold’s PerformanceParts Group.2.6 OPTIONS2.6.1 Light BarThe Light Bar is an external set of indicator lights thatcanbeseeninthemirrorfromthecabofatruckoronthefront of a rail car. They are controlled by the<strong>micro</strong>processor.a. Eight -Light Light BarThese lights correspond to the <strong>micro</strong>processor LEDs --HEAT, COOL, DEFROST, START-STOP, and ALARM.The ENGINE-AUTO-START light is only illuminatedwhen the unit is operating in Start-Stop. TheOUT-OF-RANGE light is illuminated when theOut-of-Range Alarm is active.b. Two -Light Light BarThe green LED indicates “STATUS OK”. The amberLED indicates “CHECK UNIT”. Amber follows the <strong>micro</strong>processorfault light and alarms can be read on the<strong>micro</strong>processor display.62-106832--22
2.6.2 Door and Remote SwitchesA unit has provisions to connect a Door Switch (DS)and/or two remote switches (REMS1 and 2) directly tothe <strong>micro</strong>processor.The <strong>micro</strong>processor will recognize switches <strong>with</strong> contactsthat are either open when the door is open, or thatare closed when the door is open. Additionally, the ConfigurationList gives you the ability to determine whetherthe switch will: enable the alarm only, enable the alarmand also shut the unit down, enable the alarm and putthe unit into low speed while the door is open, or to have9no alarm and only record door openings and closings inthe Data Recorder.If the door or remote switch is configured to shut the unitdown when the door is open, the unit will shut down for aminimum of three minutes. Additionally, there is anOverride Door/Remote Switch in the Functional Parameters(Refer to Functional Parameter List, Section3.16.) When this parameter is set to YES, the Door/RemoteSwitch Alarm will come on when the door is open.However, the unit will not shut down. This feature is includedin the event of a door switch failure.EIGHT -LIGHT BARTWO -LIGHT LED LIGHT BAR2--23 62-10683
2.6.3 Out of Range AlarmThe Out Of Range Alarm is intended to notify the driverwhen the refrigerated compartment temperature hasmoved away from set point or when the unit is operatingat low cooling capacity, and the compartment temperatureis not pulling down toward set point. The Out OfRange Alarm may be configured as an Alarm Only, or asan Alarm and Unit Shutdown. (Refer to Section 6.2 ConfigurationMode).If the unit shuts down due to a shutdown alarm, the OutOf Range Alarm will come on when the refrigeratedcompartment temperature has been out of range for 30to 45 minutes regardless if the refrigerated compartmenttemperature was ever <strong>with</strong>in set point range or not.Generally, when the unit is running, the refrigeratedcompartment temperature must have first been InRange before the Out of Range Alarm can be triggered.In Range is defined as the temperature of therefrigerated compartment having been <strong>with</strong>in ± 2.7°F(1.5°C) of set point in the Perishable Range, or <strong>with</strong>in +2.7°F (1.5°C) of set point in the Frozen Range.The point at which the actual Out of Range Alarm comeson is determined by the Out of Range Functional Parametersetting. Selections of 4°F (2°C), 5.5°F (3°C),7°F(4°C), and OFF are available. The OFF setting disablesthe Out of Range Alarm. All other settings allowthe user to determine how far away from set point the refrigeratedcompartment temperature will move beforeturning on the Alarm. The alarm will be activated after 30minutes if the unit is still more than the number of degreesselected in the Functional Parameter list awayfrom set point if the alarm is configured for Alarm Only.The alarm will be activated and the unit will shutdownafter 45 minutes if the alarm is configured for Alarm andShutdown.In Sleep Mode, Pretrip, Component Test Mode, or if theunit has a Door Switch or Remote Switch configured asa Door Switch, and the door has been opened, the Outof Range Alarm is disabled and will not come on. Afterexiting any of these modes, or closing the refrigeratedcompartment door, the refrigerated compartment temperaturemust again come In Range of the set point beforethe Out of Range Alarm can be activated.The internal timer is inactive in Defrost or in a Start--StopOff Cycle. Once the unit leaves these modes, and goesinto a temperature control mode (HEAT, COOL, orPULSED NULL), the Out of Range internal timer notstart until the temperature is out of range of set point.Once the compartment temperature is out of range, thetimer will start, allowing the unit time to bring the refrigeratedcompartment temperature into range before theOut of Range Alarm can be activated.If the unit is not heating or cooling correctly, the Out ofRange alarm may come on when:S The unit is in cool and in pulldown mode (RAT is stillfar away from set point) and if the Delta--T (SATminus RAT) is not at least --1.0°F (0.56°C) for 30minutes ORSThe unit is in pullup mode (RAT is still far away fromset point) and the unit is operating in heat and theSAT is the same temperature or colder than RAT.62-106832--24
2.7 ENGINE DATA9Table 2-4. Engine DataEngine ModelCT4-134DI (V2203-DI-E2B)V2203-DI-ESCDisplacement134 in 3( 2.2 liters)No. Cylinders 4Weight417.8 lbs (189.5 kg)Coolant Capacity 2 gallons (7.6 liters) (50/50 mix -- never to exceed 60/40)Oil Capacity <strong>with</strong> Filter15 quarts (14 liters)Fuel Winter: Diesel No. 1 Summer: Diesel No. 2Glow Plug Amperage7.0 amps per plug at 10.5 VDC (nominal)CAUTION2.7.1 Lubrication Systema.Oil PressureUse only ethylene glycol anti-freeze (<strong>with</strong>inhibitors) in system as glycol by itself willdamage the cooling system. Always addpre-mixed 50/50 anti-freeze and water to radiator/engine.Never exceed more than a60% concentration of anti-freeze. Use a lowsilicate anti-freeze meeting GM specificationsGM 6038M for standard life coolant oruse Texaco Havoline extended life coolantor any other extended life coolant which isDexcool approved and has 5/150 (5years/150,000 miles) on the label.CAUTION40 to 60 PSIG (2.7 To 4.1 Bars)(Engine in high speed)b.Oil Pressure Safety Switch Setting Closes15 ( ¦ 3) PSIG [1.02(¦.2) Bars]c.Lube Oil Viscosity:Outdoor TemperatureFahrenheit CentigradeSAEBelow 32_ Below 0° 10W30orMobil Delvac 1(5W 40)Above 32_ Above 0_ 10W 30orMobil Delvac 1(5W 40or 15W40)When changing oil filters, the new filtersshould be primed (partially filled) <strong>with</strong> cleanoil if possible. If the filters are not primed,the engine may operate for a period <strong>with</strong> nooil supplied to the bearings.Extended Service Interval (ESI) packages are standardon X units beginning <strong>with</strong> S/N JAB90602792. The ESIpackage reduces the frequency of scheduled serviceintervals. Refer to Section 9.1 for instructions on serviceintervals.Change 09/112--25 62-10683
2.8 ENGINE SCREW THREADSAll threads used on the diesel engine are metric.2.9 ENGINE AIR SYSTEMThe air cleaner is installed on the engine to prolong its lifeand performance by preventing dirt and grit from gettinginto the engine causing excessive wear on all operatingparts. It is the responsibility of the operator to give the aircleaner equipment regular and constant attention inaccordance <strong>with</strong> the instructions. (Refer to section 9.8.8)Clean air is supplied to the engine through the aircleaner. The air is necessary for complete combustionand scavenging of the exhaust gases. As the enginepiston goes through the intake stroke, the piston drawsclean fresh air down into the cylinder for thecompression and power strokes. As the engine goesthrough its exhaust stroke, the upward movement of thepiston forces the hot exhaust gases out of the cylindersthrough the exhaust valves and the exhaust manifold. Ifthe air filter is allowed to become dirty, the operation ofthe engine would be impaired.2.10 COMPRESSOR DATATable 2-5. Compressor DataCompressor Model05GNo. Cylinders 6No. Unloaders 2Weight137 lbs (62 kg)Oil Charge 5.5 pints (2.8 L)Approved OIl Mobil Arctic EAL 682.11 REFRIGERATION SYSTEM DATATable 2-6. <strong>Refrigeration</strong> System DataGearbox OilMobil SHC 75-90W: 15oz(0.43 kg)Fanshaft Oil Mobil SHC 630: 3.2oz (0.09kg)a. Compressor Discharge Pressure Transducer(CDP)Range: 0 to 500 psig (0 to 34 bar)b. Compressor Suction Pressure Transducer(CSP)Range: --29.93 inHg/--14.7 psig to 100 psig(1 to 6.9 bar)c. Defrost Air Switch (DAS)Initiates Defrost:1.40 ¦ .07inch(35¦ 1.8 mm) WGd. Defrost Timer (<strong>micro</strong>processor controlled)1.5h, 3h, 6h, or 12 hourse. Defrost Termination Thermistor (DTT)Allows defrost initiation at temperatures below 40°F(4.4°°C)Terminates defrost cycle at 55° (12.8°C)f. Receiver Fusible Plug Setting430°F (221°C) Melting Pointg. High Pressure Switch (HPS)Opens on a pressure rise at:465 ¦ 10 psig (34 ¦ 0.7 bar)Closes on a pressure fall at:350 ¦ 10 psig (24 ¦ 0.7 bar)h. Unit Dry Weight: (Approximate) 1600 lb. (725 kg)i. Expansion Valve MOPUltima and X2 2500 -- 105 PSIG (7.1 Bars)Ultra and X2 2100 -- 55 PSIG (3.7 Bars)j. Expansion Valve Superheat Setting8to10_F (4.4to5.6_C) at 0_F (-17.8_C)refrigerated compartment temperature62-10683 2--26Change 09/11
92.12 SAFETY DEVICESSystem components are protected from damage caused by unsafe operating conditions by automatic shut-down ofthe unit when such conditions occur. This is accomplished by the safety devices listed in Table 2-7.Table 2-7. Safety DevicesUnit Shutdown Safety DevicesUnsafe Conditions Safety Device Device SettingHigh engine cooling water temperature Engine coolant temp. (ENCT)(<strong>micro</strong>processor reset)Refer to section 2.7Excessive current draw by <strong>micro</strong>processor Fuse (F1) Opens at 7 1/2 ampsExcessive current draw by speed relay Fuse (F2) Opens at 10 ampsExcessive current draw by run relay Fuse (F3) Opens at 7 1/2 ampsExcessive current draw by clutch relay Fuse (F4) Opens at 7 1/2 ampsExcessive current draw by glow plug circuit,control circuit or starter solenoid (SS)Fuse (F5)Opens at 80 ampsExcessive current draw by all solenoidvalves and unloaders and light barExcessive current draw by glow/crankswitch and START/RUN-OFF switch (Glow/Crank switch removed in units built afterApril 2007)Fuse (F6)Fuse (F7)Opens at 15 ampsOpens at 5 ampsExcessive current draw by fuel heater Fuse (F8) -- Optional Opens at 20 ampsExcessive current draw by light bar Fuse (F9) Opens at 3 ampsExcessive current draw by Fresh Air Relay Fuse (F10) -- Optional Opens at 40 ampsExcessive compressor discharge pressure High pressure cutout switch(HPS) automatic resetRefer to section 2.3.8Other Safety DevicesUnsafe Conditions Safety Device Device SettingLow Engine Oil Level(May be configured for alarm only or alarmand shutdown)Low Fuel Level(May be configured for alarm only or alarmand shutdown)Low Engine Oil Level Switch(ENOLS)Low Fuel Level Switch, orLow Fuel Level SensorEngine oil level is more than 7quarts low.See Trigger On criteria foralarms 1 and 19 in Section 82--27 62-10683
2.13 COMPONENT RESISTANCE AND CURRENT DRAWTable 2-8. Component Resistance and Current DrawComponent Ohms AmpsSV1 7.8 ± 0.3 Ohms 0.10 to 2.0 AmpsSV2 and 4 10.6 ± 0.3 Ohms 0.75 to 2.0 AmpsAFAS (Auto Fresh AirSolenoid)Pull in -- 0.36 Ohms ± 10%Hold -- 14.4 Ohms ± 10%Pull in -- 29 AmpsHold -- 0.83 AmpsUnloader 10.6 ± 0.3 Ohms 1.0to2.0AmpsClutch 2.5 ± 0.2 Ohms 3.0to5.0AmpsSpeed solenoid (Units <strong>with</strong>outESC)Fuel solenoidRed--Black wires:1.5to2.5Ohms3.0 -- 8.0 Amps11.1 Ohms to 13.4 Ohms 0.25 to 2.0 AmpsWhite--Black wires: Can not be accurately measured <strong>with</strong> CoilCommander in circuit.Engine Speed Sensor (Units<strong>with</strong> ESC)12VDC Relay(GPR, SSR, FHR)12VDC Relay(RCR)Indicator lights (8 Light BarOnly)Unit non-running amps (See Note 2 in Section 8.2)Glow Plug Amps Each PlugGlow Plug Total Circuit30.0 to 40.0 Amps22 mAmps Max72 Ohms ±10% 0.14 -- 0.18 Amps80 Ohms ±15% 0.12 -- 0.17 Amps4.8 ± 0.2 Ohms NA6--9Amps6--9Amps24 -- 36 AmpsStarter Amps NA 270 -- 380 ampsCompressor Suction ModulationValveResistance72 to 84 ohms per winding92 ohms (¦ 10 %) for any twowindings.62-106832--28
2.14 REFRIGERANT CIRCUIT DURING COOLING (See Figure 2-16)When cooling, the unit operates as a vapor compressionrefrigeration system. The main components of thesystem are: the (1) reciprocating compressor, (2)air-cooled condenser, (3) expansion valve, and (4)direct expansion evaporator.The compressor raises the pressure and thetemperature of the refrigerant and forces it through thedischarge check valve and into the condenser tubes.The condenser fan circulates surrounding air over theoutside of the condenser tubes. The tubes have finsdesigned to improve the transfer of heat from therefrigerant gas to the air. This removal of heat causesthe refrigerant to liquify. Liquid refrigerant leaves thecondenser and flows through the solenoid valve SV1(normally open) and to the receiver.The receiver stores the additional charge necessary forlow ambient operation and for the heating and defrostmodes. The receiver is equipped <strong>with</strong> a fusible plug,which melts if the refrigerant temperature is abnormallyhigh and releases the refrigerant charge.The refrigerant leaves the receiver and flows throughthe manual liquid line service valve (King valve) to thesubcooler. The subcooler occupies a portion of the maincondensing coil surface and gives off further heat to thepassing air.The refrigerant then flows through a filter-drier where anabsorbent keeps the refrigerant clean and dry; and theelectrically controlled liquid line solenoid valve, SV2(normally closed), which starts or stops the flow of liquidrefrigerant.9The refrigerant flows to the “Liquid/suction” heatexchanger. Here the liquid is further reduced intemperature by giving off some of its heat to the suctiongas.The liquid then flows to an externally equalizedthermostatic expansion valve, which reduces thepressure of the liquid and meters the flow of liquidrefrigerant to the evaporator to obtain maximum use ofthe evaporator heat transfer surface.The refrigerant pressure drop caused by the expansionvalve is accompanied by a drop in temperature so thelow pressure, low temperature fluid that flows into theevaporator tubes is colder than the air that is circulatedover the evaporator tubes by the evaporator fan. Theevaporator tubes have aluminum fins to increase heattransfer; therefore heat is removed from the aircirculated over the evaporator. This cold air is circulatedthroughout the refrigerated compartment to maintainthe cargo at the desired temperature.The transfer of heat from the air to the low temperatureliquid refrigerant causes the liquid to vaporize.This low temperature, low pressure vapor passesthrough the “suction line/liquid line” heat exchangerwhere it absorbs more heat from the high pressure/hightemperature liquid and then returns to the compressorthrough the Suction Modulation Valve (CSMV). TheCSMV controls the compressor suction pressurethereby matching the compressor capacity to the load.FUSIBLE PLUGEXTERNALEQUALIZERTXVBULBEVAPORATORTXVBYPASSCHECKVALVERECEIVERCSMVVIBRASORBERCDPHPSHEAT EXCHANGERCSPLIQUID LINESV4LIQUID LINESERVICE VALVESUBCOOLERFILTERDRYERSV2N/CSV1COMPRESSORN/CN/ODISCHARGECHECK VALVECONDENSERVIBRASORBERFigure 2-16. Refrigerant Circuit During Cooling2--29 62-10683
2.15 REFRIGERANT CIRCUIT - HEATING AND DEFROSTING (See Figure 2-17)When vapor refrigerant is compressed to a high pressureand temperature in a reciprocating compressor, themechanical energy necessary to operate the compressoris transferred to the gas as it is being compressed. Thisenergy is referred to as the “heat of compression” and isused as the source of heat during the heating cycle.When the <strong>micro</strong>processor calls for heating, the hot gassolenoid valve (SV4) opens and the condenserpressure control solenoid valve (SV1) closes. Thecondenser coil then fills <strong>with</strong> refrigerant, and hot gasfrom the compressor enters the evaporator. Also theliquid line solenoid valve (SV2) will remain energized(valve open) until the compressor discharge pressureincreases to a predetermined setting in the<strong>micro</strong>processor.The <strong>micro</strong>processor de-energizes the liquid linesolenoid valve (SV2) and the valve closes to stop theflow of refrigerant to the expansion valve.When additional heating capacity is required the<strong>micro</strong>processor opens the Liquid Line Solenoid valve(SV2) to allow additional refrigerant to be metered intothe hot gas cycle (through the expansion valve).When in engine operation and the discharge pressureexceeds pressure settings detailed in Section 2.11, thepressure cutout switch (HPS) opens to de-energize therun relay coil (RR). When the RR coil is de-energized,the RR contacts open stopping the engine.The function of the hot gas bypass line is to raise thereceiver pressure when the ambient temperature is low(below -17.8_C/ 0_F ) so that refrigerant flows from thereceiver to the evaporator when needed.EXTERNALEQUALIZERTXVBULBEVAPORATORTXVBYPASSCHECKVALVEFUSIBLE PLUGRECEIVERCSMVVIBRASORBERCDP HPSHEAT EXCHANGERCSPLIQUID LINESV4LIQUID LINESERVICE VALVESUBCOOLERFILTERDRYERSV2N/CSV1COMPRESSORN/CN/ODISCHARGECHECK VALVECONDENSERVIBRASORBERFigure 2-17. Refrigerant Circuit During Heating And Defrost62-106832--30
SECTION 3OPERATION1PARAGRAPH NUMBERPage3.1 STARTING UNIT -- AUTO ...................................................... 3--13.2 MANUAL START -- GLOW AND CRANK -- IF EQUIPPED ........................... 3--23.3 Unit Startup -- Self Test ......................................................... 3--33.4 PRETRIP ..................................................................... 3--43.5 CHANGING SET POINT ....................................................... 3--83.6 START-STOP OPERATION ..................................................... 3--93.7 CONTINUOUS RUN OPERATION ............................................... 3--113.8 SLEEP MODE ON ............................................................. 3--123.9 SLEEP MODE OFF ............................................................ 3--133.10 DEFROST .................................................................... 3--153.10.1 Manual Defrost ............................................................ 3--153.11 TRIP START .................................................................. 3--163.12 VIEW ACTIVE ALARMS ........................................................ 3--173.13 VIEW INACTIVE ALARMS ...................................................... 3--183.14 UNIT DATA ................................................................... 3--203.15 VIEW HOURMETERS .......................................................... 3--243.16 FUNCTIONAL CHANGE (PARAMETERS) ........................................ 3--253.17 LANGUAGE SELECTION ...................................................... 3--313.18 STOPPING UNIT .............................................................. 3--323.19 DATA RECORDING ............................................................ 3--333.19.1 Microprocessor Information .................................................. 3--333.19.2 Data Recording ............................................................ 3--333.19.3 Sensor and Event Data ..................................................... 3--333.19.4 Data Downloading .......................................................... 3--343.19.5 DataRecorder Power-Up .................................................... 3--343.20 OPTIONS .................................................................... 3--353.20.1 IntelliSet .................................................................. 3--353.20.2 DataTrakt for Advance Microprocessors ....................................... 3--373.20.3 Two-Way Remote Communication ............................................ 3--373.20.4 AutoFresh Air Exchange .................................................... 3--383
3.1 STARTING UNIT - AUTOSECTION 3OPERATIONWARNINGUnder no circumstances should ether or any other starting aids be used to start engine.MODE LIGHTSDISPLAY-20+34.1° FMessageCenterDOOR1. Place the START/RUN-OFF switchto START/RUN position.3--162-10683
3.2 MANUAL START - GLOW AND CRANK - IF EQUIPPED*WARNINGUnder no circumstances should ether or any other starting aids be used to start engine.-20+34.°F1. Hold GLOW/CRANK switch in the GLOWposition.2. Place START/RUN-OFF switch to theSTART/RUN position.GLOWCRANK3. Continue to hold GLOW/CRANK switch in the GLOWposition for up to 15 seconds.Back of Control Box4. Then crank the engine by holding the GLOW/CRANK switchin the CRANK position until the engine starts. This may takeup to 10 seconds.*NOTEThe GLOW/CRANK switch was removed fromunits built after April 2007.When the <strong>micro</strong> powers up, “MANUAL START MODESELECTED” will appear in the MessageCenter and theAlarm LED will blink for five seconds.If the GLOW/CRANK switch is held in the GLOWposition before the START/RUN-OFF switch is placedin the START/RUN position, when theSTART/RUN-OFF switch is in the START/RUNposition, the unit Start mode is changed to MANUALSTART, and the unit operation mode is set toCONTINUOUS RUN. When the engine is running, thisswitch is disabled.The GLOW/CRANK switch, when held in the GLOWposition, tells the <strong>micro</strong>processor to energize the glowplug relay, which powers the glow plugs in the engine topreheat the combustion chamber. The CRANK positionof the switch tells the <strong>micro</strong>processor to engage theengine starter. If the switch is held in the CRANKposition, the starter will engage after a short delay of upto one second, for a maximum 10 seconds.NOTEManual Start will automatically put the unit inContinuous Run mode. Placing the unit in Start-Stop will automatically put it back into Auto Startoperation.Manual Start mode will automatically be cancelledwhen the START/RUN-OFF switch istoggled to OFF and then back to START/RUN.Refer to Section 4.2.2 for glow times.62-10683 3--2
3.3 UNIT STARTUP - SELF TESTSTANDBYENGINESELF TESTWhen first powered up:• The <strong>micro</strong>processor will run a self test.• All of the mode lights will light• All of the segments on the display will turn on• All of the Liquid Crystal diodes (LCDs) in the MessageCenterwill turn on to verify their operation• The display will then show the set point temperaturein the left four characters and the refrigeratedcompartment temperature in the right four characters.The last character (after the degree symbol)shows the temperature units as “C” Centigrade or “F”Fahrenheit. When set for °F, there is a decimal in thecompartment Temperature. When set for °C, there isa comma in the compartment Temperature.• The MessageCenter will display the default message,unless there is an alarm(s) stored in the <strong>micro</strong>processor.If there is an alarm(s) stored in the <strong>micro</strong>processor,“INACTIVE ALARMS IN MEMORY” will be displayedon the MessageCenter and the Alarm LEDwill flash for 5 seconds, then turn off.“CHECK AT NEXT SERVICE INTERVAL” will thenbe displayed if there are any active non-shutdownalarms present. Any hourmeters that are configuredON will also be displayed.• The MessageCenter will show “STATUS OK” asthe <strong>micro</strong>processor begins to position the CSMV tounit starting positions.• In engine operation, after the refrigeration valvesopen the intake air heater will energize (as required),the buzzer will sound, and the diesel engine will start.• The suction modulation valve (CSMV) will gothrough a procedure to close itself. The <strong>micro</strong>processorstarts out giving the CSMV the command toclose completely. The display will show“SMV CLOSING: WAIT XX SECONDS” where xx isthe number of seconds until the valve is fully closed.The CSMV will then open to a predetermined positionaccording to the ambient and compartment temperatures.The display will show “SETTING SMVXX%.” The start sequence will start at 30%.• After the CSMV reaches 30%, the glow plugs willenergize (as required), the buzzer will sound, andthe diesel engine will start.NOTEPlacing the unit in either Continuous Run or-Start-Stop will automatically put the unit intoAuto Start operation.3--362-10683
3.4 PRETRIPHEAT COOL DEFROST ALARM START-STOP CONTINUOUSPPPPSETPOINTTEST #1BOX TEMPERATUREMANUALDEFROSTALARM LISTSTART-STOP/CONTINUOUSSELECT1. Press the SELECT key until the MessageCenterdisplays “PRESS THE = KEY TO START PRETRIP.”2. Press the = key to start PRETRIP.3. Verify that during TEST#1 the complete display is turned on, that the buzzer comeson and that all lights on the Light Bar come on.4. The remainder of Pretrip will take 7 to 15 minutes, and will run itself automatically.The PRETRIP mode is for checking unit operation andevaluating operation of all modes. It will indicate a failurewhen one is detected.TIPA Pretrip can be started when the refrigeratedcompartment is at any temperature.The MessageCenter displays the current test and the %complete of the test. When the Pretrip tests arecomplete the MessageCenter will display one of threedifferent messages:• “PRETRIP PASS” OR• “PRETRIP FAIL IN TEST X” OR• “PRETRIP FAILED & COMPLETE”. Alarm lightwill be on.Press the ALARM LIST key to review the alarmstriggered by the Pretrip tests.TIPThe Pretrip test “PASS” results message willstay displayed until a key is pressed, or until theStart/Run--Off switch is placed in the OFF position.The Pretrip test “FAIL” results message willstay displayed until the alarms are clearedOnce Pretrip is started, the control panel keys aredisabled until Pretrip is completed.TIPIf “CAN NOT START PRETRIP” is displayed inthe MessageCenter, check to see if the unit is inPC mode, Defrost (Refer to Section 6.1) orcheck the alarm list (Section 3.12) for activeshutdown alarms.62-10683 3--4
PRETRIP (Continued)NOTESNOTE 1: Pretrip may be initiated any time theunit is running, or when the unit is off but theSTART/RUN-OFF switch is in theSTART/RUN position. Pretrip will not start ifthere is an active shutdown alarm, or if theunit is in PC mode or in defrost.NOTE 2: Pretrip will run until completed, unlessan alarm occurs that causes Pretrip to beaborted. Only alarms that will result in othererroneous alarms or will affect futurePretrip tests will allow Pretrip to be aborted.TIPPretrip may be stopped by the user by eitherturning the unit off then back on again, or bypressing and holding the = key for five seconds.“PRETRIP STOPPED BY USER” will appear inthe MessageCenter.Once Pretrip is started: If the unit is running, the<strong>micro</strong>processor will shut the unit down.If the unit is not running and the suction modulationvalve (CSMV) has reached its fully closed position,Pretrip will begin.NOTEBefore completing PreTrip, the <strong>micro</strong>processorlooks at the status of alarms and if certainalarms are active (for example: Low Fuel Warning,Check Engine Oil Level, Check CoolantLevel, Check Coolant Temperature, PreTrip willshow “FAILED”, indicating that the unit is notready to be sent out for a load, but that the alarmlist should be checked and all present alarm situationscorrected.TIPIt is always a good idea to clear all alarms fromboth Alarm Lists before starting Pretrip. Thetechnician will then know that any alarms presentfollowing Pretrip occurred during Pretrip,and are not old alarms that had not beencleared.NOTEThe operator MUST be present and validatethis test by watching the <strong>micro</strong>processor displayduring Test 1 -- Display Test. The <strong>micro</strong>processorwill turn on all segments of the LCD andLED display.Test 1 - Display And Sound TestThe <strong>micro</strong>processor activates the LCD/LED display,and all lights on the Light Bar. This test will last fiveseconds. All segments of the display, all LEDs on the<strong>micro</strong>processor, all lights of the Light Bar, and thebuzzer will be on during this test. This is the only portionof the Pretrip check that requires the operator todetermine PASS or FAIL. A defective display and soundtest is indicated if: any LCD/LED segments are notvisible, any LEDs or lights do not come on, or the buzzerdoes not sound. Anything that fails during this testshould be repaired at the conclusion of the Pretrip cycle.Pretrip will continue regardless of the outcome of thistest. A faulty display, light bar or buzzer will not affect theoperation of the unit, but will affect what is displayedduring unit operation.Test 2 - Amperage Check of Electrical ComponentsCheck the amperage (current) draw of the followingcomponents:• Battery DC Current (All Components TurnedOff)• Auto Fresh Air Solenoid• Auto Fresh Air Solenoid• Evap/Cond Fan Clutch• UL1 Front Unloader• UL2 Rear Unloader• Speed Solenoid (or ESC module)• SV1• SV2• SV4• Glow Plugs• Fuel Solenoid (or ESC module)Most components will be energized for four seconds atwhich time the amperage reading is taken. There is atwo second rest period between each component. Theglow plugs will be energized for 15 seconds, at whichtime the amperage reading is taken. Test 2 will lastapproximately two minutes. If a problem is detected <strong>with</strong>any of the listed components, the corresponding alarmwill be displayed.Test 3 - Temperature and Pressure Sensor CheckCheck the condition of the following sensors:• Return Air Sensor• Supply Air Sensor• Engine Coolant Sensor• Battery Voltage Sensor• Ambient Air Sensor• Defrost Termination Sensor• Compressor Discharge SensorTest 3 will last approximately five seconds. If a problemis detected <strong>with</strong> any of the listed components, thecorresponding alarm will be displayed.3--562-10683
PRETRIP (Continued)Test 4 - Warm UpThe engine is started automatically and the ambient airsensor is read.The Pretrip splits into two modes at this point as theengine and compressor are allowed to run and bewarmed up. If the ambient temperature is above +32°F(0°C), the unit will operate in the “Cool Pretrip” mode. Ifthe ambient temperature is at or below +32°F(0°C), theunit will operate in the “Heat Pretrip” mode.In the Cool Pretrip mode, the unit will operate in twocylinder Low Speed Cool. The compressor suction anddischarge pressures will be tested. Appropriate alarmswill be displayed if any problem is detected. Test 4 inCool Pretrip will last approximately 60 seconds.In the Heat Pretrip mode, the unit will operate in fourcylinder Low Speed Heat. The <strong>micro</strong> will check for a risein compressor discharge pressure, fan clutch operation,and SV1 operation. Appropriate alarms will be displayedif any problem is detected. Test 4 in Heat Pretrip maylast up to 12 minutes depending on ambient andcompartment temperatures and unit condition. For verylow compartment temperature, the unit may operate insix cylinder low speed heat.Test 5 - UL2 (Rear) UnloaderWith the unit still running the same as it was in Test 4, theoperation of UL2 Unloader is tested. If suction anddischarge pressures do not change when UL2 isenergized and de-energized, the “CHECK UL2” alarmwill be displayed. Test 5 will last about 20 seconds.Test 6 - UL1 (Front) UnloaderWith the unit still running the same as it was in Test 5, theoperation of UL1 is tested. If suction and dischargepressures do not change when UL1, the “CHECK UL1”alarm will be displayed. Test 6 will last about 20seconds.Test 7, 8, and 9 - Engine High and Low SpeedsThe engine will go from Low Speed to High Speed, thenback to Low Speed during these tests. Engine RPM willbe checked. If the engine is not operating <strong>with</strong>in theoperating range, either the “CHECK LOW SPEEDRPM,” or “CHECK HIGH SPEED RPM” alarm will bedisplayed. Tests 7, 8, and 9 will last about 30 seconds.Test 10 - Check Suction Modulation Valve (CSMV)This test ensures that the CSMV is opening and closingproperly. If suction pressure doesn’t change asexpected <strong>with</strong> CSMV closed then “CHECK SUCTIONMOD VALVE” alarm will be displayed. This test maytake several minutes.Test 11 - SV1 (Cool Pretrip Only)With the unit running in two cylinder Low Speed Cool,the operation of SV1 will be tested for opening andclosing. If the valve does not operate correctly, the“CHECK SV1 VALVE” alarm will be displayed. This testmay last up to three minutes.Test 12 - Check SV4NOTEThe Cool and Heat Pretrip modes will merge togetherat this step.With the unit running in two cylinder, Low Speed Heat,SV4 is tested for opening and closing. If the valve doesnot operate correctly, the “CHECK SV4” VALVE alarmwill be displayed. This test may last up to eight minutes.Test 13 - Low Side Pump DownWith the unit running in two cylinder Low Speed, SV2and SV4 will all be closed to pump the low side of the unitdown. If a problem is detected, the alarm “CANNOTPUMP DOWN LOW SIDE” will be displayed. Test 13may last up to eight minutes.Test 14 - High to Low Side LeakageThe unit will shut down, and check for pressureequalization between the high and low sides. If anyleakage is detected, the HIGH SIDE LEAK alarm will bedisplayed. This test will last one minute.Test 15 - Check Discharge Check ValveWith the unit off, the discharge check valve is checkedfor leakage. If any leakage is detected, the “CHECKDISCHARGE CHECK VALVE” alarm will be displayed.Test 15 will last 40 seconds.Test 16 - Check for Other AlarmsThe alarm list is checked for any non-pretrip alarms thatmay have occurred during the Pretrip test. If anyoperational alarms occurred, Pretrip will show FAIL, andthe technician will need to review the Alarm List and takenecessary and appropriate action to clear them (see listbelow). Test 16 will last about five seconds.62-10683 3--6
Test 16 - Check For Other Alarms That May Be Present:Check for the following alarms:AlarmNo.Alarm Description1LOW FUEL LEVEL WARNING (for units <strong>with</strong> Low Fuel Level switch/no fuel level display in Data List)LOW FUEL LEVEL WARNING (for units <strong>with</strong> Low Fuel Level 0% to 100% Sensor / fuel level is displayedin Data List)2 LOW ENGINE OIL LEVEL3 LOW COOLANT LEVEL18 LOW REFRIGERANT PRESSURE27 HIGH SUCTION PRESSURE28 CHECK REFRIGERATION SYSTEM34 ENGINE FAILED TO STOP36 CHECK COOLANT TEMPERATURE51 ALTERNATOR NOT CHARGING54 DEFROST NOT COMPLETE55 CHECK DEFROST AIR SWITCH59 DATALOGGER NOT RECORDING60 DATALOGGER TIME WRONG71 BAD F2 OR F3 FUSE81 CHECK FHR CIRCUIT82 CHECK REMOTE OUT-RANGE LIGHT223thru230232thru249If any Maintenance alarms are active, Pretrip will not pass.If any Microprocessor alarms are active, Pretrip will not pass.Pretrip TerminationWhen the Pretrip cycle is completed, the unit will return to normal temperature control operation.“PRETRIP PASS” will be shown in the display until the operator presses any key. In the event that the Pretrip testtriggered an alarm(s), the display will show either “PRETRIP FAIL and COMPLETE” (if the entire Pretrip cycle wascompleted), or “PRETRIP FAIL IN TEST–––,” (if the Pretrip cycle was aborted by an alarm before it was completed).3--762-10683
3.5 CHANGING SET POINTHEAT COOL DEFROST ALARM START-STOP CONTINUOUS-20 +34.5° FSETPOINTBOX TEMPERATURE↑↓ TO SCROLL, THEN = TO SAVEMANUALDEFROSTALARM LISTSTART-STOP/CONTINUOUSSELECT2. Press the = key to save thenew setpoint.1. With the setpoint displayed, press the UP ARROW or DOWNARROW key to change the setpoint to the desired value. TheMessageCenter will show “↑↓ TO SCROLL, THEN = TOSAVE.”Set points of --22°F to +89.6°F(--30°Cto+32°C) may beentered via the keypad. The <strong>micro</strong>processor always retainsthe last entered set point in memory. Depending on<strong>micro</strong>processor set--up, the set point may be changedup or down in either 0.1° (one--tenth of a degree) or 1°(one full degree) increments by pressing and releasingeither the UP ARROW or DOWN ARROW keyNOTEThe <strong>micro</strong>processor Configurations allow aminimum and maximum setpoint to be enteredso that only set points <strong>with</strong>in that range may beselected. “MAX SETPOINT HAS BEENREACHED” or “MIN SETPOINT HAS BEENREACHED” will appear in the MessageCenterwhen either of these conditions are met.Set point may be changed any time the Start/Stop--Offswitch is in the START/RUN position, or when the unit inPC Mode EXCEPT when:• Viewing the Alarm List, Data List or Functional ParametersOR• When the unit is in PreTrip OR• When the unit is in Sleep ModePressing the = key will cause the new displayed setpoint value to become active and “SETPOINTCHANGED” will be displayed. If the = key is not pressedand there is no keyboard activity for 5 seconds the entiredisplay and Light Bar will flash for 15 seconds and“SETPOINT NOT CHANGED” will be displayed. The<strong>micro</strong>processor setting will then revert back to the lastentered set point. All other keys are active while thedisplay is flashing and if pushed while the display isflashing, will cause the flashing to stop and perform therequested function.TIPThe set point may be changed quickly by pressingand holding the UP ARROW or DOWN AR-ROW key. The longer the key is held, the fasterthe setting will change.62-10683 3--8
3.6 START-STOP OPERATIONSTART-STOPLIGHTHEAT COOL DEFROST ALARM START-STOP CONTINUOUS-20 +34.5° FSETPOINTBOX TEMPERATURESTART/STOP MODE SELECTEDMANUALDEFROSTALARM LISTSTART-STOP/CONTINUOUSSELECT1. Press the START-STOP/CONTINUOUS key untilthe START-STOP Light on the controller illuminates.2. Verify that “START/STOP MODE SELECTED” is displayed on the MessageCenter and thatthe Start-Stop light is illuminated. The unit is now in Start-Stop operation.Automatic Start--Stop is provided to permit starting/stopping/restarting of the unit as required. This featureallows full automatic control of the engine or compressorstarting and stopping by monitoring refrigerated compartmenttemperature, battery charging amps, batteryvoltage and engine coolant temperature (Engine/Roadonly). The main function of automatic cycling is to turnoff the refrigeration system near set point to provide anenergy efficient temperature control system and to initiatea restart sequence when certain conditions are met.The Start--Stop / Continuous key is pressed to select betweenContinuous Run and Start--Stop operatingmodes. Refer to Section 4.3.1 for more detailed informationon Start--Stop Mode.If the unit fails to start after three start attempts, the“FAILED TO START-AUTO MODE” alarm will beactivated. While running, if the unit shuts down on asafety, or fails to run for the minimum run time, threeconsecutive times, the“FAILED TO RUN MINIMUM TIME” Alarm will beactivated. The shutdown counter is cleared when theunit has run for 15 minutes, or when the unit cycles offnormally.NOTEFreshProtect is not enabled in Start-Stopmode. See Functional Parameters List --Table 3-3.3--962-10683
3.6.1 Start -Stop ParametersThe selectable Start--Stop parameters in the FunctionalParameter list can be applied to Start--Stop operation sothat:• The same settings apply to any set point, or• The settings can be specified to be different, dependingon whether the set point is in the perishable rangeor in the frozen range.The decision as to whether the same settings will be usedtogether for all set points or if they will be separatedbetween Perishable and Frozen is made in the ConfigurationList. (Refer to Section 6.2.)If TOGETHER is selected in the Configuration List, thenthe following Functional Parameter values will be availablefor use:• MINIMUM RUN TIME• MINIMUM OFF TIME• OVERRIDE TEMP• MAXIMUM OFF TIME• FROZEN SHUTDOWN OFFSETIf SEPARATE is selected in the Configuration List, thenthe following Functional Parameter values will be availablefor use:• PERISHABLE MINIMUM RUN TIME• PERISHABLE MINIMUM OFF TIME• PERISHABLE OVERRIDE TEMP• PERISHABLE MAXIMUM OFF TIME• FROZEN MINIMUM RUN TIME• FROZEN MINIMUM OFF TIME• FROZEN OVERRIDE TEMP• FROZEN MAXIMUM OFF TIME• FROZEN SHUTDOWN OFFSETNOTEIn the event that the Configuration is changedfrom Separate to Together, the values from thePerishable Functional Parameters are the onesthat will be used.3.6.2 Charging AmpsA Configuration for Start--Stop Shutoff exists which allowsthe <strong>micro</strong>processor to monitor battery chargingamperage in addition to battery voltage. The batterycharging rate (as seen in the Data List) must be belowthe selected amp setting to allow the unit to cycle off.The Configuration may be set from 1.0 to 10.0 Amps in0.5 amp increments. A weak or defective battery mayshow a suitable voltage charge while the alternator isputting a high charging rate into it, then not be sufficientlycharged to restart the engine at the end of a Start-StopOff Cycle.The factory setting for this configuration is 6.5 amps.This is a general setting that may need to be adjusted forthe operating environment of the unit. Units operated incolder ambient temperatures may want to decrease thissetting to force a higher charge in the battery prior toStart-Stop Off Cycle. Units operated in warmer ambienttemperatures may use a higher setting.As a battery ages, it is normal for it to require longer rechargingperiods. If the running time is gradually increasingin Start-Stop operation due to the battery requiringa longer charging period, this run time may beshortened by raising the amp setting. (This may be seenby reviewing downloaded data and looking at the ampreading during prolonged engine Start-Stop On Cycles.)3.6.3 Restart VoltageA configuration for Start--Stop Restart on Battery Voltageallows the <strong>micro</strong>processor to restart the unit whenthe voltage selection has been reached.The Configuration may be set from 12.0 to 12.8 Volts in0.1V increments. The factory setting for this configurationis 12.2V.A lower voltage selection may result in a longer off cycle(based on battery voltage) and possibly overall shorterbattery life. A higher voltage selection may result in ashorter off cycle (based on battery voltage) and possiblyoverall longer battery life.62-10683 3--10
3.7 CONTINUOUS RUN OPERATIONHEAT COOL DEFROST ALARM START-STOP CONTINUOUS-20 +34.5° FSETPOINTBOX TEMPERATURECONTINUOUS RUN MODE SELECTEDCONTINUOUSRUN LIGHTMANUALDEFROSTALARM LISTSTART-STOP/CONTINUOUSSELECT1. Press the START-STOP/CONTINUOUSkey until the CONTINUOUS RUN 2. Verify that “CONTINUOUS RUN MODE SELECTED”Light on the <strong>micro</strong>processor illuminates. is displayed on the MessageCenter and that theCONTINUOUS RUN light is illuminated. The unit isnow in Continuous Run operation.In the Continuous Run mode, the unit will not shut downexcept for safeties or if the engine stalls. Refer toSection 4.3.2 for more detailed information onContinuous Run operation.Start-Stop and Continuous operation may be tied to theset point ranges for frozen and perishable loads. TheSTART-STOP/CONTINUOUS key is locked out if“START-STOP LOCKED” appears in theMessageCenter when the key is pressed and the unit isin Start-Stop mode or “CONTINUOUS LOCKED”appears in the MessageCenter when the key is pressedand the unit is in Continuous Run mode. Refer to theconfiguration table Section 6.2.If the unit fails to start after three start attempts, Alarm31 -- “FAILED TO START--AUTO MODE” will be activated.While running, if the unit shuts down, an internalcounter keeps track of the shutdowns. Should the unitshut down three consecutive times <strong>with</strong>out running aminimum of 15 minutes between shutdowns, theAlarm 30 “FAILED TO RUN MINIMUM TIME” Alarm willbe activated. The shutdown counter is cleared when theunit has run for 15 minutes.NOTEFreshProtect is enabled in Continuous Runmode. See Functional Parameters List --Table 3-3.3--1162-10683
3.8 SLEEP MODE ONHEATCOOL DEFROST ALARM START-STOPCONTINUOUSSETPOINTSLEEP MODE SETTINGSBOX TEMPERATUREMANUALDEFROSTALARM LISTSTART-STOP/CONTINUOUSSELECT1. Press the SELECT key until the MessageCenter displays“PRESS ↑↓ TO VIEW SETTINGS”.2. By pressing the UP or DOWN ARROW key, you will move through theFunction List until “SLEEP MODE SETTINGS” appears in theMessageCenter.3. Press the = key. “↑ ↓TO SCROLL, THEN = TO SAVE” will show in the MessageCenter.4. Press the = key to select Sleep Mode Settings.5. “SLEEP MODE: YES OR NO” will show in the MessageCenter. Press either UP orDOWN ARROW key to change the Sleep Mode to “YES”.62-10683 3--12
3.9 SLEEP MODE OFFHEATCOOL DEFROST ALARM START-STOPCONTINUOUSSETPOINTSLEEP MODE SETTINGSBOX TEMPERATUREMANUALDEFROSTALARM LISTSTART-STOP/CONTINUOUSSELECT1. Press the SELECT key until the MessageCenter displays“PRESS ↑↓ TO VIEW SETTINGS”.2. By pressing the UP or DOWN ARROW key, you will move through theFunction List until “SLEEP MODE SETTINGS” appears in theMessageCenter.3. Press the = key. “↑ ↓TO SCROLL, THEN = TO SAVE” will show in the MessageCenter.4. Press the = key to select Sleep Mode Settings.5. “SLEEP MODE: YES OR NO” will show in the MessageCenter. Press either the UP orDOWN ARROW key to change the Sleep Mode to “NO”.Sleep Mode OFFOR1. To take the unit out of Sleep Mode, place the START/RUN - OFF switchto the OFF position, then back to Start/Run.NOTEIf IntelliSleep is active the only way to exit SleepMode is to activate another IntelliSet.3--1362-10683
SLEEP MODE ON (Continued)No further menu selections are available when NO isselected from the“SLEEP MODE: YES OF NO” menu. The following submenus are available when YES is selected:1. “WAKE UP TIME”a. When “WAKE UP TIME” is set to NO the unit willremain in Sleep Mode until it is taken out manuallyper Section 3.9b. When “WAKE UP TIME” is set to YES the“SET WAKEUP TIME” menu will become available.Pressing the = key will allow the user to selectthe time the unit is to automatically wake up. Thewake up time must be at least 1 hour and no more than 8days from the time the clock is set. The following informationcan be entered:SSSSSMonthDayYearHourMinuteNOTEThe clock is a 24 hour clock. Hours 1 thru 12 areAM and hours 13 thru 24 are PM.2. “RUN PRETRIP TEST AT WAKE”a. When “PRETRIP TEST AT WAKE” is set to NOthe unit will wake up at the designated time and controlto setpoint.b. When ”PRETRIP TEST AT WAKE” is set to YES.the unit will wake up at the designated time, automaticallyrun Pretrip and then control to setpoint.“PRETRIP PASS/FAIL” will remain in the Message-Center until it is manually cleared.If Sleep Mode is selected when the unit is not running(Start-Stop OFF Cycle), any remaining Minimum OffTime will be ignored and the engine will start. It will runfor four minutes (minimum), until the engine coolanttemperature is above 122°F (50°C), and the battery isfully charged (O.K. appears in the Data list voltage line,and charging amps are less than amps set in theConfiguration list). While the unit is running in Sleepmode, “SLEEP WARNING: NO TEMP CONTROL” willflash in the MessageCenter, and the main display (setpoint and compartment temperature) will be turned off.This is because the refrigerated compartmenttemperature does not have to be at set point to allow theunit to cycle off (go to sleep).If the unit is already running when Sleep Mode isselected, it will continue to run until the conditionsdescribed above are met, then shut off (go to sleep).There is NO TEMPERATURE CONTROL in SleepMode and it should never be used for hauling perishableor frozen products.While the unit is cycled off in Sleep mode,“SLEEP MODE, OFF/ON TO WAKE” will be displayedin the MessageCenter. The display backlight will turn offafter five minutes. Sleep Mode may be exited by eitherturning the Start/Run-Off switch to the OFF position,then back to the START/RUN position, or by accessingthe Functional Parameter list, and selecting “SLEEPMODE: OFF”.While in Sleep mode, the Unit Data and Alarm lists maybe viewed, and Functional Parameters may be viewedand changed as necessary. However,Start-Stop /Continuous Run selections, and set pointcan not be changed. Manual Defrost and Pretrip can beinitiated.The unit will restart when engine coolant temperaturedrops below 34°F (1°C) or if the battery voltage dropsbelow the battery restart value selected in theconfigurations (See 6.2.1)Sleep mode is generally used in cold ambients when thetrailer or rail car may be parked or not used and the unitis OFF for an extended period of time (one day toseveral weeks) <strong>with</strong> no product inside the refrigeratedcompartment. Many times units are very difficult to startdue to a discharged battery, thickened engine oil, etc.after that time in cold ambients. In Sleep mode the unitwill “Wake Up” periodically and run to keep the batterycharged and the engine warm.In Sleep Mode the unit will “Wake Up” periodically andrun to keep the battery charged and the engine warm.NOTEIn the event that the Engine Coolant Temperaturesensor fails, Sleep mode will operate as follows:In ambients above +32°F(0°C), the unit will runas above, and will monitor battery voltage andcharging amps only (according to the configurationsetting).In ambients below +32°F(0°C), the unit will runfor 20 minutes minimum run time, then restartevery 60 minutes (maximum off time). Batteryvoltage and amperage will be monitored normally.NOTEUnits equipped <strong>with</strong> IntelliSet option can selectSleep Mode by choosing IntelliSleep. (See Section3.20.1).IntelliSleep can ONLY be exited by selecting adifferent IntelliSet.62-10683 3--14
3.10 DEFROST3.10.1 Manual DefrostDEFROST LIGHTHEAT COOL DEFROST ALARM START-STOP CONTINUOUS+34 dFSETPOINTBOX TEMPERATUREDEFROST CYCLE STARTEDMANUALDEFROSTALARM LISTSTART-STOP/CONTINUOUSSELECT1. Press the MANUAL DEFROST key. The DEFROST light will come on and the MessageCenterwill display “DEFROST CYCLE STARTED” for five seconds, or flash “CAN-NOT START DEFROST CYCLE” for five seconds.When Defrost mode CANNOT be manually initiated“CANNOT START DEFROST CYCLE” is displayed inthe MessageCenter. This will occur when:• DTT2 is above 40°F (4.4°C), and SAT isabove 45°F (7.2°C), OR• The engine has not run a minimum of15seconds after starting OR• The unit is in PC mode OR• The unit is in Pretrip OR• There is an active shutdown Alarm.NOTERefer to Section 5.11 for more detailed information onmanual and automatic defrost initiation and termination.TIPThe Manual Defrost Key can be used at anytime to start a Defrost Cycle.3--1562-10683
3.11 TRIP STARTHEAT COOL DEFROST ALARM START-STOP CONTINUOUS-20 +34.5° FSETPOINTTRIP START ENTEREDBOX TEMPERATUREMANUALDEFROSTALARM LISTSTART-STOP/CONTINUOUSSELECT1. To mark the start of a trip in the data recorder, press the SELECT key untilThe MessageCenter displays “PRESS = TO ENTER TRIP START.”2. Press the = key.3. If trip start is acknowledged by the data recorder, “TRIP START ENTERED” will be displayedfor five seconds and then the display will revert back to the normal display. Otherwise“CANNOT ENTER TRIP START” will flash and then the display will revert back tothe normal display.Trip Start places a time stamped events in the datarecorder memory to allow easy review of the data fromthe last trip, and to allow downloading data from aspecific trip. A trip begins at a Trip Start and ends at thenext Trip Start. Trip Start tells the data recorder that thepresent date and time is the beginning of a new trip.62-10683 3--16
3.12 VIEW ACTIVE ALARMSALARM LIGHTHEAT COOL DEFROST ALARM START-STOP CONTINUOUS-20 +34.5° FSETPOINTNO ACTIVE ALARMSBOX TEMPERATUREMANUALDEFROSTALARM LISTSTART-STOP/CONTINUOUSSELECT1. Press the ALARM LIST key. If there are no active alarms, the displaywill say “NO ACTIVE ALARMS” for five seconds.2. If there are active alarms, the display will be ‘A’ and the alarm number andmessage. The last alarm that occurred will be the first alarm displayed and so on.3. Press the ALARM LIST or UP ARROW key to scroll through the list of alarms.4. When you reach the end of the alarm list, “LIST END, = TO CLEAR ALARMS”is displayed for five seconds.5. To clear the active alarm list, press the = key while “LIST END, = TO CLEAR ALARMS” is beingdisplayed. “ACTIVE ALARMS LIST CLEAR” is displayed. This will move all Alarms to theInactive Alarm list.Alarms are stored in the Alarm list in the<strong>micro</strong>processor. Stored alarms may be viewed on theMessageCenter.For a complete list of alarms, their meanings, andtroubleshooting refer to Section 8.1.TIPAnother way to clear active alarms is to turn the<strong>micro</strong>processor OFF and then back ON usingthe START/RUN-OFF switch.TIPThe message “CHECK MICROPROCESSOR”(on earlier <strong>micro</strong>processors) or “CHK WIRESFROM MICRO TO KEYPAD” (on newer <strong>micro</strong>processors)means there is a wiring problembetween the <strong>micro</strong>processor and the displaymodule.3--1762-10683
3.13 VIEW INACTIVE ALARMSHEAT COOL DEFROST ALARM START-STOP CONTINUOUS-20 +34.5° FSETPOINTNO INACTIVE ALARMSBOX TEMPERATUREMANUALDEFROSTALARM LISTSTART-STOP/CONTINUOUSSELECT1. Press and hold both the ALARM LIST key and the UP ARROW key for sixseconds. If there are no inactive alarms, the display will read“NO INACTIVE ALARMS” for five seconds.2. If there are inactive alarms, the display will be ‘I’ and the alarm number andmessage.3. Press the ALARM LIST or UP or DOWN key to scroll through the list of alarms.4. When you reach the end of the alarm list, “LIST END, = TO CLEAR ALARMS”is displayed for five seconds.5. To clear the active and inactive alarm list, press the = key while“LIST END, = TO CLEAR ALARMS” is being displayed. “ALL ALARMS CLEAR” is displayed.The <strong>micro</strong>processor can hold up to 16 alarms in thecombined Active and Inactive Alarm lists. The lists canbe read via the MessageCenter or using theReeferManager PC program. There are two sections inthe Alarm list, an Active Alarm section and InactiveAlarm section. Alarms in these sections are in the orderin which the alarms activate and deactivate,respectively. On startup, all alarms are marked asinactive in the entire list. If an inactive alarm becomesactive, the alarm is moved from the Inactive Alarm list tothe Active Alarm list.As additional alarms occur, they will be placed first in theActive Alarm list. Each alarm can only be present ineither the Active or Inactive Alarm List at any given time.As conditions change, alarms may be moved from theActive Alarm list to the Inactive alarm list and back.Alarms are also recorded in the data recorder. They arerecorded at the time they occur (become active), andthe time they become inactive.For a complete list of alarms and troubleshootinginformation refer to Section 8.1.TIPWhen alarms are cleared from the InactiveAlarm list, both active and inactive alarm listsare cleared.If there is a safety shutdown,“UNIT SHUTDOWN -- SEE ALARM LIST” will beshown. Pressing the Alarm List key will bring any ActiveAlarms into the MessageCenter. Refer to Section 8 for acomplete list of Alarms and their descriptions.NOTEThe Inactive Alarm list is also called the TechniciansList. Only qualified refrigeration techniciansshould access the inactive list. It is not intendedfor the use of drivers or operators.62-10683 3--18
Table 3-1. Shutdown AlarmsSHUTDOWN ALARMSSHUTDOWNALARM ONLYor may beconfigured asSHUTDOWN(see configuration listSection 6.2.1)2 Low Oil Level X11 Low Engine Oil Pressure X12 High Coolant Temperature X13 High Discharge Pressure X15 Battery Voltage Too High X16 Battery Voltage Too Low X17 High Comp Discharge Temp X18 Low Refrigerant Pressure X19 Low Fuel Shutdown X20 Maximum Compressor Alarms (Optional) X27 High Suction Pressure X28 Check <strong>Refrigeration</strong> System X29 Check Heat Cycle X30 Failed To Run Minimum Time X31 FailedtoStart--AutoMode X32 Failed to Start -- Manual X35 Check Starter Circuit X39 Check Engine RPM X41 Engine Stalled X51 Alternator Not Charging X53 Compartment Temp Out-of-Range X56 Check Evaporator Airflow X57 Check Remote Switch 1 X58 Check Remote Switch 2 X61 Door Open X72 BadF4orF6Fuse X♦122 Check Return Air Sensor ♦♦123 Check Supply Air Sensor ♦204 Low Suction Pressure X232 Setpoint Error X233 Model # Error X237 Function Parameter Error X238 Configurations 1 Error X242 DIS PRESS Calibrate Error X243 SUCT/EVAP Calibrate Error X246 EEPROM Write Failure X248 Config Mode/HP2 Error X249 Microprocessor Error X♦If Alarms 122 and 123 are both active and setpoint is in the perishable range [10.4°F(-12°C)] and higher -- the unit willshut down. Otherwise, alarm only.3--1962-10683
3.14 UNIT DATAHEAT COOL DEFROST ALARM START-STOP CONTINUOUS-20 +34.5° FSETPOINTPRESS ↑↓TO VIEW DATABOX TEMPERATUREMANUALDEFROSTALARM LISTSTART-STOP/CONTINUOUSSELECT1. Press the SELECT key until the MessageCenterdisplays “PRESS ↑↓ TO VIEW DATA.”2. By pressing the UP ARROW key, you will move through the DataList beginning at the top and moving toward the bottom, or bypressing the DOWN ARROW key, you will move through theData List beginning at the bottom, and moving toward the top.3. The selected Data Item will remain in theMessageCenter for ten seconds, then the default message (“STATUS OK”or other customer specified message) will appear.4. To lock an item in the MessageCenter for continuous viewing, press the =key. The Data item will flash continuously to indicate it is locked.5. Pressing the UP or DOWN ARROW key will unlock that item and moveto the next data item. Pressing the = key will unlock the item. After tenseconds the default message will be displayed.62-10683 3--20
***+Table 3-2. UNIT DATA* Also appear in Configurations+ May or may not be displayed depending on functional parameter settingsSUCTION PRESSURE Compressor suction pressureDISCHARGE PRESSUREENGINE COOLANT TEMPRETURN AIR TEMPSUPPLY AIR TEMPDELTA-TAMBIENT AIR TEMPDEFROST TERM TEMP 2EVAP OUTLET TEMPBATTERYCURRENT DRAWENGINE RPMFUEL LEVELSUCTION MOD VALVESTART MODEINSTALLED OPTIONSINTELLISET INSTALLEDDATATRAK INSTALLEDCOMPRESSOR ALARMSHUTDOWNSOFTWARE REVISIONDISPLAY SOFTWARE REVCONTROL SERIAL #Compressor discharge pressureEngine coolant temperatureReturn (air entering evaporator) air temperatureSupply (air leaving evaporator) air temperatureSupply air temperature minus Return air temperature.Ambient (air entering condenser) air temperatureDefrost termination temperatureSuction line temperature at the evaporator outletBattery voltageBattery charging or discharging ampsEngine revolutions per minute% of fuel in tank. (This is only shown when 0%-100% sensor is configuredON.)% open of CSMVAUTO if the engine will start automaticallyMANUAL if the engine must be started manuallyApplies only if unit has any one or more of these options installedRevision of the software that is operating the <strong>micro</strong>processorRevision of the software that is operating the displaySerial Number of the <strong>micro</strong>processorID # ID (as entered by the user) -- Trailer, Car or Asset IDUNIT SERIAL # Unit serial numberUNIT MODEL # Unit model number (selected through configurations)HOURS TO ENGINEMAINTNumber of engine hours until the next programmed engine maintenance3--2162-10683
++**+*+*+*+*+*+Table 3-2. UNIT DATA* Also appear in Configurations+ May or may not be displayed depending on functional parameter settingsHOURS TO UNIT MAINT Number of switch-on hours until the next programmed general unit maintenanceTIME LEFT TO PM (1-5) Number of hours until the next programmed maintenancePRODUCTSHIELD SETUP: Indicates that unit has IntelliSet installed and displays ProductShield settings.PRODUCTSHIELDECONO:Indicates if ProductShield Econo is OFF OR Go To Start-Stop OR GoTo Continuous RunECONO MIN TEMP Minimum ambient temperature of range for activation of ProductShieldEcono (Will only be displayed if Econo is NOT OFF)ECONO MAX TEMP Maximum ambient temperature of range for activation of ProductShieldEcono (Will only be displayed if Econo is NOT OFF)ECONO DELTA-T Delta-T value for activation of ProductShield Econo (Will only be displayedif Econo is NOT OFF)PRODUCTSHIELD HIGHAIR:Indicates if Product Shield High Air is ON or OFFHIGH AIR MIN TEMP Minimum ambient temperature of range for activation of Product ShieldHigh Air (Will only be displayed if High Air is ON)HIGH AIR MAX TEMP Maximum ambient temperature of range for activation of Product ShieldHigh Air (Will only be displayed if High Air is ON)HIGH AIR DELTA-T Delta-T value for activation of Product Shield High Air (Will only be displayedif High Air is ON)PRODUCTSHIELD:WINTER - xx°Indicates the ambient temperature that is controlling ProductShield Winter(Will only be displayed if WINTER is NOT OFF)RANGE 1 LOCKOFF -- Temperature Range 1 Lock is turned offCONTINUOUS -- The unit is set to operate only in Continuous Run whenthe set point is set between Range 1 Minimum and Maximum TemperaturesSTART-STOP -- The unit is set to operate only in Start-Stop when theset point is set between Range 1 Minimum and Maximum TemperaturesRANGE 1 MINIMUM TEMP This is the lower limit for Range 1.RANGE 1 MAXIMUM TEMP This is the upper limit for Range 1.RANGE 2 LOCKOFF -- Temperature Range 2 Lock is turned off.CONTINUOUS -- The unit is set to operate only in Continuous Run whenthe setpoint is set between Range 2 Minimum and Maximum TemperaturesSTART-STOP -- The unit is set to operate only in Start-Stop when thesetpoint is set between Range 2 Minimum and Maximum TemperaturesRANGE 2 MIN. TEMP This is the lower limit for Range 2.RANGE 2 MAX. TEMP This is the upper limit for Range 2.62-10683 3--22
*+*Table 3-2. UNIT DATA* Also appear in Configurations+ May or may not be displayed depending on functional parameter settingsREMOTE SENSOR (1-3) This is the temperature at remote Temperature Sensor 1, 2, and 3.(These sensors are optional, and may not be applicable to your unit. Upto three remote sensors may be listed.)DATALOGGER This is the current Date and Time that the DataRecorder is using. Thismay be different than your actual time, depending on the Time Zone andDaylight Savings Time selections made by the owner of the unit3--2362-10683
3.15 VIEW HOURMETERSHEAT COOL DEFROST ALARM START-STOP CONTINUOUS-20 +34.5° FSETPOINT BOX TEMPERATURETOTAL ENGINE HOURS: 0 HRSMANUALDEFROSTALARM LISTSTART-STOP/CONTINUOUSSELECT1. Press the SELECT key until theMessageCenter displays“PRESS ↑↓ TO VIEW HOURMETERS.”2. Press the UP or DOWN ARROW key to movethrough the Hourmeter List.3. Displayed hourmeters will depend on unit configurations (See Section 6.2.1). Typicaldisplayed meters are: “TOTAL ENGINE HOURS” and “TOTAL SWITCH ON HOURS.”4. Pressing the = key will access all other meters and display“OTHER METERS AND COUNTERS”5. The selected hourmeter will remain in theMessageCenter for 10 seconds and then the default message (“STATUSOK” or other customer specified message) will appear.6. To lock an hourmeter in the MessageCenter for continuous viewing, pressthe = key. The hourmeter will flash continuously to indicate it is locked.7. Pressing any key on the keypad will unlock the item. Pressing theUP or DOWN ARROW key will move to the next hourmeter.Hourmeters available when “OTHER METERS ANDCOUNTERS” is chosen are:• Meters listed in Step 3 above that were notpreviously displayed.• Engine Protect Hours• Switch On Protect Hours• Engine Sleep Hours• High Speed Hours• Clutch Cycles• Start Cycles62-10683 3--24
3.16 FUNCTIONAL CHANGE (PARAMETERS)HEAT COOL DEFROST ALARM START-STOP CONTINUOUS-20 +34.5° FSETPOINTPRESS ↑↓TO VIEW SETTINGSBOX TEMPERATUREMANUALDEFROSTALARM LISTSTART-STOP/CONTINUOUSSELECT1. Press the SELECT key until the MessageCenter displays“PRESS ↑↓ TO VIEW SETTINGS.”2. By pressing the UP ARROW key, you will move through theFunction List beginning at the top or by pressing the DOWNARROW key, you will move through the Function List beginningat the bottom.3. To change one of the functions, bring the function you wish to change into the MessageCenter,and press = key. “↑ ↓TO SCROLL, THEN = TO SAVE” will show in the MessageCenter. Pressingeither the UP or DOWN ARROW key will begin to change the function setting. TheMessageCenter will flash, indicating that a change has been made that has not beenentered into memory.4. Continue pressing the UP or DOWN ARROW key until the desired value is displayed, then pressthe = key. The MessageCenter will stop flashing. The new value is now in memory.If the = key is not pressed <strong>with</strong>in 10 seconds, the MessageCenter will change to“FUNCTION NOT CHANGED”. This will appear for five seconds, then return to the lastFunctional Parameter displayed. If no further keys are pressed, the default message will bedisplayed after 10 seconds.NOTEAny function that is shown <strong>with</strong> a padlock symbol cannot be changed from the keypad.3--2562-10683
Table 3-3. Functional ParametersFUNCTIONALPARAMETERDEFROST TIMERSET FOR1.5HRS3HRS6HRS12HRSSELECTIONSSET S/S PARAMETERS(These may be displayed individually (8parameters) as PERISH and FROZEN, orcombined (4 parameters) <strong>with</strong> nodesignation.)S (PERISH /FROZEN)MIN RUNTIME:S (PERISH /FROZEN)MIN OFFTIME:4MINSTO60MINS(in one minuteincrements)10MINSTO90MINS20MINSDESCRIPTIONThe defrost timer will automatically put the unit into the defrost cycle atthe interval selected if evaporator is below 40°F (4.4°C).Shorter times are generally used for warm, humid products like produce.Longer times can be used for dry and frozen products.Time and Temperature values that control the Automatic Start-Stopoperation are set in this section. When “TOGETHER” is selected inConfigurations, only Perishable Settings are used.This determines the minimum length of time the unit will run every timethe unit starts in Auto Start-Stop modes.This determines the minimum length of time the unit will remain offwhenever the unit cycles off in Auto Start-Stop modes.S (PERISH /FROZEN)OVERRIDETEMP:(in one minuteincrements)3.6°F (2°C)TO18°F (10°C)11°F (6°C)(in 0.5°F orCincrements)This selects the override restart temperature for the Auto Start-StopOff Cycle. During the Minimum Off Time, should the refrigerated compartmenttemperature drift this far above or below setpoint in the PerishableRange, or above set point in the Frozen Range, the unit willoverride the Minimum Off Time, and restart.S (PERISH /FROZEN)MAX OFFTIME:FROZEN SHUT-DOWN OFFSETTEMP CONTROL:OFF10MINSTO255MINS(in one minuteincrements)0°F (0°C)TO3.6°F (2°C)RETURN AIR /SUPPLY AIROFF -- There is no maximum off time.When a minute value is selected, this is the longest amount of time theunit will remain off during a (Perishable or Frozen or both) Auto Start-Stop Off Cycle. When this time expires, the unit will restart and run forthe Minimum Run Time, regardless of any temperature change insidethe refrigerated compartment.This only applies to Frozen set points in Start-Stop operation.This offset is the number of degrees below set point that the unit willrun before cycling off. This will allow for a lower average refrigeratedcompartment temperature when considering temperature rises duringoff cycles.The unit has both a Return Air Sensor and a Supply Air Sensor. Thisselection determines which sensor temperature will be used for setpoint selections above 10.4°F (-12°C) to determine when set point isreached.Return Air is generally selected for most products. Products that aresensitive to small temperature changes may use the Supply Air setting.Supply Air limits the temperature of the air leaving the evaporator tothe setpoint setting.NOTE: Whenever the setpoint is below +10.4°F(-12°C), the unit will ALWAYS be controlled by the Return AirSensor, regardless of the selection made here.62-10683 3--26
FUNCTIONALPARAMETERDISPLAY TEMPSINFAHRENHEIT/CELCIUSDISPLAYPRESSURE INPSIG/BAR*RESET PM HOURMETERSS ENGINES SWITCH ONS PM1Thru5OUTOFRANGEALARM:SELECTIONSENGLISH UNITSMETRIC UNITSENGLISH UNITSMETRIC UNITSRESETEnglish MetricOFF OFF4°F 2°C5°F 3°C7°F 4°CDESCRIPTIONTemperatures will display in either English (°F )orMetric(°C )Pressures will display in either English ( psig) or Metric (bar)Maintenance hourmeters that have expired will appear in this list.If there are no active maintenance hourmeters, this menu item will notappear in the Functional Parameters.If there are active maintenance hourmeters and none have expiredand turned the alarm on, the MessageCenter will display“NO HOURMETERS TO RESET.”When any maintenance hourmeter has timed out, and preventativemaintenance has been performed, selecting RESET and pressing the= key will de-activate the alarm, and reset the hourmeter for the nextservice interval.Once the unit is at set point, then drifted away for more than 15 minutes,an Out--Of--Range Alarm will come on. (Or, if configured for OutOf Range Shutdown, after 45 minutes the unit will shut down.) Thissetting determines how far away from set point the temperature mustmove before the timer is started. 4°F may be used for very critical temperatureproducts, 7°F may be used for less critical products. Thealarm may be turned off by selecting the OFF setting.3--2762-10683
FUNCTIONALPARAMETERAIR FLOWAIR FLOWSELECTIONSNORMALHIGHDESCRIPTIONThe NORMAL selection allows the unit to cycle from High Speed toLow Speed, depending on how close the compartment temperature isto setpoint. Some products generate a considerable amount of heat(heat of respiration) during transportation. This frequently occurs <strong>with</strong>produce.The HIGH selection can be used for these loads, since continuoushigh air flow may be required to keep the entire load at a constant temperature.The engine will remain in High Speed when High is selected.NOTE: HIGH AIR FLOW does not work <strong>with</strong> set points below +10.4°F (-12.0°C).FRESH PROTECT OFF OFF -- Fresh Protect is turned offAUTO FRESH AIRAUTO FRESH AIRCONTROLA=2TO5°F (1.1TO2.8°C)B=4TO7°F (2.2TO3.9°C)C=6to9°F (3.3TO5.0° C)D=8to11°F (4.4TO6.1 ° C)E = 10 to 13°F (5.6TO7.2° C)0 = CLOSED1 = OPEN2 = CFM CONTROL5TO50CFMIN5CFM INCREMENTS25 CFMA thru E determines the allowable temperature SAT can go below setpointwhen the unit is operating in Continuous Run Cool. FreshProtectdoes not operate in Start-Stop. (See Section 5.8.)CLOSED -- AutoFresh Air Exchange assembly will be closed exceptfor pretrip and component test mode.OPEN -- Assembly will be open if the engine is running and the setpointis greater than 28°F (-2.2°C) and the unit is not defrostingCFM CONTROL -- Assembly will be cycled open and closed over a 20minute time period. The length of time the assembly is opened orclosed is based on the Auto Fresh Air Control Functional Parameter.The CFM CONTROL will only be active for setpoints greater than 28°F(-2.2°C) and in Continuous Run mode or Auto Start-Stop mode whenthe engine is running. The assembly will be closed when the setpointis less than 28°F (-2.2°C) or during defrost or during the off cycle ofStart-Stop mode.When CFM CONTROL is selected, this parameter is visible. WhenCFM CONTROL is used, the solenoid will open and close in 20-minutetime blocks to control the amount of air being exchanged, so that theamount of air exchanged averages the CFM setting. During the firstportion of the 20-minute block, the solenoid will be open, allowing freshair in and exhausting stale air. Once sufficient air has been exchanged,the solenoid will close until the beginning of the next 20-minute block.62-10683 3--28
FUNCTIONALPARAMETERLOW SPEEDSTART-UPMINUTES--CONTINUOUS:--START-STOPUNLOADERPRESSURECONTROLSELECTIONSOFF or1 to 255 minutesOFF or1 to 255 minutes (10min)Std-5+5DESCRIPTIONAllows user to set the number of minutes the unit will run in low speedevery time the engine starts.The recommended setting for this is Std. This setting should not bechanged unless discussed <strong>with</strong> a Carrier Transicold Factory ServiceEngineer or Field Service Engineer.SLEEP MODE SETTINGSThe following sub menus determine whether sleep mode is to be used and what the settings will be.S SLEEP MODEThe followingtwo sub menuselections will beavailable if YESis selected.S WAKE UP TIMENOYESNO -- is the normal operating selection and no further selections will beavailable.YES-- selects Sleep Mode. In this mode the unit will operate only asneeded to keep the engine warm, and the battery charged. There isNO TEMPERATURE CONTROL in Sleep Mode.The following Sleep Mode parameters were added in Software Version 04.07.00NOYESNO -- the unit will remain in Sleep Mode until it is taken out manually.This can be accomplished either through the Functional Parameter listor by turning the START / RUN--OFF switch to OFF and then back toSTART/RUN.YES-- the SET WAKE UP TIME sub menu will be availableSET WAKE UP TIME This setting is used to set Sleep Mode wake up time. The clock is a 24hour clock. Hours 1 thru 12 are AM and 13 thru 24 are PM. The wakeup time must be at least 1 hour and no more than 8 days from the timethe clock is set• MONTH 1--12 Select the correct month of the year.•DAY 1--31 Select the correct day of the month.•YEAR 1998 -- 2037 Select the correct year.•HOURS 0--23 Select the correct hour (0--11 is AM / 12--23 is PM)•MINUTES 0--59 Select the correct minute.3--2962-10683
FUNCTIONALPARAMETERSELECTIONSDESCRIPTIONNO -- The unit will wake up at the designated time and control to setpoint.S RUN PRETRIPAT WAKENOYESYES -- The unit will wake up at the designated time, automatically runPretrip and then control to set point. The Pretrip Pass/Fail messagewill remain in the MessageCenter until the message is manuallycleared.* OVERRIDEDOORSHUTDOWN* OVERRIDEREMS (1-2)SHUTDOWNLANGUAGE:**IDIOMAS:LANGUE:LINGUAGEM:This will only appear when a compartment door switch is configured “ON” in the ConfigurationList.NOYESNO -- Allows the door switch to shut the unit down whenever the compartmentdoor is opened and the door switch is configured for shutdown.YES -- Allows operator to over-ride the compartment door shutdownswitch, and allow the unit to continue to run, even <strong>with</strong> the compartmentdoor open.NOTE: This will only appear when a remote switch (REMS1 or REMS2) is configured “ON” inthe Configuration List.NOYESENGLISHFRANÇAISESPAÑOLPORTUGUÊSNO -- Allows remote switch (1 and/or 2) to shut the unit down wheneverdoor is open or the switch is turned ON.YES -- Allows operator to override remote switch (1 and/or 2), and allowthe unit to continue to run, even <strong>with</strong> the remote switch in the ONposition or the door is open.ENGLISH -- All information displayed in the MessageCenter will beshown in English.FRANÇAIS -- All information displayed in the MessageCenter will beshown in French.ESPAÑOL-- All information displayed in the MessageCenter will beshown in Spanish.PORTUGUÊS -- All information displayed in the MessageCenter will beshown in Portuguese.NOTE: This parameter can be quickly accessed by pressing and holding the Select key forsix seconds.Selections in BOLD are the factory settings.* This Functional Parameter may not appear in the list for your unit, depending on how the <strong>micro</strong>processor has been configured.NOTE**If the padlock is visible when accessing language from the Functional Parameter List, the language cannotbe changed. However, when accessing the language using the “hot key” (press and hold the Select Key for 6seconds) the language can be changed regardless if the padlock is shown or not.62-10683 3--30
3.17 LANGUAGE SELECTIONHEAT COOL DEFROST ALARM START-STOP CONTINUOUS-20 +34.5° FSETPOINTESPAÑOLBOX TEMPERATUREMANUALDEFROSTALARM LISTSTART-STOP/CONTINUOUSSELECT1. Press and hold the SELECT key for six secondsuntil MessageCenter displays current language(ENGLISH, ESPAÑOL, FRANÇAIS orPORTUGUÊS).2. Press the UP or DOWN ARROW key until the MessageCenter indicatesthe desired language. Press the = key. The new language will now beactive.If the = key is not pressed <strong>with</strong>in 10 seconds, the MessageCenter willchange to “FUNCTION NOT CHANGED.” This will flash for five seconds,then return to the current language. If no further keys are pressed, thedefault display will return in another 10 seconds.TIPIf the language is set to one that the userdoes not understand, press and hold the“SELECT” key for 6 seconds to bring upthe Language Parameter so that it can bechanged.3--3162-10683
3.18 STOPPING UNIT1. To stop the unit, place the START/RUN -OFF switch in the OFF position.The diesel engine will stop and the <strong>micro</strong>processor willturn off. The Microprocessor Main Display,MessageCenter, and all indicator LEDs will also turn off.NOTEDue to internal processing <strong>with</strong>in the <strong>micro</strong>processor,turning the START/RUN-OFFswitch OFF then back to START/RUN will resultina4to50seconddelaybetweenthedisplay going off and coming back on again.NOTEThe CSMV will close to 0% when START/RUN-OFF switch is switched to OFF.62-10683 3--32
3.19 DATA RECORDINGThe Advance <strong>micro</strong>processor contains a built-inDataRecorder <strong>with</strong> 512K of memory. The recorded datacan be downloaded from the DataRecorder using eitherReeferManager, a PC software program, or a DownloadPC card.The DataRecorder reads the same input information asthe <strong>micro</strong>processor (Functional Parameters,Configurations, and Unit Data) at all times. TheDataRecorder records events as they occur, such as setpoint changes and Defrost Initiation and Termination,and also records all data values including temperatureand pressure sensors in either averaged or snapshotformat. The details are provided below.3.19.1 Microprocessor InformationThe <strong>micro</strong>processor Information that is available to berecorded is as follows:• DataRecorder Setup Sensor Being Recorded(Logging Intervals, Events and Sensors)• DataRecorder Time Clock Date / Time• Setpoints (And all setpoint changes.)• ID Number• Unit Serial Number• Unit Model Number• Current System Mode• Functional Parameters• Microprocessor Configurations3.19.2 Data RecordingThe DataRecorder data comes from four generalcategories of information:a. Microprocessor Information as described in Section3.19.1 above.b.Sensor DataThis information is recorded at predetermined intervalsas a snapshot of the sensor at the time of the recording,or an averaged reading of the sensor readings since thelast recording. The user can determine which sensor(s)will be recorded, at what intervals, and whethersnapshot or averaged readings are preferred. Snapshotreadings of sensors are also taken at the time of ashutdown alarm.c.Event OccurrencesThis information is any additional data that is recordedon a “when it occurs” basis. Events are recorded by therecorder as they occur. An Event is defined assomething that happens (i.e. set point changed, DefrostCycle Started, or Main Power On, etc.) Hourmeters arerecorded at midnight or the first time of day the switch isturned to the ON position.d.User Area DataThe user or service technician is able to enter acomment into the DataRecorder using theReeferManager program.3.19.3 Sensor and Event DataSensorsThe following sensors may be recorded either <strong>with</strong> anaveraged reading, or snapshot or may not be recordedat all.• Return Air Temperature• Supply Air Temperature• Ambient Air Temperature• Compressor Discharge Temperature• Engine Coolant Temperature• Compressor Discharge Pressure• Compressor Suction Pressure• Battery Voltage• Battery DC Current• Engine RPMEvents (Selectable)User may determine whether the following events arerecorded. All other events such as ON / OFF, Defroststart will be recorded.• Pretrip Start• Pretrip End• Trailer ID• Unit S/N• Unit Mode• Control Mode• Transducer CalibrationOptional Sensors and EventsIn addition to the above Sensors and Events, theDataRecorder also has the capabilities to record thefollowing:• Remote Temperature Sensor 1• Remote Temperature Sensor 2• Remote Temperature Sensor 3• Remote Switch 1• Remote Switch 2• Door Switch• Fuel Tank % Level3--3362-10683
DATA RECORDING (CONTINUED)Time IntervalsThe following intervals are available for sensorrecording:• 2 Minutes• 5 Minutes• 10 Minutes• 15 Minutes• 30 Minutes• 1 Hour• 2 Hours• 4 Hours3.19.4 Data DownloadingThe data <strong>with</strong>in the DataRecorder can be downloadedfrom the DataRecorder by using either theReeferManager, (a PC software program) and adownload cable connected to the download port (refer toSection 6.1) or <strong>with</strong> a Download PC card (refer toSection 6.4) If a PC card is used, the ReeferManagerprogram is then used to extract the data from the PCcard, and place it on the computer hard disk.3.19.5 DataRecorder Power-UpThe DataRecorder records data the entire time theSTART/RUN-OFF switch is in the Run position. Aconfiguration exists which allows the user to selecteither an additional eight hours of data to be recordedafter the START/RUN-OFF switch is placed in the OFFposition, or to stop recording at the same time theSTART/RUN-OFF switch is turned to the Off position.The factory setting is to include the additional 8 hours ofdata. (See Configuration List Section 6.2.1.)62-10683 3--34
3.20 OPTIONS3.20.1 IntelliSetHEAT COOL DEFROST ALARM START-STOP CONTINUOUS+34 +34.5° FSETPOINTAPPLESBOX TEMPERATUREACTIVEMANUALDEFROSTALARM LISTSTART-STOP/CONTINUOUSSELECTDURING START UPObserve the MessageCenter during the power up process. If the unit isequipped <strong>with</strong> IntelliSet, the name of the active or modified IntelliSetwill be displayed for approximately 10 seconds before the enginestarts.DURING OPERATIONPress the SELECT key to view current IntelliSet. You will be prompted to presseither the “=” key or the UP or DOWN ARROW Key to scroll through list ofIntelliSets. The current IntelliSet will have either the word ACTIVE or MOD-IFIED after it. MODIFIED indicates that one or more of the IntelliSet settings(other than set point) have been changed. To change MODIFIED to AC-TIVE, press = key while the IntelliSet is shown in the MessageCenter.The Advance Microprocessor offers over 48 parametersthat may be set depending on the product being carried.IntelliSet allows the owner to pre--program specificproduct settings into the <strong>micro</strong>processor and give thesettings a name. The operator may then call up thesesettings by simply selecting the IntelliSet name.For example: Apples may require continuous operationat 35°F(1.7°C) <strong>with</strong> a defrost every 3 hours while a loadof cheese may require the same operation <strong>with</strong> setpoints ranging from 35°Fto42°F(1.7°Cto5.6°C) and aload of ice cream requires Start--Stop operation at-- 22°F(--30°C) <strong>with</strong> defrost at 12 hour intervals. The settingsrequired for each product may be entered into the<strong>micro</strong>processor and then locked so they cannot bechanged. In the case of the cheese, the range of setpoints may be locked, leaving the operator the ability tochange the set point <strong>with</strong>in the locked range.When a load of apples is going to be picked up, the operatorsimply selects “APPLES” from the IntelliSet menu;for cheese, “CHEESE” is selected ; for ice cream, “ICECREAM” is selected. With each selection, the <strong>micro</strong>processorautomatically re--programs the settings to providethe best temperature control, fuel economy, andperformance for that particular product.NOTEIntelliSet #31 is pre--programmed as“IntelliSleep” which allows Sleep Mode (SeeSection 3.8) to be entered by simply changingto that IntelliSet.The ONLY way to exit from IntelliSleep is to selecta different IntelliSet.NOTEThe above settings are examples of possiblesettings. Factory IntelliSets are available fromthe Information Website through your authorizedTruck/Trailer dealer.3--3562-10683
a. Changing IntelliSetsHEAT COOL DEFROST ALARM START-STOP CONTINUOUS-20 +34.5° FSETPOINTPRESS ↑↓TO VIEW INTELLISETSBOX TEMPERATUREMANUALDEFROSTALARM LISTSTART-STOP/CONTINUOUSSELECT1. PRESS = Key to display current IntelliSet. (Enable IntelliSet at =Key must configured ON. See Section 6.2.1.) If the = Key is notenabled, press the Select Key until the MessageCenter showsPRESS ↑↓TO VIEW INTELLISETS.2. Press the UP or DOWN ARROW key, to move through the IntelliSet List.The current IntelliSet will have either ACTIVE or MODIFIED to the right ofthe name.3. To use a different IntelliSet or to change the current IntelliSet from“MODIFIED to “ACTIVE,” bring the IntelliSet you wish to use into theMessageCenter and press = Key.62-10683 3--36
3.20.2 DataTrakt for Advance MicroprocessorsDataTrak allows remote communication providers(cellular, satellite, etc) to request data from the Advance<strong>micro</strong>processor and have it transmitted via theirequipment to another location. This is typically done viathe internet to any destination in the world. Someproviders can also send commands via their equipmentto the Advance <strong>micro</strong>processor to change settings andthe way the controller is operating the unit.DataTrak is an optional feature. The DataTrak option isinstalled by inserting a DataTrak PC Card into the PCCard slot of the <strong>micro</strong>processor and following theon--screen instructions on the keypad.The DataTrak Option installation can be confirmed byscrolling through the Unit Data List (see Section 3.14).DataTrak will be listed under the Installed Optionsheading if it is installed.Once DataTrak is installed, the AdvanceMicroprocessor must be properly configured for theprovider that will be connecting to it. This is done in theconfiguration list (see section 6.2.1.) The Satellite Comconfiguration can be set for “Qualcomm” or “Other”. Ifthe provider is “Qualcomm” then this selection must bemade. All other communications providers use the“Other” selection.Carrier Transicold has worked <strong>with</strong> approvedcommunication providers <strong>with</strong> recommendedinstallation locations, and wiring connections to Carrierunits. Instructions for installing this equipment issupplied by individual providers, and not by CarrierTransicold. Communications electrical harnesses andserial port splitters are available from Carrier TransicoldPerformance Parts Group (PPG).Communication Providers will connect into the wiringharness at the SATCOM port, and possibly at the J1connector. Testing the SATCOM port may be doneusing a serial port to PC cable (22--01690--00) and theReeferManager program. If ReeferManager cancommunicate <strong>with</strong> the <strong>micro</strong>processor the unit wiringand <strong>micro</strong>processor are performing normally and anycommunication problem is <strong>with</strong> the provider’sequipment.3.20.3 Two-Way Remote CommunicationThere are several different Telematics providers whosesystems are approved for one-way or possibly two-waycommunications <strong>with</strong> Carrier TransicoldTruck/Trailer/Rail refrigeration equipment. Currentinformation on each of these systems is available on theCarrier Transicold TransCentral Information Center.Please visit www.transcentral.carrier.com.3--3762-10683
3.20.4 AutoFresh Air ExchangeTo activate AutoFresh operation, the AutoFresh AirExchange configuration needs to be set (See Section6.2.1). A second configuration, AutoFresh Air Delay,can be used to delay the start of AutoFresh operation byup to 48 hours after engine start-up.Two functional parameters (See Table 3-3) are used tochoose the type of fresh air exchange. The AutoFreshAir Exchange parameter is used to choose the type offresh air control. The AutoFresh Air Control parameter isused to select the cycling of the assembly if CFMCONTROL has been set.The air exchange rate can be adjusted from zero to themaximum at the <strong>micro</strong>processor. Maximum rate is 50CFM.AutoFresh Air Exchange controls the amount of CFMexchanged based on a 20-minute duty cycle. The dutycycle timer is reset whenever the START/RUN-OFFswitch is turned OFF, then back ON, or if the unit is shutdown by either a Door or Remote switch shutdown.When the ambient air temperature is below 36°F(2.2°C)and the AutoFresh Air Exchange functional parameteris set for OPEN, the AutoFresh Solenoid (AFAS) willalways be closed for the last 15 seconds of each 20-minute time block and then reopen. Closing and openingthe vent periodically prevents ice buildup from freezingthe solenoid or air door into the open position.The AutoFresh solenoid current draw is tested duringPretrip Test #2; however, it is a good idea for thetechnician to visually verify that the solenoid actuallypushes the air assembly open, then closed again. Thisoperation is visible from ground level, by looking up atthe curbside of the unit. See Figure 3--2 and Figure 3--3.With the introduction of unfiltered air into therefrigerated compartment, “dirty” air may be drawn intothe air stream and be deposited onto the fan blades,reducing the airflow and ventilation. Periodically, the fanblades must be inspected and cleaned, if necessary, tomaintain optimum air flow and air exchangeperformance.ITEMS 6, 7 AND 8 ARE NOT ACTUALLYSHOWN . ONLY LOCATIONS ARE INDICATED.95111. Solenoid2. Jam Nut3. Washer4. Cap Screw5. Gasket6. Hose Clamp7. Inlet Hose32941012671688. Outlet Hose9. Sleeve10. Push-In Fastener11. Rail Cap Assembly12. Rail BracketAssemblyFigure 3 -1. AutoFresh Air Exchange62-10683 3--38
AIR OPENINGS POINT DOWNTO PREVENT RAIN WATER ENTRY.Figure 3 -2. AutoFresh in Closed PositionFigure 3 -3. AutoFresh in Open Position3--3962-10683
SECTION 4ENGINE1PARAGRAPH NUMBERPage4.1 INTRODUCTION .............................................................. 4--14.2 ENGINE START--UP ........................................................... 4--14.2.1 Engine Cranking ........................................................... 4--14.2.2 Variable Glow Time ......................................................... 4--14.2.3 Engine Running ............................................................ 4--34.2.4 Initial Engine Operation ..................................................... 4--34.3 RUNNING MODES ............................................................ 4--34.3.1 Start--Stop Mode ........................................................... 4--34.3.2 CONTINUOUS RUN MODE ................................................. 4--54.4 SPEED CONTROL OVERRIDES ................................................ 4--64
SECTION 4ENGINE4.1 INTRODUCTIONThis section describes the engine operation and the refrigerationsystem running modes known as automaticStart--Stop and Continuous Run.4.2 ENGINE START -UP4.2.1 Engine CrankingWhen the starting conditions are met the start sequencewill begin by fully closing (0% Open) the CompressorSuction Modulation Valve (CSMV). The CSMV will thenopen. When it reaches 30% the starting sequencecontinues by energizing the Run and Clutch relays,along <strong>with</strong> the solenoid valve (SV2) and both unloaders(UL1 and UL2.) After 5 seconds the Glow Plug Relay(GPR) will energize to supply power to the glow plugsand the buzzer will sound for 5 seconds before thestarter is energized. On initial power-up, there will be a 5second delay before the starting sequence begins. If therequired glow time is zero (warm engine, short glowtime), the <strong>micro</strong>processor will energize the starter aftera 5 second delay. The engine will crank for a maximumof 10 seconds or until the engine is “running”. The glowrelay will also be de-energized at the same time thestarter disengages. If the engine does not start, a 15second rest period will elapse before the next startattempt. The Run Relay, Clutch Relay, both unloadersand SV2 will remain energized and CSMV will remain inpre--start position until the next starting sequence.Before beginning another starting sequence, the oilpressure is checked to determine if the engine is runningor the RPM sensor has failed. For the second and thirdstart attempts the glow time is increased by 5 secondsover the glow time of the first attempt listed below. The<strong>micro</strong>processor allows three start attempts (<strong>with</strong>out theengine starting) before the starting is locked out and theFailed To Start – Auto Mode alarm is activated.NOTEIf the Engine Coolant Temperature Sensoralarm is Active, the glow time for temperaturesless than 32_F (0°C) will be used.4.2.2 Variable Glow TimeThe glow time for the first start attempt will vary in durationbased on engine coolant temperature and how the<strong>micro</strong>processor is configured: Short or Long as follows:Table 4-1. Glow TimeEngine Coolant TemperatureGlow Time in SecondsShort(Default)LongLess than 32_F (0_C) 15 5533_F to50_F (1_C to10_C)10 4051_F to77_F (11_C to25_C)5 25Greater than 78_F (26_C) 0 10The second start attempt has five seconds of glow timeadded to the time shown in the table. The third startattempt will have 10 seconds added. If the coolanttemperature sensor is defective, the <strong>micro</strong>processorassumes a temperature of less than 32_F (0_C) for theglow timing.4--162-10683
REPEAT “A”+ 10 SecondsGLOWTHIRDATTEMPT15 SecondsSTOPREPEAT “A”+ 5 SecondsGLOW15 SecondsSTOPSECONDATTEMPTMAXIMUM10 SecondsChecked at2 SecondsCRANKVARIABLE0to55SECONDSGLOWGLOWFIRSTATTEMPT “A”HOMING CSMVFigure 4 -1. Auto Start Sequence62-10683 4--2
4.2.3 Engine RunningThe engine is considered to be running when:a.Engine RPM are greater than 1000, andb.The engine oil pressure switch contacts areclosed <strong>with</strong>in 15 seconds of the engine starting.OR if the RPM sensor is not reading correctly,and the engine is being started for the secondor third attempt, the engine is considered to berunning when:a.For ambient temperatures at or above 32°F(0°C) the engine oil pressure switch contacts areclosed.b.For ambient temperatures below 32°F(0°C) thealternator charging amps are more than 2 amps.NOTEIf either of these two cases occurs, alarm 130-- CHECK ENGINE RPM SENSOR will be activated.NOTEWhile the starter is engaged, if the enginespeed is less than 50 RPM for more than 3seconds, the SSR will de--energize to stop thestarter.4.2.4 Initial Engine OperationIf a unit is started when the Engine Coolant Temperatureis 79°F(26°C) or below, after the engine starts, theunit will immediately go to low speed 4 cylinder operationuntil the water temperature reaches 79°F(26°C) orfor a minimum of 15 seconds. The CSMV will controlsuction pressure to 78 PSIG (5.3 Bars) Max. during lowspeed 4 cylinder operation. (Refer to Chart, Section5.18). Once the water temperature is greater than 79°F(26°C), the unit will run at high speed 4 cylinder operationand the CSMV will control to a maximum suctionpressure of 42 PSIG (2.9 Bars). (Refer to chart). Whenthe RAT reaches 50°F(10°C), the unit will go to 6 cylindercool operation and the CSMV will control to a maximumsuction pressure of 27 PSIG (1.8 Bars). The unitwill continue in high speed 6 cylinder cool until the controllingtemperature is 3.2°F(1.8°C) away from setpoint.The <strong>micro</strong>processor will then follow the operating sequencelogic on Figure 5--2.4.3 RUNNING MODESTwo running modes are possible: automatic Start--Stopand Continuous Run modes. The user can togglebetween the two modes by pressing the appropriate keyon the keypad. (Refer to Sections 3.6 and 3.7.)NOTEThe <strong>micro</strong>processor may be locked so that theunit will always operate in Start--Stop wheneverthe set point is <strong>with</strong>in a specific range. Refer toRange Lock (Section 5.15) and ProductShield(Section 5.16) for additional information.4.3.1 Start -Stop ModeStart--Stop mode is provided to allow fuel--efficient controlof refrigerated compartment temperature, while insuringthat the refrigerated compartment temperaturedoes not drift too far away from set point. When the refrigeratedcompartment temperature gets close the setpoint, the refrigeration system will shut off. This allowsthe diesel engine to shut down, saving fuel. As the refrigeratedcompartment temperature drifts away from setpoint, the refrigeration system and the engine will turnback on.a. Start -Stop Mode Cycle Off ConditionsWhenever the unit starts in Start--Stop Mode, it will continueto run until all five of the following criteria havebeen satisfied.1) The refrigerated compartment temperature isnear set point.After the Minimum Run Time expires, the unit will go intoan Off Cycle when the compartment temperature is<strong>with</strong>in ±0.5_F (±0.3_C) of setpoint for set points in thePerishable range or is less than +0.5_F(+0.3_C) aboveset point for set points in the Frozen range.2) The unit has run for the Minimum Run Time.The Minimum Run Time is selected in the <strong>micro</strong>processorFunctional Parameter List. (Refer to Section 3.16).The default setting is 4 minutes. The purpose of this is toforce the unit to run long enough to completely circulatethe air inside the compartment and to ensure that theproduct temperature is at set point.3) The engine coolant temperature is above 122°F(50°C).The engine coolant temperature is above 122°F(50°C).If the unit can not cycle off, it will operate as if inContinuous Run mode. The engine coolant temperaturewill override the minimum off time and out-of-rangecondition to force engine restarting when the enginecoolant temperature drops below 34_F (1_C). If theengine coolant sensor alarm is active and the ambienttemperature is above 32°F (0°C), the engine coolanttemperature will be ignored for the OFF cycle. If theengine coolant sensor alarm is active and the ambienttemperature is below 32°F (0°C) or the ambienttemperature sensor alarm is also active, the unit will runfor a minimum of 20 minutes before allowing an OFFcycle.4--362-10683
4) The battery voltage is high enoughProvisions are made to sense when the battery voltageis correct. A good battery is defined as having 13.4 VDCat 75_F (23.9°C). This voltage varies <strong>with</strong> ambient temperature.5) The battery charging amps are low enoughProvisions are made to sense when the battery chargingamps are low enough to indicate that the battery issufficiently charged. The battery is sufficiently chargedwhen the charging rate is below that selected in theConfiguration List. The selectable range is 1.0 to 10.0amps in 0.5A increments. The factory setting is 6.5Amps. (See Section 3.6.2).NOTEWhen conditions 3) thru 5) are met, “OK” willappear in the Unit Data List for battery voltage.b. Start -Stop Mode Cycle On ConditionsA restart will be initiated when one of the followingconditions occurs:1) Normal restart 1: The Refrigerated CompartmentTemperature Has Exceeded Selectable OverrideTemperatureThe <strong>micro</strong>processor continually monitors the refrigeratedcompartment temperature during the Minimum OffTime. The unit will restart if the refrigerated compartmenttemperature goes beyond the Override Temperature(above or below set point in the Perishable range orabove set point in the Frozen range). The Minimum OffTime and the Override Temperatures are selected in the<strong>micro</strong>processor Functional Parameter List (Refer toSection 3.17). The default value is 20 minutes for theMinimum Off Time and 11.0°F (6°C) for the OverrideTemperature.2) Normal restart 2: The Refrigerated CompartmentTemperature Has Exceeded Standard OverrideTemperatureAfter the Minimum Off Time has expired, the <strong>micro</strong>processorcontinually monitors the refrigerated compartmenttemperature. If the refrigerated compartment temperaturegoes more than +3.6°F(+2.0°C) away from setpoint (above or below set point in the Perishable rangeor above set point in the Frozen range), the unit will restart.The Minimum Off Time is selected in the <strong>micro</strong>processorFunctional Parameter List (Refer to Section3.17). The default setting is 20 minutes.3) Engine coolant temperature drops below 34_F(1_C).If the Engine Coolant Temperature drops below 34°F(1_C), the unit will restart, and will run until all conditionsfor shutdown are met.If Alarm 129 CHECK ENG COOLANT SENSOR is active,the unit will restart if the ambient air temperaturedrops to 32°F(0°C) after the unit has been in the OFFcycle for 60 minutes. If the unit restarts due to this condition,the Minimum Run Time will be at least 20 minutes,regardless of the setting in the Functional Parameterlist.4) Battery voltage falls below voltage selected inthe configuration list. (See Section 6.2.1)The selectable range is between 12.0 to 12.8 VDC. Thefactory setting is 12.2 VDC.TIPWhile the unit is running, the status of the unitbattery can be readily checked by reading theBattery Voltage in the Data List. If “O.K.” appearsafter the voltage reading, battery volts issufficient to allow the unit to cycle off. If “O.K.”does not appear, this condition has not beenmet, and the unit is not ready to cycle off.5) The Maximum Off Time has expired.In some ambient conditions, there are times when theunit may be off for very long periods of time. To ensurethat the load stays <strong>with</strong>in safe temperature ranges, theMaximum Off Time may be used to force the unit to restartregardless of any change in refrigerated compartmenttemperature. Maximum Off Time is selected in the<strong>micro</strong>processor Functional Parameter List. The defaultsetting is OFF.NOTEThe unit may remain in low speed for some timeafter engine start--up when in the Start--StopMode due to the High Speed Delay FunctionalParameter. The High Speed Delay is selectedin the <strong>micro</strong>processor Functional ParameterList (Refer to Section 3.17). The default value is10 minutes.c. Start -Stop IndicatorTo indicate that the unit is in the Start--Stop mode, theStart--Stop LED indicator on the keypad will be illuminated.62-10683 4--4
d. Failed To Start - Auto ModeIf the unit fails to start after three start attempts, theAlarm A31 --FAILED TO START--AUTO MODE will appearin the MessageCenter, and the Alarm LED on theKeypad will flash on and off once a second.NOTEX2 units only -- During a Start--Stop OFF cycle,the <strong>micro</strong> continues to monitor the ambient airtemperature. If the ambient air temperaturerises to115°F (46°C), SV4 will energize for 45seconds to equalize the refrigeration systempressures. This will occur only once during anOff Cycle, but may be repeated during subsequentOff Cycles.4.3.2 CONTINUOUS RUN MODEIn the Continuous Run mode, the engine will not shutdown except for shut down alarms or if the engine stalls.Continuous Run mode is normally used for fresh produceand other temperature sensitive product loads. The Start-Stop /Continuous key is pressed to switch between ContinuousRun and Start-Stop operating modes.NOTEThe <strong>micro</strong>processor may be locked so that theunit will always operate in Start--Stop or in ContinuousRun whenever the set point is <strong>with</strong>in aspecific range. Refer to Section 5.15 -- RangeLock for additional information.NOTEThe unit will remain in low speed until the enginecoolant temperature reads 79°F(26°C) in ContinuousRun Mode. High Speed Delay can bechanged from OFF or from 1 to 255 minutes.Refer to Functional Parameters in Section 3.16.4--562-10683
4.4 SPEED CONTROL OVERRIDESNOTEWith the complex control systems in use <strong>with</strong>the Advance Microprocessor, there are manydifferent reasons the engine may be operatingin either High Speed or Low Speed besides howfar the refrigerated compartment temperatureis away from set point. This section lists the differentfactors that determine the speed of theengine, in the order of their priority.Speed Control Solenoid Overrides in priority order:a. High Ambient:If ambient temperature is 120°F (48.9°C) or above,the unit will run in low speed for a minimum of 2 minutesand until the ambient drops below 110°F (43.3°C). Thisapplies to Heat and Cool modes only - not Defrost.b. Low Suction Pressure/High Discharge Pressure:If UL1 has been energized (unloaded) and thesuction pressure is less than 0 PSIG/Bar for at least 30seconds or the discharge pressure is greater than 435PSIG (29.6 Bars) for more than five seconds, the enginewill be forced to run in low speed for a minimum of fiveminutes. After five minutes, the engine can return tohigh speed if suction pressure is greater than 5 PSIG(0.34 Bar) for 30 seconds or discharge pressure is lessthan 410 PSIG (28.0 Bar) for 30 seconds.c. Low Speed Engine Coolant Warm-up:If engine Coolant Temperature Sensor Alarm is notactive the engine will run in low speed until the coolant isabove 79_F (26°C).The engine will run in low speed (while the enginewarms up) until the coolant is above 79_F (26°C).d. Defrost:The unit Is generally in High Speed but will run in lowspeed during Stage 1 (pump--down mode) of HighAmbient Defrost. It will also run at low speed at the endof the defrost cycle when the clutch is re--engagede. Door/Remote Switch Configurable for LowSpeed Alarm:The unit will be forced into low speed if the (optional)door switch, Remote Switch 1, or Remote Switch 2alarm is active and is configured for the unit to operate inLow Speed when the door is openf. Cargo Protect Mode:If the setpoint is in the frozen range i.e. below+10.4°F (-12°C), and both RAT and SAT sensor alarmsare active, the unit will run in low speed cool.g. Frozen Setpoint:If the setpoint is in the frozen range i.e. below+10.4°F (--12°C), and the refrigerated compartmenttemperature is below setpoint, the unit will run in lowspeedh. High Air Flow:For Perishable setpoints, the AIR FLOW FunctionalParameter will force the unit to operate in continuousHigh Speed operation when AIR FLOW: HIGH isselected. (When AIR FLOW: NORMAL is selected, theunit will cycle normally between high and low speeds.)High Air is NOT available for setpoints in the frozenrange i.e. below +10.4°F (--12°C).i. Product Shield High Air:The engine is forced to High Speed if Product ShieldHigh Air Configuration is set to “ON” and the ambienttemperature falls outside the selected range and thetemperature difference between the supply air and thereturn air is greater than the selected value (Refer toSection 5.16 for more information on Product Shield).j. Adjustable High Speed Delay on Engine Start-up:Whenever the engine starts, the unit will remain inlow speed according to the selection made in theFunctional Parameter list for High Speed Delay forContinuous or Start--Stop modes. A different setting isallowed for each mode. (Refer to FunctionalParameters, Section 3.16. for additional information)k. Start-Stop Frozen Range:In Start--Stop Mode <strong>with</strong> the setpoint in the frozenrange i.e. below +10.4°F(--12°C) and minimum run timehas expired and the refrigerated compartmenttemperature is not yet down to setpoint, the engine willbe forced to high speed operation.l. High Speed Delay: When operating in low speed,there is a delay when switching to high speed. The defaultdelay is one minute. Refer to ConfigurationMode, Section 6.2.Whenever the unit is operating in low speed, theremay be a delay before switching to high speed. Thisdelay is selected in the Configuration List. (Refer toConfiguration Mode, Section 6.2. )62-10683 4--6
SECTION 5TEMPERATURE CONTROL1PARAGRAPH NUMBERPage5.1 INTRODUCTION .............................................................. 5--15.2 PERISHABLE AND FROZEN SET POINT RANGES ............................... 5--15.3 PULLDOWN / PULL-UP MODE ................................................. 5--25.4 HEAT MODE OPERATION ..................................................... 5--25.5 COOL MODE OPERATION ..................................................... 5--25.6 UltraFresh 3 TEMPERATURE CONTROL ......................................... 5--35.6.1 Heat/Cool/Null Switching Operation ........................................... 5--35.6.2 Null Mode Operation ........................................................ 5--45.7 UltraFreeze TEMPERATURE CONTROL ......................................... 5--45.7.1 UltraFreeze Offset .......................................................... 5--45.7.2 UltraFreeze Start/Stop ...................................................... 5--45.8 FreshProtectt SUPPLY AIR CONTROL ........................................... 5--55.9 CARGO PROTECT MODE ..................................................... 5--55.10 ENGINE SPEED OPERATION .................................................. 5--85.11 DEFROST .................................................................... 5--85.11.1 Evaporator Temperature Criteria For Defrost ................................... 5--85.11.2 Defrost Initiation ........................................................... 5--85.11.3 Normal Defrost Operation ................................................... 5--95.11.4 Normal Defrost Termination .................................................. 5--95.11.5 Normal Defrost Termination Sequence ........................................ 5--95.11.6 High Ambient Defrost Operation .............................................. 5--105.11.7 High Ambient Defrost Termination Sequence ................................... 5--105.11.8 High Ambient Defrost Termination ............................................ 5--115.11.9 High Ambient Defrost Termination Sequence ................................... 5--115.12 UNLOADER CONTROL OPERATION ............................................ 5--115.13 SV1 OPERATION : ............................................................ 5--115.14 SV2 OPERATION : ............................................................ 5--115.15 TEMPERATURE RANGE LOCK 1 & 2 ............................................ 5--125.16 ProductShield ................................................................. 5--145.16.1 ProductShield Modes ....................................................... 5--145.17 UNLOADER CONTROL OVERRIDES ............................................ 5--185.18 MAXIMUM SUCTION OPERATING PRESSURE (COOL ONLY) ..................... 5--195.19 MAXIMUM OPERATING PRESSURE (MOP) OVERRIDE(HEAT AND DEFROST ONLY) .................................................. 5--195.20 SUCTION PRESSURE OPERATION ............................................. 5--205
SECTION 5TEMPERATURE CONTROL5.1 INTRODUCTIONTemperature control is achieved by controlling engine speed, compressor UL1 and UL2 unloaders, and solenoidvalves (SV1, SV2, SV4, and the CSMV).Temperature control attempts to maintain the compartment temperature at the chosen set point. At times thecompartment temperature may not be equal to the set point. This may be due to:•the unit is still in the process of pulling down or up to set point OR•the unit is in Start--Stop OFF mode•the unit has recently terminated defrost•the compartment door is open•the product was not at set point when loaded5.2 PERISHABLE AND FROZEN SET POINT RANGESThere are two ranges defined for set point.a. Setpoints above +10.4°F (-12°C) are considered Perishable.b. Setpoints of +10.4°F (-12°C) or below are considered Frozen.Temperature ControlHigh Air FlowStart/Stop Off CycleStart/Stop RestartCargo Protect Mode (Both RAT andSAT sensor alarms are active.)PerishableWhen the compartment temperatureis near setpoint, the unit willcycle from Heat to Cool to Heat tomaintain temperature.Continuous High Air Functional Parameteris AvailableProductShield High Air is AvailableCompartment temperature criteriais satisfied when the temperature is0.5°F (0.3°C) above or below setpoint.Unit will restart when compartmenttemperature is above or below setpointby the restart value. Restartvalue during the Minimum Off Timeis the Override Temperature selectedin the Functional parameterlist. Restart value following the MinimumOff Time is 3.6F (2.0C).Unit will shut down.FrozenWhen the compartment temperatureis near setpoint, the unit willoperate in Cool <strong>with</strong> UltraFreezeoperating at compartment temperaturesmore than 3°F (1.7°C) belowsetpoint.Continuous High Air Flow is not allowedwhen the compartment temperatureis less than 3.2F (1.8C)above setpoint.ProductShield High Air is available.Compartment temperature criteriais satisfied when the temperature is<strong>with</strong>in 0.5°F (0.3°C) above setpoint.Unit will restart when compartmenttemperature is above setpoint bythe restart value. Restart value duringthe Minimum Off Time is theOverride Temperature selected inthe Functional parameter list. Restartvalue following the MinimumOff Time is 3.6F (2.0C).Unit will operate in low speed sixcylinder cool.5--162-10683
5.3 PULLDOWN / PULL-UP MODEDuring pulldown mode the unit will run in high speed and high speed capacity (unless there is a high speed override --Refer to Section 4.4)5.3.1 Pulldown or Pull-up will be initiated in any of the following conditions:a. At engine startb. Set point changec. Operational mode change such as: Start-Stop, Continuous Operationd. Defrost terminatione. If the system is running in Start-Stop Run Mode, the minimum run time has expired, and other conditions forshutdown are met except that the compartment temperature has not reached set point.f. Pretrip termination5.3.2 Pulldown or Pull-up will end in the following conditions:a. For Continuous Run Mode:•When the RAT and SAT are equally spaced above and below set point AND ( SAT - RAT ) equals set point for set2points below 65°F (18.4_C), AND both supply and return air sensors are good.b. For START-STOP Mode:When the selected Control Probe Temperature is <strong>with</strong>in ± 0.5°F (0.3°C) of set point.NOTEWhen the system leaves Pulldown (COOL) or Pull--up (HEAT) modes, it will enter UltraFresh 3 temperatureControl Mode (see Section 5.6) when the set point is between +10.4°F and 65°F(--12°C to 18.4°C). For setpoints at or below +10.4°F(--12°C), the unit will operate in COOL and UltraFreeze (see Section 5.6). For setpoints above 65°F (18.4°C), the unit will operate in COOL, HEAT and PULSED NULL modes but will not operateinUltraFresh3.5.4 HEAT MODE OPERATIONIn HEAT Mode, the <strong>micro</strong>processor will operate the unit controls as follows:SV1 SV2 SV4 Engine SpeedCLOSERefer to SV2OperationOPENRefer toSection 5.10ClutchOutputENGAGEUL1 UL2 CSMVRefer to UL1OperationRefer to UL2Operation100%OpenHEAT mode is not used for frozen set points.5.5 COOL MODE OPERATIONIn COOL Mode, the <strong>micro</strong>processor will operate the unit controls as follows:SV1 SV2 SV4 Engine SpeedOPEN OPEN CLOSERefer to Section5.10ClutchOutputENGAGEUL1 UL2 CSMVRefer to UL1OperationRefer to UL2OperationRefer toCSMV ControlNOTEThe CSMV maintains the maximum suction pressure of the refrigeration system. The selected controllingsensor determines if the unit is running in high speed or low speed and six or four or two cylinders. The controllingsensor may be RAT or SAT depending if the the <strong>micro</strong>processor is configured for Return Air Control orSupply Air Control. Refer to Chart in Section 5.18 for maximum suction pressure limits during each mode ofoperation in Cool Mode.62-10683 5--2
5.6 UltraFresh 3 TEMPERATURE CONTROLUltraFresh 3 is an <strong>advance</strong>d method of temperature control for set points in both Perishable and Frozen ranges. Itproduces a reduced capacity state by: throttling down the CSMV and pulsing the SV4 valve (SV4 Pulse Mode), ormixing heating and cooling modes (Pulsed Null Mode).UltraFresh 3 uses the supply or return air sensor to control compartment temperature, while insuring that the supply airtemperature does not get too cold when a perishable set point is chosen.The sensor that is selected under the Functional Parameters for temperature control is shown below as the selectedprobe. The Temperature Control Probe is the sensor actually used by the <strong>micro</strong>processor to perform the temperaturecontrol. In the case of a bad probe, the remaining probe will be used for temperature control. If both probes are bad theunit will run in Cargo Protect Mode.SELECTED PROBEReturn Air SensorSupply Air SensorTEMPERATURE CONTROL PROBEReturn Air Sensor -- for perishable and frozen set pointsSupply Air Sensor for perishable set pointsReturn Air Sensor for frozen set points5.6.1 Heat/Cool/Null Switching OperationThere are three possible modes for UltraFresh 3 control temperatures. These are HEAT, COOL and NULL. (Refer toSections 5.4 and 5.5 for descriptions of HEAT and COOL modes.) When not in pulldown, UltraFresh 3 controls the unitbased on the following: (Refer to the temperature control operating sequence diagrams).a. To exit NULL and enter COOL while in Continuous Run, the control temperature must be greater than or equal to3.6°F (2_C) above set point.b. To exit NULL and enter COOL while in Start--Stop, the control temperature must be greater than or equal to 1.8°F(1_C) above set point.c. To exit COOL and enter NULL while in either Continuous Run or Start--Stop, the control temperature must be lessthan 1.5°F (0.8_C) above set point.d. To exit NULL and enter HEAT, the control temperature must be more than or equal to 1.8°F(1_C) below set point.e. To exit heat and enter NULL the control temperature must be less than 1.5°F (0.8_C) below set point.5--362-10683
5.6.2 Null Mode OperationNull Band consists of:a. Pulsed Null Mode OperationReduced capacity is produced between the HEAT and COOL Modes by a mode known as Pulsed-Null. This mode isnot a constant operating mode, but only operates for a few seconds at a time. During Pulsed-Null, the HEAT andCOOL valves are opened simultaneously to reduce either the heating or cooling capacity. In the Null Mode (Refer tothe following charts), the unit will pulse between COOL and NULL, or HEAT and NULL in 10 second increments. Thecapacity in the NULL Mode is varied by adjusting the pulse rate.• Cool ModeSV1 SV2 SV4EngineSpeedClutchOutputUL1 UL2 CSMVOPEN OPEN CLOSED LOW ENGAGE UNLOAD UNLOAD Refer to CSMV Control• Null ModeSV1 SV2 SV4EngineSpeedClutchOutputUL1 UL2 CSMVOPEN OPEN OPEN LOW ENGAGE UNLOAD UNLOAD Refer to CSMV Control• Heat ModeSV1 SV2 SV4CLOSEDReferto SV2OperationSection5.14EngineSpeedClutchOutputUL1 UL2 CSMVOPEN LOW ENGAGE UNLOAD UNLOAD Refer to CSMV ControlPulsed Null Mode operation will modify the length of each Mode in 10 second cycles. That is, if the unit is in the COOLNULL Pulse band, the unit may run in COOL for up to nine seconds, then NULL for one second, if the ControlTemperature is away from set point. As the Control Temperature comes closer to set point, the length of COOL timewill decrease, and the amount of NULL time will increase. However, the combination of the two will always equal 10seconds. The same is true for the HEAT NULL Pulse band.b. CSMV Control:The CSMV will automatically go to 30% when it enters Ultra Fresh 3 at 1.5°F(--0.8°C) above set point. The CSMV willusually control between 30% and 4% depending on the controlling probe and Suction Pressure. However, it can goabove 30% for short periods of time. For example, high ambients and low set points may cause the CSMV to openhigher than 30%.5.7 UltraFreeze TEMPERATURE CONTROLFor frozen setpoints, a modified UltraFresh 3 temperature control is used to keep the unit from over cooling and drivingthe box temperature far below setpoint. UltraFreeze operates similar to UltraFresh 3 except as noted in this section.UltraFreeze control will be used anytime a frozen setpoint is selected in both continuous and start/stop operation.When UltraFreeze is active it is normal to hear the refrigerant solenoid valves energize and de--energize every fewseconds.5.7.1 UltraFreeze OffsetIn UltraFreeze the unit will control the box temperature between setpoint and up to 3° F(1.6° C) below setpoint whilethe unit is running.5.7.2 UltraFreeze Start/StopIn start/stop operation the <strong>micro</strong> will control to setpoint by cycling the unit off when the box temperature is <strong>with</strong>in 0.5° F(0.3° C) of setpoint. Should the unit be required to continue to run after the box temperature is satisfied -- due to eitherlow battery voltage or low engine coolant temperature -- the UltraFreeze logic will control to the 3° F(1.6° C) below setpointoffset until all conditions for an off cycle are met and the unit cycles off.For frozen set points, a modified UltraFresh 3 temperature control is used to keep the unit from over cooling and drivingthe compartment temperature far below set point. Except as noted in this section UltraFreeze operates the same asUltraFresh. UltraFreeze control will be used anytime a frozen set point is selected in either continuous or Start--Stopoperation.62-10683 5--4
5.8 FreshProtectt SUPPLY AIR CONTROLFreshProtect operates between set points of +32.0°F (0° C)and 65.1°F (18.4° C) only.When the unit is operating in Start-Stop, FreshProtect is only functional after the Return Air Temperature is <strong>with</strong>in0.5 °F of set point, and criteria for shutdown other than compartment temperature has not yet been reached.When the unit is operating in Continuous Run, FreshProtect becomes functional once the Return Air Temperature(RAT) is approximately 10°F (5.6°C) above setpoint.NOTEFreshProtect only operates when the unit is set for Return Air Control. (See Table 3-3 for more informationon setting controls.) It does not operate when the unit is in Supply Air Control nor when the unit is inHeat or Defrost cycles.FreshProtect places a flexible limit on how far below setpoint the SAT can drop while the unit is operating in Cool Mode.Table 4-2 below shows the functional parameter settings and the corresponding ranges below setpoint that the SupplyAir Temperature can go, when the RAT is 10°F(5.6°C) or less above setpoint. Whenever the RAT is more than 10°F(5.6°C) above setpoint, it is possible for the SAT to be lower than the shown range since the air temperature <strong>with</strong>in thecargo area is a considerable distance from its desired point and additional cooling capacity is required.Table 4-2: FreshProtectFor Return Air Temperatures less than 10°F (5.6° C) above set point.FreshProtect SettingSupply Air Range(Below Setpoint)A2TO5°F (1.1TO2.8°C)B4TO7°F (2.2 TO 3.9°CC6to9°F (3.3TO5.0° CD8to11°F (4.4TO6.1° CE 10 to 13°F (5.6TO7.2° C)OFFNO LIMITThe process of refrigeration causes the cargo area air to be drawn into the Return Air inlet of the evaporator section.From there it is directed through the evaporator coil, where it is cooled off, then discharged through the Supply Airblower housing, and back into the cargo area. The warmer the Return Air temperature is in relationship to setpoint, themore cooling capacity is needed to bring the air temperature down to setpoint. As cooling capacity is increased, theSupply Air temperature drops, as additional heat is removed from the air. If left uncontrolled, the Supply Airtemperature can fall as much as 20°F (11.1°C) or more below the Return Air temperature.When the RAT approaches setpoint, the SAT will also approach setpoint. The SAT may then be closer to setpoint thanshown in Table 4-2.When FreshProtect is set for OFF, the system runs <strong>with</strong> FreshProtect off, and the SAT will operate as far belowsetpoint as needed to bring the RAT to setpoint as quickly as possible. All other FreshProtect settings enableFreshProtect Supply Air Temperature control, and the controller watches the Supply Air Temperature as well as theReturn Air Temperature while the system is operating in the Cool Mode.5.9 CARGO PROTECT MODEWhen both the return air sensor (RAT) alarm and the supply air sensor (SAT) alarm are active, the unit will enter CargoProtect Mode for temperature control. When the set point is in the frozen set point range, the unit will run low speedloaded cool. WARNING:NO TEMP CONTROL will be displayed in the MessageCenter. The unit will shutdown whenthe set point is in the perishable range. (See section 5.2 for definition of perishable & frozen set points).5--562-10683
Note: The following temperature control operating sequence diagrams are after pulldown and do notshow overrides.RISING BOXTEMPERATURECSMV CONTROL+3.2_F (+1.8_C )+2.3_F (+1.3_C )+1.5_F (+0.8_C )SetpointHigh Speed6 Cylinder CoolLow Speed6 Cylinder CoolLow Speed2 Cylinder CoolUltraFresh 3Low Speed2 Cylinder Null+3.6_F (+2.0_C )+2.7_F (+1.5_C )Setpoint-1.5_F (-0.8_C)CSMV -100%-1.8_F (-1.0_C)-2.7_F (-1.5_C )-3.6_F (-2.0_C )Low Speed2 Cylinder HeatLow Speed6 Cylinder HeatHigh Speed6 Cylinder Heat-2.3_F (-1.3_C )-3.2_F (-1.8_C )FALLING BOXTEMPERATURENote: System can change from Low Speed 2 Cylinder Cool to Low Speed 6 Cylinder Cool when thebox temperature rises. However, once the unit enters UltraFresh 3 Mode, it will remain in thatmode until the box temperature rises to 3.6° F(2.0° C) above setpoint at which point it will go to HighSpeed 6 Cylinder CoolFigure 5 -1. Continuous Run Temperature Control Operating Sequence - Perishable RangeRISING BOXTEMPERATURECSMV CONTROL+3.2_F (+1.8_C )+2.3_F (+1.3_C )SetpointFALLING BOXTEMPERATUREHigh Speed6 Cylinder CoolLow Speed6 Cylinder CoolUltraFreeze2 Cylinder Cool/Null+3.6_F (+2.0_C )+2.7_F (+1.5_C )SetpointFigure 5 -2. Continuous Run Temperature Control Operating Sequence - Frozen Range62-10683 5--6
CSMV CONTROL+3.2_F (+1.8_C )+2.3_F (+1.3_C )+0.5_F (+0.3_C )High Speed6 Cylinder CoolLow Speed6 Cylinder CoolLow Speed2 Cylinder Cool *RISING BOXTEMPERATURE+3.6_F (+2.0_C )**+2.7_F (+1.5_C )CSMV - 0%CSMV-100%Setpoint-2.7_F (-1.5_C )-3.6_F (-2.0_C )Start/StopOff CycleLow Speed2 Cylinder HeatLow Speed6 Cylinder HeatHigh Speed6 Cylinder HeatFALLING BOXTEMPERATURESetpoint-0.5_F (-0.3_C)-2.3_F (-1.3_C )-3.2_F (-1.8_C )* Once the Minimum Run Time has expired, the compressor will operate in 6 cylinders, dependingon suction pressure** During the Minimum Off Time, the unit will restart at Override Temperature selected in theFunctional Parameter List.Note: System can change from Low Speed 2 Cylinder Cool to Low Speed 6 Cylinder Cool when thebox temperature rises. However, once the unit enters UltraFresh 3 Mode, it will remain in thatmode until the box temperature rises to 3.6° F(2.0° C) above setpoint at which point it will go to HighSpeed 6 Cylinder CoolFigure 5-3. Start-Stop - Temperature Control Operating Sequence - Perishable RangeRISING BOXTEMPERATURECSMV CONTROL+3.2_F (+1.8_C )+0.5_F (+0.3_C )SetpointHigh Speed6 Cylinder CoolLow Speed *6 Cylinder CoolStart/Stop Off Cycle+3.6_F (+2.0_C )**SetpointFALLING BOXTEMPERATURE* Once the Minimum Run Time has expired, the compressor will operate in 6 cylinders, dependingon suction pressure** During the Minimum Off Time, the unit will restart at Override Temperature selected in theFunctional Parameter List.Figure 5 -4. Start-Stop - Temperature Control Operating Sequence - Frozen Range5--762-10683
5.10 ENGINE SPEED OPERATIONThe engine will operate the compressor at two different speeds (low and high). Speed Control is based on thedifferences of Controlling Temperature and set point as follows:Mode HIGH SPEED LOW SPEEDCOOLHEATControl Temp is more than 3.6_F (2.0_C)above setpointControl Temp is more than 3.6_F (2.0_C)below setpointControl Temp is less than 3_F (1.8_C) abovesetpointControl Temp is less than 3_F (1.8_C)below setpointNULL No AlwaysNOTEFor X2 units only -- When the ambient air temperature reaches 120°F (48.9°C), the engine will go to lowspeed for a minimum of two minutes, and until the ambient air temperature drops below 110°F (43.3°C).5.11 DEFROSTDefrost is an independent cycle overriding cooling and heating functions in order to de-ice the evaporator as required.When the unit is in Defrost, the DEFROST LED will be on, the MessageCenter will display DEFROST CYCLE STARTEDfor the first 5 seconds, then the default message will be displayed for the rest of the Defrost Cycle. The compartmenttemperature section of the Main Display will show “dF”. The set point will continue to be displayed on the left side.Compartment temperature will not be displayed during Defrost. The CSMV will always be 100% open during Defrost Mode.NOTEThe unit will operate in high speed in the defrost mode except during pump down in high ambient defrost.5.11.1 Evaporator Temperature Criteria For DefrostBefore a defrost cycle can be initiated, DTT (Defrost Termination Temperature sensor) and SAT (Supply AirTemperature sensor) must be below 40_F(4.4_C) OR SAT must be below 45°F(7.2°C). If the DTT2and SAT alarmsare active, then the RAT (Return Air Temperature sensor) must be below 45°F (7.2°C).5.11.2 Defrost InitiationWhen one of the applicable criteria is met, defrost may be initiated by any of four different methods:a. Defrost Interval Timer: The <strong>micro</strong>processor contains an internal Defrost Timer (adjustable in the Functional Parameterlist) which can be set using the keyboard (Refer to Section 3.16 Functional Change) or the ReeferManage PCProgram. The Defrost Timer may be set for 1.5, 3.0, 6.0, or 12.0 hour intervals. When the unit has run for the selectedamount of time, a defrost cycle will be initiated if the evaporator temperature criteria as defined in Section 5.11.1have been met. .The Defrost Timer is reset to zero whenever a defrost cycle ends(regardless of how it was initiated),and begins counting down until the next defrost cycle. The <strong>micro</strong>processor holds in memory the last entered DefrostTimer interval.The Defrost Timer only counts time when the engine and compressor are running and evaporator temperature criteriaas defined in Section 5.11.1 have been met. When the START/RUN--OFF switch is placed in the OFF position,the defrost timer will be reset to zero. Units running in Start--Stop will not increment the timer during off cycles. Forthis reason, the defrost timer can not attempt to initiate a defrost cycle during an OFF cycle. However, it is possiblethat the unit will go into a defrost cycle very shortly after restarting from a Start--Stop OFF Cycle, if the timer expiresat that point.b. Defrost Air Switch: A Defrost Air Switch (DAS) measures the air restriction through the evaporator coil. As ice formsand builds up, the air flow is restricted. Once enough ice builds up, the switch contacts will close, and initiate a defrostcycle f the evaporator temperature criteria as defined in Section 5.11.1 have been met. The Defrost Air Switchrequires periodic testing and calibration. (Refer to Section 9.25.2) In the case where the switch is out of adjustment,it will either not put the unit into defrost as soon as needed, or it will attempt to put the unit into defrost prematurely. Inthe first case, the defrost timer will help correct any icing problem.TIPIce is not the only thing that will cause the air differential to increase across the evaporator coil. Shrink wrap,paper, plastic bags, and other such items when caught in the return air stream and pulled up against the evaporatorcoil or the return air grill can also cause the Defrost Air Switch contacts to close.When looking at a unit for a Defrost Air Switch problem, be sure to also inspect the condition and cleanliness ofthe evaporator coil, and the return air area.c. Manual Defrost : The Defrost cycle may be started at any time (providing that evaporator temperature criteria asdefined in Section 5.11.1 have been met) by pushing the MANUAL DEFROST key (Refer to Section 3.10).62-10683 5--8
5.11.3 Normal Defrost OperationSV1 SV2 SV4 SCS Clutch Output UL1 UL2 CSMVCLOSE(energized)Refer to SV2OperationOPEN(energized)HIGHDISENGAGE(de--energized)LOAD(de--energized)LOAD(de--energized)100%OpenWhen the ambient air temperature is greater than 35°F(1.7°C) the compressor discharge pressure will be monitoredduring the defrost cycle:NOTEIf the Ambient Air temperature is below 80_F (26.7_C) the Normal Defrost Operation will be used. When the AmbientAir temperature is above 80°F (26.7_C), the High Ambient Defrost Operation will be used .If the discharge pressure rises to 340 psig (23.1 Bar), UL1 will energize and unload for the remainder of thedefrost cycle.If the discharge pressure rises to 350 psig (23.8 Bar), the SV1 valve will de--energize (open) for 1 second toreduce the discharge pressure. If the discharge pressure remains at 350 psig (23.8 Bar), the SV1 valve mayde--energize (open) again ad much as twice a minute.5.11.4 Normal Defrost TerminationDefrost Termination: Defrost will be terminated once any of the following conditions are met:a. When the defrost termination temperature (DTT) and Supply Air Temperature (SAT) are both above 55_F(12.8_C) and the sensors are working properly. If both DTT and SAT sensors are bad, then defrost will terminate in10 minutes. A sensor alarm indicates that the sensor is bad.b. A54 -- DEFROST NOT COMPLETE ALARM. The <strong>micro</strong>processor also has a Defrost Cycle Timer which monitorsthe total time of the Defrost cycle. This is the amount of time that the system is actually defrosting. This timer startsevery time a Defrost Cycle is initiated and it keeps track of the time that the system is actually defrosting. If theDefrost cycle does not complete <strong>with</strong>in 45 minutes, the following will occur:• The Defrost cycle will be terminated.• Defrost Override timer is activated which will initiate another defrost cycle in 1.5 hours regardless of the standardDefrost Timer setting.• A54 DEFROST NOT COMPLETE Alarm will be activatedNOTEIf the Defrost Air Switch (DAS) contacts are still closed at defrost termination or if the DAS calls for a defrostcycle <strong>with</strong>in eight minutes of the previous defrost cycle termination in two consecutive defrost cycles, the followingwill occur:• The Defrost Air Switch (DAS) is ignored for defrost initiation until the unit has completed another defrost cycle inwhich the DAS contacts were open at termination. (The manual defrost switch can always start a new Defrostcycle.)• A55 CHECK DEFROST AIR SWITCH Alarm is activated.• A Defrost Override timer is activated which will initiate another defrost cycle in 1.5 hours regardless of the standardDefrost Timer setting.5.11.5 Normal Defrost Termination SequenceThe following sequence will be used to perform a transition from defrost to normal temperature control:a. The <strong>micro</strong>processor will place the engine in Low Speed and Open (de-energize) SV1 and Open (energize) SV2 andSV4.b. The <strong>micro</strong>processor will return the CSMV to the same % it was prior to the initiation of defrost.c.The SV4 will close (de-energize) .d. After a few seconds the Clutch will be engaged (energized). There will be a short delay before the engine can returnto High Speed.e. At this point, the <strong>micro</strong>processor will return to normal temperature control. (The data recorder will record a DefrostTermination Event)5--962-10683
5.11.6 High Ambient Defrost OperationNOTEIf the Ambient Air temperature is below 80_F (26.7_C) then the Normal Defrost Operation will be used. When theAmbient Air temperature is above 80°F (26.7_C), the High Ambient Defrost Operation will be used.If the discharge pressure rises to 340 psig (23.1 Bar), UL1 will energize and unload for the remainder of thedefrost cycle.If the discharge pressure rises to 350 psig, the SV1 valve will de--energize (open) for 1 second to reduce thedischarge pressure. If the discharge pressure remains at 350 psig (23.8 Bar), the SV1 valve may de--energize(open) again ad much as twice a minute.The High Ambient Defrost Cycle has three separate modes:a. Pump Down Mode -- The Pump Down Mode pumps the low side of the refrigeration system down to a lower suctionpressure, and reduces the engine load normally seen at the beginning of a Defrost Cycle.SV1 SV2 SV4EngineSpeedLOW(de--energize)ClutchOutputUL1 UL2 CSMVOPEN(de--energized)CLOSE(de--energize)CLOSE(de--energize)ENGAGE(energized)UNLOAD(energized)UNLOAD(energized)100% OpenThe unit will remain in the Pump Down Mode until the following conditions are met:• A minimum of 30 seconds, and the suction pressure is less than 10 PSIG (0.68 Bar) orOR• A maximum of 5 1/2 minutes, regardless of suction pressure.b. High Ambient Defrost Mode -- Following the Pump Down Mode, the Defrost Cycle will begin. The unit controls will beopened/closed as follows:SV1 SV2 SV4EngineSpeedHIGH(de--energized)ClutchOutputUL1 UL2 CSMVCLOSE(energized)Refer to SV2 OperationOPEN(energized)DISENGAGE(de--energized)UNLOAD(de--energizedLOAD(energized)100% Openc.High Ambient Defrost Termination -- Once the Defrost Termination Temperature Sensor (DTT) and Supply Air Temperature(SAT) reach 55_F (12.8°C), the high ambient defrost cycle will terminate.5.11.7 High Ambient Defrost Termination SequenceThe following sequence will be used for High Ambient Defrost Termination.•The unit will remain in High Speed and will reset the CSMV position to the position it was in at the start of defrost.•The <strong>micro</strong>processor will open (de-energize) SV1 and open (energize) SV2 and unload (energize) UL1.•When suction pressure has risen 10 PSIG (0.7 Bar) above start point or after 15 seconds, the <strong>micro</strong>processor willplace the unit in Low Speed, close (de--energize) SV4, and unload (energize) UL2.•After 5 seconds, the clutch will be engaged.•After an additional 5 seconds, the <strong>micro</strong>processor will return to normal temperature control. (The data recorderwill record a Defrost Termination Event)NOTEIf the Ambient Air temperature is below 80_F (26.7_C) then the Normal Defrost Operation will be used. When theAmbient Air temperature is above 80°F (26.7_C), the High Ambient Defrost Operation will be used.62-10683 5--10
5.11.8 High Ambient Defrost TerminationOnce the Defrost Termination Temperature Sensor (DTT) and Supply Air Temperature (SAT) reach 55_F (12.8°C), thedefrost cycle will terminate.5.11.9 High Ambient Defrost Termination SequenceThe following sequence will be used for High Ambient Defrost Termination.a.The unit will remain in High Speed and will reset the CSMV position to the position it was in at the start of defrost.b.The <strong>micro</strong>processor will open (de-energize) SV1 and open (energize) SV2 and unload (energize) UL1.c.When suction pressure has risen 10 PSIG (0.68 Bar) above start point or after 15 seconds, the <strong>micro</strong>processorwill place the unit in Low Speed, close (de--energize) SV4, and unload (energize) UL2.d.After 5 seconds, the clutch will be engaged.e.After an additional 5 seconds, the <strong>micro</strong>processor will return to normal temperature control. (The data recorderwill record a Defrost Termination Event)NOTERefer to Section 2.15 for more on the defrost mode.5.12 UNLOADER CONTROL OPERATIONTo “LOAD,” or de-energize, a compressor unloader increases the capacity of the system by increasing the number ofcylinders pumping refrigerant in the compressor. To “UNLOAD,” or energize, a compressor unloader decreases thecapacity of the system by decreasing the number of cylinders pumping refrigerant. Refer to Section 2.3.4 for moreinformation on compressor unloaders.Unloaders will use the differences of Controlling Temperature and set point, as follows:Mode LOAD (de-energize) UL1 and UL2 UNLOAD (energize) UL1 and UL2COOL(Perishable)HEATCOOL(Frozen)Control Temp is more than 3.6_F (2_C) abovesetpointControl Temp is more than 2.7_F (1.5_C)below setpointControl Temp is more than 3.6_F (2_C)above setpointControl Temp is less than 2.3_F (1.3_C)above setpointControl Temp is less than 2.3_F (1.3_C)below setpointControl Temp is less than 1.4_F (0.8_C)above setpointWhen the compressor is fully loaded, it is operating on six cylinders. When the front unloader UL1 is Unloaded (energized),the unit operates on four cylinders. When UL1 and the rear unloader UL2 are both unloaded (energized), theunit operates on two cylinders. UL2 always unloads before UL1.5.13SV1 OPERATION :The SV1 valve will be open (de--energized) whenever the system is operating in the Cool Cycle’s SV1 valve will beclosed (energized) during Heat and Defrost Cycles. When the system is operating in the Defrost Cycle, and the DischargePressure reaches 350 PSIG (23.8 Bars) during Defrost, SV1 opens (de--energizes) for 1 second then closes(energizes) again to help control Discharge Pressure.5.14 SV2 OPERATION :The SV2 valve will be open (energized) whenever the system is operating in the Cool Cycle. The SV2 valve will openand close during the Heat and Defrost Cycles to control Discharge and Suction pressures.The following SV2 control is used during the Heat and Defrost cycles:1. If the Discharge Pressure is greater than the SV2 closed value shown in the table below, SV2 is de--energized(closed).2. If the Discharge Pressure is less than the SV2 open value, SV2 is energized (open).SV2 closed and open pressure settings are based on the model number as follows:Model No. SV2 OPEN SV2 CLOSEUltima XTC and X2 2500190 PSIG250 PSIG(12.9 Bars)(17 Bars)Ultra XTC and X2 2100200 PSIG(13.6 Bars)300 PSIG(20.4 Bars)5--1162-10683
5.15 TEMPERATURE RANGE LOCK 1 & 2 (See Figure 5 -5. and Figure 5 -6.)The unit can be locked into Start-Stop or Continuous Run operation for various set points. Two independent ranges areavailable for selection. Each range can be set to lock the unit into either Start--Stop or Continuous Run based on thecurrent set pointEach Range has its own selectable minimum and maximum temperatures, which define the span of the range. If someset point temperatures are contained in both ranges due to range overlap, the unit operation specified for Range 1 willalways have priority over the unit operation specified for Range 2.Typically, both Range 1 and Range 2 are used to control different set point ranges when the unit is not equipped <strong>with</strong>the IntelliSet option. For units <strong>with</strong> IntelliSet, because each IntelliSet is generally programmed for a specific product,only Range Lock 1 is used to hold the unit in either the Start--Stop or Continuous Run Mode, and Range Lock 2 is leftOFF.For example, if Continuous Run operation is ALWAYS required whenever the set point is between +28°F and +55°F(--2.2°C and 12.8°C), Range 1 will be set for Continuous Run, <strong>with</strong> a Range 1 Minimum Temperature of +28°F(--2.2°C)and a Range 1 Maximum Temperature of +55°F (12.8°C). Should Continuous Run operation ALWAYS also berequired <strong>with</strong> set points between --22°F(--30°C) and 0°F (--17.8°C), then Range 2 will be set for Continuous Run, <strong>with</strong> aRange 2 Minimum Temperature of --22°F (--30°C) and a Range 2 Maximum Temperature of 0°F (--17.8°C). Any setpoint outside of Range 1 or Range 2 will allow the user to change unit operation between Start--Stop and ContinuousRun.62-10683 5--12
Range Lock 1 & 2Range2issetfor0° to -22°F(-17.8° to -30°C)Range1issetfor+28° to +55°F(-2.2° to +12.8°C)Range 2 Range 1°C-30 -23.3 -17.8 -12.2 -6.7 -1.1 4.4 10.0 15.6 21.1 26.7°F-22 -10 0 10 20 30 40 50 60 70 80Figure 5-5. Range Lock 1In the example shown in Figure 5--5. Range 1 or Range 2 can be changed to lock the unit operation into Start-Stop. It isprimarily important to determine which range is to be Range 1 and which is to be Range 2 is when the ranges overlap.In the example shown in Figure 5--6., the ranges will be set to lock all set points into Start-Stop, except for a smallrange between +32 and +42°F ( 0 and 5.6°C) during which the unit will always operate in Continuous Run. Range 1Minimum Temperature will be set for +32°F(0°C), and Maximum Temperature of +42°F(5.6°C). Range 2 will be set fora Minimum Temperature of -22°F (-30°C) and a Maximum Temperature of +89.6°F (32°C).Range 1 always has prioritywhenRange1&2overlapRange2issetfor -22° to89.6°F(-30° to 32°C)Set for Start-StopRange1issetfor32° to 42°F(0° to 5.6°C)Set for Continuous°C-30 -23.3 -17.8 -12.2 -6.7 -1.1 4.4 10.0 15.6 21.1 26.7°F-22 -10 0 10 20 30 40 50 60 70 80Figure 5-6. Range Lock 25--1362-10683
5.16 ProductShieldtNOTEProductShield does not operate <strong>with</strong>in Sleep Mode.ProductShield is a group of configuration settings <strong>with</strong>in the <strong>micro</strong>processor that are available in all Advance Microprocessorsthat have the IntelliSet option installed. The ProductShield Modes work together <strong>with</strong> the various IntelliSets toallow improved operating efficiency while providing customized product protection for up to 31 different commodities.Each ProductShield setting allows the user to select an ambient temperature range in which to operate. The Minimumand Maximum range values can be set to OFF, or any value from -20 to +119°F (-28.9 to +48.4°C ).5.16.1 ProductShield Modes:a. ProductShield: Econo Go To Start -Stop and Go To Continuous RunProductShield Econo allows the unit to automatically switch from Start--Stop operation to Continuous run or vice versabased on a change in the ambient air temperature. This allows for maximum product protection while providing for fuelsavings -- depending on ambient conditions.1) When the unit is set for Continuous Run, ProductShield Econo allows the unit to cycle OFF in Start -Stop when:• ProductShield Econo configuration is set to GO TO S/S (Refer to Section 6.2.1) AND• The unit has run in Continuous Run for a minimum of either 15 minutes or the Minimum Run Time as selected in theFunctional Parameter list (whichever time is longer) AND• The ambient temperature falls <strong>with</strong>in the pre--programmed temperature range AND• The unit is not already running in ProductShield Winter mode which forces the unit to operate in Continuous Runonly. (Refer to Section c. below) AND• All the normal criteria for a Start--Stop Off Cycle (box temperature at set point, engine coolant temperature, batteryvolts and charging amps) are met.• Optionally, if the Econo Delta--T configuration is set for a numerical value and not set to OFF, the operator canpre--program a maximum evaporator coil temperature differential (Delta--T) between the return air (1RAT) and supplyair (1SAT) sensors as an additional criteria for switching to Start--Stop. In this case, the unit must bring the Delta--Tbelow this pre--programmed setting before going to Start--Stop.The product is probably cooled close to set point if the Delta--T is pre--programmed for a relatively low temperature [4to 6°F (2.2to3.3°C)] and that setting has been reached. Reaching the low Delta--T setting is an indication that notmuch heat is being removed from the product in order to maintain the Return Air Temperature.Setting the Delta--T for a higher value [8 to 27°F(4.4to15°C)]) or leaving the setting OFF enables the unit to cycle intoan OFF cycle whether or not the unit is cooling at a higher capacity.NOTEIn ProductShield Econo: Go to Start--Stop, the Delta-T must be lower than the value selected in order to enterStart--Stop.NOTEIf the unit is set for Continuous Run and ProductShield Econo is configured for GO TO CONTINUOUS or OFF,the unit will remain in Continuous Run.62-10683 5--14
Once the <strong>micro</strong>processor detects that the above criteria have been met, the unit will switch from Continuous Run to aStart--Stop Off Cycle and remain Off for the Minimum Off Time as set in the Functional Parameter list. A restart will beinitiated when one of the following four conditions occurs:a) Normal restart 1: The Refrigerated Compartment Temperature Has Exceeded Selectable Override TemperatureThe <strong>micro</strong>processor continually monitors the refrigerated compartment temperature during the Minimum Off Time.The unit will restart if the refrigerated compartment temperature goes beyond the Override Temperature (above or belowset point in the perishable range or above set point in the frozen range). The Minimum Off Time and the OverrideTemperatures are selected in the <strong>micro</strong>processor Functional Parameter List (Refer to Section 3.17). The default valueis 20 minutes for the Minimum Off Time and 11.0°F (6°C) for the Override Temperature.b) Normal restart 2: The Refrigerated Compartment Temperature Has Exceeded Standard Override TemperatureAfter the Minimum Off Time has expired, the <strong>micro</strong>processor continually monitors the refrigerated compartment temperature.If the refrigerated compartment temperature goes more than +3.6°F(+2.0°C) away from set point (above orbelow set point in the perishable range or above set point in the frozen range), the unit will restart. The Minimum OffTime is selected in the <strong>micro</strong>processor Functional Parameter List (Refer to Section 3.17). The default setting is 20minutes.c) Engine coolant temperature drops below 34_F (1_C).If the Engine Coolant Temperature drops below 34°F(1_C), the unit will restart, and will run until all conditions for shutdownare met.If Alarm 129 CHECK ENG COOLANT SENSOR is active, the unit will restart if the ambient air temperature drops to32°F(0°C) after the unit has been in the OFF cycle for 60 minutes. If the unit restarts due to this condition, the MinimumRun Time will be at least 20 minutes, regardless of the setting in the Functional Parameter list.d) Battery voltage falls below voltage selected in the configuration list. (See Section 6.2.1)In some ambient conditions, there are times when the unit may be off for very long periods of time. To ensure that theload stays <strong>with</strong>in safe temperature ranges, the Maximum Off Time may be used to force the unit to restart regardless ofany change in refrigerated compartment temperature. Maximum Off Time is selected in the <strong>micro</strong>processorFunctional Parameter List. The default setting is OFF.When the unit restarts, it will return to Continuous Run operation for a minimum of 15 minutes or the Minimum RunTime (as selected in the Functional Parameter list), whichever time is longer. The same ProductShield Econo: Go ToStart--Stop activation conditions must again be met in order for the unit to cycle OFF again. While the unit is runningand the set point is between 32 and 65.1°F (0 and 18.4°C), the FreshProtect settings (as selected in the FunctionalParameter list) will be effective.When ProductShield Econo Maximum Temperature is set for OFF, and ProductShield Econo Minimum Temperatureis set for a temperature, the ambient air temperature will be considered to be “inside the range” whenever the ambientair temperature is higher than the Minimum Temperature setting, <strong>with</strong> no upper limit.When ProductShield Econo Maximum Temperature is set for a temperature, and ProductShield Econo MinimumTemperature is set for OFF, the ambient air temperature will be considered to be “inside the range” whenever theambient air temperature is lower than the Max Temp setting, <strong>with</strong> no lower limit.When ProductShield Econo Maximum Temperature is set for OFF, and ProductShield Econo Minimum Temperatureis set for OFF, the ambient air temperature will be considered to be “inside the range” at any ambient air temperature.ProductShield ECONO: GO TO START/STOP EXAMPLESThe following examples apply in situations where all other Start--Stop conditions have been met. (Refer to Section4.3.1..)1. If the Econo Minimum Temperature is set to 30°F (-1.1°C) and the Econo Maximum Temperature is set to40°F (4.4°C) and the ambient air temperature falls between these temperatures, the unit operation can change toEcono Start--Stop.2. If the Econo Minimum Temperature is set to 30°F (-1.1°C) and the Econo Maximum Temperature is set toOFF and the ambient air temperature is anywhere above 30°F (-1.1°C), the unit operation can change to EconoStart--Stop.3. If the Econo Minimum Temperature is set to OFF and the Econo Maximum Temperature is set to 40°F(4.4°C)and the ambient air temperature falls anywhere below 40°F (1.7°C), the unit operation can change to EconoStart--Stop.4. If both the Econo Minimum and Econo Maximum Temperatures are set to OFF, unit operation can change toEcono Start--Stop at any ambient temperature.5--1562-10683
2) When the unit is set for Start -Stop, ProductShield Econo allows the unit to run in Continuous Runwhen:• ProductShield Econo configuration is set to GO TO CONTINUOUS (Refer to Section 6.2.1), AND• The unit has run in Start--Stop for a minimum of 15 minutes OR the Minimum Run Time, whichever is longer as setin the Functional Parameter list. (See Table 3-3) AND• The ambient temperature falls outside the pre--programmed temperature range.NOTEIf unit is set for Start--Stop and ProductShield Econo is configured for GO TO START / STOP or OFF, the unitwill remain in Start--Stop.Once the <strong>micro</strong>processor detects that the above criteria have been met, the unit will switch from Start--Stop toContinuous Run for a minimum of 30 minutes. After 30 minutes the unit will return to Start--Stop when the ambienttemperature has fallen <strong>with</strong>in the pre--programmed temperature range by ±3.6°F (±2°C).NOTEDelta--T logic is not used or available when unit is configured for GO TO CONTINUOUS.ProductShield ECONO: GO TO CONTINUOUS EXAMPLES1. If the Econo Minimum Temperature is set to 0°F (-17.8°C) and the Econo Maximum Temperature is set to90°F (32.2°C) and the ambient air temperature falls outside these temperatures, the unit operation can change toEcono Continuous Run.2. If the Econo Minimum Temperature is set to 0°F (-17.8°C) and the Econo Maximum Temperature is set to OFFand the ambient air temperature falls below 0°F (-17.8°C), the unit operation can change to Econo Continuous Run.3. If the Econo Minimum Temperature is set to OFF and the Econo Maximum Temperature is set to 90°F(32.2°C) and the ambient air temperature rises above 90°F (32.2°C), the unit operation can change to EconoContinuous Run.4. If both the Econo Minimum and Econo Maximum Temperatures are set to OFF, ProductShield Econo: Go ToContinuous can not operate because no range has been defined and it is therefore impossible for the ambienttemperature to be outside of range.62-10683 5--16
. ProductShield: High AirProductShield High Air mode allows the unit to provide increased airflow by operating the engine in high speed. Thisgenerally results in a reduced Delta-T. This can maximize product protection under difficult conditions while allowingthe unit to operate more efficiently during less demanding conditions.When the Air Flow parameter (in the Functional Parameter list) is set for NORMAL, ProductShield High Air allows theunit to run as required -- either High Speed or Low Speed depending on:• How far the compartment temperature is away from set point AND• Speed Override Conditions -- Refer to Section 4.4When the ambient temperature falls outside the pre--programmed temperature range, ProductShield High Air modewill be enabled, and the engine will go to high speed to provide high air flow <strong>with</strong>in the refrigerated compartment.The operator can also optionally pre--program a maximum evaporator coil temperature differential (Delta--T) betweenthe return air (1RAT) and supply air (1SAT) sensors as an additional criteria for switching to ProductShield High Air.When the Delta--T setting is used, the unit must bring the Delta--T above this pre--programmed setting before going toHigh Air Mode. The Delta--T setting is used to prevent ProductShield High Air from operating when the heat load on therefrigeration unit is low.NOTEIn ProductShield High Air, the Delta-T must be higher than the value selected in order to enter the mode.ProductShield ECONO: HIGH AIR EXAMPLES1. If the High Air Minimum Temperature is set to 0°F (-17.8°C) and the High Air Maximum Temperature is set to90°F (32.2°C) and the ambient air temperature falls outside these temperatures, the unit operation can change toHigh Air.2. If the High Air Minimum Temperature is set to 0°F (-17.8°C) and the High Air Maximum Temperature is set toOFF and the ambient air temperature falls below 0°F (-17.8°C), the unit operation can change to High Air.3. If the High Air Minimum Temperature is set to OFF and the High Air Maximum Temperature is set to 90°F(32.2°C) and the ambient air temperature rises above 90°F (32.2°C), the unit operation can change to High Air.4. If both the High Air Minimum and High Air Maximum Temperatures are set to OFF, ProductShield Econo: Highair can not operate as no range is defined and it is impossible for the ambient temperature to be outside of range.If the unit shuts down in Auto Start--Stop during High Air, it will not be in High Air when it restarts and will return tonormal operation for a minimum of 15 minutes. The original activation conditions must then be met in order for the unitto return to High Air.c. ProductShield: WinterWhen the unit is set for Start--Stop operation, ProductShield Winter allows it to switch to continuous run when theambient air temperature falls below a pre--programmed temperature falling between 32 to --20°F (0to--29°C). Thishelps protect the unit from the possibility of fuel gelling and other cold weather issues.NOTEWhen the unit is operating in Continuous Run, the unit will not switch into ProductShield Winter.When the unit is operating in Start--Stop and the <strong>micro</strong>processor detects that the ambient temperature has droppedbelow the pre--programmed temperature, the unit will switch into ProductShield Winter mode which will force the unitto operate in Continuous Run. The unit will continue to operate in Continuous Run for a minimum of 30 minutes. After30 minutes, the unit will return to auto Start--Stop if the ambient temperature has risen more than 3.6°F(2°C) above thepre--programmed ProductShield Winter temperature.NOTEAll of the ProductShield settings may be viewed in the Data List (Refer to Section 3.14). For units <strong>with</strong> Intelli-Sets, the Data List will reflect the ProductShield settings for the IntelliSet that is currently active.5--1762-10683
5.17 UNLOADER CONTROL OVERRIDESThe compressor unloaders will operate in either a de--energized (loaded) or energized (unloaded) position, dependingon current operating conditions. The list below shows the conditions that will control the operation of the unloaders inaddition to the unloader control used by the temperature control described in section 5.12.There is a delay of 10 seconds between LOADING (de-energizing) compressor cylinders under all operatingconditions except engine starting.The overrides will be allowed in Cargo Protect Mode if the override does not use the return or supply temperature.Unloader Overrides in priority order. If an override only applies or takes effect for one unloader, continue down thepriority list for the other unloader:a. High Ambient:If the ambient temperature is above 120°F (48.9°C) when the engine starts UL1 and UL2 will both be unloaded fora minimum of 2 minutes and until the ambient air temperature drops below 110°F (43.3°C)b. Mop Override, Maximum Operating Pressure Control:UL1 and UL2 will be energized and de--energized based on Compressor Suction Pressure (CSP). Refer to MOPOverride Section 5.19If the unit is operating in Defrost or in HEAT, the MOP Override can only UNLOAD the UL1. The UL2 must remainLOADED.c. Low Suction Pressure/High Discharge Pressure:Unloading is used along <strong>with</strong> low speed to increase the suction pressure or decrease the discharge pressure.These steps in capacity reduction are taken in the following order: 6--cylinder high speed to 4--cylinder high speed to4--cylinder low speed to 2--cylinder low speed. Unloading will take place if the following conditions occur: dischargepressure is greater than 435 PSIG (29.6 Bars) for 5 seconds or suction pressure is less than 0 PSIG (0Bar) for 30seconds.Therefore, if the engine is running at high speed 6 cylinder operation and one of the conditions listed above occurs,the compressor will be unloaded from 6 to 4 cylinders (UL1 will be energized) and the engine will remain in high speed.If the condition (discharge pressure greater than 435 PSIG or suction pressure less than 0 PSIG) does not change to atleast a drop in discharge pressure to less than 410 PSIG or an increase in suction pressure to above 5 PSIG, theengine will shift to low speed and the compressor will remain running on 4 cylinders). If the condition still does notchange, UL2 will energize and the compressor will operate on 2 cylinders, still in low speed operation. Once the engineshifts to low speed, or one or both of the unloaders energize due to these conditions the unit will remain in low speed,and the unloader(s) will remain energized for a minimum of 5 minutes.d. Defrost: Refer to defrost control (Refer to Section 5.11).In a Normal Defrost cycle, both unloaders will be loaded (de--energized).In a High Ambient Defrost Cycle, both unloaders will be unloaded (energized) during the Stage 1 pumpdownmode. The remainder of the Defrost Cycle will have UL1 unloaded (energized) and UL2 loaded (de--energized).e. Cargo Protect Mode:If the setpoint is in the frozen range [below +10.4°F (-12°C)] and both RAT and SAT sensor alarms are active, theunit will run fully loaded (UL1 and UL2 de-energized).f. Start/Stop Override:If the system is running in Start/Stop--Run Mode, and the minimum run time has expired and the compartmenttemperature is not at setpoint, and the Return Air Temperature is less than 50°F (10°C), both unloaders will beLOADED (de-energized) to increase the unit capacity so that set point may be reached more quickly, and allow an OffCycle.g. Continuous Run Low Speed Null Mode: UL1 and UL2 will load and unload periodically as the control systemmakes adjustments in the system’s capacity to maintain compartment temperature when it is close to setpoint.62-10683 5--18
5.18 MAXIMUM SUCTION OPERATING PRESSURE (COOL ONLY)In Cool Mode, the CSMV is used to control Suction Pressure to these MAXIMUM operating limits determined by thecompressor speed and number of loaded cylinders, as shown in the following table. Pressures may be lowerdepending on ambient and control temperatures, etc.Table 4-3 Suction MOPModelUltima XTCand X2 2500High SpeedUltima XTCand X2 2500Low SpeedUltra XTCand X2 2100High SpeedUltra XTCand X2 2100Low SpeedAmbient Air Temperaturesbelow 108.5°F (42.5°C)Ambient Air Temperaturesabove 110.3°F (43.5°C)6 Cylinders 4 Cylinders 2 Cylinders 6 Cylinders 4 Cylinders 2 Cylinders25 PSIG(1.7 Bars)35 PSIG(2.4 Bars)31 PSIG(2.1 Bars)35 PSIG(2.4 Bars)40 PSIG(2.7 Bars)50 PSIG(1.5 Bars)50 PSIG(1.5 Bars)50 PSIG(1.5 Bars)76 PSIG(5.2 Bars)76 PSIG(5.2 Bars)76 PSIG(5.2 Bars)76 PSIG(5.2 Bars)19 PSIG(1.3 Bars)21 PSIG(1.4 Bars)20 PSIG(1.4 Bars)20 PSIG(1.4 Bars)30 PSIG(2.0 Bars)35 PSIG(2.4 Bars)40 PSIG(2.7 Bars)30 PSIG(2.0 Bars))70 PSIG(4.8 Bars)60 PSIG(4.1 Bars)70 PSIG(4.8 Bars))60 PSIG(4.1 Bars)5.19 MAXIMUM OPERATING PRESSURE (MOP) OVERRIDE(HEAT AND DEFROST ONLY)The <strong>micro</strong>processor monitors the suction pressure of the refrigeration system and controls the unloaders to maintain aMaximum Operating Pressure (MOP). The CSMV is always at 100% open in heat and defrost modes. A CompressorSuction Pressure (CSP) transducer is used to provide this information to the <strong>micro</strong>processor. This MOP is calculatedbased on suction pressure, ambient air temperature, and mode of operation. From this the <strong>micro</strong>processor will be ableto determine the system load. The system load will correspond to a maximum horse power, discharge pressure andcoolant temperature which the unit can operate <strong>with</strong>in. By overriding temperature control and unloading cylinderbanks on the compressor, these conditions can be maintained at the appropriate levels.When the compressor is fully loaded it is operating on six cylinders. When the front unloader UL1 is UNLOADED(energized), the unit operates on four cylinders. When UL1 and the rear unloader UL2 are UNLOADED (energized),the unit operates on two cylinders. The front unloader, UL1, always unloads before the rear unloader, UL2.5--1962-10683
5.20 SUCTION PRESSURE OPERATION5.20.1 Directions For Reading the Chart Belowa. At ambient temperatures of 90_F (32.2_C) or below:When the system is operating in high speed and the suction pressure is greater than 63 PSIG (4.3 Bars), bothunloaders are unloaded. As the suction pressure drops below 63 PSIG (4.3 Bars), the UL2 unloader is loaded. If thesuction pressure drops below 32 PSIG (2.2 Bars), the UL1 unloader is loaded.When the system is operating in low speed and the suction pressure is greater than 65 PSIG (4.4 Bars), bothunloaders are unloaded. As the suction pressure drops below 64 PSIG (4.4 Bars), the UL2 unloader is loaded. If thesuction pressure drops below 35 PSIG (2.4 Bars), the UL1 unloader is loaded.b. At ambient temperatures of 90_F (32.2_C) or higher:At ambient temperatures of 90_F (32.2_C) or higher the unloading suction pressure settings relative to ambienttemperatures follow a descending straight line. (Refer to following chart)REFRIGERATION SYSTEM SUCTION PRESSURES FOR LOADING AND UNLOADINGPSIG706560LOW SPEED (UL2)SUCTIONPRESSURE55504540HIGHSPEED(UL2)LOW SPEED (UL1)UL1 = FRONT UNLOADERUL2 = REAR UNLOADERABOVE THE LINE = UNLOADEDBELOW THE LINE = LOADED35302520HIGHSPEED(UL1)1580.00 90.00 100.00 110.00 120.00 130.00 °FAMBIENT TEMPERATURE62-10683 5--20
SECTION 6TECHNICIAN INTERFACE1PARAGRAPH NUMBERPage6.1 PC MODE/DOWNLOAD PORT .................................................. 6--16.2 MICROPROCESSOR CONFIGURATION AND TECHNICIAN TEST MODES ......... 6--26.2.1 Configuration Mode ......................................................... 6--36.2.2 Component Test Mode ...................................................... 6--126.2.3 Service Mode .............................................................. 6--136.3 PC SUPPORT SOFTWARE ..................................................... 6--146.3.1 ReeferManager And Reports .................................................... 6--146.4 DOWNLOADING DATA WITH THE PC CARD ..................................... 6--166.5 INSTALLING NEW SOFTWARE ................................................. 6--176.5.1 Software Version Numbers .................................................. 6--176.5.2 Using The Program PC Card ................................................ 6--186.5.3 Using ReeferManager to Install Software ...................................... 6--196.5.4 Troubleshooting Software Loading Problems ................................... 6--196.6 RE-SETTING PM (PREVENTATIVE MAINTENANCE) HOURMETERS ............... 6--206.7 ADVANCE MICROPROCESSOR REPLACEMENT & CONFIGURATION SETUP ...... 6--226.7.1 Microprocessor Replacement ................................................ 6--236.7.2 Microprocessor Setup ....................................................... 6--246.7.3 Configurations Via Keypad .................................................. 6--256.7.4 Functional Parameters via Keypad ........................................... 6--256.7.5 DataRecorder Via ReeferManager PC Program ................................ 6--256.7.6 Engine And Switch-on Hourmeters Via ReeferManager PC Program .............. 6--266.7.7 Configuration/IntelliSet PC Card .............................................. 6--266.7.8 Microprocessor Final Checkout .............................................. 6--266.7.9 Replacing Display Bezel Assembly ........................................... 6--276
SECTION 6TECHNICIAN INTERFACE6.1 PC MODE/DOWNLOAD PORTPC mode allows the user to access and download datausing a computer when the unit is not running and<strong>with</strong>out starting the eight-hour DataRecorder timer.Connecting a download cable(P/N 22-01737-00 (6’ Long) or 22-01737-04 (20’ Long)to the download port <strong>with</strong> the START/RUN-OFF switchin the OFF position allows the Advance Microprocessorto power up and communicate <strong>with</strong> the computer.All functions available from the keypad may be viewedor changed using the ReeferManager and a personalcomputer (PC) connected to the download port. Usingthe PC will provide additional programming andconfiguring capabilities that will not be available throughthe keypad.The DataRecorder may also be configured anddownloaded through the download port using theReeferManager program.6--162-10683
PCmodecanbeusedfor:• Changing set point for the next load• Changing any of the functional parameters forthe next load• Reading Engine hourmeters• Reading Maintenance hourmeters• Resetting Maintenance hourmeters• Viewing the Active and Inactive alarm lists.• Entering a Trip Start• Keeping the <strong>micro</strong>processor powered up afterturning the START/RUN-OFF switch to theOFF position• Demonstrating the operation of the<strong>micro</strong>processor <strong>with</strong>out the engine running• Use any of the PC cards (Download,Program, Configuration or Option)C BD AEDownload PortJumper P/N 22-50180-00InsulatedJumperWHITE WIRETo better utilize PC mode, a PC Mode jumper (CTD P/N22-50180-01) is available. This jumper looks similar tothe Configuration jumper (refer to Section 6.2), but has aGREEN WIRE on it. With the unit off, locate thedownload port. Remove the protective plug to gainaccess to the wire terminals. Plug in jumper or connectan insulated jumper wire to terminals C and E.If the START/RUN-OFF switch is placed in theSTART/RUN position, the <strong>micro</strong>processor will go tonormal operation. If the unit is shut down <strong>with</strong> the PCcable or jumper still in place, the engine will shut downand the <strong>micro</strong>processor will remain powered up.WARNINGDo not place the START/RUN-OFF Switch inthe START/RUN position or the unit willstart.6.2 MICROPROCESSOR CONFIGURATION ANDTECHNICIAN TEST MODES(REMOVE JUMPER MODE)c. Place the START/RUN-OFF switch in the OFF position.d. With the unit off, locate the download port. Removetheprotectiveplugtogainaccesstothewireterminals.Plug in jumper P/N 22-50180-00 or connect aninsulated jumper wire between plug terminals A andB.WARNINGDo Not Allow Jumper Wire To Touch AnyGround.e. Place the START/RUN-OFF switch in theSTART/RUN position. The ALARM LED will come onand the set point will appear, but the refrigerated compartmenttemperature will not and“REMOVE JUMPER” will appear in theMessageCenter for 10 seconds. Remove the jumperat this time. ↑↓TO SCROLL, THEN = TO SELECTwill appear in the MessageCenter for 10 seconds oruntil either the UP or DOWN ARROW keys ispressed.f. Press the UP ARROW key to scroll through the MainMenu beginning at the top.Press the DOWN ARROW key to scroll through theMain Menu beginning at the bottom.g. Select the mode you wish to access and press the =key. See the following pages for information on thesetest modes:• Configuration Mode• Component Test Mode• Service Mode62-10683 6--2
6.2.1 Configuration ModeNOTETo enter Configuration mode, refer to Section 6.2.a. ↑↓TO SCROLL, THEN = TO SELECT will appear inthe MessageCenter.b. Press the UP ARROW key to scroll through the Configurationlist beginning at the top.Press the DOWN ARROW key to scroll through theConfiguration list beginning at the bottom.c. To read through the Configuration list, continue topress either the UP or DOWN ARROW keys. The listis circular, meaning that once the end is reached, it isrepeated from the beginning.d. To change one of the configurations, bring the Configurationto change into the MessageCenter and press=. ↑↓TO SCROLL, THEN = TO SAVE will show in theMessageCenter for 10 seconds Then the selectedConfiguration will flash, showing the current value.Press the UP or DOWN ARROW key to scroll throughthe list of available selections for this Configuration.e. Once a new value is showing in the MessageCenter,press the = key to save the selection. TheMessageCenter will stop flashing. The new value isnow in memory.f. Press the UP ARROW key to continue to scrollthrough the Configuration list.CONFIGURATION SELECTIONS DESCRIPTIONUNIT MODEL FAMILYULTRA / ULTIMAVECTORUnits models are grouped into families. The correctfamily must be identified for the correct model numberto be displayed in the next selection.UNIT MODEL NUMBER*This list contains many selections.Only those covered by this manualare shown here.Pick one of these models from the X<strong>series</strong> model family.NDL93N*ABONDL93P*ABONDL93R*ABONDL93S*ABONDL93S*ABANDL93U*ABANDL93V*ABOThe correct model number must be selected forproper operation and control. This is also part of theUnit Data where user can read the information.Configuration mode is the only way user can writeinformation.UNIT SERIAL NUMBER The unit S/N may be entered. This may be up to 11characters long. Numbers, letters, and a space areavailable by scrolling through the available list.TRAILERID#The ID number may be entered. This may be up to10 characters long. Numbers, letters, and a spaceare available by scrolling through the available list.Hours from existing <strong>micro</strong>processor can be installedinto replacement <strong>micro</strong>.SET NEW HOURSNOTE: Changes to these values may be made forup to 60 minutes based on the real time clock.This configuration only appears in the list until anhourmeter reaches 25 hours.GLOW TIME(LONG/SHORT)NOTE: Refer to Section 4.2.1 for glow time table.LONG = Longer glow times may be used for unitsin colder ambient conditions.SHORT= Shorter glow times are used as the factorysetting for all engines.6--362-10683
CONFIGURATION SELECTIONS DESCRIPTIONOUT OF RANGE SHUTDOWN:PARAMETERS LOCKOUT:RPM ALARM SHUTDOWN:LOW PRESSURE SHUTDOWN:LP SHUTDOWN DELAY:HIGH SUCT PRESS SHUTDOWNREFRIGERATION SYSSHUTDOWNCOMPRESSOR ALARMSHUTDOWN(Special activation required)YES/NOYES/NOYES/NOYES/NO120SECS(0 - 255 seconds)YES/NOYES/NOYES/NOCURRENT FOR S/S SHUTOFF 6.5A1A TO 10A(in .5A increments)VOLTAGE FOR S/S RESTART 12.2A12.0 TO 12.8 VDC(in .5A increments)ALTERNATOR CHECK SHUT-DOWN:ENGINE OIL LEVEL SWITCH:YES/NOYES/NOYES = When the compartment temperature hasbeen out-of-range for 30 minutes, the alarm lightwill come on, and the unit will shut down.NO = When the compartment temperature hasbeen out-of-range for 15 minutes, the alarm lightwill come on and the unit will continue to run.YES = All Functional Parameters in the function listarelockedinplace.NO = All Functional Parameters in the function listcan be changed using the keypad, unless individuallylocked out by ReeferManager.YES = If Alarm 39 (Check Engine RPM) is active,turn the alarm light on and shut the engine off.NO = If Alarm 39 (Check Engine RPM) is active,turn the alarm light on and allow the unit to continueto run.YES = When low refrigerant pressure is sensed inthe system (alarm 18 is active), turn the alarm lighton and shut the unit down (after the time delay inthe following selection).NO = When low refrigerant pressure is sensed inthe system (Alarm 18 is active), turn the alarm lighton and the unit will continue to run.After the Low Pressure signal is received, how longshall the unit continue to run before it is shut down.YES = If the unit is running and the suction pressurerises to 98 psig (6.67 Bars) or higher for 10minutes (Alarm 27 is active), the unit will shut down.NO = High suction pressure will not shut down theunit.YES = Alarm 28 is Alarm and Shut Down.NO = Alarm 28 is Alarm only.YES = The unit will shutdown and not restart whenAlarms 13, 17, 18, 27, 28, 29 or 56 occur threetimes <strong>with</strong>in two hours.NO = Normal shutdown rules for above alarms.Charging amps must be lower than this for startstopoff cycle.This value will be used during Start/Stop-Off cycles.If battery voltage falls below this value, the unit willrestart.YES = When the alternator is not charging (Alarm51 is active), turn the alarm light on and shut theunit down.NO = When the alternator is not charging (Alarm 51is active), turn the alarm light on and the unit willcontinue to run.YES = This unit has a low engine oil level switchinstalled.NO = This unit does not have a low engine oil levelswitch installed.62-10683 6--4
CONFIGURATION SELECTIONS DESCRIPTIONENGINE OIL LEVEL SHUTDOWN YES / NO YES = When the A2 -- “LOW ENGINE OIL LEVEL”alarm is activated the alarm light will illuminate andthe unit will shutdown.NO = When the A2 -- “LOW ENGINE OIL LEVEL”alarm is activated the alarm light will illuminate andthe unit will continue to run.ENGINE OIL PRESS SHUTDOWNHIGH ENGINE TEMP SHUTDOWNYES / NOYES / NOYES = When the A11 -- “LOW ENGINE OIL PRES-SURE“ alarm has been activated three times in thelast two hours of engine operation the A21 --“TECHNICIAN RESET REQUIRED“ alarm will beactivated.NO = A21 will not be activated.YES = When the A12 -- “HIGH COOLANT TEM-PERATURE” alarm has been activated three timesin the last two hours of engine operation the A21 --TECHNICIAN RESET REQUIRED alarm will beactivated.NO = A21 will not be activated.Change 09/116--4A62-10689
CONFIGURATION SELECTIONS DESCRIPTIONLOW COOLANT LEVELFUEL TANKFUEL TANK SIZEYES/NONO DEVICESWITCHINSTALLED0 TO 100% SEN-SOROFF30 GALLONS50 GALLONS75 GALLONS100 GALLONS120 GALLONSYES = A Low Coolant Level sensor is installed inthe coolant system.NO = There is no Low Coolant Level sensorinstalled in the coolant system.NO DEVICE = There is no Low Fuel Level sensorinstalled in the fuel tank.SWITCH INSTALLED = A Low Fuel Level switch isinstalled in the fuel tank.0 to 100% SENSOR = A Low Fuel Level sensor isinstalled in the fuel tank. The fuel level may be readin the unit data list.OFF = No Low Fuel Level Switch or 0 to 100%Sensor is installed in the tank; ORA Low Fuel Level switch or a 0 to 100% sensor isinstalled in the tank, but the unit will not shutdowndue to a Low Fuel Level alarm.DISPLAY TOTAL ENGINE HRDISPLAYTOTALSWITCHONHRDIESEL RESET VALUE(Refer to Section 2.7 for oil changeintervals)SWITCH ON RESET VALUENO/YESNO/YESOFF50 TO 30,000 HRSOFF50 TO 30,000 HRS30 - 120 GALLONS = When a Low Fuel Levelswitch is installed and the LOW FUELLEVEL WARNING (Alarm 1) is on, the unitwill shutdown (Alarm 19) after a time delay(Refer to chart below)30 gallon -- 30 min50 gallon -- 60 min75 gallon -- 90 min100 gallon -- 120 min120 gallon -- 150 minORIf a 0 to 100% sensor is installed, the low fuel levelWARNING (Alarm 1) will come on when the levelreaches 15% or less and the unit will shutdown(Alarm 19) when the level reaches 10%.YES = This hourmeter will be displayed during thestartup messaging sequence and will be in hourmetermenu.NO = This hourmeter will not be displayed duringthe startup messaging sequence and will be shown<strong>with</strong> the other meters and counters lists.YES = This hourmeter will be displayed during thestartup messaging sequence and will be in hourmetermenu.NO = This hourmeter will not be displayed duringthe startup messaging sequence and will be shown<strong>with</strong> the other meters and counters lists.OFF = The Engine Maintenance hourmeter isturned off.50 – 30,000 hrs = The value selected here will bethe number of hours between engine service intervals.OFF = The Switch-On Maintenance hourmeter isturned off.50 – 30,000 hrs = The value selected here will bethe number of hours between Switch-On serviceintervals.6--562-10683
•PM (1-5)CONFIGURATION SELECTIONS DESCRIPTION•PM (1-5) RESET INTERVAL(This is not displayed unless the PMmeter is assigned to a counter in theprevious configuration.)OFFENGINE HOURSSWITCH ONHOURSCLUTCH CYCLESSTART CYCLESHIGH SPEEDHOURSMAINTENANCEDAYSOFFENGINE HOURSSWITCH ONHOURSCLUTCH CYCLES1,000 TO 90,000CYCLES in 1,000cycle incrementsSTART CYCLES1,000 TO 90,000CYCLES in 1,000cycle incrementsHIGH SPEEDHOURS50 – 30000 HRSin 50 hr incrementsMAINTENANCEDAYS0 to 99,999 DAYSin 10 day incrementsOFF = The PM (1-5) Maintenance hourmeter(s) isturned off.ENGINE HOURS = PM meter will count enginehours until the next service interval.SWITCH ON HOURS = PM meter will count SwitchOn Hours until the next service interval.CLUTCH CYCLES = PM meter will count howmany times the fan clutch cycled on/off until thenext service interval.START CYCLES = PM meter will count how manytimes the engine has started until the next serviceinterval.HIGH SPEED HOURS = PM meter will count howmany hours the unit operated in high speed until thenext service interval.MAINTENANCE DAYS = PM meter will count howmany days until the next service interval.OFF = The PM (1-5) Maintenance hourmeter(s) isturned off.ENGINE HOURS = PM Meter will count enginehours until the next service interval.SWITCH ON HOURS = PM Meter will count SwitchOn Hours until the next service interval.CLUTCH CYCLES = PM Meter is connected to theclutch cycle meter. This meter counts every timethe fan clutch engages. The reset interval will be(1,000 to 90,000 cycles).START CYCLES = PM Meter is connected to theclutch cycle meter. This meter counts every timethe engine starter engages. The reset interval willbe (1,000 to 90,000 cycles).HIGH SPEED HOURS = PM Meter is connected tothe high engine speed hourmeter, which countsonly high speed engine hours. The reset interval willbe (50 – 30,000 hrs).MAINTENANCE DAYS = PM (1-5) is connected tothe real time clock, which counts only days. Thereset interval will be (10 – 99,999 days).62-10683 6--6
CONFIGURATION SELECTIONS DESCRIPTIONYESPRODUCTSHIELD SETUPNOTE: ProductShield is only availablewhen IntelliSet is installed.Refer to Section 5.16 for moreinformation on the following settings.SPRODUCTSHIELD ECONOSPRODUCTSHIELD ECONOMIN TEMPSPRODUCTSHIELD ECONOMAX TEMPSPRODUCTSHIELD ECONO --DELTA-T•PRODUCTSHIELD HIGH AIR•PRODUCTSHIELD HIGH AIR MIN.TEMPOFFGO TOSTART--STOPGO TOCONTINUOUSOFF-- 19°F to+119°F(--28.3°C to+48.3°C )in 0.5°F or°CincrementsDefault: 119°F(48.3°C )OFF-- 19°F to+119°F(--28.3°C to+48.3°C )in 0.5°F or°CincrementsDefault: 119°F(48.3°C )OFF+3.6°F to+27°F(+2°C to15°C) (in0.5° incrementsOFFONOFF-- 19°F to+119°F(--28.3°C to+48.3°C )in 0.5°F or°CincrementsDefault: 119°F(48.3°C )This message will only appear if ProductShield isinstalled. The information set in the following configurationscan be read in the Unit Data list.OFF = ProductShield Econo is OFFGO TO START/STOP = Allows unit to be set forand operate in Continuous Run until ambient temperaturefalls <strong>with</strong>in a user-defined range whenunit will go to Start-Stop. This allows fuel savingswhile offering Continuous Run operation protectionwhen ambient is outside range. Unit will return toContinuous Run when ambient goes beyond range.GO TO CONTINUOUS = Allows unit to be set forand operate in Start--Stop until ambient temperaturefalls outside a user--defined range when unitwill go to Continuous Run. This provides continuousair flow and good product protection for extremeambient temperatures. Unit will return to Start--Stopwhen ambient comes back inside range.The minimum range allowed for this selection is10°F (5.5°C).This means that the MIN temperaturewill never be closer to the MAX temperature than10°OFF = There is no lower limit for this parameter.Select the lower limit of the ambient range desiredfor this parameter. Refer to Section 5.16 for moreinformation on Econo Min. Temp.OFF = There is no upper limit for this parameter.Select the upper limit of the ambient range desiredfor this parameter. Refer to Section 5.16 for moreinformation on Econo Max. Temp.OFF = Delta--T is not used for determining the activation/de--activationof ProductShield Econo: GoTo Start/Stop modeSelect the desired Delta--T value for activation ofProductShield Econo: Go To Start/Stop mode.OFF = The unit will operate normally in high andlow speeds.ON = The unit will operate in high speed when theambient air temperature falls OUTSIDE the minimum/ maximum temperature range (selected settingsfor HIGH AIR MIN TEMP, HIGH AIR MAXTEMP, AND HIGH AIR DELTA--T -- see below)OFF = There is no lower limit for this parameter.Select the lower limit of the ambient range desiredfor this parameter. Refer to Section 5.16 for moreinformation on High Air Min. Temp.6--762-10683
CONFIGURATION SELECTIONS DESCRIPTION•PRODUCTSHIELD HIGH AIRMAX. TEMPSPRODUCTSHIELD HIGH AIRDELTA-TSPRODUCTSHIELD WINTER - xx°RANGE (1-2) LOCK•RANGE (1-2) MINIMUM TEMP•RANGE (1-2) MAXIMUM TEMPMIN SETPOINTMAX SETPOINTAUTO FRESH AIR EXCHANGEOFF-- 19°F to+119°F(--28.3°C to+48.3°C )in 0.5°F or°CincrementsDefault: 119°F(48.3°C )OFF+3.6° Fto+27°F(+2°C to15°C) (in0.5° incrementsOFF-20°F to+32°F(-28.9°C to0°C) (in0.5° Cor°F incrementsOFFSTART-STOPCONTINUOUS-22°F TO+89.6°F(-30°C to+32°C)(in 0.1° increments)〈-22°F TO+89.6°F(-30°C to+32°C)(in 0.1° increments)-22°F TO +89.6°F(-30°C to+32°C)(in 0.1° increments)-22°F TO+89.6°F(-30°C to+32°C)(in 0.1° increments)NOTINSTALLED/STANDARDOFF = There is no upper limit for this parameter.Select the upper limit of the ambient range desiredfor this parameter. Refer to Section 5.16 for moreinformation on High Air Max. Temp.OFF = Delta--T is not used for determining the activation/de--activationof High Air Delta--TSelect the desired Delta-T value for activation ofProductShield High AirOFF = ProductShield Winter is disabled.Select the desired ambient temperature belowwhich ProductShield Winter will operate (forcedContinuous Run operation.)OFF = If both Range 1 & Range 2 locks are off,Start-Stop or Continuous Run may be selected.If either Range 1 or Range 2 is not OFF, the unitwill operate in the selected mode whenever the setpoint is <strong>with</strong>in that range.START-STOP = The unit will always operate inStart-Stop whenever the set point is between theminimum & maximum temperatures for that range(see below).CONTINUOUS = The unit will always operate inContinuous Run whenever the set point is betweenthe minimum & maximum temperatures for thatrange (see below).Select the lowest temperature desired for eitherRange 1 and/or Range 2.Select the highest temperature desired for eitherRange 1 and/or Range 2.Select the lowest temperature that will ever be usedas set point. Set point can not be set lower than thisvalue.Select the highest temperature that will ever beused as set point. Set point can not be set higherthan this value.Indicates if the Auto Fresh Air Exchange isinstalled. If AutoFresh Air hardware is not installed,this configuration needs to be set to NOTINSTALLED to prevent alarms from occurring.62-10683 6--8
CONFIGURATION SELECTIONS DESCRIPTIONAUTO FRESH AIR DELAYS/S PARAMETERSREMOTE TEMP SENSOR (1-3)(Optional)NOTE: Sensor(s) on DataRecordermust also be set.DOOR SWITCH:(Optional)NOTE: Door Switch must be set tobe recorded on DataRecorder.DOOR SWITCH UNITSHUTDOWN:(Optional)SETPOINT0-48 HOURS IN1HOURINCREMENTSTOGETHERSEPARATEON/OFFSWITCH NOTINSTALLEDOPEN SWITCHOPENOPEN SWITCHCLOSEDALARM ONLYUNIT SHUTDOWNLOW ENGINESPEEDDATA RECORDERONLYSETPOINT -- Once the compartment temperaturehas reached set point 1.5°F (0.8°C), the Auto-Fresh Air Exchange system will start to operatebased on the parameters selected in the FunctionalParameter list.0 to 48 Hours -- After this length of time, AutoFreshAir Exchange will begin if the unit is no longer runningin pull down mode (Refer to Section 5.3), eventhough the compartment temperature has neverreached set point.TOGETHER = When the Minimum Run Time, MinimumOff Time, Maximum Off Time, and OverrideTemperatures are set in the Functional ParameterList, the same values will be used for both Frozenand Perishable set points.SEPARATE = When the Minimum Run Time, MinimumOff Time, Maximum Off Time, and OverrideTemperatures are set in the Functional ParameterList, different values may be entered for Perishableand Frozen set points.ON=A remote sensor has been added to the unitand connected into the wire harness at RemoteTemp Sensor (1-3) plug. This enables RemoteTemp Sensor ( 1-3) to be read through the DataList.OFF=There is no Remote Sensor (1-3) in this unit.SWITCH NOT INSTALLED = There is no doorswitch in this compartment.DOOR OPEN SWITCH OPEN = A door switch hasbeen installed on one of the refrigerated compartmentdoors. The switch contacts will be OPENwhenever the door is OPEN.DOOR OPEN SWITCH CLOSED = A door switchhas been installed on one of the refrigeratedcompartment doors. The switch contacts will beCLOSED whenever the door is OPEN.ALARM ONLY = When Door switch indicates thatthe door is open, a warning alarm will be displayedin the MessageCenter.UNIT SHUTDOWN = When Door switch indicatesthat the door is open, a warning alarm will be displayedin the MessageCenter and the unit will shutdown.LOW ENGINE SPEED = When Door switch indicatesthat the door is open, the engine will beforced to low speed.6--962-10683
CONFIGURATION SELECTIONS DESCRIPTIONREMOTE SWITCH(1-2)(Optional)NOTE: Sensor(s) on DataRecordermust also be set.REMOTE SWITCH (1-2)(Optional)NOT INSTALLEDDOOR OPENSWITCH OPENDOOR OPENSWITCH CLOSEDSWITCH ONCONTACTS OPENSWITCH ON CON-TACTS CLOSE(D)ALARM ONLYUNIT SHUTDOWNLOW ENGINESPEEDDATA RECORDERONLYNOT INSTALLED = This remote switch is notinstalled in this unit.DOOR OPEN SWITCH OPEN = The Remoteswitch will be used as a refrigerated compartmentdoor switch. The switch contacts will be OPENwhenever the door is OPEN.DOOR OPEN SWITCH CLOSED = The Remoteswitch will be used as a refrigerated compartmentdoor switch. The switch contacts will be CLOSEDwhenever the door is OPEN.SWITCH ON CONTACTS OPEN = The Remoteswitch will be used as a remote control switch. Theswitch contacts will be OPEN whenever the switchis in the ON position.SWITCH ON CONTACTS CLOSE(D) = The Remoteswitch will be used as a remote control switch.The switch contacts will be CLOSED whenever theswitch is in the ON position.ALARM ONLY = When Door switch indicates thatthe door is open, a warning alarm will be displayedin the MessageCenter.UNIT SHUTDOWN = When Door switch indicatesthat the door is open, a warning alarm will be displayedin the MessageCenter and the unit will shutdown.LOW ENGINE SPEED = When Door switch indicatesthat the door is open, the engine will beforced to low speed.DATA RECORDER ONLY = The data recorder willrecord every time the door is opened or closed.There will be no alarms or messages displayed inthe MessageCenter.SET TIMEThe following will allow the Real Time Clock in theDataRecorder to be set. The time set here can beread in the unit data list.• MONTH 1-12 Select the correct month of the year.• DAY 1-31 Select the correct day of the month.• YEAR 1998 - 2037 Select the correct year.• HOURS 0-23 Select the correct hour (0-11 is AM/12-23 is PM)• MINUTES 0-59 Select the correct minute.LIGHT BAR 8/2 Indicates the type of light bar installed.8 HR ADDITIONAL DATA:DECIMALYES/NOYES/NODISPLAYEDNOT DISPLAYEDYES = When the START/RUN-OFF switch is turnedOFF, the data recorder will continue to recordsensor data for an additional eight hours.YES = When the START/RUN-OFF switch is turnedOFF, the data recorder will continue to recordsensor data for an additional eight hours.NO = When the START/RUN-OFF switch is turnedOFF, the data recorder will stop recording all data.DISPLAYED = Set point will be shown <strong>with</strong> a decimaland temperatures may be selected to a tenth ofa degree.NOT DISPLAYED = Set point will not be shown<strong>with</strong> a decimal. All other temperatures will still bedisplayed <strong>with</strong> a decimal.62-10683 6--10
CONFIGURATION SELECTIONS DESCRIPTIONHIGH SPEED DELAYSATELLITE COMM(Optional)(This configuration is only visible inthe <strong>micro</strong>processor configuration listwhen the DataTrak option isinstalled in the <strong>micro</strong>processor. It isalways visible in the configurationlist in ReeferManager, although it isnon-functional until the DataTrak optionis installed.)UNIT OPERATION:*SeeNoteonFollowingPage• VEHICLE ID:This is only available when Unit Operation:“Rail” is selected in aboveconfiguration.•RAIL SHUTDOWN OVERRIDE:This is only available when Unit Operation:“Rail” is selected in aboveconfiguration.SeeNoteonFollowingPageSRAIL OVERRIDE RESTART:This is only available when Unit Operation:Rail is selected in aboveconfiguration.ENABLE INTELLISET AT = KEYCONFIGS COMPLETE = TO EXIT1MIN0TO10MINUTESIN 0.5 MINUTE IN-CREMENTSQUALCOMMOTHERSTANDARDRAILASSETTRAILERCARNOYES1-203NOYESSelect the length of time unit remains in low speedbefore transitioning to high speed.QUALCOMM = The <strong>micro</strong>processor is set to sendQualcomm communication messages.OTHER = The <strong>micro</strong>processor is set to send communicationmessages to communication telematicscompanies other than Qualcomm.STANDARD = The <strong>micro</strong>processor is set to controlover--the--road trailer refrigeration operation.RAIL = The <strong>micro</strong>processor is set to control Railrefrigeration operation.If Rail is selected for Unit Operation, this indicatestype of vehicle in use. This selection will be used asthe label text when displaying Trailer/Asset/Car IDfor modification.NO = When Alarm 30 or Alarm 31 occur, the unitwill not automatically restart until the Alarms arecleared.YES = When Alarm 30 or Alarm 31 occur, the unitwill automatically restart after 4 hours.If Rail is selected for Unit Operation and the RailShutdown Override is in effect this indicates thenumber of restarts allowed.NO = Pressing the SELECT key will allow the userto access the IntelliSet Menu.YES = Pressing the = key will allow the user to accessthe IntelliSet Menu.Press = to return to the Configuration Main MenuNOTEThe following changes occur in the unit’s performancewhen Rail Mode is selected:• The “Trailer ID” can now be changed in orderto more accurately define the vehicle carryingthe unit. The choices ae: “ASSET”, “CAR”, or“TRAILER.”• Rail Shutdown Override can be selected.When the Rail Shutdown Override configurationis set to NO the unit will remain off until allalarm(s) are manually reset in cases where:the unit has unsuccessfully attempted tostart 3 times ORthe unit has shut down on an alarm 3 times.When the Rail Shutdown Override configurationis set to YES, the unit will restart and attemptto continue to run when:the unit has shut down 3 times OR the unithas failed to start after 3 start attempts ANDeither Alarm 30 or Alarm 31 is active ANDthe unit has been off for 4 hours• Rail Override Restart is the number of timesthe unit can clear Alarms 30 or 31 after theunit has been off for the 4 hour off time. Thefactory setting is 3. Setting this number toohigh may result in a discharged or damagedbattery if the unit never actually starts or failsto run long enough to charge the battery priorto shutting down again.6--1162-10683
6.2.2 Component Test ModeNOTETo enter Component Test mode refer to Section6.2.Component Test Mode allows the Technician toenergize individual circuits for five minutes at a timewhile the unit isn’t running. The engine cannot startwhen the <strong>micro</strong>processor is in Component Test Mode.From the Main Menu, select Component Test Mode andpress the =. key. Use the UP or Down arrow keys toscroll through the list when↑↓TO SCROLL, THEN = TO SELECT appears in theMessageCenter. Press the = key to select thecomponent desired for testing. For example, if the FrontUnloader (UL1) Light is selected, the UL1 coil will beenergized, and the MessageCenter will display“UL1 OFF IN 5 MINUTES”. The minutes will count downto 0 at which time the UL1 circuit will be de-energized,and the MessageCenter will display the last componenttested.The test may be stopped at any time by placing theSTART/RUN-OFF switch in the OFF position or bypressing and holding the = key for 6 seconds. Shouldyou need more than 5 minutes, the timer may be reset to5 minutes anytime during the test by pressing the = key.The timer may only be reset once during each test. Afterthe 5 minute timer expires, the MessageCenter willreturn to the Component Test Mode Menu and displaythe last component tested.To retest the same component and circuit again, pressthe = key. To select another component to test, press theUP or DOWN Arrow key to view other components, andpress the = key to select the desired component. To goto Service Mode or Configuration Mode, select the MainMenu and press the = key.The only keys that operate during Component TestMode are the ALARM and SELECT keys. The alarm listis available for viewing any active or inactive alarms.The SELECT key will only allow access to the AmpCurrent Draw for the item in the Data List.When Component Test mode is selected, the MainDisplay will show OFF.The following components may be tested during theComponent Test mode:Component/Menu List MessageCenter FET LED Board LEDCool Light * COOL LIGHT OFF IN X MINS 17Heat Light * HEAT LIGHT OFF IN X MINS 8Defrost Light * DEFROST LIGHT OFF IN X MINS 16Auto Restart Light * ARL LIGHT OFF IN X MINS 7Out Of Range Light * ORL LIGHT OFF IN X MINS 15Fault Light * FAULT LIGHT OFF IN X MINS. 14Unloader 1 (front) UL1 OFF IN X MINS 23Unloader 2 (rear) UL2 OFF IN X MINS 22SV1 SV1 OFF IN X MINS 10SV2 SV2 OFF IN X MINS 21SV4 SV4 OFF IN X MINS 9Clutch Relay CLHR OFF IN X MINS 29Speed Relay SR OFF IN X MINS 27Run Relay RR OFF IN X MINS 28Buzzer BUZZER OFF IN X MINS 18Glow Plug Relay GPR OFF IN X MINS 30AutoFresh Air Exchange Relay AFAR OFF IN X MINS 12Main Menu (To access Component Testmode or Configuration mode)* These are for the Light Bar only. The FET LED will illuminate, however the corresponding indicator LEDon the Display will not illuminate.NOTEElectronic speed control modules can not be tested through the <strong>micro</strong>processor. Refer to Section 10.4.1 forTroubleshooting guide for units <strong>with</strong> Electronic Speed Control Engines.62-10683 6--12
6.2.3 Service ModeCAUTIONService Mode MUST be used whenever removingrefrigerant charge, refrigerant leakchecking or evacuating.NOTEThe START/RUN--OFF switch MUST be in theSTART/RUN position to keep the unit in ServiceMode. If the switch is placed in the OFF position,the unit exits Service Mode and closes theCSMV to 0% open and de--energizes UL1.a. Scroll through the Main Menu then press the = keywhen SERVICE MODE appears in theMessageCenter.b. “ENTERING SERVICE MODE” will appear in theMessageCenter and OFF will be displayed in themain display. The CSMV will be set to 100% openand the Front Unloader (UL1) will be energized.c. Once the CSMV is 100% open,“RECOVER/LEAK CHK/EVAC MODE” isdisplayed in the MessageCenter.d. Refrigerant recovery, leak checking, or evacuationmay be performed on the unit at this time. Refer toService Procedures in Section NO TAG.e. When the refrigeration system is evacuated thesystem pressure will go into a deep vacuum. Whilethis is occurring, the MessageCenter will change to“EVAC/CHARGE MODE.” The position of theCSMV and UL1 does not change in this mode.f. To prevent refrigerant migration to the compressorduring charging, if all pressure transducers (CSPand CDP) drop below--9.8 psig or –20 inHg (0.68bar), and then 2 of the 3 pressure transducers riseabove 5 psig (0.34 bar), the <strong>micro</strong>processor willclose the CSMV to 0% open and de-energize UL1.When the valves are closed,“CHARGE MODE – HOLD = TO EXIT” is displayedin the MessageCenter. The = key must be pressedand held for six seconds to exit Service mode or theSTART/RUN-OFF switch can be be placed in theOFF position and then back in the START/RUNposition.g. If the unit shifts to Charge Mode and“CHARGE MODE – HOLD = TO EXIT” is displayedin the MessageCenter while you are still recoveringrefrigerant, leak testing or evacuating therefrigeration system, DO NOT CONTINUE. ExitService Mode and then re-enter, making sure that“RECOVER/LEAK CHK/EVAC MODE” isdisplayed in the MessageCenter before performingany of these services.h. To exit Service Mode at any time, press and holdthe = key for 5 seconds.“EXITING SERVICE MODE” will then appear inthe MessageCenter. When exiting Service Modethe <strong>micro</strong>processor closes the CSMV to 0% openand de-energizes UL1.6--1362-10683
6.3 PC SUPPORT SOFTWARE6.3.1 ReeferManager And Reportsa. ReeferManager enables the user to do thefollowing:• Monitor in real--time via the download port (anRS--232 connection) the current status of the<strong>micro</strong>processor inputs, outputs, refrigeration,electrical, engine and temperature sensorsand alarms• Record sensor data to a file for diagnosticpurposes• Download <strong>micro</strong>processor and DataRecorderdata via serial port communications• Display, edit and send unit model number,serial number and trailer ID to the<strong>micro</strong>processor• Display, edit and send functional parametersand configuration settings to the<strong>micro</strong>processor and data recorder• Transfer hour meter values to replacement<strong>micro</strong>processors• Initiate Pretrip and Defrost operations• Support Download, Configuration andProgram PC Card operations• Provide a security log on system controlled bya System Administratorb. The Reports Program enables the user to do thefollowing:• Read .DCX download files from the Advance<strong>micro</strong>processor• Create various customized reports thatinclude set point, sensors, and events• Create various customized graphical reports• Print numerical, graphical, and event reports• View and print refrigeration system historicalsettings and changes• Filter download data by date range anddesired sensors and events• Search for a sensor or event of interest• Synchronize multiple graphical and numericalwindows to better understand historicaloperation• PC Setup enables the user to select how todisplay various parameters for use in thegraph and text window.• Easily adjust x and y axis and color schemeto accommodate various data• Export data to a spreadsheet friendly formatsuch as MS Excel.NOTEThe ReeferManager program does not supportUSB port serial connections. In the event that anotebook PC does not have a DB--9 serial portconnector, an RS_232 serial port type IIPCMCIA card adaptor may be used to adaptthe notebook PC to the Carrier download cable.For desktop PCs, a PCI bus RS--232 serial cardadaptor must be used to accomplish this task.c. Uninstall earlier versions of ReeferManager AndReports as follows:All previous version of both ReeferManager andReports must be uninstalled prior to installing newerversions of these programs.NOTEThese instructions are intended to be genericand not specific to any computer. BecauseReeferManager can be installed on any computer<strong>with</strong> any operating system (excludingVista) there will be some differences <strong>with</strong>inthose operating systems from one version toanother. The wording may not be exactly thesame; however, the procedure below will workfor all operating systems mentioned.• Click the Start button located at the lower leftcorner of your computer screen.• Move the mouse pointer up to Settings. Asecondary menu will slide out to the right.Move the mouse pointer over and click onControl Panel.• With the pop--up box, there is an icon or lineitem named Add / Remove Programs. Doubleclick it.• In the next pop--up box, scroll down until youfind ReeferManager and click it once tohighlight it.• Click on the Add / Remove button. A “ConfirmFile Deletion” or and InstallShield Wizard willappear. If you are certain you have selectedthe correct program, click Yes, Next or OKbuttons and follow the on--screen instructions.• When ReeferManager has been uninstalledyou will receive a confirmation pop--upmessage. Clear it.62-10683 6--14
d. Auto Install ReeferManagerNOTEIf this is the first time that ReeferManager hasbeen installed onto a particular computer, CarrierCommunications (CCN) must first be installed.If an earlier version of CCN has alreadybeen installed onto this computer AND the programcommunications between the computerand the Advance Microprocessor worked correctly,it is not necessary to uninstall and reinstallCCN. If the communications between thecomputer and the <strong>micro</strong>processor did not work,uninstall and reinstall CCN.• Close all programs and applications that arecurrently running.• Insert the ReeferManager CD--ROM into theappropriate drive (usually D:\\)• The CD--ROM will start running andautomatically start the install program.• Click the button to install ReeferManager.Follow the on--screen instructions, using thedefault settings.• Click the Finish button to close the installprogram.• Remove the CD from the drive and store forfuture use.• Reboot the computer to enable the programs.6--1562-10683
6.4 DOWNLOADING DATA WITH THE PC CARDCAUTION1. Place the <strong>micro</strong>processor in PC Mode (Refer toSection 6.1), or place the START / RUN--OFF switchin the START / RUN Position.2. Insert a Download Card into the PC card slot onthe front of the <strong>micro</strong>processor. Be certain thatthe instruction label is facing the “Caution” label.Do not force card into slot.3. The MessageCenter will show“COPYING DATA--PLEASE WAIT”. While thedata is being copied, the green PC CARDSTATUS LED will flash.4. When the copy is complete,“COPY COMPLETE, REMOVE CARD X” (“X” isthe number of empty spaces remaining on thecard) will show in the MessageCenter. The PCCard Status LED will be solid. You may thenremove the PC card. Do not remove the carduntil prompted to do so.5. When the card is removed, the MessageCenterwill return to the default message.6. If any other messages appear, refer to Section 7.1MessageCenter for an explanation of the errormessage. If there is an error, the PC CARD FAULTLED will be on until the card is removed.7. Data must be copied from the Download Card onto acomputer drive before it can be viewed.HEAT COOL DEFROST ALARM START-STOP CONTINUOUS-20 +34.5° FSETPOINTCOPYING DATA-PLEASE WAITBOX TEMPERATUREMANUALDEFROSTALARM LISTSTART-STOP/CONTINUOUSSELECT62-10683 6--16
6.5 INSTALLING NEW SOFTWARENOTEAll units should have the Controller software upgraded to 04.05.00 (04.07.00 for X2 units) or above. It is nolonger possible to load any versions of 03 software into that <strong>micro</strong>processor. Newer versions can be loaded asthey are released.6.5.1 Software Version NumbersThe first two digits of the software revision number (e.g.04) indicate the major release. Major releases occurwhen significant changes are made to the software.Whenever a major change to software is made and thatsoftware is installed into a <strong>micro</strong>processor, it is notpossible to downgrade the software back to any lowermajor release version.The second two digits (e.g. 05) indicate a minor release.Minor releases occur when new features, new modelsor other enhancements are added to the software.Software versions of newer or older minor versions canbe installed into a <strong>micro</strong>processor as needed.The third set of digits (e.g. 00) is the actual releasenumber. Production software is generally 00. Test andexperimental versions will have a different number. Thethird digit does not affect the major or minor designation;therefore, the software can still be installed into a<strong>micro</strong>processor as needed.NOTESome test or experimental versions may be theONLY current version that will operate correctlyin a particular unit. Until a new production versionis announced, changing the software mayresult in incorrect unit operation.6--1762-10683
6.5.2 Using The Program PC CardTIPWhenever performing a major operation to a <strong>micro</strong>processor, such as installing new operating software, it isalways a good idea to start the unit and give it a quick check over prior to performing the operation.NOTEOnce the unit shuts down to begin the software install process, the Compressor Suction Modulation Valve(CSMV) closing process begins. The software installation processes will not begin until the CSMV is completelyclosed, which will delay the actual process for about 45 seconds.CAUTIONThe display and MessageCenter may behave differently during the software loading process, dependingon the version of software currently in the controller. DO NOT INTERRUPT THE SOFTWAREINSTALLATION PROCESS ONCE IT HAS STARTED.CAUTION1. Place the Microprocessor in PC mode (Refer toSection 6.1), or place the START/RUN-OFFswitch in the START/RUN position.2. Insert a Program PC card into the PC card sloton the front of the <strong>micro</strong>processor. Be certainthat the instruction label on Program PC card isfacing the “Caution” label on the<strong>micro</strong>processor. Do not force card into slot.Hold the Program PC card at the endopposite the plug end. Do not squeeze thecard in the middle while inserting. (SeeSection 2.5.4 for PC card care)3. The MessageCenter will show one of three differentmessages:Same SW: “= to Load, ↑ To Cancel”Old SW: “= to Load, ↑ To Cancel”New SW: “= to Load, ↑ To Cancel”4. Verify by the message that you areupgrading/downgrading the software according toyour intentions.5. Press the = key to load the program. The MessageCenter will show“ENGINE AND MICRO WILL STOP NOW.” If the engine is running, it will shut down. After about45 seconds the MessageCenter backlight will dim and the message“INSTALLING PROGRAM SOFTWARE” will be displayed. The Card Status LED adjacent to thePC card slot will blink together <strong>with</strong> the Micro Status LED at a rate of 1/2 second on then1/2 second off during this installation process. Once the entire program has been loaded, theMessageCenter will show “INSTALL COMPLETE -- REMOVE CARD. At the same time, theCard Status LED will stop blinking and be on solid, indicating that the software install is complete.6. When the card is removed, the Microprocessor will power up as it was prior to inserting the card(PC mode or unit running). Allow the Micro to completely power up (Main Display andMessageCenter displaying appropriate messages) once after installing the new software beforeturning the power off, or removing the PC mode jumper. DO NOT TURN THE START/RUN-OFFSWITCH OFF DURING THE INITIAL START FOLLOWING A SOFTWARE UPGRADE.62-10683 6--18
6.5.3 Using ReeferManager to Install SoftwareCAUTIONIt is important that communications betweenthe Microprocessor and the computernot be disturbed during the softwareloading process. If using a laptop computer,turn all energy saving features off. Turnoff any screen saver, or any hard drive timeout settings.NOTE04.10 software and above can be installed usingeither the preferred previously describedProgram PC card method or by using a minimumof ReeferManager 03.07 and a computer.Existing Program PC cards may be upgraded tothe latest software version by using the Reefer-Manager program.The ReeferManager version 03.07 program isdesigned to be installed and operated on the followingWindows operating systems: Windows95, 98, ME, 2000, and XP. The programs willnot operate on Windows Vista.Prepare the PC that will be used <strong>with</strong>ReeferManager as follows:• The screen saver must be turned off.• The battery should be capable of running thePC for 30 minutes, or the PC should beplugged into an electrical outlet.• All battery saver features (hard drive time out,monitor time out, etc.) should be set to morethan 30 minutes.• The download cable must be connected to a9-pin COM port on the PC. USB to COM Portadaptors will not work.Follow these steps to use ReeferManager:a. Connect the computer to the <strong>micro</strong>processor using aDownload Cable. Once the cable is connected to thedownload port, the <strong>micro</strong>processor will power up, andshow “PC MODE”.b. Start the program by double clicking on theMicroProgrammer icon on your computer desktop.c. Click on the Load File button. The Open box will appearon the screen.d. Using the mouse, select the file you want to load (thiswill be a .bex file) by clicking once on it to highlight it.e. Click the OK button. Watch the lower left messagearea of the program. Once the file is validated, theProgram Micro button will become active.f. Place the START / RUN--OFF switch in theSTART/RUN position. Wait for the Main Display andMessageCenter to power up.g. Click on the Program Micro button. TheMessageCenter will go blank. If the engine was running,it will shut down. Nothing will happen for the first5--10 seconds, then the software will begin to load.The Microprocessor Status LED will start blinking atthe rate of 0.5 seconds on and 0.5 seconds off.h. The % complete value on the computer screen will incrementitself as the program is loaded. The % completewill stop several times during the loading processfor up to 15 seconds. This is normal. DO NOTSTOP THE PROCESS. The time to load the programis dependent upon the speed of the computer. Thiswill generally take from 4 to 6 minutes.i. It is important that the program is not interrupted fromthe time the “Program Micro” button is clicked until theprogram is completely loaded. Once the % completereaches 100%, the shutdown box will appear. Clickthe OK button.j. The <strong>micro</strong>processor will power up, and the unit willstart. Allow the engine to start completely the firsttime after loading software. DO NOT PLACE THESTART/RUN -OFF SWITCH IN THE OFFPOSITION DURING THE INITIAL START FOL-LOWING A SOFTWARE UPGRADE.6.5.4 Troubleshooting Software LoadingProblemsIf after loading the software program, the<strong>micro</strong>processor does not power up, or the engine doesnot start, use the following to isolate the problem.a. Did the unit perform properly prior to loading the software?If not, the problem most likely is not a result ofthe software loading process.b. Check the Microprocessor Status LED near the PCCard slot on the <strong>micro</strong>processor. It should be blinkingcontinuously at the rate of 1 second on and 1 secondoff. This is the “normal” heartbeat rate of the <strong>micro</strong>processor.c. If the Microprocessor Status LED is blinking at therate of .5 seconds on and .5 seconds off, the <strong>micro</strong>processoris still in Program Mode, and the softwareis not fully loaded into memory. Load the softwareagain, being careful to follow each step completely insequence.d. If the Microprocessor Status LED is not on at all,check voltage to QC1 & QC2. Also check for voltagefrom the START / RUN--OFF switch at 5MPA1. If voltageand grounds check OK, the <strong>micro</strong>processor maybe dead and require replacement.6--1962-10683
6.6 RE-SETTING PM (PREVENTATIVE MAINTENANCE) HOURMETERSTIPPM hourmeters may be reset for the next maintenance interval from the Functional Parameter list using thekeypad.HEAT COOL DEFROST ALARM START-STOP CONTINUOUS-20 +34.5° FSETPOINTPRESS ↑↓TO VIEW SETTINGSBOX TEMPERATUREMANUALDEFROSTALARM LISTSTART-STOP/CONTINUOUSSELECT1. Press the SELECT key until PRESS ↑↓ TO VIEW SETTINGS.appears in the MessageCenter.2. Press the UP ARROW key or the DOWN ARROW key untilRESET PM HOURMETERS is displayed.3. Press the = key. ↑↓TO SCROLL, THEN = TO SELECT will be displayed in theMessageCenter.4. If “NO HOURMETERS TO RESET“ appears there are none to reset.5. Press the UP or DOWN ARROW key until the PM hourmeter you wish to reset is shown.6. The MessageCenter will show the hourmeter name <strong>with</strong> the instructions“= TO RESET”, followed by the number of hours or cycles that will be used forthe next service interval.7. Press the = key to reset the hourmeter to the new value shown.8. The name of the hourmeter and “RESET” will be displayed indicating that the reset wassuccessful.9. Repeat steps 5-7 to Reset additional PM hourmeters62-10683 6--20
SETTING PM (PREVENTATIVE MAINTENANCE)HOURMETERS (Continued)NOTEThe hourmeters must first be configured “ON”(Refer to Section 6.2.1)PM (Preventative Maintenance) hourmeters areprovided to track unit operation and to notify the userwhen periodic preventative maintenance is due. Withinthe Advance Microprocessor, there are seven PMhourmeters available for use:• Engine• Switch On• Five programmable hourmetersThe programmable PM hourmeters (PM1 – PM5) can beconfigured to count any of the following:• Engine Hours• Switch On Hours• Clutch Cycles• Start Cycles• High Speed HoursThe PM hourmeters are activated and the reset intervalis selected from the Configuration List. To turn on theEngine PM hourmeter, select the desired maintenanceinterval (in hours), and enter as the“DIESEL RESET VALUE” in the Configuration list.Selecting OFF will completely turn the Engine PMhourmeter off. The reset value selected here will be thevalue used when the PM hourmeter is reset from theFunctional Parameter List.To turn on the Switch On PM hourmeter, select thedesired maintenance interval (in hours), and enter asthe “SWITCH ON RESET VALUE” in the Configurationlist. Selecting OFF will completely turn the switch on PMhourmeter off.To turn on any of the Programmable PM hourmeters,they must first be programmed to count one of theavailable parameters from the list above. For example,PM 1 may be programmed to count Clutch Cycles.Selecting OFF will completely disable the PMhourmeter. Once a selection is made, then a resetinterval may be selected. For hours, the PM hourmetermay be set in 50-hour increments anywhere from 50 to30,000 hours. For cycles, the PM hourmeter may be setin 1,000 cycle increments anywhere from 1,000 to90,000 cycles. Selecting OFF instead of an interval willalso disable the PM hourmeter.Maintenance Days are also available for customers whoservice their equipment by calendar days instead ofoperating hours or cycles.Once the PM hourmeters are activated from theConfiguration List, they can only be turned OFF orRESET for a new interval from the FunctionalParameter List.The PM Hourmeters may be reset using either a PC andthe ReeferManager program or the keypad. RESET isonly available when the accumulated hours are morethan 95% of the reset value for that Hourmeter. (Forexample: the Engine PM Hourmeter Reset Interval is1000 hrs. Reset will be allowed anytime after 950 hourshave expired.)TIPFactory default is OFF for all PM hourmeters.To reset a PM hourmeter that has not expired and is notfound in the Functional Parameter list:a. From the Configuration list, select thePM hourmeter.b. Press the = key to change.c. Select OFF for the interval.d. Press the = key to enter.e. Press the = key to change.f. Select the correct interval.g. Press the = key to enter.h. Place the START/RUN-OFF switch in the OFF positionthen back to START/RUN. Check the Data list.The correct number of hours should be showing as“HOURS TO ENGINE MAINT”.6--2162-10683
6.7 ADVANCE MICROPROCESSOR REPLACE-MENT & CONFIGURATION SETUPCAUTIONUnder no circumstances should a technicianelectrically probe the processor at anypoint, other than the connector terminalswhere the harness attaches. Microprocessorcomponents operate at different voltagelevels and at extremely low current levels.Improper use of voltmeters, jumperwires, continuity testers, etc. could permanentlydamage the processor.CAUTIONMost electronic components are susceptibleto damage caused by electrical staticdischarge (ESD). In certain cases, the humanbody can have enough static electricityto cause resultant damage to the componentsby touch. This is especially true of theintegrated circuits found on the trailer <strong>micro</strong>processor.As mentioned above, some <strong>micro</strong>processor inputs operateat voltage levels other than the conventional 12VDC. Connection points and the associated approximatevoltage levels are listed below for reference only.Under no circumstances should 12 VDC be applied atthese connection points.Grounded wrist cuffs are available from Carrier (P/N07-00304-00). These should be worn whenever handlinga <strong>micro</strong>processor.Table 6-1. Connection Point VoltageConnection Point Approximate VoltageAAT, CDT, DTT, ENCT, 2.5 VDC (Variable)RAT, SATAlthough there is less danger of electrical static discharge(ESD) damage in the outdoor environment or ina repair shop -- where the processor is likely to be handled-- proper board handling techniques should alwaysbe stressed. Advance Microprocessors should alwaysbe handled by the plastic cover and not the exposedprinted circuit board. This not only precludes the possibilityof ESD damage, but also lowers the possibility ofphysical damage to the electronic components.When field diagnosis of a Carrier Transicold Vector 6500refrigeration unit determines that an AdvanceMicroprocessor is not performing properly and must bereplaced, the following steps MUST be taken to ensurecorrect operation of the unit following the repair.Prior to beginning work on the unit, be certain that thecurrent configuration file has been downloaded for thecustomer, from the Carrier Transicold InformationCenter, and written onto a Configuration PC Card, usingthe ReeferManager Program. If the original<strong>micro</strong>processor was equipped <strong>with</strong> the IntelliSet option,this file will need to be on a Config Card in order to installthe IntelliSet parameters into the replacement<strong>micro</strong>processor. A computer is needed to enter theengine and switch on hours into the new<strong>micro</strong>processor. All settings -- including unit modelnumber, Trailer ID, unit serial number, and operatinghours and cycles -- from the old <strong>micro</strong>processor can beinstalled into the new <strong>micro</strong>processor using either thekeypad or a computer <strong>with</strong> the ReeferManagerprogram.NOTEA single set of configurations, functionalparameters and data recorder settings can besent serially to the <strong>micro</strong>processor using theReeferManager program. Multiple sets of settings(IntelliSets) can only be sent to the <strong>micro</strong>processorby using a Configuration PC card.62-10683 6--22
6.7.1 Microprocessor Replacementa. If possible, power the <strong>micro</strong>processor up, either usinga PC mode jumper, or by placing the START/RUN-OFF switch in the START/RUN position. If the <strong>micro</strong>processorwill not power up, skip ahead to step d.b. Insert a Download PC card into the PC card slot anddownload all data from the data recorder. If a DownloadPC card is not available, data may also be downloadedusing a download cable and theReeferManager PC Program.c. Scroll through the DataList and make note of the followingfrom the MessageCenter:• ID Number• Unit Serial Number• Unit Model Number• Engine Protect Hours• Switch On Protect Hours• Engine Sleep Hours• Switch On Sleep Hours• High Speed Hours• Clutch Hours• Start Cycles• Date And Timed. Remove PC jumper or turn START/RUN-OFFswitch to Off.e. Remove negative battery cable from battery.f. Remove Connectors 1MP, 2MP, & 3MP from the outsideof the control box.g. Open keypad door by removing the screws at the bottom.Open control box door and use the retaining rodto hold the door open.h. Remove Connectors 5MP & 6MP inside the controlbox. Remove all wires from the Micro.i. Locate wire to 80A fuse that runs through the CurrentSensor. Note the orientation of the wire through theCurrent Sensor, to be certain that the wire is reinstalledthrough the new Current Sensor in the samedirection. (Inserting the wire through the Current Sensorin the opposite direction will result in erroneouscurrent readings.) Remove wire from fuse holder andgently pull through the Current Sensor.j. Remove the screws holding the sides of the Micro intothe control box. Remove the single screw holding thetopoftheMicroinplace.k. Pull the Micro back, and twist out of the control box.l. Install the new Micro by reversing steps a. thru k.6--2362-10683
6.7.2 Microprocessor SetupNOTEBefore starting the unit, the <strong>micro</strong>processormust be configured for the correct unit modelfamily and model number. This can be done atthe unit keypad, or by using the ReeferManagerprogram. The steps below are used when settingthe <strong>micro</strong>processor up from the keypad.Generally, the <strong>micro</strong>processor can be setup usinga Configuration PC card however certainparameters can not be set using a ConfigurationPC card. Those parameters can be enteredusing the keypad or the ReeferManager program.The steps below detail entering the datausing the keypad.a. Ensure that the new <strong>micro</strong>processor is in place, allwires connected and the negative battery cable is reconnected.b. Place the START/RUN-OFF switch in the START/RUN position. The <strong>micro</strong>processor will immediatelygo into the Configuration List so that the correct modelnumber can be selected. Using the UP or DOWNARROW keys, scroll through the list until the correctModel Family appears, and press the = key. Use theUp or Down Arrow keys to scroll through the list ofmodel numbers until the correct model number appears(verify the model/serial plate on the unit). Pressthe = key to enter the new model number.c. Press the UP ARROW key again, and the unit serialnumber field will appear. Press the = key, then the UPARROW key. You will see a blinking cursor in the field.Now, using the UP or DOWN ARROW key, scrollthrough the Number/Letter list, until the first letter ofthe serial number you recorded above appears.Press the = key to enter that letter and <strong>advance</strong> thecursor to the next place. Repeat this process until theentire unit serial number is entered(i.e. LAD90887654).d. Press the UP ARROW key again, and the ID field willappear. Press the = key, then the UP ARROW key.You will see a blinking cursor in the field. Using the UPor DOWN ARROW key, scroll through the Number/Letterlist, until the first letter/number of the ID yourecorded above appears. Press the = key to enter thatnumber/letter, and <strong>advance</strong> the cursor to the nextplace. Repeat this process until the entire ID numberis entered. If the cursor is still blinking in a blank spaceafter you are finished, slowly (wait 2 to 3 seconds betweenpresses) press the = key to leave blanks in theremaining spaces. When you reach the end, the message↑↓ TO SCROLL, THEN = TO SELECT will appear(i.e. XYZ5678).e. Now, press the DOWN ARROW key until “SET TIME”appears. Press the = key then the UP ARROW key toenter that menu.CAUTIONBe certain that the clock you are using is accurate,and is showing the correct time.Also, some customers are located in differenttime zones from where the repair is beingmade. If you know what time zone theyuse, enter that time. If you don’t, then enterthe current time where you are located.f. When MONTH appears, press the = key, then the UPARROW key. The MessageCenter will begin to flash,indicating that it is ready to accept changes. Use theUP or DOWN ARROW key to scroll through the numberlist until the correct number of the current monthappears. Press the = key to enter that number for themonth.g. Press the UP ARROW key to go to Day.h. Using the same key presses as in f. and g. above,continue to enter the correct numerical value for theDay, Year, Hour and Minute. Hours are displayed andentered as a 24 hour clock. 0 to 12 is AM. 13 to 24 isPM.i. When you are finished, the MessageCenter will diisplay“PRESS = TO SAVE TIME CHANGES”.NOTEIf you do not press the = key, none of the timechanges you just made will be saved.j. Press the UP ARROW key to go to“SET NEW HOURS”. Press the = key then the Up Arrowkey to enter that menu.k. The first hourmeter is Engine Protect Hours. Pressthe = key to select this meter. The cursor will be blinkingon the ten-thousands place. Press the UP orDOWN ARROW key to select the correct value, thenpress the = key. If the correct number in any of thelocations is 0 (zero), just press the = key to enter 0 asthe value and move the cursor to the next place. Forexample, if you are entering 567 hours, you will pressthe=keytwicetoleavea0forthefirsttwonumbers,then use the UP and DOWN ARROW key to scrollthrough the numbers to enter the correct hours.When the correct hours for Engine Protect Hours hasbeen entered, press the = key to <strong>advance</strong> to the nexthourmeter. If an invalid number is entered, a warningmessage will flash in the MessageCenter. For example,you can not enter a higher number of hours forEngine Protect than the number of Switch On Hours.62-10683 6--24
NOTENone of the “Total” hourmeters are listed. Whenthe hours for all the hourmeters are entered, the<strong>micro</strong>processor will add the correct hours togetherand calculate the Total Engine Hours,and Total Switch On Hours. When the end of thelist is reached “PRESS = TO SAVE HOURS”will be displayed. Pressing the = key will savethe hours, and return you to the configurationlist.If you do not press the = key, none of the timehours or cycles you just entered will be saved.Hourmeters may be changed for 60 minutes followingthe initial hour entry. If an error has beenmade, be certain to correct it <strong>with</strong>in the 60 minutetime period. Following that time, the hourmeterswill count the appropriate hoursbecause the unit switch is on and the unit is operating,and no further manual changes will beallowed.NOTEAfter the configuration settings are completeuse the UP or DOWN ARROW keys until“CONFIGS COMPLETE, = TO EXIT” is displayedin the MessageCenter. Press the = keyto save.NOTEIf a Configuration card will be used to configurethe <strong>micro</strong>processor, skip ahead to CONFIGU-RATION CARD, Section 6.7.7 If the Configurationsand Functional Parameters will be setfrom the keypad, continue <strong>with</strong> following steps6.7.3 and 6.7.46.7.3 Configurations Via KeypadRefer to Section 6.2 for a list of available<strong>micro</strong>processor configurations. Refer to Section 6.2.1for instructions on how to access them.NOTEUnits equipped <strong>with</strong> IntelliSet MUST have thesettings installed using ReeferManager and aConfiguration PC card.IntelliSet settings CANNOT be installed by usingeither the keypad, or by using a laptop computer.6.7.4 Functional Parameters via Keypada. Refer to Section 3.16 for the list of available MicroprocessorFunctional Parameters and for directions onhow to access them.b. Leave the <strong>micro</strong>processor powered up as you continue<strong>with</strong> the next section.6.7.5 DataRecorder ViaReeferManager PC ProgramNOTEIf the factory settings are used, you can skip thissection and proceed to hourmeter Setup.a. Refer to Section 3.19 for list of DataRecorder Setups.b. Power up the <strong>micro</strong>processor. If it is not already poweredup, refer to directions under MicroprocessorSetup – Functional Parameters via keypad, Section6.7.4 above.c. Connect your computer to the download port of theunit (use cable 22-001737) and start theReeferManager program. You will need ReeferManagerversion 03.07.00 or higher.NOTEReeferManager 03.07.00 is REQUIRED in orderto view, change and send new features toand from the <strong>micro</strong>processor.d. In ReeferManager, go to the Serial Operations Tab,and then click on DataRecorder/Microprocessor setupbutton.e. Select the Sensors to be recorded and whether youwish averaged or snapshot recordings (averaged isrecommended for all temperature sensors; snapshotis recommended for pressure, voltage, amperage, &RPM).f. When the setup is correct, press the Send button tosend the new settings to the <strong>micro</strong>processor.g. From the “Confirm Send Information” Pop Up, checkthe data you want to send and un-check the data youdon’t want to send. Click the OK button.h. Verify that the settings were sent by waiting for theconfirmation pop up message.NOTEIf the DataRecorder date and time were not setearlier, they can be set from this screen by clickingon DataRecorder Tools>Set Date and Time.i. Leave the <strong>micro</strong>processor powered up as you continue<strong>with</strong> the next section.6--2562-10683
6.7.6 Engine And Switch-on Hourmeters ViaReeferManager PC Programa. Start the ReeferManager program. Go to the SerialOperations Tab.b. Click on DataRecorder/Microprocessor Setup button.c. In the upper left menu bar, click onMicroprocessorTools>Set New Micro Hours.d. At this screen, enter the hours that were recorded instep b. of Section 6.7.1. Send the new readings to the<strong>micro</strong>processor.NOTEHours can only be entered into the <strong>micro</strong>processoruntil either the Total Engine Hours or theTotal Switch On Hours reach 25. However, inthe case of incorrect hours being entered,changes can be made for 60 minutes after theinitial change has been made -- regardless ofthe number of hours entered. Once the 60 minuteshas expired, and either of the total hourmetersreaches 25 hours, no further changescan be made.The 60 minute grace period is based on theReal Time Clock in the DataRecorder. That iswhy it is important that the Real Time Clock isset to the correct time prior to setting the hourmeters.e. Your computer may now be disconnected and turnedoff or you can continue setting up the configurations.6.7.7 Configuration/IntelliSet PC Carda. Place the START/RUN-OFF switch in the OFF positionto power down the <strong>micro</strong>processor and to take itout of Configuration mode.b. Power the <strong>micro</strong>processor up by either placing theSTART/RUN-OFF switch in the START/RUN position(Manual Start Operation can be used if the unit is soequipped) or by inserting a PC mode jumper into thedownload port.c. Insert the Configuration PC card into the PC card slotin the <strong>micro</strong>processor and watch theMessageCenter. When the MessageCenter shows“CFG, = TO LOAD, ↑ TO CANCEL”, press the= key. It will take 10 – 15 seconds to load the Intelli-Sets from the card. “LOADING INFO” will be displayedduring this time. When finished, the Message-Center will show “ALL INFO LOADED – REMOVECARD”. Remove the Configuration PC card.d. The MessageCenter will show“MICRO WILL RESET AND RESTART NOW”, thedisplay will go blank, then come back on after a fewseconds.NOTEWhen the <strong>micro</strong>processor powers up the displaywill show“PRESS = TO VIEW INTELLISETS”. The unitwill not start until one of the new IntelliSets hasbeen selected.e. Press the UP or DOWN ARROW key to scroll throughthe list of IntelliSets. Pressing the UP ARROW keywill bring the first IntelliSet name into the MessageCenter.f. Move to the desired IntelliSet and press the = key.The desired IntelliSet will automatically become activeand the unit will be able to be started.6.7.8 Microprocessor Final Checkouta. Start the unit and allow it to run for a few minutes.b. While the unit is running, scroll through the Data Listof the <strong>micro</strong>processor. Verify that all the data that wasrecorded in Step b. of Section 6.7.1 is now accuratelydisplayed in the Data List. Also verify that the correctdate and time are being displayed.c. Initiate a Pretrip test. Allow the unit to complete thePretrip and check for any alarms. Make any necessaryrepairs before returning the unit into service.62-10683 6--26
6.7.9 Replacing Display Bezel AssemblyDisplay Bezel Assembly Removala. Place the START/RUN--OFF switch in the OFF positionand disconnect the negative battery cable. Attacha grounded wrist strap (CTD P/N 07--00304--00)and ground it to a good unit frame ground.b. Open the roadside side door containing theKeypad/Display Assembly. Unplug the display cablefrom the 10--pin harness.c. Loosen and remove the (4) hex head 1/4--20 boltsholding the bezel bracket to the door and lay the bezelassembly on a clean work surface.d. Loosen and remove the (4) 5mm x 20mm lg hex headbolts holding the bezel assembly to the bracket. Carefullyseparate the bezel assembly from the bracket.Disconnect the wiring harness from the display boardand the START/RUN--OFF switch.Display Bezel Assembly Installation(CTD P/N 91 -00312 -02SV)CAUTIONDo not over -torque screws. Torque allscrews to 11in -lbs (1.2 Nm).NOTEEleven Phillips head screws are used to retainthe keypad to the bezel: (8) 3/4” Lg. screwsaround the perimeter of the keypad and (3) 3/8”Lg. blunt tip screws in the center of the keypad.Four 3/8” Lg. Phillips head screws are used toretain the display board to the keypad.a. Remove the old gasket from the door mountingbracket.b. Ensure that the surface is completely free of any oldgasket material and apply the new gasket (included inthe kit) to the bracket.c. Plug the wire harness into the new display board andreconnect the wires to the START/RUN--OFF switch.d. Secure the bezel to the control door <strong>with</strong> the (4) 5mmX 20mm lg. hex head bolts. Torque bolts to 26 in. lbs.(2.9 Nm).e. Fasten bezel and bracket assembly to unit side doorusing (4) hex head 1/4--20 bolts.f. Reconnect wire harness (10--pin connector) from the<strong>micro</strong>processor.g. Reconnect negative battery cable and run Pretrip tocheck unit operation.DISPLAY WINDOWWINDOW GASKETKEYPAD DOORDETENT SPRINGSDETENTSDISPLAY BEZELDISPLAY BOARDKEYPAD BOARDMOUNTING BRACKET/CONTROL BOX GASKETWINDOW GASKETNOTE: GASKET ISNOTCHEDFOR CLEARANCE AROUNDDETENTS.Figure 6 -1. Display Module Assembly6--2762-10683
SECTION 7MessageCenter1PARAGRAPH NUMBERPage7.1 MessageCenter MESSAGES .................................................... 7--17
SECTION 7MessageCenter7.1 MessageCenter MESSAGESThe following table lists all of the messages that do not appear in other lists in this manual and a description of theirmeaning. Refer to Section 8 for a list of alarm messages. Refer to Section 3.14 for a list of Unit Data messages. Referto Section 3.16 for a list of Functional Parameter messages. Refer to Section 6.2.1 for a list of Configurationmessages.Message↑↓ TO SCROLL, THEN = TO LOCKMessageCenter MESSAGESDescriptionThis message is used when viewing Unit Data. Use the UP andDOWN arrow keys to move through the data list. Press the = key tolock a data item in the MessageCenter↑↓ TO SCROLL, THEN = TO SAVE Press the UP or DOWN arrow key to scroll through menu selectionsavailable in this mode. When you reach the desired selection,press the = key to store new value in <strong>micro</strong>processor’s memory.↑↓ TO SCROLL, THEN = TO SELECT Press the UP or DOWN arrow key to scroll through menu selectionsavailable in this mode. When you reach the desired selection,press the = key to select it.= TO INSTALL, INSTALLS LEFT XX An Option PC card has been inserted into the PC card slot. Pressthe = key to install the option into the <strong>micro</strong>processor. The numberof installs remaining on the PC card will be shown.ACTIVEThis message will appear in the MessageCenter along <strong>with</strong> the currentIntelliSet indicating that the IntelliSet is active and none of itssettings have been modified.ACTIVE ALARM LIST CLEAREDThe list of active alarms in the <strong>micro</strong>processor alarm lists has beenerased. (This does not remove alarms from the data recorder.)ALL ALARMS CLEAREDALL INFO LOADED -- REMOVE CARDARL LIGHT OFF IN X MINSBACK TO CONFIGSBACK TO FUNC PARAMSBAD PC CARD OR CARD SLOTBUZZER OFF IN X MINSCALIBRATION UNSUCCESSFULCANNOT ENTER TRIP STARTThe list of active and inactive alarms in the <strong>micro</strong>processor alarmlists have been erased. (This does not remove alarms from thedata recorder.)All data has been loaded into the <strong>micro</strong>processor from the PC card.The card may be safely removed from the <strong>micro</strong>processor.The Auto Restart Light circuit to the Operator’s Light Bar has beenenergized in Component Test mode. The ARL circuit will continueto be energized for the number of minutes shown.Pressing the = key <strong>with</strong> this message showing will return the userto the main <strong>micro</strong>processor Configuration list.Pressing the = key <strong>with</strong> this message showing will return the userto the main Functional Parameter list.The <strong>micro</strong>processor has detected a problem <strong>with</strong> either the PCcard or the PC card slot.The Buzzer circuit has been energized in Component Test mode.The Buzzer circuit will continue to be energized for the number ofminutes shown.Attempt to calibrate discharge transducer failed.Cannot enter trip start. A problem has been detected <strong>with</strong>in the DataRecorder.CANNOT START DEFROST CYCLE Cannot start defrost cycle. Refer to Defrost Sections 3.10, 5.11,2.15 and 9.24.CANNOT START PRETRIP Cannot start pretrip. Refer to Pretrip Section 3.4.CANNOT DOWNLOAD -- BATTERY DEADData cannot be downloaded and software upgrades are prohibitedwhen battery voltage is below 7.0 volts. This message will be displayeduntil the serial cable is removed.CARD FULL, REMOVE CARDThe PC Download card is full. There is no additional room to downloadinformation from the <strong>micro</strong>processor. You may safely removethe PC card from the slot.7--162-10683
MessageCARD LOCKED -- REMOVE CARDCARD REMOVED, DATA NOT COPIEDCARD REMOVED, REINSERT CARDCFG: =TO LOAD,↑ TO CANCELCHANGE INTELLISET TO EXITCHARGE MODE -- HOLD=TO EXITCHECK AT NEXT SERVICE INTERVALCHECK COOLANT LEVEL(Requires Optional Sensor)CHECK DOORCHECK ENGINE OIL LEVEL(Requires Optional Sensor)CHECK FUEL LEVEL(Requires Optional Sensor)CHECK MICROPROCESSOREarlier Units OnlyCHK WIRES FROM MICRO TO KEYPADLater UnitsCLHR OFF IN X MINSCOMPONENT TEST MODECOMPONENT TEST MODE MENUSELECTIONSCONFIG ERROR, REMOVE CARDCONFIGS COMPLETE,= TO EXITCONFIGURATION MODECONFIGURATION NOT CHANGEDCONTINUOUS LOCKEDCONTINUOUS RUN MODE SELECTEDCOPY COMPLETE, REMOVE CARD XXMessageCenter MESSAGESDescriptionThe lock switch on the PC card is in the “Locked” position. To usethe PC card, move the switch to the “Unlocked” position.The PC card was removed before all data was copied onto thecard.The PC card was removed from the card slot before the operationwas completed. Reinsert the PC card into the card slot to performthe operation.A Configuration card has been inserted into the PC card slot. Pressthe = key to load configurations or IntelliSets into <strong>micro</strong>processor.The IntelliSleep Intelliset is active. Alternates <strong>with</strong>“INTELLI--SLEEP MODE” at 5 second interval whether unit is runningor not.Service mode has the refrigeration system set so that it can becharged <strong>with</strong> refrigerant through the king valve. Press the = key tomanually exit, or wait until the charging is complete.The unit needs to be checked at next service interval.There is currently an active non-shutdown alarm in the Alarm list.The engine coolant level is not full.Door switch indicates that trailer or rail car compartment door is notclosed.The oil level in the diesel engine is low.The level in the fuel tank is very close to empty.There is a communication signal lost between the keypad/displayand the <strong>micro</strong>processor. Check and test the wiring to the keypad/displayThere is a communication signal lost between the keypad/displayand the <strong>micro</strong>processor. Check and test the wiring to the keypad/displayThe Clutch Relay circuit has been energized in Component Testmode. The Clutch Relay circuit will continue to be energized for thenumber of minutes shown.Pressing the = key while this message is being displayed will allowuser access to Component Test mode.The selections following this message are the components availablefor energizing during Component Test mode.There was an error configuring the <strong>micro</strong>processor <strong>with</strong> the ConfigurationPC card. Remove the PC card from the slot.The user has reached the end of the Configurations list. Pressingthe UP or DOWN ARROW key will start list over. Press the = keyto exit Configuration list.Press the = key to enter Configuration mode.New configuration selection was not entered (saved).The current set point is <strong>with</strong>in a range that has been locked into theContinuous Run mode. Start-Stop can not be selected.Continuous run mode is selected.A DownLoad PC card has been inserted into the PC card slot, andall data from the DataRecorder has been copied onto the PC card.You may safely remove PC card from the slot. XX indicates thenumber of empty download slots remaining on the card.62-10683 7--2
MessageCOPY ERROR, REMOVE CARD XXCOPYING DATA -- PLEASE WAITDATA RECORDER FAILUREDEFROST CYCLE STARTEDDOOR OPENDOOR OPEN -- LOW SPEEDMessageCenter MESSAGESDescriptionA DownLoad PC card has been inserted into the PC card slot andan error occurred while the data was being copied onto the PCcard. You may safely remove the PC card from the slot.XX indicates the number of empty download slots remaining on thecard.A DownLoad PC card has been inserted into the PC card slot andall data from the data recorder is being copied onto the PC card.DO NOT REMOVE THE CARD WHILE THIS MESSAGE IS BE-ING DISPLAYED.The <strong>micro</strong>processor has stopped recording unit data.The unit has gone into defrost.The trailer or rail compartment door is open.The trailer or rail compartment door is open forcing the unit to runin low speed.ENTERING SERVICE MODE The initial message for Service mode. See Section 6.2.3.EVAC / CHARGE MODEThe unit is in Service Mode, and the refrigeration system is readyto be evacuated or changed <strong>with</strong> refrigerant. See Section 6.2.3.EXITING PRETRIP MODEEXITING SERVICE MODEFUNCTION NOT CHANGEDHOUR METERS NOT CHANGEDINACTIVE ALARMS IN MEMORYINSTALLED, REMOVE CARD XXINSTALLING OPTION, PLEASE WAITINSTALL STOPPED, REINSERT CARDKEYPAD LOCKED -- BATTERY TOO LOWLIST END, = TO CLEAR ALARMSLOADING INFOMAIN MENUMANUAL START MODE SELECTEDMAX SETPOINT HAS BEEN REACHEDPretrip has been aborted either by user or by a pretrip alarm.Service mode has been turned off and unit is returning to normaloperation.The = key was not pressed in the allotted amount of time to selectthe new Functional Parameter setting. The new setting was notstored and the old setting will be used.Indicates that no changes have been made to the hourmeters ineither the configuration or functional parameter lists.There are inactive alarms in the <strong>micro</strong>processor alarm list whichhave not yet been cleared.An Option PC card has been inserted into the PC card slot, and theoption has been installed in the <strong>micro</strong>processor. The PC card maysafely be removed from the slot. XX indicates the number of optioninstallations remaining on card.An Option PC card has been inserted into the PC card slot, and theoption is being installed in the <strong>micro</strong>processor. DO NOT REMOVETHE CARD WHILE THIS MESSAGE IS BEING DISPLAYED.An Option PC card has been inserted into the PC card slot, and theinstall process has been stopped been stopped by the PC card notbeing fully inserted in the slot or by being removed. Remove andreinsert PC card to continue.If any keys are pressed while “UNIT BATTERY--xx V” message isbeing displayed this message will be displayed as a warning that nochanges can be made and information can not be viewed until thebattery voltage is brought back up above 10 volts for more than 10seconds.The end of the Alarm list has been reached. Pressing the = key willclear the Alarm list.A Configuration PC card has been inserted into the PC card slot,and information from the Configuration card is being loaded into the<strong>micro</strong>processor. DO NOT REMOVE THE CARD WHILE THISMESSAGE IS BEING DISPLAYED.Consists of Configuration mode, Component Test mode and Servicemodes.The user has selected manual start mode. The diesel engine mustbe started using the manual GLOW/CRANK switch. This is availableonly on units that have a Glow Crank Switch.Maximum set point allowed by configuration settings has beenreached.7--362-10683
MessageCenter MESSAGESMessageDescriptionMIN SETPOINT HAS BEEN REACHED Minimum set point allowed by configuration settings has beenreached.MODIFIEDNEW SW: = TO LOAD, TO ↑ CANCELNO ACTION TAKEN, REMOVE CARDNO ACTIVE ALARMSNO DATA ON CARD, REMOVE CARDNO DATA TO COPY, REMOVE CARDNO INACTIVE ALARMSNO INSTALLS LEFT, REMOVE CARDOLD INTELLISETS -- USE REEFERMANOLD SW, = CANNOT LOAD -- REMOVECARDOLD SW, = TO LOAD, ↑ TO CANCELPC MODEPM DUEPM HOUR METER NOT CHANGEDPRESS ↑↓ TO VIEW DATAPRESS ↑↓ TO VIEW SETTINGSPRESS ↑↓ TO VIEW PRINT MENUPRESS = TO MARK TRIP STARTPRESS = TO START PRETRIPPRESS ↑↓ TO VIEW INTELLISETPRETRIP FAIL & COMPLETEDThis message will appear in the MessageCenter along <strong>with</strong> the currentIntelliSet indicating that the IntelliSet is active and one or moreof its settings have been modified.A Program PC card has been inserted into the PC card slot, andthe program on the PC card is a newer version than what is alreadyloaded in the <strong>micro</strong>processor. Press the = key to load the program.A Program PC card has been inserted into the PC card slot, and nokey presses have been made to install the program into the <strong>micro</strong>processor.The PC card may be safely removed from the slot.There are no active alarms in the <strong>micro</strong>processor alarm list.A Program or Configuration PC card has been inserted into the PCcard slot, and no valid data is present on the PC card. The PC cardmay safely be removed from the unit.A Download PC card has been inserted into the PC card slot, andthere is no valid data in the data recorder to copy onto the PC card.The PC card may safely be removed from the unit.There are no inactive alarms in the Alarm listAn Option PC card has been inserted into the PC card slot and allinstall options have been used. The PC card may safely be removedfrom the unit.The IntelliSets that are on the Configuration PC Card were written<strong>with</strong> too old of a PC Program, like ServiceManager. The software inthe <strong>micro</strong>processor requires IntelliSets to be written to the ConfigurationPC Card using ReeferManager. Rewrite the information tothe card using ReeferManager, then use it in the <strong>micro</strong>processoragain.A Program PC Card has been inserted into the PC Card slot, andthe major version of the program on the PC Card is an older versionthan what is already loaded in the <strong>micro</strong>processor. Software<strong>with</strong> older major versions can not be loaded into the <strong>micro</strong>processor.Remove the PC Card. (Refer to Section 6.5.1 for softwareversion description.)A Program PC Card has been inserted into the PC Card slot, andthe minor version of the program on the PC Card is an older versionthan what is already loaded in the <strong>micro</strong>processor. Press the =key to load the older program. (Refer to Section 6.5.1 for softwareversion description.)Indicates that the conditions for entering PC Mode are met: theSTART/RUN-OFF switch is OFF, the PC mode Jumper is connectedand the engine is not running. PC Mode allows the user toaccess and download data using a computer when the unit is notrunning and <strong>with</strong>out starting the 8 hour data recorder timer. Refer toSection 6.1.Preventative Maintenance is now due on the unit.The last change for the PM hourmeter was not received by the <strong>micro</strong>processor.Press the UP or DOWN ARROW key to scroll through the Data list.Press the UP or DOWN ARROW key to scroll through FunctionalParameter settingsPress the UP or DOWN ARROW key to view the strip print setupmenu.Press the = key to mark the start of the trip in the data recorder.Press the = key to begin pretrip tests.Press the UP or DOWN ARROW key to view IntelliSet list.Some of the pretrip tests did not pass.62-10683 7--4
MessagePRETRIP FAIL IN TEST XXPRETRIP PASSPRODUCT SHIELD: HIGH AIR ONPRODUCT SHIELD: WINTER ONPRODUCT SHIELD: ECONO ONRECOVER / LEAK CHK / EVAC MODEREMOVE CARD -- BATTERY TOO LOWREMOTE SWITCH 1 (2) OPENREMOTE SWITCH 1 (2) OPEN -- LOWSPEEDREMOVE JUMPERSAME SW, = TO LOAD, ↑ TO CANCELSERVICE MODESETPOINT CHANGEDSETPOINT NOT CHANGEDSETTING SMV: XXX %SLEEP MODE, OFF / ON TO WAKESLEEP WARNING: DOOR OPENSLEEP WARNING: NO TEMP CONTROLSLEEP WARNING: REMS1(2) OPENSMV CLOSING: WAIT xxx SECONDSSTART MODE: AUTO or MANUALSTART-STOP LOCKEDSTART-STOP MODE SELECTEDSTATUS OKTECHNICIAN RESET REQUIRED (A21)TEST #1 to #16TIME SELECTION NOT CHANGEDMessageCenter MESSAGESDescriptionSome of the pretrip tests did not pass and the pretrip was not completed.All of the pretrip tests were OK.The unit is operating in ProductShield High Air which overrides normalunit operation. Refer to Section 5.16.1.b.The unit is operating in ProductShield Winter which overrides normalunit operation. Refer to Section 5.16.1.c.The unit is operating in ProductShield Econo which overrides normalunit operation. Refer to Section 5.16.1.a.This message will be displayed when the unit is in Service Modeand the system is ready for recovery and leak testing.If a PC card is inserted when battery is below 7.0 volts this messagewill be displayed until card is removed.Remote switch is open. May be connected to a trailer or rail carcompartment door or a remote control switch.Shows that the remote switch is open and that the unit is running inlow speed. Switch may be connected to a trailer or rail car compartmentdoor or a remote control switch.The Configuration/Technician Test mode has been entered. Removethe jumper wire before continuing.A Program PC card has been inserted into the PC card slot, andthe program on the PC card is the same as the program currentlyin the <strong>micro</strong>processor. Press the = key to reload the same programor press the UP ARROW key to cancel and remove card.Indicates that this selection has been made in Configuration andTest Modes which allows servicing of the refrigeration system.The new set point has been entered (saved into <strong>micro</strong>processormemory). The new set point will be used.The new set point has NOT been entered (NOT saved into <strong>micro</strong>processormemory). The old set point will be used.The START/RUN-OFF position has been placed in theSTART/RUN position and the CSMV is opening.The unit is cycled off in Sleep Mode. Place theSTART/RUN--OFF switch in the OFF position, then back to theSTART/RUN position to wake the <strong>micro</strong>processor up.The rail unit is in Sleep Mode and a rail car compartment door isopen. The unit will start as needed for Sleep Mode.The unit is running in Sleep mode.The rail unit is in Sleep mode and a remote switch is open. Switchmay be connected to a door or a remote control switch. The unitwill start as needed for Sleep mode.Microprocessor is powering up and CSMV is closing. XX indicatesthe number of seconds remaining until valve is fully closed.Indicates whether the unit is in Auto Start or Manual Start modeThe set point has been locked into the Start-Stop mode. ContinuousRun can not be selected.Start--Stop Mode has been selected.The unit is working correctly.AL11 (Low Engine Oil Pressure) or AL12 (High Coolant Temperature)has been activated three times in the last two hours and theunit has been locked out. The unit must be brought to a CarrierTransicold Dealer for Service.Pretrip is currently running this test and is x% completeA time change was started but not entered in Configuration list.Change 09/117--562-10683
MessageCenter MESSAGESMessageDescriptionTRIP START ENTEREDThe Trip Start marker has been placed in the DataRecorder.UNIT BATTERY LOW The unit battery has dropped below 7 volts for more than 10seconds.UNIT SHUTDOWN -- DOOR OPENUNIT SHUTDOWN -- SEE ALARM LISTUNIT SHUTDOWN -- RMS1(2)UNKNOWN CARD -- REMOVE CARDWARNING: NO TEMP CONTROLWRONG UNIT TYPE, REMOVE CARDThe unit has shut down because the trailer or rail compartmentdoor is open.An active shutdown alarm has shut the unit downThe unit has shut down because switch is open. May be connectedto a door or a remote control switch.A defective or different type of PC Card has been inserted into thePC Card slot. The <strong>micro</strong>processor can not recognize any data onthe card. The card may be safely removed from the <strong>micro</strong>processor.Both RAT and SAT alarms are on and unit is running <strong>with</strong> a setpoint in the frozen range in low speed six cylinder cool.A Configuration PC Card has been inserted into the PC Card slot.The unit model type on the PC card is not in the same unit familytype as the controller. The card may be safely removed from the<strong>micro</strong>processor62-10683 7--6 Change 09/11
SECTION 8ALARM TROUBLESHOOTING1PARAGRAPH NUMBERPage8.1 INTRODUCTION TO ALARM TROUBLESHOOTING GUIDE ........................ 8--18.2 NOTES ....................................................................... 8--28.3 DRIVER/OPERATOR ALARMS .................................................. 8--38.4 SHUTDOWN ALARMS ........................................................... 8--78.5 START UP ENGINE ALARMS ..................................................... 8--198.6 WARNING / STATUS ALARMS .................................................... 8--378.7 ELECTRICAL ALARMS ........................................................... 8--488.8 SENSOR ALARMS ............................................................... 8--568.9 PRETRIP ALARMS .............................................................. 8--688.10 MAINTENANCE ALARMS ....................................................... 8--1038.11 MICROPROCESSOR ALARMS .................................................. 8--1078
SECTION 8ALARM TROUBLESHOOTING8.1 INTRODUCTION TO ALARM TROUBLE-SHOOTING GUIDEThe Alarm Troubleshooting Guide should be usedwhenever an alarm occurs. Alarms will appear in theMessageCenter and will begin <strong>with</strong> the alarm number.Alarms are listed in the Troubleshooting Guide by alarmnumber.When an alarm occurs, look through both Active andInactive Alarm lists in the <strong>micro</strong>processor (See NoteNote 1 Section 8.2 ) and make note of all alarms.Before beginning to actually troubleshoot a unit, visuallyinspect the unit, in particular the area of the unit that iscausing a problem. In many cases the cause of theproblem will be obvious, once a visual inspection isperformed. For those cases where the cause of theproblem is not obvious, this troubleshooting guide will beof assistance.Usually you should begin troubleshooting <strong>with</strong> the firstalarm that appears in the active Alarm list. Other alarmsin the list may have contributed to the occurrence of thefirst alarm. The first alarm that appears is the last alarmthat was recorded.The check items in the troubleshooting guide are listedin order of their likeliness of occurrence and ease oftesting. We recommend that you follow the order inwhich they are presented; however, there may be timeswhen situations or experience directs you to use adifferent order. For example, if the trailer or rail car isloaded, you may want to perform all the condensing unitchecks first, even though some evaporator sectionchecks may be listed before them.As you go through the troubleshooting steps, you willfind the cause of the problem. When you find and correctthe problem, it is not necessary to continue through theremainder of the steps. Some active alarms will clear(inactivate) themselves automatically once the causehas been corrected. You then only need to go to theinactive list to clear all alarms before verifying theremainder of the unit operation. Alarms that do notinactivate themselves automatically must be clearedmanually. (SeeNote1Page8.2)When you are finished making repairs, run the unitthrough a Pretrip cycle and verify that no further activealarms occur. Also, both Alarm lists should be clearedso that there are no ‘old’ alarms in memory when the unitleaves your repair facility.If the message CHECK MICROPROCESSOR appearsin the MessageCenter, there is a communication errorbetween the keypad and the <strong>micro</strong>processor. With nocommunication, there will not be an associated alarm.Should this occur, check the wire connections for thewiring that connects connector 6 on the <strong>micro</strong>processorto the connector at the Keypad/Display assembly.In later model units this message will read “CHK WIRESFROM MICRO TO KEYPAD.”When working on the refrigeration system, anaccurately calibrated manifold test set should always beinstalled. It is also a good idea to connect an additionalhigh pressure gauge to the king valve.In high or low ambients, it may be necessary to cool orwarm the box temperature before performing specifictests providing that the trailer or rail compartment is notloaded <strong>with</strong> perishable product.WARNINGBeware of V-belts and belt driven componentsas the unit may start automatically.Before servicing unit, make sure theSTART/RUN-OFF switch is in the OFF positionor the unit is in the Maintenance mode.Also disconnect the negative battery cable.WARNINGUNITS EQUIPPED WITH STAR-TRAK TWOWAY COMMUNICATION CAPABILITIES MAYHAVE THE ABILITY TO BE STARTED ORTURNED OFF REMOTELY REGARDLESS OFTHE SETTING OF THE START/RUN-OFFSWITCH.The unit is controlled locally and there canbe no two-way communication when theMode switch on the Remote MonitoringControl Box is in MAINTENANCE MODE.Therefore, when performing any work onthe unit, place the Mode switch in MAINTE-NANCE MODE. After the unit is serviced, returnthe Mode switch to REMOTE ON. (Referto Section 3.20.3 for more detailed informationon two-way communication.)8--162-10683
8.2 NOTESNote 1 Active alarms will always be in the Alarm list.They will have an “A” in front of the alarmnumber. Active alarms may be inactivated bygoing to the end of the Active Alarm list.“LIST END, = TO CLEAR ALARMS” willappear in the MessageCenter. Pressing the =key will clear or inactivate the alarms. Thismoves the alarm to the Inactive Alarm list, ifthe condition that caused the alarm has beencorrected. When Shutdown Alarms arecleared, the unit will attempt to restart (if the<strong>micro</strong> is set for auto-start). Whennon-Shutdown Alarms are cleared, there willbe no noticeable change in the unit’soperation.Note 2The Inactive Alarm list is reached by firstpressing and holding the Alarm list key, thenthe UP Key, and holding both of them for sixseconds. Alarms in this list will begin <strong>with</strong> “I”(Inactive) followed by the alarm number.Clearing alarms from the Inactive Alarm listwill also clear alarms from the Active Alarmlist. Go to the end of the Inactive Alarm List.“LIST END, = TO CLEAR ALARMS” will showin the Message Center. Press = to clear allalarms from both lists.For units <strong>with</strong> a Glow/Crank switch, refer toNote 4, Note 5 and Note 9.Note 5 Many checks will be made <strong>with</strong> the<strong>micro</strong>processor powered up, but <strong>with</strong> nooutputs to the unit components. The unit maybe put into PC Mode to do this. For additionalinformation see PC Mode -- Section 6.1.Note 6Note 7For units <strong>with</strong> a Glow/Crank switch, analternative method to power up the<strong>micro</strong>processor <strong>with</strong> no load, hold theGlow/Crank switch in the glow position, andplace the START/RUN-OFF switch inSTART/RUN. Continue to hold theGlow/Crank switch for two seconds after theself test begins, then release. This is beforethe setpoint and box temp values are show.The Message Center will show “Manual StartMode Selected,” however no electricalcircuits will be energized. Current draw in thisstate is 0 ± 0.5 Amps.Sensors and sensor circuits may be tested atthe 1MP plug. Remove plug from<strong>micro</strong>processor and using the 1MP Plug Mapand an ohmmeter, test resistance of circuits.(See Section 9.28 for chart of resistances fordifferent sensors.)When checking the Defrost Air switch, RPMSensor (Standard Engine Only), Engine OilLevel switch, Door switch, or HPS, unplug2MP at the <strong>micro</strong>processor. Using the 2MPPlug Map and wiring diagram, check forvoltage at the appropriate terminal.Note 3Note 4To test electrical circuits when unit is <strong>with</strong>out aglow crank switch, locate the 3 “extra” wiresinside the control panel that were used toconnect to the glow crank switch before April,2007. Use either a jumper wire to energizethe circuits, or connect a temporary GCS intothe circuit to continue.To test electrical circuits when the unit isequipped <strong>with</strong> a glow crank switch, place theunit in Manual Start Operation.To do this, first turn the unit off. Press and holdthe Glow/Crank switch in the Glow position.Place the Start/Run-Off Switch in Start/Runposition. Continue to hold the Glow/Crankswitch until the setpoint and box temperatureare shown in the display, then release it. TheMessageCenter will show“Manual Start Mode Selected”, and the RunRelay will be energized. See Unit non-runningamps below for current draw in this state.Note 8Note 9When checking the light bar, Solenoid Valves& Unloader circuits, unplug 3MP at the<strong>micro</strong>processor. Using the 3MP Plug Mapand wiring diagram, check for voltage atterminal of the circuit you are testing. Shouldbe battery voltage.Some tests can only be conducted while theunit is operating. The unit may be startedautomatically by placing theSTART/RUN-OFF switch in the START/RUNposition. Units <strong>with</strong> a Glow/Crank switch canbe started manually by pressing and holdingthe Glow/Crank switch in the Glow position.Place the START/RUN-OFF switch inSTART/RUN. Continue to hold theGlow/Crank switch until the setpoint and boxtemperature are shown in the display, thenrelease it after glowing the engine for theappropriate time required for the ambienttemperature. The MessageCenter will show“Manual Start Mode Selected.” Hold theGlow/Crank switch in the Crank position untilthe engine starts.62-106838--2
AlarmNO.Steps ALARM / CAUSE CORRECTIVE ACTION8.3 DRIVER/OPERATOR ALARMS1 LOW FUEL LEVEL WARNING (for units <strong>with</strong> Low Fuel Level 0% to 100% Sensor / fuel level is displayedin Data list)Note: This is an optional alarm which will not occur unless a fuel level sensor is present and configured ON.• TRIGGER ON: Fuel level is 15% or less for more than 30 seconds.• UNIT CONTROL: Alarm only• RESET CONDITION:Auto reset when the fuel level is above 17% for more than 30 seconds, or Alarmmay be manually reset via keypad or by turning the unit off, then back on again.NOTE: Follow the steps below until a problem is found. Once a repair or correction has been made, the active alarmshould clear itself (see reset condition above). Operate the unit through the appropriate modes to see if any activealarm occurs. Continue <strong>with</strong> the steps below as necessary.1 Check For Low Fuel Levela. Check fuel level in the fuel tank Add fuel as needed to the fuel tank.2 Check Fuel Level Sensora. Inspect fuel level sensor& connectorpins & terminalsNo physical damage to switch.No damaged or corroded pins in plug.b. Check fuel level sensor operation Place START/RUN-OFF switch in START/RUN position.c. Check for voltage at the harness plug Voltage should be approximately12VDC.between pins for BLACK (SP24)negative and RED (SPK5) positivewires.d. Check for voltage at harness plugbetween pins for BLACK (SP24)negative and WHITE (1MP26)e. Check continuity of the wire from theharness plug, pin C to the<strong>micro</strong>processor plug 1MP263 Check Circuits With Test (Substitute) Sensora. Substitute known good sensor andclear alarm. Start unit and run for 30seconds.b. Check to see if alarm re-occurs.Voltage should be greater than 0 VDC and less than 5VDC, unless the probe is completely dry.Place START/RUN-OFF Switch in OFF position prior tochecking for continuity. Must be less than 10 ohms.Alarm should not come on. (Install new sensor ifnecessary)8--362-10683
AlarmNO.Steps ALARM / CAUSE CORRECTIVE ACTION1 LOW FUEL LEVEL WARNING (for units <strong>with</strong> Low Fuel Level switch/no fuel level display in Data list• TRIGGER ON: Fuel level is less than 1/8 of a tank for more than 30 seconds.• UNIT CONTROL: Alarm only• RESET CONDITION: Auto reset when fuel level is above 1/4 tank for more than 30 seconds.Alarm may be manually reset via keypad or by turning the unit off, then back on again.NOTE: Follow the steps below until a problem is found. Once a repair or correction has been made, the active alarmshould clear itself (see reset condition above). Operate the unit through the appropriate modes to see if any activealarm occurs. Continue <strong>with</strong> the steps below as necessary.1 Check For Low Fuel Levela. . Check fuel level in the fuel tank Add fuel as needed to the fuel tank.2 Check Fuel Level Switcha. . Inspect fuel level switch & connectorpins & terminalsNo physical damage to switch.No damaged or corroded pins in plug.b. .Check fuel level switch operation Place unit in Component Test Mode -- Run Relay On, or inManual Start Mode (see Note Note 4). DO NOT STARTUNIT.c. .Check for voltage at harness plugbetween pins A and Bd. .Check continuity of the wire from theharness plug, pin C to the<strong>micro</strong>processor plug 2MP043 Check Circuits With Test (Substitute) Switcha. Substitute known good sensor andclear alarm. Start unit and run for 30seconds.b. Check to see if alarm re-occurs.Voltage should be approximately 12VDC at harness plugbetween pins A and B.Place START/RUN-OFF switch in OFF position prior tochecking for continuity. Must be less than 10 ohms.Alarm should not come on. (Install new switch ifnecessary)62-106838--4
AlarmNO.Steps ALARM / CAUSE CORRECTIVE ACTION2 LOW ENGINE OIL LEVELNote: This is an optional alarm which will not occur unless an oil level sensor is present and configured ON.• TRIGGER–ON: Engine oil level is sensed approx. 7 or more qts. (6.62 or more liters) low for longer than30 seconds.• UNIT CONTROL: Alarm Only, or may be configured to shut unit down on some models.• RESET CONDITION: Auto reset if engine oil level is above 4 qt. (3.79 liters) low for more than 30seconds or alarm may be manually reset via keypad or by turning the unit off, then back on again.NOTE: Follow the steps below until a problem is found. Once a repair or correction has been made, the active alarmshould clear itself (see reset condition above). Operate the unit through the appropriate modes to see if any activealarm occurs. Continue <strong>with</strong> the steps below as necessary.1 Check Engine Oil Levela. Check engine oil dipstick Add engine oil as needed to fill.2 Check Engine Oil Level Switcha. Inspect engine oil level switch &connector pins & terminalsNo physical damage to switch.No damaged or corroded pins in plug.b. Check engine oil level switch operation Contacts open when level is more than 7 qts lowContacts closed when level is less than 4 qts low3 Check Engine Oil Level Switch Harnessa. Inspect harness & control boxconnector pins & terminals (See wiringschematic Section 11.)b. Check for shorted circuit in harness,and continuity through the harness4 Check Oil Level Switcha. Drain oil level to approximately 2.8 to3-4 quarts (3.8 liters) low. Removeswitch.b. Visually and physically inspect upperand lower float stops.No physical damage to harness.No damaged or corroded pinsPlace unit in PC mode, or in Manual Start mode (see NoteNote 4.) DO NOT START UNIT.Battery voltage reading (12-13 VDC) between wires inplugMust be securely fastened to center rod.8--562-10683
AlarmNO.Steps ALARM / CAUSE CORRECTIVE ACTION3 LOW COOLANT LEVEL• TRIGGER ON: Engine coolant level is 1 or more quarts (.95 or more liters) low for more than 30 seconds.• UNIT CONTROL: Alarm only• RESET CONDITION: Auto reset if engine coolant level is at the full mark for more than 30 seconds. Alarmmay be manually reset via keypad or by turning the unit off, then back on again.NOTE: Follow the steps below until a problem is found. Once a repair or correction has been made, the active alarmshould clear itself (see reset condition above). Operate the unit through the appropriate modes to see if any activealarm occurs. Continue <strong>with</strong> the steps below as necessary.1 Check For Low Coolant Levela. Check engine coolant level in thecoolant bottleb. Check coolant hoses for leaks orbreaks2 Check Engine Coolant Level Switcha. Inspect engine coolant level switch &connector pins & terminalsAdd coolant as needed to the coolant reservoir and to thefill tube on the radiatorRepair all leaks and breaks as necessaryAdd coolant as needed to the coolant reservoir and to thefill tube on the radiatorNo physical damage to switch.No damaged or corroded pins in plug.b. Check harness wiring to plug. Verify wires are in correct plug orifice.c. Check engine coolant level switchoperationd. Check for voltage at harness plugbetween pins A and Be. Check continuity of the wire from theharness plug, pin C to the<strong>micro</strong>processor plug 2MP15Place unit in Component Test mode, Run Relay On or inManual Start mode (see Note Note 4). DO NOT STARTUNIT.Voltage should be 12 volts at harness plug between pins Aand B.Place START-RUN/OFF switch in OFF position prior tochecking for continuity. Must be less than 10 ohms.3 Check Circuits With Test (Substitute) Switcha. Substitute known good sensor andclear alarm. Start unit and run for 30seconds.b. Check to see if alarm re-occurs. Alarm should not come on. (Install new sensor)62-106838--6
AlarmNO.Steps ALARM / CAUSE CORRECTIVE ACTION8.4 SHUTDOWN ALARMS11 LOW ENGINE OIL PRESSURE• TRIGGER–ON: Engine oil pressure is below 12 PSIG (0.82 Bar) for longer than five seconds while theengine is running.• UNIT CONTROL: Unit Shutdown & Alarm.• RESET CONDITION: Auto Reset after 15 minutes or, alarm may be manually reset via keypad or by turningthe unit off, then back on again.NOTE: Follow the steps below until a problem is found. Once a repair or correction has been made, clear the activealarm(s). (See Note 1) Operate the unit through the appropriate modes to see if any active active alarm occurs.Continue <strong>with</strong> the steps below as necessary.1 Check For Low Engine Oil Level Alarma. Check for alarm 2 Alarm conditions must be corrected and the alarm clearedto continue2 Check Engine Oil Pressure Switcha. Inspect switch & connector pins &terminalsNo physical damage to switch.No damaged or corroded pins in plug.b. Check engine oil switch operation. Contacts closed when oil pressure is above 15 PSIG (1.02Bars)Contacts open when oil pressure is below 12 PSIG (0.82Bar)3 Check Engine Oil Switch Harnessa. Inspect harness & control boxconnector pins & terminals (See wiringschematic Section 11.)b. Check for shorted circuit in harness,and continuity through the harnessNo physical damage to harness.No damaged or corroded pinsSTART/RUN-OFF switch in START/RUN position, ManualStart mode (See Note Note 4) or PC modeBattery voltage reading (12-13 VDC) between wires inplug4 Check Engine Oil Pressurea. Connect mechanical oil gauge Oil pressure must be greater than 15 PSIG (1.02 Bars)b. Check engine oil level Oil must be in safe range on dipstick8--762-10683
AlarmNO.Steps ALARM / CAUSE CORRECTIVE ACTION12 HIGH COOLANT TEMPERATURE• TRIGGER–ON: For ambient temperatures below 120°F (48.9°C) Engine coolant temperature isabove 230°F (110°C), or Ambient temperatures above 120°F (48.9°C), engine coolanttemp is over 241°F (116°C), or Engine coolant temperature is between 230°F and 241°F(110°C and 116°C) for more than five minutes.• UNIT CONTROL: Unit Shutdown & Alarm.• RESET CONDITION: Auto Reset after 15 minutes if the engine coolant temp falls below 212°F (100°C),or Alarm may be manually reset via keypad or by turning the unit off, then back on again.NOTE: Follow the steps below until a problem is found. Once a repair or correction has been made, the active alarmshould clear itself (see reset condition above). Operate the unit through the appropriate modes to see if any activealarm occurs. Continue <strong>with</strong> the steps below as necessary.1 Check Coolant Level.a. Check coolant level in overflow bottle Level must be in the Normal range.b. Check coolant level in radiator Level must be at the top of the radiator fill tube.Do not remove the cap from a hotradiator; if the cap must be removed,do so very slowly in order to releasethe pressure <strong>with</strong>out spray.2 Check Freeze Point Of Coolant.a. Use Coolant tester to checkconcentration of anti-freeze mixture.Must be between 40% to 60% Ethylene Glycol to watermixture.3 Check Airflow Through Radiator/Condenser Coila. Inspect condenser & radiator fins Fins must be straight. 90% or more of the coil surfacemust be undamaged. No “dead” air spaces. Condenser /Radiator coil must be clean.4 Check Condenser And Water Pump Beltsa. Check upper fan belt tension &condition.b. Check lower fan belt tension &condition.c. Check radiator fan belt.d. Check water pump belt tension &condition.5 Check engine cooling system.a. Compare actual engine temperature tothe <strong>micro</strong>processor readingb. Test operation of engine coolantthermostat(Refer to Section 9.9 for belt tensions)No Glazing, no cracking, no slippingTemperature must be <strong>with</strong>in ±20°F (±11.1°C).(Refer to Section 2.7 for coolant thermostat specifications)c. Check water pump operation Must not leak, impeller attached tightly to shaftd. Check water pump bypass hose tothermostat housing for internalMust be clear and open.blockage62-106838--8
AlarmNO.Steps ALARM / CAUSE CORRECTIVE ACTION13 HIGH DISCHARGE PRESSURE• TRIGGER–ON: Compressor discharge pressure is over 465 PSIG (31.6 Bars)• UNIT CONTROL: Immediate Unit Shutdown & Alarm• RESET CONDITION: Auto Reset after 15 minutes if the compressor discharge pressure falls below 350PSIG (23.8 Bars), or Alarm may be manually reset via keypad or by turning the unit off, then back onagain.NOTE: Follow the steps below until a problem is found. Once a repair or correction has been made, the active alarmshould clear itself (see reset condition above). Operate the unit through the appropriate modes to see if any activealarm occurs. Continue <strong>with</strong> the steps below as necessary.1 If Alarm Occurs During Pretrip Test 11, 12 Or 13a. Check discharge snubber tee Remove and inspect tee. If snubber restrictor is in place,remove it, reinstall tee, and re-test for alarm.b. Check SV1 for opening. During pretrip tests 11, 12 and 13, SV1 may be energizedfor 1 second to reduce head pressure during tests. If SV1fails to actually open during the 1 second that it isde-energized, this alarm may occur. Repair SV1 asneeded.2 Check Fan Beltsa. Check upper fan belt tension &conditionb. Check lower fan belt tension &condition.3 Check Wiringa. Visually Inspect wiring to HPS, SV4, &both Compressor Unloaders(Refer to Section 9.9 for belt tensions)No Glazing, no cracking, no slipping(Refer to Section 9.9 for belt tensions)No Glazing, no cracking, no slippingWires must be connected properly & securely to eachcomponent4 Check Airflow Through Condenser Coila. Inspect condenser / radiator fins Fins must be straight. 90% or more of the coil surfacemust be undamaged. No “dead” air spaces. Condenser /Radiator coil must be clean.b. Check airflow (<strong>with</strong> unit running). Even airflow through the entire coilNo “dead” spots5 Check System Pressuresa. Install Manifold Test Set and check andcompare compressor discharge &suction pressures <strong>with</strong> those shown onthe <strong>micro</strong>processor controller.6 Check For Refrigerant Overchargea. Check refrigerant level in the receivertank.7 Check HPS Switcha. Inspect switch & connector pins &terminalsb. Check switch operation(Refer to Section 2.11 for pressuresettings)Additional steps on the next page.Suction & Discharge Pressures must have the samereading on gauges & on <strong>micro</strong> display.Pressures must be in the normal range for ambient & boxtemperature conditions.Level must be between upper & lower sight glassesNo physical damage to switch.No damaged or corroded pins in plug.Contacts open when compressor discharge pressure isabove cut-out point ± 10 PSIG (±0.68 Bar)Contacts closed when compressor discharge pressure isbelow cut-in point ± 10 PSIG (±0.68 Bar)8--962-10683
AlarmNO.Steps ALARM / CAUSE CORRECTIVE ACTION13 HIGH DISCHARGE PRESSURE (Continued)8 Check HPS Switch Harnessa. Inspect harness & control boxconnector pins & terminals (See wiringschematic Section 11.)b. Check for shorted circuit in harness,and continuity through the harnessNo physical damage to harness.No damaged or corroded pinsSTART/RUN-OFF switch in START/RUN position, ManualStart mode (See Note Note 4)Battery voltage reading (12-13 VDC) between wires inplug9 Perform Pretrip Checka. Run Pretrip & check for alarms Any active alarms must be corrected and cleared beforeproceeding.10 See <strong>Refrigeration</strong> Trouble ShootingSection 10.3Discharge Pressure must be in normal range for thecurrent ambient and box temperature conditions.62-106838--10
AlarmNO.Steps ALARM / CAUSE CORRECTIVE ACTION15 BATTERY VOLTAGE TOO HIGH• TRIGGER–ON: Voltage at the <strong>micro</strong>processor is greater than 17 VDC.• UNIT CONTROL: Unit Shutdown & Alarm• RESET CONDITION: Auto Reset after 15 minutes when the voltage at the <strong>micro</strong>processor is between11 -- 14 VDC, or Alarm may be manually reset via keypad or by turning the unit off,then back on again.NOTE: Follow the steps below until a problem is found. Once a repair or correction has been made, the active alarmshould clear itself (see reset condition above). Operate the unit through the appropriate modes to see if any activealarm occurs. Continue <strong>with</strong> the steps below as necessary.1 Check Battery Voltagea. Test voltage at battery <strong>with</strong> unit off. Must be between12-16 VDCb. Test voltage at battery <strong>with</strong> unit Must be between12-16 VDCrunning.2 Check Alternator Voltagea. Test voltage at alternator output Must be between 12-16 VDCterminal <strong>with</strong> unit offb. Test voltage at alternator output Must be between 12-16 VDCterminal <strong>with</strong> unit running.3 Check Voltage At Microprocessora. Check voltage reading at Must be between 12--16 VDC.<strong>micro</strong>processor input (QC1+ to QC2-)b. Check voltage reading on<strong>micro</strong>processor displayMust be <strong>with</strong>in 0.5 VDC of reading obtained in 3 Amp(above)16 BATTERY VOLTAGE TOO LOW• TRIGGER–ON: Voltage at the <strong>micro</strong>processor is less than 10 VDC (except when the engine starter isengaged)• UNIT CONTROL: Unit Shutdown & Alarm• RESET CONDITION: Auto Reset after 15 minutes when the voltage at the <strong>micro</strong>processor is between11 -- 14 VDC, or Alarm may be manually reset via keypad or by turning the unit off, then back on again.NOTE: Follow the steps below until a problem is found. Once a repair or correction has been made, the active alarmshould clear itself (see reset condition above). Operate the unit through the appropriate modes to see if any activealarm occurs. Continue <strong>with</strong> the steps below as necessary.1 Check For Alternator Not Charging Alarma. Check for alarm 51 Alarm conditions must be corrected and the alarm clearedto continue2 Check Battery Voltagea. Inspect battery cable ends and posts Must be clean and tightb. Test voltage at battery <strong>with</strong> unit off. Must be above 11 VDCc. Test voltage at battery <strong>with</strong> unit Must be above 11 VDCrunning.d. Test specific gravity of battery (Check for battery specifications)e. Perform load test on battery (Follow (Check for battery specifications)battery manufacturer’s procedure)3 Check Voltage At Microprocessora. Check voltage reading at Must be above 11 VDC<strong>micro</strong>processor input (MPQC1+ toMPQC2-).b. Check voltage reading on Must be <strong>with</strong>in 0.5 VDC of reading obtained in 3a (above)<strong>micro</strong>processor display8--1162-10683
AlarmNO.Steps ALARM / CAUSE CORRECTIVE ACTION17 HIGH COMP DISCHARGE TEMP• TRIGGER–ON:Ambient temp below 120°F (48.9°C) discharge temp was between 310°F -- 349°F (154.4°C -- 176.7°C)for three minutes, orAmbient temp above 120°F (48.9°C) Discharge temp was between 340°F -- 349°F (171.1°C -- 176.7°C)for three minutes, orDischarge temp ever reaches 350°F (176.7°C)• UNIT CONTROL: Unit Shutdown & Alarm• RESET CONDITION:Auto Reset after 15 minutes <strong>with</strong> Ambient temp below 120°F (48.9°C) thedischarge temp falls below 300°F (148.8°C), orAuto Reset after 15 minutes <strong>with</strong> Ambient temp above 120°F (48.9°C) the dischargetemp falls below 330°F (65.4°C), orAlarm may be manually reset via keypad or by turning the unit off, then back on again.NOTE: Follow the steps below until a problem is found. Once a repair or correction has been made, the active alarmshould clear itself (see reset condition above). Operate the unit through the appropriate modes to see if any activealarm occurs. Continue <strong>with</strong> the steps below as necessary.1 If Alarm Occurs During Pretripa. Pump down low side of refrigerationsystem.Verify that system will pump down to 0 PSIG and will hold<strong>with</strong>out leak-back.2 Check Refrigerant Chargea. Check for undercharged system Level must be above lower sight glass3 Check Airflow Through Condenser Coila. Inspect condenser/radiator fins Fins must be straight. 90% or more of the coil surfacemust be undamaged. No “dead” air spaces.Condenser/ Radiator coil must be clean.b. Check airflow (<strong>with</strong> unit running). Even airflow through the entire coilNo “dead” spots4 Check system pressuresa. Install Manifold Test Set and check andcompare compressor discharge &suction pressures <strong>with</strong> those shown onthe <strong>micro</strong>processor controller.5 Check DTT2a. Visually inspect the mounting andorientation of DTT2Suction & Discharge Pressures must have the samereading on gauges & on <strong>micro</strong> display.Must be mounted tightly to the evaporator section, <strong>with</strong> thelong flat surface of DTT2 in contact <strong>with</strong> the metal surface.b. Verify the temperature of DTT2. Use a test temperature reading device (infrared,independent thermometer, etc.) to verify that DTT2temperature is the same as that being displayed in theUnit Data list. (Refer to Section 3.14.)6 Perform Pretrip Checka. Run Pretrip & check for alarms Any active alarms must be corrected and cleared beforeproceeding.7 Check compressor reed valves & gasketsa. Remove compressor heads & inspect Must be in good condition.condition of all reeds & gasketsAdditional steps on the next page.62-106838--12
AlarmNO.Steps ALARM / CAUSE CORRECTIVE ACTION17 HIGH COMP DISCHARGE TEMP (Continued)8 Check Expansion Valve (TXV)a. Visually inspect valve Bulb must be clamped tightly on the suction line andinsulated. No physical damage to bulb, capillary tube ofvalve body.b. Check MOP of valve Refer to Section 2.11c. Check superheat of valve Refer to Section 2.119 Check system for non-condensablesa. Check refrigeration system for No non–condensable gas(es) may be present.non-condensable gas(es)8--1362-10683
AlarmNO.Steps ALARM / CAUSE CORRECTIVE ACTION18 LOW REFRIGERANT PRESSURE• TRIGGER–ON:Suction Pressure is less than -6 inHg (-0.2 Bar) for more than 120* seconds, whenthe RAT is above -10°F (-23.3°C), orIf the Suction Pressure is less than -16 inHg (-0.41 Bar) for more than 120*seconds atany RAT temperature,• UNIT CONTROL: Alarm Only or Unit Shutdown & Alarm (if configured)• RESET CONDITION:Auto Reset after 15 minutes if Suction Pressure is more than -4 inHg (-0.41 Bar), orif RAT falls below -10°F (-23.3°C), or Alarm may be manually reset via keypad or byturning the unit off, then back on again.* Time may be set from 0 -- 255 seconds in the configuration list. Refer to section 6.2.1.NOTE: Follow the steps below until a problem is found. Once a repair or correction has been made, the active alarmshould clear itself (see reset condition above). Operate the unit through the appropriate modes to see if any activealarm occurs. Continue <strong>with</strong> the steps below as necessary.1 Check Fan Beltsa. Check upper fan belt tension &condition2 Check System Pressuresa. Install Manifold Test Set and check andcompare compressor discharge &suction pressures <strong>with</strong> those shown onthe <strong>micro</strong>processor controller.(Refer to Section 9.9 for belt tensions)No Glazing, no cracking, no slipping)Suction pressure must be above 3 PSIG (0.2 Bar)Suction & Discharge Pressures must have the samereading on gauges & on <strong>micro</strong> display.3 Check Refrigerant Chargea. Check for undercharged system Level must be above lower sight glass4 Manually Defrost Unita. Defrost unit and terminateautomatically.5 Check Evaporator Airflowa. Check evaporator fan clutch Must be engagedb. Check evaporator section, blowerwheel, return air bulkhead, air chute,and cleanliness of evaporator coilTypical defrost cycle time is 5-20 minutesSuction pressure should rise gradually during cycle.Good Air FlowReturn air not restrictedAir chute in good conditionNo damage to blower wheelEvap. coil clean6 Perform Pretrip Checka. Run Pretrip & check for alarms Any active alarms must be corrected and cleared beforeproceeding.7 Check Expansion Valve (TXV)a. Visually inspect valve Bulb must be clamped tightly on the suction line andinsulatedb. Check MOP of valve Refer to Section 2.11c. Check superheat of valve Refer to Section 2.1162-106838--14
AlarmNO.Steps ALARM / CAUSE CORRECTIVE ACTION19 LOW FUEL SHUTDOWN (for units <strong>with</strong> Low Fuel Level 0% to 100% Sensor / fuel level is displayedin Data list)• TRIGGER ON: Fuel level is 10% or less for more than 1 minute.• UNIT CONTROL: Unit shutdown and Alarm.• RESET CONDITION: Auto reset when fuel level is above 12% for more than 1 minute, or alarm may bemanually reset via keypad or by turning the unit off, then back on again.NOTE: Follow the steps below until a problem is found. Once a repair or correction has been made, the active alarmshould clear itself (see reset condition above). Operate the unit through the appropriate modes to see if any activealarm occurs. Continue <strong>with</strong> the steps below as necessary.1 Check For Low Fuel Level Warning Alarma. Check for alarm 1 Must be cleared.b. Check fuel level intake Must be above 1/4 tank.Fill as needed.2 Check accuracy of sensora. Verify sensor accuracy See Section 9.8.2 for sensor testing.b. Check wiring to sensor No physical damage to sensor.No damaged or corroded pins.3 Check fuel level sensor harnessa. Inspect harness & control boxconnector pins & terminals (See wiringschematic)b. Check for shorted circuit in harness,and continuity through the harnessNo physical damage to harness.No damaged or corroded pinsSTART/RUN-OFF switch in START/RUN position.Battery voltage reading (12-13 VDC) between A and Bwires in plug.19 LOW FUEL SHUTDOWN (for units <strong>with</strong> Low Fuel Level Switch / no fuel level display in Data list)• TRIGGER ON: Alarm 1 (LOW FUEL LEVEL) has been on past the allowed run time (See chart below)• UNIT CONTROL: Unit shutdown and Alarm.• RESET CONDITION: Auto reset when fuel level is above 1/4 tank for more than 30 seconds or Alarm maybe manually reset via keypad or by turning the unit off, then back on again.30 gal. Fuel tank 30 Minutes50 gal. Fuel tank 60 Minutes75 gal. Fuel tank 90 Minutes100 gal. Fuel tank 120 Minutes120 gal. Fuel tank 150 MinutesNOTE: Follow the steps below until a problem is found. Once a repair or correction has been made, the active alarmshould clear itself (see reset condition above). Operate the unit through the appropriate modes to see if any activealarm occurs. Continue <strong>with</strong> the steps below as necessary.1 Check For Low Fuel Level Warning Alarma. Check for alarm 1 Must be cleared.8--1562-10683
AlarmNO.Steps ALARM / CAUSE CORRECTIVE ACTION20 MAXIMUM COMPRESSOR ALARMS• TRIGGER ON: One of the following alarms:13 -- High Discharge Pressure 17 -- High Compressor Discharge Temperature18 -- Low Refrigerant Pressure 27 -- High Suction Pressure28 -- Check Refrigerant System 29 -- Check Heat Cycle56 -- Check Evaporator Airflowhas occurred three times during the last two hours of actual unit operation (off cycle time isnot included), AND this alarm (Alarm 20) has been enabled in this <strong>micro</strong>processor (“Test 6”or “Compressor Alarm Shutdown” appears in the Installed Options List in Unit Data), ANDCompressor Alarm Shutdown in the configuration list has been set to YES. (Refer toSection 3.14. for information on Unit Data list)• UNIT CONTROL: Unit shutdown and Alarm.• RESET CONDITION: This alarm can only be cleared from the Inactive Alarm list. It can not be clearedfrom the Active Alarm list, and it will not clear when the START/RUN-Stop switch is turned Off then Onagain. This is so that drivers and other operators can not reset the alarm. The unit MUST be taken to arepair shop for inspection and repair.NOTE: Follow the steps below until a problem is found. Once a repair or correction has been made, the active alarmshould clear itself (see reset condition above). Operate the unit through the appropriate modes to see if any activealarm occurs. Continue <strong>with</strong> the steps below as necessary.1 Check for trigger on alarmsa. Check the Active Alarm list to seewhich of the following alarms is alsopresent: A13, A17, A18, A27, A28,A29, A56See steps for the active alarm so that the alarm can becleared.All Alarm(s) from the above list must be cleared tocontinue.Reset Alarm 20 from the Inactive Alarm list.21 TECHNICIAN RESET REQUIRED• TRIGGER ON: The High Engine Temp Shutdown Configuration and/or Engine Oil Pressure ShutdownConfiguration is/are set to YES, and either Alarm 11 – Low Engine Oil Pressure, or Alarm 12 – HighCoolant Temperature has become active and shut the unit down three times <strong>with</strong>in the past 2 hours• UNIT CONTROL: Unit shutdown and alarm• RESET CONDITION: Reset from inactive alarm list only. Can not be reset by turning switch OFF and thenON again.NOTE: Follow the steps below until a problem is found. Once a repair or correction has been made, the active alarmshould clear itself (see reset condition above). Operate the unit through the appropriate modes to see if any activealarm occurs. Continue <strong>with</strong> the steps below as necessary.1 Determine Which Alarm Caused This Alarm To Be Active.a. Check active alarm list forOne or more of these alarms will be present.Alarm #’s 11 or 12.b. Follow the steps for the alarm(s) found All alarms condition must be corrected.above, and correct the alarm condition.2 Reset AlarmReset all alarms from the inactive alarm All alarms must be cleared to start unit.list.62-10683 8--16Change 09/11
AlarmNO.Steps ALARM / CAUSE CORRECTIVE ACTION27 HIGH SUCTION PRESSURE• TRIGGER ON: Suction pressure has been greater than 98 PSIG (6.7 Bars) for more than 10 minutes• UNIT CONTROL: Alarm Only or Unit Shutdown & Alarm (if configured)• RESET CONDITION:Auto reset when suction pressure is less than 75 PSIG (5.1 Bars) for five minutes ifconfigured for alarm only,orAuto Reset after 15 minutes if configured as a Shutdown Alarm or,Alarm may be manually reset via keypad or by turning the unit off, then back on again.NOTE: Follow the steps below until a problem is found. Once a repair or correction has been made, the active alarmshould clear itself (see reset condition above). Operate the unit through the appropriate modes to see if any activealarm occurs. Continue <strong>with</strong> the steps below as necessary.1 Check System Pressuresa. Check and compare compressordischarge & suction pressures <strong>with</strong>those shown on the <strong>micro</strong>processorcontroller.2 Check Compressor Drive Couplinga. Verify that compressor coupling isintact, and that the compressorcrankshaft is turning.Suction & Discharge Pressures must have the samereading ± 5 PSIG (±0.34 Bar) on gauges & on <strong>micro</strong>display.Compressor crankshaft must be turning.3 Perform Pretrip Checka. Run Pretrip & check for alarms Any active alarms must be corrected and cleared beforeproceeding.4 Check compressor reed valves & gasketsa. Remove compressor heads & inspect Must be in good condition.condition of all reeds & gaskets5 Check compressor pistons and connecting rods.a. Check compressor pistons and Must be in good condition.connecting rods.6 See <strong>Refrigeration</strong> Trouble Shooting Section 10.38--1762-10683
AlarmNO.Steps ALARM / CAUSE CORRECTIVE ACTION28 CHECK REFRIGERATION SYSTEM• TRIGGER ON: Discharge pressure is not at least 5 PSIG (0.34 Bar) higher than Suction pressure formore than 10 minutes• UNIT CONTROL: Alarm Only or Unit Shutdown & Alarm (if configured)• RESET CONDITION: Auto reset when discharge pressure is more than 20 PSIG (1.36 Bars) above thesuction pressure for five minutes, or alarm may be manually reset via keypad or byturning the unit off, then back on again.NOTE: Follow the steps below until a problem is found. Once a repair or correction has been made, the active alarmshould clear itself (see reset condition above). Operate the unit through the appropriate modes to see if any activealarm occurs. Continue <strong>with</strong> the steps below as necessary.1 Check System Pressuresa. Install Manifold Test Set and check andcompare compressor discharge &suction pressures <strong>with</strong> those shown onthe <strong>micro</strong>processor display.2 Check Compressor Drive Couplinga. Verify that compressor coupling isintact, and that the compressorcrankshaft is turning.Suction & Discharge Pressures must have the samereading -- ± 5 PSIG (±0.34 Bar) -- on gauges & on <strong>micro</strong>display.Compressor crankshaft must be turning.3 Perform Pretrip Checka. Run Pretrip & check for alarms Any active alarms must be corrected and cleared beforeproceeding.4 Check compressor reed valves & gasketsa. Remove compressor heads & inspect Must be in good condition.condition of all reeds & gaskets5 Check compressor pistons and connecting rods.a. Check compressor pistons and Must be in good condition.connecting rods.6 See <strong>Refrigeration</strong> System Troubleshooting, Section 10.3.29 CHECK HEAT CYCLE• TRIGGER ON: The unit has been operating in the heat cycle for more than 5 minutes, and the SAT ismore than 5.5°F (3°C) colder than the RAT constantly for more than 60 seconds. (Unit is actually coolingthe air going through the evaporator).• UNIT CONTROL: Unit shutdown and alarm.• RESET CONDITION: Auto reset after 15 minutes or alarm may be manually reset via keypad or byturning the START/RUN-OFF switch OFF and then back On again.NOTE: Follow the steps below until a problem is found. Once a repair or correction has been made, the active alarmshould clear itself (see reset condition above). Operate the unit through the appropriate modes to see if any activealarm occurs. Continue <strong>with</strong> the steps below as necessary.1 Perform Pretrip Checka. Run Pretrip & check for alarms Any active alarms must be corrected and cleared beforeproceeding.2 See Troubleshooting, Section 10.3. - <strong>Refrigeration</strong> System Not Heating62-106838--18
AlarmNO.Steps ALARM / CAUSE CORRECTIVE ACTION8.5 START UP ENGINE ALARMS30 FAILED TO RUN MINIMUM TIME• TRIGGER–ON: Engine has shut down on an alarm 3 times <strong>with</strong>out having run for at least 15 minutesbetween each shutdown (not including Door or Remote switch shut downs).• UNIT CONTROL: Unit Shutdown & Alarm• RESET CONDITION: Alarm may be manually reset via keypad or by turning the unit off, then back on again.If Unit Operation mode is set for Rail, this alarm will automatically reset after 4 hours.NOTE: Follow the steps below until a problem is found. Once a repair or correction has been made, clear thealarm(s). (See Note 1) Operate the unit through the appropriate modes to see if any active alarm occurs. Continue<strong>with</strong> the steps below as necessary.1 Check For Alarmsa. Check for shut down alarms Alarm conditions must be corrected and the alarm(s)cleared to continue.8--1962-10683
AlarmNO.Steps ALARM / CAUSE CORRECTIVE ACTION31 FAILED TO START - AUTO MODE• TRIGGER–ON: Engine has tried to start three times unsuccessfully in the auto start mode.• UNIT CONTROL: Unit Shutdown & Alarm• RESET CONDITION: Alarm may be manually reset via keypad or by turning the unit off, then back on again.NOTE: Follow the steps below until a problem is found. Once a repair or correction has been made, clear thealarm(s). (See Note 1) Operate the unit through the appropriate modes to see if any active alarm occurs. Continue<strong>with</strong> the steps below as necessary.1 Check For Flash Code On Engine Speed Control Unit (ENSCU)(Applies to ESC engines only).a. Check for flash codes on the ENSCU. Refer to Electronic Speed Control Diagnostic tables --Figure 10--1 thru Figure 10--4. There must be no LEDflashing alarm codes occurring to continue.2 Check Fuel Level In Tank.a. Check fuel gauge on tank. Fill tank as needed.3 Check For Alarmsa. Check for the following alarms:71 Check for Bad F2 or F3 Fuse alarm40 Check Glow Plugs alarm35 Check Starter Circuit alarmAlarm conditions must be corrected and the alarm clearedto continue4 Check Fuel Solenoid (Applies to non -ESC engines only)a. Check Run Relay LED Must be ON.b. Check voltage to fuel solenoid Energize Run Relay in Component Test Mode (Refer tosection 6.2.2) to energize the fuel solenoid.Must have 12 VDC between FSC--C (ground) & FSH--A(hold)With Manual Crank Switch in crank position (for units <strong>with</strong>GCS only)12 VDC between FSC--C (ground) & FSP--B (pick)For units <strong>with</strong>out GCS, check FSC--B (pick) circuitbetween fuel solenoid and starter motor.c. Inspect solenoid & connector pins &terminalsd. Inspect harness & control boxconnector pins & terminals (See wiringschematic)No damage to solenoidNo damaged or corroded pinsNo physical damage to harness.No damaged or corroded pinse. Check resistance of solenoid Refer to Section 2.13f. Check operation of solenoid Plunger must move in when energized5 Check Fuel Systema. Check fuel system prime No air in fuel systemb. Check fuel flow Unrestricted fuel flow through systemc. Check voltage to glow plugs Glow Plug switch ON, Manual Start Mode (units <strong>with</strong> GCSonly)Units <strong>with</strong>out GCS, energize Glow Plug Relay inComponent Test Mode (Refer to section 6.2.2)In both cases there must be more than 11 VDC6 Check Engine Air–Intake Systema. Check air filter indicator Flag must not be visible.b. Inspect air intake system Hoses & tubes in good condition.No kinks or restrictionsAdditional steps on the next page.62-106838--20
AlarmNO.Steps ALARM / CAUSE CORRECTIVE ACTION31 FAILED TO START - AUTO MODE (Continued)7 Check For Correct Engine Oila. Check for correct oil viscosity (weight)for conditionsRefer to Section 2.7Must be correct for ambient conditions8 Check Engine Exhaust Systema. Inspect the exhaust system Must be clear and unobstructed9 Check Enginea. Check engine compression Refer to Section 2.710 Check RPM Sensora. Check sensor. Refer to Section 9.8.3.8--2162-10683
AlarmNO.Steps ALARM / CAUSE CORRECTIVE ACTION32 FAILED TO START - MANUAL• TRIGGER–ON: The unit was placed in Manual Start mode, and the engine was not manually started<strong>with</strong>in five minutes. or,The user has tried to start the engine three times unsuccessfully in the Manual Start mode.• UNIT CONTROL: Unit Shutdown & Alarm• RESET CONDITION: Reset by changing to Auto Start mode, or Alarm may be manually reset via keypador by turning the unit off, then back on again.NOTE: Follow the steps below until a problem is found. Once a repair or correction has been made, clear thealarm(s). (See Note 1) Operate the unit through the appropriate modes to see if any active alarm occurs. Continue<strong>with</strong> the steps below as necessary.1 Check If Unit Has A Glow/Crank Switch (GCS).a. Visually check to see if the unit has aGCS (Units built after April, 2007 do nothave this switch). Refer to Section 3.2for location of switch.For units <strong>with</strong> a GCS, continue <strong>with</strong> Step 2 below.For units <strong>with</strong>out a GCS, check the wiring that wouldconnect to the switch if it were present for shorts. It is notpossible to place the unit in Manual Start Mode <strong>with</strong>outenergizing this circuit.2 Check For Flash Code On Engine Speed Control Unit (ENSCU)(Applies to ESC engines only).a. Check for flash codes on the ENSCU. Refer to Electronic Speed Control Diagnostic tables --Figure 10--1 thru Figure 10--4. There must be no LEDflashing alarm codes occurring to continue.3 Operator Failed To Crank Enginea. Manually start unit. Engine starts and runs4 Check Fuel Level In Tank.a. Check fuel gauge on tank. Fill tank as needed.5 Check For Check Glow Plugs Alarma. Check for alarm 40 Alarm conditions must be corrected and the alarm clearedto continue.6 Check Manual Glow/Crank Switch (GCS) (Only for units <strong>with</strong> a GCS)a. Check the glow/crank switch No damaged or corroded pinsNo physical damageb. Check voltage to glow/crank switch- Voltmeter lead on - Battery post+ Voltmeter lead on switch terminals(With wires connected to switch)START/RUN-OFF switch in START/RUN position, ManualStart mode (See Note Note 4)Position Terminals VDCOff: 1 11 V (min)2 & 3 0 V (min)Glow 1&3 101/2V(min)2 0 V (min)Disconnect wire to Starter Solenoid before checking:Crank: 1 & 2 11 1/2V (min)3 0 V (min)c. Check voltage to glow plugs Glow Plug switch ON, Manual Start modeMore than 11 VDCd. Check voltage to starter solenoid Crank switch ON, Manual Start ModeMore than 11 VDC7 Check Glow/Crank Switch Harness - All Unitsa. Inspect harness & control boxconnector pins & terminals (See wiringschematic)Additional steps on the next page.No physical damage to harness.No damaged or corroded pins62-106838--22
AlarmNO.Steps ALARM / CAUSE CORRECTIVE ACTION32 FAILED TO START - MANUAL (Continued)8 Check Fuel Solenoid (Applies to non -ESC engines only)a. Check Run Relay LED LED 28 must be ON.b. Check voltage to fuel solenoid START/RUN-OFF switch in START/RUN position, ManualStart mode (See Note Note 4)More than 11 VDC positive and good groundc. Inspect solenoid & connector pins &terminalsd. Inspect harness & control boxconnector pins & terminals (See wiringschematic (See Wiring SchematicSection 11.)No damage to solenoid or wiresNo damaged or corroded pinsWires plugged inNo physical damage to harness.No damaged or corroded pinse. Check resistance of solenoid Refer to Section 2.13f. Check operation of solenoid Plunger must move in when energized9 Check Fuel Solenoid Harnessa. Inspect harness & control boxconnector pins & terminals (See WiringSchematic Section 11.)No physical damage to harness.No damaged or corroded pins10 Check Fuel Systema. Check fuel system prime No air in fuel systemb. Check fuel flow Unrestricted fuel flow through systemc. Check fuel system check valve from Check valve must hold fuel and not leak backfilter to injection pump.11 Check Engine Air–Intake Systema. Check air filter indicator Flag must not be visible.b. Inspect air intake system Hoses & tubes in good condition.No kinks or restrictions12 Check For Correct Engine Oila. Check for correct oil viscosity (weight)for conditionsRefer to Section 2.7Must be correct for ambient conditions13 Check Engine Exhaust Systema. Inspect the exhaust system Must be clear and unobstructed14 Check Enginea. Check engine compression Compression must be above 400 PSIG (27.22 Bar)8--2362-10683
AlarmNO.Steps ALARM / CAUSE CORRECTIVE ACTION34 ENGINE FAILED TO STOP• TRIGGER–ON: Engine is turning more than 500 RPM (or the <strong>micro</strong> input shows that the engine is turningmore than 500 RPM) for 20 seconds after unit was turned off, shut down on an alarm or cycled off in aStart/Stop Off Cycle, orOil Pressure Switch contacts are closed longer than 20 seconds after unit was turned off, shut down onan alarm, or cycled off in a Start/Stop Off Cycle.• UNIT CONTROL: Alarm Only• RESET CONDITION: Alarm may be manually reset via Keypad or by turning the unit off, then back on again.NOTE: Follow the steps below until a problem is found. Once a repair or correction has been made, clear thealarm(s). (See Note 1) Operate the unit through the appropriate modes to see if any active alarm occurs. Continue<strong>with</strong> the steps below as necessary.1 Check For Engine Runninga. Verify that engine is still running. Engine should not be running.2 Check RPM Sensora. Check actual engine RPM using hand Adjust engine linkage setting as needed.held tachometer.b. Compare actual RPM <strong>with</strong> those Both readings <strong>with</strong>in ± 50 RPM.shown on display.3 Check For Bad Engine RPM Sensor Alarma. Check for Alarm 130 Alarm conditions must be corrected and the alarm clearedto continue4 Check Engine Oil Pressure Switcha. Inspect switch & connector pins &terminalsNo physical damage to switch.No damaged or corroded pins in plug.b. Check engine oil switch operation. Contacts closed when oil pressure is above 15 PSIG (1.02Bars)Contacts open when oil pressure is below 12 PSIG (0.82Bar)5 Check Engine Oil Switch Harnessa. Inspect harness & control boxconnector pins & terminals (See wiringschematic)b. Check for shorted circuit in harness,and continuity through the harnessNo physical damage to harness.No damaged or corroded pinsStart/Run--Off Switch in Start/Run position, Manual StartMode (See Note Note 4) (for units <strong>with</strong> GCS only)For units <strong>with</strong>out a GCS, use Component Test Mode toenergize the Run Relay (Refer to Section 6.2.2)Battery voltage reading (12--13 VDC) between wires inplug to Oil Pressure Switch when disconnected from theswitch.6A. Check Fuel And Speed Actuator (FSA) & Circuit (ESC Engines Only)a. Check Run Relay LED LED 28 must be OFF.b. Check for 12 VDC on the Run Relay Mustbe0VDCcircuitc. Check SPK20 for voltage Mustbe0VDCd. Check ENSCU terminals 13 & 15 for Mustbe0VDCvoltagee. Check FSA plunger Must be free to move6B. Check Fuel Solenoid (non -Electronic Speed Controlled (ESC) engines) & Circuita. Check Run Relay LED LED 28 must be OFF.b. Check voltage at harness to fuel Mustbe0VDCsolenoid (non ESC engines)c. Check fuel solenoid plunger Must be free to move62-106838--24
AlarmNO.Steps ALARM / CAUSE CORRECTIVE ACTION35 CHECK STARTER CIRCUIT• TRIGGER–ON: Engine speed failed to reach 50 RPM during 2 start attempts.• UNIT CONTROL: Unit Shutdown & Alarm• RESET CONDITION: Alarm may be manually reset via keypad or by turning the unit off, then back on again.NOTE: Follow the steps below until a problem is found. Once a repair or correction has been made, clear thealarm(s). (See Note 1) Operate the unit through the appropriate modes to see if any active alarm occurs. Continue<strong>with</strong> the steps below as necessary.1 Check Engine Start -Upa. Does engine actually start, run for a few If NO, continue <strong>with</strong> step 2 below.seconds then shut off?If YES, check wiring to RPM sensor for a broken wire.2 Check If Unit Has Electronic Speed Control Flash Code (ESC Engines Only)a. Check for flash codes on the EngineSpeed Control Unit (ENSCU).b. Check for voltage at ENSCU terminal13c. Check for ground at ENSCU terminal19.3 Check Starter Relay Circuita. Check operation of starter solenoidrelayRefer to Electronic Speed Control Diagnostic tables --Figure 10--1 thru Figure 10--4Must be above 11.5 VDCNo damage or high resistance.START/RUN-OFF switch in START/RUN position, ManualStart mode (See Note Note 4)Relay contacts closed when crank switch is ONb. Check relay socket & terminals No signs of discoloration from overheatingNo corrosionc. Check voltage to Starter SolenoidRelayd. Inspect wiring to starter solenoid &starter motorNegative lead on 85, Positive lead on 86 = 12 VDCNegative lead on Gnd, Positive lead on 87 & 30 = 12 VDCNo physical damage to wiring or battery cable end.No damaged or corroded terminalse. Check voltage to starter solenoid Must be above 11.5 VDCf. Check voltage to starter motor Must be above 10 VDC while cranking4 Check Fuel and Speed Actuator (FSA) & circuit (ESC Engines Only)a. Check Run Relay LED LED 28 must be ON.b. Check for 12 VDC on the Run Relay Mustbe0VDCcircuitc. Check SPK20 for voltage Must be 12 VDCd. Check ENSCU terminals 13 & 15 for Must be 12 VDCvoltagee. Check FSA plunger Must be free to move5 Check Startera. Inspect starter and wiring. No damage or corrosionWiring and battery cable must be clean and tight.b. Check resistance of solenoid Refer to Section 2.13c. Check resistance of starter motor Refer to Section 2.13d. Test amperage draw of starter. Refer to Section 2.13Additional steps on the next page.8--2562-10683
AlarmNO.Steps ALARM / CAUSE CORRECTIVE ACTION35 CHECK STARTER CIRCUIT (Continued)6 Check Battery Voltagea. Inspect battery cable ends and posts Must be clean and tightNo corrosionb. Test voltage at battery <strong>with</strong> unit off. Must be above 11 VDCc. Test specific gravity of battery Checkd. Perform load test on battery (Follow Checkbattery manufacturer’s procedure)7 Check for correct engine oila. Check for correct viscosity forconditionsRefer to Section 2.7Must be correct for ambient conditions62-106838--26
AlarmNO.Steps ALARM / CAUSE CORRECTIVE ACTION36 CHECK COOLANT TEMPERATURE• TRIGGER–ON: Coolant temperature is below 32°F (0°C) after the engine has been running for fiveminutes.• UNIT CONTROL: Alarm Only• RESET CONDITION: Auto Reset when Coolant temp rises above 36°F (2.2°C), or Alarm may bemanually reset via keypad or by turning the unit off, then back on again.NOTE: Follow the steps below until a problem is found. Once a repair or correction has been made, the active alarmshould clear itself (see reset condition above). Operate the unit through the appropriate modes to see if any activealarm occurs. Continue <strong>with</strong> the steps below as necessary.1 Check Coolant Temperaturea. Check temperature of coolant or upper Must be above 32°F (0°C)radiator hose2 Check Engine Coolant Sensora. Check resistance of Engine CoolantSensor (See Note 6)b. Inspect harness & control boxconnector pins & terminals (See wiringschematic Section 11.)(Refer to Section 2.13 for complete resistance chart)10k Ohms @ 77°F (25°C)No physical damage to harness.No damaged or corroded pins8--2762-10683
AlarmNO.Steps ALARM / CAUSE CORRECTIVE ACTION37 CHECK LOW SPEED RPM• TRIGGER–ON: Controller is set for low engine speed operation, and RPM being read by the <strong>micro</strong>processor are notcorrect. The correct RPM for low speed are different for different models as shown below:Less than 1325 or greater than 1625 for Ultima XTC and X2 2500A/R; orLess than 1200 or greater than 1500 for Ultra XTC and X2 2100A/Rfor more than 60 seconds (120 seconds when the <strong>micro</strong>processor calls for a change from high speedto low speed, or when the unit first starts)• UNIT CONTROL: Alarm Only• RESET CONDITION: Auto Reset if controller is set for low engine speed operation and RPM are:Between 1375 to 1575 for Ultima XTC and X2 2500A/R; orBetween 1250 to 1400 for Ultra XTC and X2 2100A/R for 60 seconds, orAlarm may be manually reset via keypad or by turning the unit off, then back on again.NOTE: Follow the steps below until a problem is found. Once a repair or correction has been made, the active alarmshould clear itself (see reset condition above). Operate the unit through the appropriate modes to see if any activealarm occurs. Continue <strong>with</strong> the steps below as necessary.1 Check Model Numbera. Verify that the model number on theunit data label matches the modelnumber shown in the <strong>micro</strong> unit datalist.Enter the correct number in the data list. (Refer to Section3.14.)2 Check For Proper Voltage To The Engine Speed Control Unit (ENSCU) Pin 22 Based On TheModel. Check For Proper Voltage With Unit Running. (ESC Engine only)a. Ultima XTC and X2 2500A Verify 0 VDC at terminal 16 of the ENSCU.Verify 12 VDC at terminal 22 of the ENSCU.b. Ultra XTC and X2 2100A Verify 0 VDC at terminal 16 of the ENSCU.Verify 0 VDC at terminal 22 of the ENSCU.3 Check Speed Solenoid & Linkage On Non -electronic Speed Controlled (ESC) Engines(Fuel and Speed Actuator on ESC engines)a. Check speed solenoid on standard Must move in and out freelyengines (Fuel and speed actuator onESC plunger)b. Check engine speed arm and linkage Must move freely4 Force Low Speed Operation (See Note 9)a. Using Functional Parameters, set theLow Speed Start Up Delay to 10minutes.b. Check operation of Speed Relay LED LED 27 must be OFF.c.Check voltage at engine speed control Mustbe0VDCunit (ENSCU) pin 16.5 Check Engine RPMa. Check actual engine RPM using handheld tachometerb. Compare actual RPM <strong>with</strong> thoseshown on display.Unit will run in low speed. RPM must be <strong>with</strong>in rangeshown above for each specific model. Adjust speedlinkage as needed.Refer to Section 2.7Adjust engine linkage setting as needed.Both readings <strong>with</strong>in ± 50 RPM6 Check Engine Air–Intake Systema. Check air filter indicator Flag must not be visible.b. Inspect air intake system Hoses & tubes in good condition.No kinks or restrictionsAdditional steps on the next page.62-106838--28
AlarmNO.Steps ALARM / CAUSE CORRECTIVE ACTION37 CHECK LOW SPEED RPM (Continued)7 Check Engine Fuel Systema. Check fuel tank level. Must have enough fuel to run engine.b Check fuel lines.Connections are tight and not leaking.No kinks or sharp bends in the lines.c Check fuel screen.Fuel screen is located in the inlet fitting to the lift pump.Screen must be clean.d Check fuel filters.Fuel filters must be clean and allow full flow of fuel throughthem.8 Check Engine Exhaust Systema. Inspect the exhaust system Must be clear and unobstructed8--2962-10683
AlarmNO.Steps ALARM / CAUSE CORRECTIVE ACTION38 CHECK HIGH SPEED RPM• TRIGGER–ON: Controller is set for high engine speed operation, and RPM being read by the <strong>micro</strong>processor arenot correct. The correct RPM for low speed are different for different models as shown below:Less than 2000, or greater than 2400 for Ultima XTC and X2 2500A/R; orLess than 1500 or greater than 1900 for Ultra XTC and X2 2100A/Rfor more than 60 seconds (120 seconds when the <strong>micro</strong>processor calls for a change from low speed to highspeed)• UNIT CONTROL: Alarm Only• RESET CONDITION: Auto Reset if controller is set for high engine speed operation and RPM are:Between 2050 to 2350 for Ultima XTC/X2 2500A/R or;Between 1550 to 1850 for Ultra XTC/X2 2100A/R for 60 seconds, orAlarm may be manually reset via keypad or by turning the unit off, then back on again.NOTE: Follow the steps below until a problem is found. Once a repair or correction has been made, the active alarmshould clear itself (see reset condition above). Operate the unit through the appropriate modes to see if any activealarm occurs. Continue <strong>with</strong> the steps below as necessary.1 Check Model Numbera. Verify that the model number on theunit data label matches the modelnumber shown in the <strong>micro</strong> unit datalist.Enter the correct number in the data list. (Refer to Section3.14.)2 Check For Proper Voltage To The Engine Speed Control Unit (ENSCU) Pin 22 Based On TheModel. Check For Proper Voltage With Unit Running. (ESC Engine Only)a. Ultima XTC and X2 2500A Verify 12 VDC at terminal 16 of the ENSCU.Verify 12 VDC at terminal 22 of the ENSCU.b. Ultra XTC and X2 2100A Verify 12 VDC at terminal 16 of the ENSCU.Verify 0 VDC at terminal 22 of the ENSCU.c. Check circuit from ENSCU terminal 16 Must be 12 VDCto <strong>micro</strong> connection MPQC3.3 Check Speed Solenoid & Linkage On Non -ESC Enginesa. Check speed solenoid plunger on non Must move in and out freelyESC engines (Fuel and speed actuatoron ESC engines)b. Check engine speed arm & linkage Must move freely(non--ESC engines)4 Check Speed Solenoid Harness (FSA Harness on ESC Engines)a. Inspect harness & control boxconnector pins & terminals (See wiringschematic Section 11.)b. Check resistance of speed solenoid(FSA on ESC units)No physical damage to harness.No damaged or corroded pins or terminalsRefer to Section 2.13. With the FSA disconnected, checkthe FSA coil resistance. Spec is 3--4 ohms +/-- 10%.c. Check amp draw of speed solenoid Refer to Section 2.13.Use Component Test Mode (Refer to Section 6.2.2) totest.Refer to Section 2.13 for amp values. View current draw inthe Unit Data List. (Section 3.14)Additional steps on the next page.62-106838--30
AlarmNO.Steps ALARM / CAUSE CORRECTIVE ACTION38 CHECK HIGH SPEED RPM (Continued)5 Force High Speed operation (See note Note 9)a. Place unit in continuous run and adjust Controller will call for High Speed operation.set point to at least 15 degrees awayfrom box temperature, and atemperature greater than 20°F(5.6°C).If the unit does not immediately go intoHigh Speed, set the AIRFLOWFunctional Parameter to HIGH.b. Check operation of Speed Relay LED LED 27 must be ON. (If LED 27 is not on, the<strong>micro</strong>processor is not calling for High Speed operation.Check Speed Overrides in Section 4.4 for moreinformation.)c. Check voltage to speed solenoid (On Must be 12-14 VDCESC engines, check voltage on theengine speed control unit (ENSCU) pin16)6 Check Engine RPMa. Check actual engine RPM using handheld tachometerb. Compare actual RPM <strong>with</strong> thoseshown on displayRefer to Section 2.7Adjust engine linkage setting as needed.Both readings <strong>with</strong>in ± 50 RPM7 Check Engine Air–Intake Systema. Check air filter indicator Flag must not be visible.b. Inspect air intake system Hoses & tubes in good condition.No kinks or restrictions8 Check Engine Exhaust Systema. Inspect the exhaust system Must be clear and unobstructed8--3162-10683
AlarmNO.Steps ALARM / CAUSE CORRECTIVE ACTION39 CHECK ENGINE RPM• TRIGGER–ON: Engine RPM have been:Less than 1200 or greater than 2500 for Ultima XTC and X2 2500A/R; orLess than 1100 or greater than 2000 for Ultra XTC and X2 2100A/Rfor more than five minutes• UNIT CONTROL: Alarm Only or Unit Shutdown & Alarm (if configured)• RESET CONDITION: Auto Reset if unit is set for Alarm Only when engine RPM are:Between 1200 to 2500 for Ultima XTC and X2 2500A/R or:Between 1100 to 2000 for Ultra XTC and X2 2100A/R for more than five minutes, orAfter 15 minutes if the unit is set for RPM Shutdown orAlarm may be manually reset via keypad or by turning the unit off, then back on again.NOTE: Follow the steps below until a problem is found. Once a repair or correction has been made, the active alarmshould clear itself (see reset condition above). Operate the unit through the appropriate modes to see if any activealarm occurs. Continue <strong>with</strong> the steps below as necessary.1 Check Model Numbera. Verify that the model number on theunit data label matches the modelnumber shown in the <strong>micro</strong> unit datalist.Enter the correct number in the data list. (Refer to Section3.14.)2 Check For Flash Code On Engine Speed Control Unit (ENSCU)(Applies to ESC engines only).a. Check for flash codes on the ENSCU. Refer to Electronic Speed Control Diagnostic tables --Figure 10--1 thru Figure 10--43 On All Units With ESC, Refer To Electronic Speed Control Diagnostic Tablesa. Check speed solenoid plunger on non Must move in and out freelyESC engines (Fuel and speed actuatoron ESC engines)b. Check engine speed arm & linkage Must move freely4 Check Fuel Systema. Check for Alarm 1 Fill tank as neededb. Check fuel flow Unrestricted fuel flow through systemFuel not gelledc. Check fuel system prime No air in fuel system5 Check Engine Air–Intake Systema. Check air filter indicator Flag must not be visible.b. Inspect air intake system Hoses & tubes in good condition.No kinks or restrictionsc. Check voltage to speed solenoid Mustbe0VDC6 Force Low Speed Operation (See Note 9)a. Using Functional Parameters, set theHigh Speed Delay for at least 10minutes so the unit starts in low speed.Unit will run in low speed. RPM must be <strong>with</strong>in rangeshown above for each specific model. Adjust speedlinkage as needed.b. Check operation of Speed Relay LED LED 27 must be OFF when the <strong>micro</strong>processor is callingfor Low Speed.c. Check voltage to speed solenoid (FSA Mustbe0VDCvoltage cannot be checked on ESC)Additional steps on the next page.62-106838--32
AlarmNO.Steps ALARM / CAUSE CORRECTIVE ACTION39 CHECK ENGINE RPM (Continued)7 Check Low Speed Engine RPMa. Check actual engine RPM using handheld tachometerb. Compare actual RPM <strong>with</strong> thoseshown on displayRefer to Section 2.7Adjust engine linkage setting as needed.Both readings <strong>with</strong>in ± 50 RPM8 Force high speed operation (See Note 9)a. Place unit in continuous run and adjust Controller will call for High Speed operation.set point to at least 15 degrees awayfrom box temperature, and atemperature greater than 20° F(5.6°C)If the unit does not immediately go intoHigh Speed, set the AIRFLOWFunctional Parameter to HIGH.b. Check operation of Speed Relay LED LED 27 must be ON. (If LED 27 is not on, the<strong>micro</strong>processor is not calling for High Speed operation.Check Speed Overrides in section 4.4 for moreinformation.)c. Check voltage to speed solenoid on Must be 12-14 VDCstandard engines. (FSA voltage cannotbe checked on ESC engines.)9 Check High Speed Engine RPMa. Check actual engine RPM using handheld tachometerb. Compare actual RPM <strong>with</strong> thoseshown on displayRefer to Section 2.7Adjust engine linkage setting as needed.Both readings <strong>with</strong>in ± 50 RPM8--3362-10683
AlarmNO.Steps ALARM / CAUSE CORRECTIVE ACTION40 CHECK GLOW PLUGS• TRIGGER–ON: Glow Plug amperage is less than 30 Amps, or greater than 43 Amps after 14seconds of glow time (NOTE: In auto start, this can only occur when the EngineCoolant Temperature is below 32°F (0°C) and the glow time is configured SHORT.)• UNIT CONTROL: Alarm Only• RESET CONDITION: Auto Reset if glow plug amperage is between 30 to 43 amps for at least 14seconds during the glow cycle, orAlarm may be manually reset via keypad or by turning the unit off, then back on again.NOTE: Follow the steps below until a problem is found. Once a repair or correction has been made, the active alarmshould clear itself (see reset condition above). Operate the unit through the appropriate modes to see if any activealarm occurs. Continue <strong>with</strong> the steps below as necessary.1 Check Glow Plug Circuita. Inspect glow plug relay & socket No signs of discoloration from overheatingNo corrosionb. Check operation of Glow Plug Relay START/RUN-OFF switch in START/RUN position-ManualStart Operation. (See Note Note 4) Glow Crank switch inGlow positionOR, use Component Test Mode to energize the Glow PlugRelay. (Refer to Section 6.2.2)LED 30 must be ONc. Check Non–Running Amps View Current Draw in Data listRefer to Section 2.13d. Check Glow Plug circuit amperage Current Draw = Non–Running Amps + Glow Plug AmpsIn Component Test Mode, only the Glow Plug Amps willbe displayed.e. Check voltage to glow plugs Must be 11 VDC or higher2 Check Glow Plug Circuit Wiringa. Inspect harness & control boxconnector pins & terminals (See wiringschematic)No physical damage to harness.No damaged or corroded pins3 Check Glow Plugsa. Check amp draw of each glow plug Refer to Section 2.1362-106838--34
AlarmNO.Steps ALARM / CAUSE CORRECTIVE ACTION41 ENGINE STALLED• TRIGGER–ON: The engine is running, RPM sensor is good, and engine speed is less than 10 RPM; orThe engine is running, RPM sensor alarm is ON, and the Oil Pressure switch contacts are open.• UNIT CONTROL: Unit Shutdown & Alarm• RESET CONDITION: Auto Restart after 15 minutes, or Alarm may be manually reset via keypad or byturning the unit off, then back on again.NOTE: Follow the steps below until a problem is found. Once a repair or correction has been made, clear thealarm(s). (See Note 1) Operate the unit through the appropriate modes to see if any active alarm occurs. Continue<strong>with</strong> the steps below as necessary.1 Check For Alarm 130 - Check RPM Sensora. Check for alarm 130 When Alarms 130 and 41 occur at the same time,generally the engine has run out or is running out of fuel.This causes the engine RPM to surge and drop. Checkfuel tank and add fuel as necessary.Check fuel lines between the fuel tank and the fuel pumpinlet for drawing air in.2 Check For Flash Code On Engine Speed Control Unit(ENSCU) (Applies to ESC engines only).a. Check for flash codes on the ENSCU. Refer to Electronic Speed Control Diagnostic tables --Figure 10--1 thru Figure 10--4All flash codes must be cleared before continuing.3 Was Engine Shut Off Manually?a. Check for external cause Correct problem.4 Check for Bad F2 or F3 Fuse Alarma. Check for alarm 71 Alarm conditions must be corrected and the alarm clearedto continue.5 Check Fuel Systema. Check for Alarm 1 Fill tank as neededb.Check fuel flowUnrestricted fuel flow through systemFuel not gelledc. Check fuel system prime No air in fuel systemd. Check fuel system check valve from Check valve must hold fuel and not leak backfilter to injection pump.6 Check Fuel Solenoid (non -ESC engines) or Fuel Speed Actuator (ESC engines)a. Check Run Relay LED LED 28 must be ON.b. Check voltage to fuel solenoid orENSCU module.c. Inspect solenoid & connector pins &terminals for non--ESC enginesInspect ENSCU module connector pins& terminals for ESC enginesd. Inspect harness & control boxconnector pins & terminals (See wiringschematic (See Wiring SchematicSection 11.)START/RUN-OFF switch in START/RUN position, ManualStart mode (See Note Note 4)More than 11 VDC positive and good groundNo damage to solenoid, or wiresNo damaged or corroded pinsWires plugged inENSCU module, or wiresNo damaged or corroded pinsWires plugged inNo physical damage to harness.No damaged or corroded pinse. Check resistance of solenoid or FSA Refer to Section 2.13f. Check operation of solenoid or FSA Plunger must move in when energizedAdditional steps on the next page.8--3562-10683
AlarmNO.Steps ALARM / CAUSE CORRECTIVE ACTION41 ENGINE STALLED (Continued)7 Check RPM Sensor (Standard Engines Only)a. Check Engine RPM in Data list Must be Steady Accurate Readingb. Check wiring from RPM Sensor toControl Box, Connectors and Pins (SeeWiring Schematic)No physical damage to harnessNo damaged or corroded pinsPlug connection fits tightly8 Check Engine Speed Sensor (ENSSN)(Units With Electronic Speed Control (ESC) engines Only)a. Inspect harness & control boxconnector pins & terminals (See wiringschematic Section 11.)No physical damage to harness.No damaged or corroded pins9 Check Engine Air–Intake Systema. Check air filter indicator Flag must not be visible.b. Inspect air intake system Hoses & tubes in good condition.No kinks or restrictions10 Check Engine Exhaust Systema. Inspect the exhaust system Must be clear and unobstructed11 Check Enginea. Check Injection pump timing Timing must be correctb. Check engine valve adjustment Rocker arm clearance must be correctc. Check engine compression Compression must be above 27.2 Bars (400 PSIG)12 Check <strong>Refrigeration</strong> Systema. Check discharge & suction pressures Must be <strong>with</strong>in normal operating range for conditions62-106838--36
AlarmNO.Steps ALARM / CAUSE CORRECTIVE ACTION8.6 WARNING / STATUS ALARMS51 ALTERNATOR NOT CHARGING• TRIGGER–ON: Unit is running (either engine or standby) and the current flow is more than -1.0 Amps(discharge) between the alternator to the battery for three continuous minutes.• UNIT CONTROL: Alarm Only or Unit Shutdown & Alarm (if configured)• RESET CONDITION: Auto Reset (if not shut down) when alternator is charging or alarm may be manuallyreset via keypad or by turning the unit off, then back on again.NOTE: Follow the steps below until a problem is found. Once a repair or correction has been made, clear thealarm(s). (See Note 1) Operate the unit through the appropriate modes to see if any active alarm occurs. Continue<strong>with</strong> the steps below as necessary.1 Check Microprocessor Current Sensora. Check <strong>micro</strong> Current Value START/RUN-OFF switch in START/RUN position, ManualStart mode, all electrical circuits off. (See Note Note 5)Must be -2.0 to 1.5 Amps <strong>with</strong> no loadb. Check direction of wire through current Must be in correct direction (See arrow on current sensor.)sensor.c. Check amp current value <strong>with</strong> 0 ampsgoing through the current sensor.2 Check Alternator Belta. Check alternator belt tension &conditionDisconnect and remove the wire going through the currentsensor, then reconnect it to the fuse holder. Power up<strong>micro</strong> and check CURRENT DRAW in the Unit Data List.The value must be between --1.0 and 1.0 Amps. (Refer toSection 3.14.)(Refer to Section 9.9 for belt tensions)No Glazing, no cracking, no slipping3 Check Alternator Wiringa. Check output & ground wire (unit OFF) Negative lead on Ground terminalPositive lead on Output terminal = same as batteryvoltage.b. Check exciter wire (if used) START/RUN-OFF switch in START/RUN position, ManualStart mode (See Note Note 4)Musthave11ormoreVDC<strong>with</strong>switchON4 Check Aux (D+) Terminal Must have less than 3 VDC <strong>with</strong> unit OFFa. Inspect harness & control boxconnector pins & terminals (See wiringschematic)No physical damage to harness.No damaged or corroded pinsb. Check output wire (unit running) Must have 13 or more VDC (when tested against -- batterypost)c. Check ground wire (unit running) Must have 13 or move VDC (when tested against +battery post)5 Check For Add–On Equipment Drawing Too Much Currenta. Check amperage of added–oncomponents & accessoriesAll add–on components & accessories must draw lessthan 20 Amps6 Perform Pretrip Checka. Run Pretrip & check for alarms Any active alarms must be corrected and cleared beforeproceeding.8--3762-10683
AlarmNO.Steps ALARM / CAUSE CORRECTIVE ACTION53 BOX TEMP OUT-OF-RANGE• TRIGGER–ON: UNIT CONTROL:Alarm Only: The box temperature has been in range -- <strong>with</strong>in ±2.7°F (±1.5°C) of setpoint for perishableand frozen -- at least once since the unit was started (Sleep Model and Component Test Modesexcluded), and is now further away from setpoint than the limit set in the functional parameters -- 4°, 5.5°,or 7°F (2.°, 3°, or4°C) for this unit, for more than 15 minutes, or for more than 30 minutes immediatelyfollowing the end of a defrost cycle. ORIf a unit Shutdown alarm occurs and the box temperature is further away from setpointthan the limit set in the functional parameters -- 4°, 5.5°, or7°F (2°, 3° or 4°C) --for more than 30 minutes regardless if the box temperature has been in--range.The box temperature has not been in range, and the unit is operating in Pulldown (Cool) and the DeltaT(SAT minus RAT) is less than 1°F (0.56°C) ORThe unit is operating in Pullup (Heat) and the SAT is the same temperature or colder than the RAT formore than 30 minutes. (Alarm 122 -- CHECK RETURN AIR SENSOR and Alarm 123 CHECK SUPPLYAIR SENSOR must not be active).Shut Down & Alarm:The box temperature has been in range -- <strong>with</strong>in ±2.7°F (±1.5°C) -- of setpoint for perishable andfrozen at least once since the unit was started (Sleep mode, Diagnostic and Component Test modesexcluded), and is now further away from setpoint than the limit set in the functional parameters for thisunit, for more than 45 minutes• UNIT CONTROL: Alarm Only or Unit Shutdown & Alarm (if configured)• RESET CONDITION: Auto Reset or Alarm may be manually reset via keypad or by turning the unit off,then back on again.NOTE: Follow the steps below until a problem is found. Once a repair or correction has been made, the active alarmshould clear itself (see reset condition above). Operate the unit through the appropriate modes to see if any activealarm occurs. Continue <strong>with</strong> the steps below as necessary.NOTE: The temperature criteria for this alarm is reset, and the box temperature must again go In-Range before thisalarm can be triggered if any of the following occur:SPretrip is startedSSetpoint is changedSA door switch or remote switch is installed and configured as a door switchNOTE: The 15, 30, or 45 minute timer is reset and starts again whenever:SThe unit cycles off and restarts in Start-StopSThe unit goes into and comes out of DefrostNOTE: This alarm does not go into the Inactive Alarm list when it becomes inactive or is cleared.NOTE: This alarm will not be used in Sleep mode1 Check Trailer Or Rail Compartment Doorsa. Inspect all trailer or rail compartment Must be closed, no air leakagedoors2 Check For Low Refrigerant Pressure Alarma. Check for alarm 18 Alarm conditions must be corrected and the alarm clearedto continueAdditional steps on the next page.62-106838--38
AlarmNO.Steps ALARM / CAUSE CORRECTIVE ACTION53 BOX TEMP OUT-OF-RANGE (Continued)3 Check Refrigerant Levela. Visually check refrigerant level inreceiver tank.4 Check system pressuresa. Install Manifold Test Set and checksystem pressures.Must be at correct level.Suction & Discharge Pressures must be in the normalrange. Suction & Discharge Pressures must have thesame reading on gauges & on <strong>micro</strong> display.5 Perform Pretrip Checka. Run Pretrip & check for alarms Any active alarms must be corrected and cleared beforeproceeding.6 Check Delta-Ta. Calculate SAT minus RAT, or checkDelta-T value in Data list.In cool, SAT must be at least 1°F (0.6°C) than RAT.In heat, SAT must be at least the same temperature asRAT or warmer.8--3962-10683
AlarmNO.Steps ALARM / CAUSE CORRECTIVE ACTION54 DEFROST NOT COMPLETE• TRIGGER–ON: Defrost cycle did not terminate automatically. [DTT2 and SAT did not reach terminationtemperature of 55°F (12.8°C) <strong>with</strong>in 45 minutes].• UNIT CONTROL: Alarm Only. While this alarm is active, the Defrost Timer will be temporarily set toinitiate a defrost cycle 90 minutes (1.5 hours) of unit running time after the alarm comes on.• RESET CONDITION: Auto Reset when defrost cycle is started again, or Alarm may be manually reset viakeypad or by turning the unit off, then back on again.NOTE: Follow the steps below until a problem is found. Once a repair or correction has been made, the active alarmshould clear itself (see reset condition above). Operate the unit through the appropriate modes to see if any activealarm occurs. Continue <strong>with</strong> the steps below as necessary.1 Perform Pretrip Checka. Run Pretrip & check for alarms Any active alarms must be corrected and cleared beforeproceeding.2 Check For Defective Defrost Sensor Location/Correct Installationa. Has sensor fallen from location? Must be corrected to continue.3 Check Evaporator Fan Clutcha. Check Evap Fan Clutch operation in Must disengage fan.defrost4 Check Refrigerant Levela. Visually check refrigerant level in Must be at correct level.receiver tank.5 Check For Low Refrigerant Pressure Alarma. Check for alarm 18 Alarm conditions must be corrected and the alarm clearedto continue6 Verify Temperature Of DTT2a. Using a service (Test) thermometer Must be <strong>with</strong>in ±2°F (1°C)check temperature of Evaporator tubesheet at DTT2 and compare <strong>with</strong> DTT2temperature in Data list.b. Check DTT2 and RAT wiring. Verify that RAT temperature is being displayed as RAT inunit Data list and that DTT2 is being displayed as DTT2.Correct wiring if required. (Refer to Section 3.14.)7 Check Accuracy Of DTT2 And SAT Temperature Readingsa. Check DTT2 resistance, and. (Refer to Section 2.13 for complete resistance chart)Check SAT resistance(See Note Note 6)10K Ohms @ 77°F (25°C)8 Check DTT2 For Proper Mountinga. Inspect DTT2 Should be screwed tightly in place.Flat area of DTT2 must be against metal surface.9 See Troubleshooting, Section 10.3.6 - <strong>Refrigeration</strong> System Not Heating62-106838--40
AlarmNO.Steps ALARM / CAUSE CORRECTIVE ACTION55 CHECK DEFROST AIR SWITCH• TRIGGER–ON: The defrost air switch has called for a defrost cycle <strong>with</strong>in eight minutes of a defrosttermination for two consecutive defrost cycles. (The air switch contact must be closed continuously for 15seconds before the defrost cycle is started.)• UNIT CONTROL: Alarm ON. While this alarm is active, the defrost air switch will NOT be used toinitiate a defrost cycle; however the Defrost Timer will initiate a defrost cycle 90 minutes after the alarmcomes on, and the manual defrost switch will remain operative.• RESET CONDITION: Auto Reset when defrost cycle terminates correctly, and the air switch does not callfor a defrost cycle <strong>with</strong>in the eight minutes following defrost termination, or Alarm may be manually resetvia keypad or by turning the unit off, then back on again.NOTE: Follow the steps below until a problem is found. Once a repair or correction has been made, the active alarmshould clear itself (see reset condition above). Operate the unit through the appropriate modes to see if any activealarm occurs. Continue <strong>with</strong> the steps below as necessary.1 Check Defrost Air Switcha. Inspect switch & connector pins & No damaged or corroded pinsterminalsb. Check defrost air switch setting <strong>with</strong>Magnehelic Gauge, and check theresistance of switch contacts2 Check Switch Wiringa. Inspect harness & control boxconnector pins & terminals (See wiringschematic)Refer to Section 2.11Contacts closed <strong>with</strong> pressure applied to high sideContacts open <strong>with</strong> no pressure appliedSeeNoteNOTAGNo physical damage to harness.No damaged or corroded pins3 Check Air Switch Hosesa. Inspect air hoses to switch No kinks or other obstructionsNo holesConnected to correct nipple4 Check Condition Of Evaporatora. Visually inspect evaporator followingdefrost.5 Perform Pretripa. Clear Active Alarm list, then run Pretrip& check for any new alarms.6 Check Evaporator Pressure Dropa. Check pressure reading <strong>with</strong>Magnehelic Gauge7 Check Evaporator Fan Clutcha. Check Evap Fan Clutch operation indefrostCoil must be clean and cleared of ice or any othermaterial.Any active alarms must be corrected and cleared beforeproceeding.Refer to Section 2.11Must disengage fan.8 Check Condition Of Refrigerated Compartment & Loada. Check condition of refrigeratedcompartment doors & sealsDoors must be closed, and door seals must seal andprevent outside air from leaking in.b. Check condition of product. If it is warmand moist, frequent defrost cycles canbe expected.8--4162-10683
AlarmNO.Steps ALARM / CAUSE CORRECTIVE ACTION56 CHECK EVAPORATOR AIRFLOW• TRIGGER–ON: In the Cool mode, the Supply Air temperature is 5°F (2.8°C) or more warmer than ReturnAir Temperature for five minutes; orIn the Heat mode, the Suction pressure has been higher than 100 PSIG (6.8 Bars) for more than 60seconds.NOTE: For this alarm the unit must be running. This alarm will not occur in either theDefrost or Pretrip cycles.• UNIT CONTROL: Unit Shutdown & Alarm• RESET CONDITION: Auto Reset in 15 minutes IF Alarm 30 is not also active or, alarm may be manuallyreset via keypad or by turning the unit off, then back on again.NOTE: Follow the steps below until a problem is found. Once a repair or correction has been made, clear thealarm(s). (See Note 1) Operate the unit through the appropriate modes to see if any active alarm occurs. Continue<strong>with</strong> the steps below as necessary.1 Check Fan Beltsa. Check upper fan belt tension &condition.b. Check lower fan belt tension &condition.2 Check Evaporator Air Flowa. Check evaporator fan clutch Must be engagedb. Check evaporator section, condition ofevaporator blower wheels, return airbulkhead, air chute, cleanliness ofevap. coil3 Check System Pressuresa. Install Manifold Test Set and check andcompare compressor discharge &suction pressures <strong>with</strong> those shown onthe <strong>micro</strong>processor controller.(Refer to Section 9.9 for belt tensions)No Glazing, no cracking, no slipping(Refer to Section 9.9 for belt tensions)No Glazing, no cracking, no slippingGood Air FlowReturn air not restrictedAir chute in good conditionNo damage to blower wheelEvap. coil cleanSuction & Discharge Pressures must have the samereading on gauges & on <strong>micro</strong> display.4 Check Refrigerant Chargea. Check for undercharged system Level must be above lower sight glass5 Perform Pretrip CheckAny active alarms must be corrected and cleared beforea. Run Pretrip & check for alarmsproceeding.6 Check SV4a. Check SV4 for leakage when closed Must not leak62-106838--42
AlarmNO.Steps ALARM / CAUSE CORRECTIVE ACTION57 CHECK REMOTE SWITCH 1• TRIGGER–ON:Remote Switch 1 is set to trigger alarm (contacts open or contacts closed depending onset up in configuration list for Remote Switch 1) for more than five seconds.NOTE: SThis alarm is disabled for Shutdown when the ’Unit Operation’ configuration is set for Rail andthe unit is operating in Sleep ModeSShut down may be overridden in the Functional Parameter list.• UNIT CONTROL: Alarm Only, or may be configured to shut unit down.• RESET CONDITION:Alarm Only: Auto Reset after Remote Switch 1 has been set to allow unit to run formore than five seconds.Unit Shutdown: Auto Reset after three minutes (minimum off time for Remote switch shutdown condition) andRemote Switch 1 has been set to allow unit to run for more than five seconds.NOTE: Follow the steps below until a problem is found. Once a repair or correction has been made, the active alarmshould clear itself (see reset condition above). Operate the unit through the appropriate modes to see if any activealarm occurs. Continue <strong>with</strong> the steps below as necessary.1 Determine What Remote Switch 1 Is Controlled Bya. Remote Switch 1 may be connected to Find and locate Remote Switch 1a refrigerated compartment door, orsome other device and used toremotely control the unit.2 Check To See If Refrigerated Compartment Side Or Rear Door Is Open, Or If The Device ThatRemote Switch 1 Is Connected To Is Set To Trigger The Alarma. Inspect refrigerated compartment Refrigerated compartment door(s) must be closeddoorsb. Check device at Remote Switch 1 Must have switch in position that allows unit to operate.3 Check Wiringa. Visually inspect wiring to switch Wiring must be connectedb. Visually inspect condition of switch Must not be damaged4 Check Remote Switch 1a. Check switch operation Contacts must Open & Close as switch is opened andclosed.5 Check Configurationsa. Verify that Configuration is set for the Must be correct for type of Remote switch being used.type of switch being used (i.e. whenDoor is open, switch contacts areclosed; etc.)8--4362-10683
AlarmNO.Steps ALARM / CAUSE CORRECTIVE ACTION58 CHECK REMOTE SWITCH 2• TRIGGER–ON: Remote Switch 2 is set to trigger alarm (contacts open or contacts closed depending onset up in configuration list for Remote Switch 2) for more than five seconds.NOTE:SThis alarm is disabled for Shutdown when the ’Unit Operation’ configuration is set for Rail andthe unit is operating in Sleep Mode.SShut down may be overridden in the Functional Parameter list.• UNIT CONTROL: Alarm Only, or may be configured to shut unit down.• RESET CONDITION:Alarm Only: Auto Reset after Remote Switch 2 has been set to allow unit to run formore than five seconds.Shutdown: Auto Reset after three minutes (minimum off time for Remote switch shutdown condition) and RemoteSwitch 2 has been set to allow unit to run for more than five seconds.NOTE: Follow the steps below until a problem is found. Once a repair or correction has been made, the active alarmshould clear itself (see reset condition above). Operate the unit through the appropriate modes to see if any activealarm occurs. Continue <strong>with</strong> the steps below as necessary.1 Determine What Remote Switch 2 Is Controlled Bya. Remote Switch 2 may be connected to Find and locate Remote Switch 2a refrigerated compartment door, orsome other device and used toremotely control the unit.2 Check To See If Refrigerated Compartment Side Or Rear Door Is Open, Or If The Device ThatRemote Switch 2 Is Connected To Is Set To Trigger The Alarma. Inspect refrigerated compartment Refrigerated compartment door(s) must be closeddoorsb. Check device at Remote Switch 2 Must have switch in position that allows unit to operate.3 Check Wiringa. Visually inspect wiring to switch Wiring must be connectedb. Visually inspect condition of switch Must not be damaged4 Check Remote Switch 2a. Check switch operation Contacts must Open & Close as switch is opened andclosed.5 Check Configurationsa. Verify that Configuration is set for the Must be correct for type of Remote switch being used.type of switch being used (i.e. whenDoor is open, switch contacts areclosed; etc.)62-106838--44
AlarmNO.Steps ALARM / CAUSE CORRECTIVE ACTION59 DATALOGGER NOT RECORDING• TRIGGER–ON: No data is being recorded by the data recorder.• UNIT CONTROL: Alarm Only• RESET CONDITION: Alarm may be manually reset via keypad.NOTE: Follow the steps below until a problem is found. Once a repair or correction has been made, clear thealarm(s). (See Note 1) Operate the unit through the appropriate modes to see if any active alarm occurs. Continue<strong>with</strong> the steps below as necessary.1 Clear Alarma. Clear Active Alarm(s) Alarms Clearb. Check for Active Alarm reoccurrence If Inactive, download all data & retain.If Active, go to next step2 Microprocessor Defectivea. Download previous data using Data retrieval OKDownload PC Card, orReeferManager Program.b. Replace <strong>micro</strong>processor & set New <strong>micro</strong>processor in placeConfigurations, FunctionalParameters, Enter hours fromremoved <strong>micro</strong>processor, setMaintenance Hour Meters, and DataRecorder Setup.NOTE: Specific configurations or IntelliSet settings may be found on the TransCentral Website (Authorized CarrierTransicold Dealers only.)8--4562-10683
AlarmNO.Steps ALARM / CAUSE CORRECTIVE ACTION60 DATALOGGER TIME WRONG• TRIGGER–ON: The real time clock in the Data Recorder does not contain a valid date.• UNIT CONTROL: Alarm Only• RESET CONDITION: Auto Reset when the Data Recorder Real Time Clock is reset, or Alarm may bemanually reset by turning the unit off, then back on again.NOTE: Follow the steps below until a problem is found. Once a repair or correction has been made, the active alarmshould clear itself (see reset condition above). Operate the unit through the appropriate modes to see if any activealarm occurs. Continue <strong>with</strong> the steps below as necessary.1 Check Real Time Clocka. Check Real Time Clock in the Data list,or using ReeferManager.2 Reset Microprocessora. Turn main switch off for 30 seconds,then turn on.b. Check for valid Real Time Clock readinginDatalistMust show correct date and time. Change as needed(Configuration list).Microprocessor powers up OKValid date and time in memory.Alarm is cleared automaticallyc. Real Time Clock can not be changed. Replace <strong>micro</strong>processor3 Microprocessor Defectivea. Download previous data using Data retrieval OKDownload PC Card, orReeferManager Program.b. Replace <strong>micro</strong>processor & set New <strong>micro</strong>processor in placeConfigurations, FunctionalParameters, Enter hours fromremoved <strong>micro</strong>processor, setMaintenance Hour Meters, and DataRecorder Setup.NOTE: Specific configurations or IntelliSet settings may be found on the TransCentral Website (Authorized CarrierTransicold Dealers only.)62-106838--46
AlarmNO.Steps ALARM / CAUSE CORRECTIVE ACTION61 DOOR OPEN• TRIGGER–ON: Trailer or rail car compartment door has been open for more than five seconds.NOTE:SThis alarm is disabled for Shutdown when the ’Unit Operation’ configuration is set for Rail andthe unit is operating in Sleep Mode.SShut down may be overridden in the Functional Parameter list.• UNIT CONTROL: Alarm Only, or may be configured to shut unit down.• RESET CONDITION:Alarm Only: Auto Reset after the door has been closed for more than five seconds.Shutdown: Auto Reset after three minutes (minimum off time for door open condition) and the door has beenclosed for more than five seconds.NOTE: Follow the steps below until a problem is found. Once a repair or correction has been made, the active alarmshould clear itself (see reset condition above). Operate the unit through the appropriate modes to see if any activealarm occurs. Continue <strong>with</strong> the steps below as necessary.1 Check To See If Refrigerated Compartment Side Or Rear Door Is Opena. Inspect refrigerated compartment Refrigerated compartment door(s) must be closeddoors2 Check Wiringa. Visually inspect wiring to door switch Wiring must be connectedb. Visually inspect condition of switch Must not be damaged3 Check Door Switcha. Check switch operation Contacts must Open & Close as door is opened andclosed.4 Check Configurationsa. Verify that Configuration is set for the Must be correct for type of door switchtype of switch being used (i.e. whenDoor is open, switch contacts areclosed; etc.)5 Temporary Solution Tipa. In the event of a defective switch thatcan not be repaired or replaced, andthe switch is forcing the unit into a Shutdown,this alarm may be temporarilyoverridden by setting the correct FunctionalParameter.In the Functional Parameter list set OVERRIDE DOORSHUTDOWN to YES.8--4762-10683
AlarmNO.Steps ALARM / CAUSE CORRECTIVE ACTION8.7 ELECTRICAL ALARMS71 BAD F2 OR F3 FUSE• TRIGGER–ON: One or more of the following fuse circuits have been open for more than 2 seconds:F2 (Speed Relay output circuit), or F3 (Run relay output circuit)• UNIT CONTROL: Alarm Only• RESET CONDITION: Alarm may be manually reset via keypad or by turning the unit off, then back on again.NOTE: Follow the steps below until a problem is found. Once a repair or correction has been made, clear thealarm(s). (See Note 1) Operate the unit through the appropriate modes to see if any active alarm occurs. Continue<strong>with</strong> the steps below as necessary.1 Check Unit Operationa. Did unit shut down? Yes Check F3No Check F22 Check Fusesa. Locate blown fuse(s) Will have open circuitb. Verify fuse size Refer to Section 2.12Must be correct rating for circuit (see wiring diagram)c. Inspect fuse & fuse holder Terminals tight; No signs of overheating, melting ordiscoloration3 Check Circuita. Check amperage draw on Speed Relay Refer to Section 2.13circuitb. Check amperage draw on Run Relay Refer to Section 2.13circuit72 BAD F4 OR F6 FUSE• TRIGGER–ON: One or more of the following fuse circuits have been open for more than 2 seconds:F4 (Clutch Relay output circuit, or F6 (SV & UL valves, Buzzer, & Fuel Heater Relay coil circuit• UNIT CONTROL: Unit Shutdown & Alarm• RESET CONDITION: Auto Reset when the fuse is replaced, and the unit is powered up, or Alarm may bemanually reset via keypad or by turning the unit off, then back on again.NOTE: Follow the steps below until a problem is found. Once a repair or correction has been made, the active alarmshould clear itself (see reset condition above). Operate the unit through the appropriate modes to see if any activealarm occurs. Continue <strong>with</strong> the steps below as necessary.1 Check Fusea. Locate blown fuse Will have open circuitb. Verify fuse size Refer to Section 2.12Must be correct rating for circuit (see wiring diagram)c. Inspect fuse & fuse holder Terminals tight; No signs of overheating, melting ordiscoloration2 Check Circuita. Check amperage draw on clutch circuit Refer to Section 2.13b. Check amperage draw on F6 circuit Refer to Section 2.13(See wiring schematic)62-106838--48
AlarmNO.Steps ALARM / CAUSE CORRECTIVE ACTION78 CHECK SV1 CIRCUIT• TRIGGER–ON: In either the Heat, Null, or Defrost cycles, the SV1 coil circuit is shorted. (The SV1output from the <strong>micro</strong> is negative, so the circuit will not be shorted to ground, but is shorted either <strong>with</strong>inthe SV1 coil itself, or to a positive wire.)• UNIT CONTROL: Alarm Only• RESET CONDITION: Auto Reset when unit calls for Heat or Defrost and the SV1 coil current (amp) drawis normal, or Alarm may be manually reset via keypad or by turning the unit off, then back on again.NOTE: Follow the steps below until a problem is found. Once a repair or correction has been made, the active alarmshould clear itself (see reset condition above). Operate the unit through the appropriate modes to see if any activealarm occurs. Continue <strong>with</strong> the steps below as necessary.1 Check SV1 Coila. Inspect SV1 coil & connector pins &terminalsNo damage to coilNo damaged or corroded pinsb. Check resistance of coil Refer to Section 2.13c. Check amp draw of coil. Refer to Section 2.13. Use ammeter2 Check SV1 Wiringa. Inspect harness & control boxconnector pins & terminals (See wiringschematic)3 Check SV1 Current Drawa. Use Component Test mode (Refer toSection 6.2.2) to test actual currentdraw of the circuit.See Notes Note 3, Note 4 & Note 8No physical damage to harness.No damaged or corroded pinsRefer to Section 2.13 for normal current values. Viewcurrent draw in Data list79 CHECK SV4 CIRCUIT• TRIGGER–ON: In either the Heat or Defrost cycles the SV4 coil circuit is shorted. (The SV4 output fromthe <strong>micro</strong> is negative, so the circuit will not be shorted to ground, but is shorted either <strong>with</strong>in the SV4 coilitself, or to a positive wire.• UNIT CONTROL: Alarm Only• RESET CONDITION: Auto Reset when unit calls for Heat or Defrost and the SV4 coil current (amp) drawis normal, or Alarm may be manually reset via keypad or by turning the unit off, then back on again.NOTE: Follow the steps below until a problem is found. Once a repair or correction has been made, the active alarmshould clear itself (see reset condition above). Operate the unit through the appropriate modes to see if any activealarm occurs. Continue <strong>with</strong> the steps below as necessary.1 Check SV4 Coila. Inspect SV4 coil & connector pins &terminalsNo damage to coilNo damaged or corroded pinsb. Check resistance of coil Refer to Section 2.13c. Check amp draw of coil. Refer to Section 2.13. Use ammeter.2 Check SV4 Wiringa. Inspect harness & control boxconnector pins & terminals (See wiringschematic)3 Check SV4 Current Drawa. Use Component Test mode (Refer toSection 6.2.2) and Alarms 81 thru 90and Alarms 93 and 97 to test actualcurrent draw of the circuit.See Notes Note 3, Note 4 & Note 8No physical damage to harness.No damaged or corroded pinsRefer to Section 2.13 for normal current values.View current draw in the Unit Data list. (Refer to Section3.14)8--4962-10683
AlarmNO.Steps ALARM / CAUSE CORRECTIVE ACTION81 CHECK FHR CIRCUIT• TRIGGER–ON: Fuel Heater Relay circuit is shorted. (The Fuel Heater Relay output from the <strong>micro</strong> isnegative, so the circuit will not be shorted to ground, but is shorted either <strong>with</strong>in the FuelHeater Relay coil itself, or to a positive wire.• UNIT CONTROL: Alarm Only• RESET CONDITION: Auto Reset when Fuel Heater Relay current (amp) draw is normal, or Alarm maybe manually reset via keypad or by turning the unit off, then back on again.NOTE: Follow the steps below until a problem is found. Once a repair or correction has been made, the active alarmshould clear itself (see reset condition above). Operate the unit through the appropriate modes to see if any activealarm occurs. Continue <strong>with</strong> the steps below as necessary.1 Check Fuel Heater Relaya. Inspect Fuel Heater Relay & socket No damage to relayNo damaged or corroded pinsb.Check resistance of relay coil Refer to Section 2.13.2 Check Fuel Heater Relay Wiringa. Inspect harness & control boxconnector pins & terminals (See wiringschematic)3 Check Fuel Heater Relay Current Drawa. Use Component Test mode (Refer toSection 6.2.2) to test actual currentdraw of the circuit.See Notes Note 3, Note 4 & Note 8No physical damage to harness.No damaged or corroded pinsRefer to Section 2.13 for normal current values.View current draw in the Unit Data list. (Refer to Section3.14).82 CHECK REMOTE OUT-RANGE LIGHT• TRIGGER–ON: The <strong>micro</strong> Light Bar configuration is set for an 8--LIGHT BAR, and the Out--of--Rangelight circuit (to the Light Bar) circuit is shorted. (The Out-Of-Range Lightoutputfrom the <strong>micro</strong> is negative, so the circuit will not be shorted to ground, but is shorted either <strong>with</strong>in theOut-Of-Range Light itself, or to a positive wire.• UNIT CONTROL: Alarm Only• RESET CONDITION: Auto Reset when In–range light current (amp) draw is normal, or Alarm may bemanually reset via keypad or by turning the unit off, then back on again.NOTE: Follow the steps below until a problem is found. Once a repair or correction has been made, the active alarmshould clear itself (see reset condition above). Operate the unit through the appropriate modes to see if any activealarm occurs. Continue <strong>with</strong> the steps below as necessary.1 Check Out-Of-Range Lighta. Inspect Out-of-Range light & socket No damage to bulbNo damaged or corroded pinsb. Check resistance of light bulb Refer to Section 2.132 Check Out-Of-Range Light Wiringa. Inspect harness & control boxconnector pins & terminals (See wiringschematic)3 Check Out-Of-Range Light Current Drawa. Use Component Test mode (SeeSection 6.2.6.2.2) to test actual currentdraw of the circuit.See Notes Note 3, Note 4 & Note 8No physical damage to harness.No damaged or corroded pinsRefer to Section 2.13 for normal current values.View current draw in the Unit Data list. (Refer to Section3.14)62-106838--50
AlarmNO.Steps ALARM / CAUSE CORRECTIVE ACTION83 CHECK REMOTE DEFROST LIGHT• TRIGGER–ON: The <strong>micro</strong> Light Bar configuration is set for an 8--LIGHT BAR, and the Defrost light circuit(to the Light Bar) circuit is shorted. (The Defrost Light output from the <strong>micro</strong> is negative, so the circuit willnot be shorted to ground, but is shorted either <strong>with</strong>in the Defrost Light itself, or to a positive wire.• UNIT CONTROL: Alarm Only• RESET CONDITION: Auto Reset when Defrost light current (amp) draw is normal, or Alarm may bemanually reset via keypad or by turning the unit off, then back on again.NOTE: Follow the steps below until a problem is found. Once a repair or correction has been made, the active alarmshould clear itself (see reset condition above). Operate the unit through the appropriate modes to see if any activealarm occurs. Continue <strong>with</strong> the steps below as necessary.1 Check Defrost Lighta. Inspect Defrost light & socket No damage to bulbNo damaged or corroded pinsb. Check resistance of light bulb Refer to Section 2.132 Check Defrost Light Wiringa. Inspect harness & control boxconnector pins & terminals (See wiringschematic)3 Check Defrost Light Current Drawa. Use Component Test mode (Refer toSection 6.2.2) to test actual currentdraw of the circuit.See Notes Note 3, Note 4 & Note 8No physical damage to harness.No damaged or corroded pinsRefer to Section 2.13 for normal current values.View current draw in the Unit Data list. (Refer to Section3.14)84 CHECK REMOTE ALARM LIGHT• TRIGGER–ON: Remote Alarm light circuit (to the Light Bar) circuit is shorted. (The Alarm Light outputfrom the <strong>micro</strong> is negative, so the circuit will not be shorted to ground, but is shorted either <strong>with</strong>in theAlarm Light itself, or to a positive wire.• UNIT CONTROL: Alarm Only• RESET CONDITION: Auto Reset when Alarm light current (amp) draw is normal, or Alarm may bemanually reset via keypad or by turning the unit off, then back on again.NOTE: Follow the steps below until a problem is found. Once a repair or correction has been made, the active alarmshould clear itself (see reset condition above). Operate the unit through the appropriate modes to see if any activealarm occurs. Continue <strong>with</strong> the steps below as necessary.1 Check Alarm Lighta. Inspect Remote Alarm light & socket No damage to bulbNo damaged or corroded pinsb. Check resistance of light bulb Refer to Section 2.132 Check Alarm Light Wiringa. Inspect harness & control boxconnector pins & terminals (See wiringschematic)3 Check Alarm Light Current Drawa. Use Component Test mode (Refer toSection 6.2.2) to test actual currentdraw of the circuit.See Notes Note 3, Note 4 & Note 8No physical damage to harness.No damaged or corroded pinsRefer to Section 2.13 for normal current values.View current draw in the Unit Data list. (Refer to Section3.14)8--5162-10683
AlarmNO.Steps ALARM / CAUSE CORRECTIVE ACTION85 CHECK UL1 CIRCUIT• TRIGGER–ON: UL1 (Front) Unloader Coil circuit is shorted. (The UL1 output from the <strong>micro</strong> is negative,so the circuit will not be shorted to ground, but is shorted either <strong>with</strong>in the UL1 itself, or to a positive wire.• UNIT CONTROL: Alarm Only• RESET CONDITION: Auto Reset when the UL1 Coil current (amp) draw is normal, or Alarm maybe manually reset via keypad or by turning the unit off, then back on again.NOTE: Follow the steps below until a problem is found. Once a repair or correction has been made, the active alarmshould clear itself (see reset condition above). Operate the unit through the appropriate modes to see if any activealarm occurs. Continue <strong>with</strong> the steps below as necessary.1 Check Front Unloader (UL1) Coila. Inspect Front Unloader (UL1) coil &terminalsNo damage to coilNo damaged or corroded pinsb. Check resistance of coil Refer to Section 2.13. Cannot be opened (infinite ohms),shorted (Zero Ohms) or shorted to ground.c. Check amp draw of coil. Refer to Section 2.13. Use ammeter.2 Check Front Unloader (UL1) Current Drawa. Use Component Test mode (Refer toSection 6.2.2) to test actual currentdraw of the circuit.3 Check Front Unloader (UL1) Coil Wiringa. Inspect harness & control boxconnector pins & terminals (See wiringschematic Section 11.)Refer to Section 2.13 for normal current values.View current draw in the Unit Data list. (Refer to Section3.14)See Notes Note 3, Note 4 & Note 8No physical damage to harness.No damaged or corroded pins86 CHECK UL2 CIRCUIT• TRIGGER–ON: UL2 (Rear) Unloader Coil circuit is shorted. (The UL2 output from the <strong>micro</strong> is negative,so the circuit will not be shorted to ground, but is shorted either <strong>with</strong>in the UL2 itself, or to a positive wire.• UNIT CONTROL: Alarm Only• RESET CONDITION: Auto Reset when the UL2 Coil current (amp) draw is normal, or Alarm maybe manually reset via keypad or by turning the unit off, then back on again.NOTE: Follow the steps below until a problem is found. Once a repair or correction has been made, the active alarmshould clear itself (see reset condition above). Operate the unit through the appropriate modes to see if any activealarm occurs. Continue <strong>with</strong> the steps below as necessary.1 Check Rear Unloader (UL2) Coila.Inspect Rear Unloader (UL2) coil &terminals.No damage to coilNo damaged or corroded pinsb. Check resistance of coil Refer to Section 2.13c. Check amp draw of coil. Refer to Section 2.13. Use ammeter.2 Check Rear Unloader (UL2) Current Drawa. Use Component Test mode (Refer toSection 6.2.2) to test actual currentdraw of the circuit.Refer to Section 2.13 for normal current values.View current draw in the Unit Data list. (Refer to Section3.14)3 Check Rear Unloader (UL2) Coil Wiringa. Inspect harness & control box See Notes Note 3, Note 4 & Note 8connector pins & terminals (See wiringschematic Section 11.)No physical damage to harness.No damaged or corroded pins62-106838--52
AlarmNO.Steps ALARM / CAUSE CORRECTIVE ACTION87 CHECK REMOTE HEAT LIGHT• TRIGGER–ON: The <strong>micro</strong> Light Bar configuration is set for an 8--LIGHT BAR, and the Remote Heat lightcircuit (to the Light Bar) circuit is shorted. (The Heat Light output from the <strong>micro</strong> is negative, so the circuitwill not be shorted to ground, but is shorted either <strong>with</strong>in the Heat Light itself, or to a positive wire.• UNIT CONTROL: Alarm Only• RESET CONDITION: Auto Reset when Heat light current (amp) draw is normal, or Alarm may bemanually reset via keypad or by turning the unit off, then back on again.NOTE: Follow the steps below until a problem is found. Once a repair or correction has been made, the active alarmshould clear itself (see reset condition above). Operate the unit through the appropriate modes to see if any activealarm occurs. Continue <strong>with</strong> the steps below as necessary.1 Check Heat Lighta. Inspect Heat light & socket No damage to bulbNo damaged or corroded pinsb. Check resistance of light bulb Refer to Section 2.132 Check Heat Light Wiringa. Inspect harness & control boxconnector pins & terminals (See wiringschematic Section 11.)3 Check Heat Light Current Drawa. Use Component Test mode (Refer toSection 6.2.2) to test actual currentdraw of the circuit.See Notes Note 3, Note 4 & Note 8No physical damage to harness.No damaged or corroded pinsRefer to Section 2.13 for normal current values.View current draw in the Unit Data list. (Refer to Section3.14)88 CHECK REMOTE COOL LIGHT• TRIGGER–ON: The <strong>micro</strong> Light Bar configuration is set for an 8--LIGHT BAR, and the Remote Cool lightcircuit (to the Light Bar) circuit is shorted. (The Cool Light output from the <strong>micro</strong> is negative, so the circuitwill not be shorted to ground, but is shorted either <strong>with</strong>in the Cool Light itself, or to a positive wire.• UNIT CONTROL: Alarm Only• RESET CONDITION: Auto Reset when Cool light current (amp) draw is normal, or Alarm may bemanually reset via keypad or by turning the unit off, then back on again.NOTE: Follow the steps below until a problem is found. Once a repair or correction has been made, the active alarmshould clear itself (see reset condition above). Operate the unit through the appropriate modes to see if any activealarm occurs. Continue <strong>with</strong> the steps below as necessary.1 Check Cool Lighta. Inspect Cool light & socket No damage to bulbNo damaged or corroded pinsb. Check resistance of light bulb Refer to Section 2.132 Check Cool Light Wiringa. Inspect harness & control boxconnector pins & terminals (See wiringschematic)3 Check Cool Light Current Drawa. Use Component Test mode (Refer toSection 6.2.2) to test actual currentdraw of the circuit.See Notes Note 3, Note 4 & Note 8No physical damage to harness.No damaged or corroded pinsRefer to Section 2.13 for normal current values.View current draw in the Unit Data list. (Refer to Section3.14)8--5362-10683
AlarmNO.Steps ALARM / CAUSE CORRECTIVE ACTION89 CHECK REMOTE AUTO LIGHT• TRIGGER–ON: Remote Auto light circuit (to the Light Bar) circuit is shorted. (The Auto Light output fromthe <strong>micro</strong> is negative, so the circuit will not be shorted to ground, but is shorted either <strong>with</strong>in the AutoLight itself, or to a positive wire.• UNIT CONTROL: Alarm Only• RESET CONDITION: Auto Reset when Auto light current (amp) draw is normal, or Alarm may bemanually reset via keypad or by turning the unit off, then back on again.NOTE: Follow the steps below until a problem is found. Once a repair or correction has been made, the active alarmshould clear itself (see reset condition above). Operate the unit through the appropriate modes to see if any activealarm occurs. Continue <strong>with</strong> the steps below as necessary.1 Check Auto Lighta. Inspect Auto light & socket No damage to bulbNo damaged or corroded pinsb. Check resistance of light bulb Refer to Section 2.132 Check Auto Light Wiringa. Inspect harness & control boxconnector pins & terminals (See wiringschematic Section 11.)3 Check Auto Light Current Drawa. Use Component Test mode (Refer toSection 6.2.2) to test actual currentdraw of the circuit.See Notes Note 3, Note 4 & Note 8No physical damage to harness.No damaged or corroded pinsRefer to Section 2.13 for normal current values.View current draw in the Unit Data list. (Refer to Section3.14)90 AUTOFRESH AIR EXCHANGE RELAY• TRIGGER–ON: AutoFresh Air Exchange circuit (to the relay coil) is shorted. (The AutoFresh AirExchange Relay output from the <strong>micro</strong> is negative, so the circuit will not be shorted to ground, but isshorted either <strong>with</strong>in the relay itself, or to a positive wire.. Alarm may bemanually reset via Keypad or by turning the unit off, then back on again.• UNIT CONTROL: Alarm Only• RESET CONDITION: Auto Reset when AFEX current (amp) draw is normal, or Alarm may bemanually reset via keypad or by turning the unit off, then back on again.NOTE: Follow the steps below until a problem is found. Once a repair or correction has been made, the active alarmshould clear itself (see reset condition above). Operate the unit through the appropriate modes to see if any activealarm occurs. Continue <strong>with</strong> the steps below as necessary.1 Check Autofresh Air Exchange Relay (AFAR)a. Inspect AFAR & socket No damage to relayNo damage to socketb. Check resistance of relay coil Refer to Section 2.13.2 Check Afar Wiringa. Inspect harness & control boxconnector pins & terminals (See wiringschematic Section 11.)3 Check Afar Current Drawa. Use Component Test mode (Refer toSection 6.2.2) to test actual currentdraw of the circuit.See Notes Note 3, Note 4 & Note 8No physical damage to harness.No damaged or corroded pinsRefer to Section 2.13 for normal current values.View current draw in the Unit Data list. (Refer to Section3.14)62-106838--54
AlarmNO.Steps ALARM / CAUSE CORRECTIVE ACTION93 CHECK START UP BUZZER• TRIGGER–ON: The Buzzer circuit is shorted. (The Buzzer output from the <strong>micro</strong> is negative, so thecircuit will not be shorted to ground, but is shorted either <strong>with</strong>in the Buzzer itself, or to apositive wire.• UNIT CONTROL: Alarm Only• RESET CONDITION: Auto Reset when Buzzer amp draw is normal, or Alarm may be manually reset viakeypad or by turning the unit off, then back on again.NOTE: Follow the steps below until a problem is found. Once a repair or correction has been made, the active alarmshould clear itself (see reset condition above). Operate the unit through the appropriate modes to see if any activealarm occurs. Continue <strong>with</strong> the steps below as necessary.1 Check Buzzera. Inspect Buzzer & wire connections No damage to buzzerNo damaged or corroded pinsb. Check resistance of buzzer Refer to Section 2.132 Check Buzzer Wiringa. Inspect harness & control boxconnector pins & terminals (See wiringschematic Section 11.)3 Check Buzzer Current Drawa. Use Component Test mode (Refer toSection 6.2.2) to test actual currentdraw of the circuit.See Notes Note 3, Note 4 & Note 8No physical damage to harness.No damaged or corroded pinsRefer to Section 2.13 for normal current values.View current draw in the Unit Data list. (Refer to Section3.14)97 CHECK SV2 CIRCUIT• TRIGGER–ON: SV2 coil circuit is shorted. (The SV2 output from the Micro is negative, so the circuit willnot be shorted to ground, but is shorted either <strong>with</strong>in the SV2 coil itself, or to a positive wire.• UNIT CONTROL: Alarm Only• RESET CONDITION: Auto Reset when unit calls for Heat or Defrost and the SV2 coil current (amp) drawis normal, or Alarm may be manually reset via keypad or by turning the unit off, then back on again.NOTE: Follow the steps below until a problem is found. Once a repair or correction has been made, the active alarmshould clear itself (see reset condition above). Operate the unit through the appropriate modes to see if any activealarm occurs. Continue <strong>with</strong> the steps below as necessary.1 Check SV2 Coila. Inspect SV2 coil & connector pins &terminalsNo damage to coilNo damaged or corroded pinsb. Check resistance of SV2 Refer to Section 2.13c. Check amp draw of SV2. Refer to Section 2.13. Use ammeter.2 Check SV2 Wiringa. Inspect harness & control boxconnector pins & terminals (Seewiring schematic Section 11.)3 Check SV2 Current Drawa. Use Component Test mode (Refer toSection 6.2.2) to test actual currentdraw of the circuit.See Notes Note 3, Note 4 & Note 8No physical damage to harness.No damaged or corroded pinsRefer to Section 2.13 for normal current values.View current draw in the Unit Data list. (Refer to Section3.14)8--5562-10683
AlarmNO.Steps ALARM / CAUSE CORRECTIVE ACTION8.8 SENSOR ALARMS121 CHECK AMBIENT AIR SENSOR• TRIGGER–ON: Ambient Air Sensor circuit has failed open or shorted. If shorted, the data list will display158°F (70°C). If the circuit is open, the data list will show the temperature as -52.6°F (-47°C)• UNIT CONTROL: A default value of 122°F (50°C) will be used for any calculations.• RESET CONDITION: Auto Reset when Ambient Air Sensor is in range or, Alarm may be manually resetvia keypad or by turning the unit off, then back on again.NOTE: Follow the steps below until a problem is found. Once a repair or correction has been made, the active alarmshould clear itself (see reset condition above). Operate the unit through the appropriate modes to see if any activealarm occurs. Continue <strong>with</strong> the steps below as necessary.1 Check Ambient Air Temperature Sensor (AAT)a. Inspect Ambient Air Sensor &connectorb. Check Ambient Air Sensor resistance(See Note Note 6)2 Check Ambient Air Sensor Wiringa. Inspect harness & control boxconnector pins & terminals. (Seewiring schematic Section 11.)b. Power <strong>micro</strong>processor up (SeeNote5Page8.2). Disconnect sensorfrom harness. Check for voltage atharness plug between pins. FROMVECTOR3 Check Remote Sensor/Switch Connectora. Locate and inspect 10-way connectorfor optional sensors and switches.No damage to sensorNo damage, moisture, or corrosion in connector(Refer to Section 9.28 for complete resistance chart)10,000 Ohms @ 77°F (25°C)No physical damage to harness.No damaged or corroded pinsVoltage should be 2.5 VDC volts at harness plug betweenpins.Connector must have cap on,No corrosion or moisture inside connector.If there is a problem <strong>with</strong> the connector and there are noremote sensors or switches in the unit, the connector maybe removed and each individual wire separated from theothers, terminated and insulated <strong>with</strong> heat shrink.62-106838--56
AlarmNO.Steps ALARM / CAUSE CORRECTIVE ACTION122 CHECK RETURN AIR SENSOR• TRIGGER–ON: Return Air Sensor circuit has failed open or shorted. If shorted, the data list will display158°F (70°C). If the circuit is open, the data list will show the temperature as -52.6°F (-47°C)• UNIT CONTROL: Use Supply Air Sensor reading plus 3.6°F (2°C). If Supply Air Sensor Alarm is on, andsetpoint is at or below +10.4°F (-12°C), unit will run in Low Speed Cool only. If setpoint is above +10.4°F(-12°C), unit will shut down.• RESET CONDITION: Auto Reset when Return Air Sensor is in range or, Alarm may be manually resetvia keypad or by turning the unit off, then back on again.NOTE: Follow the steps below until a problem is found. Once a repair or correction has been made, the active alarmshould clear itself (see reset condition above). Operate the unit through the appropriate modes to see if any activealarm occurs. Continue <strong>with</strong> the steps below as necessary.1 Check Return Air Temperature Sensor (RAT)a. Inspect Return Air Sensor & connector No damage to sensorNo damage, moisture, or corrosion in connectorb. Check Return Air Sensor resistance(See Note Note 6)2 Check Return Air Sensor Wiringa. Inspect harness & control boxconnector pins & terminals (Seewiring schematic Section 11.)b. Power <strong>micro</strong>processor up (SeeNote5Page8.2). Disconnect sensorfrom harness. Check for voltage atharness plug between pins.3 Check Remote Sensor/Switch Connectora. Locate and inspect 10-way connectorfor optional sensors and switches.(Refer to Section 9.28 for complete resistance chart)10,000 Ohms @ 77°F (25°C)No physical damage to harness.No damaged or corroded pinsVoltage should be 2.5 VDC volts at harness plug betweenpins.Connector must have cap on,No corrosion or moisture inside connector.If there is a problem <strong>with</strong> the connector and there are noremote sensors or switches in the unit, the connector maybe removed and each individual wire separated from theothers, terminated and insulated <strong>with</strong> heat shrink.8--5762-10683
AlarmNO.Steps ALARM / CAUSE CORRECTIVE ACTION123 CHECK SUPPLY AIR SENSOR• TRIGGER–ON: Supply Air Sensor circuit has failed open or shorted. If shorted, the data list will display158°F (70°C). If the circuit is open, the data list will show the temperature as -52.6°F (-47°C)• UNIT CONTROL: Use Return Air Sensor reading minus 3.6°F (2°C). If Return Air Sensor Alarm is on,and setpoint is at or below +10.4°F (-12°C) unit will run in Low Speed Cool only. If setpoint is above+10.4°F (-12°C), unit will shut down. If Alarm 132--CHECK DEFROST TERM 2 SENSOR is also active,Defrost termination will be as described in section 5.11.• RESET CONDITION: Auto Reset when Supply Air Sensor is in range or, Alarm may be manually resetvia keypad or by turning the unit off, then back on again.NOTE: Follow the steps below until a problem is found. Once a repair or correction has been made, the active alarmshould clear itself (see reset condition above). Operate the unit through the appropriate modes to see if any activealarm occurs. Continue <strong>with</strong> the steps below as necessary.1 Check Supply Air Temperature Sensor (SAT)a. Inspect Supply Air Sensor & connector No damage to sensorNo damage, moisture, or corrosion in connectorb. Check Supply Air Sensor resistance (Refer to Section 9.28 for complete resistance chart)(See Note Note 6)10,000 Ohms @ 77°F (25°C)2 Check Supply Air Sensor Wiringa. Inspect harness & control boxconnector pins & terminals (Seewiring schematic Section 11.)b. Power <strong>micro</strong>processor up (SeeNote5Page8.2). Disconnect sensorfrom harness. Check for voltage atharness plug between pins.3 Check Remote Sensor/Switch Connectora. Locate and inspect 10-way connectorfor optional sensors and switches.No physical damage to harness.No damaged or corroded pinsVoltage should be 2.5 VDC volts at harness plug betweenpins.Connector must have cap on,No corrosion or moisture inside connector.If there is a problem <strong>with</strong> the connector and there are noremote sensors or switches in the unit, the connector maybe removed and each individual wire separated from theothers, terminated and insulated <strong>with</strong> heat shrink.62-106838--58
AlarmNO.Steps ALARM / CAUSE CORRECTIVE ACTION125 CHECK COMP DISCH SENSOR• TRIGGER–ON: Compressor Discharge Sensor circuit has failed open or shorted. If shorted, the data listwill display 392°F (200°C). If the circuit is open, the data list will show the temperature as -40°F (-40°C)• UNIT CONTROL: Alarm Only• RESET CONDITION: Auto Reset when Compressor Discharge Sensor is in range or, Alarm may bemanually reset via keypad or by turning the unit off, then back on again.NOTE: Follow the steps below until a problem is found. Once a repair or correction has been made, the active alarmshould clear itself (see reset condition above). Operate the unit through the appropriate modes to see if any activealarm occurs. Continue <strong>with</strong> the steps below as necessary.1 Check Compressor Discharge Temperature Sensor (CDT)a. Inspect Compressor DischargeSensor & connectorb. Check Compressor Discharge Sensorresistance(SeeNoteNote6)2 Check Compressor Discharge Sensor Wiringa. Inspect harness & control boxconnector pins & terminals (Seewiring schematic Section 11.)b. Power <strong>micro</strong>processor up (SeeNote5Page8.2). Disconnect sensorfrom harness. Check for voltage atharness plug between pins.3 Check Remote Sensor/Switch Connectora. Locate and inspect 10-way connectorfor optional sensors and switches.No damage to sensorNo damage, moisture, or corrosion in connector(Refer to Section 9.28 for complete resistance chart)100,000 Ohms @ 77°F (25°C)No physical damage to harness.No damaged or corroded pinsVoltage should be 2.5 VDC volts at harness plug betweenpins.Connector must have cap on,No corrosion or moisture inside connector.If there is a problem <strong>with</strong> the connector and there are noremote sensors or switches in the unit, the connector maybe removed and each individual wire separated from theothers, terminated and insulated <strong>with</strong> heat shrink.8--5962-10683
AlarmNO.Steps ALARM / CAUSE CORRECTIVE ACTION126 CHECK FUEL SENSOR CIRCUIT• TRIGGER–ON: The Low Fuel Shutdown is configured as a 0% to 100% sensor, and the fuel levelreading (in the data list) is less than 2% for 30 seconds.• UNIT CONTROL: Alarm Only• RESET CONDITION: Auto Reset when fuel level is sensed above 4% for 30 seconds or, Alarm may bemanually reset via keypad or by turning the unit off, then back on again.NOTE: Follow the steps below until a problem is found. Once a repair or correction has been made, the active alarmshould clear itself (see reset condition above). Operate the unit through the appropriate modes to see if any activealarm occurs. Continue <strong>with</strong> the steps below as necessary.1 Check For Low Fuel Levela. Check fuel level in the fuel tank Add fuel as needed to the fuel tank.2 Check Fuel Level Sensora. Inspect fuel level sensor& connectorpins & terminalsNo physical damage to sensor.No damaged or corroded pins in plug.b. Check fuel level sensor operation Place unit in Manual Start mode (see Note Note 4), ORUse Component Test Mode to energize the Run Relay.DO NOT START UNIT. (Refer to Section 6.2.2)c. Check for voltage at harness plugbetween pins for BLACK (SP24) andRED (SPK5) wiresd. Check continuity of the wire from theharness plug, pin C to the<strong>micro</strong>processor plug 1MP26e. With the Fuel Level Sensorreconnected, check the voltage at the<strong>micro</strong>processor plug 1MP26Voltage should be 12 volts at harness plug between pinsfor BLACK (SP24) and RED (SPK5) wiresSTART/RUN-OFF switch in OFF position prior to checkingfor continuity. Must be less than 10 ohms.Voltage must be between 0.0 -- 5.0 VDC.3 Check Fuel Level Sensor Calibrationa. Check fuel level sensor calibration See Section 9.8.24 Check Circuits With Test (Substitute) Sensora. Substitute known good sensor andclear alarm. Start unit and run for 30seconds.b. Check to see if alarm re-occurs.Alarm should not come on. (Install new sensor)62-106838--60
AlarmNO.Steps ALARM / CAUSE CORRECTIVE ACTION129 CHECK ENG COOLANT SENSOR• TRIGGER–ON: Engine Coolant Sensor circuit has failed open or shorted. If shorted, the data list willdisplay 266°F (130°C). If the circuit is open, the data list will show the temperature as -58°F (-50°C)• UNIT CONTROL: Alarm Only• RESET CONDITION: Auto Reset when Engine Coolant Sensor is in range or, Alarm may be manuallyreset via keypad or by turning the unit off, then back on again.NOTE: Follow the steps below until a problem is found. Once a repair or correction has been made, the active alarmshould clear itself (see reset condition above). Operate the unit through the appropriate modes to see if any activealarm occurs. Continue <strong>with</strong> the steps below as necessary.1 Check Engine Coolant Temperature Sensor (ENCT)a. Inspect Engine Coolant Sensor &connectorb. Check Engine Coolant Sensorresistance(SeeNoteNote6)2 Check Engine Coolant Sensor Wiringa. Inspect harness & control boxconnector pins & terminals (Seewiring schematic Section 11.)3 Check Remote Sensor/Switch Connectora. Locate and inspect 10-way connectorfor optional sensors and switches.No damage to sensorNo damage, moisture, or corrosion in connector(Refer to Section 9.28 for complete resistance chart)10,000 Ohms @ 77°F (25°C)No physical damage to harness.No damaged or corroded pinsConnector must have cap on,No corrosion or moisture inside connector.If there is a problem <strong>with</strong> the connector and there are noremote sensors or switches in the unit, the connector maybe removed and each individual wire separated from theothers, terminated and insulated <strong>with</strong> heat shrink.8--6162-10683
AlarmNO.Steps ALARM / CAUSE CORRECTIVE ACTION130 CHECK ENGINE RPM SENSOR• TRIGGER–ON:With the unit in Auto Start:The ambient temperature is above 32°F (0°C), and this is the 2nd or 3rd start attempt, and the Engine OilPressure switch is closed (oil pressure good), and engine RPM are sensed at less than 1000 RPM; orThe ambient is below 32°F (0°C) and the DC amp draw is more than 2 amps , and this is the 2nd or 3rdstart attempt, and engine RPM are sensed at less than 1000 RPM; orWith the unit in Manual Start:The ambient temperature is above 32°F (0°C), and this is the 2nd or 3rd start attempt, and the Engine OilPressure switch is closed (oil pressure good) engine RPM are sensed at less than 50 RPM; orThe ambient is below 32°F (0°C) and the DC amp draw is more than 2 amps , and this is the 2nd or 3rdstart attempt, and engine RPM are sensed at less than 50 RPM.NOTE: This alarm can only be triggered on during the engine starting sequence and the 20 secondsimmediately following.• UNIT CONTROL: Alarm Only (Engine will be considered running)• RESET CONDITION:With the unit in Auto Start: Auto Reset in Auto Start when engine RPM are greater than 1,000 or,With the unit in Manual Start:Auto Reset in Auto Start when engine RPM are greater than 1,000 or, when Oil Pressure switch contactsOPEN or, Alarm may be manually reset via keypad or by turning the unit off, then back on again.NOTE: Follow the steps below until a problem is found. Once a repair or correction has been made, the active alarmshould clear itself (see reset condition above). Operate the unit through the appropriate modes to see if any activealarm occurs. Continue <strong>with</strong> the steps below as necessary.1 Check Alarm Lista.Check for A412 Check Engine rpm Sensor (Non -ESC engines only)a. Inspect Engine RPM Sensor &connectorb. Compare actual engine RPM <strong>with</strong>those shown on the display using handheld tachometer.When Alarms 41 and 130 occur at the same time, generallythe engine has run out or is running out of fuel. This causesthe engine to surge. Check fuel tank and add fuel as necessary.Check fuel lines between the fuel tank and the fuel pump inletfor drawing air in.No damage to sensor.No damage, moisture, or corrosion in connector.Must be ± 20 RPMMust be a steady reading.3 Check Engine Speed Sensor (ENSSN) (ESC engines Only)a. Inspect circuit from ENSCU terminal 3to <strong>micro</strong> connection 2MP18 &connector.b. Compare actual engine RPM <strong>with</strong>those shown on the display using handheld tachometer.c. Check for 12 VDC between ENSSN 12V terminal & ENSSN ground.d. Check for 12 VDC at ENSCU terminal25 to groundAdditional steps on the next page.No damage to unit.No damage, moisture, or corrosion in connector.Must be ± 20 RPMMust be a steady reading.Must be 12 VDC.Must be 12 VDC.62-106838--62
AlarmNO.Steps ALARM / CAUSE CORRECTIVE ACTION130 CHECK ENGINE RPM SENSOR (Continued)NOTE: Follow the steps below until a problem is found. Once a repair or correction has been made, the active alarmshould clear itself (see reset condition above). Operate the unit through the appropriate modes to see if any activealarm occurs. Continue <strong>with</strong> the steps below as necessary.4 Check engine RPM sensor wiring (non -ESC engines only)a. Inspect harness & control boxconnector pins & terminals (Seewiring schematic Section 11.)b.Check RPM wiringc. Check voltage reading between plugterminals A & B.5 Check circuits <strong>with</strong> test sensora. Substitute known good sensor andcheck Unit Data List reading. (Refer toSection 3.14)SeeNoteNOTAGNo physical damage to harness.No damaged or corroded pinsPlace unit in Manual Start mode (see Note Note 4), ORUse Component Test Mode to energize the Run Relay.DO NOT START UNIT. (Refer to Section 6.2.2)With + lead on A and - lead on C reading should be 5 VDC±.2 volts. If it is not, check for grounded positive circuit atCSP and CDP transducers.Must be <strong>with</strong>in ± 20 RPM or reading on tachometer8--6362-10683
AlarmNO.Steps ALARM / CAUSE CORRECTIVE ACTION132 CHECK DEFROST TERM 2 SENSOR• TRIGGER–ON: Defrost Termination Temperature Sensor 2 circuit has failed open or shorted. If shorted,the data list will display 158°F (70°C). If the circuit is open, the data list will show the temperature as-52.6°F (-47°C)• UNIT CONTROL: Use RAT or SAT for defrost initiation criteria. (See Defrost mode, Section 5.11)• RESET CONDITION: Auto Reset when Defrost Termination Temperature Sensor 2 is in range or, Alarmmay be manually reset via keypad or by turning the unit off, then back on again.NOTE: Follow the steps below until a problem is found. Once a repair or correction has been made, the active alarmshould clear itself (see reset condition above). Operate the unit through the appropriate modes to see if any activealarm occurs. Continue <strong>with</strong> the steps below as necessary.1 Check Defrost Termination Temperature Sensor 2 (DTT2)a. Inspect Defrost TerminationTemperature Sensor 2 & connectorb. Check Defrost TerminationTemperature Sensor 2 resistance(See Note Note 6)2 Check Defrost Termination Temperature Sensor 2 Wiringa. Inspect harness & control boxconnector pins & terminals (See wiringschematic Section 11.)3 Check Remote Sensor/Switch Connectora. Locate and inspect 10-way connectorfor optional sensors and switches.No damage to sensorNo damage, moisture, or corrosion in connector(Refer to Section 9.28 for complete resistance chart)10,000 Ohms @ 77°F (25°C)No physical damage to harness.No damaged or corroded pinsConnector must have cap on,No corrosion or moisture inside connector.If there is a problem <strong>with</strong> the connector and there are noremote sensors or switches in the unit, the connector maybe removed and each individual wire separated from theothers, terminated and insulated <strong>with</strong> heat shrink.62-106838--64
AlarmNO.Steps ALARM / CAUSE CORRECTIVE ACTION133 CHECK REMOTE TEMP SENSOR 1• TRIGGER–ON: Remote Temperature Sensor 1 circuit is configured on, and has failed open or shorted. Ifshorted, the data list will display 158°F (70°C). If the circuit is open, the data list will show thetemperature as -52.6°F (-47°C)• UNIT CONTROL: Alarm only.• RESET CONDITION: Auto Reset when Remote Temperature Sensor 1 is in range or, Alarm may bemanually reset via keypad or by turning the unit off, then back on again.NOTE: Follow the steps below until a problem is found. Once a repair or correction has been made, the active alarmshould clear itself (see reset condition above). Operate the unit through the appropriate modes to see if any activealarm occurs. Continue <strong>with</strong> the steps below as necessary.1 Check Remote Temperature Sensor 1 (REMSN1)a. Verify that Remote TemperatureSensor 1 has been installed and iscorrectly wired to the unit.2 Check Remote Temperature Sensor 1a. Inspect Remote Temperature Sensor 1& connectorb. Check Remote Temperature Sensor 1resistance (See Note Note 6)3 Check Remote Temperature Sensor 1 Wiringa. Inspect harness & control boxconnector pins & terminals (Seewiring schematic Section 11.)b. Check 10-way connector for allremote sensors and switches.Remote Temperature Sensor 1 is installed.Wires are connected to 10-pin connector at cavities E & F.If sensor is not present change <strong>micro</strong> configuration toOFF.No damage to sensorNo damage, moisture, or corrosion in connector(Refer to Section 9.28 for complete resistance chart)10,000 Ohms @ 77°F (25°C)No physical damage to harness.No damaged or corroded pinsNo physical damage, moisture or corrosion to connector.Cavity plugs are in place for unused circuits.8--6562-10683
AlarmNO.Steps ALARM / CAUSE CORRECTIVE ACTION134 CHECK REMOTE TEMP SENSOR 2• TRIGGER–ON: Remote Temperature Sensor 2 circuit is configured on, and has failed open or shorted. Ifshorted, the data list will display 158°F (70°C). If the circuit is open, the data list will show thetemperature as -52.6°F (-47°C)• UNIT CONTROL: Alarm only.• RESET CONDITION: Auto Reset when Remote Temperature Sensor 2 is in range or, Alarm may bemanually reset via keypad or by turning the unit off, then back on again.NOTE: Follow the steps below until a problem is found. Once a repair or correction has been made, the active alarmshould clear itself (see reset condition above). Operate the unit through the appropriate modes to see if any activealarm occurs. Continue <strong>with</strong> the steps below as necessary.1 Check Remote Temperature Sensor 2 (REMSN2)a. Verify that Remote TemperatureSensor 2 has been installed and iscorrectly wired to the unit.2 Check remote temperature sensor 2a. Inspect Remote Temperature Sensor 2& connectorb. Check Remote Temperature Sensor 2resistance (See Note Note 6)3 Check remote temperature sensor 2 wiringa. Inspect harness & control boxconnector pins & terminals (Seewiring schematic Section 11.)b. Check 10-way connector for allremote sensors and switches.Remote Temperature Sensor 2 is installed.Wires are connected to 10-pin connector at cavities G&H.If sensor is not present change <strong>micro</strong> configuration toOFF.No damage to sensorNo damage, moisture, or corrosion in connector(Refer to Section 9.28 for complete resistance chart)10,000 Ohms @ 77°F (25°C)No physical damage to harness.No damaged or corroded pinsNo physical damage, moisture or corrosion to connector.Cavity plugs are in place for unused circuits.62-106838--66
AlarmNO.Steps ALARM / CAUSE CORRECTIVE ACTION135 CHECK REMOTE TEMP SENSOR 3• TRIGGER–ON: Remote Temperature Sensor 3 circuit is configured on, and has failed open or shorted. Ifshorted, the data list will display 158°F (70°C). If the circuit is open, the data list will show thetemperature as -52.6°F (-47°C)• UNIT CONTROL: Alarm only.• RESET CONDITION: Auto Reset when Remote Temperature Sensor 3 is in range or, Alarm may bemanually reset via keypad or by turning the unit off, then back on again.NOTE: Follow the steps below until a problem is found. Once a repair or correction has been made, the active alarmshould clear itself (see reset condition above). Operate the unit through the appropriate modes to see if any activealarm occurs. Continue <strong>with</strong> the steps below as necessary.1 Check Remote Temperature Sensor 3 (REMSN3)a. Verify that Remote TemperatureSensor 3 has been installed and iscorrectly wired to the unit.2 Check remote temperature sensor 3a. Inspect Remote Temperature Sensor 3& connectorb. Check Remote Temperature Sensor 3resistance (See Note Note 6)3 Check remote temperature sensor 3 wiringa. Inspect harness & control boxconnector pins & terminals (Seewiring schematic Section 11.)b. Check 10-way connector for allremote sensors and switches.Remote Temperature Sensor 3 is installed.Wires are connected to 10-pin connector at cavities J & K.If sensor is not present change <strong>micro</strong> configuration toOFF.No damage to sensorNo damage, moisture, or corrosion in connector(Refer to Section 9.28 for complete resistance chart)10,000 Ohms @ 77°F (25°C)No physical damage to harness.No damaged or corroded pinsNo physical damage, moisture or corrosion to connector.Cavity plugs are in place for unused circuits.8--6762-10683
AlarmNO.Steps ALARM / CAUSE CORRECTIVE ACTION8.9 PRETRIP ALARMSP141 PRETRIP STOPPED BY USER• TRIGGER–ON: Pretrip cycle was stopped before the Pretrip cycle ended automatically• UNIT CONTROL: Alarm Only• RESET CONDITION: Alarm may be manually reset via keypad or by turning the unit off, then back on again.NOTE: Follow the steps below until a problem is found. Once a repair or correction has been made, clear thealarm(s). (See Note 1) Operate the unit through the appropriate modes to see if any active alarm occurs. Continue<strong>with</strong> the steps below as necessary.1 Check For Any Pretrip Alarmsa. Scroll the Alarm list for any ActivePretrip alarms2 Rerun Pretrip Check (If Desired)a. Clear Active Alarm List, then runPretrip & check for any new alarms.Alarm conditions must be corrected and the alarm clearedto continueUnit running in Pretrip mode. Check for any new alarms.b. Allow to terminate automatically Pretrip cycle operates normally.P143 CHECK CLUTCH CIRCUIT• TRIGGER–ON: Normal Amps for the Clutch Circuit is 2.0 to 7 Amps. The circuit tests outside this range.• UNIT CONTROL: Pretrip will abort and “PRETRIP FAILED IN TEST 2” will be displayed inMessageCenter.• RESET CONDITION: Auto Reset if Pretrip mode is started again, or Alarm may be manually reset viakeypad or by turning the unit off, then back on again.NOTE: Follow the steps below until a problem is found. Once a repair or correction has been made, clear thealarm(s). (See Note 1) Operate the unit through the appropriate modes to see if any active alarm occurs. Continue<strong>with</strong> the steps below as necessary.1 Check For Bad F4 Or F6 Fuse Alarma. Check for alarm 72 Alarm conditions must be corrected and the alarm clearedto continue.2 Check Clutcha. Check resistance of clutch coil Refer to Section 2.13b. Check amp draw of clutch coil. Use Component Test mode (Section 6.2.2) to test.Refer to Section 2.13 for amp values.View current draw in the Unit Data list. (Refer to Section3.14)3 Check Clutch & Circuita. Inspect clutch and wiring No damage or corrosionConnector fits together tightly, no moisture insideb. Inspect clutch relay & socket No signs of discoloration from overheatingNo corrosionc. Check operation of Clutch Relay START/RUN-OFF switch in START/RUN-Manual StartOperation. (See Note Note 4)LED 29 must be ONd. Check voltage to clutch Must be 11.5 VDC or higher4 Check Clutch Circuit Wiringa. Inspect harness & control boxconnector pins & terminals (Seewiring schematic Section 11.)No physical damage to harness.No damaged or corroded pins62-106838--68
AlarmNO.Steps ALARM / CAUSE CORRECTIVE ACTIONP144 CHECK UL1 CIRCUIT• TRIGGER–ON: Normal Amps for the UL1 (Front) Unloader Circuit is 0.75 to 2.0 Amps. The circuit testsoutside this range.• UNIT CONTROL: Pretrip will abort and “PRETRIP FAILED IN TEST 2” will be displayed inMessageCenter.• RESET CONDITION: Auto Reset if Pretrip mode is started again, or Alarm may be manually reset viakeypad or by turning the unit off, then back on again.NOTE: Follow the steps below until a problem is found. Once a repair or correction has been made, clear thealarm(s). (See Note 1) Operate the unit through the appropriate modes to see if any active alarm occurs. Continue<strong>with</strong> the steps below as necessary.1 Check For Bad F4 Or F6 Fuse Alarma. Check for alarm 72 Alarm conditions must be corrected and the alarm clearedto continue.2 Check Front Unloader (UL1)a. Check amp draw of coil. Use Component Test mode (Section 6.2.2) to test.Refer to Section 2.13 for amp values.View current draw in the Unit Data list. (Refer to Section3.14).b. Check resistance of Front Unloader Refer to Section 2.13(UL1) coil.3 Check Front Unloader (UL1) And Circuita. Inspect Front Unloader (UL1) andwiring.No damage or corrosionConnector fits together tightly, no moisture insideb. Check operation of UL1 FET (23) START/RUN-OFF switch in Start/Run-Manual StartOperation. (See Note Note 4) LED must be ONc. Check voltage to Front Unloader (UL1). Must be 11 VDC or higher across the 2 wires4 Check Front Unloader (UL1) Circuit Wiringa. Inspect harness & control boxconnector pins & terminals (Seewiring schematic Section 11.)No physical damage to harness.No damaged or corroded pins8--6962-10683
AlarmNO.Steps ALARM / CAUSE CORRECTIVE ACTIONP145 CHECK SPEED SOL CIRCUIT• TRIGGER–ON: Normal Amps for the Speed Solenoid Circuit is 3.0 to 9.0 Amps for non--Electronic SpeedControlled (ESC) engines or0 to 1.0 Amps for ESC engines. The circuit tests outsidethis range.• UNIT CONTROL: Alarm Only• RESET CONDITION: Auto Reset if Pretrip mode is started again, or Alarm may be manually reset viakeypad or by turning the unit off, then back on again.NOTE: Follow the steps below until a problem is found. Once a repair or correction has been made, clear thealarm(s). (See Note 1) Operate the unit through the appropriate modes to see if any active alarm occurs. Continue<strong>with</strong> the steps below as necessary.1 Check For Bad F2 Or F3 Fuse Alarma. Check for alarm 71 Alarm conditions must be corrected and the alarm clearedto continue.2A Check Speed Solenoid (Non -ESC engines)a. Check resistance of speed solenoid Refer to Section 2.13b. Check amp draw of speed solenoid. Use Component Test mode (Section 6.2.2) to test.Refer to Section 2.13 for amp values.View current draw in the Unit Data list. (Refer to Section3.14).2B Check Circuit For High Resistance (ESC engines)a. Check amp draw of engine speedcontrol circuit (ENSCU) pin 16 andMPQC3onthe<strong>micro</strong>.Use Component Test mode (Section 6.2.2) to test.Refer to Section 2.13 for amp values.View current draw in the Unit Data list. (Refer to Section3.14).3 Check Speed Solenoid & Circuita. Inspect speed solenoid and wiring No physical damage to harness.No damaged or corroded pinsNo damage to solenoidb. Check operation of Speed Relay LED LED 27must be ONc. Check voltage to speed solenoid Must be 11 VDC or higher across the 2 wires4 Check Speed Solenoid Circuit Wiringa. Inspect harness & control boxconnector pins & terminals (Seewiring schematic Section 11.)No physical damage to harness.No damaged or corroded pins62-106838--70
AlarmNO.Steps ALARM / CAUSE CORRECTIVE ACTIONP148 CHECK SV1 CIRCUIT• TRIGGER–ON: Normal Amps for the SV1 Circuit is 0.75 to 2.5 Amps. The circuit tests outside thisrange.• UNIT CONTROL: Pretrip will abort and “PRETRIP FAILED IN TEST 2” will be displayed inMessageCenter.• RESET CONDITION: Auto Reset if Pretrip mode is started again, or Alarm may be manually reset viakeypad or by turning the unit off, then back on again.NOTE: Follow the steps below until a problem is found. Once a repair or correction has been made, clear thealarm(s). (See Note 1) Operate the unit through the appropriate modes to see if any active alarm occurs. Continue<strong>with</strong> the steps below as necessary.1 Check For Bad F4 Or F6 Fuse Alarma. Check for alarm 72 Alarm conditions must be corrected and the alarm clearedto continue.2 Check SV1a. Check resistance of SV1 Refer to Section 2.13b. Check amp draw of SV1. Use Component Test mode (Section 6.2.2) to test.Refer to Section 2.13 for amp values.View current draw in the Unit Data list. (Refer to Section3.14).3 Check SV1 & Circuita. Inspect SV1 and wiring No physical damage to harness.No damaged or corroded pinsb. Start unit, setpoint more than 10°F Unit running in Heat Cycle(5.5°C) above box temperature, andset above +11°F (--11.5°C). (See noteNote 9)c. Check operation of SV1 FET (10) LED must be ONd. Check voltage to SV1 Must be 11 VDC or higher across the 2 wires4 Check SV1 Circuit Wiringa. Inspect harness & control boxconnector pins & terminals (Seewiring schematic Section 11.)No physical damage to harness.No damaged or corroded pins8--7162-10683
AlarmNO.Steps ALARM / CAUSE CORRECTIVE ACTIONP150 CHECK SV4 CIRCUIT• TRIGGER–ON: Normal Amps for the SV4 Circuit is 0.75 to 2.0 Amps. The circuit tests outside this range.• UNIT CONTROL: Pretrip will abort and “PRETRIP FAILED IN TEST 2” will be displayed inMessageCenter.• RESET CONDITION: Auto Reset if Pretrip mode is started again, or Alarm may be manually reset viakeypad or by turning the unit off, then back on again.NOTE: Follow the steps below until a problem is found. Once a repair or correction has been made, clear thealarm(s). (See Note 1) Operate the unit through the appropriate modes to see if any active alarm occurs. Continue<strong>with</strong> the steps below as necessary.1 Check For Bad F4 Or F6 Fuse Alarma. Check for alarm 72 Alarm conditions must be corrected and the alarm clearedto continue.2 Check SV4a. Check resistance of SV4 Refer to Section 2.13b. Check amp draw of SV4. Use Component Test mode (Section 6.2.2) to test.Refer to Section 2.13 for amp values.View current draw in the Unit Data list. (Refer to Section3.14).3 Check SV4 & Circuita. Inspect SV4 and wiring No physical damage to harness.No damaged or corroded pinsb. Start unit <strong>with</strong> setpoint more than 10°F Unit running in Heat Cycle(5.5°C) above box temperature, andset above +11°F (--11.6°C). (See noteNote 9)c. Check operation of SV–4 FET (9) LED must be ONd. Check voltage to SV–4 Must be 11 VDC or higher across the 2 wires4 Check SV4 Circuit Wiringa. Inspect harness & control boxconnector pins & terminals (Seewiring schematic Section 11.)No physical damage to harness.No damaged or corroded pins62-106838--72
AlarmNO.Steps ALARM / CAUSE CORRECTIVE ACTIONP151 CHECK GLOW PLUG CIRCUIT• TRIGGER–ON: Normal Amps for the Glow Plugs Circuit is 23 to 35 Amps after 15 seconds.The circuit tests outside this range.• UNIT CONTROL: Alarm Only• RESET CONDITION: Auto Reset if Pretrip mode is started again, or Alarm may be manually reset viakeypad or by turning the unit off, then back on again.NOTE: Follow the steps below until a problem is found. Once a repair or correction has been made, clear thealarm(s). (See Note 1) Operate the unit through the appropriate modes to see if any active alarm occurs. Continue<strong>with</strong> the steps below as necessary.1 Check Glow Plug Circuita. Inspect glow plug relay & socket No signs of discoloration from overheatingNo corrosionb. Check operation of Glow Plug Relay START/RUN-OFF switch in START/RUN-Manual StartOperation. (See Note Note 4) Glow Crank switch in Glowposition. LED 30 must be ONc. Check voltage to glow plugs Must be 11 VDC or higherd. Check Glow Plug circuit Amps Use Component Test mode (Section 6.2.2) to test.Refer to Section 2.13 for amp values.View current draw in the Unit Data list. (Refer to Section3.14)e. Check amp draw of each glow plug. Refer to Section 2.13 for amp values. Use ammeter.2 Check Glow Plug Circuit Wiringa. Inspect harness & control boxconnector pins & terminals (Seewiring schematic Section 11.)No physical damage to harness.No damaged or corroded pins8--7362-10683
AlarmNO.Steps ALARM / CAUSE CORRECTIVE ACTIONP152 CHECK FUEL SOLENOID CIRC• TRIGGER–ON: Normal Amps for the Fuel Solenoid Hold Circuit is 0.42 to 3.5 Amps (0.2 to 4.5 Amps forESC units)for non--Electronic Speed Controlled (ESC) engines, and 0.2 to 4.5 Amps for ESC engines(including possible electric fuel pump). The circuit tests outside this range.• UNIT CONTROL: Alarm Only• RESET CONDITION: Auto Reset if Pretrip mode is started again, or Alarm may be manually reset viaKeypad or by turning the unit off, then back on again.NOTE: Follow the steps below until a problem is found. Once a repair or correction has been made, clear thealarm(s). (See Note 1) Operate the unit through the appropriate modes to see if any active alarm occurs. Continue<strong>with</strong> the steps below as necessary.1 Check For Bad F2 Or F3 Fuse Alarma. Check for alarm 71 Alarm conditions must be corrected and the alarm clearedto continue.2A Check Fuel Solenoid (Non -ESC engines only)a. Check resistance of fuel solenoid Refer to Section 2.13b. Check amp draw of fuel solenoid. Use Component Test Mode (Section 6.2.2) to test.Refer to Section 2.13 for amp values.View current draw in the Unit Data list. (Refer to Section3.14)2B Check Fuel And Speed Actuator (FSA) (ESC engines only)a. Check resistance of FSA Refer to Section 2.13. With FSA unplugged, ohm spec is3--4 ohms, +/-- 10%.3A3Bb. Check amp draw between MPQC4 &terminal 13 and 15 of the ENSCU.Use Component Test Mode (Section 6.2.2) to test.Refer to Section 2.13 for amp values.Check Fuel Solenoid & Circuit (Non -ESC engines only)a. Inspect fuel solenoid and wiring No physical damage to harness.No damaged or corroded pinsNo damage to solenoidb. Check operation of Run Relay Start/Run--Off switch in Start/Run--Manual Start Operation.(See Note 2) LED 28 must be ONc. Check voltage to fuel solenoid Start/Run--Off switch in Start/Run, Manual Start Mode(See Note 2)12 VDC between FSCC (ground) & FSHA (hold)With Manual Crank Switch in crank position12 VDC between FSCC (ground) & FSPB (pick)Check FSA & Circuits (ESC only)a. Inspect FSA and wiring No physical damage to harness.No damaged or corroded pinsNo damage to solenoidb. Check operation of Run Relay Start/Run--Off switch in Start/Run--Manual Start Operation.(See Note 2) LED 28 must be ONc. Check voltage to FSA Start/Run--Off switch in Start/Run, Manual Start Mode(See Note 2) OR component test mode, run relay.12 VDCbetween engine speed control unit (ENSCU) pins 13 and19.12 VDC between ENSCU pins 13 and 19With Manual Crank Switch in crank position12 VDC between ENSCU pins 15 and 194 Check Fuel Solenoid Circuit Wiringa. Inspect harness & control boxconnector pins & terminals (Seewiring schematic Section 11.)No physical damage to harness.No damaged or corroded pinsb. Check operation of solenoid Plunger must move in when energized62-106838--74
AlarmNO.Steps ALARM / CAUSE CORRECTIVE ACTIONP153 CHECK RETURN AIR SENSOR• TRIGGER–ON: Return Air Sensor is not <strong>with</strong>in the maximum range of --53°F to +158°F (--47°C to+70°C)• UNIT CONTROL: Pretrip will abort and “PRETRIP FAILED IN TEST 3” will be displayed inMessageCenter.• RESET CONDITION: Auto Reset if Pretrip mode is started again, or Alarm may be manually reset viaKeypad or by turning the unit off, then back on again.NOTE: Follow the steps below until a problem is found. Once a repair or correction has been made, clear thealarm(s). (See Note 1) Operate the unit through the appropriate modes to see if any active alarm occurs. Continue<strong>with</strong> the steps below as necessary.1 Check Return Air Temperature sensor (RAT)a. Inspect Return Air Sensor & connector No physical damage to harness.No moisture, damaged or corroded pins1MP Plug is connected tightly to <strong>micro</strong>processor. No wiresare pushed back through plug.b. Check Return Air Sensor resistance(See Note 4 Page 8 -2)2 Check Return Air Sensor Wiringa. Inspect harness & control boxconnector pins & terminals (Seewiring schematic Section 11.)3 Check Remote Sensor/Switch Connectora. Locate and inspect 10--way connectorfor optional sensors and switches.10,000 Ohms @ 77°F (25°C) [See section 2.13 forcomplete table of temperatures and resistance values.]No physical damage to harness.No damaged or corroded pinsConnector must have cap on,No corrosion or moisture inside connector.If there is a problem <strong>with</strong> the connector and there are noremote sensors or switches in the unit, the connector maybe removed and each individual wire separated from theothers, terminated and insulated <strong>with</strong> heat shrink.8--7562-10683
AlarmNO.Steps ALARM / CAUSE CORRECTIVE ACTIONP154 CHECK SUPPLY AIR SENSOR• TRIGGER–ON: Supply Air Sensor is not <strong>with</strong>in the maximum range of --53°F to +158°F (--47°C to+70°C)• UNIT CONTROL: Pretrip will abort and “PRETRIP FAILED IN TEST 3” will be displayed inMessageCenter. Defrost termination will be as described in Section 5.11• RESET CONDITION: Auto Reset if Pretrip mode is started again, or Alarm may be manually reset viaKeypad or by turning the unit off, then back on again.NOTE: Follow the steps below until a problem is found. Once a repair or correction has been made, clear thealarm(s). (See Note 1) Operate the unit through the appropriate modes to see if any active alarm occurs. Continue<strong>with</strong> the steps below as necessary.1 Check Supply Air Temperature Sensor (SAT)a. Inspect Supply Air Sensor & connector No physical damage to harness.No moisture, damaged or corroded pins1MP Plug is connected tightly to <strong>micro</strong>processor. No wiresare pushed back through plug.b. Check Supply Air Sensor resistance(See Note 4 Page 8 -2)2 Check Supply Air Sensor Wiringa. Inspect harness & control boxconnector pins & terminals (Seewiring schematic Section 11.)3 Check Remote Sensor/Switch Connectora. Locate and inspect 10--way connectorfor optional sensors and switches.4 Check Remote Sensor/Switch Connectora. Locate and inspect 10--way connectorfor optional sensors and switches.10,000 Ohms @ 77°F (25°C) [See section 2.13 forcomplete table of temperatures and resistance values.]No physical damage to harness.No damaged or corroded pinsConnector must have cap on,No corrosion or moisture inside connector.If there is a problem <strong>with</strong> the connector and there are noremote sensors or switches in the unit, the connector maybe removed and each individual wire separated from theothers, terminated and insulated <strong>with</strong> heat shrink.Connector must have cap on,No corrosion or moisture inside connector.If there is a problem <strong>with</strong> the connector and there are noremote sensors or switches in the unit, the connector maybe removed and each individual wire separated from theothers, terminated and insulated <strong>with</strong> heat shrink.62-106838--76
AlarmNO.Steps ALARM / CAUSE CORRECTIVE ACTIONP155 CHECK COOLANT TEMP SENSOR• TRIGGER–ON: Engine Coolant Temp Sensor is not <strong>with</strong>in the maximum range of --58°F to +266°F(--50°C to +130°C)• UNIT CONTROL: Pretrip will abort and “PRETRIP FAILED IN TEST 3” will be displayed inMessageCenter.• RESET CONDITION: Auto Reset if Pretrip mode is started again, or Alarm may be manually reset viaKeypad or by turning the unit off, then back on again.NOTE: Follow the steps below until a problem is found. Once a repair or correction has been made, clear thealarm(s). (See Note 1) Operate the unit through the appropriate modes to see if any active alarm occurs. Continue<strong>with</strong> the steps below as necessary.1 Check Engine Coolant Temperature Sensor (ENCT)a. Inspect Engine Coolant Sensor &connectorb. Check Engine Coolant Sensorresistance (See Note 4 Page 8 -2))2 Check Engine Coolant Sensor Wiringa. Inspect harness & control boxconnector pins & terminals (Seewiring schematic Section 11.)3 Check Remote Sensor/Switch Connectora. Locate and inspect 10--way connectorfor optional sensors and switches.No damage to sensorNo moisture, damage or corrosion in connector1MP Plug is connected tightly to <strong>micro</strong>processor. No wiresare pushed back through plug.10,000 Ohms @ 77°F (25°C) [See section 2.13 forcomplete table of temperatures and resistance values.]No physical damage to harness.No damaged or corroded pinsConnector must have cap on,No corrosion or moisture inside connector.If there is a problem <strong>with</strong> the connector and there are noremote sensors or switches in the unit, the connector maybe removed and each individual wire separated from theothers, terminated and insulated <strong>with</strong> heat shrink.P156 CHECK BATTERY VOLTS• TRIGGER–ON: Battery voltage is less than 11 VDC or greater than 17 VDC• UNIT CONTROL: Alarm Only• RESET CONDITION: Auto Reset if Pretrip mode is started again, or Alarm may be manually reset viakeypad or by turning the unit off, then back on again.NOTE: Follow the steps below until a problem is found. Once a repair or correction has been made, clear thealarm(s). (See Note 1) Operate the unit through the appropriate modes to see if any active alarm occurs. Continue<strong>with</strong> the steps below as necessary.1 Check For Battery Voltage Too High Alarma. Check for alarm 15 Alarm conditions must be corrected and the alarm clearedto continue.2 Check For Battery Voltage Too Low Alarma. Check for alarm A16 Alarm conditions must be corrected and the alarm clearedto continue.8--7762-10683
AlarmNO.Steps ALARM / CAUSE CORRECTIVE ACTIONP157 CHECK BATTERY CURRENT• TRIGGER–ON: With all circuits off, current flow of more than +1.5 or --2 Amps is detected in the electricalcircuits.NOTE: If this alarm occurs, Pretrip Test #2 will not be performed. You will need to run Pretripagain.• UNIT CONTROL: Alarm Only• RESET CONDITION: Auto Reset if Pretrip mode is started again, or Alarm may be manually reset viaKeypad or by turning the unit off, then back on again.NOTE: Follow the steps below until a problem is found. Once a repair or correction has been made, clear thealarm(s). (See Note 1) Operate the unit through the appropriate modes to see if any active alarm occurs. Continue<strong>with</strong> the steps below as necessary.1 Check Battery Current Draw.a. Note amp draw on display.Must show +1.5 to --2 Amps(See Note 3)2 Check Individual Circuitsa. Isolate individual circuits and test amp Must be in range. (Refer to Section 2.13)draw3 Check For Parasitic Loads (Electrical current being used by a non -refrigeration unitcomponent)a. Check for electrical loads that aredrawing current <strong>with</strong> all circuits OFF.Check for non--factory installed electrical devices such aslift gates, inside lights, satellite systems, etc). These musthave zero amps during Pretrip.62-106838--78
AlarmNO.Steps ALARM / CAUSE CORRECTIVE ACTIONP158 CHECK AMBIENT AIR SENSOR• TRIGGER–ON: Ambient Air Sensor is not <strong>with</strong>in the maximum range of --53°F to +158°F (--47°C to+70°C)• UNIT CONTROL: Pretrip will abort and “PRETRIP FAILED IN TEST 3” will be displayed inMessageCenter.• RESET CONDITION: Auto Reset if Pretrip mode is started again, or Alarm may be manually reset viaKeypad or by turning the unit off, then back on again.NOTE: Follow the steps below until a problem is found. Once a repair or correction has been made, clear thealarm(s). (See Note 1) Operate the unit through the appropriate modes to see if any active alarm occurs. Continue<strong>with</strong> the steps below as necessary.1 Check Ambient Air Temperature sensor (AAT)a. Inspect Ambient Air Sensor &connectorb. Check Ambient Air Sensor resistance(See Note 4 Page 8 -2)2 Check ambient air sensor wiringa. Inspect harness & control boxconnector pins & terminals (Seewiring schematic Section 11.)3 Check remote sensor/switch connectora. Locate and inspect 10--way connectorfor optional sensors and switches.No damage to sensorNo moisture, damage or corrosion in connector1MP Plug is connected tightly to <strong>micro</strong>processor. No wiresare pushed back through plug.10,000 Ohms @ 77°F (25°C) [See section 2.13 forcomplete table of temperatures and resistance values.]No physical damage to harness.No damaged or corroded pinsConnector must have cap on,No corrosion or moisture inside connector.If there is a problem <strong>with</strong> the connector and there are noremote sensors or switches in the unit, the connector maybe removed and each individual wire separated from theothers, terminated and insulated <strong>with</strong> heat shrink.8--7962-10683
AlarmNO.Steps ALARM / CAUSE CORRECTIVE ACTIONP160 CHECK DISCH TEMP SENSOR• TRIGGER–ON: Compressor Discharge Temp Sensor is not <strong>with</strong>in the maximum range of-- 40°F to +392°F (--40°C to +200°C )• UNIT CONTROL: Alarm Only• RESET CONDITION: Auto Reset if Pretrip mode is started again, or Alarm may be manually reset viaKeypad or by turning the unit off, then back on again.NOTE: Follow the steps below until a problem is found. Once a repair or correction has been made, clear thealarm(s). (See Note 1) Operate the unit through the appropriate modes to see if any active alarm occurs. Continue<strong>with</strong> the steps below as necessary.1 Check Compressor Discharge Temperature Sensor (CDT)a. Inspect Compressor Discharge TempSensor & connectorb.Check Compressor Discharge TempSensor resistance(See Note 4 Page 8 -2)2 Check Compressor Discharge Temp Sensor Wiringa. Inspect harness & control boxconnector pins & terminals (Seewiring schematic Section 11.)3 Check Remote Sensor/Switch Connectora. Locate and inspect 10--way connectorfor optional sensors and switches.No damage to sensorNo damage or corrosion in connector1MP Plug is connected tightly to <strong>micro</strong>processor. No wiresare pushed back through plug.100,000 Ohms @ 77°F (25°C) [See section 2.13 forcomplete table of temperatures and resistance values.]No physical damage to harness.No damaged or corroded pinsConnector must have cap on,No corrosion or moisture inside connector.If there is a problem <strong>with</strong> the connector and there are noremote sensors or switches in the unit, the connector maybe removed and each individual wire separated from theothers, terminated and insulated <strong>with</strong> heat shrink.62-106838--80
AlarmNO.Steps ALARM / CAUSE CORRECTIVE ACTIONP162 CHECK AUTO FRESH AIR EXCHANGE SOLENOID (AFAS) CIRCUIT• TRIGGER–ON: Normal Amps for the AFAX Circuit is 0.4 to 2.5 Amps. The circuit tests outside thisrange.• UNIT CONTROL: Alarm Only.• RESET CONDITION: Auto Reset if Pretrip mode is started again, or Alarm may be manually reset viaKeypad or by turning the unit off, then back on againNOTE: Follow the steps below until a problem is found. Once a repair or correction has been made, clear thealarm(s). (See Note 1) Operate the unit through the appropriate modes to see if any active alarm occurs. Continue<strong>with</strong> the steps below as necessary.1 Check For Bad F10 Fusea. Check circuit current All conditions must be corrected in circuit2 Check Auto Fresh Air Exchange Solenoid (AFAS)a. Check amp draw of AFAS Use Component Test Mode (Section 6.2.2) to test.Refer to Section 2.13 for amp values.View current draw in the Unit Data List.3 Check AFAS And Circuita. Inspect AFAS and wiring No physical damage to harness.No damaged or corroded pins.No damage to solenoidb. Check operation of AutoFresh AirExchange Relay (AFAR)AFAS turned on and LED12 on.AFAR energized.c. Check voltage to AFAS 12VDC between AFAS B (ground) and AFAS A (+12VDC)when AFAR is energized.8--8162-10683
AlarmNO.Steps ALARM / CAUSE CORRECTIVE ACTIONP164 CHECK UL2 CIRCUIT• TRIGGER–ON: Normal Amps for the UL2 (Rear) Unloader Circuit is 0.75 to 2.0 Amps. The circuit testsoutside this range.• UNIT CONTROL: Pretrip will abort and “PRETRIP FAILED IN TEST 3” will be displayed inMessageCenter.• RESET CONDITION: Auto Reset if Pretrip mode is started again, or Alarm may be manually reset viakeypad or by turning the unit off, then back on again.NOTE: Follow the steps below until a problem is found. Once a repair or correction has been made, clear thealarm(s). (See Note 1) Operate the unit through the appropriate modes to see if any active alarm occurs. Continue<strong>with</strong> the steps below as necessary.1 Check for bad F4 or F6 fuse alarma. Check for alarm 72 Alarm conditions must be corrected and the alarm clearedto continue.2 Check Rear Unloader (UL2)a. Check resistance of UL2 Refer to Section 2.13b. Check amp draw of UL2 Use Component Test mode (Section 6.2.2) to test.Refer to Section 2.13 for amp values.View current draw in the Unit Data list. (Refer to Section3.143 Check Rear Unloader (UL2) And Circuita. Inspect Rear Unloader (UL2) andwiring.b. Check operation of Rear Unloader(UL2) FET (22).No damage or corrosionConnector fits together tightly, no moisture insideSTART/RUN-OFF switch in START/RUN-Manual StartOperation. (See Note Note 4) LED must be ONc. Check voltage to UL2 Must be 11 VDC or higher across the 2 wires4 Check Rear Unloader (UL2) Circuit Wiringa. Inspect harness & control boxconnector pins & terminals (Seewiring schematic Section 11.)No physical damage to harness.No damaged or corroded pins62-106838--82
AlarmNO.Steps ALARM / CAUSE CORRECTIVE ACTIONP165 CANNOT PUMP DOWN• TRIGGER–ON: With SV1, SV2, & SV4 in the closed position, the compressor is not able to pull thelow side of the refrigerant system down to 10 PSIG (0.68 Bar).• UNIT CONTROL: Pretrip will abort and “PRETRIP FAILED IN TEST 11, 12 or 13” will be displayed inMessageCenter.• RESET CONDITION: Auto Reset if Pretrip mode is started again, or Alarm may be manually reset viaKeypad or by turning the unit off, then back on again.NOTE: Follow the steps below until a problem is found. Once a repair or correction has been made, clear thealarm(s). (See Note 1) Operate the unit through the appropriate modes to see if any active alarm occurs. Continue<strong>with</strong> the steps below as necessary.1 Visually Inspect Unita. Is compressor turning <strong>with</strong> engine? Compressor must turn <strong>with</strong> engine.2 Check System Pressurea. Check and compare compressordischarge & suction pressures <strong>with</strong>those shown on the <strong>micro</strong>processorcontroller.3 Manually Test <strong>Refrigeration</strong> System (See Note 9 Page 8 -2)a. See <strong>Refrigeration</strong> Troubleshooting,Section 10.3 -- “System Will Not PumpDown”Suction & Discharge Pressures must have the samereading ± 5 PSIG (±0.34 Bar) on gauges & on <strong>micro</strong>display.Must pass all testsCorrect any problems found before proceeding.b. Run Quick Check Correct any problems found before proceeding.8--8362-10683
AlarmNO.Steps ALARM / CAUSE CORRECTIVE ACTIONP174 CHECK LOW SPEED RPM• TRIGGER–ON in Test #7:With Speed Relay turned off (speed solenoid de-energized), engine RPM are NOTBetween 1375 and 1600 for Ultima XTC and X2 2500A/R; orBetween 1275 and 1500 for Ultra XTC and X2 2100A/R• TRIGGER–ON in Test #9:15 seconds after the High Speed Test, engine RPM have NOT dropped from the high speed RPM(in Test #8) by:Between 450 and 925 for Ultima XTC and X2 2500A/R; orBetween 150 and 525 for Ultra XTC and X2 2100A/R• UNIT CONTROL: Alarm Only• RESET CONDITION: Auto Reset if Pretrip mode is started again, or Alarm may be manually reset viaKeypad or by turning the unit off, then back on again.NOTE: Follow the steps below until a problem is found. Once a repair or correction has been made, clear thealarm(s). (See Note 1) Operate the unit through the appropriate modes to see if any active alarm occurs. Continue<strong>with</strong> the steps below as necessary.Check Speed Solenoid& Linkage On Non -electronic Speed Controlled (ESC) Engines And1The Fuel And Speed Actuator On ESC Enginesa.Check speed solenoid (FSA on ESC) Must move in and out freelyplungerb. Check engine speed arm & linkage Must move freely2 Force Low Speed Operation (See Note 9 Page 8 -2)a. Set Functional Parameter “LOW LED 27 must be OFFSPEED START” for a high number (30to 90) then start the unit.Set Functional Parameter back tooriginal setting after completingrepairs.b. Check operation of Speed Relay LED LED 27 must be OFFc. Check voltage to speed solenoid (FSA Mustbe0VDCon ESC)d. On X2 2500 units ONLY, check for Must be 12 VDCvoltage on engine speed control unit(ENSCU) pin 22.3 Check For Proper Voltage To The Engine Speed Control Unit (ENSCU) Pin 16 Based OnRequested Speed From The Microprocessora. Check voltage at pin 16 <strong>with</strong> unit Must be 0 VDC for all unitsrunning.4 Check Engine RPMa. Check actual engine RPM using handheld tachometerb. Compare actual RPM <strong>with</strong> thoseshown on display.Refer to Section 2.7Adjust engine linkage setting as needed.Both readings <strong>with</strong>in ± 50 RPM5 Check Engine Air-Intake Systema. Check air filter indicator Flag must not be visible.b. Inspect air intake system Hoses & tubes in good condition.No kinks or restrictions6 Check Engine Exhaust Systema. Inspect the exhaust system Must be clear and unobstructed62-106838--84
AlarmNO.Steps ALARM / CAUSE CORRECTIVE ACTIONP175 CHECK HIGH SPEED RPM• TRIGGER–ON: With Speed Relay turned on (voltage at the speed solenoid / Engine Speed Control Unitfor high speed operation (?)), engine RPM are NOTBetween 2000 and 2300 for Ultima XTC/X2 2500A/R; orBetween 1700 and 2000 for Ultra XTC/X2 2100A/R• UNIT CONTROL: Alarm Only• RESET CONDITION: Auto Reset if Pretrip mode is started again, or Alarm may be manually reset viaKeypad or by turning the unit off, then back on again.NOTE: Follow the steps below until a problem is found. Once a repair or correction has been made, clear thealarm(s). (See Note 1) Operate the unit through the appropriate modes to see if any active alarm occurs. Continue<strong>with</strong> the steps below as necessary.1 Check Speed Solenoid & Linkage On Non -Electronic Speed Controlled (ESC) Engines, OrThe fuel And Speed Actuator On ESC Enginesa. Check speed solenoid (FSA on ESC) Must move in and out freelyplungerb. Check engine speed arm & linkage Must move freely2 Force high speed operation (See Note 9 Page 8 -2)a. Set Functional Parameter “LOW LED 27 must be ONSPEED START” to zero and adjustsetpoint at least 10°F(5.6°C) above orbelow box temperature then start theunit.Set Functional Parameter back tooriginal setting after completingrepairs.b. Check operation of Speed Relay LED 27 must be ONc. Check voltage to speed solenoid (FSA Must be 12--14 VDCon ESC)d. Check resistance of speed solenoid Refer to Section 2.13(FSA on ESC)e. Check amp draw of speed solenoid(FSA on ESC)f. Inspect harness & control boxconnector pins & terminals (See wiringschematic Section 11.)Use Component Test Mode (Section 6.2.2) to test.Refer to Section 2.13 for amp values.View current draw in the Unit Data list. (Refer to Section3.14No physical damage to harness.No damaged or corroded pins or terminalsg. On X2 2500 units ONLY, check for Must be 12 VDCvoltage on engine speed control unit(ENSCU) pin 22.3 Check For Proper Voltage To The Engine Speed Control Unit (ENSCU) Pin 16 Based OnRequested Speed From The Microprocessora. Check voltage at pin 16 <strong>with</strong> unit Must be 0 VDC for all unitsrunning.4 Check Engine RPMa. Check actual engine RPM using handheld tachometerb. Compare actual RPM <strong>with</strong> thoseshown on displayAdditional steps on the next page.Refer to Section 2.7Adjust engine linkage setting as needed.Both readings <strong>with</strong>in ± 50 RPM8--8562-10683
AlarmNO.Steps ALARM / CAUSE CORRECTIVE ACTIONP175 CHECK HIGH SPEED RPM (Continued)5 Check engine air-intake systema. Check air filter indicator Flag must not be visible.b. Inspect air intake system Hoses & tubes in good condition.No kinks or restrictions6 Check engine exhaust systema. Inspect the exhaust system Must be clear and unobstructed62-106838--86
AlarmNO.Steps ALARM / CAUSE CORRECTIVE ACTIONP178 CHECK UL1• TRIGGER–ON: The pressure differential between suction and discharge pressures did not change asexpected when the UL1 (Front) Unloader was loaded (de-energized) or unloaded (energized)• UNIT CONTROL: If alarm A191 is already on, then Pretrip will be aborted & display will read “PRETRIPFAILED IN TEST 6”.• RESET CONDITION: Auto Reset if Pretrip mode is started again, or Alarm may be manually reset viaKeypad or by turning the unit off, then back on again.NOTE: Follow the steps below until a problem is found. Once a repair or correction has been made, clear thealarm(s). (See Note 1) Operate the unit through the appropriate modes to see if any active alarm occurs. Continue<strong>with</strong> the steps below as necessary.1 Check Wiring To DPT & SPTa. Verify that correct wires are connectedto each transducerPlugs to transducers are the same. The correct wire plugmust be connected to the proper transducer.2 Check for Check UL1 alarma. Check for alarm 85 or P144 Alarm conditions must be corrected and the alarm clearedto continue3 Check system pressuresa. Check and compare compressordischarge & suction pressures <strong>with</strong>those shown on the <strong>micro</strong>processorcontroller.Suction & Discharge Pressures must have the samereading -- ± 5 PSIG (±0.34 Bar) -- on gauges & on <strong>micro</strong>display.4 Check for Check SV2 Circuit Alarma. Check for alarm 97 or P192 Alarm conditions must be corrected and the alarm clearedto continue5 Check Front Unloader (UL1) Operation - Unit must be running (See Note 9 Page 8 -2) (SeeSection 9.14 - Unloader Checkout Procedure)a. Energize UL1 coil Pressures must change <strong>with</strong>in 3--4 seconds of coil beingenergized or de--energizedSuction pressure must raise slightlyDischarge pressure must drop slightlyb. De-energize UL1 coil Suction pressure must drop slightlyDischarge pressure must raise slightly6 Check for Check UL2 Unloader alarma. Check for alarm P191 Alarm conditions must be corrected and the alarm clearedto continue7 Check SV1 for being closed.a. Check voltage to SV1 coil. Mustbe0VDCb. Check pressure differential between Must be less than 25 PSIG (1.70 Bars).compressor discharge port andreceiver king valve.8 Check the compressor center head snubber teea. Check snubber (restrictor) inside thetee assembly for HPS and CDPsensorsTee must be open and not blocked or overly restricted. Ifin doubt, remove the snubber restrictor <strong>with</strong> a hammerand small punch, then restart pretrip.8--8762-10683
AlarmNO.Steps ALARM / CAUSE CORRECTIVE ACTIONP180 CHECK SUCTION MOD VALVE• TRIGGER–ON: Suction pressure did not drop as expected during Test 10 in Pretrip, when the CSMV waschanging position.• UNIT CONTROL: Alarm only.• RESET CONDITION: Auto Reset if Pretrip mode is started again, or Alarm may be manually reset viakeypad or by turning the unit off, then back on again.NOTE: Follow the steps below until a problem is found. Once a repair or correction has been made, clear thealarm(s). (See Note 1) Operate the unit through the appropriate modes to see if any active alarm occurs. Continue<strong>with</strong> the steps below as necessary.1 Check Software Revision Levela. Upgrade software. Revision level must be 04.06.00 or higher.2 Check connector to the suction modulation valvea. Inspect CSMV and wiring. No damage or corrosion.Connector fits together tightly. No moisture inside.3 Check operation of suction modulation valvea. See CSMV troubleshooting, Section Must pass all tests.9.22.262-106838--88
AlarmNO.Steps ALARM / CAUSE CORRECTIVE ACTIONP181 CHECK SV4 VALVE• TRIGGER–ON: Suction pressure did not rise <strong>with</strong>in range & discharge pressure did not drop <strong>with</strong>in rangewhen SV4 was energized (opened)• UNIT CONTROL: Alarm Only• RESET CONDITION: Auto Reset if Pretrip mode is started again, or Alarm may be manually reset viakeypad or by turning the unit off, then back on again.NOTE: Follow the steps below until a problem is found. Once a repair or correction has been made, clear thealarm(s). (See Note 1) Operate the unit through the appropriate modes to see if any active alarm occurs. Continue<strong>with</strong> the steps below as necessary.1 Check For SV4 Alarma. Check for alarms 79, P150 Alarm conditions must be corrected and the alarm clearedto continue2 Check System Pressuresa. Check and compare compressordischarge & suction pressures <strong>with</strong>those shown on the <strong>micro</strong>processorcontroller.Suction & Discharge Pressures must have the samereading -- ± 5 PSIG (±0.34 Bar) -- on gauges & on <strong>micro</strong>display.3 Check SV4 Operation - Unit Must Be Running In Heat Cycle (See Note 9 Page 8 -2)(See Section 9.21.1, Checking SV4)a. Set unit to run in high speed cool After 60 seconds note suction and discharge pressures.b. Energize SV4 coil Hot gas hissing sound will begin immediately.Suction pressure must rise slightlyDischarge pressure must drop slightlyc. De-energize SV4 coil Hot gas hissing sound will stop immediately.Suction pressure must drop slightlyDischarge pressure must rise slightly4 Manually Test <strong>Refrigeration</strong> Systema. Run Quick Check Must pass all testsCorrect any problems found before proceeding.8--8962-10683
AlarmNO.Steps ALARM / CAUSE CORRECTIVE ACTIONP182 CHECK SV1 VALVE• TRIGGER–ON: Discharge pressure did not decrease when SV1 was de--energized (opened) as expectedin Heat Pretrip Mode, or discharge pressure did not increase as expected when SV1 was energized(closed) in Cool Pretrip Mode.• UNIT CONTROL: Alarm Only• RESET CONDITION: Auto Reset if Pretrip mode is started again, or Alarm may be manually reset viaKeypad or by turning the unit off, then back on again.NOTE: Follow the steps below until a problem is found. Once a repair or correction has been made, clear thealarm(s). (See Note 1) Operate the unit through the appropriate modes to see if any active alarm occurs. Continue<strong>with</strong> the steps below as necessary.1 Check for SV1 Alarma. Check for alarms 80, P148 Alarm conditions must be corrected and the alarm clearedto continue2 Check System Pressuresa. Check and compare compressordischarge & suction pressures <strong>with</strong>those shown on the <strong>micro</strong>processorcontroller.Suction & Discharge Pressures must have the samereading -- ± 5 PSIG (±0.34 Bar) -- on gauges & on <strong>micro</strong>display.3 Check Sv1 Operation - Unit Must Be Running In Heat Cycle. (See Note 9 Page 8 -2)(See Section 9.21.2 - Checking SV1)a. Set unit to operate in high speed heat After 3 minutes note discharge and suction pressuresb. De-energize SV1 coil Compressor discharge pressure will dropReceiver tank pressure will raise slightly4 Manually Test <strong>Refrigeration</strong> Systema. Run Quick Check Must pass all testsCorrect any problems found before proceeding.62-106838--90
AlarmNO.Steps ALARM / CAUSE CORRECTIVE ACTIONP191 CHECK UL2• TRIGGER–ON: The pressure differential between discharge and suction pressures did not change asexpected when the UL2 (Rear) Unloader was loaded (de-energized) or unloaded (energized)• UNIT CONTROL: Alarm Only• RESET CONDITION: Auto Reset if Pretrip mode is started again, or Alarm may be manually reset viaKeypad or by turning the unit off, then back on again.NOTE: Follow the steps below until a problem is found. Once a repair or correction has been made, clear thealarm(s). (See Note 1) Operate the unit through the appropriate modes to see if any active alarm occurs. Continue<strong>with</strong> the steps below as necessary.1 Check For SV2 Circuit Alarma. Check for alarm 97 or P192 Alarm conditions must be corrected and the alarm clearedto continue2 Check For Check UL2 Unloader Alarma. Check for alarm 85 or P144 Alarm conditions must be corrected and the alarm clearedto continue3 Check System Pressuresa. Check and compare compressordischarge & suction pressures <strong>with</strong>those shown on the <strong>micro</strong>processorcontroller.Suction & Discharge Pressures must have the samereading -- ± 5 PSIG (±0.34 Bar) -- on gauges & on <strong>micro</strong>display.4 Check UL2 Operation - Unit Must Be Running (See Note 9 Page 8 -2)(See Section 9.14 - Checking Unloaders)a. Energize UL2 coil Pressures must change <strong>with</strong>in 3--4 seconds of coil beingenergized or de--energizedSuction pressure must raise slightlyDischarge pressure must drop slightlyCheck snubberb. De-energize UL2 coil Suction pressure must drop slightlyDischarge pressure must raise slightly5 Check The Compressor Center Head Snubber Teea. Check snubber (restrictor) inside thetee assembly for HPS and CDPsensorsTee must be open and not blocked or overly restricted. Ifin doubt, remove the snubber restrictor <strong>with</strong> a hammerand small punch, then restart pretrip.8--9162-10683
AlarmNO.Steps ALARM / CAUSE CORRECTIVE ACTIONP192 CHECK SV2 CIRCUIT• TRIGGER–ON: Normal Amps for the SV2 Circuit is 0.75 to 2.0 Amps. The circuit tests outside this range.• UNIT CONTROL: Pretrip will abort and “PRETRIP FAILED IN TEST 2” will be displayed inMessageCenter.• RESET CONDITION: Auto Reset if Pretrip mode is started again, or Alarm may be manually reset viakeypad or by turning the unit off, then back on again.NOTE: Follow the steps below until a problem is found. Once a repair or correction has been made, clear thealarm(s). (See Note 1) Operate the unit through the appropriate modes to see if any active alarm occurs. Continue<strong>with</strong> the steps below as necessary.1 Check For Bad F4 Or F6 Fuse Alarma. Check for alarm 72 Alarm conditions must be corrected and the alarm clearedto continue.2 Check SV2a. Check resistance of SV2 Refer to Section 2.13b. Check amp draw of SV2. Use Component Test mode (Section 6.2.2) to test.Refer to Section 2.13 for amp values.View current draw in the Unit Data list. (Refer to Section3.143 Check SV2 & Circuita. Inspect SV2 and wiring No damage or corrosionConnector fits together tightly, no moisture insideb. Check operation of SV2 FET (21) START/RUN-OFF switch in START/RUN-Manual StartOperation. (See Note Note 4) LED must be ONc. Check voltage to SV2 Must be 11 VDC or higher across the 2 wires4 Check SV2 Circuit Wiringa. Inspect harness & control boxconnector pins & terminals (See wiringschematic Section 11.)No physical damage to harness.No damaged or corroded pins62-106838--92
AlarmNO.Steps ALARM / CAUSE CORRECTIVE ACTIONP194 HIGH SUCTION PRESSURE• TRIGGER–ON: This alarm is generated during Test 4 of Cool Pretrip. Suction pressure is higher thannormal. (Maximum suction pressure should be approximate MOP of TXV or a little bit higher during thistest.• UNIT CONTROL: Alarm Only• RESET CONDITION: Auto Reset if Pretrip mode is started again, or Alarm may be manually reset viakeypad or by turning the unit off, then back on again.NOTE: Follow the steps below until a problem is found. Once a repair or correction has been made, clear thealarm(s). (See Note 1) Operate the unit through the appropriate modes to see if any active alarm occurs. Continue<strong>with</strong> the steps below as necessary.1 Check for SV4 Alarma. Check for alarm P181 Condition must be corrected and alarm cleared toproceed.2 Check System Pressuresa. Check and compare compressordischarge & suction pressures <strong>with</strong>those shown on the <strong>micro</strong>processorcontroller.Suction & Discharge Pressures must have the samereading -- ± 5 PSIG ( ±0.34 Bar) -- on gauges & on <strong>micro</strong>display.3 Check MOP Of Expansion Valvea. Test MOP of Expansion valve. Refer to Section 2.11b. Verify that correct TXV is in unit. Must have correct valve.4 Manually Test <strong>Refrigeration</strong> System (See Note 9 Page 8 -2)a. Run Quick Check Must pass all testsCorrect any problems found before proceeding.8--9362-10683
AlarmNO.Steps ALARM / CAUSE CORRECTIVE ACTIONP195 LOW SUCTION PRESSURE• TRIGGER–ON: This alarm is generated during Test 4 of Cool Pretrip. Suction pressure is lower thannormal, using the lesser value of the two following calculations.Minimum suction pressure should be 15 PSIG (1Bar) less than TXV MOP (see section 2.11 forMOP values); ORRAT minus 40°F (22°C) (Calculate suction pressure using a Temperature--Pressure chart SeeTable 9-9). For example, if the RAT is +45°F,youwouldtake45°F minus 40°F which equals 5°F. Look upthe saturated suction pressure for 5°F.SeeTable9-9.• UNIT CONTROL: Alarm Only• RESET CONDITION: Auto Reset if Pretrip mode is started again, or Alarm may be manually reset viaKeypad or by turning the unit off, then back on again.NOTE: Follow the steps below until a problem is found. Once a repair or correction has been made, clear thealarm(s). (See Note 1) Operate the unit through the appropriate modes to see if any active alarm occurs. Continue<strong>with</strong> the steps below as necessary.1 Check Wiring To DPT & SPTa. Verify that correct wires are connectedto each transducer2 Check Fan Beltsa. Check upper fan belt tension &conditionb. Check lower fan belt tension &condition.3 Check Evaporator Air Flow (See Note 9 Page 8 -2)a. Check evap fan clutch Must be engagedb. Check evaporator section, return airbulkhead, air chute, cleanliness ofevap. coilPlugs to transducers are the same. The correct wire plugmust be connected to the proper transducer.(Refer to Section 9.9 for belt tensions)No Glazing, no cracking, no slipping(Refer to Section 9.9 for belt tensions)No Glazing, no cracking, no slippingGood Air FlowReturn air not restrictedAir chute in good conditionNo damage to blower wheelEvap. coil clean4 Check For SV2 Circuit Alarma. Check for alarm 97 or P192 Alarm conditions must be corrected and the alarm clearedto continue5 Check System Pressuresa. Check and compare compressordischarge & suction pressures <strong>with</strong>those shown on the <strong>micro</strong>processorcontroller.6 Check Refrigerant Chargea. Check for undercharged system. (SeeSection 9.11.4 -- Checking RefrigerantCharge)7 Manually Defrost Unita. Defrost unit and terminateautomatically.8 Check system pressuresa. Check and compare compressordischarge & suction pressures <strong>with</strong>those shown on the <strong>micro</strong>processorcontroller.Additional steps on the next page.Suction & Discharge Pressures must have the samereading -- ± 5 PSIG (±0.34 Bar) -- on gauges & on <strong>micro</strong>display.Level must be above lower sight glassTypical defrost cycle time is 5--20 minutesSuction pressure should rise gradually during cycle.Suction & Discharge Pressures must have the samereading -- ± 5 PSIG (±0.34 Bar) -- on gauges & on <strong>micro</strong>display.62-106838--94
AlarmNO.Steps ALARM / CAUSE CORRECTIVE ACTIONP195 LOW SUCTION PRESSURE (Continued)NOTE: Follow the steps below until a problem is found. Once a repair or correction has been made, clear thealarm(s). (See Note 1) Operate the unit through the appropriate modes to see if any active alarm occurs. Continue<strong>with</strong> the steps below as necessary.9 Manually Test <strong>Refrigeration</strong> System (See Note 9 Page 8 -2)a. Run Quick Check Must pass all tests.Correct any problems found before proceedingb. See <strong>Refrigeration</strong> Troubleshooting,Section 10.3.9-- “Low SuctionPressure.”10 Check Expansion Valve (TXV)a. Visually inspect valve Bulb must be clamped tightly on the suction line andinsulatedb. Check MOP of valve Refer to Section 2.11c. Verify that correct TXV is in unit. Must have correct valve.d. Check superheat of valve Refer to Section 2.1111 Check For Damage To The Suction Linea. Visually inspect suction line for any No damage to linekinks, restrictions, or other damage.12 Check For Restricted Compressor Suction Screena. Visually inspect compressor suction Must be clean and unobstructed.inlet screen for material.8--9562-10683
AlarmNO.Steps ALARM / CAUSE CORRECTIVE ACTIONP196 HIGH DISCHARGE PRESSURE• TRIGGER–ON: This alarm is generated during Test 4 of Cool Pretrip. Discharge pressure is higher thannormal. (’Normal” discharge pressure for systems operating in the Cool Mode can be estimated by takingthe temperature of the air entering the condenser coil (Ambient Air Temperature AAT) and adding 30°F(16.6° C) to it, then looking at a pressure temperature chart -see Table 9-9 - for the correspondingpressure.)• UNIT CONTROL: Alarm Only• RESET CONDITION: Auto Reset if Pretrip mode is started again, or Alarm may be manually reset viaKeypad or by turning the unit off, then back on again.NOTE: Follow the steps below until a problem is found. Once a repair or correction has been made, clear thealarm(s). (See Note 1) Operate the unit through the appropriate modes to see if any active alarm occurs. Continue<strong>with</strong> the steps below as necessary.1 Check Fan Beltsa. Check upper fan belt tension &conditionb. Check lower fan belt tension &condition.2 Check Wiringa. Visually Inspect wiring to SV4 & bothCompressor Unloaders(Refer to Section 9.9 for belt tensions)No Glazing, no cracking, no slipping(Refer to Section 9.9 for belt tensions)No Glazing, no cracking, no slippingWires must be connected properly & securely to eachcomponent3 Check Airflow Through Condenser Coil (See Note 9 Page 8 -2)a. Inspect condenser / radiator fins Fins must be straight. 90% or more of the coil surfacemust be undamaged. No “dead” air spaces. Condenser /Radiator coil must be clean.b. Check airflow (<strong>with</strong> unit running). Even airflow through the entire coilNo “dead” spots4 Check System Pressuresa. Install Manifold Test Set and check andcompare compressor discharge &suction pressures <strong>with</strong> those shown onthe <strong>micro</strong>processor controller.5 Check For Refrigerant Overchargea. Check refrigerant level in the receivertank.6 Check Discharge Check Valvea. Check that discharge check valveopens fullySuction & Discharge Pressures must have the samereading on gauges & on <strong>micro</strong> display. Pressures must bein the normal range for ambient & box temperatureconditions.Level must be between upper & lower sight glassesMust open fully <strong>with</strong> unit runningb. Check discharge check valve screen Must be clean of any debris7 Manually Test <strong>Refrigeration</strong> System (See Note 9 Page 8 -2)a. Run Quick Check Must pass all testsCorrect any problems found before proceeding.8 Check System For Non–Condensablesa. Check refrigeration system for No non–condensable gas(es) may be present.non–condensable gas(es)b. See <strong>Refrigeration</strong> Troubleshooting,Section 10.3.9 -- “High DischargePressure.”9 Check Compressora. Remove all Compressor heads andinspect valve plates, unloaders, reedvalves, & gasketsMust be in good condition.No broken or missing parts.62-106838--96
AlarmNO.Steps ALARM / CAUSE CORRECTIVE ACTIONP198 LOW DISCHARGE PRESSURE• TRIGGER–ON: In the Heat Pretrip mode, the Compressor Discharge Pressure did not rise to normal.(The minimum ’Normal” discharge pressure for systems operating in the Heat Pretrip Mode can beestimated by taking the temperature of the air entering the condenser coil (Ambient Air Temperature AAT)and looking at a pressure temperature chart -see table Table 9-9 -for the corresponding pressure, thenadding 80 psig (5.5bars) to it.)• UNIT CONTROL: Pretrip will abort and “PRETRIP FAILED IN TEST 4” will be displayed inMessageCenter.• RESET CONDITION: Auto Reset if Pretrip mode is started again, or Alarm may be manually reset viaKeypad or by turning the unit off, then back on again.NOTE: Follow the steps below until a problem is found. Once a repair or correction has been made, clear thealarm(s). (See Note 1) Operate the unit through the appropriate modes to see if any active alarm occurs. Continue<strong>with</strong> the steps below as necessary.1 Check For Ambient Sensor Alarma. Check for alarm(s) 121 and P158 Alarm conditions must be corrected and the alarm clearedto continue.b. Check Ambient Sensor calibration Must be <strong>with</strong>in ±10°F (±5.5°C) of actual temperature2 Check System Pressuresa. Install Manifold Test Set and check andcompare compressor discharge &suction pressures <strong>with</strong> those shown onthe <strong>micro</strong>processor controller.Suction pressure must be above 3 PSIG (0.2 Bar)Suction & Discharge Pressures must have the samereading on gauges & on <strong>micro</strong> display.3 Check Refrigerant Chargea. Check for undercharged system Level must be above lower sight glass4 Check SV1 Operation. (See Section 9.21.2 - Checking SV1)a. Check the operation of the SV1 valve Must perform correctlyper test procedureCorrect any problems found before proceeding5 Check Compressor For Ability To Pump Up Pressurea. Check the operation of the high side ofthe compressor by covering thecondenser inlet air.b. Remove compressor heads & inspectcondition of all reeds & gasketsDischarge pressure must rise a minimum of 50 to 100 psig(3.4 to 6.9 bars)Must be in good condition.8--9762-10683
AlarmNO.Steps ALARM / CAUSE CORRECTIVE ACTIONP200 CHECK UL1 CYLINDERS• TRIGGER–ON: A problem has been detected inside the front cylinder head of the compressor <strong>with</strong> asuction reed, discharge reed, head gasket or valve plate gasket.• UNIT CONTROL: Alarm Only• RESET CONDITION: Auto Reset if Pretrip mode is started again, or Alarm may be manually reset viaKeypad or by turning the unit off, then back on again.NOTE: Follow the steps below until a problem is found. Once a repair or correction has been made, clear thealarm(s). (See Note 1) Operate the unit through the appropriate modes to see if any active alarm occurs. Continue<strong>with</strong> the steps below as necessary.1 Check Refrigerant Chargea. Check for undercharged system Level must be above lower sight glass2 Manually Test <strong>Refrigeration</strong> System (See Note 9 Page 8 -2)a. Run Quick Check Must pass all testsCorrect any problems found before proceeding.b. Check and compare compressorsuction pressure <strong>with</strong> pressure shownon the <strong>micro</strong>processor controller.3 Check Compressor Front Head Reed Valves & Gasketsa. Remove compressor front head & Must be in good condition.inspect condition of all reeds & gasketsSuction Pressure must have the same reading on gauge &on <strong>micro</strong> display.62-106838--98
AlarmNO.Steps ALARM / CAUSE CORRECTIVE ACTIONP201 CHECK UL2 CYLINDERS• TRIGGER–ON: A problem has been detected inside the rear cylinder head of the compressor <strong>with</strong> asuction reed, discharge reed, head gasket or valve plate gasket.• UNIT CONTROL: Alarm Only• RESET CONDITION: Auto Reset if Pretrip mode is started again, or Alarm may be manually reset viaKeypad or by turning the unit off, then back on again.NOTE: Follow the steps below until a problem is found.* Once a repair or correction has been made, clear thealarm(s). (See Note 1) Operate the unit through the appropriate modes to see if any active alarm occurs. Continue<strong>with</strong> the steps below as necessary.1 Manually Test <strong>Refrigeration</strong> System (See Note 9 Page 8 -2)a. Run Quick Check Must pass all testsCorrect any problems found before proceeding.b. Check and compare compressorsuction pressure <strong>with</strong> pressure shownon the <strong>micro</strong>processor controller.2 Check Compressor Rear Head Reed Valves & Gasketsa. Remove compressor rear head & Must be in good condition.inspect condition of all reeds & gasketsSuction Pressure must have the same reading on gauge &on <strong>micro</strong> display.P202 HIGH SIDE LEAK• TRIGGER–ON: With the Low Pressure Side of the refrigeration system forced to low pressure, refrigerantpressure is leaking past one of the components in the High Pressure Side of the refrigeration system intothe Low Pressure Side..• UNIT CONTROL: Alarm Only• RESET CONDITION: Auto Reset if Pretrip mode is started again, or Alarm may be manually reset viaKeypad or by turning the unit off, then back on again.NOTE: Follow the steps below until a problem is found. Once a repair or correction has been made, clear thealarm(s). (See Note 1) Operate the unit through the appropriate modes to see if any active alarm occurs. Continue<strong>with</strong> the steps below as necessary.1 Manually Test <strong>Refrigeration</strong> System (See Note 9 Page 8 -2)a. Run Quick Check Must pass all testsCorrect any problems found before proceeding.b. Check and compare compressorsuction pressure <strong>with</strong> pressure shownon the <strong>micro</strong>processor controller.c. With manifold gauges connected to thecompressor discharge and suctionvalves, and the unit running in Cool,slowly front seat the King Valve until thesuction pressure reaches 5 psig (3bar), then shut the engine off.Suction Pressure must have the same reading on gauge &on <strong>micro</strong> display.Monitor manifold gauges <strong>with</strong> the unit off. The suction anddischarge pressures should not equalize for severalminutes.Correct any problems before proceeding.8--9962-10683
AlarmNO.Steps ALARM / CAUSE CORRECTIVE ACTIONP203 CHK DISCHARGE CHECK VALVE• TRIGGER–ON: Refrigerant is leaking backwards through the Discharge Check Valve• UNIT CONTROL: Alarm Only• RESET CONDITION: Auto Reset if Pretrip mode is started again, or Alarm may be manually reset viakeypad or by turning the unit off, then back on again.NOTE: Follow the steps below until a problem is found. Once a repair or correction has been made, clear thealarm(s). (See Note 1) Operate the unit through the appropriate modes to see if any active alarm occurs. Continue<strong>with</strong> the steps below as necessary.1 Check Discharge Check Valvea. Test Discharge Check Valve for Must not leak.leakage2 Manually Test <strong>Refrigeration</strong> System (See Note 9 Page 8 -2)a. Run Quick Check Must pass all testsCorrect any problems found before proceeding.b. Check and compare compressorsuction pressure <strong>with</strong> pressure shownon the <strong>micro</strong>processor controller.Suction Pressure must have the same reading on gauge &on <strong>micro</strong> display.62-106838--100
AlarmNO.Steps ALARM / CAUSE CORRECTIVE ACTIONP204 LOW SUCTION PRESSURE• TRIGGER–ON: Suction Pressure is less than --10inHg (--0.34 Bar) for more than 30 continuous seconds,or less than 16inHg (--0.54 Bar) for more than 5 seconds at any time during Pretrip.• UNIT CONTROL: Pretrip will abort and “PRETRIP FAILED IN TEST X” will be displayed inMessageCenter indicating in which test the suction pressure was too low.• RESET CONDITION: Auto Reset if Pretrip mode is started again, or Alarm may be manually reset viaKeypad or by turning the unit off, then back on again.NOTE: Follow the steps below until a problem is found. Once a repair or correction has been made, clear thealarm(s). (See Note 1) Operate the unit through the appropriate modes to see if any active alarm occurs. Continue<strong>with</strong> the steps below as necessary.1 Check Fan Beltsa. Check upper fan belt tension &conditionb. Check lower fan belt tension &condition.2 Check System Pressuresa. Install Manifold Test Set and check andcompare compressor discharge &suction pressures <strong>with</strong> those shown onthe <strong>micro</strong>processor controller.3 Manually Defrost Unita. Defrost unit and terminateautomatically.4 Check Evaporator Air Flowa. Check evap fan clutch Must be engagedb. Check evaporator section, return airbulkhead, air chute, cleanliness ofevap. coil(Refer to Section 9.9 for belt tensions)No Glazing, no cracking, no slipping(Refer to Section 9.9 for belt tensions)No Glazing, no cracking, no slippingSuction pressure must be above 3 PSIG (0.2 Bar)Suction & Discharge Pressures must have the samereading on gauges & on <strong>micro</strong> display.Typical defrost cycle time is 5--20 minutesSuction pressure should rise gradually during cycle.Good Air FlowReturn air not restrictedAir chute in good conditionNo damage to blower wheelEvap. coil clean5 Check Refrigerant Charge - See Section 9.11.4 - Checking Refrigerant Charge)a. Check for undercharged system Level must be above lower sight glass6 Check Expansion Valve (TXV)a. Visually inspect valve Bulb must be clamped tightly on the suction line andinsulatedb. Check MOP of valve Refer to Section 2.11c. Check superheat of valve Refer to Section 2.118--10162-10683
AlarmNO.Steps ALARM / CAUSE CORRECTIVE ACTIONP205 CHK DEFROST TERM 2 SENSOR• TRIGGER–ON: Defrost Termination Temperature Sensor 2 is not <strong>with</strong>in the maximum range of-- 53°F to +158°F (--47°C to+70°C)• UNIT CONTROL: Alarm and defrost cycle will terminate as described in section 5.11.• RESET CONDITION: Auto Reset if Pretrip mode is started again, or Alarm may be manually reset viaKeypad or by turning the unit off, then back on again.NOTE: Follow the steps below until a problem is found. Once a repair or correction has been made, clear thealarm(s). (See Note 1) Operate the unit through the appropriate modes to see if any active alarm occurs. Continue<strong>with</strong> the steps below as necessary.1 Check Defrost Termination Temperature Sensor 2 (DTT2)a. Inspect Defrost TerminationTemperature Sensor 2 & connectorb. Check Defrost TerminationTemperature Sensor 2 resistance(See Note 4 Page 8 -2)2 Check Defrost Termination Temperature Sensor 2 Wiringa. Inspect harness & control boxconnector pins & terminals (Seewiring schematic Section 11.)No damage to sensorNo damage or corrosion in connector1MP plug is connected tightly to <strong>micro</strong>processor. No wiresare pushed back through plug.10,000 Ohms @ 77°F (25°C) [See section 2.13 forcomplete table of temperatures and resistance values.]No physical damage to harness.No damaged or corroded pins62-106838--102
AlarmNO.Steps ALARM / CAUSE CORRECTIVE ACTION8.10 MAINTENANCE ALARMS223 ENGINE MAINTENANCE DUE• TRIGGER–ON: The Engine Maintenance Hour Meter time has expired.• UNIT CONTROL: Alarm Only. Alarm Light will NOT be turned on.• RESET CONDITION: Alarm may be manually reset via keypad.1 Check Unit Maintenance Recordsa. Schedule unit into service facility formaintenance2 Perform Maintenancea. Perform appropriate engine & unitmaintenance3 Reset Engine Maintenance Hour Metera. Check that the Engine MaintenanceHour Meter interval is set for yourrequirements.b. Reset Engine Maintenance Hour Meterfor the next service intervalMust be done soon!4 SeeNote1Page8-2a. Clear the inactive alarms. All alarms cleared.Follow instructions on proper maintenance formReset Interval in Configuration list as required.Hour Meter is reset in the Functional Parameter list.Follow maintenance interval recommendations in Section9.1.225 GENERAL MAINTENANCE DUE• TRIGGER–ON: The General Maintenance Hour Meter time has expired.• UNIT CONTROL: Alarm Only. Alarm Light will NOT be turned on.• RESET CONDITION: Alarm may be manually reset via keypad.1 Check Unit Maintenance Recordsa. Schedule unit into service facility for Must be done soon!maintenance2 Perform Maintenancea. Perform appropriate engine & unit Follow instructions on proper maintenance formmaintenance3 Reset General Maintenance Hour Metera. Check that the General Maintenance Reset Interval in Configuration list as required.Hour Meter interval is set for yourrequirements.b. Reset General Maintenance HourMeter for the next service interval4 SeeNote1Page8-2a. Clear the inactive alarms. All alarms cleared.Hour Meter is reset in the Functional Parameter list.Follow maintenance interval recommendations in Section9.1.8--10362-10683
AlarmNO.Steps ALARM / CAUSE CORRECTIVE ACTION226 SERVICE SOON - PM #1 DUE• TRIGGER–ON: The Maintenance Hour Meter #1 time has expired.• UNIT CONTROL: Alarm Only. Alarm Light will NOT be turned on.• RESET CONDITION: Alarm may be manually reset via keypad.1 Check Unit Maintenance Recordsa. Schedule unit into service facility formaintenance2 Perform Maintenancea. Perform appropriate engine & unitmaintenance3 Reset Maintenance Hour Meter #1a. Check that Maintenance Hour Meter#1 interval is set for yourrequirements.b. Reset Maintenance Hour Meter #1 forthe next service intervalMust be done soon!4 SeeNote1Page8-2a. Clear the inactive alarms. All alarms clearedFollow instructions on proper maintenance formReset Interval in Configuration list as required.Hour Meter is reset in the Functional Parameter list.Follow maintenance interval recommendations in Section9.1.227 SERVICE SOON - PM #2 DUE• TRIGGER–ON: The Maintenance Hour Meter #2 time has expired.• UNIT CONTROL: Alarm Only. Alarm Light will NOT be turned on.• RESET CONDITION: Alarm may be manually reset via keypad.1 Check Unit Maintenance Recordsa. Schedule unit into service facility formaintenance2 Perform Maintenancea. Perform appropriate engine & unitmaintenance3 Reset Maintenance Hour Meter #2a. Check that Maintenance Hour Meter#2 interval is set for yourrequirements.b. Reset Maintenance Hour Meter #2 forthe next service intervalMust be done soon!4 SeeNote1Page8-2a. Clear the inactive alarms. All alarms cleared.Follow instructions on proper maintenance formReset Interval in Configuration list as required.Hour Meter is reset in the Functional Parameter list.Follow maintenance interval recommendations in Section9.1.62-106838--104
AlarmNO.Steps ALARM / CAUSE CORRECTIVE ACTION228 SERVICE SOON - PM #3 DUE• TRIGGER–ON: The Maintenance Hour Meter #3 time has expired.• UNIT CONTROL: Alarm Only. Alarm Light will NOT be turned on.• RESET CONDITION: Alarm may be manually reset via keypad.1 Check Unit Maintenance Recordsa. Schedule unit into service facility formaintenance2 Perform Maintenancea. Perform appropriate engine & unitmaintenance3 Reset Maintenance Hour Meter #3a. Check that Maintenance Hour Meter#3 interval is set for yourrequirements.b. Reset Maintenance Hour Meter #3 forthe next service intervalMust be done soon!4 SeeNote1Page8-2a. Clear the inactive alarms. All alarms clearedFollow instructions on proper maintenance formReset Interval in Configuration list as required.Hour Meter is reset in the Functional Parameter list.Follow maintenance interval recommendations in Section9.1.229 SERVICE SOON - PM #4 DUE• TRIGGER–ON: The Maintenance Hour Meter #4 time has expired.• UNIT CONTROL: Alarm Only. Alarm Light will NOT be turned on.• RESET CONDITION: Alarm may be manually reset via keypad.1 Check Unit Maintenance Recordsa. Schedule unit into service facility formaintenance2 Perform Maintenancea. Perform appropriate engine & unitmaintenance3 Reset Maintenance Hour Meter #4a. Check that Maintenance Hour Meter#4 interval is set for yourrequirements.b. Reset Maintenance Hour Meter #4 forthe next service intervalMust be done soon!4 SeeNote1Page8-2a. Clear the inactive alarms. All alarms cleared.Follow instructions on proper maintenance formReset Interval in Configuration list as required.Hour Meter is reset in the Functional Parameter list.Follow maintenance interval recommendations in Section9.1.8--10562-10683
AlarmNO.Steps ALARM / CAUSE CORRECTIVE ACTION230 SERVICE SOON - PM #5 DUE• TRIGGER–ON: The Maintenance Hour Meter #5 time has expired.• UNIT CONTROL: Alarm Only. Alarm Light will NOT be turned on.• RESET CONDITION: Alarm may be manually reset via keypad.1 Check Unit Maintenance Recordsa. Schedule unit into service facility formaintenance2 Perform Maintenancea. Perform appropriate engine & unitmaintenance3 Reset Maintenance Hour Meter #5a. Check that Maintenance Hour Meter#5 interval is set for yourrequirements.b. Reset Maintenance Hour Meter #5 forthe next service intervalMust be done soon!4 SeeNote1Page8-2a. Clear the inactive alarms. All alarms cleared.Follow instructions on proper maintenance formReset Interval in Configuration list as required.Hour Meter is reset in the Functional Parameter list.Follow maintenance interval recommendations in Section9.1.62-106838--106
AlarmNO.Steps ALARM / CAUSE CORRECTIVE ACTION8.11 MICROPROCESSOR ALARMS232 SETPOINT ERROR• TRIGGER–ON: There is an error in the Setpoint that is stored in the <strong>micro</strong>processor memory, or in thememory sector of the <strong>micro</strong>processor that the Setpoint is stored in.• UNIT CONTROL: Unit Shutdown & Alarm• RESET CONDITION: Auto Reset when a valid Setpoint is entered, or Alarm may be manually reset byturning the unit off, then back on again.NOTE: Follow the steps below until a problem is found. Once a repair or correction has been made, the active alarmshould clear itself (see reset condition above). Operate the unit through the appropriate modes to see if any activealarm occurs. Continue <strong>with</strong> the steps below as necessary.1 Check Set Pointa. Check set point settingMust be between --22 and +89.6° F(--30°C and +32°C)b. Enter new set point2 Reset Microprocessora. Turn the Start/Run--Off switch off for 30 The <strong>micro</strong>processor powers up OK and the latest setpointseconds and then turn back on. appears in the display.b. Valid set point can not be entered. Replace <strong>micro</strong>processor3 SeeNote1Page8-2a. Clear the inactive alarms. All alarms cleared233 MODEL # ERROR• TRIGGER–ON: There is an error in the Model Number that is stored in the <strong>micro</strong>processor memory, or inthe memory sector of the <strong>micro</strong>processor that the Model Number is stored in.• UNIT CONTROL: Unit Shutdown & Alarm• RESET CONDITION: Auto Reset only when a valid Model number is entered.NOTE: Follow the steps below until a problem is found. Once a repair or correction has been made, the active alarmshould clear itself (see reset condition above). Operate the unit through the appropriate modes to see if any activealarm occurs. Continue <strong>with</strong> the steps below as necessary.1 Check Model Numbera. Check Model Number in Must be a valid Model Number from Configuration List.<strong>micro</strong>processorb. Enter correct Model Number From Configuration List, select correct Model Number.2 Reset Microprocessora. Turn Start/Run--Off switch off for 30 Microprocessor powers up OKseconds, then turn back on.b. Check for valid Model number in DataList.c. Valid model number can not beentered.Valid number is present.Alarm is clearedReplace <strong>micro</strong>processor3 SeeNote1Page8-2a. Clear the inactive alarms. All alarms cleared8--10762-10683
AlarmNO.Steps ALARM / CAUSE CORRECTIVE ACTION237 FUNCTIONAL PARAMETERS ERROR• TRIGGER–ON: There is an error in one or more of the Functional Parameters that are stored in the<strong>micro</strong>processor memory, , or in the memory sector of the <strong>micro</strong>processor that the Functional Parametersarestoredin.• UNIT CONTROL: Unit Shutdown & Alarm.• RESET CONDITION: Auto Reset when valid Functional Parameters are entered, or Alarm may bemanually reset by turning the unit off, then back on againNOTE: Follow the steps below until a problem is found. Once a repair or correction has been made, the active alarmshould clear itself (see reset condition above). Operate the unit through the appropriate modes to see if any activealarm occurs. Continue <strong>with</strong> the steps below as necessary.1 Check Functional Parametersa. Check Functional Parameters All must be set for selectable values2 Reset Microprocessora. Turn Start/Run--Off switch off for 30 Microprocessor powers up OKseconds, then turn back on.b. Check for valid Functional Parametersin Functional Parameters List.c. Valid Functional Parameter(s) can notbe entered.Valid number is set for all parameters.Alarm is clearedReplace <strong>micro</strong>processor3 SeeNote1Page8-2a. Clear the inactive alarms. All alarms cleared.62-106838--108
AlarmNO.Steps ALARM / CAUSE CORRECTIVE ACTION238 CONFIGURATIONS 1 ERROR• TRIGGER–ON: There is an error in Configuration Group 1 that is stored in the <strong>micro</strong>processor memory,or in the memory sector of the <strong>micro</strong>processor that the Configurations are stored in.• UNIT CONTROL: Unit Shutdown & Alarm.• RESET CONDITION: Auto Reset when valid Configuration(s) are entered, or Alarm may be manuallyreset by turning the unit off, then back on againNOTE: Follow the steps below until a problem is found. Once a repair or correction has been made, the active alarmshould clear itself (see reset condition above). Operate the unit through the appropriate modes to see if any activealarm occurs. Continue <strong>with</strong> the steps below as necessary.1 Check Configurationsa. Check Configurations All must be set for selectable values2 Check Software Versiona. Check Microprocessor Software version.Upgrade to the latest version of software. Newer versionsof ReeferManager may contain configurations that werenot present in older versions of Microprocessor software.3 Reconfigure Microprocessora. Send settings to Microprocessor. Using ReeferManager and a Configuration PC Card, writethe desired configuration file to the PC Card, then load thefile into the Microprocessor. Allow the Microprocessor toreboot itself.4 Reset <strong>micro</strong>processora. Turn Start/Run--Off switch off for 30 Microprocessor powers up OKseconds, then turn back on.b. Check for valid Configurations in DataList.c. Valid Configurations can not beentered.Valid number is present.Alarm is clearedReplace <strong>micro</strong>processor5 SeeNote1Page8-2a. Clear the inactive alarm. All alarms cleared.8--10962-10683
AlarmNO.Steps ALARM / CAUSE CORRECTIVE ACTION242 DIS PRESS CALIBRATE ERROR• TRIGGER–ON: There is an error in the Discharge Pressure Sensor Calibration value stored inthe<strong>micro</strong>processor memory or in the memory sector of the <strong>micro</strong>processor that the calibration value is storedin.• UNIT CONTROL: Unit Shutdown & Alarm• RESET CONDITION: Auto Reset when the Discharge Pressure Sensor is calibrated successfully, orAlarm may be manually reset via Keypad or by turning the unit off, then back on again.NOTE: Follow the steps below until a problem is found. Once a repair or correction has been made, the active alarmshould clear itself (see reset condition above). Operate the unit through the appropriate modes to see if any activealarm occurs. Continue <strong>with</strong> the steps below as necessary.1 Check Discharge Pressure Readinga. Check Discharge Pressure Reading Must read valid data.2 Calibrate Discharge Pressure Sensora. Calibrate Discharge Pressure Sensor. Calibration successful.b. Discharge Pressure Sensor can not be Replace <strong>micro</strong>processorsuccessfully calibrated.3 SeeNote1Page8-2a. Clear the inactive alarms. All alarms cleared.243 SUCT/EVAP CALIBRATE ERROR• TRIGGER–ON: There is an error in the Suction / Evaporator Pressure Sensor Calibration value stored inthe <strong>micro</strong>processor memory or in the memory sector of the <strong>micro</strong>processor that the calibration value isstored in.• UNIT CONTROL: Unit Shutdown & Alarm• RESET CONDITION: Auto Reset when the Suction / Evaporator Pressure Sensor is calibratedsuccessfully, or Alarm may be manually reset via Keypad or by turning the unit off, then back on again.NOTE: Follow the steps below until a problem is found. Once a repair or correction has been made, the active alarmshould clear itself (see reset condition above). Operate the unit through the appropriate modes to see if any activealarm occurs. Continue <strong>with</strong> the steps below as necessary.1 Check Suction / Evaporator Pressure Readinga. Check Suction / Evaporator Pressure Must read valid data.Reading2 Calibrate Suction / Evaporator Pressure Sensora. Calibrate Suction/Evaporator Pressure Calibration successful.Sensor.b. Suction/Evaporator Pressure Sensor Replace <strong>micro</strong>processorcan not be successfully calibrated.3 SeeNote1Page8-2a. Clear the inactive alarms. All alarms cleared.62-106838--110
AlarmNO.Steps ALARM / CAUSE CORRECTIVE ACTION246 EEPROM WRITE FAILURE• TRIGGER-ON: There is an error in the ability to write information to be stored in the memory• UNIT CONTROL: Unit Shutdown & Alarm• RESET CONDITION: Alarm may be manually reset via keypad or by turning the unit off, then back onagain.NOTE: Follow the steps below until a problem is found. Once a repair or correction has been made, clear thealarm(s). (See Note 1) Operate the unit through the appropriate modes to see if any active alarm occurs. Continue<strong>with</strong> the steps below as necessary.1 Check Microprocessora. Check set point settingMust be between -22°F to +89.6°F (-30°C to+32°C)b. Enter new set point2 Reset Microprocessora. Turn START/RUN-OFF switch off for Microprocessor powers up OK30 seconds, then turn back on.b. Alarm 246 remains active. Replace <strong>micro</strong>processor.3 SeeNote1Page8-2a. Clear the inactive alarms. All alarms cleared.248 CONF MODE / HP2 ERROR• TRIGGER–ON: Microprocessor internal operational program error.• UNIT CONTROL: Unit Shutdown & Alarm• RESET CONDITION: Auto Reset only when valid info is available for the <strong>micro</strong>processor are entered.Follow the steps below until a problem is found. Once a repair or correction has been made, clear the alarm(s). (SeeNote 1) Operate the unit through the appropriate modes to see if any active alarm occurs. Continue <strong>with</strong> the stepsbelow as necessary.1 Check Microprocessora. Check set point settingMust be between -22°F to +89.6°F (-30°C to+32°C)b. Enter new set point2 Reset Microprocessora. Turn START/RUN-OFF switch off for Microprocessor powers up OK30 seconds, then turn back on.b. Alarm 248 remains active. Replace <strong>micro</strong>processor.3 SeeNote1Page8-2a. Clear the inactive alarms. All alarms cleared.8--11162-10683
AlarmNO.Steps ALARM / CAUSE CORRECTIVE ACTION249 MICROPROCESSOR ERROR• TRIGGER–ON: Microprocessor Input Conversion Error• UNIT CONTROL: Unit Shutdown & Alarm• RESET CONDITION: Auto Reset when input conversions are valid, or Alarm may be manuallyreset by turning the unit off, then back on again.Follow the steps below until a problem is found. Once a repair or correction has been made, clear the alarm(s). (SeeNote 1) Operate the unit through the appropriate modes to see if any active alarm occurs. Continue <strong>with</strong> the stepsbelow as necessary.1 Check Microprocessora. Check Temperature Sensor Data Must be valid reading for RAT, SAT, AAT, etc.b. Check for any Active Sensor Alarms Must all be cleared.2 Check Microprocessor & Unit Wiringa. Check Wiring to Micro and at inputdevices to the <strong>micro</strong>.3 Reset Microprocessora. Turn START/RUN-OFF switch off for30 seconds, then turn back on.Must not be miss wired to allow 12 VDC on any of thesensor input circuits.Microprocessor powers up OKb. Alarm 249 remains active. Replace <strong>micro</strong>processor.4 SeeNote1Page8-2a. Clear the inactive alarms. All alarms cleared62-106838--112
SECTION 9SERVICE1PARAGRAPH NUMBERPage9.1 MAINTENANCE SCHEDULE .................................................... 9--19.2 PRETRIP INSPECTION ........................................................ 9--49.3 GRILLE INSERT REMOVAL .................................................... 9--89.4 SURROUND REMOVAL ........................................................ 9--99.5 DOOR LATCH MAINTENANCE AND REPLACEMENT ............................. 9--109.6 PRIMING FUEL SYSTEM ...................................................... 9--119.7 SERVICING FUEL PUMP ...................................................... 9--129.8 ENGINE SERVICE AND COMPONENTS ......................................... 9--129.9 SERVICING AND ADJUSTING V-BELTS ......................................... 9--179.10 FANSHAFT ASSEMBLY ........................................................ 9--219.11 THERMOSTATIC EXPANSION VALVE ........................................... 9--249.12 REPLACING THE COMPRESSOR .............................................. 9--289.13 CHECKING COMPRESSOR OIL LEVEL ......................................... 9--309.14 COMPRESSOR UNLOADER VALVE ............................................ 9--319.15 REPLACING OR SERVICING CHECK VALVE ..................................... 9--329.16 CHECKING AND REPLACING FILTER-DRIER .................................... 9--339.17 CHECKING AND REPLACING HIGH PRESSURE CUTOUT SWITCH (HPS) .......... 9--339.18 COMPRESSOR DISCHARGE PRESSURE TRANSDUCER (CDP) ................... 9--359.19 COMPRESSOR SUCTION PRESSURE TRANSDUCER (CSP) ...................... 9--379.21 SERVICING SOLENOID VALVES ................................................ 9--389.22 COMPRESSOR SUCTION MODULATION VALVE (CSMV) ......................... 9--419.23 LIGHT BAR ................................................................... 9--439.24 CHECKING DEFROST OR HEATING CYCLE ..................................... 9--439.25 DEFROST AIR SWITCH (DAS) ................................................. 9--439.26 EVAPORATOR COIL CLEANING ................................................ 9--449.27 CONDENSER COIL CLEANING ................................................. 9--459.28 MICROPROCESSOR SENSOR CHECKOUT ..................................... 9--459.29 UNIDRIVE TORQUE REQUIREMENTS .......................................... 9--479
SECTION 9SERVICEWARNINGBeware of V-belts and belt driven componentsas the unit may start automatically.Before servicing unit, make sure theSTART/RUN-OFF switch is in the OFF positionor the unit is in Maintenance mode.Also disconnect the negative battery cable.CAUTIONUse only Carrier Transicold approved PolyolEster Oil (POE). Buy quantities of onequart or less. When using this hygroscopicoil, immediately reseal. Do not leave containerof oil open or contamination will occur.CAUTIONUnit uses R404A and POE oil. The use of inertgas brazing procedures is mandatory forall Carrier Transicold refrigeration units;otherwise compressor failure will occur.For more information, refer to TechnicalProcedure 98-50553-00 Inert Gas BrazingCAUTIONWhen changing oil filters, the new filtersshould be primed (partially filled) <strong>with</strong> cleanoil if possible. If the filters are not primed,the engine may operate for a period <strong>with</strong> nooil supplied to the bearings.WARNINGUNITS EQUIPPED WITH STAR-TRAK TWOWAY COMMUNICATION CAPABILITIES MAYHAVE THE ABILITY TO BE STARTED ORTURNED OFF REMOTELY REGARDLESS OFTHE SETTING OF THE START/RUN-OFFSWITCH.The unit is controlled locally and there canbe no two-way communication when themode switch on the Remote Monitoringcontrol box is in MAINTENANCE MODE.Therefore, when performing any work onthe unit, place the mode switch in MAINTE-NANCE MODE. After the unit is serviced, returnthe mode switch to REMOTE ON. (Referto Section 3.20.3 for more informationon two-way communication.)NOTETo avoid damage to the earth’s ozone layer, usea refrigerant recovery system whenever removingrefrigerant. When working <strong>with</strong> refrigerantsyou must comply <strong>with</strong> all local government environmentallaws, U.S.A. EPA section 608.9.1 MAINTENANCE SCHEDULEFor the most reliable operation and for maximum life,your unit requires regular maintenance. This includes oiland filter changes, fuel and air filter replacement,coolant replacement, and pretrip inspections.Maintenance should be performed according to theschedule on the following page.9--1 62-10683
Table 9-1. Maintenance ScheduleSYSTEMOPERATIONa. Daily MaintenancePre-Trip Inspection - before startingCheck Engine HoursCheck Engine Oil Levelb. Every Service Interval 1 or AnnuallyUnit 1. Check unit mounting bolts2. Check engine and compressor mount bolts3. Check door latches & hinges4. Check gauges, switches and electrical connections5. Check all belt tensions 16. Check control box7. Check gearbox and fan shaft for oil leaks8. Check fan shaft, idler and gearbox bearings9. Check clutch air gap and adjust as requiredEngine 1. Check oil/filter change interval 1 (refer to section f. of this table)2. Check for oil leaks3. Check low oil pressure safety4. Clean crankcase breather5. Check engine speeds for units <strong>with</strong>out electronic speed controlFuel System 1. Clean fuel pump strainer2. Change fuel filter(s) 1 (refer to section f. of this table)3. Check fuel heater (optional)CoolingSystemExhaustSystemAir IntakeSystemStartingSystemChargingSystem1. Clean radiator/condenser fin surface2. Check antifreeze concentration 13. Check water pump4. Check water temperature sensor functions1. Check mounting hardware2. Check muffler and exhaust pipes1. Change air cleaner element 12. Check and replace air filter indicator if needed1. Check battery condition2. Clean battery connections and cable ends3. Check battery hold down clamps4. Check starter operation1. Check alternator brushes and replace if necessary2. Check alternator output3.4CheckCheckACTION/REFERENCESECTIONCheckCheckCheckCheck9.9CheckCheckCheckCheck9.8.5Check2.129.8.9Table 2-19.79.7---9.8.1 and 9.279.8.1Check2.7CheckCheckCheck9.8.8Check/ReplaceCheck/ReplaceCheckCheckCheck2.1362-106839--2
SYSTEMOPERATIONACTION/REFERENCESECTIONb. Every Service Interval 1 or Annually (Continued)<strong>Refrigeration</strong>System1. Check air switch & calibrate2. Check & clean evaporator coil and defrost drain hoses3. Check operating refrigerant pressure4. Check all sensor calibrations5. Check manual defrost operation6. Check Compressor drive coupling7. Perform Pre--Trip inspection4.159.26CheckCheckCheckCheck9.2c. Every 6000 Hour Maintenance (Normal Operating Conditions) <strong>with</strong> conventional coolantCoolingSystem1. Drain and flush cooling system (12,000 hours <strong>with</strong> Extended LifeCoolant)Section 9.8.1d. Every 10,000 Hour MaintenancePerform complete 2000 and 3000 hour Preventive Maintenance and the following:Fuel System 1. Clean and adjust injector nozzles. Engine Service Guidee. Every 12,000 Hour Maintenance <strong>with</strong> extended life coolantCoolingSystem1. Drain and flush cooling system (6,000 hours <strong>with</strong> ConventionalCoolant)Section 9.8.1f. Oil And Filter Change IntervalsOil & Filter Change Interval usingAPI Class CG engine oilStandard Oil FilterESI Oil Filter2000 hrs/1yr3000 hrs/2 yrsOil & Filter Change Interval usingMobil Delvac 1 engine oil*4000 hrs/2 yrs*** Mobil Delvac1 is the only approved synthetic oil. Maximum oil drain interval is two (2) years.** New oil filter required at 1 yr intervalThese maintenance schedules are based on the use of approved oils and regular pretrip inspections of the unit. Failureto follow the recommended maintenance schedule may affect the life and reliability of the refrigeration unit.9--3 62-10683
9.2 PRETRIP INSPECTIONWARNINGInspect battery cables for signs of wear, abrasion or damage at every Pre -Trip inspection and replaceif necessary. Also check battery cable routing to ensure that clamps are secure and that cables arenot pinched or chafing against any components.The following pretrip inspection should be performed before every trip and at regular maintenance intervals.BEFORE STARTING ENGINE OK ADJUST/REPLACEDrain water from bottom of fuel tank j jDrain water from water separator on fuelfilter (if applicable)jjCheck radiator coolant level j jCondenser Coil Cleanliness: Check thecoil for cleanliness, straighten fins if necessaryjjRadiator Coil Cleanliness: Check the coilfor cleanliness, straighten fins if necessaryjjAir Cleaner Hoses: insure they’re secure<strong>with</strong>noleaksAir Cleaner Indicator: check operation (ifapplicable)Engine Oil Level: check and add if necessaryCheck condition and tension of belts j jCheck all fan and idler bearings j jDoor Latches/Hinges: Check for properoperationjjCondenser Fan Blades: Check condition j jCheck battery fluid level (if applicable) j jBattery cables and terminals, are securedand cleanjjEvaporator Section: check coil(s) forcleanliness and clear of debrisCheck air chute (if applicable) j jCheck bulkhead and return air screen j jDefrost Water Drains: No debris & drainproperlyjjPlace in Continuous Run, and start unit. j jjjjjjjjj62-106839--4
IMMEDIATELY AFTER STARTINGENGINEFuel Leaks: Check fuel lines/filters forleaksOKjADJUSTOil Leaks: Check oil lines/filters for leaks j jCoolant System: Check for leaks j jExhaust System: Check for leaks j jCondenser Fan: Check for proper airflow. j jEvaporator Fan: Check for proper airflow. j jEnsure clutch engages properly -- no slipor unusual noisesjjCheck for unusual noises -- alternator, fanshaft, water pump, idler and gearbox bearingsjjPRETRIP OK ADJUSTInitiate Pretrip j jList any Pretrip alarms j jList Alarms occurring during PretripjAFTER OPERATING UNIT FOR 15 MINUTESOR MOREOKADJUSTCheck refrigerant level j jCheck compressor oil level j jCheck for proper temperature control j jCheck engine speeds j jCheck auto start--stop operation j jInitiate defrost and allow to terminate automatically j jAllow Defrost to terminate automatically, endingthe Pretrip. j j9--5 62-10683
OPERATE IN HIGH SPEED COOL AND RECORD(from Microprocessor Unit Data List)SUCTION PRESSUREDISCHARGE PRESSUREENGINE COOLANT TEMPRETURN AIR TEMPSUPPLY AIR TEMPAMBIENT AIR TEMPDEFROST TERM TEMP #2COMP DISCH TEMPCSMV%BATTERY VOLTAGEDC CURRENT DRAWENGINE RPMSOFTWARE REVISIONCONTROL SERIAL #UNIT MODEL #HOURS TO ENGINE MAINTENANCEHOURS TO UNIT MAINTENANCETIME LEFT TO PM1TIME LEFT TO PM2TIME LEFT TO PM3TIME LEFT TO PM4TIME LEFT TO PM5DATALOGGER TIME AND DATEFINAL OK ADJReview Functional Parameters and fill in Table 9-2 jDownload recorder data (if required)jEnter Trip Start in <strong>micro</strong>processorj62-106839--6
Table 9-2 CHECK AND RECORD THE FOLLOWINGFunctionSettingDefrost Timer Set For:Set S/S Parameters:PERISHABLEMin. Run TimeMin. Off TimeOverride TempMax. Off TimeFROZENMin. Run TimeMin. Off TimeOverride TempMax. Off TimeFrozen Shutdown OffsetTemp. ControlDisplay In:Set PM HourmetersEngineSwitch OnPM 1PM 2PM 3PM 4PM 5Out of Range AlarmAir FlowUnloader Pressure Control9--7 62-10683
9.3 GRILLE INSERT REMOVAL (See Figure 9 -1)Removal of insert will ease in condenser coil cleaning.(Refer to Section 9.27).a. Remove the 3 bolts on each side of the grille insert.b. Remove the 2 bolts on top of the grille insert.c. Swing insert down and lift out of locating holes.d. Reverse above steps to install new grille insert.GRILLE INSERT MOUNTING BOLTSSURROUNDGRILLE INSERTLUBRICATE LATCHES AND PINSFigure 9 -1 Grille Insert Removal And Door Latch Maintenance62-106839--8
9.4 SURROUND REMOVALa. Place the Start/Run--Off switch in the OFF positionand disconnect the starter.b. Open both side and front doors.c. Remove the bolts that secure the surround to the unit.d. Reverse above steps to install new surround.SURROUND MOUNTING BOLTSREMOVE DECAL PLATE TOACCESS UNIT MOUNTING STUD.SURROUND MOUNTING BOLTSFigure 9 -2 Surround Removal9--9 62-10683
9.5 DOOR LATCH MAINTENANCE ANDREPLACEMENTProper maintenance is important for smooth operationof the latch assembly and the latch pins that are mountedon the unit’s frame (See Figure 9--1). In order tokeep the movable parts clean and lubricated, CTD recommendsthe use of a de--greasing cleaner and LPS 2lubricant. This lubricant should be available at any localautomobile and truck parts suppliers.9.5.1 Front Door Latch Cable Replacementa. Remove circular clip that secures the cable to thepaddle assembly.b. Slide cable from paddle and rotate other end out oflatch assembly.c. Reverse above steps to install new cable.9.5.2 Side Door Latch Cable Replacementa. Remove circular clip that secures the cable to thepaddle assembly.b. Remove the lower cable from the paddle assemblyand the lower latch.NOTEThe lower cable is threaded through the uppercable eyelet and the lower latch assembly.(See Figure 9--3)c. Remove the upper cable from the upper latch.d. Reverse above steps to install new cable.UPPER CABLEUN -THREAD THE LOWERCABLE FROM THE UPPERCABLE ANDLATCH ASSEMBLYREMOVE CIRCULAR CLIPPADDLE ASSEMBLYFigure 9 -3 Side Door Latch Lower Cable Removal62-106839--10
9.6 PRIMING FUEL SYSTEM9.6.1 Mechanical Fuel PumpThe mechanical fuel lift pump is mounted on the enginenext to the injection pump. This pump has a manualplunger for priming the fuel system when the fuel tankhas been run dry. (See Figure 9--1).To prime the fuel system, use the following steps:a. Turn the bleed valve (red) counter-clockwise untilfully opened.b. Turn the top of the manual fuel pump plungercounter-clockwise to unlock it. S-L-O-W-L-Y(up/down once per second) pump the manualplunger until positive pressure (resistance) is felt.This may take up to 200 strokes. This will indicatefuel flow.c. Continue to pump S-L-O-W-L-Y (up/down once persecond) approximately 100 more strokes to fill thefilter and bleed the air out of the lines.d. Start engine. It may be necessary to continue topump until the engine starts.e. Depress and turn the top of the manual plungerclockwise to lock in place.f. When engine is running smoothly, turn bleed valveclockwise until fully closed.RedFuel BleedValveRedFuel BleedValveManualFuel PumpPlungerManualFuel PumpPlungerENGINE WITH ELECTRONIC SPEED CONTROLNON ESC ENGINEFigure 9 -1. Priming Fuel Pump9--11 62-10683
9.7 SERVICING FUEL PUMP9.7.1 Mechanical Pump (See Figure 9 -2)The fuel filter may become plugged or restricted <strong>with</strong>foreign particles or wax as a result of using the wronggrade of fuel or untreated fuel in cold weather. This willcause the engine to lose capacity. The filter must becleaned on a regular schedule such as unit pre-trip orwhen the oil and fuel filters are changed. (Refer toSection 9.1).9.8 ENGINE SERVICE AND COMPONENTS9.8.1 Cooling SystemAir flows through the condenser/radiator. Thecondenser/radiator must be internally and externallyclean for adequate cooling. The water pump V-belt mustbe adjusted periodically to provide maximum air flow.(Refer to Section 9.9.2)CAUTION2411. Nut2. Banjo3. Filter4. Copper Rings31Use only ethylene glycol anti-freeze (<strong>with</strong>inhibitors) in system as glycol by itself willdamage the cooling system. Always addpre-mixed 50/50 anti-freeze and water to radiator/engine.Never exceed more than a60% concentration of anti-freeze. Use a lowsilicate anti-freeze meeting GM specificationsGM 6038M for standard life coolant oruse an extended life coolant , which isDexcool approved and has 5/150 (5years/150,000 miles) on the label.a. Servicing the Cooling System:1) Remove all foreign material from the condenser/radiatorcoil. Compressed air or water may be used as acleaning agent. It may be necessary to use warm watermixed <strong>with</strong> any good commercial dishwasher detergent.Rinse coil <strong>with</strong> fresh water if a detergent isused.NOTEDraining the coolant from the engine petcockwill leave approximately 1 quart (.9 liters) ofcoolant in the block.Figure 9 -2. Mechanical Fuel Pumpa. Turn nut counter-clockwise to loosen and remove nut(Item 1, Figure 9--2). Use container to catch drainingfuel.b. Remove banjo fitting (Item 2) and let it hang loose.c. Turn filter (Item 3) counter-clockwise and remove.Check and clean.d. Replace copper rings (Item 4).e. To install reverse above steps.2) Drain coolant completely by removing lower radiatorhose and radiator cap.3) Install hose and fill system <strong>with</strong> clean, untreated waterto which 3 - 5% of an alkaline based radiator cleaneris added -- 6 oz (151 grams) to 1 gallon (3.78 liters)of water.4) Run engine and drain while warm. Rinse systemthree times after it has cooled down. Refill system<strong>with</strong> water.5) Run engine to operating temperature. Drain systemagain and fill <strong>with</strong> 50/50 water/anti-freeze mixture.Unit coolant capacity is 1.67 U.S. gallons. (see CautionNote and Refer to Section 2.7) NEVER POURCOLD WATER INTO A HOT ENGINE, however hotwater can always be added to a cold engine.62-106839--12
9.8.2 Fuel Level SensorAn optional fuel level sensor supplies an input signal tothe <strong>micro</strong>processor as to the % of fuel remaining in thefuel tank. The <strong>micro</strong>processor then turns on the CheckFuel Level alarm when the level reaches 15%, and (ifconfigured to do so) turns the engine off when the levelreaches 10%.The sensor has the capability of sending from 0% to100% of the fuel level to the <strong>micro</strong>processor. The fueltank level will be displayed in the Unit Data list. Someunits may have sensors that may be calibrated ifnecessary.9.8.3 The RPM Sensor (Units beginning <strong>with</strong> belowserial numbers and ALL X2 units. Refer toSection 9.8.7 for information on units <strong>with</strong>Electronic Speed Control).a. Serial Number Cut -OffsS Ultra XTC -- KAV90910396S Ultima XTC -- KAV90910334b. Testinga. Verify that the wiring to sensor is correct. See wiringschematic in Section 11.GROUNDSUPPLYVOLTAGEOUTPUTb. Check voltage at the RPM Sensor connector <strong>with</strong> theRun Relay energized (Unit running, Unit off, ManualStart mode selected, and test must be completed<strong>with</strong>in five minutes -- before the Failed To Start Manualmode occurs, or Component Test mode will energizethe Run Relay for five minutes <strong>with</strong>out startingthe unit.)c. Voltage between ENRPMA-2MP31 andENRPMC-2MP7 should be 5.0 VDC.d. Check continuity between ENRPMB and 2MP18.Figure 9 -3. Fuel Level Sensor Wiringa. Verify that the wiring to sensor is correct and connectedproperly.b. Check voltage at the Fuel Level Sensor <strong>with</strong> theSTART/RUN-OFF switch in the START/RUN position.(Unit running, or Unit off and Manual Start modeselected.)c. Voltage between red wire (positive) and black wire(negative) should be 12.5 to 13.5 VDC. Do not disconnectthe red or black wires from the switch.d. Disconnect the white wire (output) from the sensor.Voltage between black wire (negative) and white wire(output) should be 0 VDC when the switch is dry andout of the fuel.e. When the switch is immersed into fuel, the voltagereading between black wire (negative) and white wire(output) increase up to 5 VDC when fuel has reachedthe full mark.e. If the above tests check OK, read warning below. Ifthe RPM display is still not correct, replace the RPMsensor.WARNINGThe +5.0 VDC (terminal B) is common betweenthe compressor discharge pressuretransducer, the compressor suction pressuretransducer, and the RPM sensor. If thiscircuit is shorted to ground (due to one ofthe mentioned components being defective,or a frayed wire) the MessageCenterwill show:SSuction Pressure: -14.7 PSIG/BarSDischarge Pressure: 0 PSIG/BarSEngine RPM: 09--13 62-10683
9.8.4 Engine Oil And Oil FilterCapDipstickQTS 2 1 SAFETo check the engine oil level:Run the unit to bring the engineup to operating temperature,shut the unit off, and unscrewthe cap/dipstick. Wipe the dipstickclean and insert the capinto the oil fill tube <strong>with</strong>outthreading it into the oil fill tube.Remove the dipstick again andcheck oil level. DO NOT add oilif the level is in the “safe” range.If needed, add oil as indicatedby markings on dipstick untillevel is in the “safe” range.9.8.5 Lube Oil FiltersAfter warming up the engine, stop engine, place shallowdrain pan under filter and remove filter. Lightly oil gasketon new filter before installing. Tighten per the filtermanufacturer’s directions.CAUTIONWhen changing oil filters, the new filtersshould be primed (partially filled) <strong>with</strong> cleanoil if possible. If the filters are not primed,the engine may operate for a period <strong>with</strong> nooil supplied to the bearings.Replace filter(s) and add lube oil. (Refer to Section 2.7)Warm up engine and check for leaks.a. Lube Oil And Fuel Flow Diagramsa. To Change Engine Oil and Filter:1) Warm up the engine and then stop it by placing theStart/Run--Off switch in the OFF position.2) Remove drain plug from oil pan and drain engine oilusing Oil Drain Tool (CTD P/N 68-15763-00).3) Lightly oil gasket on new filter before installing. Tighten3/4 to 1 of a turn after the seal makes contact.123456CAUTIONWhen changing oil filters, the new filtersshould be primed (partially filled) <strong>with</strong> cleanoil if possible. If the filters are not primed,the engine may operate for a period <strong>with</strong> nooil supplied to the bearings.4) Replace filter and add lube oil. (Refer to Section 2.7.)Warm up engine and check for leaks.b. Replace filter and add lube oil. (Refer to Section 2.7.)Warm up engine and check for leaks.11101. Fuel Tank2. Fuel Supply Line3. Fuel Pump (Optional)4. Mechanical Lift Pump5. Fuel Filter6. Fuel Warmer (Optional)9877. Fuel Bleed Valve8. Injection Pump9. Injector Nozzles10. Fuel Leak-off Line11. Fuel Return LineFigure 9 -4. Fuel System Diagram62-106839--14
1245b. Servicing the Speed Control Solenoid andLinkageNOTECheck operation of speed solenoid before replacement.If solenoid is sticking, clean and lubricatethe solenoid in accordance <strong>with</strong> TechnicalInstruction 98--50234.31) Solenoid Removal/Replacement1. Engine Block2. Oil Pan3. Full Flow Oil Filter4. Engine Oil Connection5. Oil Pressure SwitchFigure 9 -5. Lube Oil Flow Diagram9.8.6 Speed Control Solenoid And Linkage - NonESC engines only (Units beginning <strong>with</strong> belowserial numbers and ALL X2 units Refer toSection 9.8.7 for information on units <strong>with</strong>Electronic Speed Control).a. Serial Number Cut -OffsS Ultra XTC -- KAV90910396S Ultima XTC -- KAV90910334154a) Disconnect wiring to solenoid. Disconnect linkagearm (Item 4, Figure 9--6) from solenoid. Removemounting hardware from solenoid and then removesolenoid.b) Install replacement solenoid and mounting hardware.Do not tighten at this time.c) Attach linkage to solenoid and install the clip to thelinkage rod.2) Low Speed Adjustmenta) Hold the speed lever against the low speed stopand check the RPM. Adjust the low speed stop screwif necessary.b) Check engine speed using <strong>micro</strong>processor datalist.c) Check for proper operation by running Pretrip (Referto Section 3.4).3) High Speed Adjustmenta) Loosen but do not remove the 4-speed solenoidmounting nuts.b) Turn the jacking nut, allowing the solenoid to movealong the slots until the desired high speed isreached. Tighten the solenoid mounting bolts andverify correct high and low speed RPM.21. Solenoid2. Bolt3. Solenoid Bracket34. Linkage (Speed)5. ClipFigure 9 -6. Speed Control Solenoid4) Check for proper unit operation by running Pretrip(Refer to Section 3.4).NOTELE (Low Emission) DI engines are delivered<strong>with</strong> a tamper resistant high-speed adjustmentscrew on the engine. High-speed adjustmentsare made using the slotted holes in the solenoidmounting bracket and the speed solenoid adjustingbracket <strong>with</strong> solenoid adjusting bolt andlockout (on the bracket).Change 09/119--15 62-10683
9.8.7 Electronic Speed Control (ESC) (Units beginning<strong>with</strong> below serial numbers and ALL X2 units)a. Serial Number Cut -OffsS Ultra XTC -- KAV90910396S Ultima XTC -- KAV90910334Refer to Section 11 for schematic wiring diagram. Referto Section 10 for ESC diagnostic alarms and diagnostictrees.LEDFigure 9 -8. Frame Mounted Engine Speed ControlUnit (ENSCU)The FSA combines the fuel shutoff solenoid and speedcontrol solenoid into one component. Engine speed iscontrolled by varying rod position.The ENSSN provides the RPM signal to the ENSCU forspeed control. It is located on the front of the engine inthe gear case cover.ENSSNFSAFigure 9 -7. Electronic Speed ControlComponentsb. DescriptionEngines <strong>with</strong> electronic speed control have no RPMsensor, speed or fuel solenoids. Engine speed iscontrolled by three components: the engine speedcontrol unit (ENSCU), the fuel and speed actuator (FSA)and the engine speed sensor (ENSSN).The ENSCU is mounted on the roadside frame behindthe upper door. It provides the RPM signal to the<strong>micro</strong>processor. The unit has an alarm LEDincorporated <strong>with</strong>in it, which is used to diagnose failures<strong>with</strong>in the ESC system.9.8.8 Engine Air Filtera. Engine Air Filter InspectionThe dry type air filter should be inspected regularly forleaks. A damaged air filter or hose can seriously affectthe performance and life of the engine. The air filter isdesigned to effectively remove contaminants from theair stream entering the engine. An excessiveaccumulation of these contaminants in the air filter willimpair its operation; therefore, a service scheduleshould be set up and followed. The air cleaner filterelement requires replacement when dirty.1) Check all connections for mechanical tightness. Besure filter outlet pipe is not fractured.2) In case of leakage and if adjustment does not correctthe trouble, replace necessary parts or gaskets.Swelled or distorted gaskets must always be replaced.3) Air Filter Service IndicatorThe air filter indicator is connected to the engine airintake manifold and its function is to indicate when theair filter requires replacement. During operation: when aplugged air cleaner causes the intake manifold pressureto drop to 20” (500 mm) WG, the indicator will move tothe red line. The air cleaner should then be replaced andthe indicator reset by pressing the reset button.b. Air Filter Service Procedure1) Release 2 clips on air cleaner housing and removebottom cover.2) Remove filter element, wipe inside of air cleanerhousing clean and install new filter element.3) Wipe inside of bottom cover clean and re-install.4) Re-secure 2 clips on air cleaner housing and closeroadside door.62-106839--16
9.8.9 Engine Crankcase BreatherThe engine uses a closed type breather <strong>with</strong> thebreather line attached to the cylinder head cover. (SeeFigure 9--9)The breather assembly should be cleaned once a yearor at every 2000 hours maintenance interval (whichevercomes first). See Table 9-143121. Screw2. Breather Cover3. Breather Valve4. Breather TubeFigure 9 -9. DI - Engine Crankcase Breather9.8.10 Glow Plugsa. Servicing Glow PlugsThe total circuit amp draw for the glow plug circuit ischecked during a Pretrip cycle. The glow plugs, whenenergized, draw a nominal 6 to 9 amps each at 10.5 vdc.When servicing, the glow plug is to be fitted carefully intothe cylinder head to prevent damage to glow plug.Torquevaluefortheglowplugis14to18ft-lb(1.9to2.5Mkg).b. Checking for a Defective Glow Plug1) The entire circuit may be tested using ComponentTest mode. (Refer to Section 6.2.2.)2) To test individual glow plugs, disconnect all glowplugs from each other, and place an ammeter (or cliponammeter) in <strong>series</strong> <strong>with</strong> each glow plug and energizethe plugs. Each plug (if good) should show 6 to 9amps draw (at 12 VDC).3) A second method is to disconnect the wire connectionto the plug and test the resistance from the plug to aground on the engine block. The reading should be0.7 to 1.2 ohms if the plug is good.9.9 SERVICING AND ADJUSTING V-BELTSWARNINGBeware of V-belts and belt driven componentsas the unit may start automatically.Before servicing unit, make sure theSTART/RUN-OFF switch is in the OFF positionor the unit is in Maintenance mode.Also disconnect the negative battery cable.9.9.1 Belt Tension GaugeUse a belt tension gauge (tester) P/N 07-00253, shownin Figure 9--10 whenever V-belts are adjusted orreplaced.A belt tension gauge provides an accurate and easymethod of adjusting belts to their proper tension.Properly adjusted belts give long lasting and efficientservice. Too much tension SHORTENS belt andbearing life, and too little tension causes slippage andexcessive belt wear. It is also important to keep beltsand sheaves free of any foreign material, which maycause the belts to slip.The belt tension gauge can be used to adjust all belts.The readings, which we specify for Carrier Transicoldunits are applicable only for our belts and application, asthe tension is dependent on the size of the belt anddistance between sheaves. When using this gauge, itshould be placed as close as possible to the midpointbetween two sheaves. (See Figure 9--11)The V-belts must be kept in good condition <strong>with</strong> theproper tension to provide adequate air movementacross the coils.9--17 62-10683
Table 9-3. Belt Tension (See Figure 9 -11)BELTSLbsTensionMkgWater Pump/Alternator/Crankshaft 45 to 55 6.2to7.6Gearbox to Fan shaft 70 to 80 9.7to11.1Engine to Gearbox 70 to 80 9.7to11.19.9.2 Water Pump/Alternator/Crankshaft V-BeltThe water pump/alternator/crankshaft V-belt is drivenby a sheave on the engine crankshaft. Frayed, crackedor worn belts must be replaced. Adjustment is achievedby altering the position of the front side idler/alternator.When replacing a V-belt, avoid excessive force whenapplying tension to the V-belt to prevent damage to thewater pump bearings. (Refer to Table 9-3)a. Make sure negative battery terminal is disconnectedand remove old belt.b. Place V-belt on alternator sheave and then install alternator<strong>with</strong> two bolts loosely in position.Figure 9 -10 Belt Tension Gauge(Part No. 07-00253)c. Check the center alignment of the engine drive, alternatorand water pump sheaves to ensure properalignment. Pulley misalignment will create excessbelt wear and shorten alternator bearing life. The centerline of all three sheaves must be in line.d. Pivot alternator to place tension on belt using handforce only. Do not use pry bar or excessive force as itmay cause bearing failure. For correct belt tensionsee Table 9-3. Tighten pivot and adjustment bolts.e. Reinstall negative battery cable.Gearbox to Fan Shaft BeltTorque to 80 ft-lbs (11.1 Mkg)Engine to Gearbox BeltAlternatorTorque to 15 to 16 ft-lbs(2.1 to 2.2 Mkg)Water Pump/Alternator/CrankshaftBeltFigure 9 -11. V-Belt Arrangement None ESC Engine62-106839--18
Gearbox to Fan Shaft BeltTorque to 80 ft-lbs (11.1 Mkg)Engine to Gearbox BeltAlternatorTorque to 15 to 16 ft-lbs(2.1 to 2.2 Mkg)Water Pump/Alternator/CrankshaftBelt9.9.3 Gearbox To Fan Shaft V -BeltWARNINGKeep hands and arms away from unit whenoperating <strong>with</strong>out belt guard in place. Neverrelease a unit for service <strong>with</strong>out the beltguard securely tightened in placea. To Replace V-belt:1) Disconnect negative battery cable and remove V-belt guard.2) DO NOT START UNIT UNTIL V-BELT GUARD ISINSTALLED.3)Loosen idler pulley.Figure 9 -12. V-Belt ArrangementElectronic Speed Control Engine4) Remove old belt and replace <strong>with</strong> new belt. (SeeFigure 9--11)5) Using a belt tension gauge (Figure 9--10) on the belt,rotate idler pulley so that the gauge reads the correcttension (Refer to Table 9-3).6) Tighten idler, carriage bolt, and bolts.NOTEThe tension of both belts must be checked andadjusted, if necessary, after a brief break-in period.(See step 6)7) Reconnect negative battery cable, and install beltguard and operate unit in high speed for 5-10 minutes.Remove guard and disconnect battery. Repeatsteps 4 and 5.9--19 62-10683
9.9.4 Engine To Gearbox V-Belta. To Replace V-belt:1) Disconnect negative battery cable and remove V-belt guard, and then loosen idler bolt.2) Match mark adapter to engine flywheel (SeeFigure 9--13A) for ease of assembly.3) Remove six bolts (5/16-18 x 1 lg), securing adapterdrive sheave to engine flywheel, Figure 9--13A.4) Insert two of the six bolts (5/16-18 x 1 lg) into thethreaded holes (jacking holes) provided on engineadapter. Jack adapter from engine flywheel. Removethe two screws from adapter. Insert a pry barbetween engine flywheel and adapter, Figure 9--13Aand slide the adapter-sheave toward the compressorenough to change the V-belt as shown inFigure 9--13B. Replace V-belt.5) Pry the adapter back toward the engine flywheel oruse 5/16-18 x 2-1/2 lg bolts (3) in every other hole ofadapter and take up evenly on the bolts until the5/16-18 x 1 lg bolts engage engine flywheel. Applythread sealer (Loctite #262) to the bolts used to secureadapter to flywheel. Take up on all bolts evenlyand then torque to a value of 28 ft-lb (3.87 Mkg).6) Place V-belt on the gearbox sheave and adjust belttension as indicated in Table 9-3. Install V-beltguard. DO NOT START UNIT UNTIL V-BELTGUARD IS INSTALLED.7) Reconnect negative battery cable. Start unit and runfor 10 minutes to allow for belt stretch.8) Disconnect battery. Turn unit off, remove belt and recheckbelt tension. Install belt guard.BELTADAPTERMATCH MARKNEW BELTATTACHING SCREWSFLYWHEELADAPTERFLYWHEELFigure AFigure BFigure 9 -13. Removing V-Belt from Engine Adapter Drive Sheave62-106839--20
9.10 FANSHAFT ASSEMBLY - SEE FIGURE 9 -14WARNINGBeware of V-belts and belt driven componentsas the unit may start automatically.Before servicing unit, make sure theSTART/RUN-OFF switch is in the OFF positionor the unit is in Maintenance mode.Also disconnect the negative battery cable.9.10.1 Clutch RemovalCAUTIONDo not get anti-seize oil/compound ontoclutch contact surfaces. Thoroughly cleanoff oil/compound <strong>with</strong> contact or brakecleaner if this occurs.a. Turn the START/RUN-OFF switch to OFF and disconnectthe negative battery cable.b. Loosen the fan belt idler and remove upper drive belt.c. Remove the top eight bolts (four along top edge andtwo down each side) that hold fan shroud to condenserframe.d. Remove the three bolts that thread through the backof the clutch rotor/pulley forward into the condenserfan hub. Carefully remove the condenser fan and hubassembly from unit.e. Place the three pins of the spanner wrench (CTD P/N07-00396-01) into the holes on the face of the clutcharmature. Place the tool handle between the fan shaftframe support and pod (10 o’clock position) to providehands free anti-rotation. Loosen and remove the armatureretaining bolt and washer.NOTEThe armature-retaining bolt is a LEFT HANDTHREAD BOLT.f. Remove the clutch armature. A standard 5/8”-11 X 1”right hand thread bolt can be threaded through thecenter to jack the armature off the shaft, if needed.g. Use spanner socket (CTD P/N 07-00303-02) to removethe spanner nut that secures the clutch rotor.NOTEThe armature-retaining bolt is a LEFT HANDNYLOCK THREAD BOLT.h. Slide the clutch rotor/pulley off and remove. If the rotorwill not slide off easily, remove the condenser fan hubadapter from the fan. Place the adapter backwardsagainst the fan shaft hub, and thread three5/16-18 X 2 3/4” long bolts from the back of the rotorforward into the hub adapter. Tighten the bolts evenlyto pull the rotor off the fan shaft hub.i. Unplug the clutch coil connector from the wiring harness,then remove the clutch coil. Be sure to retainall shims on fan shaft hub, correctly positioned onFanshaft pin..j. Remove the vent hose and 1/8” barb fitting from fanshaft hub. Install a plug to prevent oil from spilling outvent hole while removing fan shaft.9.10.2 Blower Wheel And Fanshaft Removala. Remove bulkhead and air chute (if so equipped). Removeevaporator back panel.b. Remove the bolts that secure DTT and SAT to thenozzle cover. Care should be taken to prevent cuttingwires on evaporator coil.c. Remove the remaining bolts in the nozzle cover andcarefully remove it from the pod.NOTEThe nozzle cover (CTD P/N 58-04469-00) issealed <strong>with</strong> a gasket (CTD P/N 42-00506-00). Ifthe gasket is damaged during removal, it MUSTbe replaced.d. Remove the two 1/4”-20 X 1” long bolts from the blowerwheel split taper bushing. Insert them into thethreaded holes. Tighten bolts evenly to push theblower wheel away from the bushing.e. Remove the fan shaft seal ring clamp and carefullypeel seal from pod (use a putty knife if needed).NOTEThe fan shaft seal (CTD P/N 42-00372-00) iscaulked to the pod. If seal is damaged during removal,it MUST be replaced.f. Remove the four 3/8” bolts from the fan shaft.g. Remove fan shaft from unit.9--21 62-10683
9.10.3 Fanshaft Installationa. Install two keys into the shaft keyways.NOTEIf it is necessary to drive the keys into place, besure to support the shaft while tapping the keys.b. Position the fan shaft so that the housing is in the normalmounting position, <strong>with</strong> the shaft horizontal andthe vent hole facing directly up. Remove both pipeplugs (1/8” NPT) from fan shaft.c. Ensure oil in fan shaft is at proper level. If not, fill thefan shaft <strong>with</strong> oil (07-00373-00) until oil is at the bottomof the level hole (approximately 3 oz/89 ml). Applypipe thread sealant to the pipe plug on the side offan shaft housing and tighten. Reinstall pipe plug onhub to prevent oil spillage.d. Install the fan shaft into the unit <strong>with</strong> the four fan shaftmounting bolts and torque bolts to 28 to 30 ft-lb (3.9 to4.1 Mkg), making sure the plug for the vent is pointingup.NOTETo aid in fan shaft alignment, install two 3/8”-16x 1 1/2” studs (bolts <strong>with</strong> heads cut off) into thefan shaft mounting hub. Once the first two fanshaft mounting bolts are loosely installed, removethe studs and install bolts.e. Apply pipe thread sealant to barb fitting and install intovent hole. Slide hose vent onto barb fitting.f. Apply caulk to the fan shaft seal and place on the fanshaft. Place fan shaft seal ring clamp on seal andtighten.Retaining BoltLEFT HAND THREADSee Clutch Installation, Step 625 to 30 ft-lbs. (3.5 to 4.1 Mkg)3BoltsSee Clutch InstallationStep 818 to 22 ft-lbs. (2.5 to 3.0 Mkg)Condenser FanRotor ShimFanshaft HubHub AdapterClutch RotorClutch Armature10 to 11 ft-lbs. (1.4 to 1.5 Mkg)Spanner Nut80 to 85 ft-lbs. (11.1 to 11.5 Mkg)Clutch CoilFigure 9 -14. Fanshaft Assembly62-106839--22
9.10.4 Blower Wheel Installationa. Make sure key is properly placed in keyway. Slideblower wheel and bushing onto shaft.b. Loosely attach blower wheel to bushing and slide assemblyforward until blower wheel touches pod. (Thiswill set approximate clearance between blower wheeland pod.)c. Loosely attach the nozzle cover to pod <strong>with</strong> retainingbolts. Install SAT <strong>with</strong> at least 1/2” of sensor in thenozzle. Reattach DTT.d. Slowly and evenly torque blower wheel bushing boltsto 10 to 11 ft-lbs (1.4 to 1.5 Mkg)e. Position nozzle cover so that blower wheel is centeredin cover opening. Torque nozzle cover bolts to20 in-lbs (0.23 Mkg).f. Rotate blower wheel and check that clearance isapproximately 1/4.” Adjust nozzle cover and/or blowerwheel if necessary.g. Reinstall evaporator panel, reattach air chute andbulkhead (if so equipped).Fanshaft SealRing ClampFanshaftNozzle Cover BoltsBlower WheelBushingPodNozzle CoverNozzle Cover GasketBlower WheelSpring ClipFigure 9 -15. Blower Wheel And Nozzle Cover Assembly9--23 62-10683
9.10.5 Clutch InstallationNOTEThe orientation of the clutch coil MUST be onthe bottom. Secure the harness to the lowerright fan shaft mounting bolt using the cushionclamp provided.a. Place clutch coil onto fan shaft hub, <strong>with</strong> coil harnesson top. Make sure all original shims are correctlypositioned on fan shaft pin and then slide coil ontohub so fan shaft pin fits into notch in coil.NOTEThe fan shaft pin is used to position the coil toproperly secure the wire harness to the frame.b. Install rotor spacer and rotor onto the fan shaft.c. Install the new spanner nut (included in mounting accessorykit (CTD P/N 50-00236-21.) Use CTD spannersocket 07-00303-02 and torque to 80-85 ft-lbs(11.1to11.5Mkg.)NOTEThe spanner nut is a LEFT HAND NYLOCK-THREAD NUT.d. Slide the armature into place on the fan shaft, makingsure the key is in place and the keyway lines up correctly<strong>with</strong> the shaft key.e. Install the new armature retaining bolt and washer.Use spanner wrench (CTD P/N 07-00396-01) at the 2o’clock position to hold the armature, then torque theretaining bolt to 25-30 ft-lb. (3.5 to 4.1 Mkg)NOTEThe armature retaining bolt is a LEFT HANDTHREAD BOLT.f. Measure the clutch air gap <strong>with</strong> the air gap tool(CTD P/N 07-00432-00). The gap should be between0.015and0.090inches(0.38and2.3mm).Ifit is not, remove entire clutch. If gap is less than0.015” (0.38 mm), remove enough of the fan shafthub shims to increase the gap to approximately0.020” (0.51mm). Shims (CTD P/N 50-00232-30are 0.010” (0.25mm) each. If the gap is more than0.090” (2.3 mm), add enough shims to reducegaptoapproximately0.020”(0.51mm).Reinstallclutchassembly and re--measure to verify air gap.g. Installcushionclamponcoilharnessapproximately3” from coil to prevent harness from rubbing onrotor.h. Reattach the condenser fan and hub assembly totheclutchrotor.Threadthethreeboltsfrombehindthe clutch rotor into the condenser fan hub, andtorque the bolts to 18-22 ft-lb. (2.5 to 3.0 Mkg).i. Reinstalltheupper drivebelt and adjust idler toattaina belt tension of 70-80 ft-lb. (9.7 to 11.1 Mkg)j. Remove condenser fan shroud spacer/supportsthat may have been inserted. Reinstall upper eightbolts that hold shroud to condenser frame.k. Plug the clutch coil connector back into the wiringharness. Tie-wrap harness as needed to secure.l. Re-connect negative battery cable.m. Check unit for proper clutch operation.WARNINGDo not start unit <strong>with</strong>out installing the evaporatorpanels as unit damage or body harmmay result.n. Check for proper unit operation by running Pretrip(Refer to Section 3.4).9.11 THERMOSTATIC EXPANSION VALVECAUTIONService mode MUST be used whenever removingrefrigerant charge, refrigerant leakchecking or evacuating. Refer to Section6.2.3.The thermostatic expansion valve (TXV) is anautomatic device, which maintains constant superheatof the refrigerant gas leaving the evaporator regardlessof suction pressure. The valve functions are: (a)automatic response of refrigerant flow to match theevaporator load and (b) prevention of liquid refrigerantentering the compressor. Unless the valve is defective,it seldom requires any maintenance.9.11.1 Replacing Expansion Valve & Screena. Pump down the unit by closing the king valve. (Referto Section NO TAG.)b. Remove insulation (Presstite) from expansion valvebulb and then remove bulb from suction line.c. Remove Presstite from the expansion valve powerhead. Unscrew power head only if the element is beingchanged and replace by reversing steps a.through c.d. Use a wet rag to keep TXV cool whenever brazing.Heat inlet, outlet and equalizer connections to valvebody and remove valve. Clean all tube stubs so newvalve fits on easily.e. Reverse steps a. through d. to install new valve andscreen, <strong>with</strong> cone of screen pointing into liquid line atinlet to the valve.f. The thermal bulb is located below the center of thesuction line (See Figure 9--16). This area must beclean to ensure positive bulb contact. Firmly tightenthe straps around the thermal bulb and suction lineand insulate both <strong>with</strong> Presstite.g. Evacuate by placing vacuum pump on suction servicevalve. Draw down to 500 <strong>micro</strong>ns.62-106839--24
h. Open king valve and then check refrigerant level. SeeSection 9.11.4.i. Check unit operation by running Pretrip (Refer to Section3.4).9.11.2 Checking Superheat32145NOTEDo not adjust expansion valve unless absolutelynecessary.Due to the time involved in adjusting the superheat,replace the valve rather than adjusting it.9.11.3Measuring SuperheatNOTEThe expansion valve and bulb location areshown in Figure 2-7.a. Remove evaporator panel from rear of unit and thenpull loose the Presstite insulation from one end of theexpansion valve bulb.b. Loosen one TXV bulb clamp and make sure area underclamp (above TXV bulb) is clean.c. Place thermocouple above (parallel <strong>with</strong>) TXV bulband then secure loosened clamp making sure bothbulbs are firmly secured to suction line as shown inFigure 9--16. Use Presstite insulation to completelycover both bulbs.1. Suction Line2. TXV Bulb Clamp3. Nut and Bolt (Clamp)4. Thermocouple5. TXV BulbFigure 9 -16. Thermostatic Expansion ValveBulb and ThermocoupleNOTEWhen conducting this test the suction pressuremust be at least 6 PSIG (0.41 Bar) below expansionvalve maximum operating pressure(MOP). For MOP Refer to Section 2.11.d. Connect an accurate gauge to the 1/4” (0.01mm) porton the suction service valve.e. Run unit until stabilized. Set controller 10_F (5.5_C)below refrigerated compartment temperature.f. From the temperature/pressure chart (Refer toTable 9-9), determine the saturation temperature correspondingto the evaporator outlet pressure.g. Note the temperature of the suction gas at the expansionvalve bulb.h. Subtract the saturation temperature determined inStep f. from the average temperature measured inStep g. The difference is the superheat of the suctiongas.9--25 62-10683
1511121443113944781051 Refrigerant Recovery Unit2 Refrigerant Cylinder3 Manifold Gauge Set4 Valve5 Evacuation Manifold6 Vacuum Pump7 Vacuum Gauge8 King Valve9 Receiver10Condenser11 Evaporator12Discharge Service Valve13Suction Service Valve14Compressor15Compressor Suction Modulation Valve(CSMV)26Figure 9 -17. Vacuum Pump Connection62-106839--26
CAUTIONService mode MUST be used whenever removingrefrigerant charge, refrigerant leakchecking or evacuating. Refer to Section6.2.3.CAUTIONDo not vapor charge R404A. Only liquidcharging through the receiver outlet (king)valve is acceptable.9.11.4 Checking The Refrigerant ChargeNOTEHigh speed operation at some conditions maycreate high turbulence inside the receiver. If it isdifficult to see the refrigerant settling properly inthe receiver sight glass, unplug the speed solenoid,forcing low speed operation. There shouldbe less turbulence in the receiver and the liquidrefrigerant should settle properly.Checking Refrigerant Level on Units With S/N Priorto JAR90710713NOTEThe ambient (air entering the condenser) airtemperature should be above 40°F (4.4°C)a. Start unit in cooling mode. Run approximately tenminutes - until the refrigeration system is warmed upand the refrigerated compartment temperature is lessthan 45°F (7.2C).b. Check the lower sight glass on the receiver to determinecharge. The system is correctly charged whenrefrigerant level is at centerline of sight glass, thenweigh in another 3 lbs. (1.4 kg) of refrigerant.Checking Refrigerant Level on Units With S/NBeginning With JAR90710713NOTEThe ambient (air entering the condenser) airtemperature should be above 40°F (4.4°C)a. Start unit in cooling mode. Run approximately tenminutes -- until the refrigeration system is warmed upand the refrigerated compartment temperature is lessthan 45°F (7.2C).b. Check the lower sight glass to determine charge. Thesystem is correctly charged when the lower sightglass is not empty and the upper sight glass isnot full.c. If the system appears to be overcharged: Remove refrigerantthrough the king valve to correct refrigerantlevel.d. If the refrigerant system appears to be undercharged:Add refrigerant through the king valve.9.11.5 Partial ChargeCAUTIONDo not vapor charge R404A. Only liquidcharging through the receiver outlet (king)valve is acceptable.NOTEThe ambient (air entering the condenser) airtemperature should be above 40°F (4.4°C)a. Place drum of refrigerant on scale and note weight.Backseat discharge and suction service valves andinstall a manifold gauge set. Purge lines. Connect asecond manifold test set discharge gauge to the kingvalve. Connect the suction pressure hose to manifolddead head port. Connect a charging line between thecenter tap of the second gauge set and refrigerantdrum. Open the LIQUID valve on drum and purge allhoses.b. Start the unit. Adjust the setpoint so that the unit willrun in high speed cool mode.c. Run the unit for approximately ten minutes -- until therefrigeration system is warmed up and the refrigeratedcompartment temperature is less than 45°F(7.2C).d. Check the appropriate sight glass to determinecharge. (See Step g. for determination of charge.) Ifundercharged proceed <strong>with</strong> step e.e. Frontseat the king valve, and monitor the second setof manifold gauges. When the king valve pressuredrops below the pressure in the refrigerant drum,open the manifold gauge set discharge valve and allowliquid refrigerant to flow into the system.f. While monitoring the appropriate sight glass, carefullyweigh the refrigerant into the system. Because theunit is in this charging state, it is not possible to accuratelydetermine when the system is full. Therefore,never allow more than 3 lbs. (1.4 kg) of refrigerant intothe system at a time.g. After metering 3 lbs (1.4 kg) of refrigerant into the system,close the valve of the manifold gauge set connectedto the king valve. Open the king valve and allowthe system to balance out (approximately 4-5minutes and the refrigerated compartment temperatureis less than 45°F (7.2C). Check sight glass(es) todetermine charge:Units With S/N Prior to JAR90710713 -- Once therefrigerant level is at centerline of the lower sightglass, weigh in another 3 lbs. (1.4 kg) of refrigerant.Units With S/N Beginning With JAR90710713 --Charge the system until the refrigerant level is at centerlineof the lower sight glass. THE LOWER SIGHTGLASS SHOULD NOT BE EMPTY AND THE UP-PER SIGHT GLASS SHOULD NOT BE FULL.h. Start unit and check for noncondensibles and run aunit Pretrip. (Refer to Section 3.4).9--27 62-10683
9.11.6 Adding Full ChargeCAUTIONDo not vapor charge R404A. Only liquidcharging through the receiver outlet (king)valve is acceptable.a. Dehydrate unit to 500 <strong>micro</strong>ns and leave in deep vacuum.(Refer to Section Table 9-9)b. Place drum of refrigerant on scale and connect chargingline from drum to king valve. Purge charging line atking valve.c. Note weight of drum and refrigerant.d. Open liquid valve on drum. Midseat king valve and allowthe liquid refrigerant to flow into the unit until thecorrect weight of refrigerant has been added as indicatedby scales. Correct charge will be found inTable 2-1.NOTEIt is possible that all liquid may not be pulled intothe receiver, as outlined in step d. In this case,frontseat the receiver outlet valve (king valve)and run the unit in cooling until the correctamount of refrigerant is added.e. When scale indicates that the correct charge hasbeen added, close liquid line valve on drum and backseatthe king valve. Remove charging hose.f. Start unit and check for noncondensibles and run aunit Pretrip. (Refer to Section 3.4).COMPRESSORCDTHPSCDPFigure 9 -18. Pressure Switch and Sensor9.12 REPLACING THE COMPRESSORIf compressor is inoperative and unit still has refrigerantpressure, frontseat suction and discharge servicevalves to trap most of the refrigerant in the unit.If compressor runs, pump down the unit. (Refer toCAUTIONSection NO TAG.)Service mode MUST be used whenever removingrefrigerant charge, refrigerant leakchecking or evacuating. Refer to Section6.2.3.NOTEService replacement compressors are shipped<strong>with</strong>out oil.9.12.1 Removal and Replacement of CompressorNOTEThe service replacement compressor is sold<strong>with</strong>out shutoff valves (but <strong>with</strong> valve pads).The valve pads should be installed on the removedcompressor prior to return shipping.Customer should retain the original capacityunloader valves for use on replacement compressor.Check oil level in service replacementcompressor. (Refer to Section 9.13)If compressor does not operate, frontseat both suctionand discharge service valves, and remove refrigerantcharge from compressor (Refer to Section NO TAG.)a. Disconnect negative battery cable.b. Remove the two rear compressor bracket mountingbolts (compressor shockmount end).c. Block up engine.d. Back out suction and discharge service bolt valveflange by two complete revolutions and leave threadsengaged.e. Break seal between service valves and compressorand remove bolts from valve flanges.f. Remove fuel filter bracket (if necessary) from thecompressor bell housing.g. Disconnect wiring to unloader valve assemblies,Compressor Discharge Temperature Sensor (CDT),Compressor Discharge Pressure Transducer (CDP),Compressor Suction Pressure Transducer (CSP)and the wiring to the high pressure cutout switch(HPS). Identify wiring and switches if necessary. (SeeFigure 9--18)62-106839--28
h. Remove 10 bolts from the engine-compressor bellhousing.i. Disconnect ground strap from frame.j. Remove Suction Pressure Transducer from suctionline.k. Attach sling or other device to the compressor.l. Slide compressor enough to clear nylon drive gear(as shown in Figure 9--19), and remove compressorfrom unit.m.Drain oil from defective compressor before shipping.n. The original unloader valves must be transferred tothe replacement compressor. The plug arrangementremoved from the replacement is installed in the originalcompressor as a seal. If piston is stuck, it may beextracted by threading socket head cap screw intotop of piston. A small Teflon seat ring at bottom of pistonmust be removed.o. Remove the complete High Pressure switch assembly(HPS) (See Figure 9--18) and install on new compressorafter checking switch settings. RemoveCompressor Discharge Temperature sensor (CDT),Compressor Discharge Pressure transducer (CDP),and Compressor Suction Pressure transducer (CSP)and install on new compressor. Install compressorframe to new compressor (if removed <strong>with</strong> defectivecompressor).2346751089p. Install compressor in unit by reversing step 4.12.b.through n. The use of new locknuts is recommendedwhen replacing compressor. Torque bolts to a valueof 46 ft/lb (6.4 Mkg). Install new gaskets on servicevalves and tighten bolts uniformly. Refer to Section9.29.1 -- drive gear installation.q. Attach two lines (<strong>with</strong> hand valves near vacuumpump) to the suction and discharge service valves.Leak test, then dehydrate and evacuate compressorto 500 <strong>micro</strong>ns (29.90” Hg vacuum = 75.9 cm Hg vacuum).Turn off valves on both lines to pump.r. Fully backseat (open) both suction and dischargeservice valves.s. Remove vacuum pump lines and install manifoldgauges.t. Check refrigerant level.u. Start unit and check for noncondensibles.v. Check compressor oil level. (Refer to Section 9.13)Add oil if necessary.w. Check compressor unloader operation. (Refer toSection 9.14)x. Check refrigerant cycles by running a unit Pretrip.(Refer to Section 3.4)1) Compressor2) Bolts3) Compressor Bell Housing4) Key5) Compressor Drive Gear6) Locking Tab7) Nylon Drive Gear8) Drive Sheave Bolts9) V-Belt10) Engine Adapter Drive Sheave1Figure 9 -19. Compressor Drive Assembly9--29 62-10683
9.13 CHECKING COMPRESSOR OIL LEVELCAUTIONService mode MUST be used whenever removingrefrigerant charge, refrigerant leakchecking or evacuating. Refer to Section6.2.3.9.13.1 To Check The Oil Level In The Compressor:a. Operate the unit in high speed, fully loaded cool for atleast 15 minutes. Unplug wires to the unloaders ifnecessary to ensure six cylinder operation.NOTECheck the oil sight glass on the compressor toensure that no foaming of the oil is present after15 minutes of operation. If the oil is foamingcheck the refrigerant system for flood-back ofliquid refrigerant. Correct this situation beforeperforming step 2.b. After 15 minutes, initiate a defrost cycle. This will allowany residual oil to be returned to the compressor.NOTEOperate the unit in defrost for 3-5 minutes only.Do not allow the unit to terminate defrostautomatically. The sudden reduction of crankcasepressure at defrost termination couldcause a temporary increase in oil circulationand gave a false oil level reading.c. After 3-5 minutes of defrost operation, turn the unit offand wait 5-15 seconds. Observe the compressor oillevel in the sight glass. (See Figure 9--20). Oil levelshould be between the Minimum and Maximummarks.- Maximum- MinimumFigure 9 -20. Oil Level in Sight Glass9.13.2 Adding Oil With Compressor In SystemTwo methods for adding oil are the oil pump method andclosed system method.a. Oil Pump MethodOne compressor oil pump that may be purchased is aRobinair, part no. 14388. This oil pump adapts to a oneU.S. gallon (3.785 liters) metal refrigeration oil containerand pumps 2-1/2 ounces (0.0725 liters) per stroke whenconnected to the oil fill (item 3, Figure 9--21). There is noneed to remove pump from can after each use.When the compressor is in operation, the pump checkvalve prevents the loss of refrigerant, while allowing thetechnician to develop sufficient pressure to overcomethe operating suction pressure to add oil as necessary.Backseat suction service valve and connect oil charginghose to oil fill (Item 3, Figure 9--21). Purge the oil hose atoil pump. Add oil as necessary (Refer to Section 2.10).b. Closed System MethodCAUTIONExtreme care must be taken to ensure thehose is immersed in the oil at all times.Otherwise air and moisture will be drawninto the compressor.When an oil pump is not available, oil may be drawn intothe compressor through the oil fill port or through thesuction service valve.1)Connect the suction connection of the gauge manifoldto the compressor suction service valve port, and thecommon connection of the gauge manifold to a vacuumpump. Remove the discharge hose from thegauge manifold; connect one end to the compressoroil fill port, and immerse the other end in an opencontainer of refrigeration oil. Start the vacuum pump,and pull the compressor into a 10”-15” vacuum. Stopthe pump. Watch the oil level in the sight glass. As itreaches the minimum mark, stop the flow of oil fromthe container. (Refer to Section 2.10).2)Break any remaining vacuum (raise to 0 Bar/PSIG)<strong>with</strong> refrigerant remaining in the system (crack openthe suction service valve), or from a fresh drum of refrigerant.Replace the oil port plug, and evacuate thecompressor crankcase. Open both service valvesbefore starting the unit.9.13.3 Adding Oil To Service Replacement CompressorService replacement compressors may or may not beshipped <strong>with</strong> oil.If compressor is <strong>with</strong>out oil:Add correct oil charge (Refer to Section 2.10) throughthe suction service valve flange cavity or by removingthe oil fill plug (See Figure 9--21)62-106839--30
9.13.4 To Remove Oil From The Compressor:a. Close suction service valve (frontseat) and pump unitdown to 0.07 to 1 to 2 PSIG (0.1 Bar). Frontseat dischargeservice valve and slowly bleed remaining refrigerant.b. Slowly remove the oil drain plug from the compressorand drain the proper amount of oil. Replace the plugsecurely back into the compressor.c. Open service valves and run unit to check oil level, repeatas required to ensure proper oil level.10976851.2.High Pressure Switch ConnectionSuction Service Valve3.4.Oil Fill PlugBottom Plate5.6.Oil Drain PlugOil Level Sight Glass7.8.Oil PumpUnloader Solenoid9.10.Discharge Thermistor ConnectionDischarge Service ValveFigure 9 -21. Compressor12439.14 COMPRESSOR UNLOADER VALVE (SeeFigure 9 -22)The compressor unloaders (located on the compressorcylinder heads) are controlled by the AdvanceMicroprocessor. (Refer to Section 2.3.5)9.14.1 Unloader Checkout Procedurea. Connect manifold gauges to the compressor suctionand discharge service valves and start unit in cooling<strong>with</strong> the refrigerated compartment temperature atleast 5_F(2.8_C) above set point and the compressorwill be fully loaded (both unloader coils are de-energized).Note suction pressure.b. Unplug both unloader coils.c. Using cable included in the test kit (CTD P/N07--50006--00), energize front unloader. Note dischargeand suction pressures. A rise of approximately3 psig (0.2 bar) will be noted on the suction pressuregauge. Discharge pressure should drop approximately5to15psig(0.4to1.0bar).d. Disconnect UL1 and note pressures. Suction pressureshould drop and discharge pressure should riseby same amount as in step c. above.e. Repeat steps c. & d. for UL2 (rear unloader). At theend of the test, plug both unloaders back in.NOTEIf either unloader coil energizes and the suctionand discharge pressures do not change, the unloaderassembly must be checked.9.14.2 Replacing Unloader Valve Internal Parts(See Figure 9 -22)a. Pump down the unit. (Refer to Section NO TAG)Frontseat both service valves to isolate the compressor.b. Remove coil retaining cap (if equipped), and coil.c. Remove enclosing tube collar (item 2, Figure 9--22)using installation/removal tool supplied <strong>with</strong> repair kit(item 3).d. Check plunger for restriction due to: (a) Corroded orworn parts; (b) Foreign material lodged in valve; (c)Bent or dented enclosing tube.e. Install new parts. Do not over tighten enclosing tubeassembly. Torque to a value of 8 ft pounds (1.1 Mkg).f. Remove supplied installation/removal tool. Installcoil, and voltage plate.g. Evacuate and dehydrate the compressor. (Refer toSection NO TAG.)h. Start unit and check unloader operation (Refer toSection 9.14.1.).i. Check unit operation by running Pretrip (Refer to Section3.4).9--31 62-10683
9.14.3 Unloader Coil ReplacementNOTEThe coil may be removed <strong>with</strong>out pumping theunit down.a. Disconnect leads. Remove retainer, if equipped. Liftoff coil. (See Figure 9--22)b. Check unloader coil resistance <strong>with</strong> an ohm meter.Correct resistance should be between 7.5 and 10.5ohms.c. Verify coil type, voltage and frequency of old and newcoil. This information appears on the coil housing.d. Place new coil over enclosing tube and retainer andconnect wiring.e. Check unit operation by running Pretrip (Refer to Section3.4).1Use tooltorque stemnut to 2.8 to20-22ft-lbs (30Nm)2Note: When installing coil,make sure roll pin is fittedinto stem nut, and coilseats properly onto pin tokeep it from rotating.9CAUTIONService mode MUST be used whenever removingrefrigerant charge, refrigerant leakchecking or evacuating. Refer to Section6.2.3.9.15 REPLACING OR SERVICING CHECK VALVEA check valve allows the hot gas to travel in onedirection only.The function of the Hot Gas Bypass check valve is toraise the receiver pressure when the ambienttemperature is low so that refrigerant can flow from thereceiver to the evaporator when the unit is in heating ordefrost.The function of the Discharge Line check valve is toprevent any liquid refrigerant from migrating into thecompressor during the unit off cycle.45632137845610Torque 3 Bolts to12-16 ft-lbs (16 to22 Nm)11121. Cap2. Spring3. Gasket4. Stem5. Seat6. BodyFigure 9 -23. Discharge Check Valve(Serviceable)Prior to S/N JAW90756460Figure 9 -22. Unloader Valve1. Coil Assembly2. Stem/Enclosing TubeAssy3. Installation/RemovalTool4. Spring, Plunger5. Plunger Assembly6. “O” Ring7. Valve Body8. Gasket, Valve Body9. Pin, Anti-Rotation (fitsinto top of stem nut)10. Bolts, Valve Body (3)11. Washers (3)12. Piston (use only <strong>with</strong>hot gas bypassunloaders)07-00457-00Figure 9 -24. Discharge Check Valve(Non-Serviceable)Beginning With S/N JAW9075646062-106839--32
9.16 CHECKING AND REPLACING FILTER-DRIER9.16.1 To Check Filter-DrierThe unit must be running in Cool for this test. Check for arestricted or plugged filter-drier by feeling the liquid lineinlet and outlet connections of the drier cartridge. If theoutlet side feels cooler than the inlet side, then thefilter-drier should be changed.9.16.2 To Replace Filter-DrierFigure 9 -25. Hot Gas Check Valve(Non-Serviceable)9.15.1To Service Check Valve (See Figure 9 -23)a. Store the refrigerant in an evacuated container.(Refer to Section NO TAG.a)b. Replace necessary parts.c. Evacuate and dehydrate unit. (Refer to SectionNO TAG)d. Addrefrigerantcharge.(RefertoSectionNO TAG)9.15.2To Replace Check Valve (See Figure 9 -24and Figure 9 -25)a. Store the refrigerant in an evacuated container.(Refer to Section NO TAG)b. Using a pipe cutter, cut the valve stub-outs andunsweat theremainingstub-outfrom theconnectingcopper.NOTEInert brazing techniques MUST be followedduring replacement of valves.NOTEPlace magnetic discharge check valve tool(CarrierTransicoldP/N07-00457-00) ontopofdischargecheckvalve(Figure 9--24)topullthe plunger from the body seat.c. Replace valve.d. Evacuate and dehydrate unit. (Refer to SectionNO TAG)e. Addrefrigerantcharge.(RefertoSectionNO TAG)f. Check unit operation by running Pretrip (Refer toSection 3.4.a. Pump down the unit per section NO TAG. Removebracket, then replace drier. Tighten inlet side fitting.b. Slowly open king valve and purge air through thedrier. Tighten drier outlet side fitting.c. Close the king valve.d. Leak test drier connections.e. Remove the refrigerant pressure from the low side ofthe system according to Step NO TAG of SectionNO TAG.f. Evacuate the low side of the system according toSection NO TAG.g. Check refrigerant level.h. Check unit operation by running Pretrip (Refer to Section3.4).9.17 CHECKING AND REPLACING HIGH PRES-SURE CUTOUT SWITCH (HPS)9.17.1 Checking High Pressure SwitchWARNINGDo not use a nitrogen cylinder <strong>with</strong>out apressure regulator. Cylinder pressure isapproximately 2350 PSIG (159.9 Bars). Donot use oxygen in or near a refrigerant systemas an explosion may occur. (SeeFigure 9 -26)9--33 62-10683
1231. Cylinder Valveand Gauge2. Pressure Regulator3. Nitrogen Cylinder4. Pressure Gauge[0 to 400 PSIG (0 to27.2 Bars)]5. Bleed-Off Valve6. 1/4 inch Connection4569.17.2 Replacing High Pressure Switcha. Pump down compressor per Section NO TAG.Frontseat both suction and discharge service valvesto isolate compressor.b. Slowly equalize compressor pressure through theservice valve gauge ports.c. Recover refrigerant remaining in compressor to 0psig/bar.d. Disconnect wiring from defective switch, and removeold switch. The HPS is located on the top cylinderhead (See Figure 9--21).e. Install new HPS after verifying switch settings and reconnectwiring. (Refer to Section 9.17.1)f. Evacuate and dehydrate the compressor. (Refer toSection NO TAG)NOTEEvacuation and dehydration is necessary onlyin the event that the compressor has reachedatmospheric pressure during this procedure.g. Check unit operation by running Pretrip (Refer to Section3.4).Figure 9 -26. Typical Setup for Testing HighPressure Switcha. Remove switch as outlined in Section 9.17.2.b. Connect ohmmeter or continuity light across switchterminals. Ohmmeter will indicate resistance andcontinuity light will be lit if switch closes after relievingpressure.c. Connect switch to a cylinder of dry nitrogen. (SeeFigure 9--26)d. Set nitrogen pressure regulator higher than cutoutpoint on switch being tested. Pressure switch openand close points are shown in Section 2.11.e. Close valve on cylinder and open bleed-off valve.f. Open cylinder valve. Slowly close bleed-off valve andincrease pressure until the switch opens. If a continuitylight is used, it will go out. If an ohmmeter is used,the meter will indicate open. Open pressure ongauge. Slowly open bleed-off valve (to decreasepressure) until switch closes. (The light will light or theohmmeter indicator will move.)62-106839--34
9.18 COMPRESSOR DISCHARGE PRESSURETRANSDUCER (CDP)(CTD P/N 12-00352-04 - RED)OUTPUT VOLTAGE WITH5V SUPPLY (VOLTS)HIGH RANGE PRESSURE TRANSDUCER- CDPPRESSURE (PSIG)Figure 9 -27 Discharge Pressure TransducerValues9.18.1 Testing Compressor Discharge PressureTransducera. Verify that the wiring to the transducer is correct. (Seewiring diagram, Section 11.)b. Power up the transducer circuit. Place unit into PCMode (Refer to Section 6.1).c. Check Voltage to transducer connector. Voltagereading between A (negative) and B (positive) shouldbe 5.0 VDC.d. Check wire resistance between C (output to <strong>micro</strong>processor)and 1MP05.e. Place +5.0 VDC on transducer terminal B and --5.0VDC on transducer terminal A. Disconnect C from the<strong>micro</strong>processor. Test voltage between B and C. Thereading should be as shown in table below.9.18.2 Calibrating Compressor Discharge PressureTransducerThe compressor discharge pressure transducer (CDP)has a range of 0 to 500 PSIG (0 to 34.02 Bars). With thislarge of a pressure range, some transducers will notread exactly the same as the next. To allow for variationsin transducers, and still display an accurate pressurereading in the Data list, a calibration feature for the CDPbuilt into the <strong>micro</strong>processor.To calibrate the CDP, it must be removed from thecompressor and exposed to atmosphere. During thecalibration process, the <strong>micro</strong>processor measures thedifference between what the transducer is sending andwhat the <strong>micro</strong>processor was expecting for a zeroreading. The difference between these two is called anoffset. This offset is then stored in the <strong>micro</strong>processor’smemory, and is used in all future calculations fordisplaying compressor discharge pressure.NOTEThe Compressor Discharge Pressure on the<strong>micro</strong>processor Data list will never read lessthan 0 Bar/PSIG, even if it is exposed to a vacuum(such as when evacuating the system.)Consequently, a transducer reading of 0 doesnot indicate accurate calibration. Every dischargetransducer must be calibrated beforebeing installed into a compressor.a. Power up the transducer circuit. Place unit into PCmode (Refer to Section 6.1), or place unit in ManualStart mode.b. Press the Select key until “Press ↑↓to View Data” appearsin the MessageCenter.c. Press the Up Arrow until “Discharge Pressure” is displayedin the MessageCenter.d. Press and hold the Equal key for six seconds. TheMessageCenter will blink 5 times. When it stops blinking,the display will either show“DISCHARGE PRESSURE: 0.0 BAR/PSIG,” or themessage “CALIBRATION UNSUCCESSFUL.”e. When “DISCHARGE PRESSURE: 0.0 BAR/PSIG”appears, the offset has been saved into the <strong>micro</strong>processormemory, and the calibration is complete.f. If the calibration was unsuccessful, either there ismore than 0 Bar/PSIG on the transducer, or the transduceris further away from 0 than an offset will allow.The transducer must be replaced.9--35 62-10683
Table 9-4. Compressor Discharge Pressure TransducerBars/PSIG Voltage Bars/PSIG Voltage Bars/PSIG Voltage0/0 0.5 5.44/80 1.1 17.0/250 2.50.68/10 0.6 6.12/90 1.2 18.7/275 2.71.36/20 0.7 6.8/100 1.3 20.41/300 2.92.04/30 0.7 8.51/125 1.5 22.11/325 3.12.72/40 0.8 10.21/150 1.7 23.81/350 3.33.4/50 0.9 11.91/175 1.9 25.52/375 3.54.08/60 1.0 13.61/200 2.1 27.22/400 3.74.76/70 1.1 15.31/225 2.3 30.62/450 4.1NOTEThe +5.0 VDC (terminal B) is common betweenthe Compressor Discharge Pressure Transducer,the Compressor Suction PressureTransducer, and the RPM sensor for non ESCengines or ENSSN for engines <strong>with</strong> electronicspeed control. If this circuit is shorted to ground(due to one of the mentioned components beingdefective, or a worn wire) the MessageCenterwill show:SSuction Pressure: -14.7 PSIG (-1.0 Bar)SDischarge Pressure: 0 PSIG/BarSEngine RPM: 0.9.18.3 Replacing Compressor Discharge PressureTransducera. Pump down compressor per Section NO TAG.Frontseat both suction and discharge service valvesto isolate compressor.b. Slowly equalize compressor pressure through theservice valve gauge ports.c. Recover refrigerant remaining in compressor to 0psig/bar.d. Disconnect wiring from defective transducer, and removethe transducer. The CDP is located on the topcylinder head.e. Connect wiring and calibrate the transducer per Section9.18.2.f. Install new CDP and reconnect wiring.g. Evacuate and dehydrate the compressor. (Refer toSection NO TAG)WARNINGThe Compressor Discharge PressureTransducer does not have a Schrader valvein the connecting fitting. Any dischargepressure remaining in the compressor willbe released when removing the CDP.NOTEEvacuation and dehydration is necessary onlyin the event that the compressor has reachedatmospheric pressure during this procedure.h. Check unit operation by running Pretrip (Refer to Section3.4).Table 9-5. Compressor Suction Pressure TransducerPSIG/Bars Voltage PSIG/Bars Voltage PSIG/Bars Voltage-10/-0.68 0.7 30/2.04 2.1 70/4.76 3.5-5/-0.34 0.8 35/2.38 2.2 75/5.1 3.60/0 1.0 40/2.72 2.4 80/5.44 3.85/0.34 1.2 45/3.06 2.6 85/5.78 4.010/0.68 1.4 50/3.4 2.8 90/6.12 4.115/1.02 1.5 55/3.74 2.9 95/6.46 4.320/1.36 1.7 60/4.08 3.1 100/6.8 4.525/1.7 1.9 65/4.42 3.362-106839--36
9.19 COMPRESSOR SUCTION PRESSURETRANSDUCER (CSP)(CTD P/N 12-00352-03 - BLUE)9.19.2 Calibrating Compressor Suction PressureTransducerThe Compressor Suction Pressure Transducer (CSP)has a range of --14.7 to100 psig (--1 to 6.8 bar).Calibration is not required because the range is sosmall.OUTPUT VOLTAGE WITH5V SUPPLY (VOLTS)PRESSURE (PSIG)NOTEThe +5.0 VDC (terminal B) is common betweenthe Compressor Discharge Pressure Transducer,the Compressor Suction PressureTransducer, and the RPM sensor for non ESCengines or ENSSN for engines <strong>with</strong> electronicspeed control. If this circuit is shorted to ground(due to one of the mentioned components beingdefective, or a worn wire) the MessageCenterwill show:SSuction Pressure: -14.7 PSIG/BarSDischarge Pressure: 0 PSIG/BarSEngine RPM: 0Figure 9 -28 Suction Pressure Transducer Values9.19.1 Testing Compressor Suction PressureTransducera. Verify that the wiring to the transducer is correct. (Seewiring diagram, Section 11).b. Power up the transducer circuit. Place unit into PCmode (Refer to Section 6.1), or place unit in ManualStart mode.c. Check Voltage to transducer. Voltage reading betweenA (negative) and B (positive) should be 5.0VDC.d. Check wire continuity C (output to <strong>micro</strong>processor)and 1MP6.e. Place +5.0 VDC on transducer terminal B and -5.0VDC on transducer terminal A. Test voltage betweenB and C. The reading should be as shown in table below.9.19.3 Replacing Compressor Suction PressureTransducera. Pump down compressor per Section NO TAG.Frontseat both suction and discharge service valvesto isolate compressor.b. Slowly equalize compressor pressure through theservice valve gauge ports.c. Recover refrigerant remaining in compressor to 0psig/bar.d. Disconnect wiring from defective transducer, and removeold transducer. The CSP is located on the fittingon the crankcase of the compressor.e. Install new CSP and reconnect wiring.f. Evacuate and dehydrate the compressor. (Refer toSection NO TAG)NOTEEvacuation and dehydration is necessary onlyin the event that the compressor has reachedatmospheric pressure during this procedure.g. Check unit operation by running Pretrip (Refer to Section3.4).9--37 62-10683
9.20 REPLACING RECEIVER SIGHT GLASS AS-SEMBLY OR FUSIBLE PLUGCAUTIONService mode MUST be used whenever removingrefrigerant charge, refrigerant leakchecking or evacuating. Refer to Section6.2.3.a. Remove the refrigerant from the complete system.(Refer to Section NO TAG.)b. Unscrew the sight glass assembly or fusible plug anddiscard.c. Wrap threads of new sight glass or plug <strong>with</strong> Teflontape or spread some sealing compound on pipethreads of new sight glass assembly or plug andinstall. Torque the sight glass to 15 to 25 ft lbs (20 to34Nm).Torquethefuseplugto4to8ftlbs(5to11Nm).d. Using a trace amount of refrigerant removed from thesystem in Step a. bring the pressure of the system upto about 10 psig (xxx). Add dry nitrogen to increasethe pressure to 100 psig (6.9 bar). Leak check receiversight glass or fusible plug. (Section NO TAG. )e. After leak checking unit, release the refrigerant/nitrogento atmosphere and evacuate and dehydrate asoutlined in Section NO TAG.f. Add refrigerant charge. (Refer to Section NO TAG)g. Check unit operation by running Pretrip. (Refer toSection 3.4).b. Replacing SV2/SV4 internal partsCAUTIONService mode MUST be used whenever removingrefrigerant charge, refrigerant leakchecking or evacuating. Refer to Section6.2.3.426 713589.21 SERVICING SOLENOID VALVES9.21.1 Solenoid Valve - SV2/SV4CAUTIONDo not over tighten or damage the enclosingtube assembly. Torque to 17-ft pounds(2.4 Mkg). Also make sure all parts areplaced on the enclosing tube in proper sequenceto avoid premature coil burnout.a. Replacing the SV2/SV4 CoilNOTEThe coil may be replaced <strong>with</strong>out removing therefrigerant or pumping the unit down.1) Unplug from wiring harness, remove coil retainerand coil assembly.2) Verify coil type, voltage and frequency. This informationappears on the coil housing.3) Place new coil over enclosing tube, retainer and connectwiring.1) Coil Assembly2) Retainer3) Enclosing Tube Assy4) Plunger Assy5) Seal6) Piston Assy7. Body8. Bracket AdapterFigure 9 -29. SV2/SV4 Solenoid ValvesTo service the liquid line solenoid valve (SV2) or the hotgas solenoid valve (SV4) first pump the unit down.(Refer to Section NO TAG.)Remove and store the refrigerant charge in anevacuated container. (Refer to Section NO TAG.)1) Remove coil retainer and coil assembly from valve.Remove enclosing tube assembly and related items.2) Check for foreign material in valve body.3) Install new parts.62-106839--38
NOTERebuild kit (P/N 14-00150-51) contains both ablack neoprene seal and a white Teflon seal. Usethe one that matches seal in existing valve. Thevalve <strong>with</strong> the Teflon seal can be identified by twodimples in the housing. (See Figure 9--30)DIMPLESFigure 9 -30. SV-2/SV-4 MARKING4) Tighten enclosing tube assembly to a torque value of17 ft pounds (2.4 Mkg) and leak check the valve. (Referto Section NO TAG)5) Install coil assembly and retainer.6) Start unit and check refrigerant charge (Refer to SectionNO TAG.)7) Check refrigeration cycles.8) Run Pretrip. (Refer to Section 3.4)9.21.2 Solenoid Valve - SV1a. Solenoid Valve SV1 Checkout ProcedureTo obtain proper heating and defrost, the normally open(N.O.) SV1 solenoid valve must energize and closetightly during the heat and defrost cycles. If the valvedoes not close tightly due to physical damage, foreignmaterial or wear, refrigerant leakage through the valvecan reduce heating capacity.During normal heat or defrost cycles the followingconditions will be observed when the valve isoperating properly:1) Receiver refrigerant level will drop quickly at the initiationof heating or defrost mode.2) Suction pressure will rise slowly to90-100 PSIG (6.12 to 6.80 Bar).3) Discharge pressure will drop quickly, but will begin torise to a minimum of 250 PSIG (17.0 Bars) <strong>with</strong>in 15to 20 minutes.If suction and discharge pressures remain low andthe receiver level does not drop, the valve may beinoperative and can be checked by the followingmethod.1) Verify the solenoid coil has proper voltage and is energizedin heating and defrosting.2) Connect a discharge pressure gauge to the compressordischarge service valve and connect a gauge tothe manual shut-off valve (king valve) leaving the receivertank.3) With the refrigerated compartment temperature at35_F(1.7_C) or lower, operate the unit in high speedcool and remove or disconnect the “GND” wire leadingto the SV1 coil.4) With a separate 12 VDC negative ground wire,energize SV1 <strong>with</strong> the unit in high speed cooling andobserve the discharge and receiver pressures. If thevalve is closing properly, compressor discharge pressurewill begin to rise and the receiver pressure willremain the same or begin to drop slowly. If the valve isnot seating properly, both discharge and receiverpressure will rise slowly or remain the same.5) Operate the unit until discharge pressure reaches200 PSIG (13.61 Bars) and disconnect jumper wire toSV1 valve. Discharge and receiver pressure shouldbe <strong>with</strong>in 5 to 15PSIG (0.34 to 1.02 Bars) of each other.b. Replacing the SV1 CoilNOTEThe coil may be replaced <strong>with</strong>out removing therefrigerant or pumping the unit down.1) Remove top locknut, spacer cup and nameplate.2) Disconnect wiring and remove coil.3) Replace coil by reversing steps 1 and 2.9--39 62-10683
c. Replacing SV1 Internal Components (SeeFigure 9 -31)CAUTIONService mode MUST be used whenever removingrefrigerant charge, refrigerant leakchecking or evacuating. Refer to Section6.2.3.1) Remove and store the refrigerant charge in an evacuatedcontainer. (Refer to Section NO TAG.)2) Remove the top locknut, spacer cup, nameplate, coilassembly and spacer.3) Using a 12 point, 1-3/8 inch box wrench, loosen theenclosing tube locknut and bleed off remaining refrigerant.4) Remove enclosing tube and locknut assembly. Thegasket is inside the enclosing tube.5) Remove seat disc from inside of body and check forobstructions and foreign material.6) Place the seat disc into the valve body <strong>with</strong> the smallerdiameter end facing up.7) Place the enclosing tube locknut over the enclosingtube. Install spacer over enclosing tube making sureit is seated properly in the enclosing tube locknut.Tighten enclosing tube locknut to a torque value of20 ft-lb (2.78 Mkg). Do not over tighten.8) Install coil assembly, nameplate and top locknut orscrew.9) Dehydrate and evacuate the system. (Refer to sectionNO TAG) Charge unit <strong>with</strong> refrigerant per sectionsNO TAG.10) Start unit and check operation.11)Run Pretrip. (Refer to Section 3.4)123456789101) Locknut/Screw2) Spacer Cup3) Nameplate4) Coil5) SpacerSV16) Enclosing Tube Locknut7. Enclosing Tube8. Seal9. Seat Disc10. BodyFigure 9 -31. SV1 Solenoid Valve62-106839--40
9.22 COMPRESSOR SUCTION MODULATIONVALVE (CSMV)The purpose of the CSMV is to control suction pressure,maintain the compressor <strong>with</strong>in normal operating rangeand maximize unit capacity and fuel economy.At initial startup, the <strong>micro</strong>processor will go through aself test. When the test is complete, the MessageCenterwill display “SMV CLOSING”. When closing iscomplete, the MessageCenter will display “SETTINGSMV XXX%”. The XX% will count up to a predeterminedpercentage depending on ambient temperature andcompartment temperature. The unit will then go throughits normal start procedure.9.22.2 CSMV DiagnosticsIf the CSMV is suspected to be faulty, the first thing theoperator should do is perform a Pretrip test (Refer toSection 3.4). Some symptoms that could indicate afaulty CSMV are:SUnusually high suction pressure in COOL mode.A27 -- “HIGH SUCTION PRESSURE ALARM” maybe generated.SUnusually low suction pressureA18 -- “LOW REFRIGERANT ALARM” may be generatedCSMV2-1/8 inch NutSPoor temperature controlCompartment temperature deviates from set point.If the unit fails Test 10 during pretrip(P180 “CHECK SUCTION MOD VALVE”) the CSMVcould be faulty. The CSMV could have becomemechanically jammed, or it could have failed electricallyin the power head, or it may not be receiving the propersignal from the <strong>micro</strong>processor. There are several stepsthe operator should make in addition to the unit Pretrip tofurther diagnose the valve.Figure 9 -32 Suction modulation valve (CSMV)9.22.1 FunctionThe CSMV coil consists of two windings labeled 1 and 2.Each winding has two poles, labeled A and B.Both poles of both windings have a wire connected backto the <strong>micro</strong>processor.Looking at the 4--pin connector on the CSMV coil, thewiring is as follow :Table 9-6 CSMV ConnectionsConnector Pin Wire Color Winding/PoleA BLACK 1AB WHITE 1BC RED 2BD GREEN 2ARefer to Section 2.13 for resistance value.There is no common connection point between the twowindings.The <strong>micro</strong>processor opens and closes the CSMV bysending a <strong>series</strong> of electrical pulses to the coil.CAUTIONDo not connect 12 VDC to the CSMV windingsin an attempt to rotate the valve or irreparabledamage will occur.a. The CSMV may be stuck in some position other thancompletely closed and the stepper motor cannotmove the piston. To check if the valve is stuck, firststart the unit and run in cool mode <strong>with</strong> manifoldgauges attached to the compressorb. Allow the suction pressure to pull down to 0 psig/bar.WARNINGCarrier Transicold does not recommend allowingthe compressor to pull less than0 psig/bar at any time.c. Once the unit has reached suction pressure of0 psig/bar place the Start/Run--Off switch in the theOFF position. After the engine shuts down, the <strong>micro</strong>processorwill fully close the CSMV.NOTECarefully listen to the valve. When the unit is offand the valve is closing, the valve will make aratcheting noise that may be heard or felt as it isclosing. If this can be heard or felt, it indicatesthat the <strong>micro</strong>processor is attempting to closethe valve, and may serve as a quick indicationthat the drive module is in working order. It isnot, however, an indication that the valve pistonis actually working.d. Wait about 2 minutes after the engine stops to ensurethe valve is fully shut.9--41 62-10683
e. If the CSMV is fully shut, the suction pressure shouldstill read 0 psig/bar. If the valve is stuck at some positionother than fully closed, or it cannot fully close forany reason, the suction pressure during this test willrise.1) If the suction pressure holds at 0, go to Step f.2) If the suction pressure rises, go to Step NO TAGf. Use the Stepper Motor Tester (CTD special tool P/N07--00375--00) to manually open the valve. The suctionpressure on the manifold gauge should go up. Ifthe suction pressure does not go up, the CSMV isstuck closed (go to Step NO TAG) or there is somethingobstructing the refrigerant.NOTEOpening the valve can also be accomplished byusing the <strong>micro</strong>processor. Place the Start/Run--Off switch in the START/RUN position. The <strong>micro</strong>processorwill go through its self test and thedisplay will show“SMV CLOSING: WAIT XXX SECONDS”. Thevalve is obviously closed at this point, but the<strong>micro</strong>processor is programmed to always closethe CSMV every time the <strong>micro</strong>processor ispowered up. The display will then show “SET-TING SMV XXX%” . Refer to 9.22 above. If thesuction pressure does not go up, the CSMV isstuck closed (go to Step NO TAG) or there issomething obstructing the refrigerant.NOTEIf the valve passes steps a. through f., the valveis operating properly.g. If the suction pressure rises during Step e., or if thevalve is determined to be stuck closed in Step f., turnthe unit Off by placing the Start/Run--Off switch in theOFF position and unplug the 4 pin connector to theCSMV. With a reliable digital ohmmeter, check thewinding resistance between 1A (Black) wire and the1B (White) wire AND between the 2A (Green) wireand the 2B (Red) wire. Refer to Section 2.13 forstandard resistance in normal ambient temperatures.If this resistance is confirmed, proceed to Step 8. If aninfinite or zero ohm reading occurs, first check thewires at the connector for good contact. If the connectoris in good condition and the resistance is still bad,one (or both) of the coils could be faulty. Replace theCSMV power head assembly P/N 14--00263--20. Referto Section 9.22.3.1A (BLK)2A (GRN)12(WHT) 1B(RED) 2BFigure 9 -33 CSMV Coilh. Locate the wires on the engine harness side of theCSMV connector. Locate the wires labeled CSMVA,CSMVB, CSMVC and CSMVD. These will correlateto the connector pins labeled A, B, C and D. SeeFigure 9--33.i. Place the Start/Run--Off switch in the START/RUNposition. DO NOT ALLOW THE UNIT TO START.When the MessageCenter displays “SMV CLOSING:WAIT XXX SECONDS”, measure the AC voltage betweenpins A and B and then between C and D using avoltmeter that is set to read AC volts. The digital voltmetershould read from 10 to 16 VAC for each pair ofwires. If this test passes, there is a good signal comingfrom the <strong>micro</strong>processor.j. If a reading of 10 to 16 VAC is not present on one orboth of the wire pairs, check the wiring between the<strong>micro</strong>processor and the CSMV connector, or checkthe <strong>micro</strong>processor for proper model number configuration.k. If all the above tests pass, the CSMV is operatingproperly and the abnormal unit operation can be contributedto something other than the CSMV.9.22.3 Replacing The CSMV Power Head(14 -00263 -20)a. Pump the unit down at the king valve (Refer to SectionNO TAG).CAUTIONService mode MUST be used whenever removingrefrigerant charge, refrigerant leakchecking or evacuating. Refer to Section6.2.3.b. Unplug the CSMV connector from the engine harness.c. Loosen the 2 1/8” nut on the CSMV and remove thepower head assembly. (See NO TAG).d. Install the new CSMV power head.e. The power head should be set to 100% (Open) whenreceived from the warehouse. This is to ensure theTeflon valve seal is not damaged when it is installed.Ensure the valve is fully open by using Stepper MotorTester (CTD special tool P/N 07--00375--00) to manuallyopen the valve to 100% before it is installed.62-106839--42
f. Torque the 2 1/8” nut to 35 to 40 ft--lbs (47.4 to 54.2Nm)g. Reconnect the CSMV connector to the engine harness.h. Evacuate the low side of the refrigeration system.(Refer to Section NO TAG)i. Open the liquid line service valve, run the unit forapproximately 10 minutes and initiate a pretrip.Emergency CSMV Repair Procedures:In the event that the CSMV system has a failure, andreplacement components are not readily available in anemergency. A LIMP-HOME procedure can be done asfollows :a. Attach a manifold gauge set.b. Perform a low side pump down per Section NO TAG.When the unit has reached 0 to 5 psig (0 to 0.34 bar)close the suction service valve and turn the unit OFF.c. Remove CSMV power head by loosening the 2-1/8inch diameter nut (see NO TAG), and sliding thepower head out.d. Remove the piston by loosening the Allen screw andremoving the piston and screw.e. Install the power head assembly (<strong>with</strong>out the piston),torque to 35 to 40 foot-lbs (47.4 to 54.2 Nm).f. Open all valves.g. Start the unit.h. Adjust the suction service valve so that the approximatetemperature OR current limit is maintained. Forperishable loads, it is recommended that the adjustmentbe made so that the available capacity is slightlylarger than the load, the unit will cycle OFF and ON.i. Once repair parts become available, repair as required.9.23 LIGHT BAR9.23.1 Light Bar Operation and Testa. The green LEDs illuminate when +12 volts is appliedto Pin G and ground is applied to Pin B.b. The amber LEDs will illuminate when +12 volts is appliedto Pin G and ground is applied to Pin B and PinH.c. Use an Ohmmeter to test light bar operation. PIN Bshould be open to other terminals, and PIN G shouldhave 325 to 550 ohms to PIN H.9.24 CHECKING DEFROST OR HEATING CYCLENOTEDTT must be 40_F(4.4_C) or lower, before anychecks can be made.9.24.1 Hot Gas Solenoid Valve (SV1 & SV4) Heatingand Defrostinga. Connect a discharge pressure gauge to the manualshut-off valve (king valve) and another gauge to thecompressor discharge service valve. Connect agauge to the compressor suction service valve.b. Start unit <strong>with</strong> controller set at least 10_F(5.5_C) belowindicated refrigerated compartment temperatureto obtain high speed cooling. Press the MANUAL DE-FROST key to initiate defrost. (DTT must be at or below40_F (4.4_C). The hot gas solenoid valve (SV4)will energize and the hot gas line will be hot to touchon both sides of the valve. The condenser pressurecontrol solenoid (SV1) closes and suction pressurewill rise approximately 10 to 15 PSIG (0.68 to1.02Bars) after five minutes on unit operation. Refer toSection 9.21.2 if unit does not heat properly.c. Unit should remain in defrost until DTT (located on thecenter tube sheet below the evaporator) reaches55_F (12.8_C ). At this point the defrost cycle will terminateand the unit will resume automatic operation.9.25 DEFROST AIR SWITCH (DAS)9.25.1 Testing The Defrost Air Switch And Circuita. To check the Defrost Air switch, run unit in high speedcooling and place a jumper across the air switch terminals.This will start the defrost cycle as it simulates theaction of the defrost air switch. Bypassing the switch inthis manner operates all components involved in defrost.NOTEIf DTT is above 40_F (4.4_C), theMessageCenter will show“CANNOT START DEFROST CYCLE.”b. Unit should remain in defrost until DTT reaches 55_F(12.8_C). At this point the defrost cycle will terminate,and the unit will resume automatic operation.c. If the above test indicates satisfactory operation, testDefrost Air switch (DAS) settings using a magnehelicgauge. (Refer to Section 9.25.2)9--43 62-10683
9.25.2 Checking Calibration Of Defrost Air Switch2561. Ohmmeter or Continuity Device2. Adjustment Screw (0.050” socket head size)3. Low Side Connection4. Pressure Line or Aspirator Bulb (P/N07-00177-01)5. Magnehelic Gauge (P/N 07-00177-00)6. High Side ConnectionFigure 9 -34. Defrost Air Switch Test Setupa. Make sure magnehelic gauge is in proper calibration.NOTEThe magnehelic gauge may be used in anyposition, but must be re-zeroed if position ofgauge is changed from vertical to horizontal orvice versa. USE ONLY IN POSITION FORWHICH IT IS ZEROED. The Defrost Air switchMUST be in the same orientation as it will be inwhen installed in the unit.b. With air switch in vertical position, connect high pressureside of magnehelic gauge to high side connectionof air switch. (See Figure 9--34)c. Install tee in pressure line to high side connection. Teeshould be approximately halfway between gauge andair switch or an improper reading may result.d. Attach an ohmmeter to the air switch electrical contactsto check switch action.NOTEUse a hand aspirator (P/N 07-00177-01), sinceblowing into tube by mouth may cause an incorrectreading.431e. With the gauge reading at zero, apply air pressurevery slowly to the air switch. An ohmmeter will indicatecontinuity when switch actuates. The switchcontacts should close and the ohmmeter needlemove rapidly to 0. Any hesitation in the ohmmeter indicatesa possible problem <strong>with</strong> the switch, and itshould be replaced.f. Refer to Section 2.11 for switch settings. If switch fails toactuate at correct gauge reading, adjust switch by turningadjusting screw clockwise to increase setting orcounterclockwise to decrease setting.g. Repeat checkout procedure until switch actuates atcorrect gauge reading.h. After switch is adjusted, place a small amount of paintor fingernail polish on the adjusting screw so thatvibration will not change switch setting.9.26 EVAPORATOR COIL CLEANINGThe use of recycled cardboard cartons is increasingacross the country. The recycled cardboard cartonscreate much more fiber dust during transport than “new”cartons. The fiber dust and particles are drawn into theevaporator where they lodge between the evaporatorfins. If the coil is not cleaned on a regular basis,sometimes as often as after each trip, the accumulationcan be great enough to restrict air flow, cause coil icing,repetitive defrosts and loss of unit capacity. Due to the“washing” action of normal defrost the fiber dust andparticles may not be visible on the face of the coil butmay accumulate deep <strong>with</strong>in.Clean the evaporator coil on a regular basis, not only toremove cardboard dust, but also to remove any greaseor oil film, which sometimes coats the fins and preventswater from draining into the drain pan.Cardboard fiber particles after being wetted and driedseveral times can be very hard to remove. Therefore,several washings may be necessary.a. Remove rubber check valves (Kazoo) from drainlines (front of refrigerated compartment).b. Remove evaporator bulkhead and back panel, thenspray coil <strong>with</strong> a mild detergent solution such asOakite 164 or any good commercial grade automaticdish washer detergent such as Electrosol or Cascadeand let the solution stand for a few minutes and reverseflush (opposite normal air flow) <strong>with</strong> clean waterat mild pressure. A garden hose <strong>with</strong> spray nozzle isusually sufficient. Make sure drain lines are clean.c. Replace evaporator back panel and run unit until defrostmode can be initiated to check for proper drainingfrom drain pan.62-106839--44
9.27 CONDENSER COIL CLEANINGRemove all foreign material from the condenser coil byreversing the normal air flow. (Air is pulled in through thefront and discharges over the engine.) Use an FDAapproved cleaning agent whenever possible. However,compressed air or water may be used as a cleaning agent.It may be necessary to use warm water mixed <strong>with</strong> anygood commercial dishwasher detergent. Rinse coil <strong>with</strong>fresh water if a detergent is used.9.28 MICROPROCESSOR SENSOR CHECKOUTAn accurate ohmmeter must be used to checkresistance values shown in Table 9-7.Due to variations and inaccuracies in ohmmeters,thermometers or other test equipment, a reading <strong>with</strong>in2% of the chart value would indicate a good sensor. If asensor is bad, the resistance reading will usually bemuch higher or lower than the resistance values given inTable 9-7.At least one lead from the sensor must be disconnectedfrom the unit electrical system before any reading istaken. Not doing so will result in a false reading. Twopreferred methods of determining the actual testtemperature at the sensor, is an ice bath at 32_F(0_C)or a calibrated temperature tester.Table 9-7. Sensor Resistance (ENCT, RAT, SAT, ATT, DTT)°F °C Ohms °F °C Ohms °F °C Ohms °F °C Ohms-40 -40 336,500 18 -7.8 49,060 76 24.4 10,250 134 56.7 2,809-38 -38.9 312,600 20 -6.7 46,230 78 25.6 9,760 136 57.8 2,697-36 -37.8 290,600 22 -5.6 43,580 80 26.7 9,299 138 58.9 2,590-34 -36.7 270,300 24 -4.4 41,100 82 27.8 8,862 140 60.0 2,488-32 -35.6 251,500 26 -3.3 38,780 84 28.9 8,449 142 61.1 2,390-30 -34.4 234,200 28 -2.2 36,600 86 30.0 8,057 144 62.2 2,297-28 -33.3 218,200 30 -1.1 34,560 88 31.1 7,686 146 63.3 2,208-26 -32.2 203,400 32 0 32,650 90 32.2 7,334 148 64.4 2,124-24 -31.1 189,700 34 1.1 30,850 92 33.3 7,000 150 65.6 2,042-22 -30 177,000 36 2.2 29,170 94 34.4 6,684 155 68.3 1,855-20 -28.9 165,200 38 3.3 27,590 96 35.6 6,384 160 71.1 1,687-18 -27.8 154,300 40 4.4 26,100 98 36.7 6,099 165 73.9 1,537-16 -26.7 144,200 42 5.5 24,700 100 37.8 5,828 170 76.7 1,402-14 -25.6 134,800 44 6.6 23,390 102 38.9 5,571 175 79.4 1,281-12 -24.4 126,100 46 7.7 22,160 104 40.0 5,327 180 82.2 1,171-10 -23.3 118,100 48 8.9 20,990 106 41.1 5,095 185 85.0 1,072-8 -22.2 110,500 50 10 19,900 108 42.2 4,874 190 87.8 983-6 -21.1 103,600 52 11.1 18,870 110 43.3 4,665 195 90.6 902-4 -20 97,070 54 12.2 17,900 112 44.4 4,465 200 93.3 829-2 -18.9 91,030 56 13.3 16,980 114 45.5 4,275 205 96.1 7620 -17.8 85,400 58 14.4 16,120 116 46.7 4,095 210 98.9 7022 -16.7 80,160 60 15.5 15,310 118 47.8 3,923 215 101.7 6474 -15.6 75,270 62 16.6 14,540 120 48.9 3,759 220 104.4 5986 -14.4 70,720 64 17.7 13,820 122 50.0 3,603 225 107.2 5538 -13.3 66,460 66 18.9 13,130 124 51.1 3,454 230 110.0 51110 -12.2 62,500 68 20.0 12,490 126 52.2 3,313 235 112.8 47312 -11.1 58,790 70 21.1 11,880 128 53.3 3,177 240 115.6 43814 -10.0 55,330 72 22.2 11,310 130 54.4 3,049 245 118.3 40616 -8.9 52,090 74 23.3 10,760 132 55.6 2,926 250 121.1 3789--45 62-10683
Table 9-8. Sensor Resistance (CDT)°F °C Ohms °F °C Ohms °F °C Ohms °F °C Ohms °F °C Ohms-40 -40 3,360,000 18 -7.8 189,690 76 24.4 102,460 134 56.7 28,160 260 126.7 3,290-38 -38.9 3,121,020 20 -6.7 461,170 78 25.6 97,600 136 57.8 27,040 270 132.2 2,850-36 -37.8 2,900,710 22 -5.6 434,790 80 26.7 92,990 138 58.9 25,970 280 137.8 2,490-34 -36.7 2,697,500 24 -4.4 410,080 82 27.8 88,630 140 60.0 24,960 290 143.3 2,170-32 -35.6 2,509,940 26 -3.3 386,940 84 28.9 84,510 142 61.1 23,980 300 148.9 1,910-30 -34.4 2,336,720 28 -2.2 365,260 86 30.0 80,600 144 62.2 23,050 310 154.4 1,680-28 -33.3 2,186,670 3 -1.1 344,930 88 31.1 76,890 146 63.3 22,160 320 160.0 1,480-26 -32.2 2,028,680 32 0 325,860 90 32.2 73,380 148 64.4 21,310 330 165.5 1,310-24 -31.1 1,891,780 34 1.1 307,970 92 33.3 70,040 150 65.6 20,500 340 171.1 1,160-22 -30 1,765,060 36 2.2 291,180 94 34.4 66,880 155 68.3 18,980 350 176.7 1,040-20 -28.9 1,647,700 38 3.3 275,410 96 35.6 63,880 160 71.1 16,940 360 182.2 920-18 -27.8 1,538,950 40 4.4 260,590 98 36.7 61,040 165 73.9 15,450 370 187.8 830-16 -26.7 1,438,120 42 5.5 246,670 100 37.8 58,330 170 76.7 14,070 380 193.3 740-14 -25.6 1,344,580 44 6.6 233,570 102 38.9 55,770 175 79.4 12,870 390 198.9 670-12 -24.4 1,257,770 46 7.7 221,260 104 40.0 53,330 180 82.2 11,750 400 204.4 600-10 -23.3 1,177,150 48 8.9 209,670 106 41.1 51,010 185 85.0 10,750 410 210.0 540-8 -22.2 1,102,240 50 10 198,760 108 42.2 48,800 190 87.8 9,870 420 215.6 490-6 -21.1 1,032,600 52 11.1 188,490 110 43.3 46,710 195 90.6 9,050 430 221.1 450-4 -20 967,830 54 12.2 178,820 112 44.4 44,710 200 93.3 8,320 440 226.7 410-2 -18.9 907,560 56 13.3 169,700 114 45.5 42,820 205 96.1 7,650 450 232.2 3700 -17.8 851,450 58 14.4 161,100 116 46.7 41,010 210 98.9 7,050 460 237.8 3402 -16.7 799,180 60 15.5 152,990 118 47.8 39,290 215 101.7 6,510 470 243.3 3104 -15.6 750,470 62 16.6 145,340 120 48.9 37,660 220 104.4 6,000 480 248.9 2806 -14.4 705,060 64 17.7 138,120 122 50.0 36,100 225 107.2 5,540 490 254.4 2608 -13.3 662,690 66 18.9 131,310 124 51.1 34,610 230 110.0 5,130 500 260.0 24010 -12.2 623,150 68 20.0 124,870 126 52.2 33,200 235 112.8 4,76012 -11.1 586,230 70 21.1 118,790 128 53.3 31,850 240 115.6 4,41014 -10.0 551,740 72 22.2 113,040 130 54.4 30,560 245 118.3 4,09016 -8.9 519,500 74 23.3 107,600 132 55.6 29,330 250 121.1 3,80062-106839--46
9.29 UNIDRIVE TORQUE REQUIREMENTS(FIGURE 9 -35)Extensive damage may occur if the proper hardwareand procedures are not followed. Periodic inspection ofhardware and bolt torque is recommended to insure theintegrity of the unidrive.NOTEThread locking sealant, 5/16 flat washer and5/16 lock washer must be used on bolts betweenthe compressor mounting flange and theengine bell housing. The recommended sealantis Loctite Threadlocker 262.The following figures show the torque value, size andgrade of the hardware to be used when reassemblingthe unidrive assembly.9.29.1 Drive GearWhen installing a nylon drive gear always:a. Install <strong>with</strong> black dot facing steel gear.b. Use new bolts and locking tabs included in drive gearkit.c. Use Loctite or a similar thread locking compound onthreads of drive gear bolts.d. DO NOT use Never-Seez or any other lubricatingcompound on the nylon drive gear or compressorsteel gear. The gear must be assembled dry.e. Torque the (6 bolt) nylon drive gear bolts to 30 ft-lbs.9--47 62-10683
M8 x 1.25 x 20 mm lg(4 Required) 28 ft-lbs (3.87 Mkg)5/16-18 x 3/4 lg Grade 8(4 Required) 25 ft-lbs (3.46 Mkg)3/8-24 x 1.00 lg Grade 828 ft-lbs (3.87 Mkg)or3/8-16 x 1-3/4 lg Grade 5(6 Required) 30 ft-lbs (4.15 Mkg)DIRECT DRIVE90 ft-lbs (12.45 Mkg)M12 x 1.25 x 25 mm lg(3 Required) 65 ft-lbs (8.99 Mkg)3/8-16 x 1 lg Grade 5 (10 Required)28 ft-lbs (3.87 Mkg)Figure 9 -35. Unidrive Torque Requirements - Non ESC Engine62-106839--48
M8 x 1.25 x 20 mm lg(6 Required) 28 ft-lbs (3.87 Mkg)3/8-16 x 1-3/4 lg Grade 5(6 Required) 30 ft-lbs (4.15 Mkg)3/8-24 x 1.00 lg Grade 828 ft-lbs (3.87 Mkg)DIRECT DRIVE90 ft-lbs (12.45 Mkg)M12 x 1.25 x 25 mm lg(3 Required) 65 ft-lbs (8.99 Mkg)3/8-16 x 1 lg Grade 5 (12 Required)28 ft-lbs (3.87 Mkg)Figure 9 -36. Unidrive Torque Requirements - Electronic Speed Control Engine9--49 62-10683
Table 9-9. R404A Temperature-Pressure ChartTemperature Pressure Temperature Pressure_C _F Bars PSIG _C _F Bars PSIG-40 -40 0.31 4.5 0 32 5.00 72.5-37 -35 0.49 7.1 1 34 5.21 75.6-34 -30 0.68 9.9 2 36 5.43 78.8-32 -25 0.89 12.9 3 38 5.66 82.1-29 -20 1.12 16.3 4 40 5.90 85.5-28 -18 1.22 17.7 6 42 6.14 89.0-27 -16 1.32 19.2 7 44 6.38 92.5-26 -14 1.43 20.7 8 46 6.63 96.2-24 -12 1.54 22.3 9 48 6.89 99.9-23 -10 1.65 23.9 10 50 7.15 103.7-22 -8 1.77 25.6 13 55 7.96 115.4-21 -6 1.88 27.3 16 60 8.69 126.1-20 -4 2.01 29.1 18 65 9.47 137.4-19 -2 2.13 30.9 21 70 10.30 149.4-18 0 2.26 32.8 24 75 11.18 162.1-17 2 2.40 34.8 27 80 12.10 175.5-16 4 2.54 36.8 29 85 13.07 189.6-14 6 2.68 38.9 32 90 14.10 204.5-13 8 2.83 41.1 35 95 15.18 220.2-12 10 2.99 43.3 38 100 16.33 236.8-11 12 3.14 45.6 41 105 17.53 254.2-10 14 3.31 48.0 43 110 18.78 272.4-9 16 3.47 50.4 46 115 20.11 291.6-8 18 3.65 52.9 49 120 21.50 311.8-7 20 3.83 55.5 52 125 22.95 332.9-6 22 4.01 58.1 54 130 24.48 355.0-4 24 4.20 60.9 57 135 26.07 378.1-3 26 4.39 63.7 60 140 27.74 402.3-2 28 4.59 66.5 63 145 29.48 427.6-1 30 4.79 69.5 66 150 31.30 454.062-106839--50
SECTION 10UNIT TROUBLESHOOTING1PARAGRAPH NUMBERPage10.1 DIESEL ENGINE .............................................................. 10--110.1.1 Engine Will Not Start ....................................................... 10--110.1.2 Engine Starts Then Stops ................................................... 10--110.1.3 Starter Motor Malfunction ................................................... 10--210.1.4 Malfunction In The Engine Starting Circuit ..................................... 10--210.1.5 Miscellaneous Engine Troubleshooting ........................................ 10--310.2 ALTERNATOR (12 Volt DC) ..................................................... 10--310.3 REFRIGERATION / TEMPERATURE CONTROL .................................. 10--410.3.1 Unit Will Not Cool .......................................................... 10--410.3.2 Unit Runs But Has Insufficient Cooling ........................................ 10--410.3.3 System Will Not Pump Down ................................................ 10--410.3.4 Unit Operates Long Or Continuously In Cooling ................................ 10--410.3.5 Unit Will Not Terminate Cooling .............................................. 10--510.3.6 Unit Will Not Heat Or Has Insufficient Heating .................................. 10--510.3.7 Unit Will Not Terminate Heating .............................................. 10--510.3.8 Defrost Cycle Malfunction ................................................... 10--510.3.9 Abnormal Pressure ......................................................... 10--610.3.10 Abnormal Noise ........................................................... 10--710.3.11 Control System Malfunction ................................................. 10--710.3.12 No Evaporator Air Flow Or Restricted Air Flow ................................ 10--710.3.13 Expansion Valve Malfunction ................................................ 10--710.3.14 Compressor Suction Modulation Valve (CSMV) Malfunction ..................... 10--810.3.15 Solenoid Valve Malfunction (SV1, 2 OR 4) .................................... 10--810.4 ELECTRONIC SPEED CONTROL TROUBLESHOOTING .......................... 10--810.4.1 Advance Microprocessor Troubleshooting Guide ............................... 10--1310.5 COMPRESSOR TROUBLESHOOTING GUIDE ................................... 10--2310
SECTION 10UNIT TROUBLESHOOTINGCAUTIONUnder no circumstances should anyone attempt to service the Advance Microprocessor. See Section10.4.1 for <strong>micro</strong>processor troubleshooting. Should a problem develop <strong>with</strong> the Advance Microprocessor,contact your nearest Carrier Transicold dealer for replacement.NOTERun a Pretrip and Check all active alarms before continuing <strong>with</strong> troubleshooting.ACTION /INDICATION / TROUBLEPOSSIBLE CAUSESREFERENCESECTION10.1 DIESEL ENGINE - See Table 10-1 and Figure 10 -1 thru Figure 10 -4 for ESC troubleshooting10.1.1Engine Will Not StartBattery insufficiently chargedCheckBattery terminal post dirty or defectiveCheckBad electrical connections at starterCheckStarter motor will notcrank or low cranking speedStarter motor cranksbut engine fails to startStarter cranks, engages,but dies after a few secondsStarter motor malfunctions 10.1.3Starter motor solenoid defectiveEngine ManualOpen starting circuit 10.1.4Incorrect grade of lubricating oil 2.7Unloaders not unloaded 9.14High refrigeration suction pressure 9.22No fuel in tankCheckAir in fuel system 9.6Water in fuel systemDrain SumpPlugged fuel filter(s)ReplacePlugged fuel lines to injector(s)CheckESC defective 10.4Voltage drop in battery cable(s)CheckEngine lube oil too heavy 2.7.110.1.2Engine Starts Then StopsFuel supply restrictedCheckNo fuel in tankCheckLeak in fuel systemCheckFaulty fuel control operationEngineFuel filter restrictedReplaceEngine stops afterInjector nozzle(s) defectiveEngine Manualseveral rotationsInjection pump defectiveEngine ManualAir cleaner or hose restricted 9.8.8Safety device open 2.12Fuel solenoid defectiveEngine ManualFuel pump (FP) malfunction 9.610--1 62-10683
INDICATION / TROUBLEPOSSIBLE CAUSESACTION /REFERENCESECTION10.1.3Starter Motor MalfunctionStarter motor will notcrank or turns slowlyStarter motor turnsbut pinion does not engageStarter motor does not disengageafter switch was depressedStarter motor does not disengageafter engine is startsBattery insufficiently chargedCheckBattery cable connections loose or oxidizedCheckBattery cables defectiveReplaceStarter brushes shorted outEngine ManualStarter brushes hang up or have no contactEngine ManualStarter solenoid damagedEngine ManualGlow/Crank switch defectiveReplaceEngine lube oil too heavy 2.7Pinion or ring gear obstructed or wornClean both,remove burrs,or replaceGlow/Crank switch defectiveStarter motor solenoid defectiveEngine is already runningDefective starterReplaceEngine ManualCheckEngine Manual10.1.4Malfunction In The Engine Starting CircuitBattery defectiveCheckNo power to starterLoose electrical connectionsTightenmotor solenoid (SS)ESC defective 10.4No power to Starter Solenoid connector 10.4Battery defectiveCheckLoose electrical connectionsTightenFuel solenoiddoes not energize or doesnot remain energizedOil pressure safety switch (ENOPS) defectiveRun relay (RR) defectiveEngine coolant temp. (ENCT) defectiveFuel solenoid defectiveStart/Run-Off switch defectiveReplaceReplaceReplaceEngine ManualReplace62-1068310--2
INDICATION/TROUBLEPOSSIBLE CAUSESACTION/REFERENCESECTION10.1.5 Miscellaneous Engine TroubleshootingRestriction in air cleaner 9.8.8Air in fuel system 9.6Air vent restricted in fuel tank capCleanRestricted fuel linesEngine ManualLoss of powerDefective fuel injection pumpEngine ManuallDefective injector(s) or incorrect typeEngine ManualIncorrect fuel injection pump timingEngine ManuallIncorrect valve timingEngine ManualPoor compressionEngine ManualVibrationEngine shockmounts defectiveReplacePoor compressionEngine ManualRestriction in air cleaner 9.8.8Exhaust pipe restrictionRemovelRestriction in water jacketEngine ManualOverheatingRestriction in radiator 9.8.1Coolant level too low 8.5.1Loose water pumpreplaceDefective thermostatEngine ManualDefective water pump/beltEngine ManualExcessive crankcase pressure Plugged crankcase breather line 9.8.910.2 ALTERNATOR (12 Volt DC)Alternator fails to chargeLow or unsteady charging rateExcessive charging rate(as evidenced by batteryrequiring too frequent refilling) oramp reading shows constanthigh amp charge.Limited charging system operating timeCheckBattery conditionCheckAlternator belt loose/broken 9.9Loose, dirty, corroded terminals, or broken leadsCheck/RepairExcessively worn, open or defective brushesCheckOpen blocking diodeCheckRegulator faultyCheckOpen isolation diodeCheckOpen rotor (field coil)ReplaceAlternator belt loose 9.9Loose, dirty, corroded terminals, or broken leadsCheck/RepairExcessively worn, sticky or intermittent brushesCheckFaulty regulatorCheckGrounded or shorted turns in rotorCheckOpen, grounded or shorted turns in statorReplaceRegulator leads loose, dirty, corroded terminals, orwires brokenClean/RepairDefective regulatorCheck10--3 62-10683
INDICATION/TROUBLEPOSSIBLE CAUSESACTION/REFERENCESECTION10.2 ALTERNATOR (12 Volt DC) - cont.Defective or badly worn V-belt 9.9Worn bearing(s)ReplaceNoisy alternatorMisaligned belt or pulley 9.9Loose pulleyTighten10.3 REFRIGERATION / TEMPERATURE CONTROL10.3.1Unit Will Not CoolDiesel engine Malfunction(s) 10.1Compressor malfunction<strong>Refrigeration</strong> systemCompressor drive defective 9.12Compressor defective 9.12Defrost cycle did not terminate 10.3.8Abnormal pressure 10.3.9Solenoid valve malfunction 10.3.15Clutch Failure 9.10.5Check system for non--condensablesNO TAG10.3.2Unit Runs But Has Insufficient CoolingCompressorCompressor valves defective 9.12Unloader malfunction 9.14Abnormal pressure 10.3.9Unloader malfunction 9.14<strong>Refrigeration</strong> systemExpansion valve malfunction 10.3.13No or restricted evaporator airflow 10.3.12Clutch Failure 9.10.5Engine does notdevelop full rpm10.3.3System Will Not Pump Down10.3.4Unit Operates Long Or Continuously In CoolingHot LoadRefrigerated CompartmentDefective box insulation or air leakSpeed control linkage 9.8.6Engine malfunction 10.1Check SV4 9.21.1Check by-pass check valve 9.15Check SV2 9.21.1Check king valveCheck compressorPre-coolproductCorrectAbnormal pressure 10.3.9<strong>Refrigeration</strong> systemTemperature sensor malfunctionCheckCheck system for non--condensablesNO TAGCompressor Defective 9.1262-1068310--4
INDICATION/TROUBLEPOSSIBLE CAUSESACTION/REFERENCESECTION10.3.5 Unit Will Not Terminate CoolingTemperature sensor malfunctionUnit fails to stop coolingMicroprocessor improperly setCheckCheck set pointCheck whether<strong>micro</strong>processoris set at °C or°F10.3.6Unit Will Not Heat Or Has Insufficient HeatingAbnormal pressure 10.3.9Temperature sensor malfunction 10.3.11<strong>Refrigeration</strong>Solenoid valve malfunction 10.3.151/4” check valve (bypass) defective 9.15Clutch Failure 9.10.5CompressorCompressor drive defective 9.12Compressor defective 9.12Engine does not developfull rpmEngine malfunction 10.1FSA malfunction 10.4Diagnostic code on ENSCU 10.410.3.7 Unit Will Not Terminate HeatingMicroprocessor temperature improperly setResetUnit fails to stop heatingMicroprocessor malfunction 10.4.1Temperature sensor malfunctionCheck10.3.8Defrost Cycle MalfunctionWill not initiate defrostautomaticallyWill not initiate defrost manuallyInitiates but does not defrostFrequent defrostDoes not terminate orcycles on defrostDefrost air switch (DAS) out of calibration 9.25.2DTT2 is above 40_F (4.4_C)Cool Box DownDefrost air switch (DAS) defective 9.24 & 9.25.2Loose terminal connectionsTightenAir sensing tubes defective or disconnectedCheckKeypad defectiveReplaceLoose terminal connectionsTightenDTT2 is above 40_F (4.4_C)Cool Box DownUnit has been running less than 15 secondsTry againLow refrigerant chargeNO TAGSolenoid valve malfunction 10.3.15Clutch/Gearbox defectiveReplaceDefrost air switch (DAS) out of adjustment 9.24 & 9.25.2Wet loadNormalLow refrigerant chargeDefrost air switch (DAS) out of adjustmentNO TAG9.24 & 9.25.2Refrigerated CompartmentHot LoadDefective or insufficient refrigerated compartment insulationor air leakAllow time topull downCorrect10--5 62-10683
INDICATION/TROUBLE10.3.9Abnormal Pressurea. CoolingHigh discharge pressureLow discharge pressureHigh suction pressureLow suction pressureSuction and dischargepressures tend to equalizewhen unit is operatingPOSSIBLE CAUSESACTION/REFERENCESECTIONCondenser coil dirty 9.27Condenser fan defective 9.10V-belt broken or loose 9.9Discharge check valve restricted 9.15Non--condensables or refrigerant overchargeNO TAG andTable 2-1Solenoid valve (SV1) malfunction 9.21.2SV4 leaking 9.21Compressor valves(s) worn or broken 9.12SV4 leaking 9.21Compressor valves(s) worn or broken 9.12Compressor gasket(s) defective 9.12Suction service valve partially closedOpenKing valve partially closedOpenFilter-drier partially plugged 9.16Low refrigerant chargeNO TAGExpansion valve malfunction 10.3.13No evaporator air flow or restricted air flow 10.3.12Excessive frost on coil 9.24Solenoid valve (SV2) defective 9.21Clutch Failure 9.10.5Suction modulation valve malfunction 9.22Compressor valves defective 9.12Compressor gasket(s) defective 9.12b. HeatingHigh discharge pressureLow discharge pressureLow suction pressureSolenoid valves (SV1 and SV4) malfunction 10.3.15Condenser fan defective 9.10V-belts broken or loose 9.9Non-condensables in systemNO TAGCompressor valve(s) worn or broken 9.12Solenoid valve (SV1) malfunction 10.3.15Low refrigerant chargeNO TAGRefrigerant shortageNO TAGSolenoid (SV1) open 10.3.1562-1068310--6
INDICATION/TROUBLE10.3.10 Abnormal NoisePOSSIBLE CAUSESACTION/REFERENCESECTIONCompressorLoose mounting boltsTightenWorn bearings 9.12Worn or broken valves 9.12Liquid slugging 10.3.13Insufficient oil 9.13Condenser orevaporator fanLoose or striking shroudCheckBearings defective 9.10Bent shaft 9.10Clutch/Gearbox Defective ReplaceV-belts Cracked or worn 9.910.3.11 Control System MalfunctionWill not controlSensor defective 9.28Relay(s) defectiveCheckMicroprocessor malfunctionCheck10.3.12No Evaporator Air Flow Or Restricted Air FlowEvaporator coil blockedNo or partial evaporatorair flowFrost on coil 9.24Dirty coil 9.26V-belt broken or loose 9.9Clutch/Gearbox defectiveReplaceEvaporator fan loose or defective 9.10Evaporator fan rotating backwards 9.9Evaporator air flow blocked in refrigerated compartment Check10.3.13 Expansion Valve MalfunctionLow suction pressure <strong>with</strong>high superheatLow superheat and liquidslugging in compressorLow refrigerant chargeNO TAG/NO TAGExternal equalizer line pluggedCleanIce formation at valve seatNO TAGWax, oil or dirt plugging valve or orificeCleanBroken capillary 9.11Power assembly failure or partial loss ofelement/bulb chargeReplaceSuperheat setting too high 9.11.2Superheat setting too low 9.11.2External equalizer line pluggedCleanIce holding valve openNO TAGForeign material in valveCleanPin and seat of expansion valve eroded orheld open by foreign materialCleanFluctuating suctionpressureImproper bulb location or installation Figure 9--16Low superheat setting 9.11.2High superheat Broken capillary Replace10--7 62-10683
INDICATION/TROUBLEPOSSIBLE CAUSESACTION/REFERENCESECTION10.3.14 Compressor Suction Modulation Valve (CSMV) MalfunctionCoil not seated properlyCoil defectiveCSMV not controlling correctlyLoose connectorCSP defectiveCDT defectiveCDP defective10.3.15 Solenoid Valve Malfunction (SV1, 2 OR 4)No power to valveImproper wiring or loose connectionsSolenoid valve does notfunction properlySolenoid valve closes butrefrigerant continues to flowCheckCheck and ReplaceCheck andTightenCheck and ReplaceCheck and ReplaceCheck and ReplaceCheckCheckCoil defective 9.21Valve improperly assembled 9.21Coil or coil sleeve improperly assembled 9.21Movement of plunger restricted due to:a. Corroded or worn partsb. Foreign material lodged in valvec. Bent or dented enclosing tubForeign material lodged under seatDefective seat9.219.219.21CleanReplace10.4 ELECTRONIC SPEED CONTROL TROUBLESHOOTINGTable 10-1. ENSCU LED Fault Chart (See following pages for troubleshooting trees)FaultLED display pattern1 Engine Over Speed: more than 2,530 RPM One Long–OneShort2 No signal from ENSSN for 2 seconds after RPMis greater than 1,000 RPM for 10 seconds, ORfor 5 seconds while engine cranking (no voltageat pin 18 of ENSCU).3 Actuator (FSA) wiring disconnected or opencircuit. Coil Resistance Spec: 2.8 ohm +/- 10%.Two Long–OneShortTwo Long–ThreeShort4 ENSCU supply voltage is greater than 26V. Two Long–SevenShortFailed componentENSSN or mechanical engineproblemENSSN or wiring problemFSA or wiring problemENSCU or alternator problem62-1068310--8
NONOTE : Ensure the run relay isenergized during test . With ENSSNunplugged during testing , unit willstall & go through start sequenceagain . Unit will not start . This isnormal .Verify there is at least 11 VDC goinginto the ENSSN 12V terminal ?NOYESSTART HEREStart unit.Using strobe light07-00177-01 or equivalent,check engine RPM.Is RPM equal to or over 2,530?Check for highresistance or anopen in the ENSSNground circuit.Did you find andcorrect the condition?YESYESCheck high speed mechanicalstop on injection pump assemblyfor loose screws or tampering.Are the screws loose?YESCheck for highresistance oran openbetween ENSCUterminal 25 &ENSSN 12Vterminal.Did you findand correctthe condition?Using jumper wire, check for5 VDC at ENSCU terminal 10.Do you have 5 VDC atterminal 10?YESSystemOKNONOSystemOKRemove new ENSCUand re-install oldENSCU back into unit,ENSCU is not the fault.Review results ofabove tests <strong>with</strong> yoursupervisor. Ifnecessary, go to thebeginning of thetable & test again.NOSet proper high speed RPMper this manualDid you find andcorrect the condition?NONOYESSystemOKCheck for proper internal mechanicaloperation of injection pump assemblyand governor assembly. Did youfind and correct the condition?YESNONOCheck for open or highresistance on circuit betweenENSSN and ENSCU. Did youfind and correct the condition?YESNOReplace ENSCU. Did youfind and correct the condition?Replace ENSSN. . Did youfind and correct the condition?YESReview resultsof above tests<strong>with</strong> your supervisor. Ifnecessary, goto thebeginning of thetable &test again.SystemOKYESNOYESSystemOKRemove new ENSSNand re-install oldENSSN back into unit,ENSSN is not the fault.Review results ofabove tests <strong>with</strong> yoursupervisor. Ifnecessary, go to thebeginning of the table& test again.SystemOKFigure 10 -1. ESC Diagnostic Tree - 1 Long, 1 Short LED Code10--9 62-10683
Using jumper wire,verify there is at least 11VDC at ENSCU terminal 25?YESNOCheck for highresistance or anopen betweenENSCU terminal25 & ENSSN12 V terminal. .Did you findand correctthe condition?YESSTART HEREVerify unit starts, go intohigh speed and stall afterrunning for a few seconds?Verify there is at least 11VDC going into theENSSN 12 V terminal?SystemOKYESYESCheck for highresistance or anopen in theENSSNG groundcircuit.Did you find andcorrect the condition?NOUsing jumper wire, check for5 VDC at ENSCU terminal10. Do you have 5 VDC atterminal 10?YESSystemOKYESNOReplace ENSCU.Did you find and correctthe condition?NONORemove new ENSCUand re-install oldENSCU back intounit, ENSCU is notthe fault. Reviewresults of abovetests <strong>with</strong> yoursupervisor. Ifnecessary, go to thebeginning of the table &test again.SystemOKYESRemove new ENSSNand re-install oldENSSN back into unit,ENSSN is not the fault.Review results ofabove tests <strong>with</strong> yoursupervisor. Ifnecessary, go to thebeginning of the table& test again.Check for open or highresistanceoncircuitbetween ENSSN and ENSCU.Did you find and correct thecondition?NONOReplace ENSSN. Did youfind and correct thecondition?YESSystemOKFigure 10 -2. ESC Diagnostic Tree - 2 Long, 1 Short LED Code62-1068310--10
Go to Advance Microdiagnostic tableFigure 10 -6NOSTART HEREDoes the engine starterengage & turn the engineover?YESYESCheck for high resistanceor an open on the FSA groundcircuit terminal 2.Did you find and correctthe condition?NOWith the FSA disconnected,check the resistance of theFSA coil. Spec is2.8 ohms +/- 10%.Is ohm reading <strong>with</strong>in spec?NOReplace the FSA. Didyou find and correctthe condition?NORemove new FSAand re-install oldFSA back intounit, FSA is notthe fault. Reviewresults of abovetests <strong>with</strong> yoursupervisor. Ifnecessary, go to thebeginning of the table &test again.YESYESSystemOKNOYESVerify the proper voltagegoing into FSA terminal1. 12 VDC whenStart/Run-Off switch isfirst turned on for thepull in voltage, 1 VDC forhold in voltage & 0.8 VDCduring starter engagement.Do you have the correctvoltage?YESYESRemove the FSA from theengine & inspect. FSA shouldmove freely <strong>with</strong>out binding andshaft should be straight. IsFSA functioning properly?Review resultsof above tests<strong>with</strong> your supervisor. Ifnecessary, goto thebeginning of thetable &test again.NONOReplace ENSCU. Did you findand correct the condition?Remove new ENSCUand re-install oldENSCU back into unit,ENSCU is not the fault.Review results of abovetests <strong>with</strong> yoursupervisor. If necessary,go to the beginning ofthe table & test again.NOUsing jumper wire, are theproper voltages presentat ENSCU terminal 7?NOYESCheck for open or highresistance on circuitbetween FSA and ENSCU. .Did you find and correctthe condition?Review resultsof above tests<strong>with</strong> your supervisor. Ifnecessary, goto thebeginning of thetable &test again.YESSystemOKSystemOKFigure 10 -3. ESC Diagnostic Tree - 2 Long, 3 Short LED Code10--11 62-10683
Replace ENSCU. Did youfind and correct the condition?NOYESNOSTART HEREWith the Start/Run-Offswitch ON and the ENSCUwire 13 removed from theconnector (connectorplugged in), check voltageat ENSCU terminal 13. Isvoltage 26 VDC or higher?NOTE: With connectorunplugged, unit will notstart but will crank.Check voltage while unitis cranking.YESNOCheck voltage output atalternator. Is voltage 26VDC or higher?YESReplace alternator.Did you find andcorrect the condition?Remove new ENSCUand re-install oldENSCU back intounit, ENSCU is not thefault. Review resultsof above tests <strong>with</strong>your supervisor. Ifnecessary, go to thebeginning ofthe table & test again.SystemOKStarting at terminal13 at the ENSCU,check circuit forinduced voltagecreating the 26 VDCsignal.Did you find andcorrect the condition?NOYESSystemOKNORemove newalternator andre-install oldalternator back intounit, alternator is notthe fault. Reviewresults of abovetests <strong>with</strong> yoursupervisor. Ifnecessary, go to thebeginning of thetable & test again.YESSystemOKReview resultsof above tests<strong>with</strong> your supervisor. Ifnecessary, goto thebeginning of thetable &test again.Figure 10 -4. ESC Diagnostic Tree - 2 Long, 7 Short LED Code62-1068310--12
10.4.1Advance Microprocessor Troubleshooting GuideThe purpose of the following procedure is to provide a logical and straightforward guide to be used whentroubleshooting operational or other problems occurring <strong>with</strong> the <strong>micro</strong>processor. Often users and technicians havemistakenly worked to correct a problem that has ended up being normal operation. The <strong>micro</strong>processor has severaldifferent conditions contributing to operating parameters. These conditions are called out in the various diagnosticcharts to aid the technician in pinpointing the problem, or in realizing that the unit is performing normally.When using these tables, it is important to verify the reported symptom or problem and then correctly identify theappropriate table for that particular condition. Using the incorrect table will lead to an incorrect diagnosis. A table ofcontents is included to easily identify the correct table to use.When using these Diagnostic Tables, it is very important not to skip any steps. Follow the flow of the tables in the orderthat they are laid out. These tables are formatted into a logical troubleshooting sequence. Skipping around the tableswill most likely lead to errors in diagnosis.Throughout the tables, the steps will point the technician to areas to look at or check for a problem. Most of the stepswill lead the technician to a circuit or other area of the unit to check, test, and possibly repair other than the<strong>micro</strong>processor. Some steps will point to a possible problem <strong>with</strong> the <strong>micro</strong>processor. Whenever reaching one ofthese steps, it is a very good practice to install the new <strong>micro</strong>processor, then verify unit operation PRIOR TO writinghours, Trailer ID, Unit Serial Number, etc., into the new <strong>micro</strong>processor. Once the technician is satisfied that a new<strong>micro</strong>processor is required, the hours, trailer ID, unit serial number, customer configurations, or IntelliSets, etc.,should be entered. Should the problem remain even <strong>with</strong> the new <strong>micro</strong>processor in place, once all repairs are made,the original <strong>micro</strong>processor is to be reinstalled into the unit, to avoid unnecessary costs to the customer or having theWarranty Request rejected if there is no problem found <strong>with</strong> the returned <strong>micro</strong>processor.All steps leading to replacement of the <strong>micro</strong>processor have a number associated <strong>with</strong> them. When filling out the MPRtag that will be attached to the returned part, write the step number on the upper half of the tag in the Failure DescriptionField. Include the same information in the Failure Description Field when entering the warranty claim information online. This will show which diagnostic table was used and the path that was followed to determine the <strong>micro</strong> was at fault.10--13 62-10683
START HEREIs unit equipped<strong>with</strong> StarTrak?YESDisconnect StarTrak from unitand install J1 jumper. This willeliminate StarTrak from the system.NONOIs Micro StatusLED blinking?YESYESCheck the F1 fuse.Is the fuse blown?Check Micro StatusLED blink rate.Replace the fuse.Did you find andcorrect thecondition?YES NONOReturn tothe top ofthis chartMicro Status LEDis blinking at 1second ON & 1second OFF.Micro Status LED is blinkingat 1/2 second ON & 1/2second OFF.YESYESYESYESYESSystem OKRe-installStarTrak ifdisconnectedearlier.Check groundconnectors at thebattery, starter,engine block andinside the control box.Did you find andcorrect the condition?NOCheck voltagebetween QC1 & QC2.Voltage should read11 volts or higher.Is voltage <strong>with</strong>in rangeNOCheck Wiring for highresistance or an open.Did you find andcorrect the condition?NOCheck voltagebetween 5MPA1 &QC2. Voltageshould read 11volts or higher. Isvoltage<strong>with</strong>in range?NOCheck Wiring for highresistance or an open.Did you find andcorrect the condition?YESNOYESYESIs thesystemoperat -ing OKnow?YESSystem OKRe-installStarTrak ifdisconnectedearlier.Inspect and repair poorconnections at the <strong>micro</strong>and display. Did you findand correct the condition?NOEnsure the operator is waitinglong enough by turning theStart/Run-Off switch ON andwaiting 2minutes for the displayto come on. Did you find andcorrect the condition?NOInspect and repairhe 3 wiringharnesses for the<strong>micro</strong> and display:the cable from theYES<strong>micro</strong> to the back ofthe display, thecable from the backof the display to thedisplay itself and theribbon cable fromthe keypad to theboard. Did you findand correct thecondition?NO(MPR Code #2)Replace <strong>micro</strong> and operateNO system in order to verify repair.(MPR Code #1) Did you find and correct thecondition?NORemove new <strong>micro</strong> and re-install old <strong>micro</strong>back into the unit. Micro is not the fault.Review results of above tests <strong>with</strong> yoursupervisor. If necessary, go to the beginningof the table & test again.Check the Glow / Crank switchand wiring for shorting. Is theswitch or circuit shorted?YESYESDid the loadingof the softwarecorrect theproblem?YESYESNONONONOLoad current versionof software from http://www.transcentral.carrier.com Did thecurrent version ofsoftware load correctly?Go To Condition 8 -Programming Problems<strong>with</strong> PC Cards if using a PCCard to upgrade software orCondition 9 - ProgrammingProblems <strong>with</strong> MicroProgrammerif using a PC to upgrade software.Did the software load correctly?Review the results ofabove tests <strong>with</strong> yoursupervisor. If necessary,go to the beginning of thetable & test again.YESReplaceSwitch andrepairwiring asneeded. Didyoufindandcorrect theproblem?YESSystem OKRe-installStarTrak ifdisconnectedearlier.Figure 10 -5. Micro Diagnostic Tree - Cond. 1 - Start/Run-Off Switch On - Unit Does Not Operate62-1068310--14
Wrong Chart.See Condition 1.NOSTART HEREThe unitstarts & runs.YESNOMicro may not be configured properly.Verify correct model number is selectedin the <strong>micro</strong> via unit data. Did you findand correct the condition?YESUnit may be running on old software.Upgrade software to current version.Did the software load correctly?NOGo ToCondition 8 -Programming Problems<strong>with</strong> PC Cards if using aPC Card to upgradesoftware- or -Condition 9 -Programming Problems<strong>with</strong> MicroProgrammerif using a PC to upgradesoftware.Did the software load correctly?NOYESYESDid the loading of thesoftware correct the problem?NOCheck ground connectors at thebattery, starter, engine block andinside the control box. Did you findand correct the condition?NOCheck for active & inactive alarms.Refer to Section 8 for troubleshootingalarms. Did you find and correct thecondition?NOVerify function settings, configurations andIntelliSet settings are installed & correct. Didyou find and correct the condition?YESYESYESYESYESSystemOKReview the results ofabove tests <strong>with</strong> yoursupervisor. Ifnecessary, go to thebeginning of the table& test again.NOUse Pre Trip to check for any alarms.Use the Component Test Mode (Section6.2.2) toverify operation. Did you find and correctthe condition?NOUse this manual to check for correctoperation. Did you find and correct the condition?YESYESNODownload data recorder & reviewunit operation. Did you find andcorrect the condition?NOYESYESRemove new <strong>micro</strong> & re-installold <strong>micro</strong> back in the unit. Microis not the fault. Review resultsof above tests <strong>with</strong> yoursupervisor. If necessary, go tobeginning of table & test again.NOAre you sure unit is not operatingproperly? Operate the system. Did youfind and correct the condition?NO(MPR Code #5)YESReplace <strong>micro</strong> and operate system inorder to verify repair. Did you findand correct the condition?YESFigure 10 -6. Micro Diagnostic Tree - Cond. 2 - Start/Run-Off Switch On - Unit Operates But Not Properly10--15 62-10683
START HEREIs the unitequipped <strong>with</strong>StarTrak?NOTurn the Start/Run-OffswitchtotheOFF position.Does the enginecontinue to run?NOThere a problem<strong>with</strong> theStarTraksystem.Repair asnecessary.YESDisconnect StarTrakfrom the unit and installJ1 Jumper. This willeliminate StarTrakfrom the system.Unplug fuel solenoid or fueland speed actuator. Doesthe unit stop?YESCheck wiring for fuelsolenoid of fuel and speedactuator for a short. Didyou find and correct thecondition?YESSystem OK Re-installStarTrak ifdisconnectedearlier.YESNOYESNONONORemove connectors from unit one at atime to determine if any other devicesare providing power feedback,causing the <strong>micro</strong> to remain powered.Did you find and correct the condition?NOYESCheck for defectiveStart/Run-Off switch.Is Switch defective?Check wiring toStart/Run-Off switch for anopen or short. Did you findand correct the condition?NOVerify the Run Relayde-energizes when theStart/Run-Off switch isin the OFF position.NOIs the relaydefective?NOYESYESNOYESCheck wiring to Run Relayfor an open or short. Did youfind and correct the condition?Did the loadingof the softwarecorrect theproblem?Fuel solenoid or fuel andspeed actuator is defectiveor mechanically seized.YESReview the results ofabove tests <strong>with</strong> yoursupervisor. Ifnecessary, go to thebeginning of the table& test again.Replace Start/Run-Off switch. Didyoufindandcorrect the condition?NOYESReplace RunRelay. Didyoufindandcorrectthecondition?Load current version ofsoftware from http://www.transcentral.carrier.com.Did the software loadcorrectly?NOYESYESYESNOSystem OKRe-installStarTrak ifdisconnectedearlier.YESVerify correct fuel solenoid orfuel and speed actuator operation& replace if needed.Operate system in order to verifyrepair. Did you find and correctthe condition.NORemove new fuelsolenoid or fuel andspeed actuator & reinstallold component.Old component is not the fault.Go ToCondition 8 -Programming Problems<strong>with</strong> PC Cards if using aPC Card to upgradesoftware- or -Condition 9 -Programming Problems<strong>with</strong> MicroProgrammerif using a PC to upgradesoftware.Did the software load correctly?Figure 10 -7. Micro Diagnostic Tree - Cond. 3 - Start/Run-Off Switch Off - Unit Fails To Stop62-1068310--16
YESSTART HERE Check the Speed Solenoidor FSA and linkage for correct operation.Did you find and correct the condition?NOUnit may be running old software. Upgrade software from YEShttp://www.transcentral.carrier.com.Did you find and correctthe condition?NOCheck System discharge pressure at compressor.Is discharge pressure 435PSI or higher?YESNOCheck system suction pressure at compressor. Is suction pressure 5PSI or lower?NOCheck engine coolant temperature. Is coolant temperature 77°F or below?YESYESSystem OKSystem OKNOYESYESNONONONOIs unit indefrost?NODoes the unit have a doorswitch or remote switch?YESNOYESYESYESYESIs the switch configured for low speed?Are alarms A122 and A123both present?NOIs the unit in Start/Stopoperation?NOYESIs the setpoint 10.5°For higher?Is return air temp equal to orcolder than setpoint?The <strong>micro</strong> is calling for low speedoperation. If you believe this is notcorrect, review your testing <strong>with</strong> yoursupervisor before changing<strong>micro</strong>processor.Review the test results <strong>with</strong> yoursupervisor. If necessary, go tothe beginning of the table andtest again.NOIs the ambient temp 80°For higher?Has the unit been indefrost for more than5 1/2 minutes?NOYESNOYESNOIs speed relay LED27illuminated on <strong>micro</strong>?YESIstheF2fuseblown?NOIs there voltage at QC3?NONOYESYESNOIs the door open?NOYES Is setpoint 10°F or lower?Check funtional parametersettings for high speed delayminutes for continuous run.Check funtional parameter settings forhigh speed delay minutes for start/stopCheck for proper operation of thespeed relay. Is the relayoperating properly?Micro is calling for high speed. Isthere 12V at the speed controlsolenoid or FSA?Check wiring and connections from QC3 to speed controlsolenoid or FSA. Did you find and correct the condition?NONOCheck door switch wiring for an open.Did you find and correct the condition?NONOHas the unit been in defrostfor less than 30 secondsand suction pressure is lessthan 10 PSI OR Has the unit YESbeen in defrost for up to5 1/2 minutes and thesuction pressure is morethan 10 PSI?YESHas the unit beenrunning less that theselected highspeed delay minutes?Check the configurations for high speed delay.Is the setpoint further away from the selectedprobe temp for less than the selected minutes?Is selected probe temp <strong>with</strong>in+/- 3.6°F of setpoint?Check the F2 circuitfor excess amp draw orshort to ground. Didyoufindandcorrect the condition?NOCheck for proper operationof the speed controlYES solenoid or FSA. Is thesolenoid/actuatoroperating properly?NORepair or replace solenoid oractuator as needed.YESYESYESNOYESYESYESYESYESReplace relay. Did youfind and correct the condition?YESFigure 10 -8. Micro Diagnostic Tree - Cond. 4 - Unit Will Not Run In High Speed10--17 62-10683
START HEREIs the unit operating in defrost?NOUnit may be running old software. Upgradesoftware fromhttp: //www.transcentral.carrier.com. Didyou find and correct the condition?NOCheck functional parameter settings for air flow.Does the setting show high?YESYESYESNODoes the unit have IntelliSet options?YESYESNOIs ProductShield HighAir configured on?YESWhat is the version of software in the <strong>micro</strong>?NOSoftware Rev 04.02.00and earlier.Software Rev 04.03.00and later.YESCheck to see if the ambientis inside the Min/Max range.Did you find and correct thecondition?Check to see if the ambientis outside the Min/Max range.Did you find and correct thecondition?YESCheck setpointNONOSystem OKIs setpoint +10.4F orlower?Is setpoint +10.5F orhigher?NOIs return air temperatureequal to or colder thansetpoint?YESNOIs selected probe tem greaterthan 3.6F from setpoint?NONOIs there a voltage of 12V orhigher at QC3?Is there 12V or higher at theSpeed Solenoid or FSA?YESNOIs speed relay LED27illuminated on the<strong>micro</strong>? Did you find andcorrect the condition?Check wiring for high resistance or shorted connections. Did you find andcorrect the condition?NOYESYESSystem OKYESYESCheck the speed solenoid or FSAand linkage for binding. Did you findand correct the condition?YESNOReview the test results <strong>with</strong> yoursupervisor. If necessary, go tothe beginning of the table andtest again.Figure 10 -9. Micro Diagnostic Tree - Cond. 5 - Unit Will Not Run In Low Speed62-1068310--18
“CONNECTION OK”Are the dates for thedata on the downloadscreen?NOData Recorder date & time maybe set wrong. Set the correct date& time. Did you find and correctthe condiditon?NODid you have a communicationfailure during a download?NOYESYESSystemOKYESSTART HEREWhat does theReeferManager programdisplay on the bottom ofthe screen of your PC?NOGo to Condition 1 -Unit does not operate.There is noserialconnection.Is the <strong>micro</strong>status lightblinking 1second on & 1second off?“NOT CONNECTED”YESYESVerify the integrity ofthe download cableand connections.Did you find andcorrect the condition?NONOWhen viewing thedownload in Reports, aspecific sensor or eventdoes not show up in thedata file. TheReports data filtersettings may be setincorrectly or specificsensors and events maynot be recorded.DataRecorder is notconfigured properly.Use the Reports DataFilter pull down menu toset sensors & events tobe viewed OR useService Manager orReeferManager tocorrectly set up recordingparameters. Operate thesystem in order to verifythe repair.When viewing downloaded data, does allthe data appear onJan 01, 1970?YESYESDataRecorder date &time have never been set.Set date & time. Operatethe system in order toverify the repair.SystemOKYESYESIntermittent communicationproblem. Ensure AC cord isproperly connected or PC batteryis fully charged. Did you findand correct the condition?NOVerify PC power saving featuresare OFF. (I.E. screen saver, monitortime out, hard disc time out, autopower down/sleep mode).Did you find and correct the condition?NOVerify the integrity of thedownload cable andconnections. Did you findand correct the c ondition?NOUse PCDownload Cardto downloaddata.SystemOKYESYESYESUse the configurationjumper to verify thatdownload port wiring iscorrect and doesn’t have anopen, high resistance or ashort. See Section XXX. Didyou find and correct thecondition?NOVerify the correct com port isselected in the PC software. SeeHelp>Contents>PC Setup foradditional information. Did youfind and correct the condition?NOVerify com portavailability (I.E. infrareddevices turned off, PDAapplications turned off,computer has 9 pin serialport. DO NOT connectUSB port. Did you findand correct the condition?NOUse PCDownload Cardto downloaddata.Figure 10 -10. Micro Diagnostic Tree - Cond. 6 - Data Recorder Data Download Problems When UsingReeferManager and a Download Cable. Data File Analysis Problems Using Reports10--19 62-10683
START HEREMake sure the Start/Run-Offswitch is ON or the <strong>micro</strong> isin PC Mode. (See Section 6.1.)Usint either a PC card or computer <strong>with</strong> adownload cable hooked into the serialport/download plug, load current version ofthe software into <strong>micro</strong>. Insert PC cardintothePCcardslotonthe<strong>micro</strong>.What does the MessageCenterdisplay say about the PC Card?“UNKNOWN CARD” “CARD LOCKED -REMOVE CARD”“CARD FULL -REMOVE CARD”MessageCenter hasaddition PC Carderror messages.Doesn’t acknowledgethat a PC Card hasbeen inserted..PC Card may bedefective. Try adifferent card. Didyoufindandcorrect condition?NOIfyouhavetried2ormore PC cards on oneparticular <strong>micro</strong>, takethose same suspectPC cards and trythem on another <strong>micro</strong>.If the cards functionproperly on thesecond <strong>micro</strong>, itproves the first <strong>micro</strong>is not reading thePC cards properly.Is the <strong>micro</strong> at fault?NOThecard“WriteProtect”switch is ON. Unlock PCCard by sliding “WriteProtect” switch to the“OFF” position & re-insertthe card. Operate thesystem in order to verifythe repair.YES(MPR Code #4)Download card has nomore empty memoryspace. UseReeferManagerto extract downloadeddata & then erasecard. Operate thesystem inorder to verify therepair.SystemOKYESReplace <strong>micro</strong> and operatesystem in order to verifyrepair. Did you find andcorrect the condition?YESSee Section 7.1 for alist of MessageCentererror messages. Findyour specific errormessage and followthe directions in thedescription column.Repair as needed.Operate the system inorder to verify therepair.YESPC Card is not seatedproperly. Remove cardfrom slot, wait 10seconds & re-insertcard. Did you find andcorrect the condition?PC card slot may bedefective. Turn power off andverify status light is notblinking. Check for bent pinsin the card slot & straightenas needed. Did you find andcorrect the condition?NONOMicro is not thefault.NOMicro is not thefault. Remove new<strong>micro</strong> & re-install old<strong>micro</strong>.YES(MPR Code #4)Are pins unable tobe straightened orpins broken?Review the test results<strong>with</strong> your supervisor. Ifnecessary, go to thebeginning of the tableand test again.NOFigure 10 -11. Microprocessor Diagnostic Tree - PC Card Problems62-1068310--20
START HEREAre you trying to load any version ofsoftware that is older than 04.00.00?YESDoes the MessageCenter say“OLD SOFTWARE: CANNOT LOAD”?YESNOInsert the PC Card into the PC Card slot onthe front of the <strong>micro</strong>. Be certain that theinstructions label on the download card isfacing the “Caution” label on the <strong>micro</strong>. Donot force the card into the slot. Handle thecard from the edges. Did you find andcorrect the condition?NODoes the MessageCenter acknowledge aprogram card was nstalled by displaying“OLD SOFTWARE,” “NEW SOFTWARE”or “SAME SOFTWARE”?YESNONOYESOnce 04.00 is installed into the <strong>micro</strong>, it is nolonger possible to load any version of 03 orprevious software. Newer versions can beloaded as released. If loading 04.00 or 04.02and the <strong>micro</strong> has 03.xx or previoius software,incrementally upgrade the software. SeeBulletin SER04-47 for instructions.Verify you are using a Progra PC card and notanother PC card. Did you find and correct thecondition?NOOnce the unit shuts down to begin thesoftware installation process, the suctionmodulation valve closing process begins. Thesoftware installation processes will not beginuntil the CSMV is completely closed, whichwill delay the actual process for about 45seconds. Did you find and correct thecondition?YESSystem OKYESCan the card be read by theReeferManager program?NOSystem OKYESNOMicro display will show“ENGINE AND MICRO WILLSTOP NOW” and engine willstop. Did you find and correctthe condition?YESPlace card backinto the <strong>micro</strong> andtry again. Did thissolve the problem?YESNOPossibledefectivePC card. Retryoperation <strong>with</strong>another card.NOSystem OKYESThe display will show “ INSTALLING PROGRAM SOFTWARE.”Make sure you wait until the display shows “INSTALLL COMPLETE”before removing card. Did you find and correct the condition?Using the ReeferManagerProgram, install Programcard into computer andre-install the correct .bex file.YESNODoes MessageCenter display “CARD DATA CORRUPT - CANNOT LOAD”?NOSoftware has finishedloading.YESIs the card status LED on solid?NOIs the card status LED flashing 1/2second on and 1/2 second off?NOYESHas the card statusLED been illuminated formore than 5 minutes?NOYESThere is a problem loadingthe software. Turn unitStart/Run-Off switchoff. Remove the Programcard and try again.Micro does ot recognize the card. Try anotherprogram card, or use MicroProgrammer.Wait at least 5 minutes.Figure 10 -12. Micro Diagnostic Tree - Cond. 8 - Programming Problems With PC Cards10--21 62-10683
START HEREAre you trying to load any version ofsoftware that is older than 04.00.00?NOYESOnly MicroProgrammer version 3.14 is to be used toproperly install 04.00.00 and later software. Earlierversions of MicroProgrammer should be discarded.MicroProgrammer only runs on Windows 95/98. It willnot run on Windows 2000 or XP. Are you usingversion 3.14 on a Windows 95/98 machine?YESDid you find andcorrect the condition?NODoes the MessageCenter say“OLD SOFTWARE: CANNOTLOAD”?NONONONOYESObtain MicroProgrammer 3.14 and Windows95/98 for software installation.Did you find and correct the condition?When downloading <strong>with</strong> a cable, make sure cableconnections are secure and tight. Turn off all screensavers and power saver options on the laptop. Theseoptions can interfere <strong>with</strong> software download. Did youfind and correct the condition?YESOnce 04.00 is installed into the <strong>micro</strong>, its no longer possible to load any versionof 03 or previous software. Newerversions can be loaded as released. Ifloading 04.00 or 04.02 and the <strong>micro</strong>has 03.xx or previoius software,incrementally upgrade the software.See Bulletin SER04-47 for instructions.YESSystem OKYESMake sure you are not using USB or 9-pin adapters on thecomputer. Did you find and correct the condition?YESSystem OKTry again usinga good cable.NOCheck the integrity ofthe download cable. IsthecableOK?YESYESYESNONODid the MicroProgrammer program launchproperly on your computer?When you loaded the problem file,does it say “FILE VALID” on thebottom of the screen?The PROGRAM MICRO button is notactive. Click on the button. Is thesoftware loading?Did you get a“Communication Error”message?NONONOYESProblem is <strong>with</strong>computer. Try loadingsoftware<strong>with</strong>another computer.Verify you are loading acorrect . BEX file for theAdvance <strong>micro</strong>. Are youloading the correct file?Is the PercentCompleteincreasing?YESNOYESNOYESLoad the correctfile and try again.Close MicroProgrammerand start over again ORuse Program PC card.Did you achieve100% download?YESYESProblem is <strong>with</strong>computer. Tryloading software<strong>with</strong> anothercomputer.YESNOCheck download port on unit. (Plugin jumper and see if you can put<strong>micro</strong> into configuration mode.)Will <strong>micro</strong> go into configuration mode?NORepair faulty wiring or damageddownload port. Did you find andcorrect the condition?YESNOYESMake sure you wait at least 5 minutes forsoftware to load. If you waited the 5 minutes,turn the unit off for 30 seconds. Exit out ofthe MicroProgrammer. Turn unit back on.YESRestart MicroProgrammer and try again.If you are at this table for a second time,program <strong>micro</strong> using Program PC card.YESFigure 10 -13. Micro Diagnostic Tree - Cond. 9 - Programming Problems With MicroProgrammer62-1068310--22
10.5 Compressor Troubleshooting GuideThe purpose of the following procedure is to provide a logical and systematic method of determining whether 06Dcompressor repair or replacement is required.A. Checkout Procedure For Determining If Compressor Repair Or Replacement Is RequiredCertain operating conditions or refrigeration system components may be misdiagnosed and subsequently lead to thedetermination that the compressor is bad. These conditions or components must be checked prior to replacing acompressor and must be checked after a replacement compressor is installed to prevent replacement compressordamage.1. Check refrigerant level per Section 9.11.4.2. Ensure that the compressor crankshaft is turning and that the compressor drive gears are in good condition.3. Install gauges on the suction and discharge service valves. A separate gauge should be connected to the unit liquidline king valve in order to determine pressures in other steps.4. Check unloaders as follows:a. With the unit operating in high speed cool, check the status of the front and rear cylinder unloaders. The <strong>micro</strong>processorenergizes the unloaders independently, based on suction pressure. If one or both unloaders are energized,unplug or disconnect the power source separately for the front and rear unloaders.b. Using a separate 12V power source energize and de--energize each unloader separately. Note the suction pressurechange as each unloader is energized or de--energized. Both unloaders should show a rise in suction pressurerise of 3 to 6 PSIG (0.2 to 0.4 bar) when energized and a drop of 3 to 6 PSIG when de--energized. If little or no changeis noticed for either unloader, the cylinder head(s) must be removed for further inspection. See Section B. for inspectionprocedure.5. Perform unit pumpdown per Section NO TAG:a. Shut the unit off and observe the suction, discharge, and receiver pressure. Receiver pressure should drop veryslowly, and suction and discharge pressure will slowly equalize to <strong>with</strong>in a nominal saturated pressure range. Referto the refrigerant pressure temperature chart in Table 9-9 for pressures corresponding to approximate ambient temperatures.Remember, the engine compartment temperatures are generally higher than actual ambient air temperatures.A fast reading digital thermometer such as 07--00269 is helpful in determining ambient temperatures.NOTEThe amount of time required to pump the unit down to 0 PSIG is not by itself an indicator that the compressoris bad. A longer than normal pumpdown time necessitates additional checks to determine the cause.b. If the suction, discharge, and receiver pressures do not rapidly equalize SV4, discharge and bypass check valvesare in good condition. Further compressor evaluation can only be done by following the compressor inspection procedure(Section B.)c. If the suction, discharge, and receiver pressures equalize above saturated pressure, SV4, discharge and bypasscheck valves must be checked before determining whether further compressor inspection is required6. To determine the cause of suction, discharge, and receiver pressure equalization, start the unit <strong>with</strong> the king valveclosed and slowly close the suction service valve until suction pressure reaches 0 psig/bar. Turn the unit off andopen the hand valves between the suction and discharge gauges.a. If the pressures equalize to above saturated pressure, the discharge check valve is not holding and must be repaired.Once the discharge check valve is repaired the compressor must be inspected further. (Section B.)a. If the pressures do not equalize, the SV4 or bypass check valve must be repaired. Any repair of these valves alsorequires further inspection of the compressor. (Section B.)7. if all refrigeration system components check out, it will be necessary to follow the compressor inspection procedure.(Section B.)10--23 62-10683
B. Compressor Inspection ProcedureNOTEOnly conduct this procedure after running Pretrip.The system must be OFF during the following procedure.1. Refrigerant Recoverya. Close (frontseat) the suction and discharge service valves.b. Reclaim the refrigerant by using an approved refrigerant recovery machine, and reduce the compressor pressureto 0 PSIG. (Refer to Section NO TAG.)NOTETo avoid damage to the earth’s ozone layer, use a refrigerant recovery system whenever removing refrigerant.When working <strong>with</strong> refrigerants you must comply <strong>with</strong> all local government environmental laws, U.S.A. EPA section608.CAUTIONService mode MUST be used whenever removing refrigerant charge, refrigerant leak checking orevacuating. Refer to Section 6.2.3.When compressor disassembly is required for compressor inspection, disconnect electrical wires inorder to isolate power from compressor.2. Compressor Inspectiona. Start <strong>with</strong> the front cylinder head of the compressor.b. Remove the cylinder head of the compressor and observe the following cautions.CAUTIONLeave two cylinder head bolts loose <strong>with</strong> threads engaged in the crankcase until cylinder head iscompletely loosened to prevent any residual crankcase pressure.c. Remove the valve plate.NOTEDo not pry the valve plate in order to remove it from the crankcase. If necessary, remove 2 bolts from the dischargevalve stop. Remove the valve stop. Using one of the discharge valve stop bolts as a jacking screw, liftthe valve plate from the dowel pins, pushing the head off the crankcase.d. Inspect the parts of the cylinder head and/or the valve plate.1) Inspect cylinder head gaskets for proper alignment and center web blow--out.2) Inspect the discharge valves for loose or damaged valve stops, or any debris that may affect the proper operationof the valves.3) Inspect for broken, cracked, or chipped discharge reeds.4) If applicable, inspect the discharge check valve to ensure the piston moves and contacts the plate.5) Inspect for broken, cracked, or chipped suction valves.6) Inspect the valve plate and the cylinder head for cracks.7) Inspect valve plate gaskets for damage and wear.e. Remove oil in the cylinders on top of the pistons to avoid unnecessary clean up. Inspect the top of the piston fordamage. Check for debris, burned and carbonized oil sludge, or mechanical failure.f. Inspect cylinder bores for excessive wear. Excessive wear for cylinder bores is defined as heavy and unevenscratches, gouges, or chipping of the internal wall of the cylinder, <strong>with</strong> a depth greater than 0.025 inch, which arecaused by foreign objects, other than a normal reciprocating movement of the pistons and piston rings.62-1068310--24
g. Check compressor rotation.1) Unplug the fuel solenoid.2) Rotate the compressor by hand if possible or by using the engine starter to “bump” the compressor.NOTEBumping the compressor means to momentarily energize the starter motor <strong>with</strong>out ignition of the engine.3) All pistons should move freely and smoothly up and down <strong>with</strong>out any inconsistent resistance or seizure.h. Repeat Steps 2.b. thru 2.g. for the center head and the rear head.3. Decision to repair or replacea. The compressor should be REPAIRED if no defects are found, or if the only defects found are in Steps 2.d.1), 4),5) or 6).b. The compressor should be REPLACED if it failed the examination of 2.f., 2.g., 2. h., or has broken dischargevalves.4. Replacement of the compressor.a. Refer to Section 9.12 for compressor replacement procedures.b. Drain and measure the compressor oil, and put it in a plastic bottle. Follow Carrier Transicold instructions for returningthe oil <strong>with</strong> the compressor.5. Repair of the compressor.a. Replace gaskets in addition to all replacement parts.b. The torque required to reassemble the screws of the valve stop on the valve plate is 12 ft lbs (16. 3 Nm)c. Replace a new valve plate or a cylinder head only when it is defective. The torque required for the bolts of the cylinderhead is 35 to 55 ft lbs (40 to 48 Nm)d.The failed compressor may have pumped oil into the system. Do not charge more oil until you install the new compressorand run the unit to determine if oil level is correct.6. A reminder when shipping for warranty credita.When shipping the failed compressor for warranty credit, include the completed field failure diagnostic report andthe bottled oil sample for the purpose of further analysis.7. Electrical testing of the compressor.a.Check current draw of the motor winding <strong>with</strong> a current meter while the motor is running. Each of the 3 legs shoulddraw an equal amount of current <strong>with</strong>in 10%. The rated load current at 460VAC is 17.5 amps for a high efficiency41CFM compressor.b.Check the resistance of each winding while compressor is off and power is isolated and disconnected from anysource. The resistance will be approximately 1ohm and should be equal across all legs.c.Check the resistance to ground from each leg while compressor power is isolated and disconnected from anysource. There should be low resistance to ground, open <strong>with</strong> standard ohmmeter. Because oil and refrigerant fluidsare conductors, the use of a megohmeter may show variations in resistance to ground through the case of the compressorusing higher test voltages.10--25 62-10683
START HEREGone through the system diagnostics.No system or other component defect discovered.The system is OFF.Recover refrigerant.Start the compressor inspection <strong>with</strong>front cylinder head.Next (center or rear)cylinder heads.Remove the cylinder head.Inspect the parts of the head and the valve plate.Inspect pistons.Inspect the cylinder bores.Check the compressor rotation.NODone forallheads?RepairYESReplace or repair the compressor?ReplaceFollow repair procedures.Follow replacement procedures.ENDFigure 10 -14 Compressor Diagnostics62-1068310--26
C. Procedure After Compressor Repair Or Replacement1. Run Pretrip to ensure all refrigeration components function properly.2. In addition, to ensure the repair of the original compressor or the reliability of the replacement compressor, checkthe following:a. Verify proper air switch setting using 07--00177 magnehelic gauge or equal.b. Verify that air switch will initiate defrost by momentarily jumping the air switch contacts.c. Check all switches and sensors for proper operation.3. See Section 9.13 for compressor oil level check procedure4. Perform refrigerant and compressor oil moisture/acid tests per instructions <strong>with</strong> test kits; change oil or reclaim refrigerantas required. Refer to 98--50037 for system cleanup procedures.5. If a compressor failure, such as broken valves, had the possibility of releasing large particles into the system, thedischarge strainer located in the inlet of the discharge check valve should also be removed and inspected.10--27 62-10683
SECTION 11WIRING1PARAGRAPH NUMBERPagePLUGS USED WITH SCHEMATIC 62--10499 REV V (STANDARD ENGINE) ................ 11--1PLUGS USED WITH SCHEMATIC 62--04102 REV -- (ESC ENGINE) ...................... 11--2PLUGS USED WITH SCHEMATIC 62--10300 REV A (ESC ENGINE) ...................... 11--2HC PLUG FOR ALL UNITS ........................................................... 10--3ADVANCE MICRO DISPLAY HARNESS CONNECTIONS ................................ 10--4VOLTAGE TESTS ................................................................... 10--411
SECTION 11WIRINGPlugs used <strong>with</strong> Schematic 62 -10499 Rev V (Standard Engine)1 MP - Natural2 MP - Black3MP -Grey124124124123512351235Component Terminal Component Terminal Component TerminalREMSN1 3 (14) REMS1 3 SATCOM (C) 3DAS 6REMSN2 4 (14) ENRPM 7 (18) (31) SLP (C) 5CSMV--D 8 (19) (20) (32)CDP 5 (16) (30)ORL 8REMS2 13CSP 6 (17) (30) CL 9ENCT 7 (18) ENCLS 15 SV2 11CDT 9 (20) DS 16 UL1 (Front) 12DTT2 10 (21) ENOPS 17 SLP (E) 13ENRPM 18 (7) (31)AAT 11 (22) CSMV--C 19 (8) (20) (32) SATCOM (B) 15CSMV --A 20 (8) (19) (32)RAT 12 (23) HC9 25 SLP (A) 17REMSN1 (SP23) 14 (3) ENOLS 28 FHR (HC--17) 18REMSN2 (SP23) 14 (4) HPS 29 FL 19REMSN3 15 (33)ENRPM 31 (7) (18)CSMV--B 32 (8) (19) (20)DL 20CDP 16 (5) (30)CSP 17 (6) (30)UL2 (Rear) 23ENCT 18 (7) SATCOM (A) 27CDT 20 (9) SLP (B) 29DTT2 (SP11) 21 (10) HL 33AAT 22 (11) SV4 34SAT (SP12) 23 (35) SV1 35RAT (SP12) 23 (12)FLS 26CDP (SPK4) 30 (5) (16)CSP (SPK4) 30 (6) (17)11--1 62-10683
Plugs used <strong>with</strong> Schematic 62 -04102 Rev - and 62 -10300 Rev A (ESCEngine)1 MP - Natural2 MP - Black3MP -Grey124124124123512351235Component Terminal Component Terminal Component TerminalREMSN1 3 (14) REMS1 3 SATCOM (C) 3REMSN2 4 (14)DAS 6CSMV--D 8 (19) (20) (32)SLP (C) 5CDP 5 (16) (30)ORL 8REMS2 13CSP 6 (17) (30) CL 9ENCT 7 (18) ENCLS 15 SV2 11CDT 9 (20) DS 16 UL1 (Front) 12DTT2 10 (21) ENOPS 17 SLP (E) 13ENSCU 18AAT 11 (22) CSMV--C 19 (8) (20) (32) SATCOM (B) 15CSMV --A 20 (8) (19) (32)RAT 12 (23) HC9 25 SLP (A) 17REMSN1 (SP23) 14 (3) ENOLS 28 FHR (HC--17) 18REMSN2 (SP23) 14 (4) HPS 29 FL 19REMSN3 15 (33) CSMV--B 32 (8) (19) (20) DL 20CDP 16 (5) (30)CSP 17 (6) (30)UL2 (Rear) 23ENCT 18 (7) SATCOM (A) 27CDT 20 (9) SLP (B) 29DTT2 (SP11) 21 (10) HL 33AAT 22 (11) SV4 34SAT (SP12) 23 (35) SV1 35RAT (SP12) 23 (12)FLS 26CDP (SPK4) 30 (5) (16)CSP (SPK4) 30 (6) (17)REMSN3 33 (15)EV1 34SAT 35 (23)62-1068311--2
HC Plug For All Units17161815196571814234910111213ComponentTerminal+12vdc Input from SPK3 to Fuel Heater Relay Coil 1+12vdc Output from (MPQC3) to ENSCU--16 2+12vdc Output from transformer to starter motor (SM)2C+12vdc Input unswitched Power from Battery (BTY+)To Main Power In (MPQCI)3+12vdc Output from (MPQC4) to SPK20 4+12vdc Output unswitched to – SPK2 SPK3 5+12vdc Output from J1 jumper to – SPK5 SPK7 6+12vdc Output from Clutch Relay to Clutch (CLH) 7+12vdc Output to Starter Solenoid (SS) 8+12vcd Output to 2MP25 9+12vdc from SROS to J1 jumper * 11*+12vdc Output to Glow Plugs (GP) 14--12vdc Input Ground from Battery (GRD) 15+12vdc Output to Fuel Heater Circuit (FHTS) 16--12vdc Output to Fuel Heater Relay Coil (FHR) 17Unused Teminals: 10, 12, 13, 18 & 19NOTE: Terminal 11 used only <strong>with</strong> units <strong>with</strong> J--1 Jumper11--3 62-10683
ADVANCE MICRO DISPLAY HARNESS CONNECTIONSTest Point Pin Color DescriptionTP14 Pin 1 Black +12 Vdc for Display backlighting and indicator LEDsTP13 Pin 2 White Ground for Backlighting and indicator LEDsTP13 Pin 3 Red Ground for Backlighting and indicator LEDsTP12 Pin 4 Green +5 Vdc for Display processor and LCDTP11 Pin 5 Brown Display groundTP10 Pin 6 Orange TX the serial communications from the control to the displayTP9 Pin 7 Blue RX the serial communications from the display to the controlTP8 Pin 8 Yellow Display groundVOLTAGE TESTS:Negative Test Lead Positive Test Lead Voltage ReadingTP13 TP14 12TP13 TP12 5TP13 TP11 0TP13 TP8 0TP11 TP14 12TP11 TP8 0TP8 TP14 1262-1068311--4
BASED ON DWG 62--10499 REV V
BASED ON DWG 62--10499 REV W
BASED ON DWG 62--11300 REV A10--9--
AAdvance Microprocessor TroubleshootingGuide, 10--13Air Filter Service Procedure , 9--16Air Switch, 9--44Alternator Operation , 2--11Alternator/Regulator, 2--11Ambient Air Temperature Sensor, 2--14Auto Fresh Air Exchange (AFAX), 3--38Automatic Defrost, 3--15IndexCompressor Unloader, 2--12, 9--31Condenser Coil, 9--45Condenser/Subcooler, 2--10Config. and Tech. Test Modes, 6--2Configuration Mode, 6--3Continuous Run Mode, 4--5Continuous Run Operation, 3--11BBelt Tension Gauge, 9--17Blower Wheel And Fanshaft Removal, 9--21Blower Wheel Installation, 9--23CCalibrating Compressor Suction PressureTransducer, 9--37Cargo Protect Mode, 5--5Changing IntelliSets, 3--36Changing Setpoint, 3--8Charging Amps, 3--10Checking for a Defective Glow Plug, 9--17Checking High Pressure Switch , 9--33Checking Superheat , 9--25Clutch Installation, 9--24Clutch Removal, 9--21Component Test Mode, 6--12Compressor, 2--12Compressor Data, 2--26Compressor Discharge Pressure Transducer,2--14, 2--26, 9--35Compressor Discharge TemperatureTransducer,2--14Compressor Oil Level, 9--30Compressor Suction Modulation Valve , 2--14Compressor Suction Modulation Valve(CSMV), 9--41Compressor Suction Pressure Transducer,2--14, 2--26, 9--37Compressor Transducers, 2--14Compressor Troubleshooting Guide, 10--23Cool Mode Operation, 5--2CSMV Control, 5--4CSMV Diagnostics, 9--41DData Ohms And Amps, 2--28Data Recording, 3--33Defrost, 5--8Defrost Air Switch, 9--43, 9--44Defrost Cycle, 9--43Defrost Initiation, 5--8Defrost Temperature Sensor, 2--15Defrost Termination Thermistor , 2--26Defrost Timer, 2--26Display, 2--19Display Bezel Assembly, 6--27Display Bezel Assembly Installation, 6--27Door Latch Maintenance, 9--10Door Switches & Remote Switches, 2--23,2--24Download Port, 6--1Downloading Data With The PC Card, 6--16Drive Gear, 9--47Index --1 62--10683
EElectronic Modules, 2--22Electronic Speed Control, 9--16Emergency CSMV repair procedures, 9--43Engine, 2--10Engine Air Filter, 9--16Engine Air Filter Inspection, 9--16Engine Air System, 2--26Engine Coolant Level Sensor, 2--10Engine Coolant Temperature, 3--10Engine Coolant Temperature Sensor, 2--10Engine Cooling System, 9--12Engine Crankcase Breather, 9--17Engine Cranking, 4--1Engine Data, 2--25Engine Oil, 2--25, 9--14Engine Oil Level Switch, 2--10Engine Oil Pressure Switch, 2--10Engine RPM Sensor , 2--10Engine Screw Thread, 2--26Engine Sensors, 2--10Engine Speed Control Unit, 2--10Engine Speed Operation , 5--8Engine To Gearbox V-Belt, 9--20Engine Transducers, 2--10Evaporator Coil, 2--14, 9--44Evaporator Sensors, 2--15Evaporator Transducers, 2--15Events , 3--33Expansion Valve, 9--24IndexFusible Plug, 2--26GGearbox Oil, 2--26Gearbox To Fan Shaft V--Belt, 9--19Glow Plugs, 9--17Grille Insert Removal, 9--8HHeat Exchanger, 2--14Heat Mode Operation , 5--2Heat/Cool/Null Switching Operation, 5--3Heating Cycle, 9--43High Ambient Defrost Operation, 5--10High Ambient Defrost Termination Sequence,5--10, 5--11High Pressure Cutout Switch, 9--33High Pressure Switch, 2--26, 9--33IFFailed To Start -- Auto Mode, 4--5Fanshaft, 9--21Fanshaft Installation, 9--22Fanshaft Oil, 2--26Filter Drier, 2--13Filter--Drier, 9--33FreshProtect, 5--5Fuel and Speed Actuator, 2--10Fuel Level Sensor, 9--13Functional Change (Parameters), 3--2562--10683Index --2Indicator LEDs, 2--19, 3--33Installing New Software, 6--17Integral Voltage Regulator Operation (12VDC) , 2--11IntelliSet, 3--35KKey Descriptions, 2--20
LLanguage Selection, 3--31LIGHT BAR, 2--22, 9--43Light Bar Operation and Test, 9--43Lube Oil And Flow Diagrams, 9--14Lube Oil Filter, 9--14Lube Oil Flow Diagram, 9--15Lubrication System, 2--25IndexPPC Mode, 6--1PC Support Software, 6--14Perishable Set Point Ranges, 5--1Pretrip, 3--4Pretrip Inspection, 9--4Priming Fuel System, 9--11ProductShield, 5--14Pulldown / Pull--up Mode, 5--2Pulsed Null Mode Operation, 5--4MMaintenance Schedule, 9--1Manual Defrost, 3--15Manual Start -- Glow & Crank, 3--2Max Operating Pressureoverride, 5--19Measuring Superheat , 9--25MessageCenter, 2--20MessageCenter , 7--1Microprocessor Replacement, 6--22Microprocessor Sensor Checkout, 9--45NNormal Defrost Operation, 5--9Normal Defrost Termination, 5--9Normal Defrost Termination Sequence, 5--9Null Mode Operation, 5--4OOil Filter, 9--14RRe--Setting PM Hourmeters, 6--20Receiver, 2--13Receiver Fuse Plug Setting, 2--26Receiver Sight Glass, 9--38ReeferManager, 6--14Refrigerant Circuit -- Cooling, 2--29Refrigerant Circuit -- Heating & Defrosting,2--30<strong>Refrigeration</strong> System Data , 2--26Remote Switches, 2--23Remove Jumper Mode, 6--2REPLACING CHECK VALVE , 9--32Replacing Compressor Discharge PressureTransducer, 9--36Replacing Compressor Suction PressureTransducer , 9--37Replacing Display Bezel Assembly, 6--27Replacing Expansion Valve & Screen , 9--24Replacing SV1 Internal Components, 9--40Replacing SV2/SV4 internal parts , 9--38Replacing the Compressor, 9--28Replacing The CSMV Power Head, 9--42Replacing the SV1 Coil , 9--39Replacing the SV2/SV4 Coil , 9--38Replacing Unloader Valve Internal Parts,9--31Restart Voltage, 3--10Return Air Temperature Sensor, 2--15RPM Sensor, 9--13Running Modes, 4--3Index --3 62--10683
SSafety Decals, 1--5Safety Devices, 2--27Safety Precautions, 1--1Sensor Checkout, 9--45Serial Number Cut--Offs, 9--15, 9--16Service Mode, 6--13Servicing Check Valve, 9--32Servicing Fuel Pump, 9--12Servicing Glow Plugs, 9--17Servicing Solenoid Valves , 9--38Servicing the Speed Control Solenoid andLinkage, 9--15Sleep Mode On, 3--12, 3--13Solenoid Valve SV1 Checkout, 9--39Sortware Version Numbers, 6--17Speed Control Overrides, 4--6Speed Control Solenoid And Linkage, 9--15Start--Run/Off Switch, 2--20Start--Stop Indicator, 4--4Start--Stop Mode, 4--3Start--Stop Mode Cycle Off Conditions, 4--3Start--Stop Mode Cycle On Conditions, 4--4Start--Stop Operation, 3--9Starting Unit -- Auto, 3--1Stopping Unit, 3--32Suction MOP (Cool Only), 5--19Suction Pressure Operation , 5--20Supply Air Temperature Sensor , 2--15Surround Removal, 9--9SV1 , 9--39SV1 Operation (Defrost Only), 5--11SV2 Operation (Heating and Defrost), 5--11SV2/SV4, 9--38Switch Descriptions, 2--20IndexTTemperature Range Lock 1 & 2, 5--12Testing Compressor Suction Pressure Transducer,9--37Testing The Defrost Air Switch, 9--43Thermal Expansion Valve, 2--14Thermostatic Expansion Valve, 9--24Trip Start, 3--16Troubleshooting, 8--1Troubleshooting Software Loading, 6--19Two--Way Remote Communication, 3--37UUltraFreeze Offset, 5--4UltraFreeze Start/Stop, 5--4UltraFresh 3 Temperature Control , 5--3, 5--4Unidrive torque Requirements, 9--47Unit Data, 3--20Unit Startup -- Engine/Road and ElectricStandby, 3--3Unloader, 9--31Unloader Checkout Procedure, 9--31Unloader Control Operation, 5--11Unloader Control Overrides, 5--18Using ReeferManager to Install Software,6--19Using The DataShare Program PC Card,6--18VV--Belts, 9--17Variable Glow Time, 4--1View Active Alarms, 3--17View Hourmeters, 3--24View Inactive Alarms, 3--18WWater Pump V-- Belt, 9-- 1862--10683Index --4
North AmericaCarrier Transicold700 Olympic DriveAthens, GA 30601 USATel: 1 -706 -357 -7223Fax: 1 -706 -355 -5435Central Americaand MexicoEjercito Nacional No. 418Piso 9, Torre YumalCol. Chapultepec Morales11570 Mexico, D.F.Tel: (5255) 9126.0300Fax: (5255) 9126.0373Carrier Transicold Division,Carrier CorporationTruck/Trailer Products GroupP.O. Box 4805Syracuse, N.Y. 13221 U.S Awww.carrier.transicold.comA member of the United Technologies Corporation family. Stock symbol UTX©2009 Carrier Corporation D Printed in U. S. A. 1009