Untitled - Uhlenbrock
Untitled - Uhlenbrock
Untitled - Uhlenbrock

You also want an ePaper? Increase the reach of your titles
YUMPU automatically turns print PDFs into web optimized ePapers that Google loves.
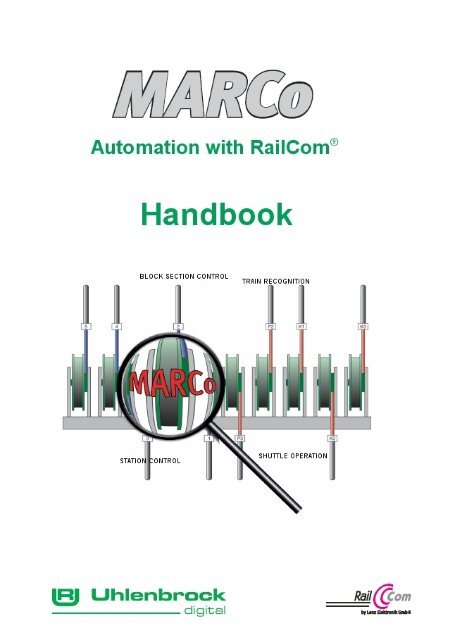
Table of Contents3MARCo1. MARCo – Modular Automation with RailCom ® ....................................51.1 MARCo does this on a digital layout: ......................................................................... 51.2 How MARCo operates .................................................................................................. 62. Quick Installation....................................................................................72.1 Installation of a MARCo transmitter 68 320................................................................ 72.2 Installation of MARCo-Receiver 68 500 ...................................................................... 82.3 First test drive ............................................................................................................... 93. MARCo transmitter ...............................................................................103.1 Technical Specification.............................................................................................. 103.2 Installation and Connection....................................................................................... 103.2.1 Connecting the LISSY Mini-transmitter 68400 ..................................................... 103.3 Programming and Reading........................................................................................ 113.4 Train categories .......................................................................................................... 124. MARCo-Receiver...................................................................................134.1 Technical Specification.............................................................................................. 134.2 Installation of MARCo-Receivers 68 500 .................................................................. 134.2.1 Connecting the MARCo-Receivers ...................................................................... 134.2.2 Installing the MARCo-Receivers .......................................................................... 144.3 Connection the MARCo-Receiver to the LocoNet ................................................... 144.4 MARCo-Receiver Programming ................................................................................ 154.4.1 Programming with the Intellibox (650, 65000, 65050).......................................... 154.4.1.1 Selecting a MARCo-Receiver .................................................................. 154.4.1.2 Programming and Reading...................................................................... 154.4.1.3 Universal address.............................................................................................. 174.4.2 Programming with an Intellibox II (65100)............................................................ 184.4.2.1 MARCo-Receiver selection...................................................................... 184.4.2.2 Programming and Reading...................................................................... 194.4.2.3 Universal Address.................................................................................... 204.4.3 Programming with the LISSY/MARCo Creator Program...................................... 225. MARCo receiver's basic functions......................................................235.1 Receiver address ........................................................................................................ 235.2 Selection of the different functions .......................................................................... 236. First applications ..................................................................................246.1 To switch a turnout..................................................................................................... 246.2 Setting up a Shuttle train terminus ........................................................................... 257. Functions...............................................................................................277.1 Preparation of the MARCo receiver .......................................................................... 277.1.1 Deletion of old programming ................................................................................ 277.1.2 Programming table preparation............................................................................ 277.2 Basic functions ........................................................................................................... 277.2.1 Reporting train number and category................................................................... 287.2.2 Reporting the direction ......................................................................................... 287.3 Switching operation.................................................................................................... 297.3.1 General instruction description............................................................................. 307.3.2 Priorities in processing instructions ...................................................................... 307.3.3 Switching Locomotive auxiliary functions ............................................................. 327.3.4 Speed changes .................................................................................................... 357.3.5 Solenoid and route switching ............................................................................... 387.4 Automatic System....................................................................................................... 417.4.1 Basic Function Time controlled Shuttle traffic ...................................................... 417.4.2 Basic operation Shuttle traffic manually started ................................................... 43
MARCo1. MARCo – Modular Automation with RailCom ®Finally, your digital layout can have all the things that have been possible onanalogue layouts for a long time. MARCo fulfils the demands of railway modellers,who wanted to have simple automatic control of their layout, with block systems andauto-reversing, a digital system which up till now needed the aide of a computer.1.1 MARCo does this on a digital layout:MARCO consists of an Infrared sender, which is installed under a vehicle, and one receivermodule with its two Infrared detectors built into the track. The locomotive address, traincategory, speed and travel direction are detected by the infrared receiver and conveyed viathe LocoNet. Additionally, without the use of a computer, some automatic control functionsare possible.• Train recognitionMARCo recognizes the locomotive and indicates which train has pulled into a track at thestation.• Shuttle train controlMARCo steers a shuttle train into the terminus of a single-railed branch line.• Locomotive-dependent shadow-station controlMARCo administers your shadow-station, finds an independent track for each individualtrain and if necessary automatically dispatches it again from the shadow-station.• Digital Block controlMARCo is a new style of block system for digital layouts and controls the blocks on thelayout automatically, without the necessity of a computer.• Holding PointMARCo stops the train at a station on the branch line and allows it to drive on after aconfigurable time.• Starting and brake delay at signalsMARCo brakes and stops each digital locomotive at a red signal, with the decoder’s internalbrake.• Automatic control of locomotive auxiliary functionsMARCo switches on the situation-dependent sound of locomotives, e.g. the whistle beforeentering a tunnel or the horn at a level crossing. MARCo turns OFF the sound oflocomotives equipped with “IntelliSound” while they travel in invisible areas (shadow-station,tunnel).• Locomotive-dependent switching from solenoids and routesMARCo switches the light of a particular locomotive ON or OFF after a specified time, e.g.if the engine driver has turned the locomotive OFF• Locomotive-dependent Speed influenceMARCo controls the speed of locomotives, e.g. on entry to a station or along slow sectionsof track• Programming of decoder CVsMARCo can read and program CVs of RailCom capable locomotive decoders and RailComtransmitters, while they are running on the main line.5
1.2 How MARCo operatesMARCoMARCo is an automation system, based on the RailCom ® Technology, which represents a bidirectionalfeedback system. Simply stated, the locomotive sends its address to the track andin return receives new driving instructions from the track. The information is thereforetransferred from locomotive to the track. A detector which can receive this information isconnected to the track Gleis. So that the information can be transferred, the digital signal andthe booster must allow a corresponding gap in the DCC digital signal (e.g. Power 4, Part No.63240). This gap is known as “Cutout”. If the detector has received the information, it ispassed to the MARCo-Receiver. The MARCo-Receiver reacts with its programming and thensends, e.g. new locomotive instructions across the LocoNet to the Intellibox. The center putsthe instructions into a DCC signal and then sends it to the locomotive decoder via the track,which then controls the locomotive with the new information.The RailCom Technology functions exclusively with the DCC data format.The locomotive information is sent from a RailCom transmitter or a RailCom capablelocomotive decoder. The RailCom transmitter is described in the MARCo system as MARCotransmitter. This MARCo transmitter in a vehicle is contacted via a digital address like alocomotive decoder. The address is sent via the track to the MARCo receiver.The MARCo-Receiver can have different instructions to change speeds, to switch locomotivefunctions (e.g. Sound) or to switch from turnouts, signals or entire routes, that are stored in theIntellibox. The instructions are implemented or not, depending upon the recognized address.Furthermore, the MARCo-Receiver can switch routes in the IB-Switch, or control a PCprogram, through track occupation reporting. The MARCo-Receiver recognizes a locomotive’saddress, and scans all stored instructions to determine if there is one to do for that address.Since the MARCo receivers can be installed anywhere in the vehicle, i.e. not centrally located,it forms a modular assembly. This has given the system its Name: Modular Automatic forRailCom - MARCo.The MARCo-Receiver can also be set up for different kinds of complex automatic operations,e.g. shuttle-track or Block-section. In this instance it implements functions without beingprogrammed for a special vehicle. Thus it becomes a terminus for shuttle trains, which stopand after a waiting period, pull out again in the opposite direction, independent of the train’saddress. It is also suitable for monitoring or setting of signals. In a section block all trains willdrive through on a green signal, stop on a red signal.Each MARCo-Receiver has a clear receiver address (base address). It can be identified bythis address by the Intellibox at any time. It is also possible to read or reprogram this address.6
2. Quick InstallationMARCoThe following steps explain how you can very simply fit your MARCo transmitter and MARCo-Receiver and obtain your first results. Preferably these steps are carried out with the help of asmall test track, which is separate from the layout.IMPORTANT! Read through the manual step by step to familiarize yourself with all functionsand capabilities of the MARCo system. After each section work through the small example, inorder to complete your understanding of the operation of MARCo.Conditions:In order to work through the examples listed in the following section, you need thefollowing:• Intellibox with Transformer e.g. 70VA transformer Part No. 20 075• Power 4 Part No. 63240 with Transformer e.g. 70VA transformer Part No. 20 075• MARCo set consisting of two MARCo transmitters 68 320, a MARCo-Receiver 68 500 and aLocoNet cabME2.15 m.• DCC Locomotive decoderNOTE• You can work through the examples with any Intellibox without problems. However, shouldyou wish to program your MARCo-Receivers later, you will need an Intellibox (from firmwareversion 1.3) or Intellibox-Basic or IB-Com, or Intellibox II (recommend from System softwareversion 1.011-1.011).• You will find the version of the Intellibox system firmware in the basic menu under softwareversion. Firmware updates are available for download from our InterNet site -www.uhlenbrock.de2.1 Installation of a MARCo transmitter 68 320Attach the MARCo transmitter to the digitalized DCC locomotive with the enclosed doublesidedtape. Take care that no short circuit occurs between the transmitter and chassis. If youdo not have space under a locomotive for the MARCo transmitter (particularly in N gauge) theMARCo transmitter can be mounted under a wagon, in which case that wagon and locomotivemust be used as a unit.Connect the wires of the MARCO transmitter to the power pickup of your locomotive: the redwire with the right (isolated) pickup of its locomotive, the black wire with the left (non-isolated)pickup.7
2.2 Installation of MARCo-Receiver 68 500MARCoConnection of MARCo-ReceiversEvery MARCo-Receiver is connected to the track output of the RailCom capable Booster (herePower 4). Two track sections can be connected to each MARCo receiver. Isolate the tracksections which are to be monitored from the rest of the layout. Connect the first section in thetravel direction to input Gleis 1 (track 1) and the second to input Gleis 2 (track 2). The lengthand position of the isolated sections depend on the selected function and the type of traffic thereceiver is to control (e.g. acceleration and braking) of your locomotives. A locomotive shouldalways fit completely into the section. If, for example, only simple switching processes are tobe executed, short sections are sufficient. If, on the other hand, precise stopping is to beimplemented (chap. 7.5.2), the first track section must be long enough to allow the locomotivewith the longest braking distance to brake fully before it reaches the second section.Important: Insert the isolation breaks into the side of the track that is connected to the digitalpower’s red wire (3-Rail track, the centre rail). The ‘earth’ wire (brown) remains withoutisolation.Note: If multiple boosters are used then take care to ensure that the chassis connections of allthe transformers are connected together, to ensure trouble free operation.Mounting the MARCo ReceiversMount the MARCo receivers under the layout in proximity to the track sections. For this youposition the MARCo-Receiver under the layout baseboard. Mark the mounting hole of themodule. Turn two round screws (round head ∅2.5 x 10) far into the board so that the notchesin the MARCo-Receiver slide over the screws. Then turn the screws tight.Now connect the track power and track sections, according to the description, to the terminalsof the MARCo receiver.Connect the module to the LocoNet T-Socket of the Intellibox with any LocoNet. Uponcomplete connection the control LED on the MARCo-Receiver will light momentarily.NOTE: With larger distances you must eventually extend the LocoNet cable to the Intellibox.You will find accessories for the LocoNet in our catalogue.8
2.3 First test driveMARCoEach freshly inserted MARCo transmitter has a digital address just like a locomotive. Thepreset address is 3. As the locomotive and the MARCo transmitter must have the sameaddress, place the locomotive on the programming track of the Intellibox and program thelocomotive address with a DCC Programming (DCC byte or register programming).The MARCo-Receiver has the factory set module address of 1 and has two switchingfunctions programs. For each recognized locomotive it switches the front light ON whenrunning in one direction and OFF when running in the other direction. When driving thelocomotive or wagon past the detectors, the control LED of the MARCo-Receiver should lightup briefly.Call up the just programmed locomotive address on the controller and drive the locomotiveinto the first track section: the control LED of the MARCo-Receiver should light up briefly.When driving into the track section, the locomotive’s front light should change state. Itswitches ON when driving from section 1 to section 2 and/or OFF when driving from section 2to section 1. If testing with a wagon (without front lighting), observe the state of the indicatorLED of the "function" key on the Intellibox. It changes when driving into the section.If nothing happens, examine the individual steps of the instructions again:• Did the MARCo-Receiver control LED blink as it was being connected to the LocoNet?• Are the four connections and the LocoNet correctly connected?• Did the control LED blink when the vehicle entered the section?9
3. MARCo transmitterMARCoMARCo infrared transmitters are used for all vehicles that are to perform control functions andin which there are no RailCom capable decoders. They send locomotive addresses ranged 1to 9999. They can also be mounted (e.g. Control wagons) and send the same address as thatin the locomotive in this arrangement.3.1 Technical SpecificationThe MARCo transmitter 68 320 has its own processor and can therefore be installed in anydesired DCC digital locomotive. If a mixed LISSY/MARCo operation is wanted a LISSY Minitransmitter68 400 can be connected to the MARCo transmitter then this sends same addressas the MARCo transmitter.Property 68 330 68 400Dimensions 13.1 x 7.5 x 1.9mm 7 x 5.1 x 1.7mmUsed withAny desired DCC loco decoderLoco decoder with LISSY OutputMARCo transmitterShort address Preset to 3 same as decoder/MARCo addressLong address Preset to 2000 same as decoder/MARCo addressLocomotive addresses 1-9999 1-9999Programmable With DCC centers -3.2 Installation and ConnectionAttach the MARCo transmitter to the underside of the DCC digital locomotive with theenclosed double-sided tape. Ensure that there us no shorting between the transmitter and thechassis. If there is not enough space under a locomotive for the MARCo transmitter(particularly in N gauge) the MARCo transmitter can be mounted in a wagon, in which casethat wagon and locomotive must be used as a unit.Connect the wires from the MARCo transmitter with the power pickups of the locomotive: Thered wire to the right (insulated) of pickup and the black to the left (non-insulated) pickup.3.2.1 Connecting the LISSY Mini-transmitter 68400Connecting the LISSY Mini-transmitter to a locomotive decoder is done according to theinstructions for the particular decoder manual. The LISSY Mini-transmitter 68400 can beconnected to the MARCo transmitter 68320 according the the following diagram.10
3.3 Programming and ReadingMARCoThe MARCo transmitter 68320 can be programmed with the Intellibox, on the programmingtrack in. The MARCo transmitter stores its information exactly like a DCC locomotive decoderin CVs and/or registers as in the following table:CVsLocoCVsMARCO MeaningValueRangeFactorydefault1 116 Short address 0-127 317 117 Long address High byte 192-231 19918 228 Long address Low byte 0-255 20829 129 0=Short address valid, 32=Long address valid 0-32 0Programming of long Addresses without Programming MenuIf the MARCo transmitter is not installed in a locomotive with digital decoder (e.g. in a Wagon),then the long address can not be programmed from the Intellibox Programming. CVs 117 and118 must be calculated and individually programmed.Here is a guide for programming address 2000.• Divide the address value by 256 (2000:256 = 7 remainder 208).• Take the whole number result (7) and add 192.• Enter the result (199) as the value in CV 117 (Factory default).• Enter the remainder (208) as the value in CV 118 (Factory default).• Important: Set CV 129 to 32, so that the decoder uses the long address.TIP: If you do not wish to calculate the values for CVs 117 and 118, then if you have alocomotive with the same address, you can read the values of CVs 17 and 18 in thelocomotive decoder and program them into CVs 117 and 118 of the MARCo transmitter.Important: Set CV 129 to 32, so that the decoder uses the long address.It is also possible to program the the decoder using mainline programming from a digitalcenter while it is driving around. The precise method is carried out according to the manual forthe center.If the MARCo transmitter is installed it is programmed, together with the locomotive, using theCV programming according to the column “Locomotive CVs”.The MARCo transmitter can also be programmed separately from the locomotive, when theCVs are programmed according to the column “CVs MARCo”.ATTENTION: There are some locomotive decoders that also use the CVs from the “CVsMARCo” column but for a totally different purpose. In this case the MARCo transmitter canonly be programmed separately from the locomotive.The MARCo transmitter CVs can also be read with the Intellibox (see Intellibox Handbook). If itis installed in a locomotive with a decoder it is always read together with that decoder. Thiscan lead to error reports especially if the locomotive decoder and MARCo transmitter havedifferent values in the CVs. In this case the locomotive decoder must be disconnected fromthe power pickup, i.e. remove the decoder’s plug from its socket. Reading of the values from aMARCo transmitter is similarly possible.NOTE: For programming the decoder, the vehicle must always be on the Intelliboxprogramming track alone. If a number of vehicles are on the programming track then alllocomotive decoders and MARCo transmitters are programmed the same!11
3.4 Train categoriesMARCoWith the Intellibox II (from Software version 1.011 - 1.011) and the MARCo-Receiver, 15 traincategories can be used. Since the MARCo transmitter does not send train categories, alinking mechanism in the Intellibox II between locomotive address and one of the 15 traincategories is used.Categories are different identifiers with which vehicles can be divided into different groups touse for control on you layout: for example passenger trains, freight trains, express trains,regional trains, special trains.The MARCo-Receiver executes its stored instruction not only depending on recognizedaddresses but also because of individual categories.The categories can be freely selected. Your fantasy is no boundary for this.12
4. MARCo-ReceiverMARCoMARCo receivers are always installed where control functions are required on the layout.The MARCo-Receiver is a high-quality, electronic circuit in a small housing. Do not removeelectronics from the housing, as this could cause damage.4.1 Technical SpecificationAll MARCo-Receivers have an address range of 1 to 4095, are programmable with theIntellibox II, Intellibox I (from Version 1.3), IntelliboxBasic, IB-Com and TwinCenter. Data transfer takesplace via the LocoNet.In every MARCo-Receiver there are two detectors.If the isolated track section, to which the detectorsare connected, are located directly behind eachother (Operating as Double detector), then directiondependent instructions can be programmed into theMARCo Receivers, i.e. the one direction differentinstruction can be execute than in the otherdirection. You also have the possibility to locate thetrack section at different locations on the layout (2 single detectors). So you can program onereceiver for two different locations which then are independent of direction.Property 68 500Dimensions in mm 53 x 50 x 21Address rage 1-4095Automatic operations 12Travel direction independent functionsyesTravel direction dependent functionsyesRailCom detectors 2Switching commands per double detector 30Switching commands per single detector 15Current load on LocoNetapprox. 25mAModule address ex-factory 14.2 Installation of MARCo-Receivers 68 5004.2.1 Connecting the MARCo-ReceiversEvery MARCo-Receiver is first connected to track power from a RailCom capable booster(here Power 4). Two track sections can be connected to each MARCo-Receiver. Isolate themonitored track section from the rest of the layout. Connect the first track section, according todriving direction, to input Gleis 1 (track 1) and the second to input Gleis 2 (track 2). The lengthand position of the isolated sections depend on the selected function and the type of traffic thereceiver is to control (e.g. acceleration and braking) on your locomotives. A locomotive shouldalways fit completely into the section. If, for example, only simple switching processes are tobe executed, short sections are sufficient. If, on the other hand, precise stopping is to beimplemented (chap. 7.5.2), the first track section must be long enough to allow the locomotivewith longest braking distance to brake fully before it reaches the second section.Important: Insert the isolation breaks into the side of the track that is connected to the digitalpower’s red wire. The ‘earth’ wire (brown) remains without isolation.13
MARCoNOTE: If multiple boosters are used take care to ensure that the chassis side of the supplytransformers are coupled so as to perform without interference.4.2.2 Installing the MARCo-ReceiversFasten the MARCo-Receiver in the proximity of the detectors under your layout. Position theMARCo-Receiver under the layout board and mark the mounting holes of the module. Turntwo screws (round head screws Ø 2.5 x 10) so far into the board that they will still push into theslots of the MARCo-Receiver.Now connect the track power and the track sections to the terminals of the MARCo-Receiverin line with the labelling.Connect the module to the Intellibox LocoNet T-Socket with any suitable length LocoNetcable. With correct connection the MARCo-Receiver’s control LED will light up for a shorttime.4.3 Connection the MARCo-Receiver to the LocoNetConnect the enclosed LocoNet cable between the modules with the LocoNet socket on theIntellibox. With larger distances you may need to extend the LocoNet cable to the Intellibox.In our catalogue you will find suitable accessories.When connected correctly the MARCo-Receiver control LED will always light up when avehicle enters a MARCo track section.IMPORTANT: Before installing the MARCo-Receiver it is important to set the decoder toanother address in accordance with Chapter 5. The receiver is factory set to address 1. Ifseveral MARCO receivers are attached to the LocoNet with same address, it will no longer bepossible to access them individually.14
4.4 MARCo-Receiver ProgrammingMARCoAfter installation and connecting, but prior to programming a MARCo Receiver, it is importantto check if it is functioning correctly, and that the Intellibox is able to communicate with it.As described in chapter 4.3, the MARCo-Receiver signals recognition of a vehicle in its sectionby flashing its control LED. If this occurs, the MARCo-Receiver and detectors are connectedcorrectly.To verify correct installation the MARCo-Receiver can perform a few preset instructions.These are factory preset. MARCo receivers switch the front light of any locomotive ‘ON’ whenit passes from detector 1 to detector 2 and in the other direction, from detector 1 to detector 2,Should this be detector 2 to detector 1 ‘OFF’.If you drive a locomotive with a MARCo-transmitter into a track section from the MARCo-Receiver you can test the operation of the MARCo-Receiver, by calling up the locomotive’saddress on the Intellibox, noting the light function. This will be switched on and off.To program a MARCo-Receiver an Intellibox (650, 65000 or 65050 with Software Version from1.3) or Intellibox II (65100, all Software Versions) is required. Information about the Version ofthe system software for the Intellibox (650, 65000 or 65050) is found in the Basic SettingsMenu under Software Version. You can download Software Update from our internet sitewww.uhlenbrock.de at any time.4.4.1 Programming with the Intellibox (650, 65000, 65050)4.4.1.1 Selecting a MARCo-ReceiverProgramming the LocoNet CV's• Ensure that the receiver is correctly connected to the LocoNet.• Press the Intellibox [menu]-key followed by the [mode]-key.• Step through the menu options with the [ ]-key to locate "LocoNet Prog.".• Step into the submenu with the []-key.• Enter the part number of the receiver (here 68 600) and press the [ ]-key.• Enter the address of the receiver (in this case e.g. 1) and press the [ ]-key.The top line will display the part number of the receiver and its address. The lower line willindicate LocoNet CV (in this case "0" as the module address) and its present value (here 1).The cursor will flash under the "0" on the lower line. The top line will remain unchanged duringentire programming period. To confirm that the MARCo-Receiver is communicating correctly,the control LED will flash.4.4.1.2 Programming and ReadingThe MARCo-Receivers are configured with the Intellibox in a similar way to the locomotivedecoders, i.e. by adjusting various configuration variables (CV), e.g. the instructions called upas a MARCo transmitter passes the detectors. In order to differentiate MARCo-Receiver CVsfrom Locomotive decoder CVs, receiver CVs will be referred to as LNCVs, because thereceivers are connect to the LocoNet and not the track.15
MARCoIf the cursor flashes in the LNCV area, the number of your MARCo-Receiver LNCV can beentered. Then press the [ ]-key and the value of the selected LNCV will be read from thereceiver.With the []-key move back to the LNCV number for the next LNCV you wish to configure.Pressing the []-key will take you back to input another receiver address, if a further MARCo-Receiver is to be configured. The [menu]-key will take you out of LocoNet programming modeMethod:• After calling up the desired MARCo-Receiver you see the following display:LNCV 0 (module address) is displayed with value is 1, and the cursor flashes under the 0.• At the cursor position enter the LocoNet–CV number using the numeric keys on theIntellibox, e.g. 2 to select the operating mode• Press the [ ]-key display the value of the LNCV. Value is displayed.• Press the []-key to move to the value.• Enter the desired value for this LNCV, e.g. 23 to select function Block status reporting.• Press the [ ]-key and the changed value is programmed.• Press once []-key to select of another LNCV.• Press twice []-key to select of another MARCo-Receiver.• To terminate programming mode the press the [menu]-key.TIP: As you become accustomed to the Intellibox, numerical values at the cursor position canalso be changed by using the [ + ] and [ ] keys to count up or down respectively.NOTE: When programming a MARCo-Receiver all previous programming will be erased frommemory.16
4.4.1.3 Universal addressMARCoAs you saw above, a MARCo-Receiver can only have its configuration read if it is selectedunder its module address (LNCV 0). It can thereby by be differentiated from all other MARCOreceivers on the layout.What if you have forgotten the address of a MARCo-Receiver? In this case the Universaladdress 65535 will help.Procedure• Connect only the MARCo-Receiver with the unknown module address to the LocoNet T-Socket, i.e. without any other MARCo-Receivers.• Press the [menu] key followed by the [mode] key in order to enter the Basic Settings Menu.• With the [ ]-key move to the menu "LocoNet Prog." option• Press the []-key• Input the MARCo-Receiver part number 68 500• Press the [ ]-key• Input of the Universal address 65,535• Press the [ ]-key• The display will indicate LNCV 0 with the programmed module address.This address can now be changed or maintained. The MARCo-Receiver then bereconnected to the layout.17
MARCo4.4.2 Programming with an Intellibox II (65100)4.4.2.1 MARCo-Receiver selection• Press the [mode]-Key, to get to the Main Section menu:• Press the “LocoNet Programming” button:• Press the “Part Number” button, enter the MARCo-Receiver part number 68500 and pressthe Enter key [ ]:• Press the “Module Number” button, enter the MARCo-Receiver’s module number (Factorydefault “1”) and press the Enter key [ ] :18
MARCo• Press the “Prog.mode on” button:• Now the MARCo-Receiver is in programming mode. One of the blue LEDs blinks and youcan program and read the MARCo-Receiver LNCVs.4.4.2.2 Programming and ReadingSimilar to locomotive decoders, MARCo-Receiver programming is done with a variety ofConfiguration variables (CV). To distinguish locomotive decoder CVs from the CVs in theMARCo-Receiver, the latter are known as LocoNet-CVs (LNCV), since they are not connectedto the track, but to the LocoNet in the Intellibox.Method:• After calling up the desired MARCo-Receiver as described in Chapter 4.5.2.1 the followingdisplay appears:• Press the “LNCV” button, enter the number of the desired LocoNet-CV (in this Example “2”)and press the Enter key [ ]. LNCV 2 is read and the value is displayed in last display rowafter “Value” (in the Example Value “1”):19
MARCo• If you with to change the LNCV press the “Value” button, enter the new value (in thisExample “23”) and press the Enter key [ ].• To program the value into the module you must press the “Program” button on the righthand side. The LNCV is now programmed. To verify you can press the “Read” button tocheck if the programming worked.• Further LNCVs can then be programmed, or, by pressing the “Prog.mode off”, the MARCo-Receiver will return to normal operating mode. The blue LEDs switch off.• To leave programming press the “Back” button. You return to the Main Menu and back tothe control panel by pressing the [mode]-Key.4.4.2.3 Universal AddressAs you saw above a MARCo-Receiver can only be read when it is called under its moduleaddress (LNCV 0). That way it can be distinguished from all the other MARCo-Receivers onthe layout.What if you have forgotten the address of a MARCo-Receiver? In this case the universaladdress 65535 will help you.Method:• Connect the MARCo-Receiver with the unknown module address alone, i.e. without anyother MARCo-Receivers, to the Intellibox II LocoNet T-Socket.20
MARCo• Press the [mode]-Key to get into the Main Menu:• Press the “LocoNet Programming” button:• Press the “Part Number”, enter the MARCo-Receiver part number 68500 and press theEnter key [ ]:• Press the “Module Number”, enter the module number 65535 or press the []-Key to the“Broadcast” menu and finally press Enter key [ ]:21
MARCo• Press the “Prog.mode on” button:• In the display the actual module address will be shown (in this example the value 43). Thisaddress can now be changed in LNCV 0 or left as it is. The MARCo-Receiver can then beconnected to the layout again.4.4.3 Programming with the LISSY/MARCo Creator ProgramLISSY/MARCo-Creator is the PC-Program with which you can easily and quickly plan yourlayout with a MARCo-System and program all the MARCo-Receivers with their requiredsettings.With a track plan on hand, the desired automation can be planned. Whether its a shuttle line, aholding point, a shadow station or switching of locomotive functions, all automatic controloperations which the MARCo supports can be implemented in your layout planning with theLISSY/MARCo-Creator.The program also sets up all addresses that are used on your layout for solenoids, feedbacks,MARCo-Receiver, or Routes which are needed, for example, for station control.Routes in the Intellibox (650, 65000, 65050), the Intellibox ® II (65100), IB-Control II (65410)can also be programmed directly with the LISSY/MARCo-Creator. All layout data can besaved and printed.22
5. MARCo receiver's basic functionsMARCoAfter learning how to program and read an individual LNCV, this chapter will acquaint you withsome basic functions and how to adjust these by configuring LNCVs.5.1 Receiver addressThe module address by which the MARCo-Receiver is identified is in LNCV 0. This is also theaddress for the first detector or double detector.LNCV DescriptionValueRangeFactorydefault0 Module address and track 1 address 1-4095 11Address track 2 (2. single detector) for track 2, or as feedback addressused in Automatic functions 4 - 281-4095 2If the detectors are inserted in two independent locations on the layout and used as a doubledetector, then each detector needs its own address, by which it is identified in the systemlater. While track 1 is identified by the module address (first detector address) in LNCV 0,track 2 is identified by the address in LNCV1. In this case the address in LNCV1 is used as adecoder address.When direction dependent automatic functions are to be employed, the second detector isused for direction recognition. The address in LNCV 1 is used as a feedback address to senda ‘vacant’ or ‘occupied’ message.Method:Call up the LocoNet Programming Menu in the Intellibox as outlined in Chapter 4.5 and enterfollowing steps:Step 1: Call up MARCo-Receiver, as in described Chap. 4.5.Step 2: LNCV 0 Value 2 program Set Module address to 2Step 3: LNCV 1 Value 3 program 2. Detector address (Entry Track 2) is set to value 3.Step 4: End programming5.2 Selection of the different functionsLNCVDescription2 Selection of the different functions of the module:0-1 = Basic function1-3 = switching operation4-28 = automatic functions96-99 = delete functionsValueRange0-10,20-26,96-99Factorydefault2Detailed information to the different functions and how they are adjusted are outlined inchapter 7.23
6. First applicationsMARCoIn this chapter we will use 2 examples to demonstrate how easily MARCo can be configuredwith the Intellibox.Before you try the examples out, delete all current LNCV values in the MARCo receiver, byprogramming the LNCV 2 with the value 98.LNCV Description Value2All LNCVs to the value 0 sets, except LNCV 0 and 1 (module and detectoraddress)98Flushing the moduleMethod:Call up the LocoNet Programming Menu in your Intellibox as in Chapter 4.5 and execute thefollowing steps:Step 1: Call up MARCo-Receiver, as in described Chap. 4.5.Step 2: LNCV 2 Value 98 program All LNCV are set to 0, except the module addressStep 3: End programmingAfter this all LNCVs are set to a value 0 and thus no functions are programmed. LNCV 0(module and 1 st detector address) and LNCV 1 (2 nd detector address) are not deleted.6.1 To switch a turnoutFunctionEvery locomotive that drives over the detector is to set turnout 20 to “green/straight”.Install a detector at the location you wish to switch the turnout and attach it to the MARCo-Receiver as follows:Program the LNCVs as indicated in the table:LNCV Description Value28090Switching operation with 2 single detectors in 2 different places of the layout,without direction recognitionAddress the locomotive that is to trigger the switch20000 means that any locomotive can trigger the switchInstruction for switching the solenoid with address 20 into the green/straightposition32000020124
MARCoMethod:Step 1: Call up MARCo-Receiver, as in described Chap. 4.5.Step 2: LNCV 2 Value 98 program All LNCV are set to 0, except the MARCo-Receivermodule addressStep 3: LNCV 2 Value 3 program Set function “2 Single detector without directiondetection”Step 4: LNCV 80 Value program Set “Every locomotive”20000Step 5: LNCV 90 Value 201 program Set solenoid 20 to greenStep 6: End programmingIf the LNCVs 80 and 90 are changed as follows, then only the locomotive with the address 10switches the solenoid with the address 30 to red (round).LNCV Description Value2 Switching operation with 2 single detectors in 2 different places of the layout, 3without direction recognition80 Recognition of locomotive address 10 only to activate the switch 1090 Instruction for switching the solenoid with address 30 into the red/round position 3006.2 Setting up a Shuttle train terminusThe following automation is done with a MARCo receiver:• A locomotive which drives over a double detector from Track 1 to Track 2 is stopped withthe decoder’s internal braking inertia. At the same time the signal with solenoid address 10is switched to “red”.• The locomotive is stationery for 20 seconds• After that the travel direction is changed• The signal with solenoid address 10 is switched to “green”’• The locomotive drives off using the decoder’s acceleration inertia• 5 seconds after the locomotive departed the shuttle terminus is ready for the nextlocomotiveConnect two the track sections as double detector of the MARCo-Receiver at the locationwhere the trains are to reverse.25
MARCoProgram the following LNCVs as indicated in the table:LNCV Description Value2 Set function for shuttle train terminal, with timed departure 44 Waiting time at terminus, 20 seconds 206 Address of exit signal at which the shuttle will wait. In this example the signal that 10is to be switched by the MARCo-Receiver is operated by a solenoid decoder withaddress 1010 Block option: only after 5 seconds after the train has left on a green signal, is thetrack regarded as clear by the MARCo receiver. Only then can a new train enterinto the terminus.5Method:Call up the LocoNet Programming Menu in your Intellibox as described in Chapter 4.5 andexecute the following sequence:Step 1: Call up MARCo-Receiver, as in described Chap. 4.5.Step 2: LNCV 2 Value 98 program Flush MARCo-ReceiverStep 3: LNCV 2 Value 4 program Set function “Shuttle train”Step 4: LNCV 4 Value 20 program Set waiting time in secondsStep 5: LNCV 6 Value 10 program Enter signal address 10Step 6: LNCV 10 Value 5 program Delay in seconds after which the block is ready for thenext trainStep 7: End programmingIf the LNCV 10 is changed as follows, then automatically 10 seconds after the Locomotive’sshuttle train drives off, the signal at address 10 will have its solenoid switched to red.LNCV Description Value10 Block option: 10 seconds after the train has left on a green signal, the MARCo-Receiver will regarded the track as clear. Only then can a new train enter into theterminus. Also the signal will be switched to red.266How to calculate the value 266, to program this operation, is described in chapter 8.5.5"Automatic operation - occupancy detection".NOTE: In order a completely automate a shuttle train two receivers are required, one in eachterminus.26
7. FunctionsMARCoThis chapter concerning the functions of the MARCo-Receiver 68,600 is the most importantchapter in this book. Please read it thoroughly, so you can derive many hours of pleasure fromthe automation of your layout.7.1 Preparation of the MARCo receiverBefore we can start programming, it is important that the MARCo-Receiver be prepared. Asalready learned in the previous chapters the MARCo-Receiver is pre-programmed to facilitatequick testing after installation and connection, to check that everything is functioning correctly.7.1.1 Deletion of old programmingMethod:Call up the LocoNet Programming Menu in your Intellibox as in Chapter 4.5 and execute thefollowing steps:Step 1: Call up MARCo-Receiver, as in described Chap. 4.5.Step 2: LNCV 2 Value 98 program All LNCV are set to 0, except the module addressStep 3: End programmingAfter this all LNCVs are set to a value 0 and thus no functions are programmed. LNCV 0(module and 1 st detector address) and LNCV 1 (2 nd detector address) are not deleted.Further details about the deletion or resetting of the receiver can be found in chapter 7.5.7.7.1.2 Programming table preparationIn the context of programming a MARCo-Receiver we recommend that you record yourprogramming. This avoids having to flush the programming frequently because you haveforgotten which LNCVs have been programmed.In the appendix you can find two examples of programming tables. You can copy the table, sothat can make your own table for every MARCo-Receiver you program.The table is explained in detail in this section7.2 Basic functionsIn the basic function a MARCo-Receiver is to capture a passing locomotive’s address andtrain category. In addition it can, after setting up, also determine the speed and drivingdirection.The data sent to the LocoNet can be in different formats. This can be specified in LNCV 15(module pre-setting). If LNCV 15 is set to 1, the MARCo-Receiver sends data in a format thatcan be used by <strong>Uhlenbrock</strong> LocoNet modules (e.g. LocoNet display 63 450. A value of 2 or 3sends Digitrax compatible data, which some PC control programs also use.LNCV Description0 Module address and address track 11 Address for track 2 (only when using 2 single detectors)2 Basic function0 = locomotive detection using a double detector.determines address, category, driving direction and speed.1 = locomotive detection using 2 single detectors in 2 independent places of the layout.determines address and category15 Selection of the transmission format0 = Don’t send any transmission format (ÜF) to the LocoNet1 = Send ÜF <strong>Uhlenbrock</strong> with Locomotive address2 = Send ÜF Digitrax with Locomotive address and Block status (vacant/occupied)27
7.2.1 Reporting train number and categoryMARCoThe MARCo-Receiver is only there to register locomotive address and train category of apassing train. An individual detector in the track is sufficient for this. One MARCo-Receivermodule can therefore supervise two track sections.For simple train monitoring in two places with a module the following functions must beprogrammed:LNCV Description Value0 Module address and track 1 address 1-40951 Address track 2 (2. Dingle detector) for track 2 1-40952 Read locomotive data from 2 Single detectors for 2 independent locations on thelayout. Output of the address17.2.2 Reporting the directionIf, in addition to the locomotive address, the driving direction is to be reported on the LocoNet,then both detectors must be connected to the monitored section.LNCV Description Value2 0 = locomotive detection using a double detector.0determine address and directionIn addition the following function must be programmed:Driving directionTo report the driving direction, the module must know which of the two detector should bepassed first. Automatic operations, e.g. how long a train should stop for, can be adjusted, byspecifying the active driving.LNCV Description Value3Driving direction, in which the automatic function is active according to LNCV 20 = detection reported when driving direction is from track 1 to track 21 = detection reported when driving direction is from track 2 to track 12801
7.3 Switching operationMARCoAfter a MARCo-Receiver is installed into a layout, you can accomplish a range of diversecontrols. This may be a simple Switching operation (switching turnout before a station, switchlights on at tunnel entrance) and speed instructions (decrease speed in a speed restrictionsection), up to complex operations (terminus of a shuttle-train, section control with signalling).In LNCV 2 you specify the function the MARCo-Receiver is to have.In order to setup a switching operation, program LNCV 2 as follows:LNCV Description Value2 Switching operation with 1 double detector with direction recognition 2LNCV Description Value2 Switching operation with 2 detector without direction recognition 3With switching operation individual instructions in 3 groups can be programmed and called intooperation later:• Switching of special functions (light, telex coupling, smoke, sound, single noises etc..)• Changing speeds (only meaningful with locomotives)• Switching of turnouts, signals or routesEach instruction group has 10 instructions that can be programmed. For Double detectors all10 instructions are available for both detectors. With two single detectors 5 instructions areavailable for each detector.In practice, switching operations apply when processing the functions in the following table:Sequence Function If, then1. Are individual speed instructions to be sent? implement2. Are solenoids, route or occupancy instructions to be sent? implement3. Are individual function instructions to be sent? implement29
7.3.1 General instruction descriptionMARCoFor the programming of switching operation the MARCo-Receiver has LNCVs 20 to 109available. By programming certain combinations of value into these LNCVs you can developexecutable instructions.A complete instruction always consists of three entries:• Vehicle address• Command value• Command optionsVehicle addressesAs addresses the following values can be used:LNCV Description0 No instruction is required to be present1-9999 Locomotive address; should the MARCo-Receiver recognize this address, theprogrammed instruction will be sent to this address by the Intellibox20001-20015Train category: shown in chapter 3.4, can be assigned in MARCo transmitter CV 115.This category value (1-4) becomes part of the vehicle address to be sent. If aninstruction is present for a recognized category, it is implemented for the particularvehicle address.The address 20001 corresponds to the category 1, address 20002 corresponds tocategory 2 etc.20000 Broadcast locomotive address: the programmed instruction is always implemented,independent of Vehicle address or categoryCommand value and command optionThe entries for command value and option depend on whether it is speed, function, orsolenoid instructions. While the address is simply taken from the above table, you also needto determine the numerical value for the command, or command option which is to be used.The advantage of the computed values is that single instructions can operate a number ofitems at the same time, or with a particular command option, different command variants canbe produced. This is explained further in following sections.7.3.2 Priorities in processing instructionsIn the respective groups, the programmed actions are sequentially processed in ascendingorder of LNCV numbers. In each group, instructions can be executed for the recognizedaddress, the recognized category, or broadcast to every vehicle. A specific vehicle can haveseveral instructions programmed.The different address formats have the following priorities:1. Highest priority: Address instructions (addresses 1-9999)2. Middle priority: Category instructions (addresses 20001-20015)3. Lowest priority: Broadcast instructions (address 20000)During the processing of a group of instructions in ascending order, every valid instruction isimmediately implemented. However, lower priority instructions will only be implemented solong as no suitable instruction of higher priority is found for the vehicle. Further instructionswith lower priority after that will not be implemented.Thus if a category instruction is found, further category instructions will be implemented, butbroadcast instructions will not. An address instruction results in further address instructionsbeing implemented, but no further category or broadcast instructions can be implemented.Example 1Locomotive 3 with the train category 1 (address 20001) arrives at the detector. The LNCVentries for the functions are programmed as follows:30
Programming of function instructions31MARCoCommand LNCV ... 0 ... 1 ...,2 ... 3 ... 4 ... 5 ... 6 ... 7 ... 8 ... 9Address 2... 20000 20001 3 20002 103 20001 20000 3 - -Value 3…Option 4…The actions are implemented as follows:Command priority of function for the locomotive address 3 and category 1LNCV Value Instruction Action20 20000 Broadcast Implemented21 20001 category Category match: implemented, but no more broadcast instructions22 3 address Address match: implemented, but no further instructions with lower priority23 20002 category Not implemented, wrong category24 103 address Not implemented, wrong address, but priority matches25 20001 category Category too low: Not implemented26 20000 Broadcast Broadcast not implemented, too low priority27 3 address Address matches: implementedExample 2Locomotive 3 with the train category 1 (address 20001) arrives at the detector. The LNCVentries for speeds are programmed as follows:Programming of speed instructionsSpeed LNCV ... 0 ... 1 ...,2 ... 3 ... 4 ... 5 ... 6 ... 7 ... 8 ... 9Address 5... 20002 20001 3 20000 103 20001 3 - - -Value 6…Option 7…The actions are implemented as follows:Command priority of speed instructions for the locomotive address 3 and category 1LNCV Value Instruction Action50 20002 category Not implemented, wrong category51 20001 category Category match: implemented, but no more broadcast instructions52 3 address Address match: implemented, but no further instructions with lower priority53 20000 broadcast Not implemented, too low priority54 103 address Not implemented, wrong address, but priority matches55 20001 category Category too low: Not implemented56 3 address Address matches: implementedExample 3Locomotive 3 with the train category 1 (address 20001) arrives at the detector. The LNCVentries for solenoid are programmed as follows:Programming of solenoids and route instructionsMA/FS LNCV ... 0 ... 1 ...,2 ... 3 ... 4 ... 5 ... 6 ... 7 ... 8 ... 9Address 8... 3 20002 20000 20001 103 20001 3 - - -Value 9…Option 10…The actions are implemented as follows:Command priority of solenoid instructions for the locomotive address 3 and category 1LNCV Value Instruction Action80 3 address Address match: implemented, but no further instructions with lower priority81 20002 category Not implemented, wrong category82 20000 broadcast Not implemented, too low priority, but priority matches83 20001 category Not implemented, category too low84 103 address Not implemented, wrong address, but priority matches85 20001 category Category too low: Not implemented
86 3 address Address matches: implemented7.3.3 Switching Locomotive auxiliary functionsMARCoThe 10 instructions for auxiliary functions, such as front lighting (f0) or sound and/or otherspecial functions (f1 to f12) are programmed into LNCVs 20 to 49. The following applies:LNCV Description20-29 Address of vehicle to receive the function instructions30-39 Values for function40-49 Options for functionLNCVs belonging to an instruction are always separated by 10. Example: the data for the firstinstruction are in LNCVs 20, 30, 40, those for the second instruction in LNCVs 21, 31, 41 etc..The following table clarifies the basics, each column representing an instruction:Allocation of the LNCVs for function instructionsFor receivers with a double detectordouble detectorFor receivers with two single detectors 1st Detector 2nd DetectorLNCV for the address 20 21 22 23 24 25 26 27 28 29LNCV for the value 30 31 32 33 34 35 36 37 38 39LNCV for the option 40 41 42 43 44 45 46 47 48 49Switch function LNCV 2 = 2 LNCVs for function instructions with double detector.Switch function LNCV 2 = 3 LNCVs for function instructions with 2 single detectors.Values for switching OFF auxiliary functionsIf a locomotive e.g. is to have the light switched ON or OFF, you press [f0]-key or [off]-key onthe Intellibox. Should the decoder have further functions (e.g. Sound decoder: On/Off, whistle,pump, inertia etc.), then these further functions are switched with keys [ f1 ] to [ f4 ] also key[loco # ] as shift key for the functions [ f5 ] to [ f8 ].The MARCo-Receiver can call up functions f0 to f12, provided the locomotive decodersupports them. The meaning of these functions is different from decoder to decoder. Pleasetake note of the operating instructions of your decoder.Programming a function value into the appropriate LNCV does switching of the function. Thefunction values are shown in the following table:Computation of the command value for the change of locomotive special functions (LF)LF F0 F1 F2 F3 F4 F5 F6 F7 F8 F9 F10 F11 F12Value 1 2 4 8 16 32 64 128 256 512 1024 2048 4096SelectionSumCalculatedvalue forLNCV 30-39If several functions are to be switched simultaneously, mark them off in the correspondingcolumn in the "selection" row. Then transfer the numerical values of the selected column fromthe "value" row into the last row. The sum of the values is then programmed into an LNCVwithin the range 30 to 39.ExampleThe light and horn are to be switched on, e.g., before a tunnel. The light is turned by functionf0 ([function] key on the Intellibox) and the horn is, e.g. f2, thus the following example tableresults:Computation of the command value for the change of locomotive special functions (LF)LF F0 F1 F2 F3 F4 F5 F6 F7 F8 F9 F10 F11 F12Value 1 2 4 8 16 32 64 128 256 512 1024 2048 4096Selection x xCalculatedvalue forLNCV 30-39Sum 1 4 5In this example the value 5 must be used as the command value.32
MARCoIt is not possible to turn one function ON and another OFF in the same instruction. For thisseveral instructions must be used.Options for switching of special functionsThe changes to be performed to the special functions are specified in the LNCV for thecommand options. Here you specify if the action is travel direction dependent or not, whetherthe auxiliary function is be switched ON or OFF, or whether the state of the auxiliary function isto be changed. This means, if the function was OFF before passing the detector, it will switchON. If, on the other hand, it was ON, it will switch OFF after passing the detector. Finally theauxiliary function can also, for a defined time, switch ON and after a set time automaticallyswitch OFF again.The following table shows which values specify the various options.Computation of the command option for the change of locomotive special functionsOpt No. Description Selection Value Sum1 Do not evaluate driving direction 0Driving direction from Track1 to track2 2Driving direction from Track2 to track1 32 Switching function 2 or 3 0Automatic operation 4-12, 20-28: on arrival at the detector 0Automatic operation 4-12, 20-28: when driving off 43 Switch auxiliary function off 0Switch auxiliary function on 8Change auxiliary function 164 Auxiliary function timed change 325 Switching duration in seconds (max. 31) * 256 * 2566 Position in the sequence (0-4) * 8192 (see Chap. 7.4.6) * 8192Calculated value for LNCV 40 to 49Setting the time delay for the execution of function instructionsIn the switching operation the function instructions are executed immediately the detectors arepassed. With automatic operation the function can be executed upon arrival at the detector orwhen the locomotive is departing (see chapter 7.4.6).Timed special functionsFor switching On and/or OFF (not for toggling) a timer can be set. After this time theinstruction is reversed, i.e. the opposite Instruction is followed. e.g. there is a sound decoder,with a sound which only occurs when a particular function is switched ON. When switchingthe function OFF nothing happens. By use of the timer can you can without further effort andwithout the necessity for a further MARCo receiver, automatically switch the function off again,so that the vehicle is ready for the next power-on procedure.ExampleThe MARCo-Receiver is programmed according to the following table:Programming of function instructionsCommand LNCV ... 0 ... 1 ...,2 ... 3 ... 4 ... 5 ... 6 ... 7 ... 8 ... 9Address 2... 20000 20002 103Value 3… 33 1 2Option 4… 16 11 4130What do these instructions mean?LNCVs 20, 30 and 40 give the following instruction:With all locomotives (20000 is the locomotive Universal address), in both driving directions,when over-driving the MARCo-Receiver detectors, functions f0 (light) and f5 (smoke) aretoggled.The numerical values for the command in LNCV 30 and the command option in LNCV 40 areshown in the following two tables:33
MARCoComputation of the command value for the change of locomotive special functions (LF)LF F0 F1 F2 F3 F4 F5 F6 F7 F8 F9 F10 F11 F12Value 1 2 4 8 16 32 64 128 256 512 1024 2048 4096Selection x xCalculatedvalue forLNCV 30Sum 1 32 33Computation of the command option for the change of locomotive special functionsOpt No. Description Selection value sum1 Do not evaluate driving direction X 0 0Driving direction from Track1 to track2 2Driving direction from Track2 to track1 32 Switching function 2 or 3 X 0 0Automatic operation 4-12, 20-28: on arrival at the detector 0Automatic operation 4-12, 20-28: when driving off 43 Switch auxiliary function off 0Switch auxiliary function on 8Change auxiliary function X 16 164 Auxiliary function timed change 325 Switching duration in seconds (max. 31) * 256 * 2566 Position in the sequence (0-4) * 8192 (see Chap. 7.4.6) * 8192Calculated value for LNCV 40 16LNCVs 21, 31 and 41 give the following instruction:All category 2 locomotives (i.e. 20002) switch the light ON (f0) when driving in the directionfrom detector 2 to detector 1.The numerical values for the command value in LNCV 31 and the command option in LNCV41 are shown over the following two tables:Computation of the command value for the change of locomotive special functions (LF)LF F0 F1 F2 F3 F4 F5 F6 F7 F8 F9 F10 F11 F12 CalculatedValue 1 2 4 8 16 32 64 128 256 512 1024 2048 4096 value forSelection XLNCV 31Sum 1 1Computation of the command option for the change of locomotive special functionsOpt No. Description Selection Value Sum1 Do not evaluate driving direction 0Driving direction from Track1 to track2 2Driving direction from Track2 to track1 X 3 32 Switching function 2 or 3 X 0 0Automatic operation 4-12, 20-28: on arrival at the detector 0Automatic operation 4-12, 20-28: when driving off 43 Switch auxiliary function off 0Switch auxiliary function on X 8 8Change auxiliary function 164 Auxiliary function timed change 325 Switching duration in seconds (max. 31) * 256 * 2566 Position in the sequence (0-4) * 8192 (see Chap. 7.4.6) * 8192Calculated value for LNCV 41 11LNCVs 22, 32 and 42 give the following instruction:The locomotive address 103 switches f1 (e.g. sound), in driving direction from detector 1 todetector 2. The function is to be switched off again after 16 seconds have elapsed.The numerical values for the command value in LNCV 32 and the command option in LNCV42 arise over the following two tables:34
MARCoComputation of the command value for the change of locomotive special functions (LF)LF F0 F1 F2 F3 F4 F5 F6 F7 F8 F9 F10 F11 F12 CalculatedValue 1 2 4 8 16 32 64 128 256 512 1024 2048 4096 value forSelection XLNCV 32Sum 2 2Computation of the command option for the change of locomotive auxiliary functionsOpt No. Description Selection Value Sum1 Do not evaluate driving direction 0Driving direction from Track1 to track2 X 2 2Driving direction from Track2 to track1 32 Switching function 2 or 3 X 0 0Automatic operation 4-12, 20-28: on arrival at the detector 0Automatic operation 4-12, 20-28: when driving off 43 Switch auxiliary function off X 0 0Switch auxiliary function on 8Change auxiliary function 164 Auxiliary function timed change X 32 325 Switching duration in seconds (max. 31) * 256 X 4096 40966 Position in the sequence (0-4) * 8192 (see Chap. 7.4.6) * 8192Calculated value for LNCV 42 4130NOTE:• If detection of the driving direction is switched off, then setting the driving direction ofdetector 1 to detector 2 or in reverse of detector 2 to detector 1 has no meaning, i.e. drivingdirection need not be programmed.• When using 2 individual detectors in different places of the layout the driving directioncannot be determined. The detection of the driving direction should then be switched off.Method:Call up the LocoNet Programming Menu in your Intellibox as in Chapter 4.5 and execute thefollowing steps:Step 1: Call up MARCo-Receiver, as in described Chap. 4.5.Step 2: LNCV 2 Value 98 program Flush MARCo-ReceiverStep 3: LNCV 20 Value program Set “All locomotive”20000Step 4: LNCV 30 Value 33 program Select functions f0 and f5Step 5: LNCV 40 Value 16 program Change special function without directionRepeat steps 3-5 for LNCV groups 21, 31, 41 – 22, 32, 42 etc.Step 7: End programming7.3.4 Speed changesThe 10 speeds instructions are programmed into LNCVs 50 to 79 as indicated in the followingtable:LNCV Description50-59 Address of Vehicle for the speed change60-69 Value for the speed70-79 Options for changing the speedLNCVs belonging to an instruction are always separated by 10. Example: the data for the firstinstruction are in LNCVs 50, 60, 70, those for the second instruction in LNCVs 51, 61, 71 etc.The following table clarifies the basics, each column represents an instruction:35
Allocation of the LNCVs for speed instructions36MARCoFor receivers with a double detectorDouble detectorFor receivers with two single detectors 1 st Single Detector 2 nd Single DetectorLNCV for the address 50 51 52 53 54 55 56 57 58 59LNCV for the value 60 61 62 63 64 65 66 67 68 69LNCV for the option 70 71 72 73 74 75 76 77 78 79Switch function LNCV 2 = 2 LNCVs for function instructions with double detector.Switch function LNCV 2 = 3 Each of the two single detectors has 5 instructions available.Values for the speedsThe speed of a vehicle can be programmed with absolute values, percentages or in kilometresper hour.Absolute speed, values 0-127The speed is programmed to a particular speed step. The transmitted speed step valuesrange from 0 to 127. Speed step 0 means stopped. Brake application on speed step 0 isimplemented by the locomotive decoder’s internal delay values. Speed step 1 is anemergency stop without any delays. Speed steps 2-127 converted into the max. possiblespeed step range of the Locomotive decoder depending on the respective data format.For locomotive decoders with 128 speed steps, the value entered corresponds to the desiredspeed step. If the locomotive decoder uses a different number of speed steps, then its speedvalue must convert to the range 0-127. To assist, tables for the different data formats arefound in the appendix. As a guide the following equation can be used:desired speed stepabsolute speed = total value{ max. number of steps for the decoder • 126 + 1}ExampleThe decoder has 14 drive positions. The locomotive is to drive with speed step 10.10/14 * 126 + 1 = 1260/14 + 1 = 90 + 1 = 91Therefore, in this instance speed value of 91 would be programmed into the LNCV.Relative speed values 0-255The speed can also be entered as a percentage, relative to the current speed, within the rangeof 0% to 255%. 50% means halving the speed, 200% a speed doubling. The number ofspeed steps of the decoder is irrelevant in this case.Options for speedInstructions for one set of LNCV command options are specified here: i.e. how to program achange of speed. The option value to be programmed is calculated by adding the differentoption priorities. In command options one can select in which direction the speed instruction isto operate, its absolute, or relative velocity value, or a speed in Km/h etc. The following Tableshows all speed options:Computation of the command option for the change of locomotive speedOpt No. Description selection value sum1 Do not evaluate driving direction 0Driving direction from Track1 to track2 2Driving direction from Track2 to track1 32 Switching function 2 or 3 0Automatic operation 4-12, 20-28: on arrival at the detector 0Automatic operation 4-12, 20-28: when driving off 43 Speed specified as absolute value (0-127) 0Speed specified in percent (0-255%) 8Speed specified in Km/h 16Calculated value for LNCV 70 to 79
MARCoExamplesThe MARCo-Receiver is programmed in accordance with the following table:Programming of speed instructionsCommand LNCV ... 0 ... 1 ...,2 ... 3 ... 4 ... 5 ... 6 ... 7 ... 8 ... 9Address 5... 20000 20002Value 6… 80 50Option 7… 0 11What do these instructions mean?LNCVs 50, 60 and 70 give the following instruction:All locomotives (20000 is the Universal address for all locomotives) will be switched to anabsolute of 80 when passing the MARCo-Receiver in either directionThe numerical value for the command option in LNCV 70 is determined from the followingexample table:Computation of the command option for the change of locomotive speedOpt No. Description Selection Value Sum1 Do not evaluate driving direction X 0 0Driving direction from Track1 to track2 2Driving direction from Track2 to track1 32 Switching function 2 or 3 X 0 0Automatic operation 4-12, 20-28: on arrival at the detector 0Automatic operation 4-12, 20-28: when driving off 43 Speed specified as absolute value (0-127) X 0 0Speed specified in percent (0-255%) 8Speed specified in Km/h 16Calculated value for LNCV 70 0LNCVs 51, 61 and 71 give the following instruction:All category 2 locomotives (according to 20002), travelling in direction from detector 2 todetector 1 will have their speed reduced to 50%.The numerical value for the command option in LNCV 71 is computed from the following table:Computation of the command option for the change of locomotive speedOpt No. Description Selection Value Sum1 Do not evaluate driving direction 0Driving direction from Track1 to track2 2Driving direction from Track2 to track1 X 3 32 Switching function 2 or 3 X 0Automatic operation 4-12, 20-28: on arrival at the detector 0Automatic operation 4-12, 20-28: when driving off 43 Speed specified as absolute value (0-127) 0Speed specified in percent (0-255%) X 8 8Speed specified in Km/h 16Calculated value for LNCV 71 11NOTE• If detection of travel direction is turned OFF, then the selection of the travel direction fromtrack 1 to track 2 or in reverse from track 2 to track 1 is meaningless, so travel directionsneed not be programmed.• When using 2 individual detectors in different locations of the layout, detection of traveldirection should be turned OFF.37
38MARCoMethod:Call up the LocoNet Programming Menu in your Intellibox as in Chapter 4.5 and execute thefollowing steps:Step 1: Call up MARCo-Receiver, as in described Chap. 4.5.Step 2: LNCV 2 Value 98 program Flush MARCo-ReceiverStep 3: LNCV 50 Value program Set “All locomotive”20000Step 4: LNCV 60 Value 33 program Select functions f0 and f5Step 5: LNCV 70 Value 0 program Change special function without directionRepeat steps 3-5 for LNCV groups 51, 61, 71 – 52, 62, 72 etc.Step 7: End programming7.3.5 Solenoid and route switchingThe 10 instructions for switching individual solenoids (switches, signals) or entire routes, whichare stored in the Intellibox, are set up in LNCVs 80 to 109. Furthermore feedback commandscan be set up here as well, like the one sent by LocoNet Feedback modules (e.g. 63320 or63330). With the feedback it is possible to set up track routes that have been stored in theIntellibox or and also track lighting in the TrackControl can monitor the feedback. Thisfollowing table applies to this feature:LNCV Description80-89 Address of Vehicle which triggers the instruction90-99 Value for switching the solenoid or sending feedback100-109 Options for the solenoid or feedback functionLNCVs belonging to an instruction are always separated by 10. Example: the data for the firstinstruction are in LNCVs 80, 90, 100, those for the second instruction in LNCVs 81, 91, 101etc. The following table clarifies the basics, each column represents an instruction:Allocation of the LNCVs for solenoid instructionsFor receivers with double detectordouble detectorFor receivers with 2 singledetectors1st Detector2nd DetectorLNCV for the address 80 81 82 83 84 85 86 87 88 89LNCV for the value 90 91 92 93 94 95 96 97 98 99LNCV for the option 100 101 102 103 104 105 106 107 108 109Switch function LNCV 2 = 2 LNCVs for function instructions with double detector. All 10instructions are available for both installed detectors.Switch function LNCV 2 = 3 Each of the installed detectors has 5 function instructionsavailable.Command values for solenoids and/or feedback instructionsWith the Intellibox you can switch 1 to 2000 solenoids. In Keyboard modethe Intellibox always has direct access to 8 solenoids with the 16 centralkeys. Each pair of keys, e.g. Keys 1 and 4, can switch the assigned signalto red (key 1) or green (key 4).This also happens when switching solenoids from the MARCo receiver,only that the LNCVs cannot specify "red" or "green". The MARCo-Receiver represents these as numbers thus: "red"=0, "green"=1. If redkey 1 is pressed, the command means e.g. "set solenoid 1 to red". Hencethe LNCV for this solenoid contains 2 numbers: Solenoid address (1) andThe keys of theNumeric padswitching direction (0). For programming of the command value of the MARCo receiver, theswitching direction and the solenoid address are combined, therefore to set solenoid 1 to red"the instruction value is 10".If the MARCo-Receiver is to deliver a feedback command, you proceed in a similar manner.The feedback address has the number 2 added if the track section is free and the number 3added, if the track section is occupied.
MARCoGenerally: to switch a solenoid to "red" (signal red, turnout round) the solenoid addressnumber 0 is added; to switch a solenoid to "green" (signal green, turnout straight) the solenoidaddress number 1 is added.Sending a feedback with the condition is done the same way. For "vacant" add the number 2to the feedback address, or for "occupied" add the number 3 to the feedback address.A few examples: the command value 431 switches the solenoid 43 to green/straight, thecommand value 4560 switches the solenoid 456 to red/round. The command value 2002sends feedback for the address 200 with the condition "free", whereas the Command value5913 sends a feedback for the address 591 with the condition "occupied".Commands for RoutesBesides switching individual solenoids, track routes can be implemented. You can switchroutes with solenoid commands when using the Intellibox and using feedback commands toswitch the routes using the Intellibox or IB-Switch.To decide which command values to use in order to activate routes in the Intellibox, refer tothe following table:Translation between the route number of the Intellibox and the command valueprogrammed in a MARCo receiverGroup 1 Group 2 Group 3RouteSolenoid Add MARCO RouteSolenoid Add MARCO RouteSolenoid Add MARCONo.value No.value No.value1 2001-red 20010 1 2009-red 20090 1 2017-red 201702 2001- green 20011 2 2009- green 20091 2 2017- green 201713 2002-red 20020 3 2010-red 20100 3 2018-red 201804 2002- green 20021 4 2010- green 20101 4 2018- green 201815 2003-red 20030 5 2011-red 20110 5 2019-red 201906 2003- green 20031 6 2011- green 20111 6 2019- green 201917 2004-red 20040 7 2012-red 20120 7 2020-red 202008 2004- green 20041 8 2012- green 20121 8 2020- green 202019 2005-red 20050 9 2013-red 20130 9 2021-red 2021010 2005- green 20051 10 2013- green 20131 10 2021- green 2021111 2006-red 20060 11 2014-red 20140 11 2022-red 2022012 2006- green 20061 12 2014- green 20141 12 2022- green 2022113 2007-red 20070 13 2015-red 20150 13 2023-red 2023014 2007- green 20071 14 2015- green 20151 14 2023- green 2023115 2008-red 20080 15 2016-red 20160 15 2024-red 2024016 2008- green 20081 16 2016- green 20161 16 2024- green 20241ExampleRoute 13 of Group 2 routes is switched by the command value 20150.Routes in the IB-Switch are activated over feedback commands. Each key of the IB-Switchcan be assigned a feedback instruction with an individual address and one feedback condition(occupied or vacant). For details refer to the IB-Switch manual.Options for solenoid and feedback instructionsFollow the same method as for speed and function programming. Compute an entry for theLNCV for the command option to execute the solenoid and/or feedback instruction. Thefollowing table shows the possible Option values:Computation of the command option for solenoid and feedback instructionsOpt No. Description selection value sum1 Do not evaluate driving direction 0Driving direction from Track1 to track2 2Driving direction from Track2 to track1 32 Switching function 2 or 3 0Automatic operation 4-12, 20-28: on arrival at the detector 0Automatic operation 4-12, 20-28: when driving off 4Calculated value for LNCV 100 to 10939
MARCoNOTE: In a normal switching operation the solenoid and feedback instructions areimplemented immediately the detector is passed. The use of command option 2 ismeaningless in this case. It is only meaningful in automatic operation (see chapters 7.4.1 to7.4.4).ExamplesThe MARCo-Receiver is programmed in accordance with the following table:Programming of solenoid and route instructionsCommand LNCV ... 0 ... 1 ...,2 ... 3 ... 4 ... 5 ... 6 ... 7 ... 8 ... 9Address 5... 94 103 20000Value 6… 580 20131 1003Option 7… 2 3 3What do these instructions mean?LNCVs 80, 90 and 100 show the following instruction:The locomotive address 94 is to switch the solenoid 56 to red/round (LNCV 90 = 560), andwhen travelling from detector 1 to detector 2.The value for LNCV 100 is computed from the following example table:Computation of the command option for solenoid and feedback instructionsOpt No. Description selection value sum1 Do not evaluate driving direction 0Driving direction from Track1 to track2 X 2 2Driving direction from Track2 to track1 32 Switching function 2 or 3 X 0 0Automatic operation 4-12, 20-28: on arrival at the detector 0Automatic operation 4-12, 20-28: when driving off 4Calculated value for LNCV 100 2LNCVs 81, 91 and 101 give the following instruction:The locomotive address 103 is to use route 10 from Group 2 of the Intellibox (LNCV 91 =20131 (see above table) when travelling from detector 2 to detector 1.The value in LNCV 101 computed from the following table:Computation of the command option for solenoid and feedback instructionsOpt No. Description selection value sum1 Do not evaluate driving direction 0Driving direction from Track1 to track2 2Driving direction from Track2 to track1 X 3 32 Switching function 2 or 3 X 0 0Automatic operation 4-12, 20-28: on arrival at the detector 0Automatic operation 4-12, 20-28: when driving off 4Calculated value for LNCV 101 3LNCVs 82, 92, 102 give the following instruction:All locomotives (LNCV 82 = 20000, Universal address) announce feedback address 100 withthe "occupied" condition (LNCV 92 = 1003). The feedback takes place when the locomotivepasses the double detector when travelling from detector 2 to detector 1.NOTE• If you turn detection of travel direction OFF, then selection of travel direction from Track1 totrack2 or in reverse from Track2 to track1 is meaningless, so travel direction need not beprogrammed.• When using 2 individual detectors in different locations of the layout, detection of traveldirection should be turned OFF.40
MARCoMethod:Call up the LocoNet Programming Menu in your Intellibox as described in Chapter 4.5 andexecute the following sequence:Step 1: Call up MARCo-Receiver, as in described Chap. 4.5.Step 2: LNCV 2 Value 98 program Flush MARCo-ReceiverStep 3: LNCV 50 Value program Set “All locomotive”20000Step 4: LNCV 92 Value program Value feedback address 100 “occupied”1003Step 5: LNCV 102 Value 3 program Travel direction from track 1 to track 2Repeat steps 3-5 for LNCV groups 80, 90, 100 – 81, 91, 101 etc.Step 7: End programming7.4 Automatic SystemThe previous section (8.3 Switching operation) showed how to change the speed, specialfunctions (light, horn etc..), for each individually recognized vehicle i.e. switch individualturnout, track routes or send feedbacks.There are also events on your layout which must be reacted to immediately, independently ofthe vehicle address. e.g. in a sectioned system, every locomotive, irrespective of the address,must stop at a red signal and can proceed with a green signal. It therefore makes no sense forevery vehicle to have its own set of instructions programmed.We refer to sequences, which are executed for all vehicles, as automated systems. Thevarious possibilities, which the MARCo-Receiver offers in an automated layout, are describedin the following sections.7.4.1 Basic Function Time controlled Shuttle trafficTo operate shuttle traffic as shown in the following diagram.The following sequence is made available by this automatic mode:• A locomotive passes signal S1 in the reverse direction.• The locomotive over-drives the double detector of the MARCo receiver.• The signal S1 is switched to red.• The locomotive brakes with its inertia and stops.• An adjustable waiting period, (same for all vehicles).• During the wait the driving direction is changed (light changes).• Signal S1 is set to green.• The locomotive accelerates back to its original speed.41
MARCoIn order to set up this sequence, the following LNCVs need to be programmed:LNCV Description Value0 Module and first detector address 1-40952 Selection of sequence type, shuttle train with terminus delay time 43 Direction, in which the sequence in LNCV 2 is activatedActive when travelling from detector 1 to detector 2Active when travelling from detector 2 to detector 1014 Waiting time at the terminus in seconds 0-2556 Address exit signal at which the train at the terminus waits.S1This is switched by the MARCo-Receiver and does not have to physicallyexist on the layout.10 Block option: the time after which the section is set to vacant again after thetrain has left on a green signal0-511ExampleTimed shuttle-service with exit signal (solenoid address10) is programmed into the MARCo-Receiver with the module address 2. The detectors are connected to the MARCo-Receiver sothat on arrival the train passes over detector 1 first. All trains are held for 20 seconds beforethey drive off again. 10 seconds after a train has driven off, the MARCo-Receiver is readyagain for the next shuttle train (block option).In order to setup the example specified above, the following LNCVs need to be programmed:LNCV Description Value0 Module and first detector address 22 Selection of sequence type, shuttle train with terminus delay time 43 Direction, in which the sequence in LNCV 2 is activated ihen train travels0from detector 1 to detector 2If it’s travelling in the other direction nothing happens4 Waiting time at the terminus, 20 seconds 206 Address exit signal at which the train at the terminus waits. In this case10address 10, switched by the MARCo receiver.10 Block option: 10 seconds after the train has left, the MARCo-Receiverconsiders the section vacant again and the next train can enter.1042
MARCoMethod:Call up the LocoNet Programming Menu in your Intellibox as described in Chapter 4.5 andexecute the following sequence:Step 1: Call up MARCo-Receiver, as in described Chap. 4.5.Step 2: LNCV 2 Value 98 program Flush MARCo-ReceiverStep 3: LNCV 0 Value 3 program Set module address to 3Step 4: LNCV 2 Value 5 program Function “Shuttle service remote controlled”Step 5: LNCV 4 Value 2 program Enter waiting time in secondsStep 6: LNCV 6 Value 10 program Enter signal address 10Step 7: LNCV 10 Value 10 program Enter waiting time in seconds, after which the track isready for the next trainStep 8: End programmingNOTE: This automatic function can be combined with various other functions which aredescribed in Chapter 7.4.5.7.4.2 Basic operation Shuttle traffic manually startedSetting up shuttle traffic in accordance with following illustration:The following operational sequence is set up by this automated operation:• A locomotive passed signal S1 in reverse direction.• A locomotive runs over the double detector of the MARCo receiver• The signal S1 is switched to red• The locomotive brakes to a stop with its internal system.• A preset timer function is started. This is the same for all vehicles• During this time the locomotive’s travelling direction is changed (light changes)• The MARCo-Receiver monitors signal S1 and waits, till it is switched to green by anotherdevice that is connected to the LocoNet: (Intellibox, IB-control, DAISY, IB-Switch or acomputer program via the Intellibox), an instruction from a route (Intellibox or IB-Switch) orfrom another MARCo receiver.• Once the signal is green, the locomotive is switched into motion in the opposite direction toreturn to its original location.43
MARCoIn order to setup the example specified above, the following LNCVs need to be programmed:LNCV Description Value0 Module and first detector address 1-40952 Selection of sequence type, shuttle train with terminus delay time 43 Direction, in which the sequence in LNCV 2 is to be activatedActive when travelling from detector 1 to detector 2Active when travelling from detector 2 to detector 1014 Waiting time at the terminus in seconds 0-2556 Address exit signal at which the train at the terminus waits.S1This is switched by the MARCo-Receiver and does not have to physicallyexist on the layout.10 Block option: the time after which the section is set to vacant again after thetrain has left on a green signal0-511ExampleThe shuttle train is manually started by switching the exit signal at solenoid address 10 withthe exit signal connected to the MARCo receiver, with the module address 3. The tracksections are connected to the MARCo-Receiver so that trains entering the terminus passsection 1 first and then section 2. All trains are to stop 2 seconds before the MARCo-Receivermonitors the exit signal. If the exit signal with address 10 is on green, it accelerates the trainto its original speed. 10 seconds after a train has left, the MARCo-Receiver is ready for thenext shuttle train (block option).In order to setup the example specified above, the following LNCVs need to be programmed:LNCV Description Value0 Module and first detector address 32 Selection of sequence type, shuttle train with terminus delay time 53 Direction, in which the sequence in LNCV 2 is to be activated when train0travels from detector 1 to detector 2If it’s travelling in the other direction nothing happens4 Waiting time at the terminus, 2 seconds 26 Address exit signal at which the train at the terminus waits. In this case10address 10, switched by the MARCo receiver.10 Block option: 10 seconds after the train has left, the MARCo-Receiverconsiders the section vacant again and the next train can enter.1044
MARCoMethod:Call up the LocoNet Programming Menu in your Intellibox as described in Chapter 4.5 andexecute the following sequence:Step 1: Call up MARCo-Receiver, as in described Chap. 4.5.Step 2: LNCV 2 Value 98 program Flush MARCo-ReceiverStep 3: LNCV 0 Value 3 program Set module address to 3Step 4: LNCV 2 Value 5 program Function “Shuttle service remote controlled”Step 5: LNCV 4 Value 2 program Enter waiting time in secondsStep 6: LNCV 6 Value 10 program Enter signal address 10Step 7: LNCV 10 Value 10 program Enter waiting time in seconds, after which the track isready for the next trainStep 8: End programming• NOTE: This automatic function can be combined with various other functions which aredescribed for both receivers 68 600 and 68 610 in Chapter 7.4.5.7.4.3 Basic Operation Holding pointTo operate a train automatically as shown in the following diagram:The following operational sequence is setup by this automated operation:• The locomotive enters the track section of the MARCo receiver.• The signal S1 is switched to red.• The locomotive brakes with its own inertia (locomotive decoder) and stops.• An adjustable waiting period, which is the same for all vehicles, expires.• Signal S1 is set to green.• The locomotive accelerates again back to its original speed.In order to achieve this sequence, the following LNCVs must be programmed:LNCV Description Value0 Module and first detector address 1-40952 Selection of sequence type, Holding point 63 Direction, in which the sequence in LNCV 2 is to be activatedActive when travelling from track 1 to track 2Active when travelling from track 2 to track 1014 Holding time at the terminus in seconds 0-2556 Address exit signal at which the train at the terminus waits.S1This is switched by the MARCo-Receiver and does not have to physicallyexist on the layout.10 Block option: the time after which the section is set to vacant again after thetrain has left on a green signal0-511Holding point for both driving directionsLNCV 6 contains the address of the directional signal that is located at the programmedholding point. Especially with the holding points it is possible to automate it in both directions.In this case (LNCV 3 = 2), it is also necessary to install two signals at the location. In LNCV 6,address S1 is the signal in driving direction from detector 1 to detector 2. In driving directiondetector 2 to detector 1, the signal S1+1 then automatically switches. Neither signal need bephysically present on the layout.45
MARCoExampleA MARCo-Receiver with the module address 4 is installed at the holding point with the exitsignal with solenoid address 12. The detectors are connected to the MARCo-Receiver so thatthe sequence is triggered when the train travels from detector 1 and to detector 2. All trainsstop for 30s. After that the MARCo-Receiver sets the exit signal to green and thenaccelerates back up to its original speed. 10 seconds after the departure, the MARCo-Receiver should be ready to handle a new train (block option).In order to setup the example specified above, the following LNCVs need to be programmed:LNCV Description Value0 Module and first detector address 42 Selection of sequence type, Holding point 63 Direction, in which the sequence in LNCV 2 is to be activatedActive when travelling from detector 1 to detector 2Active when travelling from detector 2 to detector 1Active in both travelling directions (holding point only)0124 Holding time at the terminus in seconds 306 Address exit signal at which the train at the terminus waits.12This is switched by the MARCo-Receiver and does not have to physicallyexist on the layout.10 Block option: the time after which the section is set to vacant again after thetrain has left on a green signal10Method:Call up the LocoNet Programming Menu in your Intellibox as described in Chapter 4.5 andexecute the following sequence:Step 1: Call up MARCo-Receiver, as in described Chap. 4.5.Step 2: LNCV 2 Value 98 program Flush MARCo-ReceiverStep 3: LNCV 0 Value 4 program Set module address to 4Step 4: LNCV 2 Value 6 program Function “Holding Point”Step 5: LNCV 4 Value 30 program Enter waiting time in secondsStep 6: LNCV 6 Value 12 program Enter signal address 12Step 7: LNCV 10 Value 10 program Enter waiting time in seconds, after which the track isready for the next trainStep 8: End programmingNOTE: This automatic function can be combined with various other functions which aredescribed in Chapter 7.4.5.46
7.4.4 Basic operation Block sectionsMARCoTo protect a section of track with a signal, so that entry signal S2 prevents a subsequent trainfrom entering the block section, if it is already occupied. The train in this block section isaffected by exit signal S3. This signal depends on the condition of the following block sectionand becomes controlled manually or automatically.With this basic operation for a block system a longer track distance is divided into severalblocks, which can be traversed automatically. For a meaningful, automatically controlled blocksystem, it must consist of at least 3 blocks. A block system can always control one train lessthan the number of blocks. The behaviour of a locomotive in a block depends on the state ofthe exit signal at the end of the Block, which is also the entry signal for the next block. Forautomatic operation one MARCo-Receiver is needed per block.The following operational sequence shows how each MARCo receiver, in an automatic blocksystem, is programmed. It assumes that the signal at the end of the block is red:• The locomotive passes the detectors of the MARCo-Receiver and therefore completelyenters the Block with the signal S3.• The signal S3 at the end of the block is red, the locomotive brakes and stops.• The signal S2 of the previous block, from which the locomotive came, is also set to red (thishappens as a matter of course).• The signal S1 of the block before, which is now vacant, is set to green (this happens as amatter of course).• The MARCo-Receiver monitors the signal S3 and waits for it to be set to green by anotherdevice attached to the LocoNet (Intellibox, IB-control, DAISY, IB-Switch or a computerprogram via the Intellibox), an instruction from a route (Intellibox or IB-Switch) or anotherMARCo receiver.• If the signal turns green S3, e.g. is switched by a MARCo receiver, 2 blocks ahead in thetravelling direction, the locomotive accelerates to its original speed again and proceeds intothe next block• As soon as the train is completely in the next block, the signal S3 must be set back to red,e.g. by the MARCo receiver, that controls the following block.47
MARCoIn order to setup this operation, the following LNCVs must be programmed:LNCV Description Value0 Module and first detector address 02 Automatic mode: block section/station block 73 Direction, in which the sequence in LNCV 2 is to be activatedActive when travelling from detector 1 to detector 2Active when travelling from detector 2 to detector 1016 Exit signal of the controlled blockS3The exit signal S3 is monitored by the MARCo-Receiver for its status:red signal stops the train, with green signal the train travels through.Note: The signal does not physically have to be on the layout.7 Exit signal red the previous blockS2-0The exit signal S2 of the now vacant block behind of the train is nowautomatically switched to red by MARCO receiver.Note: The signal does not physically have to be on the layout.8 Entry signal green the previous blockS1-1The entry signal S1 of the now free, the MARCo-Receiver switches blockbefore it to green automatically, thus a following train can proceed.Note: The signal does not physically have to be on the layout..10 Block optionThe block status is changed from "occupied" to "vacant", if a train in theblock departs or drives through the block’s exit signal (LNCV 6) it switchesto "red".0NOTE: Whilst LNCV 6 contains only the pure signal address, LNCV 7 and LNCV 8 link to thesignal addresses depending on the travel direction (0 = red, 1 = green).If the signal at the end of the block is green, if the locomotive passes over the detectors, itdoes not change speed. However in all cases signals S2 and S1 of the previous blockschange.Example block sectionWe will discuss an individual block, block 3, within a block system of at least three blocks.The solenoid addresses of the signals.Description S1 S2 S3Sol. Address 5 6 748
The MARCo-Receiver for block 3 in the example is programmed as follows:49MARCoLNCV Description Value0 Module and first detector address 32 Automatic mode: block section/station block 73 Direction, in which the sequence in LNCV 2 is to be activated0Active when travelling from detector 1 to detector 26 Exit signal of the controlled block7The exit signal S3 is monitored by the MARCo-Receiver for its state, redsignal stops the train, with green signal the train travels through.Note: The signal does not physically have to be on the layout.7 Exit signal red, the previous block60The exit signal S2 of the now vacant block behind the train is nowautomatically switched to red by MARCo receiver.Note: The signal does not physically have to be on the layout.Entry signal green from the previous block518The entry signal S1 of the now free, the MARCo-Receiver switches theblock before it to green automatically, thus a following train can proceed.Note: The signal does not physically have to be on the layout.10 Block optionThe block state is changed from "occupied" to "vacant", if a train in theblock departs or drives through, the block’s exit signal (LNCV 6) switches to"red".0What do these entries mean?• The MARCo-Receiver has the module address 3 (LNCV 0)• The operating mode is Block Section (LNCV 2 = 7)• The block operates when passing the detectors from detector 1 to detector 2 (LNCV 3).• For the exit, the signal with address 7 (LNCV 6) is monitored. On entry, signal 6 is set to“red” (LNCV 7). This signal is for the block which the train has just left. Further signal 5 isset to “green” (LNCV 8). A possible waiting train here then moves on to the red signal 6.Method:Call up the LocoNet Programming Menu in your Intellibox as described in Chapter 4.5 andexecute the following sequence:Step 1: Call up MARCo-Receiver, as in described Chap. 4.5.Step 2: LNCV 2 Value 98 program Flush MARCo-ReceiverStep 3: LNCV 0 Value 3 program Set module address to 3Step 4: LNCV 2 Value 7 program Function “Block Section”Step 5: LNCV 6 Value 7 program Enter signal address 7Step 6: LNCV 7 Value 60 program Set signal 6 to redStep 7: LNCV 8 Value 51 program Set signal 5 to greenStep 8: LNCV 10 Value 0 program Enter waiting time in seconds, after which the track isready for the next trainStep 9: End programmingNOTE: This automatic function can be combined with various other functions which aredescribed for both receivers 68 600 and 68 610 in Chapter 7.4.5.7.4.5 Station administrationWith MARCo you can administer an entire station. This can consist of up to 10 parallel trackswith a common entry track.Each arriving train selects its designated track in the station. If this track is occupied, the trainwaits at the station entrance at a red signal, until its designated track is vacant. Only then willthe train automatically enter its designated track.A complete station administration is developed as follows: Install a MARCo-Receiver as theautomatic entry manager in the block before the station and in the block after the station,install a MARCo-Receiver as the automatic exit manager. The MARCo receivers in the stationtracks are automatic block sections with block feedback messages.
MARCoThe entry manager ensures that each track in the station is designated to be used for up to 8different locomotive addresses or categories. The routes from the approach to the stationtrack are automatically switched as track routes. These routes must be stored in the Intelliboxor IB-Switch. The exit manager provides for automatic departure of the trains from the station.It selects a train for departure and switches the appropriate route, which is stored in theIntellibox, Intellibox II or IB-Switch.The station can be completely integrated into an automatic block system.It is also possible to use only the entry manager. In this case the station arrivals are controlledautomatically and within the station the trains are controlled manually. If one uses only theExit Manager, i.e. the station departures are automatically controlled and the arrivals arecontrolled manually.In addition, it is possible, for the entry and exit manager to operate separately from each other.In this case station entry, and/or exit are automatically controlled, and the remainder controlledmanually.7.4.5.1 Entry managersYou have a station with a number of parallel tracks as in the following diagram:At the entrance into the station there is a single approach track with the signal S10. Theapproach track is a block section with a MARCo-Receiver set up as the automatic Entrymanager. This regulates the entry of the train to the designated track.After the signal, the track branches out to the parallel station tracks. Each station track ismonitored by a MARCo-Receiver programmed as an automatic block section with block statusmessages. The MARCo-Receiver in the station track regulates the deceleration of theindividual train ahead of the respective block exit signal, as well as activating auxiliaryfunctions, e.g. switching on Front lighting and calling up sounds.The allocation of an individual train to the tracks takes place via the entry manager as afunction of the vehicle addresses and categories, which are programmed in LNCVs 20 to 119.NOTE: The routes to the individual tracks of the station must be setup in the Intellibox or IB-Switch. The last instruction of each route must switch the signal at the station, i.e. the exitsignal of the entry manager (here S10) to green, so that a waiting train can proceed into thestation.If a train arrives at the entry manager signal, a vacant track, into which this train is permitted toenter, is selected, and the pertinent route switched.50
MARCoTo set a MARCo-Receiver as entry manager to a station the LNCVs are programmed asfollows:LNCV Description Value0 Module and first detector address 1-40952 Automatic mode: entry manager 83 Direction, in which the sequence in LNCV 2 is to be activatedActive when travelling from detector 1 to detector 2Active when travelling from detector 2 to detector 1015 Waiting period for processing solenoids - route or feedback instructions. (in 0-255seconds.)6 Exit signal of the controlled blockS10The exit signal S10 is monitored by the MARCo-Receiver for its state, redsignal stops the train, with green signal the train travels through.Note: The signal does not physically have to be on the layout.10 Block option: The block status is changed from "occupied" to "vacant", if atrain in the block departs or drives through the block’s exit signal (LNCV 6)switches to "red".0The administration of the station is done with LNCVs 20 to 119. Each track uses 10 LNCVsfor the following purpose:• The address of the MARCo-Receiver for the monitoring of the station track• The instruction for switching a route is setup in the Intellibox or IB-Switch. This route mustcontain switching of all turnouts required to free the path to the desired track. The finalinstruction of the route must always switch the station entry signal to green.• The addresses of the locomotives, which may enter a particular track. This can be anindividual Locomotive address, a train category or the Universal address for all locomotives.Up to 8 different entries are possible.LNCV Description20 Station track 1Address (LNCV 0) of the MARCo-Receiver that supervises track 1 of the station21 Route to track 1Instruction for switching the route in Intellibox or IB-Switch, which leads to track 1 of thestation (see also ch. 7.3.5)22 1. Address or train category of the locomotive, which may enter track 123 2. Address or train category of the locomotive, which may enter track 124 3. Address or train category of the locomotive, which may enter track 125 4. Address or train category of the locomotive, which may enter track 126 5. Address or train category of the locomotive, which may enter track 127 6. Address or train category of the locomotive, which may enter track 128 7. Address or train category of the locomotive, which may enter track 129 8. Address or train category of the locomotive, which may enter track 130 Station track 2Address (LNCV 0) of the MARCo-Receiver that supervises track 2 of the station31 Route to track 2Instruction for switching the route in Intellibox or IB-Switch, which leads to track 2 of thestation (see also ch. 7.3.5)32-39 Addresses or train categories of the locomotives, which may enter track 240 Station track 3Address (LNCV 0) of the MARCo-Receiver that supervises track 3 of the station41 Route to track 3Instruction for switching the route in Intellibox or IB-Switch, which leads to track 3 of thestation (see also ch. 7.3.5)42-49 Addresses or train categories of the locomotives, which may enter track 350 Station track 4Address (LNCV 0) of the MARCo-Receiver that supervises track 4 of the station51 Route to track 4Instruction for switching the route in Intellibox or IB-Switch, which leads to track 4 of thestation (see also ch. 7.3.5)52-59 Addresses or train categories of the locomotives, which may enter track 451
52MARCoLNCV Description60 Station track 5Address (LNCV 0) of the MARCo-Receiver that supervises track 5 of the station61 Route to track 5Instruction for switching the route in Intellibox or IB-Switch, which leads to track 5 of thestation (see also ch. 7.3.5)62-69 Addresses or train categories of the locomotives, which may enter track 570 Station track 6Address (LNCV 0) of the MARCo-Receiver that supervises track 6 of the station71 Route to track 6Instruction for switching the route in Intellibox or IB-Switch, which leads to track 6 of thestation (see also ch. 7.3.5)72-79 Addresses or train categories of the locomotives, which may enter track 680 Station track 7Address (LNCV 0) of the MARCo-Receiver that supervises track 7 of the station81 Route to track 7Instruction for switching the route in Intellibox or IB-Switch, which leads to track 7 of thestation (see also ch. 7.3.5)82-89 Addresses or train categories of the locomotives which may enter track 790 Station track 8Address (LNCV 0) of the MARCo-Receiver that supervises track 8 of the station91 Route to track 8Instruction for switching the route in Intellibox or IB-Switch, which leads to track 8 of thestation (see also ch. 7.3.5)92-99 Addresses or train categories of the locomotives, which may enter track 8100 Station track 9Address (LNCV 0) of the MARCo-Receiver that supervises track 9 of the station101 Route to track 9Instruction for switching the route in Intellibox or IB-Switch, which leads to track 9 of thestation (see also ch. 7.3.5)102-109 Addresses or train categories of the locomotives, which may enter track 9110 Station track 10Address (LNCV 0) of the MARCo-Receiver that supervises track 10 of the station111 Route to track 10Instruction for switching the route in Intellibox or IB-Switch, which leads to track 10 of thestation (see also ch. 7.3.5)112-119 Addresses or train categories of the locomotives, which may enter track 10NOTE• If a locomotive (train) passes over the detectors of the entry manager, it firstly checkswhether the recognized address was programmed for one of the station tracks. If this trackis vacant, the appropriate route is switched. The last instruction of the route switches theentry signal to green and the train heads into its destination track.• If the destination track is occupied, the locomotive waits at the red entry signal, until thedestination track becomes vacant.• A locomotive address can also be programmed for several tracks. Then the locomotive issent to the first vacant track which is found.• If the address of the locomotive is not allocated for any track, the entry manager checks ifthe recognized category is assigned to one of the tracks. If this is the case, it again checksif the track is vacant. If a vacant track is found, the route is switched for entry to this track.The last instruction of the route must switch the entry signal to the station to green. Thetrain enters the station.• Categories can also be assigned to several tracks of the station.• If the entry manager does not find a track for a recognized address or category, it checks ifone of the tracks is approved for the entry by all vehicles (address entry 20000). If a track isprogrammed that way and vacant, the train is moved to there.• The search for a vacant track starts with LNCV 20 of MARCo receiver. Then, all followingLNCV entries are cyclically scanned in ascending order.
MARCo• ATTENTION: A locomotive, whose address and category are not assigned to a track, doesnot automatically enter a station without a track for all vehicles (address entry 20000), butstops at the red signal. This locomotive must be then driven manually into a free track.Example: Entry into a 3-track stationYou have a 3-track station with a single approach track. The associated MARCo-Receiver isprogrammed as entry manager as follows:LNCV Description Value0 Module and first detector address, 1-4095 102 Automatic mode: entry manager 83 Direction, in which the sequence in LNCV 2 is to be activated0Active when travelling from detector 1 to detector 25 Waiting period between switching the track route and starting the waiting5locomotive. It applies to all automatic modes setup with LNCV 2Value is given in seconds.6 Exit signal for the controlled blockThe exit signal state is monitored by the MARCo receiver. A red signalstops the train, a green signal allows it to drive through.Note: The signal does not physically have to be on the layout.10LE Route Locomotive addresses and categoriesLNCV ... 0 ... 1 …2 …3 …4 …5 …6 …7 …8 …92 21 20010 94 78 863 22 20011 20002 218 1004 23 20020 20000567891011What do the entries in the previous tables mean?• The MARCo-Receiver has the module address 10 (LNCV 0).• The operating mode is entry manager (LNCV 2 = 8).• The entry manager works when travelling from detector 1 to detector 2 (LNCV 3).• To enter the station, signal S10 with the address 10 (LNCV 6) is monitored.• Before entering the station the train waits for a period of 5 seconds (LNCV 5) for switchingthe routes• The 3 tracks of the station are monitored by MARCo receivers 21 (LNCV 20), 22 (LNCV 30)and 23 (LNCV 40).• The routes to the 3 tracks of the station are routes in the Intellibox: Group 1/route 1 (LNCV21), Group 1/route 2 (LNCV 31), Group 1/route 3 (LNCV 41). All routes must switch theturnouts first, and signal 10 to green, last.• For example, the tracks are entered as follows: Steam locomotives BR94, BR78, BR86drive into track 1, diesel locomotives V100 and BR218 and category 2 locomotives driveinto track 2, all other trains drive into track 3.53
MARCoExtended operation: Solenoids or feedback messages, independent of address of thelocomotive in the block sectionOnce the basics are working, the time delays for the trains may need to be modified.Chapter 8.3.5 showed how to switch solenoids for signals or routes and/or sending feedback.With LNCV 7 and LNCV 8 there are two ways to produce such instructions. Theseinstructions are implemented immediately after the detectors are passed, independently of therecognized vehicle address, i.e. all vehicles switch the same solenoids and/or routes and sendthe same feedback.LNCV Description7 1. Solenoid, route or feedbackAddress and direction of first solenoid to be switched, i.e. the address has 0 or 1 added,and/or address of a route or address of a feedback with attachedStatus 3 for “occupied” or 2 for “vacant” or the address of a route.Note: The signal does not have to physically be on the layout.8 2. Solenoid, Route or feedbackAddress and direction of a second solenoid to be switched, i.e. the address has 0 or 1 added,and/or. address of a route or address of a feedback with attachedStatus 3 for “occupied” or 2 for “vacant” or the address of a routeNote: The signal does not have to physically be on the layout.Further examples for entry managers can be found in the Examples chapter.NOTE: Since LNCVs 20 to 111 are used to configure the Entry Manager, it is not possible touse them for functions outlined in Chapter 7.3.7.4.5.2 Exit managersBasic operationYou have a station with a number of parallel tracks in as shown in the following diagram:Different trains are located in the station waiting for the exit signals to turn green, which canhappen manually. They monitor the state of the section, i.e. the block section following thestation. If this block is vacant, i.e. no vehicle is in the block, a train from the station can departand enter this block. To do this, switch all appropriate turnouts to the exit and lastly the exitsignal of the desired station track, to green.This task can however also be done by a MARCo-Receiver with the automatic Exit manageroperation in the first block after the station. The exit manager does nothing different to theexample. When the supervised block is vacant, the exit manager selects an occupied trackand switches the route from this track to the exit block section. This route then switches theexit signal of the selected track to green.The routes of the individual station tracks to the exit block must be in the Intellibox or IB-Switch. The last instruction of each route must switch the exit signal of the respective stationtrack to green.54
MARCoTo set a MARCo-Receiver as exit manager for a station, the LNCVs are programmed asfollows:LNCV Description Value0 Module and first detector address, 1 4095 92 Automatic mode: exit manager10The tracks are checked in chronological order if they are occupied. The nextoccupied track is selected for departure.The tracks are checked randomly in their occupied state. The next, randomlyfound, occupied track is selected for departure.3 Direction, in which the sequence in LNCV 2 is to be activatedActive when travelling from detector 1 to detector 2Active when travelling from detector 2 to detector 1015 Waiting period for processing switching commands for solenoids and routes. 0-255(in seconds).6 The state of the exit signal S30 is monitored by the exit manager, red signal S30causes the train to stop, a green signal permits passing through.Note: The signal does not have to physically exist on the layout.7 Station exit on redInstruction for switching a route in Intellibox, Intellibox II or IB-Switch, sets allstation signals to red again (see also ch. 7.3.5). turnouts do not need to bemonitoredThe administration of the station is done with LNCVs 20 to 119. Each track uses 2 LNCVs forthe following purpose: Address of the MARCo-Receiver for monitoring the station track andinstruction for switching a route in the Intellibox or IB-Switch. This route must contain allturnout-switching instructions, to clear the route from the station track to the station exit. Thelast instruction in this route must always switch the exit signal of the station to green.LNCV Description20 Track 1: Address (LNCV 0) of the MARCo-Receiver that supervises Track121 Track 1: Route switching instruction in the Intellibox or IB-Switch, for the route to Track 1 exit.30 Track 2: Address (LNCV 0) of the MARCo-Receiver that supervises Track231 Track 2: Route switching instruction in the Intellibox or IB-Switch, for the route to Track 3 exit.40 Track 3: Address (LNCV 0) of the MARCo-Receiver that supervises Track341 Track 3: Route switching instruction in the Intellibox or IB-Switch, for the route to Track 3 exit.50 Track 4: Address (LNCV 0) of the MARCo-Receiver that supervises Track451 Track 4: Route switching instruction in the Intellibox or IB-Switch, for the route to Track 4 exit.60 Track 5: Address (LNCV 0) of the MARCo-Receiver that supervises Track561 Track 5: Route switching instruction in the Intellibox or IB-Switch, for the route to Track 5 exit.70 Track 6: Address (LNCV 0) of the MARCo-Receiver that supervises Track671 Track 6: Route switching instruction in the Intellibox or IB-Switch, for the route to Track 6 exit.80 Track 7: Address (LNCV 0) of the MARCo-Receiver that supervises Track781 Track 8: Route switching instruction in the Intellibox or IB-Switch, for the route to Track 7 exit.90 Track 8: Address (LNCV 0) of the MARCo-Receiver that supervises Track891 Track 8: Route switching instruction in the Intellibox or IB-Switch, for the route to Track 8 exit.100 Track 9: Address (LNCV 0) of the MARCo-Receiver that supervises Track9101 Track 9: Route switching instruction in the Intellibox or IB-Switch, for the route to Track 9 exit.110 Track 10: Address (LNCV 0) of the MARCo-Receiver that supervises Track10111 Track 10: Route switching instruction in the Intellibox or IB-Switch, for the route to Track 10 exit.NOTE: The switching routes must be entered into the Intellibox, Intellibox II or IB-Switch55
MARCoCoordination with the entry managerThe operation of entry and exit managers described so far operate totally independent of oneanother. Thus the exit manager does not know which locomotive has just arrived at the EntryManager and is waiting to enter an occupied track. It can therefore easily happen that the ExitManager dispatches a few trains from the station, before the destination track for the waitingtrain is vacated. In stations with many tracks and block traffic with relatively few blocks thedanger therefore exists that the rail traffic becomes grid locked, because no track is beingcleared for the waiting train, as due to full blocks a vehicle in the Exit Manager block will not beable to leave.This problem can be solved by entering into the exit manager’s LNCV 13 the address of theentry manager. Furthermore in LNCVs 22-29, 32-39, to 112-119, make the same entriesabout locomotive track allocations as in the entry manager. Before the exit manager vacatesa track according to one of the procedures described above, (chronological or random), itqueries the entry manager about the address and/or category of locomotive that is waiting fora vacant track. If it finds that the destination track is actually occupied, its normal trackselection is interrupted and it first vacates the destination track for the waiting train.LNCV Description13 Link of the exit manager with the entry manager.22-29 Locomotive addresses or train categories, which may enter in track 132-39 Locomotive addresses or train categories, which may enter in track 242-49 Locomotive addresses or train categories, which may enter in track 352-59 Locomotive addresses or train categories, which may enter in track 462-69 Locomotive addresses or train categories, which may enter in track 572-79 Locomotive addresses or train categories, which may enter in track 682-89 Locomotive addresses or train categories, which may enter in track 792-99 Locomotive addresses or train categories, which may enter in track 8102-109 Locomotive addresses or train categories, which may enter in track 9112-119 Locomotive addresses or train categories, which may enter in track10ATTENTION: The entry manager, with whom the exit manager is linked, must have LNCV 15set to <strong>Uhlenbrock</strong> protocol (see chapter 7.6).NOTE: When searching for a track which can be vacated, the exit manager proceeds inexactly the same way as the entry manager searches for a destination track. It first tries tolocate a locomotive in the station under its individual address. If this fails, it searches for anappropriate train category. If this also fails it checks if a track for general traffic was vacated.With LNCV 8 you have a further possibility of sending a switching command. This instructionis implemented immediately after passing the detectors, irrespective of the recognized vehicleaddress, i.e. all vehicles switch the same solenoid, route or send the same feedback.LNCV Description7 1.Solenoid, Feedback or RouteAddress and direction of a second solenoid to be switched, i.e. the address has 0 or 1 added,and/or address of a route or address of a feedback with attachedStatus 3 for “occupied” or 2 for “vacant” or the address of a routeNote: The signal does not have to physically be on the layout.8 2. Solenoid, Route or feedbackAddress and direction of a second solenoid to be switched, i.e. the address has 0 or 1 added,and/or address of a route or address of a feedback with attachedStatus 3 for “occupied” or 2 for “vacant” or the address of a route.Note: The signal does not have to physically be on the layout.NOTE: Since LNCVs 20 to 111 are used to configure the Entry Manager, it is not possible touse them for functions outlined in Chapter 7.3.7.4.5.3 MARCo Receivers for station tracksThe individual tracks in the station are monitored by MARCo receivers with the automaticmode of ‘Block section with block status message’. This operates in exactly the same way56
MARCoas the automatic block section function, however in addition it reports its status to an entry oran exit manager via the LocoNet. That means that all MARCo receivers supervise the stationtracks with the entry into LNCV 7 to set the same signal to red, i.e. the entry signal to thestation at the entry manager.In order to achieve this operation, the following LNCVs are to be programmed:LNCV Description Value0 Module and first detector address, 1-4095 1-40952 Automatic mode: block detector with status message. 233 Direction, in which the sequence in LNCV 2 is to be activated0Active when travelling from detector 1 to detector 26 The exit signal, at the end of the track is monitored by the track manager. A S2xred signal stops the train, a green signal allows it to drive through.Note: The signal does not physically have to be on the layout.7 The station entry signal S10 is automatically set to red by the track manager. S10-0Note: The signal does not have to physically be on the layout.8 The entry signal into the entry manager’s block is automatically set to green bythe MARCo receiver, so the next train can the entry manager’s vacant blocksectionNote: The signal does not have to physically be on the layout.As the MARCo-Receiver with the automatic mode ‘block section with block status message’operates exactly like the automatic mode ‘block section’, for all further programming of basicoperation and extended functions refer to chapter. 7.4.4 Block sections.ATTENTION: LNCV 15 must be to value 1 or 9 (transmission format <strong>Uhlenbrock</strong>, see Ch. 7.6)Each MARCo-Receiver can report its internal state "vacant" or "occupied" over that LocoNet.Status reporting is setup by adding the number 16 to the function code (value 4-10) in LNCV 2(functions), e.g. Function 4 is a terminus section without active block status message andfunction 20 is the same terminus section with active block status message. Function 8 is anentry manager without active block status message and function 24 the same entry managerwith active block status message.Therefore it is possible to automate e.g. a shuttle terminus controlled by an entry managerwhich allows trains to enter, or a station with more than 10 tracks is administered as severalstations in one.Automatic modes from LNCV 2 without block status message with block status messageShuttle terminus time controlled 4 20Shuttle terminus signal controlled 5 21Holding point 6 22Block section 7 23Entry manager 8 24Exit manager cyclically chronologically 9 25Exit manager random selection 10 26Exit manager cyclically chronologically11 27and selective track switchingExit manager random and selective trackswitching12 287.4.5.4 Station control with passing loopThe station passing loop serves to bypass the station on a specially designated track. Thetrack does not require its own MARCo-Receiver to monitor it. All trains that use this track, , togo directly from the station entrance (Block with entry manager) to the exit (Block with Exitmanager) without stopping.57
MARCoThe passing loop can be utilized in two different ways:1. When a particular solenoid address is switched to “green“, all trains arriving in the EntryManager block, travel via the passing loop directly the Exit Manager block. In this case theEntry Manager behaves like a block which is located just ahead of the Exit Manager. Theautomatic now proceeds, so, when the block exit signal turns green the route to thepassing loop is also set.2. If the solenoid address is set to “red” all trains that are entered in the Entry Manager’sLNCVs 122-127, run through the passing loop.Programming the Entry ManagerThe passing loop is enabled in the Entry Manager by LNCVs 13, 120 and 122-127 with thefollowing meaning:• The solenoid address which selects the passing loop for all trains (Setting this solenoid to“green”) or only for particular trains (Setting this solenoid to “red”)• MARCo-Receiver address with which the Entry Manager reports the passing loop asoccupied or vacant.Attention: This address must not be used by any other MARCo Receiver.• The addresses of the trains which are to use the station’s passing loop. This can be anindividual locomotive address or a train category. Up to 6 different entries are possible.LNCV Description Value2 Automatic function Entry Manager 8 or 2413 Meaning of the LNCV, in case LNCV 2 has a value of 8 or 24:1-2000Passing loop controlled by solenoid addressSolenoid green = All trains use the passing loopSolenoid red = Only the address or train categories in LNCV 122 to 127 use thepassing loop120 Virtual address, with which Exit Manager reports the passing loop as occupied 1-4095or vacant.This address (LNCV 0) can’t be used by any other MARCo Receiver.121 Not used -122-127 addresses (1-9999) or train category (20001-20015) of the locomotive which isto automatically use the passing loop.1-9999,20001-20015Function DescriptionThe Entry Manager reports the passing loop as “occupied” as soon as train arrives, which ismeant for this track. If the solenoid with the address specified in LNCV 13 is switched to“green” (all trains should bypass the station), the Entry Manager reports the passing loop as“vacant” until the solenoid is switched to “red” again. If the MARCo-Receiver is programmedas Entry Manager and has the programming for a passing loop LNCV 120 then a programmedtime dependent block vacant report, specified in LNCV 10, is ignored and the block is alwaysreported as “vacant”, when the block exit signal (LNCV 6) is switched from “green” to “red”.Programming Exit ManagerThe passing loop is enabled in the Exit Manager with LNCVs 13 and 120 to 123 with thefollowing meaning:• The address of the station’s Entry Manager58
MARCo• MARCo-Receiver address with which the Entry Manager reports the passing loop asoccupied or vacant (the Entry Manager’s LNCV 120).ATTENTION: This address must not be used by another MARCo Receiver.• The instruction to switch a route in the Intellibox or IB-Switch. This route must contain allturnout switching instructions which clear the path from the Entry Manager block to the ExitManager block. The last instruction in the route must always be to switch the station entrysignal to “green”.• If the station bypass is executed and the desired train arrives at the Exit Manager detectorthen, for safe block traffic, the exit signal for the Exit Manager’s block must be switched to“green” and the exit signal for the Entry Manager to “red”. These instructions do not applyto those in LNCVs 7 and 8 in station operation for tracks 1-10. On arrival of a train that hastaken the path via the passing loop the instructions from LNCV 7 and 8 are replaced bythose in LNCV 122 and 123.LNCV Description Value13 Meaning of the LNCV, if LNCV 2 is valued 9, 10, 25 or 26:1-4095Linking the function of Entry Manager and Exit Manager.0 = No linking of Entry Manager and Exit Manager1-4095 = if the address from LNCV 0 of the matching Entry Manger is enteredhere, the Exit Manager ascertains if a locomotive is waiting at Entry Manager,to enter the station. The Exit Manager clears a track so the waiting train canenter the station. The prerequisite for this that the entries in LNCVs 20-119 arethe same in both managers. Furthermore a new train selection is made in casea station control with passing loop is set to status “all trains must use thepassing loop” is returned to “normal operation”.120 Address, with which the Entry Manager reports the passing loop as occupied 1-4095or vacant.This address (LNCV 0) must not be used by another MARCo Receiver.121 Route from the station entry to the station exit10-20483Instruction for switching the route in the Intellibox or IB-Switch which is thepath from the station entrance (Entry Manger block) to the station exit (ExitManager block).122 If a train enters the passing loop instead of the instruction in LNCV 7 the value 10-20483programmed here is used. (programming see LNCV 7)123 If a train enters the passing loop instead of the instruction in LNCV 8 the valueprogrammed here is used. (programming see LNCV 8)10-20483Function DescriptionFor the Exit Manager the passing loop is a station track with two special characteristics:1. If this track is occupied, the preference is to clear this track before all other tracks and theroute is set according to LNCV 121.2. If this track was used when a train arrives, the values LNCVs 7 and 8 will be replaced bythe values from LNCVs 122 and 123.If the Entry Manager receives the instruction, via solenoid command, that all trains are to usethe passing loop, it reports the passing loop as vacant. The Exit Manager now directs allarriving trains directly via the passing loop. This means as soon as the Exit Manager blockbecomes vacant, the entry signal for the station is switched to “green“ and a train arriving thencan immediately travel through to the Exit Manager block, via the passing loop.If the Exit Manager has given such a train the all clear and the route via the passing loop hasbeen setup the Exit Manager waits the arrival of a train. If the Entry Manager state is switchedwith a solenoid according to LNCV 13, back to allowing trains running through station, theEntry Manager spontaneously reports the passing loop as vacant. So that no train collisionsoccur the Exit Manager waits until such time that a train arrives at the Entry Manager. Afterthat the Exit Manager makes a new train selection and a new route out of the station isselected and switched. This new selection can only take place if LNCV 13 contains the moduleaddress of the linked Entry Manager.59
MARCoExample 1: 3-Track Station control with Passing LoopThe automatically controlled station consists of three station tracks and a passing loop. Thestation tracks 1 to 3 are available to all trains, except trains with a train category 4 and thelocomotive with address 200. Trains of category 4 and locomotive 200 bypass the station viathe passing loop. Solenoid address 100 is to be used so all trains travel via the passing loop.Solenoid address 130 switch the entire station control off.Basic Programming of LNCVs 0-15 of the five MARCo ReceiversLNCVLE Function0 1 2 3 4 5 6 7 8 9 10 11 12 13 14 15101 Block section 101 0 23 0 0 2 101 1100 0 0 0 130 0 0 0 9102 Block section 102 0 23 0 0 2 102 1100 0 0 0 130 0 0 0 9103 Block section 103 0 23 0 0 2 103 1100 0 0 0 130 0 0 0 9110 Entry Manager 110 0 8 0 0 2 110 0 0 0 0 130 0 100 0 9120 Exit Manger 120 0 9 0 0 2 120 20201 0 0 0 130 0 110 0 9Additional Programming of MARCo-Receiver ME110 (Entry Manager)LNCV ... 0 ... 1 ...,2 ... 3 ... 4 ... 5 ... 6 ... 7 ... 8 ... 9Track 1 2... 101 20170 20000 0 0 0 0 0 0 0Track 2 3… 102 20171 20000 0 0 0 0 0 0 0Track 3 4… 103 20181 20000 0 0 0 0 0 0 0Passing Loop 12… 100 0 20004 200 0 0 0 0 0 0Additional Programming of MARCo-Receiver ME120 (Exit Manager)LNCV ... 0 ... 1 ...,2 ... 3 ... 4 ... 5 ... 6 ... 7 ... 8 ... 9Track 1 2... 101 20181 20000 0 0 0 0 0 0 0Track 2 3… 102 20190 20000 0 0 0 0 0 0 0Track 3 4… 103 20191 20000 0 0 0 0 0 0 0Passing Loop 12… 100 20200 1100 0 0 0 0 0 0 0Programming of the Routes in the Intellibox IRoute Group andRoute Number3/1 3/2 3/3 3/4 3/5 3/6 3/7 3/8Entry Entry Entry Exit Exit Exit Passing Signal inRoute FunctionTrack 1 Track 2 Track 3 Track 1 Track 2 Track 3 loop Sta.- redSolenoid address 20170 20171 20180 20181 20190 20191 20200 20201Step 0 113 R 113 R 113 G 122 R 123 R 123 G 113 R 101RStep 1 112 G 112 R 110 G 121 R 122 G 122 G 112 G 102RStep 2 111 R 110 G 101 G 121 R 121 R 111 G 103RStep 3 110 G 102 G 103 G 121 GStep 4110 GThe last example is achieved with routes in an IB-Switch in the following section.60
MARCoBasic Programming of LNCVs 0-15 of the five MARCo-ReceiversLNCVLE Function0 1 2 3 4 5 6 7 8 9 10 11 12 13 14 15101 Block section 101 0 23 0 0 2 101 1100 0 0 0 130 0 0 0 9102 Block section 102 0 23 0 0 2 102 1100 0 0 0 130 0 0 0 9103 Block section 103 0 23 0 0 2 103 1100 0 0 0 130 0 0 0 9110 Entry Manager 110 0 8 0 0 2 110 0 0 0 0 130 0 100 0 9120 Exit Manger 120 0 9 0 0 2 120 83 0 0 0 130 0 110 0 9Additional Programming of MARCo-Receiver ME110 (Entry Manager)LNCV ... 0 ... 1 ...,2 ... 3 ... 4 ... 5 ... 6 ... 7 ... 8 ... 9Track 1 2... 101 13 20000 0 0 0 0 0 0 0Track 1 3… 102 23 20000 0 0 0 0 0 0 0Track 1 4… 103 33 20000 0 0 0 0 0 0 0Passing Loop 12… 100 0 20004 200 0 0 0 0 0 0Additional Programming of MARCo-Receiver ME120 (Exit Manager)LNCV ... 0 ... 1 ...,2 ... 3 ... 4 ... 5 ... 6 ... 7 ... 8 ... 9Track 1 2... 101 43 20000 0 0 0 0 0 0 0Track 1 3… 102 53 20000 0 0 0 0 0 0 0Track 1 4… 103 63 20000 0 0 0 0 0 0 0Passing Loop 12… 100 73 1100 0 0 0 0 0 0 0Programming of the Routes in an Intellibox II or IB-SwitchRoute Number 1 2 3 4 5 6 7 8Route FunctionEntry Entry Entry Exit Exit Exit Passing Signal inTrack 1 Track 2 Track 3 Track 1 Track 2 Track 3 loop Sta.- redSet route via1 2 3 4 5 6 7 8feedback address occupied occupied occupied occupied occupied occupied occupied occupiedStep 1 113 R 113 R 113 G 122 R 123 R 123 G 113 R 101RStep 2 112 G 112 R 110 G 121 R 122 G 122 G 112 G 102RStep 3 111 R 110 G 101 G 121 R 121 R 111 G 103RStep 4 110 G 102 G 103 G 121 GStep 5110 GExample 2: Same Example with a different track planBasic Programming of LNCVs 0-15 of the five MARCo-ReceiversLNCVLE Function0 1 2 3 4 5 6 7 8 9 10 11 12 13 14 15101 Block section 101 0 23 0 0 2 101 1100 0 0 0 130 0 0 0 9102 Block section 102 0 23 0 0 2 102 1100 0 0 0 130 0 0 0 9103 Block section 103 0 23 0 0 2 103 1100 0 0 0 130 0 0 0 9110 Entry Manager 110 0 8 0 0 2 110 0 0 0 0 130 0 100 0 9120 Exit Manger 120 0 9 0 0 2 120 20201 0 0 0 130 0 110 0 961
MARCoAdditional Programming of MARCo-Receiver ME110 (Entry Manager)LNCV ... 0 ... 1 ...,2 ... 3 ... 4 ... 5 ... 6 ... 7 ... 8 ... 9Track 1 2... 101 20190 20000 0 0 0 0 0 0 0Track 1 3… 102 20191 20000 0 0 0 0 0 0 0Track 1 4… 103 20100 20000 0 0 0 0 0 0 0Passing Loop 12… 100 0 20004 200 0 0 0 0 0 0Additional Programming of MARCo-Receiver ME120 (Exit Manager)LNCV ... 0 ... 1 ...,2 ... 3 ... 4 ... 5 ... 6 ... 7 ... 8 ... 9Track 1 2... 101 20101 20000 0 0 0 0 0 0 0Track 1 3… 102 20110 20000 0 0 0 0 0 0 0Track 1 4… 103 20111 20000 0 0 0 0 0 0 0Passing Loop 12… 100 20120 1100 0 0 0 0 0 0 0Programming of the Routes in the IntelliboxRoute Group andRoute Number2/1 2/2 2/3 2/4 2/5 2/6 2/7 2/8Route FunctionEntry Entry Entry Exit Exit Exit Passing Signal inTrack 1 Track 2 Track 3 Track 1 Track 2 Track 3 loop Sta.- redSolenoid address 20090 20091 20100 20101 20110 20111 20120 20121Step 0 113 R 113 R 113 G 121 R 122 R 123 G 113 R 101RStep 1 112 G 112 R 110 G 122 R 123 R 103 G 112 G 102RStep 2 111 R 110 G 123 R 102 G 111 G 103RStep 3 110 G 101 G 121 GStep 4122 GStep 5123 RStep 6110 GThe last example is achieved with routes in an Intellibox II or IB-Switch in the following section.Basic Programming of LNCVs 0-15 of the five MARCo-ReceiversLNCVLE Function0 1 2 3 4 5 6 7 8 9 10 11 12 13 14 15101 Block section 101 0 23 0 0 2 101 1100 0 0 0 130 0 0 0 9102 Block section 102 0 23 0 0 2 102 1100 0 0 0 130 0 0 0 9103 Block section 103 0 23 0 0 2 103 1100 0 0 0 130 0 0 0 9110 Entry Manager 110 0 8 0 0 2 110 0 0 0 0 130 0 100 0 9120 Exit Manger 120 0 9 0 0 2 120 83 0 0 0 130 0 110 0 9Additional Programming of MARCo-Receiver ME110 (Entry Manager)LNCV ... 0 ... 1 ...,2 ... 3 ... 4 ... 5 ... 6 ... 7 ... 8 ... 9Track 1 2... 101 13 20000 0 0 0 0 0 0 0Track 1 3… 102 23 20000 0 0 0 0 0 0 0Track 1 4… 103 33 20000 0 0 0 0 0 0 0Passing Loop 12… 100 0 20004 200 0 0 0 0 0 0Additional Programming of MARCo-Receiver ME120 (Exit Manager)LNCV ... 0 ... 1 ...,2 ... 3 ... 4 ... 5 ... 6 ... 7 ... 8 ... 9Track 1 2... 101 43 20000 0 0 0 0 0 0 0Track 1 3… 102 53 20000 0 0 0 0 0 0 0Track 1 4… 103 63 20000 0 0 0 0 0 0 0Passing Loop 12… 100 73 1100 0 0 0 0 0 0 062
MARCoProgramming of the Routes in an Intellibox II or IB-SwitchRoute Number 1 2 3 4 5 6 7 8Route FunctionEntry Entry Entry Exit Exit Exit Passing Signal inTrack 1 Track 2 Track 3 Track 1 Track 2 Track 3 loop Sta.- redSet route via1 2 3 4 5 6 7 8feedback address occupied occupied occupied occupied occupied occupied occupied occupiedStep 1 113 R 113 R 113 G 121 R 122 R 123 G 113 R 101RStep 2 112 G 112 R 110 G 122 G 123 G 103 G 112 G 102RStep 3 111 R 110 G 123 R 102 G 111 G 103RStep 4 110 G 101 G 121 GStep 5122 GStep 6123 GStep 7110 G7.4.5.5 Exit Manager with selective track switching OptionExit from a 3-track station with Block sections in the tracksIn the example, the Exit Manager needs to selectively switch the signals associated with eachof the block sections in the station. It is no longer sufficient, like in the previous example, toswitch route when the at the Exit Manager to switch all signals in the station to “red”, e.g. atrain from track 1 reaches the Exit Manager, then signal 22 must be switched to “red” andsignal 21 to “green”.The routes for the individual tracks in the station to the exit block must be stored in theIntellibox, Intellibox II or IB-Switch. The last instruction in every route must definitely be toswitch the exit signal at the end of the corresponding station to “green”.The Exit Manager’s MARCo-Receiver LNCVs are programmed as follows:LNCV Description Value0 Module and first detector address, 1 4095 92 Automatic mode: exit manager10The tracks are checked in chronological order if they are occupied. The nextoccupied track is selected for departure.The tracks are checked randomly in their occupied state. The next, randomlyfound, occupied track is selected for departure.3 Direction, in which the sequence in LNCV 2 is to be activatedActive when travelling from detector 1 to detector 2Active when travelling from detector 2 to detector 1015 Waiting period for processing switching commands for solenoids and routes. 0-255(in seconds).6 The state of the exit signal S30 is monitored by the exit manager, red signalcauses the train to stop, a green signal permits passing through.Note: The signal does not have to physically exist on the layout.S30The management of the station happens via LNCVs 20 to 119. Every track has 2 LNCVs withthe following entries: address of the MARCo-Receiver that is to monitor the station track andthe instruction to switch the route in the Intellibox, Intellibox II or IB-Switch.63
LNCV Description20 Track 1: Address (LNCV 0) of the MARCo-Receiver that monitors this trackMARCo21 Track 1: Route switching instruction in the route from leading this track to station exit.30 Track 2: Address (LNCV 0) of the MARCo-Receiver that monitors this track31 Track 2: Route switching instruction in the route from leading this track to station exit.40 Track 3: Address (LNCV 0) of the MARCo-Receiver that monitors this track41 Track 3: Route switching instruction in the route from leading this track to station exit.50 Track 4: Address (LNCV 0) of the MARCo-Receiver that monitors this track51 Track 4: Route switching instruction in the route from leading this track to station exit.60 Track 5: Address (LNCV 0) of the MARCo-Receiver that monitors this track61 Track 5: Route switching instruction in the route from leading this track to station exit.70 Track 6: Address (LNCV 0) of the MARCo-Receiver that monitors this track71 Track 6: Route switching instruction in the route from leading this track to station exit.80 Track 7: Address (LNCV 0) of the MARCo-Receiver that monitors this track81 Track 8: Route switching instruction in the route from leading this track to station exit.90 Track 8: Address (LNCV 0) of the MARCo-Receiver that monitors this track91 Track 8: Route switching instruction in the route from leading this track to station exit.100 Track 9: Address (LNCV 0) of the MARCo-Receiver that monitors this track101 Track 9: Route switching instruction in the route from leading this track to station exit.110 Track 10: Address (LNCV 0) of the MARCo-Receiver that monitors this track111 Track 10: Route switching instruction in the route from leading this track to station exit.NOTE: Coordination (LNCV 13) with the Entry Manager is not possible in this case. ThereforeLNCVs 22-29, 32-39, to 112-119 are not programmed with the same locomotive-trackassignments as the Entry Manager.When a train arrives at the Exit Manager the switching instructions in LNCV 7 and 8 areexecuted. These are entered in LNCV 22, 23, or 32, 33 to 112, 113, selective track switchingsequences.LNCV Description Value22 Exit signal “red” for the last block in track 1 S22-023 Entry signal “green” for the second last block in track 1 S21-132 Exit signal “red” for the last block in track 2 S24-033 Entry signal “green” for the second last block in track 2 S23-142 Exit signal “red” for the last block in track 3 S26-043 Entry signal “green” for the second last block in track 3 S25-1etc.112 Exit signal “red” for the last block in track 10 Sx-0113 Entry signal “green” for the second last block in track 10 Sy-164
MARCoStation control with passing loop is possible in these operating modes as already described.The following LNCVs must be programmed:LNCV Description Value13 0= No coupling of Exit Manager and Entry Manager 0120 Address with which the Entry Manager reports the passing loop as 1-4095occupied.The addresse (LNCV 0) must not be used by any other MARCo-Receiver.121 Route from the station entrance to the station exit10-20483Instruction for switching route in the Intellibox, Intellibox II or IB-Switch,that leads from the staition entrance (Block with the Entry Manager) tothe Exit Manager (Block with the Exit Manager).122 If a train arrives at in the passing loop the instruction entered here is10-20483executed.123 If a train arrives at in the passing loop the instruction entered here isexecuted.10-204837.4.6 Extended Functions for Shuttle service, Holding Point and Block SectionThe automatic functions, Shuttle train time controlled, Shuttle train remote controlled, holdingpoint and block section can be combined with three additional functions which are described inthe following section.Overall Switching OperationOnce the basics are working, the time delays for shuttle train may need to be modified.Chapter 7.3.6 shows how to switch solenoids for signals or routes and/or sending feedback.With LNCV 7 and LNCV 8 there are two ways to produce such instructions. Theseinstructions are implemented immediately after the detectors are passed, independent of therecognized vehicle address, i.e. all vehicles switch the same solenoids and/or routes and sendthe same feedback.LNCV Description7 1.Solenoid, Feedback or RouteAddress and direction of a second solenoid to be switched, i.e. the address has 0 or 1 added,and/or address of a route or address of a feedback with attachedStatus 3 for “occupied” or 2 for “vacant” or the address of a routeNote: The signal does not have to physically be on the layout.8 2. Solenoid, Route or feedbackAddress and direction of a second solenoid to be switched, i.e. the address has 0 or 1 added,and/or address of a route or address of a feedback with attachedStatus 3 for “occupied” or 2 for “vacant” or the address of a route.Note: The signal does not have to physically be on the layout.Individual Switching OperationChapter 7.3 is concerned with switching operations, how set up a specific vehicle’s functions,speeds or solenoid change and/or sending Feedback. All switching functions described canalso be programmed individually for automated shuttle train systems.Chapter 7.3 described adjusting command options, whether the programmed Instruction isexecuted the instant the detectors are passed or later when the automatic departure is to beimplemented. Speed instructions generally are implemented only at departure.65
MARCoProcessing the instructions of the individual switching operation apply as follows:Sequence Function If, then1. Are locomotive special function instructions from LNCV 20-49 to be sent implementto Position 0?2. Are sonlenoid, route- or feedback instructions from LNCV 80-109 to be implementsent?3. Are locomotive special function instructions from LNCV 20-49 to be sent implementto Position 1?4. Has a waiting period been programmed into LNCV 5? delayed5. Are locomotive special function instructions from LNCV 20-49 to be sent implementto Position 2?6. Is an individual waiting period programmed for this locomotive in LNCV implement110-127?7. Are locomotive special function instructions from LNCV 20-49 to be sent implementto Position 3?8. Is an individual speed change instruction from LNCV 50-79 to be sent? implement9. Are locomotive special function instructions from LNCV 20-49 to be sentto Position 4?implementFor this, functions 4 to 7 are sequentially executed if the block signal is switched from “red” to“green”, so the train departs. They are not executed if the train arrives at the sensor when theblock exit signal is green.Time delayed switching of solenoidsIf the switching operation is to switch an entire route for the vehicle, it does not make sense forthe vehicle to depart immediately after sending the route switching command. The selectedroute may not have been completely implemented at the time, the individual solenoids couldstill be changing. In order to prevent this, a waiting period can be set, in LNCV 5, aftersending the route or feedback instructions, for which the MARCo-Receiver waits before itimplements the speed instruction. The waiting time from LNCV 5 is inserted at Position 4 inthe above executed sequence, if the block signal is switched from “red” to “green” when thetrain is to depart.LNCV Description Value5 Waiting period for processing solenoids, routes or feedback instructions, in 0-255seconds.Further examples with locomotive specific switching commands can be found in the“Examples” section of this manual.Locomotive specific DelayLNCV 5 determines for all trains the length of time to wait at the block exit signal after it hasturned “green”. In LNCVs 110 to 117 and 120 to 127 can contain additional delays forindividual locomotives, so that, for example, a rail car stays at the platform longer than afreight train. The programming is done with the following LNCVs:LNCV Description110-117 Vehicle addresses which trigger the Delay120-127 Delay in Seconds (0-255)The vehicle addresses are programmed according to the same convention that is also usedfor all other functions in switching operations (see Chap. 7.3.4 to 7.3.6).Switching of Locomotive functions at various Points in the Automatic SequenceAs shown in the sequence of the automatic operation above, there are 5 positions at which anaction, which switches locomotive special functions, can be activated.In the Option for the switching of special functions it can be specified at what point in theswitching sequence the programmed switch function is to be executed. Valid are:66
MARCoCalculation of Instruction option for Changing of Locomotive Special FunctionsOpt No. Description Selection Value Sum1 Do not evaluate driving direction 0Driving direction from Track1 to track2 2Driving direction from Track2 to track1 32 Switching function 2 or 3 0Automatic operation 4-12, 20-28: on arrival at the detector 0Automatic operation 4-12, 20-28: when driving off 43 Special function is switched off 0Special function is switched on 8Special function is toggled 164 Special function is toggled with a delay factor 325 Switching duration in Seconds (max. 31) * 256 • *2566 Position in the sequence (0-4) * 8192 *8192Calculated Value for LNCV 40-49With this function it is possible, in automatic operations, to switch multiple special functions ofthe locomotive in a block section.ExampleA rail car with address 15, in block operation, is first the sound of closing of doors (f3) and thenas it departs the sound of the whistle (f2). In this example the special function for closing doorsmust be activated in position 2 and the special function for the whistle in position 4. Bothoperations must be programmed in different LNCVs. Next, a pause of 5 seconds can beinserted between the two sounds by a locomotive specific Delay. The programming:Special function f3 at Position 2 is switched on for 1 Second.Calculation of Instruction option for Changing of Locomotive Special Functionsn Description Selection Value Sum1 Do not evaluate driving direction 0Driving direction from Track1 to track2 X 2 2Driving direction from Track2 to track1 32 Switching function 2 or 3 0Automatic operation 4-12, 20-28: on arrival at the detector 0Automatic operation 4-12, 20-28: when driving off X 4 43 Special function is switched off 0Special function is switched on X 8 8Special function is toggled 164 Special function is toggled with a delay factor X 32 325 Switching duration in Seconds (max. 31) * 256 1s • *256 2566 Position in the sequence (0-4) * 8192 2 *8192 16384Calculated Value for LNCV 40 16686For switching on special function f2 at position 4 for 1 second:Calculation of Instruction option for Changing of Locomotive Special FunctionsOpt No. Description Selection Value Sum1 Do not evaluate driving direction 0Driving direction from Track1 to track2 X 2 2Driving direction from Track2 to track1 32 Switching function 2 or 3 0Automatic operation 4-12, 20-28: on arrival at the detector 0Automatic operation 4-12, 20-28: when driving off X 4 43 Special function is switched off 0Special function is switched on X 8 8Special function is toggled 164 Special function is toggled with a delay factor X 32 325 Switching duration in Seconds (max. 31) * 256 1s • *256 2566 Position in the sequence (0-4) * 8192 4 *8192 32768Calculated Value for LNCV 41 3307067
MARCoProgramming of Function InstructionsCommand LNCV ... 0 ... 1 ...,2 ... 3 ... 4 ... 5 ... 6 ... 7 ... 8 ... 9Address 2... 15 15Value 3… 8 4Option 4… 16686 33070Programming of individual DelayCommand LNCV ... 0 ... 1 ...,2 ... 3 ... 4 ... 5 ... 6 ... 7Address 11... 15Value 12… 568
7.5 Special functions7.5.1 DirectDriveMARCoThe direct take-over of a locomotive by a controller on a control desk without the need to enterthe locomotive address is known as DirectDrive. This simple and convenient method oflocomotive control can be used in combination of MARCo with a number of <strong>Uhlenbrock</strong> controldesks.The prerequisite for DirectDrive is that the MARCo-Receiver is setup so that it sends the<strong>Uhlenbrock</strong> data format. For this LNCV 15 must have a Value 1 or 9 (more about LNCV 15 inChap. 7.6). Then the MARCo-Receiver sends all locomotive information via the LocoNet, assoon as a locomotive arrives at the Detector. The controllers connected to the LocoNet canthen support locomotive selection with the DirectDrive Function.7.5.1.1 DirectDrive and Intellibox/IB-ControlThe Intellibox MARCo Mode (from Software Version 1.55) can be selected by multipleoperation of the [mode]-key or pressing the [mode] and [6] in quick succession. The middle ofthe display changes to match the selected mode.NOTE: Even though the mode here is known as LISSY-Mode, it functions in exactly the sameway, with the information transmitted by the MARCo-Receiver.If the LISSY Mode is selected the MARCo-Receiver can be monitored in the middle part of thedisplay:In the display represented above it shows that the monitored receiver was passed by alocomotive with address 234 in the direction indicated by the arrow. The 2 shown after thedash is the train category. If the monitored point is passed by a wagon with a MARCotransmitter it is indicated in the display with a W:For a MARCo-Receiver in a vacant block section the middle section of the display is cleared.If a locomotive is reported by MARCo Receiver, as shown in the middle part of the displays,then this locomotive can be taken over one of the two controllers on the Intellibox. For this youpress the []-key to take over the locomotive on the left controller and the []-key, to takeover the locomotive on the right controller.7.5.1.2 DirectDrive and Track-ControlThe TrackControl Speed Controller 69 300 similarly supports the DirectDrive Function. Assoon as a locomotive passes the MARCo Receiver’s Detector which is assigned to thecontroller the LED above the [lok#]-key blinks “green”. Now only the [lok#]-key needs to bepressed once and the locomotive is taken over by the controller.Also every TrackControl Signal module 69 230 can have a MARCo-Receiver assigned to itusing LocoNet programming. For this, LNCV 37 of the signal module must be assigned withthe MARCo Receiver’s module address. If this is done, the signal module remembers thelocomotive which last passed the detector of the assigned MARCo Receiver. If now the buttonon the signal module is pressed at the same time as the [lok#]-key on the controller 69 300,the locomotive which last passed the detector is taken over. This way you take control of trains69
MARCothat are stopped at a red signal in your station, using the keys on your TrackControl speedcontroller.7.5.2 Braking before a signalLengthening the Braking section with a Precision stopThis Chapter is about shuttle trains, holding point, block section and station block, explainingthat every vehicle will brake immediately it passes over the first track section (Track 1) byusing its internal braking settings. Thus, the point at which a vehicle comes to rest isdependent on its speed when it enters the block and the design of the vehicle. So everylocomotive will stop at a different place.This behaviour can be modified second track second is the actual stopping point that is whenthe signal is reached. The locomotive brakes after passing the first detector to an adjustablespeed (the programmed speed step applies to all locomotives) and moves forward at thisspeed to the second detector, where it finally stops. By setting a slow speed, a point can berealized at which all vehicles stop, if the mechanical characteristics of the locomotive are nottoo different.This can be achieved by programming a block speed in LNCV 9.LNCV Description9 Block speedIf a speed step (2-127) is entered here, then the module in the automatic modes 4-12 and 20-28 (LNCV 2) will reduce the speed to the preset value when a train is recognized. Afterreaching the second track section (track 2) the train brakes to speed step 1.0 = stopping with the decoder-internal delay1 = emergency stop (stop without delay)2-127 = speed step for the slow section70
MARCoThe speed step values 2 to 127 are automatically converted by the Intellibox depending on thenumber of speed steps the individual locomotive is set to DCC 14/27/28/128 speed steps. Thecalculated values are rounded to a whole number.After passing over detector 1, the locomotive will use its decoder-internal deceleration toreduce speed to the programmed speed step for this section, and finally stops only after itpasses over detector 2.The factory default for LNCV 9 = 0, block speed function is switched off.7.5.3 Deactivating the automatic mode via solenoid addressSometimes, e.g. when manually shunting within tracks with MARCo receivers, it can be usefulto switch an automated MARCo-Receiver off and to restart it on completion of the manualprocess. The MARCo-Receiver must then have a solenoid address assigned to it in LNCV 11.If this is set to "red", the MARCo-Receiver is deactivated. By switching it to "green" theMARCo-Receiver is reactivated. When switching the MARCo-Receiver OFF, the current statevalues are deleted and it restarts the automatic mode from scratch.When restarting the automatic mode, the MARCo-Receiver assumes the respective blocksection is free for a new vehicle. If the reactivated unit acts as an exit manager, then afterswitching on in the vacant state, a train will automatically be cleared to leave the station. Forsafety reasons, to avoid collisions, this procedure must be manually started, by setting astation exit signal to green.LNCV Description11 Automatic mode on/off switch, by solenoid address.0 = automatic operation not influenced by the solenoid address1-2000 = solenoid address with which MARCo-Receiver deactivated (red) or activated (green)7.5.4 Train dependent automation (only with Intellibox II, from Ver. 1.0.11-1.0.11)It is possible to affect the layout automation by a train’s category. For this there is LNCV 12:LNCV Description12 Train dependent automation = switchin automatic function on or off by train category..For Functions 4-12 and 20-28 according to LNCV 20 = automation not influenced by categories1-15 = For all train categories other than the one entered, the automatic function is to beexecuted after arriving in the track section101-115 = only the entered train category is to execute the automatic function after arriving inthe track section.NOTE: With Intellibox II (from Software version 1.011 - 1.011) 15 train categories can be used.For this, a linking option in the Intellibox II between locomotive address and one of 15locomotive categories can be used.This permits interesting operational sequences to be set up e.g. the Valley Station for theshuttle train for the mountain railway, at which the driving direction is reversed. All other trainsdrive through without direction changes.7.5.5 Block option "vacant/occupied" in the automated layoutWhen a vehicle with MARCo transmitter drives over a MARCo-Receiver programmed for anautomatic mode, it then implements the program. Internally the MARCo-Receiver saves the"occupied" state. That means that the MARCo-Receiver must become “vacant” again before itcan accept the next vehicle. As long as the MARCo-Receiver is "occupied", it cannot handleany further vehicles automatically.Should a vehicle that entered a block automatically be ‘released’ manually, the block must beset to “vacant” again before the next vehicle can enter the block.During the automatic operation the MARCo receivers always switch to the "occupied" statewhen a vehicle passes the detectors. LNCV 10 can specify how the MARCo-Receiver can bereturned to the “vacant” state.In particular, for the shuttle terminus or holding point, it is advisable to switch the abandonedstop back to “vacant” via a timer and also set signal back to "red".71
MARCoLNCV Description10 Block option = options for the block change in state of "occupied" to "vacant", if a train left theblock or drove through.0 = exit signal (LNCV 6) is switched to "red". after the block is vacated1-255 = if afterwards the indicated number of seconds passed. Value in seconds.257-511 = like preceding option. Now the exit signal indicated in LNCV 6 is also set to red.Also the exit signal specified in LNCV 6 is switched to “red”Value in seconds + 256.7.5.6 Resetting and deletionIn the course of operating a layout it can be necessary to set a MARCo-Receiver to a known,defined state.If you want to program your own functions, then we recommend that you delete the factoryinstalled pre-programmed Functions before you commence programming, otherwise these caninterfere with your desired operation.If you have a MARCo-Receiver with unknown contents, it is better that you reset it to factorydefault. In factory default condition you have a number of known pre-programmed functions.Therefore you can simply test the operation.The delete and/or reset is done via programming a special mode of operation into the LNCV 2of your MARCO receiver. Four different options exist for deletion and/or resetting:LNCV Description Value2 Delete functions96-9996 = Clear the current operating conditions. Programmed LNCVs is notchanged.97 = Clear all LNCVs for the switching mode (starting from LNCV 20)98 = Set all LNCVs to 0, except LNCV 0 and 1 (address)99 = Reset to Factory default, without changing addressFactory default settings of MARCo Receivers:Function LNCV Description ValueBasic Settings0 Module address, and first detector address 11 Second detector address 22 Direction sensitive switch mode 215 Save module operation mode at power off 8Switching Function 1 20 For all trains 2000030 …f0 (light) 140 …Turn off if direction S1 -> S2 2Switching Function 1 21 For all trains 2000031 …f0 (light) 141 …Turn on if direction S2 -> S1 11All other LNCVs are programmed to the Value 0.72
7.6 Module SettingsWith the help of LNCV 15 various module settings can be affected.MARCoOpt No. Description Selection Value Sum1 Send transfer format (ÜF) to the LocoNet 0Send ÜF <strong>Uhlenbrock</strong> format with loco address and category 1Send ÜF Digitrax format with loco address and block vacant 2Send ÜF Digitrax format with loco address and block occupied 33 Does not save operating status when switching off 0Saves operating status when switching off 84 Sends no feedback (vacant/occupied) for the block(vacant/occupied)0Sends feedback (vacant/occupied) for the Block16(vacant/occupied) the address in LNCV 1 (address tracl 2) inoperating mode LNCV 2 = 4-12 and 20-285 Sends no feedback (vacant/occupied) for the block(vacant/occupied) for track10Sends feedback (vacant/occupied) for the Block32(vacant/occupied) with the address in LNCV0 (1. Moduleaddress) for track1 in operating mode LNCV 2 = 1 and LNCV 2= 36 Sends no feedback (vacant/occupied) for the block(vacant/occupied) for track20Sends feedback (vacant/occupied) for the Block64(vacant/occupied) with the address in LNCV0 (2. Addresstrack2) for track1 in operating mode LNCV 2 = 1 and LNCV 2 =3Calculated value for LNCV 15With option 1 you can specify whether and which LocoNet protocol format is sent to otherLocoNet devices that will use the MARCo receiver’s reported data (address, category, drivingdirection, receiver address of the MARCo receiver). e.g. if a LocoNet display (item No. 63450)is to Indicate the locomotive address to be used, the MARCo-Receiver must be set to send<strong>Uhlenbrock</strong> format.With the option 3 you can specify whether the MARCo-Receiver saves status informationwhen the power is switched off.Option number 4 determines if the MARCo-Receiver sends Feedback occupied or vacant withthe address of the second track section (LNCV 1). Only for automatic functions (LNCV 2 = 4 -28).Option number 5 can determine if the MARCo-Receiver sends feedback occupied or vacantwith the module address for track1 (LNCV 0). Only for operating modes Basic function andSwitching function with double detector. (LNCV 2 = 1 or 3)Option number 6 can determine if the MARCo-Receiver sends feedback occupied or vacantwith the address of the second track section (LNCV 1). Only for operating modes Basicfunction and Switching function with double detector. (LNCV 2 = 1 or 3)LNCV 15 is set to 8 in the Factory.Number of valid received Address bytesBefore the locomotive address is sent over the LocoNet and an automatic function isexecuted, a minimum number of vaslid bytes, specified in LNCV 17, must be received by theRailCom Telegrams when a locomotive enters a particular decoder section.LNCV Description Value17 Number of valid received Address bytes that must be received by RailCom 0-255before the address is accepted.73
MARCoWaiting time to the next Automatic StartWaiting time in Seconds after which a locomotive has left a detector track section, before anew locomotive can activate an automatic function (not in operating mode 3, two singledetectors).LNCV Description Value18 Time to the next automatic start in seconds (not with operating mode 3, twosingle detectors).0-255Startup TimeThe MARCo-Receivers attempt, at start-up, to register their temporarily saved administeredlocomotive addresses with the center. If many MARCo-Receivers are installed it can lead todata loss if they all want to register at the same time.In order to control these train registrations in a regular way the MARCo-Receiver has a startuptime in LNCV 19. This determines the time after power on that the MARCo-Receiver waits,before it attempts to register the administered locomotive address.LNCV Description Value19 Startup time in 0.5s steps (maximum 127.5s) 0-255It makes sense therefore to increment the startup time from one MARCo-Receiver to the nextby a value of 1.74
8 Tips and Tricks8.1 Switching off and state savingMARCoIn the course of running the layout the MARCo-Receiver saves different state information suchas: Locomotive address, category, speed, occupancy etc. The MARCo-Receiver is factory setso that these states are retained if the layout power is OFF. When turning the power back ONsaved state information is restored. The layout can continue where it left off when it was turnoff. If the MARCO Receivers are connected to a LocoNet segment which is powered byLocoNet Power Injector (63100), this power injector must be switched on after the Intelliboxhas fully booted.After an erasing process, this function is deactivated. All LNCVs, except the address aredeleted during this procedure (LNCV 2 = 98). To activate state saving again LNCV 15 mustbe set to value 8.8.2 Commuter trains and multi-tractionAs described in chapter 7.5.5, the MARCo-Receiver uses the first recognized address to setthe internal occupied state (block option). Further vehicles, passing the detectors, don’t triggerthe ‘program’ again.Should a commuter train’s control cab car be fitted with a MARCO transmitter with the sameaddress as the locomotive, the train will stop correctly at a red signal irrespective of itstravelling direction. As soon as the address is recognized, an appropriate speed instruction issent regardless of whether the address was sent by the locomotive or by the control cab car.It is similar with multi-traction. The first vehicle identifies itself with its address. This does nothave to be the so-called guidance address of the multi-traction. The system recognizes thefact that it concerns multi-traction and sends the appropriate Instructions to all vehicles drivingin the traction.8.3 Command execution timeWhen processing individual groups of instructions of the switching operation, the currentinstruction must be completed before the next one can be implemented.The instruction for switching an individual solenoid takes approx. 0.5 seconds. If severalsolenoids are to be operated in a sequence, processing will take accordingly longer.In the group of the function instructions it is possible to time the functions, switching them onfor a certain time (chapter 7.3.4) and then automatically switching off again. Processing of thesequence can only continue after such an instruction has timed out.NOTE: Avoid long times and too many timed functions. Otherwise there is a possibility thatinstructions at the end of the command string are implemented too late.8.4 Extended stationsChapter 7.4.5 showed that with an entry manager, station block and exit managers it ispossible to automate simple stations. In the example in the aforementioned Chapter thestation block operates (track manager) e.g. as block busy response. As the MARCo-Receivercan automatically send an Occupied or Free message, every other function, and not only theblock, is suitable for station administration.The entry and exit supervised tracks do not necessarily have to be in the close range of thestation, but in principle can be distributed around the layout. Thereby varied operationalsequence can be arranged. This however requires a very good knowledge of the operation ofthe layout and Documentation of MARCo-Receiver programming. The possibility of"distributed stations" is therefore for advanced users.75
8.5 MARCo and Fleischmann TwinCenterMARCoIf your TwinCenter has Software Version 1.1 or higher you can use all the functions andprogramming possibilities described in this manual for use with the Intellibox I.The software update to Version 1.1 is available from the Fleischmann Company’s internet site.76
MARCoAppendix77
MARCoA.1 MARCO transmitter 68320 Configuration Variable (CVs)CVs CVsValue FactoryMeaningLoco MARCORange default1 116 Short address 0-127 317 117 Long address High byte 192-231 19918 118 Long address Low byte 0-255 208short address valid29 1290-32 0long address validA.2 LNCV Table for the MARCo ReceiverLNCV Description0 Module address and first detector addressGeneral address : 655351 Address track 2 (2. Single detector) for track 2, or as feedback address(according to Module configuration in LNCV 15)2 Selection of the different modesBasic functions0 = Receiving locomotive data via a double detector.Transmission of address, category, driving direction and speed.Note: Transmission on the LocoNet is activated with LNCV 15.1 = Receiving locomotive data over 2 single detectors in 2independent places on the Layout.Note: Transmission on the LocoNet is activated with LNCV 15.Switching operation2 = Switching operations with double detector in a single location onthe layout with direction sensing3 = Switching operations with 2 single detectors at 2 indepententlocations on the layout with direction detectionAutomatic functions without block reporting4 = time controlled shuttle traffic terminus5 = signal controlled shuttle traffic terminus6 = time controlled holding point7 = block section/station block8 = entry manager9 = exit manager, chronological track sequence10 = exit manager, random track sequence11 = exit manager, chronological track sequence, selective trackswitching12 = Exit manager, random track sequence, selective track switchingAutomatic functions with block reporting20 = time controlled shuttle traffic terminus with block status message21 = signal controlled shuttle traffic terminus with block status message22 = time controlled holding point with block status message23 = block section/station block with block status message24 = entry manager with block status message25 = exit managers, chron. track sequence with block status message26 = exit managers, random track sequence with block status message27 = exit manager, chronological track sequence, selective trackswitching28 = exit manager, random track sequenceDelete functions96 = delete current operating status.Programmed LNCVs are not changed.97 = delete all LNCVs starting from LNCV 2098 = all LNCVs sets 0, except LNCV 0 and 1 (address) to the value99 = restore factory defaults, without address changeValue SeeRange chapter1-4095 5.1655351-4095 5.1, B20-10,2,34-1220-2896-995.2And7.78
MARCoLNCV Description3 Direction in which the automation is active according to LNCV 20 = Automatic active with travel direction from track 1 to track 21 = Automatic active with travel direction from track 2 to track 12 = Automatic active in both travel directions (only stopping point)4 Holding time for shuttle traffic and terminus (automatic functions in setin LNCV 2). Value in seconds.5 Delay period between switching the locomotive’s route and thedeparture of the waiting locomotive applies to all modes set in LNCV 2.Value in seconds.6 Solenoid address of the exit signal for the automatic mode set in LNCV2. In automatic modes 4, 6, 20 and 22 the signal is set by the module;in automatic modes 5, 7-10, 21 and 23-26 the signal is monitoredstopping the train.Note: This signal must always be specified in automatic mode.7 1. Address for solenoid, routes from Intellibox or feedback for thoseAutomatic modes set in LNCV 2. The appropriate instruction is sent, ifthe detector is passed.0 = no address instruction is sent20010 - 20241 = switch an Intellibox route10, 20, 30 - 20000 = solenoid 1, 2, 3 - 2000 set to red/round11, 21, 31 - 20001 = solenoid 1, 2, 3 - 2000 to green/straight set12, 22, 32 - 20482 = feedback address 1, 2, 3 - 2048 - vacant13, 23, 33 - 20483 = feedback address 1, 2, 3 - 2048 - occupied20010-20241 = Intellibox I – Route switching8 2. Address for solenoid, routes in Intellibox or feedback for thoseautomatic mode as set in LNCV 2. See LNCV 7.9 Block speedIf a speed step (2-127) is entered here, then the module in theautomatic modes 4-10 and 20-26 (LNCV 2) can use a 3 detectorsystem. The normal double detector detects the train and reduces itsspeed to the specified value. Detector 2 and 3 are connected inparallel - 2. Detector 3. then brakes the train to speed step 1 (=emergency stop).0 = stop with the locomotive decoder’s-internal delay1 = emergency stop (stop without delay)2-127 = speed step for the slow section10 Block option = options for reporting the change in block status from"occupied" to "vacant", if a train drives out of or through the block.0 = exit signal (LNCV 6) is set to "red" after the block is vacated1-255 = the statue is reported after the specified Value in seconds.257-511 = like previously. Now the Exit signal in LNCV 6 is set to red.Value in seconds + 25611 Automatic operation functions by solenoid address switch on or off.0 = no mechanism influence by the solenoid address1-2000 = solenoid red: MARCo-Receiver is not active or green isactivate12 Train dependent automation = switching automatic functions on or offby train categories.For functions 4-12 and 20-28 as in LNCV 20 = no automatic influence by train categories1-15 = All train categories the except the one entered should influencethe automatic function upon arrival in the track section,101-115 = Only the one entered should influence the automaticfunction upon arrival in the track section.Value SeeRange chapter0-2 7.40-255 7.4.17.4.30-255 7.4.51 2000 7.4.17.4.40-20483 7.4.17.4.50-20483 7.4.17.4.50-127 7.4.20-511 7.4.50-2000 7.4.30-15101-1157.4.479
MARCo13 Meaning of the LNCV, if LNCV 2 has a value of 9, 10, 25, or 26: 0-4095 7.4.5.2Linking of the Exit manager and Entry manager functions.0 = no linking from the Exit Manager to the Entry manager1-4095 = enter the address from LNCV 0 of the associated Entrymanager, so Exit manager can determine if a train is waiting to enterthe station at the Entry manager. The Exit manager clears a track sothat the waiting train can enter the station. The conditions for this arethe values in LNCVs 20-119 with both managers programmed thesame. Also, a new train selection is automatic if the station control withpassing loop has the condition, “all trains should use the passing loop”,and is returned to “Normal operation“.15 Presets for the Receiver module0-63 7.60 = Don’t send any transmission format (ÜF) to the LocoNet1 = Send ÜF <strong>Uhlenbrock</strong> with Locomotive address2 = Send ÜF Digitrax with Locomotive address and Block status(vacant/occupied)Attention: only one transmission format can be used at one time.4 = The MARCo-Receiver is used with a LokBoss8 = Save the actual operating state at power down16 = Send a feedback message vacant/occupied for thevacant/occupied block with the address from LNCV 1 (address track 2)in operating modes LNCV 2 = 4-12, 20-2832 = Send a feedback message vacant/occupied for thevacant/occupied block with the address from LNCV0 (1.Moduleaddress) in operating modes LNCV 2 = 1 or 364 = Send a feedback message vacant/occupied for thevacant/occupied block with the address from LNCV 1 (address track 2)in operating modes LNCV 2 = 1 or 3Note: The selected values are totalled and entered into the LNCV.16 Software version varies -17 Number of valid received Address bytes that must be received byRailCom before the address is accepted.0-255 7.618 Time to the next automatic start, in seconds (not with operation mode 0-255 7.63, two single detectors).19 Startup time in 0.5s steps (maximum 127.5s) 0-255 7.680
A.2.1 Extended LNCV Table for the MARCo-ReceiverMARCoIn principle, the LNCV table for the MARCo Receiver. Shown below, are only the LNCVs whose meaningdiffers or extended.Function: “Station Control with Passing Loop”The receiver is configured as Entry Manager; LNCV 2 is set to 8 or 24.LNCV DescriptionValue Range chapter13 Passing loop controlled by solenoid0-2000 7.4.5.4Solenoid green = all trains use the passing loopSolenoid red = only trains and train categories entered in CV 122 to 127use the passing loop120 Virtual Address, with which the Entry Manger reports the passing as 1-4095 7.4.5.4occupied or vacant.This address (LNCV 0) must not be used by other MARCo Receivers.121 Not used - -122-127 Addresses of Locomotives (1-9999) or train categories (20001-20004),that should automatically use the passing loop.The receiver is configured as Exit Manager; LNCV 2 is set to 9,10, 25 or 26LNCVDescription13 Linking the function of Entry Manager and Exit Manager.0 = No linking of Entry Manager and Exit Manager1-4095 = if the address from LNCV 0 of the matching Entry Manger isentered here, the Exit Manager ascertains if a locomotive is waiting atEntry Manager, to enter the station. The Exit Manager clears a track sothe waiting train can enter the station. The prerequisite for this that theentries in LNCVs 20-119 are the same in both managers. Furthermore anew train selection is made in case a station control with passing loop isset to status “all trains must use the passing loop” is returned to “normaloperation”.120 Address with which the Entry Manager reports the passing loop asoccupied or vacant.This address (LNCV 0) must not be used by another MARCO Receiver.121 Route from the station entry to the station exitInstruction for switching the route in the Intellibox or IB-Switch which isthe path from the station entrance (Entry Manger block) to the stationexit (Exit Manager block).122 If a train enters the passing loop, instead of the instruction in LNCV 7,the value programmed here is used. (programming see LNCV 7)123 If a train enters the passing loop, instead of the instruction in LNCV 8,the value programmed here is used. (programming see LNCV 8)1-9999,20001-200157.4.5.4Value SeeRange chapter0-2000 7.4.5.41-4095 7.4.5.410-20483 7.4.5.410-20483 7.4.5.410-20483 7.4.5.4Function “Locomotive specific Delay” in automatic operation of a Shuttle service,Holding point and Block SectionLNCV DescriptionValue Range chapter110-117 Vehicle addresses which trigger the Delay 1-9999 7.4.6120-127 Delay in Seconds (0-255) 0-255 7.4.681
MARCoA.3 MARCo-Receiver Factory defaultsYou can set the MARCo-Receiver to the above values with a RESET, by programming theLNCV 2 to 99. The value for the addresses in LNCV 1 and 2 remains unchanged.Function LNCV Description ValueBasic settings0 Module address, and track 1 address 11 Address Track 2 (2. Single detectors) for Track 2, or as2feedback address used in automatic functions 4 - 282 Direction sensitive switch mode 215 Save module operation mode at power off 817 8 valid address bytes must be received via RailCom before 8the address is accepted.18 5 seconds before the automatic start 519 Startup time in 0.5s 1Switch Function 1 20 For all trains 2000030 ...The light 140 ...Turn off if direction S1 -> S2 2Switch Function 2 21 For all trains 2000031 ...The light 141 ...Turn on if direction S2 -> S1 1182
MARCoA.4 Speed step tableTable for converting speed steps to absolute speed:DCC 14 SS DCC 27 SS DCC 28 SS1 21 2 1 22 8 2 72 103 13 3 114 17 4 163 195 22 5 206 26 6 254 297 31 7 298 35 8 345 389 40 9 3810 44 10 436 4811 49 11 4712 53 12 527 5713 58 13 5614 62 14 618 6715 67 15 6516 71 16 709 7617 76 17 7418 80 18 7910 8619 85 19 8320 89 20 8811 9521 94 21 9222 98 22 9712 10523 103 23 10124 107 24 10613 11425 112 25 11026 116 26 11514 12427 121 27 11928 12483
A.5 Route Table for the Intellibox 1MARCoTranslation between the route number of the Intellibox 1 and the command valueprogrammed in a MARCo receiverGroup 1 Group 2 Group 3RouteSolenoid Add MARCo RouteSolenoid Add MARCo RouteSolenoid Add MARCoNo.value No.value No.value1 2001-red 20010 1 2009-red 20090 1 2017-red 201702 2001- green 20011 2 2009- green 20091 2 2017- green 201713 2002-red 20020 3 2010-red 20100 3 2018-red 201804 2002- green 20021 4 2010- green 20101 4 2018- green 201815 2003-red 20030 5 2011-red 20110 5 2019-red 201906 2003- green 20031 6 2011- green 20111 6 2019- green 201917 2004-red 20040 7 2012-red 20120 7 2020-red 202008 2004- green 20041 8 2012- green 20121 8 2020- green 202019 2005-red 20050 9 2013-red 20130 9 2021-red 2021010 2005- green 20051 10 2013- green 20131 10 2021- green 2021111 2006-red 20060 11 2014-red 20140 11 2022-red 2022012 2006- green 20061 12 2014- green 20141 12 2022- green 2022113 2007-red 20070 13 2015-red 20150 13 2023-red 2023014 2007- green 20071 14 2015- green 20151 14 2023- green 2023115 2008-red 20080 15 2016-red 20160 15 2024-red 2024016 2008- green 20081 16 2016- green 20161 16 2024- green 20241A.6 Table to use Extended FunctionsComputation of the command value for the change of locomotive special functions (LF)LF F0 F1 F2 F3 F4 F5 F6 F7 F8 F9 F10 F11 F12Value 1 2 4 8 16 32 64 128 256 512 1024 2048 4096SelectionSumCalculatedvalue forLNCV 30-39Computation of the command option for the change of locomotive auxiliary functionsOpt No. Description Selection Value SumDo not evaluate driving direction 01 Driving direction from track 1 to track 2 2Driving direction from track 2 to track 1 3Switching function 2 or 3 02 Automatic operation 4-12, 20-28: on arrival at the detector 0Automatic operation 4-12, 20-28: when driving off 4Switch auxiliary function off 03 Switch auxiliary function on 8Change auxiliary function 164 Auxiliary function timed change 325 Switching duration in seconds (max 31) * 256 *2566 Position in the sequence (0-4) * 8192 *8192Calculated value for LNCV 40 to 4984
MARCoComputation of the command option for the change of locomotive speedOpt No. Description selection value sumDo not evaluate driving direction 01 Driving direction from track 1 to track 2 2Driving direction from track 2 to track 1 3Switching function 2 or 3 02 Automatic operation 4-12, 20-28: on arrival at the detector 0Automatic operation 4-12, 20-28: when driving off 43Speed specified as absolute value (0-127) 0Speed specified in percent (0-255%) 8Calculated value for LNCV 70 to 79Computation of the command option for solenoid and feedback instructionsOpt No. Description selection value sumDo not evaluate driving direction 01 Driving direction from track 1 to track 2 2Driving direction from track 2 to track 1 3Switching function 2 or 3 02 Automatic operation 4-12, 20-28: on arrival at the detector 0Automatic operation 4-12, 20-28: when driving off 4Calculated value for LNCV 100 to 109A.7 Copying templatesFollowing this you will find two tables that you can copy to record the programming for each ofyour MARCo receivers.Naturally you can create your own tables if you wish, in order to document your layout. Werecommend that you thoroughly document your layout, so that after some time you are stillable to determine what each receiver is programmed to do. This helps you to fully enjoy yourlayout.85
MARCoMARCo-Receiver No.ConfigurationSwitch Operation Shuttle Service Holding Point Block SectionBasic programmingLNCV Value Type LNCV Value Type0 1. Address (module address) 9 Speed before stopping1 2. Address (track 2) 10 Block option2 Function (mode) 11 Solenoid address for on/off Op.3 Driving direction 12 Category option4 Holding time 13 Address entry manager5 Delay for solenoid switching 15 Module configuration6 Signal to sets 16 Number of address bytes7 1. Solenoid/feedback address 17 Time to next auto. Start8 2. Solenoid/feedback address 18 Startup timeProgramming of function instructionsCommand LNCV ... 0 ... 1 ...,2 ... 3 ... 4 ... 5 ... 6 ... 7 ... 8 ... 9Address 2...Value 3…Option 4…Programming of speed instructionsCommand LNCV ... 0 ... 1 ...,2 ... 3 ... 4 ... 5 ... 6 ... 7 ... 8 ... 9Address 5...Value 6…Option 7…Programming of solenoid and route instructionsCommand LNCV ... 0 ... 1 ...,2 ... 3 ... 4 ... 5 ... 6 ... 7 ... 8 ... 9Address 8...Value 9…Option 10..Programming of individual DelayCommand LNCV ... 0 ... 1 ...,2 ... 3 ... 4 ... 5 ... 6 ... 7Address 11...Value 12…86
MARCo◦MARCo-Receiver No.ConfigurationEntry ManagerExit ManagerBasic programmingLNCV Value Type LNCV Value Type0 1. Address (module address) 9 Speed before stopping1 2. Address (track 2) 10 Block option2 Function (mode) 11 Solenoid address for on/off Op.3 Driving direction 12 Category option4 Holding time 13 Address entry manager5 Delay for solenoid switching 15 Module configuration6 Signal to sets 16 Number of address bytes7 1. Solenoid/feedback address 17 Time to next auto. Start8 2. Solenoid/feedback address 18 Startup timeReceiver switches the following RoutesLE Route Locomotive addresses and categoriesLNCV ... 0 ... 1 …2 …3 …4 …5 …6 …7 …8 …92…3…4…5…6…7…8…9…10…11… - -12… - -87
MARCoExamples88
1. ExampleMARCoFading IntelliSound in/outOn the layout is a tunnel that travels in a particular direction. In the tunnel the locomotives donot operate with IntelliSound. At the tunnel exit the sound is to be reactivated. Via the specialfunction f8 the IntelliSound module can fade the sound out, if it is on. If the special function f8is switched off, then the sound will be faded in audibly.In order to trigger this operation automatically with each locomotive, track 1 is installed justoutside the tunnel entrance and track 2 is placed just before the tunnel exit.Programming necessary for this example is:Basic programming of the LNCVs 0-19LNCV Value Type LNCV Value Type0 1 1. Address (module address) 8 0 2. Solenoid/feedback address1 2 2. Address (track 2) 9 0 Speed before stopping2 3 Function (mode) 10 0 Block option3 0 Driving direction 11 0 Solenoid address for on/off Op.4 0 Holding time 12 0 Category option5 0 Delay for solenoid switching 13 0 Address entry manager6 0 Signal to sets 15 0 Module configuration7 0 1. Solenoid/feedback address 19 1 Startup timeProgramming of function instructionsDetector 1 Detector 2Command LNCV ... 0 ... 1 ...,2 ... 3 ... 4 ... 5 ... 6 ... 7 ... 8 ... 9Address 2... 20000 0 0 0 0 20000 0 0 0 0Value 3… 256 0 0 0 0 256 0 0 0 0Option 4... 8 0 0 0 0 0 0 0 0 0Computation of the command value for the change of locomotive special functions (LF)LF F0 F1 F2 F3 F4 F5 F6 F7 F8 F9 F10 F11 F12 CalculatedValue 1 2 4 8 16 32 64 128 256 512 1024 2048 4096value forLNCVSelectionx30/35Sum 256 25689
MARCoComputation of command options to change the locomotive special functionsOpt No. Description Selection Value SumDo not evaluate driving direction X 0 01 Driving direction from Track 1 to Track 2 2Driving direction from Track 2 to Track 1 3Switching function 2 or 3 X 0 02 Automatic operation 4-12, 20-28: on arrival at the detector 0Automatic operation 4-12, 20-28: when driving off 4Switch auxiliary function off 03 Switch auxiliary function on X 8 8Change auxiliary function 164 Auxiliary function timed change 325 Switching duration in seconds (max 31) * 256 *2566 Position in the sequence (0-4) * 8192 *8192Calculated value for LNCV 40 8Computation of command options to change the locomotive special functionsOpt No. Description Selection Value SumDo not evaluate driving direction X 0 01 Driving direction from Track 1 to Track 2 2Driving direction from Track 2 to Track 1 3Switching function 2 or 3 X 0 02 Automatic operation 4-12, 20-28: on arrival at the detector 0Automatic operation 4-12, 20-28: when driving off 4Switch auxiliary function off X 0 03 Switch auxiliary function on 8Change auxiliary function 164 Auxiliary function timed change 325 Switching duration in seconds (max 31) * 256 *2566 Position in the sequence (0-4) * 8192 *8192Calculated value for LNCV 45 090
MARCo2. ExampleSolenoid switching and feedbackIn the example, a track section will be travelled in only in one direction, and reports asoccupied, if a train is in the section.The feedback for the track section uses an address over 50. Furthermore upon entry to thesection, route 3 from group 2 in the Intellibox is to be enabled, if a train from category 3 entersthe section. Locomotive 100 is to set the exit signal for the track with the solenoid address 30to "green".Basic programming of the LNCVs 0-19LNCV Value Type LNCV Value Type0 1 1. Address (module address) 8 0 2. Solenoid/feedback address1 2 2. Address (track 2) 9 0 Speed before stopping2 3 Function (mode) 10 0 Block option3 0 Driving direction 11 0 Solenoid address for on/off Op.4 0 Holding time 12 0 Category option5 0 Delay for solenoid switching 13 0 Address entry manager6 0 Signal to sets 15 0 Module configuration7 0 1. Solenoid/feedback address 19 1 Startup timeProgramming of solenoid and route instructionsDetector 1 Detector 2Command LNCV ... 0 ... 1 ...,2 ... 3 ... 4 ... 5 ... 6 ... 7 ... 8 ... 9Address 2... 20000 20003 - - - 20000 100 - - -Value 3… 503 20100 - - - 502 301 - - -Option 4... 8 0 - - - 0 0 - - -Computation of the command option for solenoid and feedback instructionsOpt No. Description selection value Sum12Do not evaluate driving direction X 0 0Driving direction from Track 1 to Track 2 2Driving direction from Track 2 to Track 1 3Switching function 2 or 3 X 0 0Automatic operation 4-12, 20-28: on arrival at the detector 0Automatic operation 4-12, 20-28: when driving off 4Calculated value for LNCV 100-109 091
Feedback from when passing a Track SectionMARCoOnly for MARCo-Receiver Automatic functions 4-28In the example a section of track is to be fitted with a double detector and report it as occupiedor vacant when a train enters from track 1 to track 2 or departs.The feedback message for the track section should be via feedback address 10. The MARCo-Receiver has module address 2 and works as a block section with block status reporting. Itsexit signal has address 1.Basic programming of the LNCVs 0-19LNCV Value Type LNCV Value Type0 1 1. Address (module address) 8 0 2. Solenoid/feedback address1 10 2. Address (track 2) 9 0 Speed before stopping2 23 Function (mode) 10 0 Block option3 0 Driving direction 11 0 Solenoid address for on/off Op.4 0 Holding time 12 0 Category option5 0 Delay for solenoid switching 13 0 Address entry manager6 0 Signal to sets 15 17 Module configuration7 0 1. Solenoid/feedback address 19 1 Startup timeSince the 2. Sensor address (LNCV 1) is not used as Sensor address it now works as afeedback address. Thus the entries in LNCVs 80 - 109 from the previous example are nolonger required. The state of the automatic function for block status message (here LNCV 2 =23) is programmed. Also options 1 and 4 must be programmed in the module configurtion(LNCV 15 = 17). If additional operating states are to be saved at power down they are addedto the module configuration (LNCV 15 = 17 + 8 = 25).92
3. ExampleMARCoShuttle train terminus in a branch lineIn a branch line station as shown in the sketch below, some trains, which come from the left,are to stop in the station, then reverse out over turnout W1 and drive up the branch line.For this these trains are assigned train category 2. The MARCo-Receiver ME1 in our exampleis put into time delayed shuttle time operating mode, however this function is only active if atrain from category 2 arrives. All other trains drive through without stopping.If the train stops and drives off again, then the turnout W1 is switched to the branch position.So that the turnout is fully switched over before the train drives off, the train not start till 5seconds after the turnout switching command is issued. Additionally the motor coach with thelocomotive address 96 will honk when driving off (special function F2) and the locomotive withthe address 80 will ring its bell for10 seconds (special function F3).Allocation of the solenoid addressesDesignation W1 S1Solenoid address 10 20The necessary programming of the MARCo-Receiver ME1 is:Basic programming of the LNCVs 0-19LNCV Value Type LNCV Value Type0 1 1. Address (module address) 8 0 2. Solenoid/feedback address1 0 2. Address (track 2) 9 0 Speed before stopping2 4 Function (mode) 10 2 Block option3 0 Driving direction 11 0 Solenoid address for on/off Op.4 60 Holding time 12 12 Category option5 5 Delay for solenoid switching 13 0 Address entry manager6 20 Signal to sets 15 8 Module configuration7 0 1. Solenoid/feedback address 19 1 Startup timeProgramming of solenoid and route instructionsCommand LNCV ... 0 ... 1 ...,2 ... 3 ... 4 ... 5 ... 6 ... 7 ... 8 ... 9Address 8... 20002Value 9… 101Option 10.. 6Computation of the command option for solenoid and feedback instructionsOpt No. Description Selection Value Sum12Do not evaluate driving direction 0Driving direction from Track1 to track2 X 2 2Driving direction from Track2 to track1 3Switching function 2 or 3 0Automatic operation 4-12, 20-28: on arrival at the detector 0Automatic operation 4-12, 20-28: when driving off X 4 4Calculated value for LNCV 100 to 109 693
MARCoProgramming of function instructionsCommand LNCV ... 0 ... 1 ...,2 ... 3 ... 4 ... 5 ... 6 ... 7 ... 8 ... 9Address 8... 96 80 - - - - - - - -Value 9… 4 8 - - - - - - - -Option 10.. 302 2606 - - - - - - - -Horn (F2) switched on for 1 second:Computation of command value to change the locomotive special functionsAuxiliary F0 F1 F2 F3 F4 F5 F6 F7 F8 F9 F10 F11 F12Value 1 2 4 8 16 32 64 128 256 512 1024 2048 4096SelectionxCalculated valuefor LNCV30Sum 4 4Computation of command option to change the locomotive special functionsOpt No. Description selection value sumDo not evaluate driving direction 01 Driving direction from Track1 to track2 X 2 2Driving direction from Track2 to track1 3Switching function 2 or 3 02 Automatic operation 4-12, 20-28: on arrival at the detector 0Automatic operation 4-12, 20-28: when driving off X 4 4Switch auxiliary function off 03 Switch auxiliary function on X 8 8Change auxiliary function 164 Auxiliary function timed change X 32 325 Switching duration in seconds (max 31) * 256 1 *256 2566 Position in the sequence (0-4) * 8192 *8192Calculated value for LNCV 40 302Bell ringing (F3) switched on for 10 second:Computation of command value to change the locomotive special functionsAuxiliary F0 F1 F2 F3 F4 F5 F6 F7 F8 F9 F10 F11 F12Value 1 2 4 8 16 32 64 128 256 512 1024 2048 4096Calculated valuefor LNCV31SelectionxSum 8 8Computation of command option to change the locomotive special functionsOpt No. Description Selection Value SumDo not evaluate driving direction 01 Driving direction from Track1 to track2 X 2 2Driving direction from Track2 to track1 3Switching function 2 or 3 02 Automatic operation 4-12, 20-28: on arrival at the detector 0Automatic operation 4-12, 20-28: when driving off X 4 4Switch auxiliary function off 03 Switch auxiliary function on X 8 8Change auxiliary function 164 Auxiliary function timed change X 32 325 Switching duration in seconds (max 31) * 256 10 *256 25606 Position in the sequence (0-4) * 8192 *8192Calculated value for LNCV 41 260694
4. ExampleMARCoBraking at a holding point with two directional trafficIn order to stop a train in either direction at the same place you must use the ancillary circuitas shown, so no more than 2 photo detectors are attached to the receiver input. Control of twosignals with different addresses is however not possible with the circuit indicated here,because in this case the module’s operating mode is ‘direction dependent holding place’ andthe travelling direction is recognized by different detectors. The MARCo-Receiver controls onlyone signal with the solenoid address, which is entered in LNCV6.Basic programming of the LNCVs 0-19LNCV Value Type LNCV Value Type0 1 1. Address (module address) 9 10 Speed before stopping1 0 2. Address 10 2 Block option2 6 Function (mode) 11 0 Solenoid address for on/off Op.3 0 Driving direction 12 0 Category option4 60 Holding time 13 0 Address entry manager5 2 Delay for solenoid switching 15 0 Module configuration6 10 Signal to sets 17 8 Number of receiver addr. bytes7 0 1. Solenoid/feedback address 18 0 Time to next automatic start8 0 2. Solenoid/feedback address 19 1 Startup time95
96MARCo
5. ExampleMARCoBlock section controlIn the above example the one-way traffic block is at entrance to a station entry, which isprotected by signal S1 (entry signal). As is normal, in our example, a train, which enters avacant block, sets the block protection signal to "stop" and the block which the train has left, isfree for a new train. In our example, if a train enters block 2, because signal S3 is on "green",signal S3 is switched to "red", as soon as the train reaches the detector ME2. At the sametime signal S4 can be set to "green", since block 3 is vacant again.Allocation of the solenoid addressesDesignation S1 S2 S3 S4Solenoid address 11 12 13 14Signal S1 is the entry signal for the station and in our example is switched manually.Basic programming for LNCVs 0-19, of MARCo-Receiver ME 1-4LNCVLE Function0 1 2 3 4 5 6 7 8 9 10 11 12 13 15 191 Block section 1 0 7 0 0 0 11 120 131 0 0 0 0 0 8 202 Block section 2 0 7 0 0 0 12 130 141 0 0 0 0 0 8 213 Block section 3 0 7 0 0 0 13 140 0* 0 0 0 0 0 8 224 Block section 4 0 7 0 0 0 14 0* 0* 0 0 0 0 0 8 23* This LNCV can be used, to control block sections, which lie before track section "block 4".If the modules ME 1 to ME 4 are not to implement any further switching functions, LNCVs 20-109 are set to zero.Extension of the exampleAll trains with the train category 2 that enter the Station, i.e. if signal S1 is switched to green,the track route 10/group 1 in the Intellibox is selected. For this route the turnouts to the stationare switched so that the trains of the category 2 can enter track 1.So that all turnouts have time to move to their new position before the train proceeds, MARCoreceivers ME 1 waits 5 seconds before it allows the train to depart. The route can be switchedduring this time. The more items that have to be switched for the route the more time has tobe allowed for the process to finish.97
MARCoBasic programming of MARCo-Receiver ME 1LNCV0 1 2 3 4 5 6 7 8 9 10 11 12 13 15 19LE Function1 Block section 1 0 7 0 0 0 11 120 131 0 0 0 0 0 8 20Programming of solenoid and route instructionsCommand LNCV ... 0 ... 1 ...,2 ... 3 ... 4 ... 5 ... 6 ... 7 ... 8 ... 9Address 8... 20002 - - - - - - - - -Value 9… 20051 - - - - - - - - -Option 10.. 6 - - - - - - - - -Computation of the command option for solenoid and feedback instructionsOpt No. Description Selection Value SumDo not evaluate driving direction 01 Driving direction from Track1 to track2 X 2 2Driving direction from Track2 to track1 3Switching function 2 or 3 02 Automatic operation 4-12, 20-28: on arrival at the detector 0Automatic operation 4-12, 20-28: when driving off X 4 4Calculated value for LNCV 100 698
6. ExampleShadow stationThe shadow station in our example should have the following track plan:MARCoFunctionality:Trains, which enter the entry manager’s track section in the travel direction, will always bestopped at signal S5. MARCo-Receiver ME5 then determines into which track the arrivingtrain may go and switches the route which leads to that track. These route instructions mustswitch all the turnouts and as the last instruction the command switches signal S5 to "green".Thus the route to the track is prepared and entry signal S5 is set to "green", and MARCo-Receiver ME5 allows the train into the selected track.As soon as the exit manager’s track section is vacant, this seeks out an occupied track in thestation and switches the route, from this track to Station exit track. In this route the switchingcommands must switch all of the turnouts and as a last instruction, the switch of that track’sexit signal to "green". This way the exit from a Track to the exit is prepared for the appropriatetrain. That train is then set in motion by the appropriate MARCo-Receiver ME1, 2 or 3.The station control if necessary can also be accomplished with entry manager or Exitmanager, if entry or exit is controlled manually. In this case the appropriate routes or turnoutsand Signals are to be operated manually.Solenoid address 20 is used in the example to deactivate the exit manager. If the solenoidwith the address 20 switched to "red", then the exit manager is switched OFF and train will notdepart the station automatically. Should the layout that has the shadow station be switchedOFF, then the solenoid 20 is set to "red". The automatic train departures from this station arethereby stopped. Seeing the entry track to the station with trains is controlled automatically,you must wait until all the tracks are fully occupied. Now the layout can be switched off. Thedata: which train is on which track, is stored and after restarting the layout, automatic trafficcan again commence. For this only, a train needs to be manually driven out of the shadowstation, by e.g. switching one of the signals S1 to S3 to green or switch an appropriate routefor a train to exit.Allocation of the solenoid addressesDesignation W1 W2 W3 W4 S1 S2 S3 S4 S5Solenoid address 1 2 3 4 11 12 13 14 15Basic programming for LNCVs 0-19, of MARCo-Receiver ME5LNCV0 1 2 3 4 5 6 7 8 9 10 11 12 13 15 19LE Function1 Block section 1 0 23 0 0 0 11 150 0 0 0 0 0 0 9 202 Block section 2 0 23 0 0 0 12 150 0 0 0 0 0 0 9 213 Block section 3 0 23 0 0 0 13 150 0 0 0 0 0 0 9 224 Entry manager 4 0 9 0 0 0 14 20040 0 0 0 20 0 9 9 235 Exit manager 5 0 8 0 0 2 15 0 *) 0 0 0 0 0 0 9 24* This LNCV can be used, to control block sections, which lie before track section the Entry Manager.99
MARCoProgramming of the MARCo-Receiver ME 5 (entry managers)Command LNCV ... 0 ... 1 ...,2 ... 3 ... 4 ... 5 ... 6 ... 7 ... 8 ... 9Address 2... 1 20010 20000 0 0 0 0 0 0 0Value 3… 2 20011 20000 0 0 0 0 0 0 0Option 4... 3 20020 20000 0 0 0 0 0 0 0Programming of MARCo-Receiver ME 4 (exit managers)Command LNCV ... 0 ... 1 ...,2 ... 3 ... 4 ... 5 ... 6 ... 7 ... 8 ... 9Address 2... 1 20021 20000 0 0 0 0 0 0 0Value 3… 2 20030 20000 0 0 0 0 0 0 0Option 4... 3 20031 20000 0 0 0 0 0 0 0All not specified LNCVs are to be set to zero, if the MARCo-Receiver is to carry no otherswitching tasks.Note: So that this example functions correctly the Intellibox needs to be equipped with thesoftware should Version 1.55 or higher.Programming of the routes in the IntelliboxRoutes Function Solenoid2 3 5NumberNumber Address State Address State Address State1 entry track 1 2001 - red 3 Red 4 green 15 green2 entry track 2 2001 - green 3 Red 4 red 15 green3 entry track 3 2002 - red 3 green 15 green4 exit track 1 2002 - green 2 green 1 red 11 green5 exit track 2 2003 - red 2 green 1 red 12 green6 exit track 3 2003 - green 1 green 13 green7 S1/S2/S3 red 2004 - red 11 Red 12 red 13 redExtension of the exampleThe trains with the locomotive address 3 and 10 are to be brought in only in track 1 and thetrain category 1 only into track 2. These tracks can also be occupied by other trains.Programming of the MARCo-Receiver ME 5 (entry managers)Command LNCV ... 0 ... 1 ... 2 ... 3 ... 4 ... 5 ... 6 ... 7 ... 8 ... 9Address 2... 1 20010 20000 3 10 0 0 0 0 0Value 3… 2 20011 20000 20001 0 0 0 0 0 0Option 4... 3 20020 20000 0 0 0 0 0 0 0Programming of MARCo-Receiver ME 4 (exit managers)Command LNCV ... 0 ... 1 ... 2 ... 3 ... 4 ... 5 ... 6 ... 7 ... 8 ... 9Address 2... 1 20021 20000 3 10 0 0 0 0 0Value 3… 2 20000 20000 20001 0 0 0 0 0 0Option 4... 3 20031 20000 0 0 0 0 0 0 0100
MARCoImplementation with Intellibox and IB-SWITCHESThe routes for the example are switched with the IB-SWITCH.Basic programming for LNCVs 0-19, of MARCo-Receiver ME 1 to ME 5LNCVLE Function0 1 2 3 4 5 6 7 8 9 10 11 12 13 15 191 Block section 1 0 23 0 0 0 11 150 12 0 0 0 0 0 9 202 Block section 2 0 23 0 0 0 12 150 22 0 0 0 0 0 9 213 Block section 3 0 23 0 0 0 13 150 32 0 0 0 0 0 9 224 Entry manager 4 0 9 0 0 0 14 73 72 0 0 20 0 5 9 235 Exit manager 5 0 8 0 0 2 15 0*) 0*) 0 0 0 0 0 9 24*) These two LNCV can be used, to control the block section, which before the track section with the entry manager.Programming of the MARCo-Receiver ME 5 (entry managers)Command LNCV ... 0 ... 1 ...,2 ... 3 ... 4 ... 5 ... 6 ... 7 ... 8 ... 9Address 2... 1 13 20000 0 10 0 0 0 0 0Value 3… 2 23 20000 0 0 0 0 0 0 0Option 4... 3 33 20000 0 0 0 0 0 0 0All not specified LNCVs are to be set to zero, if the MARCo-Receiver is to carry no otherswitching tasks.NOTE: All dependencies between the routes should be deleted, and the IB-Switch should beso set up that routes are restored if they contain solenoids to be switched (special option 5 =7). The MARCo receivers 1-3 have the following programming for switching of solenoids:Programming of MARCo-Receiver ME 4 (exit managers)Command LNCV ... 0 ... 1 ...,2 ... 3 ... 4 ... 5 ... 6 ... 7 ... 8 ... 9Address 2... 1 43 20000 0 10 0 0 0 0 0Value 3… 2 53 20000 0 0 0 0 0 0 0Option 4... 3 63 20000 0 0 0 0 0 0 0Programming of the routes in the Intellibox II or IB-SWITCHRoute Route viaRoutesSection 1 Section 2 Section 3Function feedbackNumberSet Release Address State Address State Address State1 Entry track 1 1-red 1-green 3 red 4 green 15 green2 Entry track 2 2-red 2-green 3 red 4 red 15 green3 Entry track 3 3-red 3-green 3 green 15 green - -4 Exit track 1 4-red 4-green 2 green 1 red 11 green5 Exit track 2 5-red 5-green 2 green 1 red 12 green6 Exit track 3 6-red 6-green 1 green 13 green - -7 S1/S2/S3 red 7-red 7-green 11 red 12 red 13 red101
MARCoExtension to an automatically controlled oval track with 3-track stationIf the entry and exit managers are interconnected by the track, as in the example, anautomatically controlled layout with a 3-track station can be made.The connecting track has yet another MARCo-Receiver LE6 to manage that block section.This results in three block sections between the stations entry and exit. The automation isdone by means of the following programming:Basic programming of LNCVs 0-19 of MARCo receivers ME1 to ME 6 using the IntelliboxI for route controlLNCV0 1 2 3 4 5 6 7 8 9 10 11 12 13 15 19LE Function1 Block section 1 0 23 0 0 0 11 150 161 0 0 0 0 0 9 202 Block section 2 0 23 0 0 0 12 150 161 0 0 0 0 0 9 213 Block section 3 0 23 0 0 0 13 150 161 0 0 0 0 0 9 224 Exit manager 4 0 9 0 0 0 14 20040 0 0 0 20 0 5 9 235 Entry manager 5 0 8 0 0 2 15 160 141 0 0 0 0 0 9 246 Block section 6 0 7 0 0 0 16 140 0 0 0 0 0 0 9 25102
7. ExampleMARCoAutomatic control of a small branch lineShown below is a sketch of Branch line, which is to be controlled automatically.In the example above two motor coaches with the addresses 60 and 61 are to drive into theBranch line. The motor coach with the number 60 is to use track 1 of the Branch line and themotor coach with the number 61 is to use track 2. For this turnout W1 is switched accordingly,when the motor coaches arrive at the holding point. Both motor coaches always do anintermediate stop at the holding point before they continue. Both wait in the Branch linestation and at the holding point for 3 minutes and eventually go back.On the return trip from the branch line yard to the main station, the motor coaches waitautomatically at the entry signal into the main station S4. Signal S4 is set to “red” by eithermotor coach as it arrives at the holding point on its return trip, thus the motor coaches will waitat the station entrance before they enter the station. The signal can then be operatedmanually and set to “green” after turnouts have been set for entry into the appropriate track forthe motor coach.All other trains only enter the Branch line with manual control and are not automaticallycontrolled. For this the motor coaches are assigned to train category 1. MARCo receiversME1-3 are programmed so that only trains with category 1 are automatically controlled. TheMARCo-Receiver at the station entry ME4 stops every train, if that signal S4 is on red.Allocation of the solenoid addressesDesignation W1 S1 S2 S4Solenoid address 1 11 12 14Basic programming of the LNCVs 0-19 the MARCo-Receiver ME 1 to 4LNCVLE Function0 1 2 3 4 5 6 7 8 9 10 11 12 13 14 151 Timed shuttle train 1 0 4 0 180 2 11 0 0 0 10 0 11 0 8 202 Timed shuttle train 2 0 4 0 180 2 12 0 0 0 10 0 11 0 8 213 Holding point 3 0 6 2 180 2 0 0 0 0 10 0 11 0 8 224 Block section 4 0 7 0 0 0 14 0 0 0 0 0 0 0 8 23The MARCo-Receiver also has the 3 following settings for switching solenoids:Programming of MARCo-Receiver ME 3Command LNCV ... 0 ... 1 ...,2 ... 3 ... 4 ... 5 ... 6 ... 7 ... 8 ... 9Address 8... 20001 60 61 0 10 0 0 0 0 0Value 9… 140 11 10 0 0 0 0 0 0 0Option 10.. 3 2 2 0 0 0 0 0 0 0103
MARCoComputation of command option for solenoid and Feedback instructionsOpt No. Description Selection Value SumDo not evaluate driving direction 01 Driving direction from Track1 to track2 2Driving direction from Track2 to track1 X 3 3Switching function 2 or 3 02 Automatic operation 4-12, 20-28: on arrival at the detector X 0 0Automatic operation 4-12, 20-28: when driving off 4Calculated value for LNCV 100 3Computation of command option for solenoid and Feedback instructionsOpt No. Description Selection Value SumDo not evaluate driving direction 01 Driving direction from Track1 to track2 X 2 2Driving direction from Track2 to track1 3Switching function 2 or 3 02 Automatic operation 4-12, 20-28: on arrival at the detector X 0 0Automatic operation 4-12, 20-28: when driving off 4Calculated value for LNCV 100 2104
Product Overview MARCo and AccessoriesPart No. 68 100 MARCo SetPart No. 68 400 LISSY Mini-Transmitter module for decoders with SUSI InterfacePart No. 68 500 MARCo-ReceiverPart No. 68 500 MARCo Special Edition Shadow station controllerPart No. 63 100 LocoNet Power Injector 500 mAPart No. 63 450 LocoNet DisplayPart No. 62 015 LocoNet Cable 0.28 mPart No. 62 025 LocoNet CabME2.15 mPart No. 62 045 LocoNet Cable 0.60 mPart No. 62 065 LocoNet Cable 6 mPart No. 62 120 LocoNet Branch 2.15 mPart No. 62 225 LocoNet CouplingPart No. 62 250 LocoNet Distributor 5-wayPart No. 69 250 Track-Control Train number displayPart No. 19 300 LISSY/MARCo-Creator (Graphic Programming software LISSY & MARCo)Part No. 63 120 USB-LocoNet Interface including LocoNet-Tool (Programming)HotlineOur Hotline is availableMondays to Fridays 14:00-16:00Wednesdays 16:00-18:0002045-858327
Authors: Dr.-Ing. T. Vaupel, D. RichterTranslated by Wolfram Steinke© Copyright <strong>Uhlenbrock</strong> Elektronik GmbH, Bottrop1 st Edition July 2012All Rights ReservedDuplication is only allowed with written AuthorizationPart Number 60 810