You also want an ePaper? Increase the reach of your titles
YUMPU automatically turns print PDFs into web optimized ePapers that Google loves.
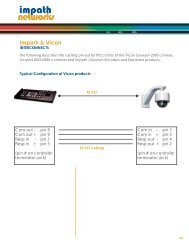
2.2.5 Alarm Connections• Connect Alarm Input (Sensor) to ‘AI 1~AI 2’ connectors and connect Sensor Common to ‘G’ connector.• Connect Alarm Output (buzzer, siren, etc.) to ‘AO 1’ connectors and connect Common to ‘G’ connector.• Connect Pan/Tilt receiver (or Pan/Tilt camera) to ‘RS-485/422’ connector. Please observe proper (+) and (-) polarity.2.2.6 RS-485/422 Connections• PTZ Camera connector• Please use TX+, TX-, RX+ and RX- terminals.2.2.7 USB Connections• There are two identical USB ports in rear. You may connect an external hard disk, an external USB and a USB memorystick to the USB ports.• When you use an external hard disk, please assure the connecting cable is not longer than 1.8m (6 ft).2.2.8 Factory Reset Switch• Reset the switch to restore all setup values of menus to factory default settings. You may also use this switch to initializeSystem Log file.• The switch is located in a pin hole that between the VGA port and power connector of rear panel.• Put the clip pin into the switch hole on the monitor (Live) screen and keep pressing until you feel the switch has clicked.CAUTIONPRESS FACTORY RESET SWITCH ONLY IN LIVE MODE. NEVER PRESS IN SETUP MODE.2.2.9 Power Supply Connections• Plug the power supply adapter (DC 12V, 3.33A) which include in this product to ’DC12V’ connector and plug another side topower source. Adapter input voltage is a free volt (100 VAC ~ 240 VAC). Please do not use any different power supplyadapter because it may cause the DVR to malfunction.2.2.10 Connections Guideline• Video Out Connector: If only the monitor is connected to VIDEO OUT connector, please set the impedance switch on therear side of the monitor to 75 ohms to prevent abnormally bright or collapsed images. If you want to connect another device(e.g., a recorder) to the back of the monitor, please set the impedance switch on the rear side of the monitor to HIGH Z(High Impedance) and set the last device to 75 ohms.• Alarm Input Connector: Do not input any type of voltage to the AI 1~AI 2 connectors.10