infcr-b - Newport
infcr-b - Newport
infcr-b - Newport
- No tags were found...

Create successful ePaper yourself
Turn your PDF publications into a flip-book with our unique Google optimized e-Paper software.
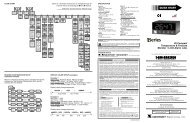
4SECTION 4. CONFIGURING THE METERRefer to Table 6-1 for a summary list of menu configuration.4.1 SELECTING THE INPUT TYPE (INPT)To select your appropriate input type signal.1. Press the MENU button until the meter shows "INPT" .2. Press the /DEV button. The meter shows one of the following:* "RTD.2" (2-wire RTD input)* "RTD.3" (3-wire RTD input)* "RTD.4" (4-wire RTD input)3. Press the /MAX button to scroll through available choices.4. Press the MENU button to store your choices. The meter momentarily shows "STRD",followed by "DEC.P" (Decimal point).4.2 DECIMAL POINT POSITION (DEC.P)To select a decimal point display position.1. Press the MENU button until the meter shows "DEC.P".2. Press the /DEV button. The meter shows one of the following:* FFFF.* FFF.F3. Press the /MAX button to scroll between choices.4. Press the MENU button to store your choices. The meter momentarily shows "STRD",followed by "RD.CF" (Reading Configuration).When you change the decimal position the meter adjusts setpoints, deadbands,proportional band, and manual reset values. These adjustments are made accordingto the new decimal point. If one or more of these values overflow the meter flashes"ER2" when you store a new decimal point position.AUTOMATIC DECIMAL POINT ADJUSTIf you select 0.1 degree resolution the decimal point automatically adjusts itself to 1 degree if thetemperature reading is above 999.9 or below -199.9.19