Mixture Design Tutorial (Part 1 â The Basics) - Statease.info
Mixture Design Tutorial (Part 1 â The Basics) - Statease.info
Mixture Design Tutorial (Part 1 â The Basics) - Statease.info

Create successful ePaper yourself
Turn your PDF publications into a flip-book with our unique Google optimized e-Paper software.
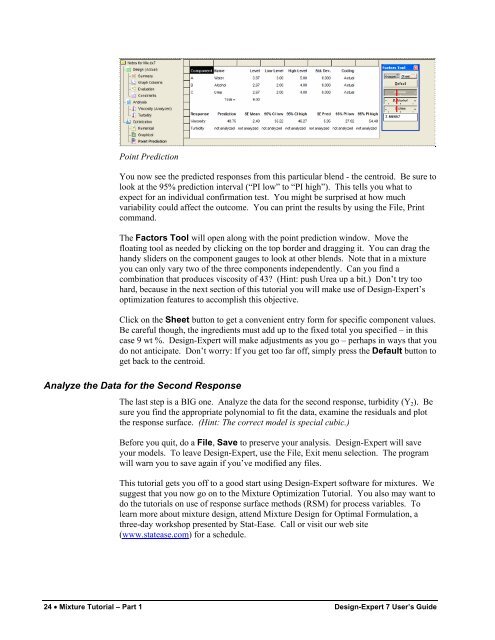
Point PredictionYou now see the predicted responses from this particular blend - the centroid. Be sure tolook at the 95% prediction interval (“PI low” to “PI high”). This tells you what toexpect for an individual confirmation test. You might be surprised at how muchvariability could affect the outcome. You can print the results by using the File, Printcommand.<strong>The</strong> Factors Tool will open along with the point prediction window. Move thefloating tool as needed by clicking on the top border and dragging it. You can drag thehandy sliders on the component gauges to look at other blends. Note that in a mixtureyou can only vary two of the three components independently. Can you find acombination that produces viscosity of 43? (Hint: push Urea up a bit.) Don’t try toohard, because in the next section of this tutorial you will make use of <strong>Design</strong>-Expert’soptimization features to accomplish this objective.Click on the Sheet button to get a convenient entry form for specific component values.Be careful though, the ingredients must add up to the fixed total you specified – in thiscase 9 wt %. <strong>Design</strong>-Expert will make adjustments as you go – perhaps in ways that youdo not anticipate. Don’t worry: If you get too far off, simply press the Default button toget back to the centroid.Analyze the Data for the Second Response<strong>The</strong> last step is a BIG one. Analyze the data for the second response, turbidity (Y 2 ). Besure you find the appropriate polynomial to fit the data, examine the residuals and plotthe response surface. (Hint: <strong>The</strong> correct model is special cubic.)Before you quit, do a File, Save to preserve your analysis. <strong>Design</strong>-Expert will saveyour models. To leave <strong>Design</strong>-Expert, use the File, Exit menu selection. <strong>The</strong> programwill warn you to save again if you’ve modified any files.This tutorial gets you off to a good start using <strong>Design</strong>-Expert software for mixtures. Wesuggest that you now go on to the <strong>Mixture</strong> Optimization <strong>Tutorial</strong>. You also may want todo the tutorials on use of response surface methods (RSM) for process variables. Tolearn more about mixture design, attend <strong>Mixture</strong> <strong>Design</strong> for Optimal Formulation, athree-day workshop presented by Stat-Ease. Call or visit our web site(www.statease.com) for a schedule.24 • <strong>Mixture</strong> <strong>Tutorial</strong> – <strong>Part</strong> 1 <strong>Design</strong>-Expert 7 User’s Guide