
You also want an ePaper? Increase the reach of your titles
YUMPU automatically turns print PDFs into web optimized ePapers that Google loves.
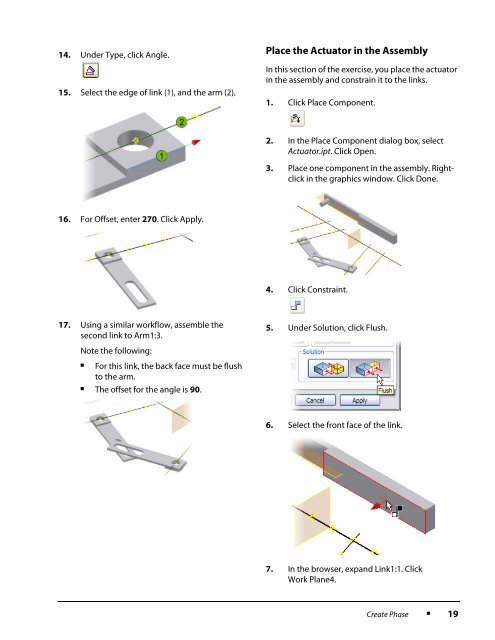
14. Under Type, click Angle.15. Select the edge of link (1), and the arm (2).Place the Actuator in the AssemblyIn this section of the exercise, you place the actuatorin the assembly and constrain it to the links.1. Click Place Component.2. In the Place Component dialog box, selectActuator.ipt. Click Open.3. Place one component in the assembly. Rightclickin the graphics window. Click Done.16. For Offset, enter 270. Click Apply.4. Click Constraint.17. Using a similar workflow, assemble thesecond link to Arm1:3.5. Under Solution, click Flush.Note the following:■For this link, the back face must be flushto the arm.■The offset for the angle is 90.6. Select the front face of the link.7. In the browser, expand Link1:1. ClickWork Plane4.Create Phase■19