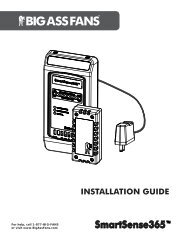
12’–24’ BASIC6 24 Electrical Installationelectric shock or damage the motor and the controller! Hazard of electrical shock!WARNING: The installation of a <strong>Big</strong> <strong>Ass</strong> and with any additional requirements set forth by the National Electric Code (NEC), ANSI/NFPA 70-2011, and all local codes. Codecompliance is ultimately YOUR responsibility!WARNING: The fan controllers contain high voltage capacitors that take time to discharge after removal of mains supply. Beforeworking on the fan controller, ensure isolation of mains supply from line inputs at the fan controller’s disconnect if installed. Waitthree (3) minutes for capacitors to discharge to safe voltage levels. Failure to do so may result in personal injury or death. Note:Darkened display LEDs are not an indication of safe voltage levels.CAUTION: It is the sole responsibility of the installer to verify the operating voltage of the fan system prior to installation! It isalso mandatory that the installer verify that airfoils, motor hub assemblies, and fan controllers are matched properly at the time ofinstallation, especially if multiple fan systems will be installed.CAUTION: An incorrectly installed controller can result in component damage or reduction in the fan’s life. Wiring or applicationerrors such as under-sizing the controller, incorrect or inadequate AC supply, or excessive ambient temperatures may result in amalfunction of the fan system. Verify correct voltage, phase, and horsepower before beginning installation!WARNING: Exercise caution and common sense when powering the fan. Do not connect the fan to a damaged or hazardous powersource. Do not attempt to resolve electrical malfunctions or failures on your own. Contact <strong>Big</strong> <strong>Ass</strong> <strong>Fans</strong> at 1-877-BIG-FANS if youhave any questions regarding the electrical installation of this fan.CAUTION: For use with <strong>Big</strong> <strong>Ass</strong> <strong>Fans</strong>-supplied variable frequency drive only. Not for use with other speed control devices!CAUTION: Shielded cable, if applicable, must be landed on the motor’s ground terminal!CAUTION: To avoid a short circuit, be very careful not to get metal chips in the controller!CAUTION: The <strong>Big</strong> <strong>Ass</strong> <strong>Fans</strong> product warranty will not cover equipment damage or failure that is caused by improper installation.CAUTION: The following information is merely a guide for proper installation. The <strong>Big</strong> <strong>Ass</strong> <strong>Fans</strong> Company cannot assumeresponsibility for the compliance or the non-compliance to any code, national, local, or otherwise for the proper installation of thesefan controllers, fans, or associated equipment. A hazard of personal injury and/or equipment damage exists if codes are ignoredduring installation.montage peut provoquer un choc électrique ou endommager le moteur ou le régulateur. Risque de choc électrique !AVERTISSEMENT : Les régulateurs de ventilation contiennent des condensateurs à haute tension qui prennent le temps dese décharger après la coupure de l’alimentation secteur. Avant de réparer le régulateur de ventilation, assurer l’isolation del’alimentation secteur des entrées de ligne du régulateur. Attendre trois minutes pour que les condensateurs se déchargent à descouleur sombre ne sont pas une indication des niveaux de tension non dangereux.BSI, etc.) concernant les types de câbles, la taille des conducteurs, la protection des circuits de dérivation et les appareils desectionnement.régulateurs du ventilateur correspondent au moment de l’installation, surtout en cas d’installation de plusieurs ventilateurs.ATTENTION : Un régulateur mal installé peut causer des dommages matériels ou réduire la durée de vie du ventilateur. Des erreursde câblage ou d’application (p. ex. sous-dimensionnement du régulateur, une alimentation AC incorrecte ou inadéquate ou desavant de commencer l’installation.ADVERTISSEMENT : Faites preuve de prudence et de bon sens lors de la mise en marche du ventilateur. Ne pas brancher leventilateur à une source d’alimentation endommagée. Ne pas tenter de résoudre de yous-même des dysfonctionnements ou pannesélectriques.ATTENTION : À utiliser exclusivement avec le variateur de fréquence fourni par le fabricant. Ne pas utiliser avec d’autres dispositifsde contrôle de vitesse.ATTENTION : Tout câble blindé, le cas échéant, doit être relié à la borne de terre du moteur.ATTENTION : Pour éviter un court-circuit, faire très attention à ne pas introduire de copeaux métalliques dans le régulateur.ATTENTION : La garantie du produit ne couvre pas l’endommagement de l’équipement ou le non fonctionnement causé par unemauvaise installation ou une mauvaise manipulation.ATTENTION : Les renseignements suivants sont donnés uniquement pour guider l’installation. La société <strong>Big</strong> <strong>Ass</strong> <strong>Fans</strong> ne sauraitassumer la responsabilité du respect ou non-respect d’aucun code, national, local ou autre,pour l’installation correcte de cesrégulateurs, ventilateurs ou autre matériel associé. Le non-respect des codes durant l’installation peut entraîner un risque deblessure ou d’endommagement du matériel.WWW.BIGASSFANS.COM ©2012 DELTA T CORP. DBA BIG ASS FAN ALL RIGHTS RESERVED
DO NOT USE THISDISCONNECT TOSTART AND STOP THEFAN. PERMANENTDAMAGE WILLRESULT!AUTOU/T1 V/T2 W/T3FWDREVRUNSTOPDO NOT USE THISDISCONNECT TOSTART AND STOP THEFAN. PERMANENTDAMAGE WILLRESULT!AUTOU/T1 V/T2 W/T3FWDREVRUNSTOP12’–24’ BASIC6 Electrical Installation (cont.)25If you are installing an onboard variable frequency drive (VFD), ensure you route the power wiring to the fan location.Electrical installation overviewThe electrical installation section is intended for a professional electrician. If you are unfamiliar or uncomfortable with installing electricalcomponents, do not attempt to install the fan without an electrician. Serious personal injury or damage to the fan and other equipmentcould result. This guide is merely a recommendation of proper installation. Adhering to national and local electric codes is yourmandatory that the installer verify that airfoils, motor assemblies, and fan controllers are matched properly at the time of installation,especially if multiple fan systems will be installed.The following sections outline how to prepare for the electrical installation, and include the required cables and how to properly routethe cabling through conduit, how to properly ground the fan system, how to properly wire the fan controller, how to properly wire the fanmotor, and proper startup procedures.Controller storageStore the controller within an ambient temperature range of -40°F to 185°F (-40°C to 85°C) and a relative humidity range of 0 to 95%,non-condensing. Do not expose the controller to a corrosive atmosphere. If the controller has been in storage or disconnected frompower for more than one year, apply AC supply power to the controller for a period of two hours prior to operation in order to reconditionthe internal DC bus capacitors.Power requirements for fan controllersThe power requirements for fan controllers are listed in the table on p. 2. If multiple controls are connected to one feeder circuit, thecircuit required is the sum of the feeder circuit requirements listed on the chart. This type of installation will also require that each fancontrol be installed downstream from a dedicated over-current protection device.Mounting the wall controllerIf you are mounting the controller to the fan motor frame instead of the wall (onboard VFD option), skip this section andrefer to the mounting instructions that came with the wall controller and hardware for the onboard VFD.Mount the controller to a wall using a #8–#10 screw. Adhere to the following guidelines when selecting the controller location: objects or moving equipment. Do not mount any controller adjacent to or above a heat source or heat-producing equipment. The ambient temperature must be between 14º F (-10º C) and 122º F (50º C). Do not expose the controller to a corrosive atmosphere, moisture, or direct sunlight. When mounting the controller, keep in mind that the fan should be visible from the controller. A minimum distance of 6” (15.2 cm) should be maintained between fan controllers.1 HP Controller6.25” (159 mm)5.95” (151 mm)2 HP Controller6.25” (159 mm)5.95” (151 mm)WARNINGSCA MEWARNINGSCA ME10.9” (277 mm)9.5” (241 mm)MR F1 2 5 6 25 4 1113A13B13C14 14 3016 17L1PEL1 L2 L2 L35.51” (140 mm)MR F1 2 5 6 25 4 1113A13B13C 14 30 16 17L1PEL1 L2 L2 L39.5” (241 mm)10.9” (277 mm)7.3” (185 mm)L3L3WWW.BIGASSFANS.COM ©2012 DELTA T CORP. DBA BIG ASS FAN ALL RIGHTS RESERVED