
Create successful ePaper yourself
Turn your PDF publications into a flip-book with our unique Google optimized e-Paper software.
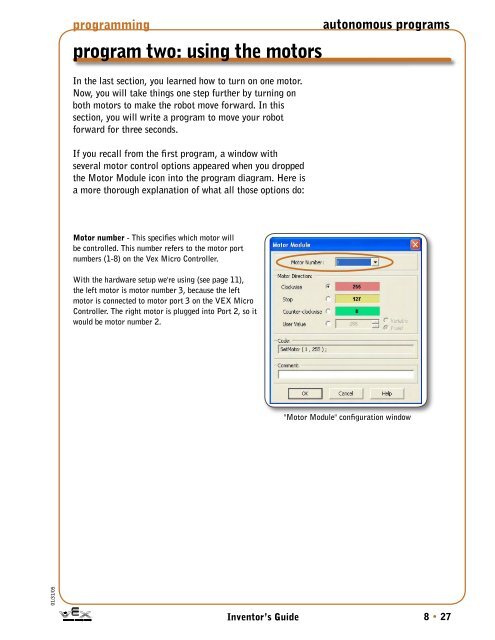
programmingprogram two: using the motorsIn the last section, you learned how to turn on one motor.Now, you will take things one step further by turning onboth motors to make the robot move forward. In thissection, you will write a program to move your robotforward for three seconds.If you recall from the first program, a window withseveral motor control options appeared when you droppedthe Motor Module icon into the program diagram. Here isa more thorough explanation of what all those options do:autonomous programsMotor number - This specifies which motor willbe controlled. This number refers to the motor portnumbers (1-8) on the Vex Micro Controller.With the hardware setup we're using (see page 11),the left motor is motor number 3, because the leftmotor is connected to motor port 3 on the <strong>VEX</strong> MicroController. The right motor is plugged into Port 2, so itwould be motor number 2."Motor Module" configuration window01/31/05Inventor’s Guide8 • 27