A-Teachers-Guide-to-the-Intel-Galileo-Final
A-Teachers-Guide-to-the-Intel-Galileo-Final
A-Teachers-Guide-to-the-Intel-Galileo-Final

You also want an ePaper? Increase the reach of your titles
YUMPU automatically turns print PDFs into web optimized ePapers that Google loves.
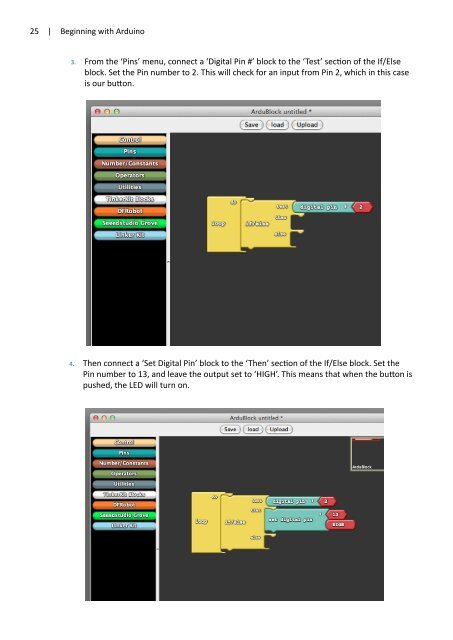
25 | Beginning with Arduino3. From <strong>the</strong> ‘Pins’ menu, connect a ‘Digital Pin #’ block <strong>to</strong> <strong>the</strong> ‘Test’ section of <strong>the</strong> If/Elseblock. Set <strong>the</strong> Pin number <strong>to</strong> 2. This will check for an input from Pin 2, which in this caseis our but<strong>to</strong>n.4. Then connect a ‘Set Digital Pin’ block <strong>to</strong> <strong>the</strong> ‘Then’ section of <strong>the</strong> If/Else block. Set <strong>the</strong>Pin number <strong>to</strong> 13, and leave <strong>the</strong> output set <strong>to</strong> ‘HIGH’. This means that when <strong>the</strong> but<strong>to</strong>n ispushed, <strong>the</strong> LED will turn on.