PSIJuly2018

Create successful ePaper yourself
Turn your PDF publications into a flip-book with our unique Google optimized e-Paper software.
TEST<br />
PRODUCT TEST<br />
Oncam EVO-180-WED<br />
browsers can be used for configuration only but<br />
will not show the picture or allow zone setting.<br />
A strong password is not forced on first use,<br />
but good password management should be<br />
standard practice for any security installation.<br />
What’s in the box?<br />
Camera and enclosure<br />
Mounting bracket<br />
Quick-start guide<br />
Drilling template<br />
Conduit adaptor<br />
12 pin Alarm, Audio, Power<br />
connector<br />
Spanner<br />
Security driver<br />
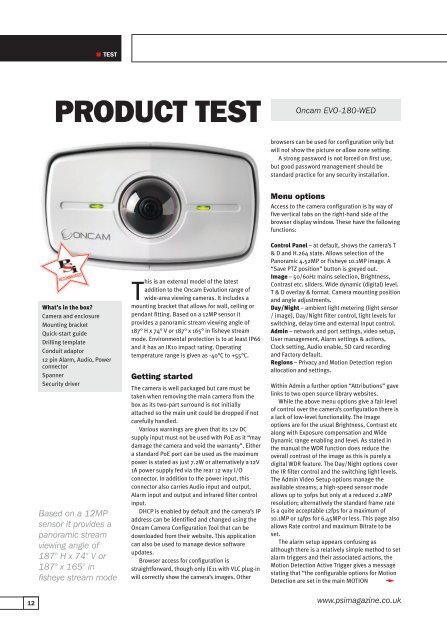
Based on a 12MP<br />
sensor it provides a<br />
panoramic stream<br />
viewing angle of<br />
187° H x 74° V or<br />
187° x 165° in<br />
fisheye stream mode<br />
This is an external model of the latest<br />
addition to the Oncam Evolution range of<br />
wide-area viewing cameras. It includes a<br />
mounting bracket that allows for wall, ceiling or<br />
pendant fitting. Based on a 12MP sensor it<br />
provides a panoramic stream viewing angle of<br />
187° H x 74° V or 187° x 165° in fisheye stream<br />
mode. Environmental protection is to at least IP66<br />
and it has an IK10 impact rating. Operating<br />
temperature range is given as -40°C to +55°C.<br />
Getting started<br />
The camera is well packaged but care must be<br />
taken when removing the main camera from the<br />
box as its two-part surround is not initially<br />
attached so the main unit could be dropped if not<br />
carefully handled.<br />
Various warnings are given that its 12v DC<br />
supply input must not be used with PoE as it “may<br />
damage the camera and void the warranty”. Either<br />
a standard PoE port can be used as the maximum<br />
power is stated as just 7.2W or alternatively a 12V<br />
1A power supply fed via the rear 12 way I/O<br />
connector. In addition to the power input, this<br />
connector also carries Audio input and output,<br />
Alarm input and output and infrared filter control<br />
input.<br />
DHCP is enabled by default and the camera’s IP<br />
address can be identified and changed using the<br />
Oncam Camera Configuration Tool that can be<br />
downloaded from their website. This application<br />
can also be used to manage device software<br />
updates.<br />
Browser access for configuration is<br />
straightforward, though only IE11 with VLC plug-in<br />
will correctly show the camera’s images. Other<br />
Menu options<br />
Access to the camera configuration is by way of<br />
five vertical tabs on the right-hand side of the<br />
browser display window. These have the following<br />
functions:<br />
Control Panel – at default, shows the camera’s T<br />
& D and H.264 state. Allows selection of the<br />
Panoramic 4.52MP or Fisheye 10.1MP image. A<br />
“Save PTZ position” button is greyed out.<br />
Image – 50/60Hz mains selection, Brightness,<br />
Contrast etc. sliders. Wide dynamic (digital) level.<br />
T & D overlay & format. Camera mounting position<br />
and angle adjustments.<br />
Day/Night – ambient light metering (light sensor<br />
/ image), Day/Night filter control, light levels for<br />
switching, delay time and external input control.<br />
Admin – network and port settings, video setup,<br />
User management, Alarm settings & actions,<br />
Clock setting, Audio enable, SD card recording<br />
and Factory default.<br />
Regions – Privacy and Motion Detection region<br />
allocation and settings.<br />
Within Admin a further option “Attributions” gave<br />
links to two open source library websites.<br />
While the above menu options give a fair level<br />
of control over the camera’s configuration there is<br />
a lack of low-level functionality. The Image<br />
options are for the usual Brightness, Contrast etc<br />
along with Exposure compensation and Wide<br />
Dynamic range enabling and level. As stated in<br />
the manual the WDR function does reduce the<br />
overall contrast of the image as this is purely a<br />
digital WDR feature. The Day/Night options cover<br />
the IR filter control and the switching light levels.<br />
The Admin Video Setup options manage the<br />
available streams; a high-speed sensor mode<br />
allows up to 30fps but only at a reduced 2.2MP<br />
resolution; alternatively the standard frame rate<br />
is a quite acceptable 12fps for a maximum of<br />
10.1MP or 14fps for 6.45MP or less. This page also<br />
allows Rate control and maximum Bitrate to be<br />
set.<br />
The alarm setup appears confusing as<br />
although there is a relatively simple method to set<br />
alarm triggers and their associated actions, the<br />
Motion Detection Active Trigger gives a message<br />
stating that “the configurable options for Motion<br />
Detection are set in the main MOTION<br />
12 www.psimagazine.co.uk