
You also want an ePaper? Increase the reach of your titles
YUMPU automatically turns print PDFs into web optimized ePapers that Google loves.
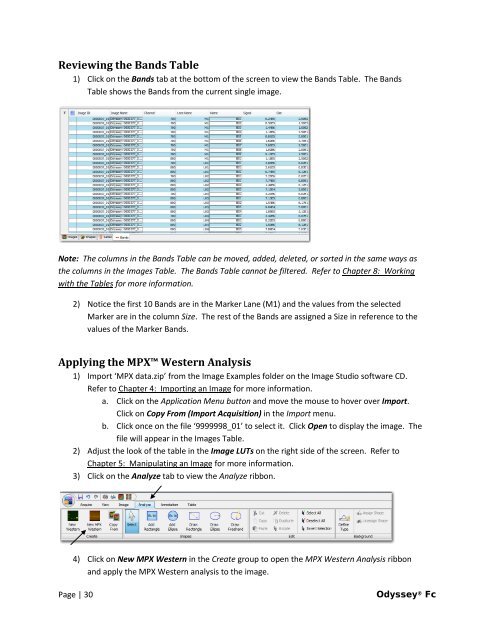
Reviewing the Bands Table<br />
1) Click on the Bands tab at the bottom of the screen to view the Bands Table. The Bands<br />
Table shows the Bands from the current single image.<br />
Note: The columns in the Bands Table can be moved, added, deleted, or sorted in the same ways as<br />
the columns in the Images Table. The Bands Table cannot be filtered. Refer to Chapter 8: Working<br />
with the Tables for more information.<br />
2) Notice the first 10 Bands are in the Marker Lane (M1) and the values from the selected<br />
Marker are in the column Size. The rest of the Bands are assigned a Size in reference to the<br />
values of the Marker Bands.<br />
Applying the MPX Western Analysis<br />
1) Import ‘MPX data.zip’ from the Image Examples folder on the Image Studio software CD.<br />
Refer to Chapter 4: Importing an Image for more information.<br />
a. Click on the Application Menu button and move the mouse to hover over Import.<br />
Click on Copy From (Import Acquisition) in the Import menu.<br />
b. Click once on the file ‘9999998_01’ to select it. Click Open to display the image. The<br />
file will appear in the Images Table.<br />
2) Adjust the look of the table in the Image LUTs on the right side of the screen. Refer to<br />
Chapter 5: Manipulating an Image for more information.<br />
3) Click on the Analyze tab to view the Analyze ribbon.<br />
4) Click on New MPX Western in the Create group to open the MPX Western Analysis ribbon<br />
and apply the MPX Western analysis to the image.<br />
Page | 30 <strong>Odyssey</strong> ® <strong>Fc</strong>