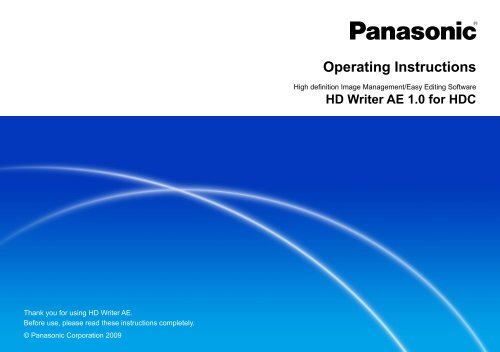
HD Writer AE for HDC Operating Instructions - Panasonic
HD Writer AE for HDC Operating Instructions - Panasonic
HD Writer AE for HDC Operating Instructions - Panasonic

You also want an ePaper? Increase the reach of your titles
YUMPU automatically turns print PDFs into web optimized ePapers that Google loves.
Thank you <strong>for</strong> using <strong>HD</strong> <strong>Writer</strong> <strong>AE</strong>.<br />
Be<strong>for</strong>e use, please read these instructions completely.<br />
© <strong>Panasonic</strong> Corporation 2009<br />
<strong>Operating</strong> <strong>Instructions</strong><br />
High definition Image Management/Easy Editing Software<br />
<strong>HD</strong> <strong>Writer</strong> <strong>AE</strong> 1.0 <strong>for</strong> <strong>HD</strong>C
Contents<br />
Introduction<br />
What you can do with this software<br />
(basic operations) ………………………………… 4<br />
What you can do with this software<br />
(advanced features) ……………………………… 5<br />
Read be<strong>for</strong>e starting operation ………………… 6<br />
General precautions ……………………………… 7<br />
<strong>Operating</strong> environments ………………………… 9<br />
Optical discs and SD cards supported<br />
<strong>for</strong> recording …………………………………… 11<br />
Recording length of optical discs and<br />
SD cards ………………………………………… 12<br />
Preparation<br />
Connect the video camera to a computer … 13<br />
Disconnecting the video camera from the computer ……… 14<br />
Starting the software …………………………… 15<br />
Exiting the software ………………………………………… 15<br />
Basic operations<br />
Feature overview ……………………………… 16<br />
Importing content to a computer<br />
(Simply Import to PC) ………………………… 17<br />
Importing only content that you have not already imported<br />
(differential importing) ………………………………………… 19<br />
Recording on discs in standard quality<br />
(Simply Create DVD-Video Disc) …………… 20<br />
Recording on discs and SD cards in high<br />
definition (Simply Create BD/DVD/SD Card<br />
(AVC<strong>HD</strong>)) ………………………………………… 22<br />
Viewing content on a computer ……………… 24<br />
Playing video content ………………………………………… 25<br />
Viewing photos ……………………………………………… 26<br />
2
Contents<br />
Advanced Features<br />
Feature overview ……………………………… 27<br />
Main window ………………………………………28<br />
Content preview area ………………………………………… 29<br />
Importing content to a computer<br />
(Import to PC) …………………………………… 30<br />
Registering or deregistering destination folders ………… 33<br />
Playing content ………………………………… 34<br />
Delete content …………………………………… 36<br />
Editing content on your computer ………… 37<br />
Editing video content (basic operations) ………38<br />
Selecting scenes to edit ……………………………………… 38<br />
Saving edited videos ………………………………………… 38<br />
Editing video content (Delete partially) ………41<br />
Deleting selected portions of content ……………………… 41<br />
Editing video content (Dividing scenes) ………44<br />
Assigning the playback order/<br />
adding opening titles/adding effects …………45<br />
Assigning the playback order ……………………………… 45<br />
Adding opening titles ………………………………………… 47<br />
Adding scene transitions …………………………………… 49<br />
Editing digital photos ……………………………51<br />
Protecting and renaming content ………………52<br />
Recording on optical discs and SD cards … 53<br />
Recording ……………………………………………53<br />
Recording <strong>for</strong>mats …………………………………………… 53<br />
Top menus …………………………………………………… 54<br />
Automatic multi-disc recording ……………………………… 54<br />
Additional recording on media with existing content ……… 55<br />
[Create Media] menu ………………………………56<br />
Recording video content …………………………57<br />
Selecting video content to record …………………………… 58<br />
Recording selected video content<br />
(<strong>for</strong> BD-R/RE (BDMV), DVD-RAM · DVD-R/RW · SD card<br />
(AVC<strong>HD</strong>), DVD-R/RW (DVD-Video)) ……………………… 61<br />
Recording selected video content<br />
(DVD-RAM (DVD-VR <strong>for</strong>mat)) ……………………………… 65<br />
Recording photos …………………………………67<br />
Using convenient features …………………… 70<br />
Viewing highlights of video content<br />
(Highlight Playback) ………………………………70<br />
Viewing photos shot using high-speed burst<br />
shooting (Continuous photo playback) ………71<br />
Creating still pictures from video ………………72<br />
Searching <strong>for</strong> desired content……………………73<br />
Uploading content to YouTube …………………75<br />
Other<br />
Formatting discs ……………………………… 78<br />
Advanced settings ……………………………… 81<br />
Windows in this software ……………………… 86<br />
Shortcut menus ………………………………… 95<br />
Troubleshooting ………………………………… 98<br />
Trademark and Licence In<strong>for</strong>mation ………… 106<br />
3
Introduction<br />
What you can do with this software (basic operations)<br />
Connect a video camera with<br />
recorded content to your computer<br />
Playback<br />
Play back content on your<br />
computer (→24–26)<br />
Recording<br />
Import (save) content<br />
to your computer (→17–19)<br />
Recording on discs in standard<br />
quality (DVD-Video <strong>for</strong>mat) (→20–21)<br />
Create discs that can be played on most DVD<br />
players.<br />
Recording on discs and SD<br />
memory cards∗ in high definition<br />
(BDMV or AVC<strong>HD</strong> <strong>for</strong>mat) (→22–23)<br />
Create discs and SD cards <strong>for</strong> high-quality<br />
playback on <strong>HD</strong>-compatible equipment.<br />
∗ When you record videos to SD memory cards,<br />
AVC<strong>HD</strong> <strong>for</strong>mat is the only <strong>for</strong>mat available.<br />
Advanced features (→5, 27)<br />
4
What you can do with this software (advanced features)<br />
Edit and<br />
Record<br />
Importing to a Computer (→30)<br />
Editing<br />
• Deleting selected portions of a scene (→41)<br />
• Dividing scenes (→44)<br />
• Assigning the playback order of scenes (→45)<br />
• Adding opening titles (→47)<br />
• Adding scene transitions (→49)<br />
Creating Discs (→53)<br />
Connect a video camera with<br />
recorded content to your computer<br />
Share on<br />
YouTube<br />
Introduction<br />
You can upload videos to<br />
YouTube∗. (→75)<br />
Your video can be accessed and<br />
watched on the Internet.<br />
∗ YouTube is a website <strong>for</strong> sharing<br />
video content on the Internet<br />
5
Read be<strong>for</strong>e starting operation<br />
Contents of these operating instructions<br />
The description of Windows ® in these operating instructions is<br />
based on the Windows Vista ® ●<br />
screen.<br />
●Please<br />
note that the explanations and screen images in these<br />
operating instructions may differ from the actual explanations<br />
and screen images due to version upgrades of the software<br />
and the use environments of PCs.<br />
●For<br />
instructions on using your computer, optical disc drive,<br />
or video camera, or instructions on the Windows operating<br />
system, refer to the respective <strong>Operating</strong> <strong>Instructions</strong>.<br />
Steps to protect important image data<br />
●To<br />
be prepared in case of accidents or technical problems,<br />
back up captured data that is important to you by importing it to<br />
your computer and creating a disc or taking other measures.<br />
●Be<strong>for</strong>e<br />
deleting the original image data, confirm that it was<br />
recorded correctly to your computer, to disc or to SD memory<br />
card.<br />
●Do<br />
not modify or delete files or folders ([AVC<strong>HD</strong>], [BDMV],<br />
[DCIM], [DVD_RTAV], or others) used by this software.<br />
Important<br />
● Playback of discs or SD memory cards created with this software<br />
in BDMV <strong>for</strong>mat or AVC<strong>HD</strong> <strong>for</strong>mat is only possible on equipment<br />
which is compatible with each <strong>for</strong>mat. Do not insert these media<br />
in incompatible equipment. Not only will playback be unsupported,<br />
it may not be possible to eject the media. Additionally, valuable<br />
content may accidentally be deleted after a message is displayed<br />
requesting you to <strong>for</strong>mat the media.<br />
● The recorded and/or edited content is <strong>for</strong> personal use only and<br />
may not be reproduced or exported without permission from the<br />
copyright holder.<br />
Video Video<br />
1st Day 2nd Day<br />
Introduction<br />
Terms<br />
BDMV<br />
This is a standard <strong>for</strong> recording and playing back high-definition<br />
images on Blu-ray discs.<br />
AVC<strong>HD</strong><br />
This is a standard <strong>for</strong> recording and playing back high definition<br />
images.<br />
DVD-Video<br />
A <strong>for</strong>mat that can be played on most DVD players.<br />
Scene<br />
This means the image recorded during one recording (after<br />
starting recording until it is stopped).<br />
Video<br />
In this software, “scenes” (video content with the same recording date,<br />
<strong>for</strong> example) in the same folder are collectively referred to as “videos.”<br />
Top menu<br />
A feature <strong>for</strong> displaying an interface similar to a table of contents<br />
when a disc is played. (Top menu is not displayed on video cameras.<br />
Top menus are only displayed on devices that support this feature.)<br />
SD cards<br />
In these instructions, SD memory cards and SDHC memory<br />
cards are collectively referred to as SD cards.<br />
1<br />
6<br />
st Scene Captured 2nd Scene Captured 3rd Scene Captured 1st Scene Captured 2nd Scene Captured<br />
Scene Scene Scene Scene Scene
General precautions<br />
Not compatible with the following video <strong>for</strong>mats and<br />
content<br />
●Video<br />
recorded on video cameras that are not compatible with<br />
this software<br />
●Video<br />
captured using other devices cannot be imported. To<br />
import video from a previous <strong>Panasonic</strong> high-definition video<br />
camera, use the version of <strong>HD</strong> <strong>Writer</strong> provided with that video<br />
camera.<br />
Media containing data recorded with previous <strong>Panasonic</strong> highdefinition<br />
video cameras or data recorded with other devices<br />
cannot be imported with this software.<br />
●Video<br />
created or edited with other software<br />
●Commercial<br />
DVD or Blu-ray video content<br />
General in<strong>for</strong>mation about using the software<br />
●Do<br />
not execute the following operations while the software is<br />
running. Doing so may cause defects (damage to media, etc.).<br />
- Turn off the PC or video camera, or restart the PC.<br />
- Switch the user or log off.<br />
- Change the screen settings.<br />
- Use the screen saver or the power-saving functions (makes<br />
the PC enter the standby or sleep modes after a certain time<br />
has elapsed without any operation on the PC).<br />
- Use other software (especially software <strong>for</strong> writing to DVDs<br />
or CDs, or recording/encoding software with a high CPU<br />
utilization and large memory requirements).<br />
- Use the shared drive of another PC connected to the<br />
network.<br />
●BD-RE<br />
Ver. 1.0 / Ver. 2.1 standard disc cannot be used.<br />
●DVD<br />
disc in AVCREC standard is not supported.<br />
Introduction<br />
Discs and drive<br />
●If<br />
the drive is being used by another software (Explorer, etc.),<br />
the drive cannot be used with this software. Close the software<br />
be<strong>for</strong>e using the drive with this software. (If the drive is being<br />
used by this software, the drive cannot be used with other<br />
software.)<br />
●Be<strong>for</strong>e<br />
using this software, ensure that the transfer mode of the<br />
drive is set to [DMA]. If it is not set to [DMA], set it to [DMA] by<br />
referring to the operating instructions of your drive. (It may be<br />
impossible to set it to [DMA] depending on your PC.)<br />
●Use<br />
the type of discs recommended <strong>for</strong> your disc drive, and<br />
avoid soiling or scratching them. Reading and recording may<br />
not be possible with dirty or scratched discs.<br />
Discs that are incompatible with the disc drive may not be<br />
recognised, or recording may not be possible.<br />
●The<br />
recording speeds (2x, 4x, etc.) <strong>for</strong> drives and discs indicate<br />
the maximum speed and not the actual recording speed.<br />
(Speeds may vary depending on the combination of drive and<br />
disc or the use conditions.)<br />
Operations during disc recording<br />
If the following actions are executed while the data is being<br />
recorded onto a disc, recording may not complete properly, and<br />
the disc, device, or data may be damaged.<br />
Operations <strong>for</strong> user switching or logging off from Windows ® ●<br />
.<br />
●Operation<br />
of other recording software.<br />
●Connection<br />
cables <strong>for</strong> a PC or a DVD device (an external DVD<br />
drive) are inserted or removed, or the power is turned on or off.<br />
●Other<br />
USB devices such as SD card reader are installed or<br />
removed.<br />
This software is <strong>for</strong>cibly closed.<br />
●<br />
7
General precautions<br />
Disc creation<br />
●Video<br />
recorded in DVD-Video <strong>for</strong>mat must be at least<br />
2 seconds long. Video recorded in DVD-VR <strong>for</strong>mat must be at<br />
least 3 seconds long.<br />
●Conversion<br />
may be required when recording, depending on the<br />
images. In this case, because the image has to be encoded again,<br />
recording takes longer and image quality may also be degraded.<br />
●When<br />
recorded in DVD-Video <strong>for</strong>mat, the end section of the<br />
image may be shortened <strong>for</strong> about 0.5 seconds.<br />
Playback and use of produced media<br />
Discs created in AVC<strong>HD</strong> standard cannot be accessed with<br />
equipment or software that does not support the AVC<strong>HD</strong><br />
standard. (Also, because the filing system uses a UDF 2.5<br />
<strong>for</strong>mat, the files on the disc cannot be checked on a PC using<br />
Windows ® Explorer unless UDF 2.5 has been installed.)<br />
Discs created in BDMV standard cannot be accessed with<br />
equipment or software that does not support the BDMV<br />
standard. (Also, because the filing system uses a UDF 2.6<br />
<strong>for</strong>mat <strong>for</strong> BD-R or UDF 2.5 <strong>for</strong>mat <strong>for</strong> BD-RE, the files on the<br />
disc cannot be checked on a PC using Windows ® ●<br />
●<br />
Explorer<br />
unless each <strong>for</strong>mat has been installed.)<br />
●DVD-Video<br />
and DVD-VR <strong>for</strong>mat cannot be played back,<br />
imported, or edited.<br />
●Pictures<br />
on a disc cannot be imported. This software is not<br />
capable of importing pictures from a disc recorded with the<br />
DVD burner and a video camera connected.<br />
●For<br />
DVD-R discs with dual layer on single side, images may be<br />
frozen or sounds may be inaudible <strong>for</strong> a moment when shifting<br />
from the first layer to the second layer, depending on the player.<br />
●Normal<br />
playback may not be possible (a narrow, small, or<br />
incomplete playback window may be displayed) when using<br />
some models of older equipment (even if the equipment is<br />
compatible with the disc) or with some types of recorded data.<br />
●The<br />
recording mode is not displayed when discs or SD cards created<br />
using this software are played back using the <strong>HD</strong> video camera.<br />
Introduction<br />
SD cards<br />
●Recording<br />
on used SD cards may require <strong>for</strong>matting<br />
(initialisation).<br />
SD cards must be <strong>for</strong>matted by using video cameras<br />
compatible with this software.<br />
●Do<br />
not insert or remove SD cards when importing data from SD<br />
cards or recording data on discs. Removing SD cards then may<br />
cause data corruption or SD card damage.<br />
●Use<br />
of SDHC memory cards requires SDHC-compatible<br />
equipment.<br />
●If<br />
the write-protect switch has been set to [LOCK], recording is<br />
not possible.<br />
●Initialising<br />
SD cards or deleting card data only modifies file<br />
management in<strong>for</strong>mation. Data on SD cards is not completely<br />
deleted. We recommend physically destroying SD cards or<br />
thoroughly deleting all data on SD cards when disposing of SD<br />
cards or transferring ownership. Use discretion in managing<br />
data on SD cards.<br />
Functions using online services<br />
●Because<br />
YouTube services and specifications are subject<br />
to change, operation of online services cannot be guaranteed<br />
in the future. Available services and screens are subject to<br />
change without notice.<br />
(These services are valid as of December 1, 2008.)<br />
●Unless<br />
you are the copyright holder or you have obtained<br />
permission from the copyright holder, do not upload videos<br />
protected under copyright.<br />
8
<strong>Operating</strong> environments<br />
System requirements<br />
Introduction<br />
PC IBM ® PC/AT compatible personal computer with an Intel ® Pentium ® 1.0 GHz or higher CPU (including compatible<br />
CPU)<br />
When using playback function and the MPEG2 output function, Intel<br />
(<br />
® Core 2 Duo 2.16 GHz or higher, Intel ®<br />
Pentium ® D 3.2 GHz or higher, or AMD Athlon 64 X2 Dual-Core 5200+ or higher is recommended.<br />
When editing content or using seamless transfer functions or continuous photo playback function, an Intel ® )<br />
Core 2 Quad 2.6 GHz processor or higher is recommended.<br />
OS Preinstalled<br />
Microsoft ® Windows Vista ® Home Basic or Service Pack 1<br />
Microsoft ® Windows Vista ® Home Premium or Service Pack 1<br />
Microsoft ® Windows Vista ® Ultimate or Service Pack 1<br />
Microsoft ® Windows Vista ® Business or Service Pack 1<br />
Microsoft ® Windows ® XP Home Edition Service Pack 2/Service Pack 3<br />
Microsoft ® Windows ® XP Professional Service Pack 2/Service Pack 3<br />
Microsoft ® Windows ® 2000 Professional Service Pack 4<br />
RAM Windows Vista ® : 1 GB or more<br />
Windows ® XP/2000: 512 MB or more (1 GB or more recommended)<br />
Display High Colour (16 bit) or more (32 bit or more recommended)<br />
Desktop resolution of 1024 x 768 pixels or more (1280 x 1024 pixels or more recommended)<br />
Windows Vista ® : Video card complying with DirectX ® 9.0c (DirectX ® 10-compatible video card is recommended)<br />
Windows ® XP/2000: Video card complying with DirectX ® 9.0c<br />
DirectDraw ® overlay support<br />
PCI Express x 16 is recommended<br />
Hard disk Ultra DMA-100 or higher<br />
450 MB or more free space <strong>for</strong> installing software<br />
● Recording to optical discs or SD cards requires twice the amount of free space as the size of the disc or SD card to be<br />
created. When automatically splitting data over multiple discs, 17 GB of free space are required.<br />
● If the compression setting is enabled, errors will occur during recording. Clear the check <strong>for</strong> [Compress this drive to<br />
save disk space] in [Properties] <strong>for</strong> the hard disk drive.<br />
Necessary software Windows Vista ® : Microsoft ® DirectX ® 10 (preinstalled in Windows Vista ® )<br />
Microsoft ® DirectX ® 10.1 (preinstalled in Windows Vista ® SP1)<br />
Windows ® XP/2000: Microsoft ® DirectX ® 9.0c (preinstalled in Windows ® XP SP2/SP3)<br />
Installing the software on a computer that is not compatible with these versions DirectX ® ●<br />
may cause the computer to<br />
stop operating normally. If you are unsure if your PC is compatible, contact the manufacturer.<br />
Sound DirectSound ® support<br />
9
<strong>Operating</strong> environments<br />
Drive CD-ROM drive (<strong>for</strong> installation)<br />
When writing to DVD or BD, a compatible drive and media are necessary.<br />
Interface USB port (Hi-Speed USB (USB2.0))<br />
Video cameras<br />
connected via USB<br />
<strong>Panasonic</strong> <strong>HD</strong> video cameras this software is provided with<br />
Content Content captured using <strong>Panasonic</strong> <strong>HD</strong> video cameras this software is provided with<br />
Other requirements Mouse or equivalent pointing device,<br />
an environment with Internet access (required <strong>for</strong> online functions “YouTube Uploader”)<br />
Depending on the per<strong>for</strong>mance of your personal computer, a<br />
message about playback per<strong>for</strong>mance may appear during installation.<br />
Even if the system requirements mentioned in these operating<br />
instructions are fulfilled, some personal computers cannot be used.<br />
Supplied CD-ROM is available <strong>for</strong> Windows only.<br />
This software is not compatible with Microsoft ® Windows ® 3.1,<br />
Windows ® 95, Windows ® 98, Windows ® 98 SE, Windows ® Me, and<br />
Windows NT ® .<br />
Operation is not guaranteed on Microsoft ® Windows Vista ® Enterprise,<br />
Windows ® XP Media Center Edition, Tablet PC Edition and not<br />
compatible with 64 bit operation systems.<br />
When 2 or more USB devices are connected to a PC, or when<br />
devices are connected through USB hubs or by using extension<br />
cables, proper operation is not guaranteed.<br />
Operation on an upgraded OS is not guaranteed.<br />
Operation on an OS other than the one pre-installed is not<br />
guaranteed.<br />
This software does not support the multi-boot environments.<br />
Windows Vista ® : Log on with an administrator account or a standard<br />
user account be<strong>for</strong>e using this software. The software will not function<br />
with a Guest account.<br />
Windows ® ●<br />
●<br />
●<br />
●<br />
●<br />
●<br />
●<br />
●<br />
●<br />
●<br />
XP/2000: Log on with an administrator account be<strong>for</strong>e<br />
using this software. (Installation and uninstallation of the software<br />
requires an administrator account.)<br />
● This software does not support the multi-monitor environments.<br />
Introduction<br />
For fonts and screen settings, use the standard Windows ® ●<br />
settings.<br />
Characters may not display properly depending on the settings.<br />
● This software cannot be used simultaneously with other time-shifting<br />
image editing software or video capture products. Note that other<br />
software running background processes, timer recording in particular,<br />
may cause this software to malfunction.<br />
● This software operates only when the built-in clock on the PC is set to<br />
a value within the following range.<br />
From 0:00 on January 1, 1970, to 23:59 on December 31, 2037.<br />
If the built-in clock is set to a value outside this range, this software<br />
may not be activated or operated properly.<br />
●<br />
This software can only handle images recorded with this software or<br />
a <strong>Panasonic</strong> video camera that this software accompanied. Images<br />
created with other video cameras, DVD recorders, software and<br />
commercial DVD videos and BD videos are not supported.<br />
10
Optical discs and SD cards supported <strong>for</strong> recording<br />
Blu-ray discs DVD discs SD cards∗6∗7 Introduction<br />
BD-R BD-RE DVD-RAM∗2 DVD-R DVD-RW SD<br />
SDHC<br />
memory card memory card<br />
12 cm<br />
12 cm 12 cm 12 cm 512 MB - 2 GB 4 GB - 32 GB<br />
Single sided/<br />
Single sided/ Single sided/ Single sided<br />
Dual layer on single side Double sided Dual layer on<br />
single side<br />
Recording<br />
Format<br />
High definition BDMV∗9 Standard<br />
quality<br />
― ― DVD-VR<br />
AVC<strong>HD</strong><br />
DVD-Video∗4 ―<br />
Appending ― ―<br />
●<br />
●<br />
●<br />
●<br />
Format Required∗ 1 Required∗ 1 Required∗ 1∗ 3 ― Required∗ 1∗ 5 Required∗ 8 Required∗ 8<br />
Picture ― ― ― ― ― JPEG(DCF)<br />
+R and +RW DVD discs can be used <strong>for</strong> recording in AVC<strong>HD</strong><br />
<strong>for</strong>mat.<br />
Playback of BDMV, AVC<strong>HD</strong>, DVD-VR, and DVD-Video content<br />
requires equipment compatible with the respective <strong>for</strong>mats.<br />
8 cm discs are not supported.<br />
Recording errors may occur, depending on the disc quality.<br />
∗ 1 Can be <strong>for</strong>matted by using this software.<br />
∗ 2 2.6 GB and 5.2 GB double-sided DVD-RAM discs are not<br />
supported.<br />
∗ 3 The type of <strong>for</strong>matting DVD-RAM discs varies depending on<br />
whether AVC<strong>HD</strong> or DVD-VR will be used. (→79)<br />
∗ 4 DVD-Video can be played on most DVD players.<br />
∗ 5 Used DVD-RW discs can be used again <strong>for</strong> recording after<br />
<strong>for</strong>matting.<br />
∗ 6 Includes miniSD cards (up to 2 GB), microSD cards (up to 2 GB)<br />
and microSDHC cards (up to 8 GB). (As of November 2008.)<br />
∗ 7 SD cards must have a capacity of at least 32 MB <strong>for</strong> video<br />
recording. Additionally, operation is not guaranteed when<br />
recording video to 32 MB – 256 MB SD cards.<br />
SD cards of 8 MB – 128 MB can be used to store photos.<br />
∗ 8 SD cards must be <strong>for</strong>matted by using video cameras compatible<br />
with this software.<br />
∗ 9 BD-RE disc: Compatible with Blu-ray Disc Rewritable <strong>for</strong>mat<br />
BD-R disc: Compatible with Blu-ray Disc Recordable <strong>for</strong>mat<br />
11
Recording length of optical discs and SD cards<br />
For BDMV and AVC<strong>HD</strong> <strong>for</strong>mat<br />
Blu-ray discs<br />
BD-R/BD-RE<br />
Approximate Recording Length Per Disc/Card<br />
Image quality<br />
HA HG HX HE<br />
(Best quality) (High quality) (Standard) (Long duration)<br />
25 GB approx. 3 h approx. 3 h 50 min approx. 5 h 30 min approx. 8 h 20 min<br />
50 GB approx. 6 h approx. 7 h 40 min approx. 11 h approx. 16 h 40 min<br />
DVD discs 4.7 GB approx. 35 min approx. 45 min approx. 1 h 5 min approx. 1 h 40 min<br />
8.5 GB approx. 1 h 5 min approx. 1 h 15 min approx. 2 h approx. 3 h<br />
SD cards 8 GB approx. 1 h approx. 1 h 20 min approx. 2 h approx. 3 h<br />
16 GB approx. 2 h approx. 2 h 40 min approx. 4 h approx. 6 h<br />
32 GB approx. 4 h approx. 5 h 20 min approx. 8 h approx. 12 h<br />
For DVD-Video and DVD-VR <strong>for</strong>mat<br />
DVD-R/RW<br />
(DVD-Video)<br />
DVD-RAM<br />
(DVD-VR)<br />
Approximate Recording Length Per Disc<br />
Image quality<br />
(High quality) (Standard)<br />
4.7 GB (Single sided) approx. 1 h approx. 1 h 30 min<br />
8.5 GB<br />
(Dual layer on single side)<br />
approx. 1 h 50 min approx. 2 h 40 min<br />
4.7 GB approx. 1 h<br />
Introduction<br />
12
Preparation<br />
Connect the video camera to a computer<br />
By connecting a compatible video camera to your computer with the included cable, you can import content on the internal recording media of<br />
the video camera or on the SD card installed in the video camera to your computer or create discs.<br />
Important<br />
To avoid draining the battery of notebook computers or video<br />
cameras, use an AC adapter with these devices.<br />
If this type of message is<br />
displayed, close the window.<br />
(Example of display)<br />
1 Start the computer.<br />
2 Turn on the video camera.<br />
3 Connect the video camera to a computer.<br />
Insert the USB cable included with the video camera firmly<br />
into the USB port.<br />
4<br />
5<br />
Set the video camera to the mode <strong>for</strong><br />
connecting to a PC.<br />
For details, refer to the operating instructions <strong>for</strong> the video<br />
camera.<br />
Confirm that the video camera is<br />
recognised by the computer.<br />
The video camera is correctly recognised by the computer if<br />
the video camera is added as a drive in [Computer] (or [My<br />
Computer]).<br />
13
Connect the video camera to a computer<br />
Tip<br />
● For further details, also refer to the video camera manual.<br />
● To record to optical discs or SD cards, use a disc drive or SD card<br />
reader/writer. (Some video cameras support recording to the SD card<br />
in the video camera.)<br />
●Do<br />
not operate the video camera or disconnect the USB cable<br />
during the transfer of video camera data. The software may<br />
malfunction, and data may be lost.<br />
●When<br />
the computer has been connected to a video camera which<br />
is running on battery power, a warning message is displayed<br />
when the remaining battery charge is low. The level of the<br />
remaining charge indicated in the message serves solely as a<br />
general guide so connect the AC adapter as soon as possible.<br />
SD card connection<br />
When using an SD card slot or reader/writer, connect the device<br />
be<strong>for</strong>e starting this software. (For connection instructions, refer to<br />
the <strong>Operating</strong> <strong>Instructions</strong> of the computer or SD card.)<br />
●If<br />
you connect the device after startup, select the drive on the<br />
[SD] tab of the [Settings] window, and then click [OK]. (→84)<br />
Disconnecting the video camera from the computer<br />
1<br />
2<br />
3<br />
4<br />
5<br />
Preparation<br />
Confirm that the video camera is not<br />
recording or being accessed in some<br />
way.<br />
Double-click or in the task tray.<br />
Example of the<br />
task tray icon<br />
Select [USB Mass Storage Device] and<br />
click [Stop].<br />
If multiple USB devices are displayed, you can double-click<br />
each to check the video camera.<br />
Disconnect the USB cable from the<br />
computer.<br />
Turn off the video camera.<br />
14
Starting the software<br />
Important<br />
Do the following be<strong>for</strong>e starting the software.<br />
– Close other software and resident programs.<br />
– Disable the screen saver or power-saving functions (functions to<br />
make the computer enter standby or sleep mode when a specified<br />
time has elapsed without any operations on the PC).<br />
1 Double-click on the desktop to<br />
start the program.<br />
Preparation<br />
Startup is also possible by selecting [Start]→[All Programs]→<br />
[<strong>Panasonic</strong>]→[<strong>HD</strong> <strong>Writer</strong> <strong>AE</strong> 1.0]→[<strong>HD</strong> <strong>Writer</strong> <strong>AE</strong>].<br />
Tip<br />
First startup<br />
● A window is displayed regarding the licence agreement. Read the<br />
agreement carefully be<strong>for</strong>e continuing.<br />
●<br />
From the Start menu, select [All Programs]→[<strong>Panasonic</strong>]→[<strong>HD</strong> <strong>Writer</strong><br />
<strong>AE</strong> 1.0]→[Read this be<strong>for</strong>e starting], and then read the supplemental<br />
explanations and late-breaking in<strong>for</strong>mation.<br />
Exiting the software<br />
1<br />
2<br />
Click or .<br />
The “Simple Menu” is closed.<br />
Click or .<br />
15
Basic operations<br />
Feature overview<br />
This section summarizes basic software operations. The following operations are possible using the [Simple Menu].<br />
●If<br />
the main window (→28) is displayed instead of this one, click [Simple Menu] in the upper-right corner to display the [Simple Menu].<br />
Simple Menu<br />
Viewing content you have imported<br />
to your computer (→24–26)<br />
Video content or digital photos on your video camera<br />
Import (save) content to<br />
your computer (→17–19)<br />
Recording on discs in standard<br />
quality (DVD-Video <strong>for</strong>mat) (→20–21)<br />
Recording on discs and SD<br />
memory cards∗ in high definition<br />
(BDMV or AVC<strong>HD</strong> <strong>for</strong>mat) (→22–23)<br />
∗ When you record videos to SD memory cards, AVC<strong>HD</strong><br />
<strong>for</strong>mat is the only <strong>for</strong>mat available.<br />
Advanced features (→27)<br />
Preparation:<br />
●Connect the video camera to the computer (→13)<br />
●Double-click<br />
on the desktop to start the program.<br />
If you have used the video camera to record content on an SD<br />
card, insert that card in the video camera.<br />
(Startup is also possible by selecting [Start]→[All Programs]→<br />
[<strong>Panasonic</strong>]→[<strong>HD</strong> <strong>Writer</strong> <strong>AE</strong> 1.0]→[<strong>HD</strong> <strong>Writer</strong> <strong>AE</strong>].)<br />
The [Simple Menu] is displayed.<br />
16
Importing content to a computer (Simply Import to PC)<br />
Basic operations<br />
Video content or digital photos on your video camera can be imported to your computer, where it will be grouped by recording date. (Video<br />
captured using other devices cannot be imported. To import video from a previous <strong>Panasonic</strong> high-definition video camera, use the version<br />
of <strong>HD</strong> <strong>Writer</strong> provided with that video camera. Media containing data recorded with previous <strong>Panasonic</strong> high-definition video cameras or data<br />
recorded with other devices cannot be imported with this software.)<br />
Simple Menu<br />
A<br />
Preparation:<br />
●Connect<br />
the video camera to the computer (→13)<br />
If you have used the video camera to record content on an SD<br />
card, insert that card in the video camera.<br />
1 Click [Import to PC].<br />
The [Import to PC] window is displayed.<br />
2 Click and select the video camera.<br />
If the video camera is not listed, click [Refresh] ( A ).<br />
●<br />
3 Select items to import.<br />
●<br />
To check the content, as shown below, double-click a thumbnail<br />
(small image).<br />
Close confirmation window<br />
● Each time you click, items are selected or cleared.<br />
● You can select content based on the recording date. For<br />
selection at a more detailed level (scenes) (→30)<br />
17
Importing content to a computer (Simply Import to PC)<br />
B C<br />
If importing is not possible<br />
●If<br />
the in<strong>for</strong>mation area ( C ) displays yellow letters, nothing is<br />
selected <strong>for</strong> importing, no media is loaded, or there is a similar<br />
problem.<br />
●If<br />
the in<strong>for</strong>mation area ( C ) displays red letters, there is not<br />
enough free space in the importing destination, or there is<br />
another similar problem.<br />
●A<br />
“?” will appear in the thumbnail <strong>for</strong> data<br />
recorded with previous <strong>Panasonic</strong> highdefinition<br />
video cameras or with other devices.<br />
This data cannot be imported.<br />
Basic operations<br />
4 Click and select an importing<br />
destination (a folder on your computer).<br />
Subfolders <strong>for</strong> each recording date are created in the selected<br />
folder, and the content is imported there.<br />
Recording dates are used <strong>for</strong> the subfolder names.<br />
● To import all content to a single folder, select [Specified folder]<br />
( B ) and enter the name in the text box next to this option.<br />
Note that these characters are not supported: \ / : * ? " < > |<br />
5 Click [Start copying].<br />
●<br />
6<br />
7<br />
This button is not available unless you have selected at least<br />
one video or photo.<br />
Click [OK] when the confirmation<br />
message is displayed.<br />
●<br />
If you click [Cancel], the previous window is displayed.<br />
Importing now begins, and the status is shown in the progress<br />
indicator.<br />
● Importing the data takes time. Do not operate the computer until<br />
importing is finished.<br />
● To cancel importing in progress, click [Cancel].<br />
Click [OK] when a message is displayed<br />
indicating importing is finished.<br />
18
Importing content to a computer (Simply Import to PC)<br />
Storage locations of imported content<br />
Content is imported to subfolders (named with dates) in the folder<br />
selected in step 4, or to your specified folder.<br />
Folder selected in step 4<br />
Content imported here<br />
(example: date folder)<br />
● To rename these date folders or your specified folder after<br />
importing, right-click the folder and select [Properties], and then<br />
change the name in [Title]. (Names are a maximum of 64 singlebyte<br />
characters.)<br />
Content on SD Media Storage, optical discs, or SD cards<br />
can also be imported to your computer<br />
In step 2, select the SD Media Storage, optical disc, or inserted<br />
SD card instead of your video camera.<br />
●Top<br />
menus are not imported if you select only some items with<br />
a top menu <strong>for</strong> importing.<br />
●<br />
The video recorded by other than video cameras this software<br />
provided with cannot be imported from SD Media Storage to<br />
PC.<br />
Tip<br />
● Register a new folder to import content to a destination other than<br />
folders displayed in step 4. (“Registering new folders” →33)<br />
● Content captured on video cameras that support relay recording using<br />
relay recording is treated as a single video.<br />
●<br />
For further details on methods of importing (→30)<br />
Basic operations<br />
Importing only content that you have not already<br />
imported (differential importing)<br />
Each time you attempt to import content on the internal recording<br />
media of the video camera or on the SD cards∗ installed in the video<br />
camera, and that include content already imported, the new content<br />
is automatically detected, and only the new one will be imported.<br />
(∗This feature applies only to SD card content recorded with <strong>HD</strong><br />
video cameras this software is provided with. However, adding<br />
content from another video camera will prevent the differential<br />
content from being recognised.)<br />
(Selected): Subject to importing<br />
●Content<br />
that you have captured since importing the<br />
previous content<br />
●Content<br />
that you have edited on the video camera since<br />
importing the previous content<br />
(Cleared): Not subject to importing<br />
●Content<br />
already imported (labeled )<br />
(Note that once content has been imported, it is not subject<br />
to importing again, even if you have deleted it from your<br />
computer.)<br />
Tip<br />
● Click the check boxes to select or clear items, as desired. To restore<br />
the previous state after any changes, click [Refresh] ( D ).<br />
19<br />
D
Basic operations<br />
Recording on discs in standard quality (Simply Create DVD-Video Disc)<br />
Video content captured with a video camera can be recorded on DVD discs in standard quality. DVD discs recorded this way can be played on<br />
most DVD players.<br />
●For<br />
a list of supported discs (→11)<br />
●Content<br />
that does not fit on a single disc will be automatically split and recorded over multiple discs. However, this function may not be<br />
available if the work area file system is FAT32. ([Work area setting] →81)<br />
●Top<br />
menus (an interface <strong>for</strong> discs similar to a table of contents →54) are also created automatically. For instructions on changing the top<br />
menu design (→82)<br />
Simple Menu<br />
A<br />
Preparation:<br />
●Connect<br />
the video camera to the computer (→13).<br />
If you have used the video camera to record content to an SD<br />
card, insert that card in the video camera.<br />
●Load<br />
the DVD-R/RW disc to record to.<br />
1 Click [Create a DVD].<br />
The [Create a DVD] window is displayed.<br />
2 Click and select the video camera.<br />
● If the video camera is not listed, try clicking [Refresh] ( A ).<br />
3 Select the items to record.<br />
● Each time you click, items are selected or cleared.<br />
● You can select content based on the recording date. For<br />
selection at a more detailed level (scenes) (→30)<br />
20
Recording on discs in standard quality (Simply Create DVD-Video Disc)<br />
B<br />
Content on SD cards or on your computer can also<br />
be recorded to a DVD disc (except <strong>for</strong> video content<br />
converted into the MPEG2 <strong>for</strong>mat)<br />
In step 2, select an inserted SD card or a folder on your<br />
computer instead of your video camera.<br />
●Data<br />
cannot be imported between the same kinds of media, such<br />
as from one DVD disc to another or from one SD card to another.<br />
●Different<br />
media cannot be used to record to a single media.<br />
Tip<br />
● Discs created this way are <strong>for</strong> playback only. Additional content<br />
cannot be recorded on them.<br />
● Lower-per<strong>for</strong>mance computers may require a significantly longer time<br />
<strong>for</strong> disc recording.<br />
● Digital photos cannot be recorded with this function. To record photos<br />
(“Recording photos” →67)<br />
● When creating media of relay recorded video content continuously<br />
recorded on different memory (e.g. hard disk or SD cards) with<br />
compliant video cameras, only video content in the memory selected<br />
at the time of connection is imported.<br />
●<br />
For further details on recording on various media (→53)<br />
4<br />
5<br />
6<br />
7<br />
8<br />
Basic operations<br />
Click and select the DVD disc to record to.<br />
Click and select the video image quality.<br />
[High quality]: Priority to video quality<br />
[Standard quality]: Priority to recording capacity<br />
Click [Start writing].<br />
●<br />
This button is not available unless you have selected at least one item.<br />
Click [OK] when the confirmation<br />
message is displayed.<br />
●<br />
If you click [Cancel], the previous window is displayed.<br />
Recording now begins, and the status is shown in the<br />
progress indicator.<br />
● It takes time to record all the data. Do not operate the computer<br />
until recording is finished.<br />
● Clicking [Cancel] when changing discs or during data conversion<br />
will stop recording in progress. However, recording cannot be<br />
stopped when data is being written.<br />
● Content that does not fit on a single disc during DVD recording<br />
will be split and recorded over multiple discs. The approximate<br />
number of discs needed is indicated ( B ). Follow the instructions<br />
displayed to switch to a new disc.<br />
● During multi-disc recording, you can stop recording when it is<br />
time to load the second or subsequent disc. In<strong>for</strong>mation about<br />
the remaining content will be displayed then. To record the<br />
remaining content later, refer to this in<strong>for</strong>mation and select the<br />
content again, and then resume recording.<br />
● If a media problem causes recording to fail, follow the instructions<br />
to replace the media. The content you were recording when the<br />
failure occurred will be recorded again on the new media.<br />
Click [OK] when a message is displayed<br />
indicating that recording is complete.<br />
21
Basic operations<br />
Recording on discs and SD cards in high definition (Simply Create BD/DVD/SD Card (AVC<strong>HD</strong>))<br />
Video content captured with a video camera can be recorded on discs and SD cards in high definition.<br />
Discs and SD cards recorded this way can be played on <strong>HD</strong>-compatible equipment. (This includes Blu-ray players when you record to Blu-ray<br />
discs or <strong>HD</strong>-compatible DVD recorders supporting AVC<strong>HD</strong> standard when you record to DVD discs, <strong>for</strong> example.) They can also be played<br />
using this software.<br />
●For<br />
a list of supported discs and SD cards (→11)<br />
●Typical<br />
DVD players do not support playback. If you prefer to use typical DVD players, record in DVD-Video <strong>for</strong>mat (standard quality). (→20)<br />
●Content<br />
that does not fit on a single disc will be automatically split and recorded over multiple discs.<br />
●Top<br />
menus (an interface <strong>for</strong> discs similar to a table of contents →54) are created automatically when recording to media other than SD cards.<br />
For instructions on changing the top menu design (→82)<br />
Simple Menu<br />
A<br />
Preparation:<br />
●Connect<br />
the video camera to the computer (→13).<br />
If you have used the video camera to record content to an SD<br />
card, insert that card in the video camera.<br />
●Load<br />
the BD-R/RE, DVD-R/RW, DVD-RAM disc or SD card to<br />
record to.<br />
When using SD cards, see “SD card connection” (→14).<br />
1 Click [Save as BD/AVC<strong>HD</strong>].<br />
● The [Save as BD/AVC<strong>HD</strong>] window is displayed.<br />
2 Click and select the video camera.<br />
● If the video camera is not listed, try clicking [Refresh] ( A ).<br />
3 Select the items to record.<br />
● Each time you click, items are selected or cleared.<br />
● You can select content based on the recording date. For<br />
selection at a more detailed level (scenes) (→30)<br />
22
Recording on discs and SD cards in high definition (Simply Create BD/DVD/SD Card (AVC<strong>HD</strong>))<br />
Content on storage media or on your computer can also<br />
be recorded to an optical disc or SD card<br />
In step 2, select inserted media or a folder on your computer<br />
instead of your video camera.<br />
●Data<br />
cannot be imported between the same kinds of media,<br />
such as from one disc to another or from one SD card to<br />
another.<br />
Different media cannot be used to record to a single media.<br />
●<br />
Tip<br />
● When content is recorded to storage media, playback may be<br />
interrupted a few seconds between scenes.<br />
● Digital photos cannot be recorded with this function. To record photos<br />
(“Recording photos” →67)<br />
● When creating media of relay recorded video content continuously<br />
recorded on different memory (e.g. hard disk or SD cards) with<br />
compliant video cameras, only video content in the memory selected<br />
at the time of connection is imported.<br />
● For further details on recording to various media (→53)<br />
B<br />
4<br />
5<br />
6<br />
7<br />
Basic operations<br />
Click and select the optical disc or SD<br />
card to record on.<br />
Click [Start writing].<br />
● This button is not available unless you have selected at least<br />
one item.<br />
Click [OK] when the confirmation<br />
message is displayed.<br />
●<br />
If you click [Cancel], the previous window is displayed.<br />
Recording now begins, and the status is shown in the<br />
progress indicator.<br />
● With media other than DVD-R/RW and BD-R discs, recording<br />
can be stopped by clicking [Cancel]. With DVD-R/RW and BD-R<br />
discs, recording can be stopped by clicking [Cancel] when<br />
changing discs or during data conversion. However, recording<br />
cannot be stopped when data is being written.<br />
● It takes time to record all the data. Do not operate the computer<br />
until recording is finished.<br />
● Content that does not fit on a single disc will be split and<br />
recorded over multiple discs. The approximate number of discs<br />
needed is indicated ( B ). Follow the instructions displayed to<br />
switch to a new disc.<br />
● During multi-disc recording, you can stop recording when it is<br />
time to load the second or subsequent disc. In<strong>for</strong>mation about<br />
the remaining content will be displayed then. To record the<br />
remaining content later, refer to this in<strong>for</strong>mation and select the<br />
content again, and then resume recording.<br />
● If a media problem causes recording to fail, follow the instructions<br />
to replace the media. The content you were recording when the<br />
failure occurred will be recorded again on the new media.<br />
Click [OK] when a message is displayed<br />
indicating that recording is complete.<br />
23
Viewing content on a computer<br />
Video content and photos you have imported to your computer can be viewed on your monitor.<br />
Simple Menu<br />
Main Window<br />
Tip<br />
● Alternatively, in step 2 you can select a connected video camera or<br />
inserted media. Content shown as thumbnails can be played. For<br />
further details on playback (→34)<br />
A<br />
1<br />
2<br />
3<br />
4<br />
Click [Playback on a PC].<br />
Basic operations<br />
After the window <strong>for</strong> assistance is<br />
displayed, check the in<strong>for</strong>mation and<br />
click [Close] to close it.<br />
Click the folder where you imported the<br />
content to.<br />
● If the folder is not listed, try clicking [Refresh] ( A ).<br />
Click [Video] or [Picture].<br />
Click the folder or thumbnail <strong>for</strong> playback.<br />
● Content can also be played by right-clicking and selecting<br />
[Playback] in the menu displayed, or by double-clicking<br />
thumbnails.<br />
5 Click [Play].<br />
The selected video or photo is now played in the preview<br />
window. (→25–26)<br />
● For videos, selecting a folder will play all clips in the folder.<br />
Selecting a thumbnail will play all scenes in the folder after that<br />
scene, one after another.<br />
24
Viewing content on a computer<br />
Playing video content<br />
Current video title<br />
Stop playback, return to start of video<br />
Playback slider<br />
Move the slider to change the<br />
playback position<br />
Current playback time<br />
Total video playback time<br />
Mute<br />
Recording time and date<br />
Volume up/down<br />
Previous video<br />
Return to the beginning of the current<br />
video<br />
● If you click within 1 sec. of start,<br />
playback returns to beginning of the<br />
previous video.<br />
Tip<br />
● If no action is taken <strong>for</strong> about 3 seconds in full screen mode, the<br />
controls are hidden. Move the mouse to display them again.<br />
● Double-click the screen to view content in full-screen mode. Doubleclick<br />
again to view at the original size.<br />
Basic operations<br />
View in full-screen mode<br />
Play/Pause<br />
Display the highlight settings (→70)<br />
(This appears only when playing<br />
back video content with a highdefinition<br />
image quality shot using<br />
a video camera with which this<br />
software is provided.)<br />
Create still pictures from the paused<br />
video (→72)<br />
Scene marker<br />
Close window<br />
Next video<br />
Reverse/<strong>for</strong>ward frame by frame<br />
(when paused)<br />
25
Viewing content on a computer<br />
Viewing photos<br />
Previous/next photo<br />
Tip<br />
● Double-click the screen to view content in full-screen mode. Doubleclick<br />
again to view at the original size.<br />
● You cannot play back photos shot using high-speed burst shooting on<br />
this window. (→ 71)<br />
View in full-screen mode<br />
Close window<br />
Basic operations<br />
Viewing photos by recording date<br />
You can view photos saved on your computer by recording date.<br />
In the media/folder selection area, click by [Recording date],<br />
under [PC Hard drive]. Select a desired date to display all photos<br />
captured on that date in the content viewing area.<br />
26
Advanced Features<br />
Feature overview<br />
This section describes more advanced software operations. The following operations are possible.<br />
Import content to your<br />
computer (→30–33)<br />
Play content (→34–35)<br />
Delete content (→36)<br />
Edit content on your<br />
computer (→37–52)<br />
• Deleting unnecessary portions of content<br />
• Dividing scenes<br />
• Assign the playback order<br />
• Adding opening titles<br />
• Adding scene transitions<br />
• Edit digital photos<br />
• Protect content/rename content<br />
Record on optical discs and<br />
SD cards (→53–69)<br />
Use convenient features<br />
(→70–77)<br />
• Create still pictures from video<br />
• View highlights of video content<br />
• Viewing photos shot using high-speed<br />
burst shooting<br />
• Combine scenes<br />
• Search <strong>for</strong> desired content<br />
• Upload content to YouTube<br />
Use the main window (→next page) <strong>for</strong> general operations such as importing, playback, and editing. This window is displayed when you close<br />
the Simple Menu that appears immediately after the software starts up.<br />
●<br />
If the message at right is displayed when<br />
media is loaded, the main window will also be<br />
displayed if you select [Import to PC/save to<br />
disc/playback on PC].<br />
Tip<br />
● To prevent the [Simple Menu] from being<br />
displayed at startup, clear the check mark by<br />
[Display this screen at startup] in the lower-left<br />
corner of the [Simple Menu].<br />
27
Feature overview<br />
Main window<br />
Control buttons<br />
Type of content<br />
● Video: video content<br />
● Picture: photo or other still picture<br />
Rearrange display order<br />
● Click to sort in ascending (▲) or<br />
descending (▼) order. The order changes<br />
each time you click.<br />
Change display <strong>for</strong>mat<br />
● In<strong>for</strong>mation shown when viewing content<br />
by [Details] varies depending on the type<br />
of content.<br />
Media/folder selection area<br />
[<strong>Panasonic</strong> Video Camera]: Detected video cameras<br />
[PC Hard drive (<strong>HD</strong>)]:<br />
High-definition content imported to the computer using this software<br />
● Subfolders where you have imported <strong>HD</strong> content are displayed. (These folders<br />
are inside folders you have registered in this software.) To register or deregister<br />
folders <strong>for</strong> storing content (→33)<br />
[PC Hard drive]:<br />
Standard-definition content converted using this software<br />
[PC Hard drive] (Displayed when the [Picture] tab is selected):<br />
Digital photos imported to the computer using this software<br />
[SD]: Detected SD card drives<br />
[BD/DVD]: Detected BD/DVD drives<br />
●<br />
Advanced Features<br />
Access the [Simple Menu] (→16)<br />
Display the [Settings] panel (→81–85)<br />
Update in<strong>for</strong>mation in the areas <strong>for</strong><br />
media or folder selection and content<br />
previewing<br />
Content preview area<br />
● Content of media or folders selected in<br />
the media/folder selection area is shown<br />
here.<br />
Resize thumbnails<br />
● By default, small thumbnails are<br />
displayed.<br />
Click to expand listed items.<br />
(Click again to close the in<strong>for</strong>mation.)<br />
To examine media or folders:<br />
This example illustrates how to examine video<br />
camera content.<br />
Click directly under [<strong>Panasonic</strong> Video Camera]. (The<br />
file path, indicated here by G:\, varies depending on<br />
the computer used.)<br />
● If nothing is listed under [<strong>Panasonic</strong> Video<br />
Camera], click , which will change to .<br />
●<br />
If [<strong>Panasonic</strong> Video Camera] is not listed, try<br />
clicking [Refresh].<br />
28
Feature overview<br />
Content preview area<br />
Content in the preview area is displayed as folders or thumbnails.<br />
Folders<br />
When importing to a date folder, videos with the same recording<br />
date are saved in the same folder.<br />
Additionally, photos shot using high-speed burst shooting with a<br />
video camera are saved together in a single folder.<br />
1 Type of content<br />
: Video<br />
: Photos shot using highspeed<br />
burst shooting<br />
Tip<br />
● Up to 9,999 scene and photo thumbnails can be displayed.<br />
● For large amounts of content, it may take some time to display<br />
thumbnails.<br />
Main window<br />
2 Protection setting<br />
: Protected content<br />
Advanced Features<br />
Thumbnails<br />
Thumbnails are small images representing video content or<br />
photos.<br />
1 Type of content<br />
: Video<br />
3 Importing status<br />
: Imported to the computer<br />
(Shown only <strong>for</strong> content on the internal recording media of<br />
the video camera or on the SD card installed in the video<br />
camera. Not shown <strong>for</strong> SD card devices.)<br />
: Recorded on BD-R/RE or DVD-R/RW disc<br />
●<br />
: Photo or other still picture<br />
: Recorded on DVD-RAM disc<br />
: Recorded on SD card<br />
The “recorded” icons are not displayed on the [Create a DVD]<br />
(→20) and [Save as BD/AVC<strong>HD</strong>] (→22) screens.<br />
29
Importing content to a computer (Import to PC)<br />
Advanced Features<br />
Content (video content in AVC<strong>HD</strong> <strong>for</strong>mat, and photos) on the internal recording media of the video camera, an SD card installed in the video<br />
camera, an SD card which has been connected using an SD card slot or a device such as an SD card reader/writer, or content (videos in<br />
BDMV <strong>for</strong>mat or AVC<strong>HD</strong> <strong>for</strong>mat) on a disc created with this software can be imported to your computer. This content can also be edited after it<br />
is imported to the computer. (→37)<br />
On the main window, click to display the [Import to PC] menu.<br />
Simply Import to PC<br />
(For details →17)<br />
Import to PC<br />
(See in<strong>for</strong>mation starting on the next page)<br />
Important<br />
● Only video content or photos can be imported to your computer<br />
using this software. Other data cannot be imported.<br />
● Importing requires 1.3 times more free space than the size of the<br />
content.<br />
● Top menus are not imported.<br />
● Do not use Windows Explorer or other software to delete, modify,<br />
or move content (folders or files) imported to the computer using<br />
this software. This prevents the content from being managed by this<br />
software.<br />
● When using the SD Media Storage drive (VW-PT2), data cannot be<br />
imported using [Import to PC]. Use the procedure in [Simply Import<br />
to PC]. (→17-19)<br />
Preparation:<br />
● Load the media to import from (connect the video camera and<br />
computer, <strong>for</strong> example (→13))<br />
When using SD cards, see “SD card connection” (→14).<br />
Used when importing all content to the computer.<br />
●Able<br />
to select images based on the recording dates.<br />
●Unimported<br />
content is detected automatically (differential importing →19).<br />
Used when importing specific content.<br />
●Individual<br />
scenes can be selected.<br />
Tip<br />
● Video captured using other devices cannot be imported. To import<br />
video from a previous <strong>Panasonic</strong> high-definition video camera, use<br />
the version of <strong>HD</strong> <strong>Writer</strong> provided with that video camera.<br />
Media containing data recorded with previous <strong>Panasonic</strong> highdefinition<br />
video cameras or data recorded with other devices cannot<br />
be imported with this software.<br />
● Note that content captured while using the world time function of<br />
video cameras is imported to a separate folder even if it has the same<br />
recording date.<br />
● Content captured on video cameras that support relay recording using<br />
relay recording is treated as a single video.<br />
●<br />
Up to 9,999 videos and photos can be stored in [PC Hard drive<br />
(<strong>HD</strong>)], [PC Hard drive] and [PC Hard drive] respectively. (The<br />
maximum capacity may be less than this, in some cases.)<br />
30
Importing content to a computer (Import to PC)<br />
A<br />
1<br />
2<br />
3<br />
4<br />
Advanced Features<br />
Click the drive or folder to import from.<br />
● If the drive or folder is not listed, try clicking [Refresh] ( A ).<br />
● Previous <strong>Panasonic</strong> high-definition video cameras, or media<br />
containing data recorded with previous <strong>Panasonic</strong> highdefinition<br />
video cameras or with other devices, cannot be<br />
connected to this software.<br />
Click [Video] or [Picture].<br />
Click the content to select it <strong>for</strong><br />
importing.<br />
Selected items are outlined in yellow.<br />
● To select multiple items, hold the [Ctrl] key while clicking the<br />
thumbnails.<br />
● When a drive or folder is selected, all content in it is selected <strong>for</strong><br />
importing.<br />
Click [Import to PC], and then select<br />
[Import to PC].<br />
The importing window (→next page) is displayed.<br />
● Importing is also possible by right-clicking items in step 3 and<br />
selecting [Import to PC].<br />
31
Importing content to a computer (Import to PC)<br />
Current item/total items<br />
Thumbnail of content to import<br />
A<br />
Previous/next<br />
Name, length, and size of content<br />
Resolution and<br />
audio <strong>for</strong>mat<br />
Close window<br />
Storage locations of imported content<br />
Content is imported to subfolders (named with dates or as<br />
specified) in the folder selected in step 5.<br />
Folder selected in step 5<br />
Content imported here<br />
(example: date folder)<br />
●<br />
To rename these date folders or your specified folder after<br />
importing, right-click the folder and select [Properties], and then<br />
change the name in [Title]. (Names are a maximum of 64 singlebyte<br />
characters.)<br />
Advanced Features<br />
5 Click and select an import destination<br />
(a folder on your computer).<br />
● You can register other folders on your computer, if desired.<br />
(“Registering new folders” →next page)<br />
Subfolders <strong>for</strong> each recording date are created in the selected<br />
folder, and the content is imported there.<br />
Recording dates are used <strong>for</strong> the subfolder names.<br />
● By default, folders are named with the most recent recording<br />
date of content, in the order [month-day-year].<br />
● To import all content to a single folder, select [Specified folder]<br />
( A ) and enter the name in the text box next to this option.<br />
Note that these characters are not supported: \ / : * ? " < > |<br />
6 Click [Start].<br />
7<br />
8<br />
Click [Yes] when the confirmation<br />
message is displayed.<br />
● To cancel this process, click [No].<br />
Importing now begins, and the status is shown in the progress<br />
indicator.<br />
● To cancel importing in progress, click [Cancel].<br />
● Importing the data takes time. Do not operate the computer until<br />
recording is finished.<br />
Click [OK] when a message is displayed<br />
indicating importing is finished.<br />
32
Importing content to a computer (Import to PC)<br />
Registering or deregistering destination folders<br />
Registering new folders<br />
1 Click [Settings] on the main window.<br />
(Otherwise, right-click [PC Hard drive (<strong>HD</strong>)] or [PC Hard drive] in<br />
the media/folder selection area and select [Set Target folder].)<br />
The settings panel is displayed.<br />
2 Click the [PC <strong>HD</strong>D] tab.<br />
3 Click [Add].<br />
4 Select a folder to register and click [OK].<br />
5 Click [OK] to close the [Settings] panel.<br />
Folders you register are listed under [PC Hard drive (<strong>HD</strong>)] and [PC<br />
Hard drive] in the media/folder selection area.<br />
Tip<br />
●<br />
Up to 10 folders can be registered.<br />
Advanced Features<br />
Deregistering folders<br />
1 Select the folder in [Registration folder] and click [Delete].<br />
2 Click [OK] when the confirmation message is displayed.<br />
3 Click [OK] to close the [Settings] panel.<br />
● Folders are only deregistered. The content itself is not deleted.<br />
33
Playing content<br />
Advanced Features<br />
You can play content (videos in AVC<strong>HD</strong> <strong>for</strong>mat and photos) on the computer, internal recording media of the video camera, an SD card<br />
installed in the video camera, an SD card which has been connected using an SD card slot or a device such as an SD card reader/writer, or<br />
content (videos in BDMV <strong>for</strong>mat or AVC<strong>HD</strong> <strong>for</strong>mat) on a disc created with this software.<br />
●<br />
Playback is possible only <strong>for</strong> content imported to the computer using this software. Content imported using Windows Explorer or similar<br />
software cannot be played.<br />
Preparation:<br />
● Load the media (insert media in the video camera and connect the<br />
camera, <strong>for</strong> example (→13))<br />
When using SD cards, see “SD card connection” (→14).<br />
A<br />
1<br />
Click the drive or folder where content<br />
<strong>for</strong> playback is stored.<br />
● If the drive or folder is not listed, try clicking [Refresh] ( A ).<br />
● Previous <strong>Panasonic</strong> high-definition video cameras, or media<br />
containing data recorded with previous <strong>Panasonic</strong> highdefinition<br />
video cameras or with other devices, cannot be<br />
connected to this software.<br />
2 Click [Video] or [Picture].<br />
3 Click the folder or thumbnail <strong>for</strong> playback.<br />
● For videos, selecting a folder will play all videos in the folder.<br />
Selecting a thumbnail folder will play all scenes in the folder<br />
after that scene, one after another.<br />
● Content can also be played by right-clicking and selecting<br />
[Playback] in the menu displayed, or by double-clicking<br />
thumbnails.<br />
● If you do not see the folder where desired content is stored,<br />
select [Settings]→[PC <strong>HD</strong>D]→[Registration folder] (→82) and<br />
switch to the drive where the desired content is.<br />
4 Click [Play].<br />
The content selected is now played in the preview window.<br />
Sound is played in 2-channel mode.<br />
● For details about the preview window (→25–26)<br />
34
Playing content<br />
Tip<br />
Top menus are not played. To play the top menu, use equipment that<br />
supports top menu playback.<br />
Depending on graphics features (such as [Windows Aero] in Windows<br />
Vista ® ), your computer environment, and the content being played,<br />
frames may be dropped and colour loss may occur during playback,<br />
and playback may not be smooth. These problems are more likely to<br />
occur in full-screen mode.<br />
Additionally, in sections where the resolution or audio <strong>for</strong>mat changes,<br />
noise may be produced, and playback may not be smooth.<br />
If errors in reading a disc occur, playback may resume from the next<br />
item after the affected position.<br />
Playback of content in DVD-Video and DVD-VR <strong>for</strong>mat is not<br />
supported.<br />
Problems such as dropped frames are normal in the preview window<br />
(where image quality is reduced) and in full-screen mode. For best<br />
results during playback, use AVC<strong>HD</strong>-compatible video cameras and<br />
playback equipment.<br />
Frame rates <strong>for</strong> various computer processors are as follows. (These<br />
are guideline values.)<br />
Processor Frame Rate (fps)<br />
Pentium ® 1.0 GHz – Pentium ® 4<br />
2<br />
Hyper-Threading Technology 3.0 GHz<br />
Pentium ® 4 Hyper-Threading Technology<br />
3.0 GHz – Pentium ® 10<br />
D 3.0 GHz<br />
Pentium ® D 3.0 GHz – Pentium ® D 3.2 GHz 30<br />
Pentium ® ●<br />
●<br />
●<br />
●<br />
●<br />
D 3.2 GHz or higher,<br />
60 (fields)<br />
Core 2 Duo 2.16 GHz or higher<br />
● Actual frame rates may be lower, depending on the computer<br />
environment and conditions of use.<br />
Advanced Features<br />
Conditions when frame rates may be lower:<br />
● When other software is running during installation of this software<br />
● When other software is running during video playback with this<br />
software<br />
● When using a computer with a video card that shares memory <strong>for</strong><br />
the main memory and video memory<br />
● When there is minimal free space on the system drive or the drive<br />
where temporary files are created<br />
Intelligent Scene Selection<br />
[INTEL. SCENE] is a video camera function, available only during<br />
playback on video cameras. It is not provided by this software.<br />
For the following content and media, undesired scenes may not<br />
be skipped using the [INTEL. SCENE] video camera function.<br />
●Content<br />
which was, in part, imported to the computer using<br />
[Import to PC]<br />
●Content<br />
managed in some way using the [Video editing]<br />
function<br />
●Media<br />
created selecting some content with [Create Media]<br />
●Media<br />
created selecting some content with [Save as BD/<br />
AVC<strong>HD</strong>]<br />
35
Delete content<br />
You can delete content imported to the computer using this software.<br />
Important<br />
Once content has been deleted, it cannot be restored. Always<br />
check content carefully be<strong>for</strong>e deletion.<br />
● When folders are deleted, all data in the folder is deleted, including<br />
data other than the content.<br />
● Scenes that have been protected cannot be deleted. Additionally,<br />
videos containing protected scenes cannot be deleted. First, clear<br />
the protection. (→52)<br />
1<br />
Advanced Features<br />
Click the folder where content <strong>for</strong><br />
deletion is stored.<br />
2 Click the folder or thumbnail <strong>for</strong> deletion.<br />
● To select multiple thumbnails, hold the [Ctrl] key while clicking<br />
the thumbnails.<br />
● Only one folder can be selected.<br />
3 Click [Delete].<br />
4 Click [OK] when the confirmation<br />
message is displayed.<br />
●<br />
To cancel this process, click [Cancel].<br />
Tip<br />
● Content can also be deleted by right-clicking thumbnails and selecting<br />
[Delete] in the menu displayed.<br />
● When you delete all content in a folder, the folder itself is also deleted.<br />
● Deletion may take a long time, depending on the content.<br />
36
Editing content on your computer<br />
Content imported to your computer can be edited. The following operations are possible.<br />
●<br />
●<br />
●<br />
●<br />
●<br />
Edit video content<br />
(→37–52)<br />
Deleting selected portions of a scene (→41)<br />
Dividing scenes (→44)<br />
Assigning the playback order of scenes (→45)<br />
Adding opening titles (→47)<br />
Adding scene transitions (→49)<br />
Edit digital photos<br />
(→51)<br />
Protect content/<br />
rename content (→52)<br />
Tip<br />
● Only video content and photos you have imported to your computer<br />
can be edited. For in<strong>for</strong>mation on importing (→17–19, 30–33)<br />
● Although files and folders <strong>for</strong> content imported to the computer using<br />
other software may be displayed, they cannot be managed with this<br />
software. Always use this software to import content to the computer.<br />
● New files are created after you edit content, leaving the original files<br />
in the state be<strong>for</strong>e editing.<br />
● Editing requires an amount of free work space on the computer at<br />
least equivalent to the size of the content <strong>for</strong> editing.<br />
Advanced Features<br />
37
Editing content on your computer<br />
Editing video content (basic operations)<br />
Video editing area<br />
Name of storage folder<br />
(Can be changed as needed)<br />
Selecting scenes to edit<br />
1<br />
2<br />
Advanced Features<br />
Click [Edit] and select [Video editing].<br />
The video editing area is displayed.<br />
Drag a scene to edit to the video editing<br />
area.<br />
Edit video content<br />
●Deleting<br />
selected portions of a scene (→41)<br />
●Dividing<br />
scenes (→44)<br />
●Assigning<br />
the playback order of scenes (→45)<br />
●Adding<br />
opening titles (→47)<br />
●Adding<br />
scene transitions (→49)<br />
Saving edited videos<br />
Click [Save as AVC<strong>HD</strong> Format] or [Save<br />
as MPEG2 Format].<br />
[Save as AVC<strong>HD</strong> Format]:<br />
Save content in AVC<strong>HD</strong> <strong>for</strong>mat (→Below)<br />
[Save as MPEG2 Format]:<br />
Save content in MPEG2 <strong>for</strong>mat (→Next page)<br />
1<br />
2<br />
When select [Save as AVC<strong>HD</strong> Format]<br />
Click and select a destination <strong>for</strong> saving<br />
the file.<br />
●<br />
Edited scenes are saved in separate folders from the original<br />
data.<br />
38
Editing content on your computer Editing video content (basic operations)<br />
3 Click [OK].<br />
4<br />
5<br />
2<br />
3<br />
4<br />
Advanced Features<br />
Processing status is shown in the progress indicator.<br />
● When there are multiple scenes in the video editing area<br />
Save each scene as an individual AVC<strong>HD</strong> file.<br />
Combine scenes and save as a single AVC<strong>HD</strong> file.<br />
● To cancel editing, click [Cancel].<br />
Click [OK] when a message is displayed<br />
indicating that processing is finished.<br />
Edited content is saved as a new file.<br />
The file name is identified in the message indicating completion.<br />
Click [Close] to close this window.<br />
When selecting [Save as MPEG2 Format]<br />
Click and select a destination where you<br />
want to save the file.<br />
●<br />
● When the destination hard disk is in FAT or FAT32 <strong>for</strong>mat,<br />
Edited scenes are saved in separate folders from the original data.<br />
MPEG2 files exceeding 4 GB cannot be produced.<br />
Select the video image quality.<br />
Select the number of audio channels.<br />
●<br />
channel content.<br />
●<br />
[Save as 2-channel audio] is available when converting 5.1<br />
Converting 5.1 channel video content to MPEG2 <strong>for</strong>mat by using<br />
[Save images in original <strong>for</strong>m] produces content with an aspect ratio<br />
of 16:9 and 5.1 channel sound, which may be incompatible with<br />
software that does not specifically support this <strong>for</strong>mat. Conversion<br />
using [Save as 2-channel audio] may improve compatibility.<br />
39
Editing content on your computer Editing video content (basic operations)<br />
Tip<br />
● Recording date in<strong>for</strong>mation will correspond to in<strong>for</strong>mation of the<br />
opening scene.<br />
● Up to approximately 12 hours of video content can be saved.<br />
● This software is only compatible with MPEG2 files with accompanying<br />
in<strong>for</strong>mation files.<br />
● Renaming files using Windows Explorer or similar software will<br />
prevent the files from being managed by this software.<br />
● Conversion of some content may result in out-of-sync or dropped<br />
frames, or conversion may fail.<br />
● Converting content to MPEG2 <strong>for</strong>mat enables you to use the content<br />
in other software <strong>for</strong> working with DVD-Video content.<br />
● The resulting MPEG2 files can also be recorded on various media<br />
using this software.<br />
5 Click [OK].<br />
6<br />
7<br />
Advanced Features<br />
Processing status is shown in the progress indicator.<br />
● When there are multiple scenes in the video editing area<br />
Save each scene as an individual MPEG2 file.<br />
Combine scenes and save as a single MPEG2 file.<br />
● To cancel editing, click [Cancel].<br />
Click [OK] when a message is displayed<br />
indicating that processing is finished.<br />
Edited content is saved as a new file.<br />
The file name is identified in the message indicating completion.<br />
Click [Close] to close this window.<br />
● Chapter points will not be maintained when creating DVD discs from<br />
MPEG2 files produced with the [Merging into one scene] function.<br />
(→59)<br />
● If the original content includes scenes with both 2 and 5.1 channel<br />
audio, combining them will produce a file with 5.1 channel audio.<br />
(Audio channel in<strong>for</strong>mation can be checked in the [Properties]<br />
window.)<br />
● If scenes with rapid motion are affected by blurry image edges or<br />
video noise after MPEG2 conversion, selecting [Settings]→[Convert<br />
MPEG2]→[Picture quality priority] may improve the image quality.<br />
(→83)<br />
●<br />
MPEG2 files produced this way have an accompanying in<strong>for</strong>mation<br />
file (MTV file).<br />
40
Editing content on your computer<br />
Editing video content (Delete partially)<br />
Deleting selected portions of content<br />
Delete unneeded portions of video content or portions with shooting<br />
errors as follows.<br />
Only video content imported to your computer can be edited. First,<br />
import the content to your computer. (→17–19, 30–33)<br />
●Video<br />
content to be edited must be at least two seconds long.<br />
Video editing area<br />
1<br />
Selected portion<br />
Advanced Features<br />
Follow the steps in “Selecting scenes to<br />
edit” (→38).<br />
2 Click a scene.<br />
● Select only one scene.<br />
3 Click [Edit] and select [Delete partially].<br />
The [Delete partially] window is displayed.<br />
4<br />
5<br />
Click to play the scene. Click to<br />
pause playback at the starting position<br />
<strong>for</strong> deletion.<br />
Click to fine-tune the position. (→43)<br />
Click [Set start point] to identify the<br />
starting point.<br />
Otherwise, you can drag ▼ to identify the starting point.<br />
41
Editing content on your computer Editing video content (Delete partially)<br />
For details about this window<br />
(→next page)<br />
Cancel editing<br />
6<br />
7<br />
Advanced Features<br />
Click again to resume playback.<br />
Click to pause playback at the<br />
ending position <strong>for</strong> deletion.<br />
Click [Set end point] to identify the<br />
ending point.<br />
Otherwise, you can drag ▲ to identify the ending point.<br />
8 Click [Select] to confirm this selection.<br />
● The portion that will be deleted is indicated in grey<br />
● Thumbnails of the starting and ending points are displayed.<br />
● To select multiple portions, repeat steps 3–7.<br />
● To clear the selection, click the corresponding thumbnail and<br />
9<br />
click [Release].<br />
Play the video content to check the<br />
portion that will remain after deletion.<br />
10 Click [Partially delete].<br />
Results of editing are applied to the video editing area.<br />
To save as a video<br />
●Follow<br />
the steps in “Saving edited videos” (→38).<br />
42
Editing content on your computer Editing video content (Delete partially)<br />
Image at the starting point<br />
Selected portion<br />
The portion that will be deleted is<br />
indicated in grey<br />
●<br />
The ending edge of the selected<br />
portion may not match the end<br />
point, but the selection in grey is<br />
the portion that will be deleted.<br />
Length of content, from the<br />
starting to ending point<br />
Length of content retained<br />
Length of content deleted<br />
h: hours<br />
m: minutes<br />
s: seconds<br />
f: number of frames<br />
Recommended portion<br />
Candidate <strong>for</strong> deletion<br />
Camera shake<br />
Fast pan<br />
Rapid tilt<br />
Out of focus<br />
Back light<br />
Low light intensity<br />
Recording ground accidentally<br />
Section marker<br />
● Scenes are divided based on selected portions.<br />
Portion represented by the thumbnail<br />
● The selected deletion range to date will be cancelled, if [Highlight<br />
asstnce] or [Unnec section asstnce] are clicked.<br />
● For content captured when the video camera functions [HIGHLIGHT]<br />
and [SHOOTING GUIDE] were activated, the content is divided<br />
into portions the camera recommends to keep or delete. However,<br />
portions of content that the camera recommends to keep or delete<br />
may not be shown, depending on the shooting conditions.<br />
Image at the ending point<br />
Advanced Features<br />
: Skip approximately<br />
0.5 sec.<br />
: Previous/next frame<br />
[Highlight asstnce]:<br />
Click to set the range excluding the<br />
highlight as the deletion range.<br />
[Unnec section asstnce]:<br />
Click to set the deletion candidate<br />
range as the deletion range.<br />
Thumbnails at the beginning of each<br />
section<br />
Cancel editing<br />
43
Editing content on your computer<br />
Editing video content (Dividing scenes)<br />
Scenes can be divided at desired positions.<br />
Only content imported to your computer can be edited. First, import the content to your computer. (→17–19, 30–33)<br />
Video content to be divided must be at least four seconds long.<br />
Playback<br />
Skip approx. 0.5 sec.<br />
slider<br />
Previous/next frame buttons<br />
h: hours m: minutes s: seconds f: number of frames<br />
1<br />
Advanced Features<br />
Follow the steps in “Selecting scenes to<br />
edit” (→38).<br />
2 Click a scene to edit.<br />
● Select only one scene.<br />
3 Click [Edit] and select [Divide Scene].<br />
The [Divide Scene] window is displayed.<br />
4 Click to play the content.<br />
5 Click to pause playback at the position<br />
to divide scenes.<br />
● After pausing playback, you can adjust the position <strong>for</strong> division<br />
by using the playback slider or previous/next frame buttons.<br />
● Content cannot be divided at a position where resulting scenes<br />
would be less than two seconds.<br />
6 Click [Execute divide].<br />
Results of editing are applied to the video editing area.<br />
To save as a video<br />
●Follow<br />
the steps in “Saving edited videos” (→38).<br />
44
Editing content on your computer<br />
Assigning the playback order/adding opening titles/adding effects<br />
You can group content imported to your computer that was recorded on various dates and assign the playback order.<br />
You can also add opening titles and scene transitions, such as fading.<br />
Video editing area A<br />
Tip<br />
●<br />
Changing the playback order of scenes/Deleting scenes in the video<br />
editing area (→next page)<br />
Advanced Features<br />
Assigning the playback order<br />
1 Click [Edit] and select [Video editing].<br />
The video editing area is displayed.<br />
2<br />
Drag a scene to edit to the video editing<br />
area.<br />
● Repeat this process to collect desired scenes.<br />
● To add video content or scenes from another folder, select the<br />
folder and go to step 2.<br />
● Videos are expanded into scenes when added to the video<br />
editing area.<br />
● To cancel this process, click [Close] ( A ).<br />
45
Editing content on your computer<br />
Advanced Features<br />
Assigning the playback order/adding opening titles/<br />
adding effects<br />
Changing the order of scenes<br />
1 Drag scenes to the desired position.<br />
Deleting scenes in the video editing area<br />
1 Click a scene to remove.<br />
● To select multiple scenes, hold the [Ctrl] key while clicking the<br />
thumbnails.<br />
2 Click [Delete].<br />
1 2<br />
● Scenes are only removed from the video editing area. The content<br />
itself is not deleted.<br />
● Deletion is also possible by right-clicking scenes and selecting<br />
[Delete] in the menu displayed.<br />
To save as a video<br />
●Follow<br />
the steps in “Saving edited videos” (→38).<br />
46
Editing content on your computer<br />
Advanced Features<br />
Assigning the playback order/adding opening titles/<br />
adding effects<br />
Adding opening titles<br />
Titles can only be added to the opening scenes.<br />
Preparation:<br />
● Arranging scenes and videos in the video editing area (→45)<br />
1 Click [Title].<br />
The [Insert Title] window is displayed.<br />
2 Enter the title and specify effects.<br />
(For details about this window →next page)<br />
● If not all text is displayed, or if text covers images in the content,<br />
change the font or reduce the size.<br />
3 Click [OK].<br />
●<br />
●<br />
●<br />
●<br />
●<br />
To cancel this process, click [Cancel].<br />
A new opening title scene will be added. (This is indicated by<br />
on the thumbnail.)<br />
To change the titles, first delete the opening title scene, and<br />
create a new title scene again.<br />
To delete titled scenes in the video editing area, first delete the<br />
adjacent scene labeled with an icon ( ).<br />
Titles cannot be added to scenes labeled ( ).<br />
47
Editing content on your computer<br />
[Insert Title] window<br />
Title preview<br />
Enter the title<br />
(Up to 128 single-byte<br />
characters on two lines.)<br />
Title display duration<br />
● Click ▼ to specify how long<br />
the title is displayed. (3, 5, or<br />
10 seconds.)<br />
● Titles cannot be added to<br />
scenes which lengths are less<br />
than specified duration plus 2<br />
seconds.<br />
Add fade-in effects<br />
Preview the title and<br />
effects in the preview window<br />
Advanced Features<br />
Assigning the playback order/adding opening titles/<br />
adding effects<br />
Font<br />
Font size<br />
Text style<br />
: Bold<br />
: Italic<br />
: Drop shadow<br />
: Outline<br />
Colour of outline [ ]<br />
Drop shadow colour [ ]<br />
Darken text background<br />
Text colour<br />
● Click to select a colour. (→92)<br />
Text position<br />
Cancel the title and effects<br />
48
Editing content on your computer<br />
Effects are added here<br />
Advanced Features<br />
Assigning the playback order/adding opening titles/<br />
adding effects<br />
Adding scene transitions<br />
Preparation:<br />
● Arranging scenes and videos in the video editing area (→45)<br />
1<br />
Click the scene be<strong>for</strong>e the scene <strong>for</strong><br />
effects.<br />
2 Click [Transition].<br />
The [Insert Transition] window is displayed.<br />
3 Specify the desired effect.<br />
(For details about this window →next page)<br />
4 Click [OK].<br />
●<br />
●<br />
the thumbnail.)<br />
●<br />
a new one.<br />
●<br />
●<br />
To cancel this process, click [Cancel].<br />
The effect is now added to the scene. (This is indicated by on<br />
To change the effect, delete the scene with the effect and create<br />
To delete scenes with effects in the video editing area, first<br />
delete the adjacent scene labeled with an icon ( ).<br />
Scenes with effects cannot be rearranged.<br />
Tip<br />
● It may take some time to save content in AVC<strong>HD</strong> <strong>for</strong>mat with effects<br />
between scenes of different resolutions.<br />
49
Editing content on your computer<br />
Advanced Features<br />
Assigning the playback order/adding opening titles/<br />
adding effects<br />
[Insert Transition] window Effect<br />
[Fade (Black)]/[Fade (White)]<br />
The previous scene fades out to black or white, and the<br />
Preview window<br />
Effect duration<br />
● Click to specify how long<br />
the effect is displayed.<br />
(3, 4, or 5 seconds.)<br />
● Transitions cannot be added<br />
to scenes which lengths are<br />
less than specified duration<br />
plus 2 seconds.<br />
Playback position<br />
Move the playback slider to<br />
change the playback position.<br />
Effect preview<br />
Cancel the transition effects<br />
next screen gradually fades in.<br />
[Mix]<br />
Scenes are momentarily superimposed as the next scene<br />
fades in.<br />
[Wipe]<br />
The next scene is revealed as if a curtain is drawn back.<br />
[Slide]<br />
The previous scene slides right, revealing the next scene.<br />
[Zoom-in]<br />
The next scene appears in the centre of the previous<br />
scene and gradually expands.<br />
[Zoom-out]<br />
The previous scene gradually shrinks, and the next scene<br />
appears in the background.<br />
[Stretch]<br />
The previous scene shrinks, trans<strong>for</strong>ming into the next<br />
scene.<br />
[Corner wipe]<br />
The next scene emerges from the upper-left corner,<br />
moving toward the other corners.<br />
[Corner slide]<br />
The next scene slides diagonally down and to the right<br />
from the upper-left corner.<br />
[Corner zoom]<br />
The next scene expands diagonally down and to the right<br />
from the upper-left corner.<br />
50
Editing content on your computer<br />
Editing digital photos<br />
Photos can be retouched or rotated.<br />
Tip<br />
● Only photos imported to your computer can be edited. First, import the photos to your computer. (→17–19, 30–33)<br />
Photo after editing<br />
Undo<br />
Rotate right 90º<br />
Retouch<br />
Rotate left 90º<br />
Advanced Features<br />
1 Click [Picture].<br />
2 Click the thumbnail.<br />
3 Click [Edit] and select [Edit Picture].<br />
The window <strong>for</strong> photo editing is displayed.<br />
● Editing is also possible by right-clicking the thumbnail and<br />
selecting [Edit picture].<br />
4 Edit the photo.<br />
5 Click [Save].<br />
6<br />
Click [OK] when a message is displayed<br />
indicating that processing is finished.<br />
When the message is displayed, click [Yes] to retain the photo<br />
be<strong>for</strong>e editing or [No] to delete it.<br />
● The saved photo will be named as follows.<br />
“Edit Picture (serial number) of original file name”<br />
51
In the properties window, content can be renamed or protected from<br />
accidental deletion.<br />
●Video,<br />
scenes, pictures, and folders can be renamed.<br />
Only scenes and photos can be protected.<br />
●<br />
Editing content on your computer<br />
Protecting and renaming content<br />
(Example of scene properties window)<br />
1 In<br />
Advanced Features<br />
the content viewing or media/folder selection area of the<br />
main window<br />
Right-click a thumbnail or folder and<br />
select [Properties].<br />
The properties window is displayed.<br />
To rename content<br />
Change the name in [Title].<br />
●<br />
Names are a maximum of 64 single-byte characters.<br />
To protect content or clear protection<br />
Click [ON] or [OFF] in [Protect Setting].<br />
2 Click [Close].<br />
Tip<br />
● [Title] is the name as displayed in this software.<br />
The file name itself cannot be changed by renaming the title.<br />
●<br />
Thumbnails of protected scenes and photos are labeled with this icon:<br />
52
Recording on optical discs and SD cards<br />
Advanced Features<br />
Image captured with video cameras or imported to computers can be recorded on optical discs and SD cards in a variety of <strong>for</strong>mats.<br />
This section describes some considerations and precautions to understand be<strong>for</strong>e recording.<br />
●Also<br />
refer to the description of drive settings (→7) and in<strong>for</strong>mation on media supported <strong>for</strong> recording (→11).<br />
Recording<br />
Recording <strong>for</strong>mats<br />
Several recording <strong>for</strong>mats are available <strong>for</strong> video content and photos, and each <strong>for</strong>mat has particular characteristics. Choose the optimal<br />
recording <strong>for</strong>mat <strong>for</strong> your needs.<br />
Recording Format<br />
BDMV <strong>for</strong>mat<br />
Image Quality<br />
High<br />
Characteristics<br />
● Additional recording is possible on discs BD-R/RE<br />
Available Media Playback Equipment<br />
Equipment compatible with<br />
definition recorded with this software.<br />
● Top menus can be created.<br />
(12 cm, single-sided, single-sided/dual<br />
layer)<br />
Blu-ray discs<br />
AVC<strong>HD</strong> <strong>for</strong>mat High ● Additional recording is possible on discs DVD-R∗<br />
AVC<strong>HD</strong>-compatible<br />
definition recorded with this software other than DVD-<br />
R/RW discs.<br />
● Top menus can be created on media other<br />
(12 cm, single-sided, single-sided/dual<br />
layer)<br />
DVD-RW∗ (12 cm, single-sided)<br />
equipment<br />
● Typical DVD players do<br />
not support playback.<br />
than SD cards.<br />
DVD-RAM<br />
(Can be played with this<br />
(12 cm, single-sided, double-sided)<br />
SD cards<br />
software on a computer.)<br />
DVD-Video Standard ● Additional recording is not possible <strong>for</strong> discs DVD-R (12 cm, single-sided, single- Typical DVD players<br />
<strong>for</strong>mat definition recorded with this software.<br />
● Top menus can be created.<br />
sided/dual layer)<br />
DVD-RW (12 cm, single-sided)<br />
● Recording is not possible on<br />
prerecorded discs. However, DVD-RW<br />
discs can be used <strong>for</strong> recording after<br />
being <strong>for</strong>matted. (→78)<br />
DVD-VR <strong>for</strong>mat Standard ● Additional recording is possible on discs DVD-RAM<br />
DVD-VR-compatible<br />
definition recorded with this software.<br />
● Top menus cannot be created.<br />
(12 cm, single-sided, double-sided) equipment and software<br />
DCF <strong>for</strong>mat<br />
● Format designed <strong>for</strong> recording photos on SD SD cards Playback or printing<br />
(Picture)<br />
cards.<br />
is possible with DCFcompatible<br />
equipment<br />
(digital cameras, TVs, and<br />
printers. etc.)<br />
∗ +R and +RW types of DVD disc are also supported.<br />
53
Recording on optical discs and SD cards Recording<br />
Top menus<br />
Creating media with this software will create a “top menu”<br />
interface that serves as a table of contents. To view content, select<br />
thumbnails in the top menu. Customize the design of top menus as<br />
desired when creating them.<br />
●Top<br />
menus cannot be created when recording to SD cards or<br />
recording in DVD-VR <strong>for</strong>mat.<br />
●Top<br />
menus are displayed only on equipment that supports this<br />
feature. They cannot be played on video cameras or in this<br />
software.<br />
●Creating<br />
top menus is optional. (Content is played back in the<br />
order of recording.)<br />
●<br />
Top menus are automatically created in the default design when<br />
you use [Simply Create BD/DVD/SD Card (AVC<strong>HD</strong>)] (→22–23)<br />
or [Simply Create DVD-Video Disc] (→20–21). To change the top<br />
menu design (→82)<br />
Advanced Features<br />
Automatic multi-disc recording<br />
Content will be automatically divided <strong>for</strong> recording over multiple<br />
discs only under these conditions.<br />
●The<br />
content exceeds the capacity of one disc when you are using<br />
[Simply Create BD/DVD/SD Card (AVC<strong>HD</strong>)] (→22–23) or [Simply<br />
Create DVD-Video Disc] (→20–21) to create media<br />
●More<br />
than 99 items of content are recorded to a disc using<br />
[Simply Create DVD-Video Disc] (→20–21)<br />
Tip<br />
● Content is automatically divided so that the final scene fits on the disc.<br />
●<br />
The approximate number of discs needed is displayed, but recording<br />
may require fewer or more discs.<br />
54
Recording on optical discs and SD cards Recording<br />
Additional recording on media with existing content<br />
Formats supporting additional recording: Blu-ray discs (BDMV),<br />
DVD-RAM (AVC<strong>HD</strong>), SD cards (AVC<strong>HD</strong>), and DVD-RAM (DVD-VR)<br />
When recording additional content, you can add content to media<br />
recorded with this software by using the same recording <strong>for</strong>mat as<br />
the existing content.<br />
When you load media with existing content, a confirmation<br />
message about additional recording is displayed. Select [Yes] if you<br />
will add content. (If you select [No], content cannot be added.)<br />
●<br />
Media with existing content is identified by this icon in top menu<br />
thumbnails: (On SD cards, thumbnails are labeled as follows:<br />
)<br />
If you will not add content, click the button or eject the media.<br />
(For in<strong>for</strong>mation about how content on media without top menus<br />
(such as media in DVD-VR <strong>for</strong>mat) is displayed (→65))<br />
Tip<br />
● Content cannot be added to protected DVD-RAM discs. Clear<br />
protection settings with the equipment originally used to protect the<br />
disc. When recording in AVC<strong>HD</strong> <strong>for</strong>mat, there is no need to clear the<br />
protection setting be<strong>for</strong>e adding content if auto protection is enabled.<br />
(→85)<br />
●<br />
Additional content can also be recorded to SD cards when photos<br />
have been recorded to the cards.<br />
Advanced Features<br />
55
Recording on optical discs and SD cards<br />
[Create Media] menu<br />
The [Create Media] menu is used when recording to optical<br />
discs and memory cards.<br />
In the main window, click this button to access the menu:<br />
Authoring menu<br />
∗1 Content is automatically divided <strong>for</strong> recording over<br />
multiple discs if it does not fit on one.<br />
∗2 Top menus are not created.<br />
∗3 +R and +RW types of DVD disc are also supported.<br />
∗ 1<br />
∗ 1<br />
Recording<br />
Format<br />
Advanced Features<br />
Recording<br />
Order<br />
Media<br />
Subject to recording<br />
● Content on the internal recording<br />
media of the video camera or on<br />
the SD card installed in the video<br />
BD-R/RE BDMV camera<br />
● Content imported to the computer<br />
DVD-RAM<br />
DVD-R/RW∗<br />
(except <strong>for</strong> video content<br />
converted into the MPEG2 <strong>for</strong>mat)<br />
By<br />
recording<br />
date<br />
3<br />
SD cards<br />
AVC<strong>HD</strong><br />
● Content on the internal recording<br />
media of the video camera or on<br />
the SD card installed in the video<br />
camera<br />
● Content imported to the computer<br />
(except <strong>for</strong> video content<br />
converted into the MPEG2 <strong>for</strong>mat)<br />
BD-R/RE<br />
DVD-RAM<br />
DVD-R/RW∗<br />
BDMV<br />
● Content imported to the computer<br />
(except <strong>for</strong> video content<br />
converted into the MPEG2 <strong>for</strong>mat)<br />
Any order<br />
3 SD cards∗<br />
AVC<strong>HD</strong><br />
2<br />
● Content on the internal recording<br />
media of the video camera or on<br />
the SD card installed in the video By<br />
DVD-R/RW DVD-Video camera<br />
● Content imported to the computer<br />
(except <strong>for</strong> video content<br />
converted into the MPEG2 <strong>for</strong>mat)<br />
recording<br />
date<br />
DVD-R/RW<br />
DVD-RAM∗<br />
DVD-Video<br />
● Content imported to the computer<br />
Any order<br />
2 DVD-VR<br />
SD cards DCF<br />
56
Recording on optical discs and SD cards<br />
Recording video content<br />
Preparation:<br />
● Import the video content to the computer<br />
● Exit all other software<br />
● Be sure to exit other software that may access the optical drive,<br />
such as Windows Explorer.<br />
● Load the media <strong>for</strong> recording<br />
● When using SD cards, see “SD card connection” (→14).<br />
● When recording video content to SD cards, use a compatible video<br />
camera to initialise the cards.<br />
● When adding content to DVD-RAM discs, clear any protection<br />
by using the equipment originally used to protect the disc. When<br />
recording in AVC<strong>HD</strong> <strong>for</strong>mat, there is no need to clear the protection<br />
setting be<strong>for</strong>e adding content if auto protection is enabled. (→85)<br />
● Recording requires twice the amount of free space (<strong>for</strong> a work<br />
folder) as the capacity of the disc or SD card you are creating. To<br />
change the work folder (→81)<br />
Advanced Features<br />
Video content and scenes can be selected from a variety of folders of content imported to the computer with this software <strong>for</strong> recording in any<br />
order on optical discs and SD cards. You can record in high or standard definition.<br />
Video and scenes can be combined on a single disc or SD card.<br />
●Content<br />
<strong>for</strong> recording in DVD-Video <strong>for</strong>mat must be at least 2 seconds long. Content <strong>for</strong> recording in DVD-VR <strong>for</strong>mat must be at least<br />
3 seconds long.<br />
●Videos<br />
converted to MPEG2 <strong>for</strong>mat can also be used in DVD-Video or DVD-VR recording. However, it cannot be combined with highdefinition<br />
content.<br />
Important<br />
Do not do the following during recording. These operations<br />
may prevent successful recording and damage discs or<br />
equipment.<br />
- Disconnect cables or cords of computer or DVD equipment or turn<br />
equipment on or off<br />
- Log off in Windows (as by switching users)<br />
- Force this software to close<br />
- Install or remove an SD card<br />
Time required <strong>for</strong> recording<br />
● Recording will take some time. The amount of time required <strong>for</strong><br />
recording varies depending on disc specifications and optical drive<br />
per<strong>for</strong>mance. For details, refer to the <strong>Operating</strong> <strong>Instructions</strong> of the<br />
disc and drive.<br />
●<br />
Recording may take several hours especially in the following cases.<br />
- Recording videos on discs by converting from standard quality to<br />
high-definition<br />
- Recording small video content in DVD-Video <strong>for</strong>mat (because<br />
specifications require that dummy data be appended even to files<br />
less than about 1 GB to make them about 1 GB)<br />
57
Recording on optical discs and SD cards<br />
Selecting video content to record<br />
In the authoring area, add video content to record.<br />
Authoring area<br />
Recording video content<br />
1 Click a folder on your computer.<br />
2 Select [Video].<br />
3<br />
Advanced Features<br />
Click [Create Media] and select the type<br />
of media to create.<br />
For instructions with this option<br />
(→22–23)<br />
For instructions with this option<br />
(→20–21)<br />
For instructions with this option<br />
(→67–68)<br />
This example illustrates the procedure when you select one of<br />
the options labeled .<br />
The media authoring area is displayed.<br />
● For details about the [Create Media] menu (→56)<br />
58
Recording on optical discs and SD cards<br />
Authoring area<br />
A B<br />
Tip<br />
● Optical drives in use by this software cannot be used by other software.<br />
● Content editing is not possible while the authoring area is displayed.<br />
Complete any required editing (such as dividing scenes) in advance.<br />
● The scene point in<strong>for</strong>mation is retained as chapter points even after<br />
recording, except in the following cases.<br />
- In DVD-Video <strong>for</strong>mat, the scene is after the 256th scene<br />
- If selecting [Merging into one scene] when editing and saving video<br />
(→40)<br />
Recording video content<br />
Advanced Features<br />
4 Drag video content to the authoring area.<br />
● You can add scenes and videos. However, photos cannot be<br />
added.<br />
● Repeat this process to choose the video content (up to 99<br />
items). To select multiple items, hold the [Ctrl] key while clicking<br />
the thumbnails.<br />
● To add video content from another folder, select the folder<br />
and then per<strong>for</strong>m step 4. However, current selection will be<br />
cancelled if you select content in folders not on the computer or<br />
content in different folders such as in [PC Hard drive].<br />
● Referring to [Capacity] ( A ) as a guideline, select an amount of<br />
content that will fit on the disc or SD card. Note that the actual<br />
amount of data recorded may be different.<br />
● Content will be recorded in the order you drag it to the authoring<br />
area, one thumbnail after another. However, content can be<br />
recorded as a single file when you record in DVD-VR <strong>for</strong>mat. (→84)<br />
● Video content is expanded into scenes when you add video<br />
content from the [PC Hard drive (<strong>HD</strong>)] to the media creation area<br />
when you record in AVC<strong>HD</strong> <strong>for</strong>mat.<br />
● When video content has been registered, the scenes in that<br />
content will be automatically recorded in the order in which they<br />
were shot.<br />
● To cancel authoring, click ( B ).<br />
Removing content from the authoring area<br />
1 Click a scene to remove.<br />
● To select multiple items, hold the [Ctrl] key while clicking the<br />
thumbnails.<br />
2 Click [Delete].<br />
2<br />
1<br />
●<br />
●<br />
Thumbnails are only removed from the authoring area. The<br />
content itself is not deleted.<br />
Removal is also possible by right-clicking thumbnails and<br />
selecting [Delete] in the menu displayed.<br />
59
Recording on optical discs and SD cards<br />
Recording video content<br />
Changing the order of content<br />
1 Drag thumbnails to the desired position.<br />
5 Click [Save].<br />
Advanced Features<br />
For BD-R/RE, DVD-R/RW, DVD-RAM (AVC<strong>HD</strong> <strong>for</strong>mat), or<br />
SD cards:<br />
A window is displayed <strong>for</strong> creating the top menu.<br />
(→next page)<br />
For DVD-RAM (DVD-VR <strong>for</strong>mat):<br />
A window is displayed <strong>for</strong> creating the disc. (→65)<br />
● When you have specified [Makes seamless if the recording<br />
modes are the same] in [Seamless setting during SD, DVD or<br />
BD recording] (→85), a message is displayed if any scenes are<br />
in different recording modes (with different resolution, frame<br />
rates, or number of audio channels). In this case, select scenes<br />
recorded in the same mode.<br />
● When recording in DVD video <strong>for</strong>mat, registering the video to<br />
the media creation area allows the video to be played back<br />
continuously without interruption between individual scenes.<br />
● For continuous playback without interruption between individual<br />
scenes when recording in AVC<strong>HD</strong>/BDMV/DVD-VR <strong>for</strong>mat, select<br />
the scenes you wish to play continuously and combine them into<br />
a single file.<br />
To combine scenes into single files, use the “Editing content on<br />
your computer” ([Merging into one scene]) operation (→39–40).<br />
60
Recording on optical discs and SD cards<br />
Recording video content<br />
Advanced Features<br />
Recording selected video content (<strong>for</strong> BD-R/RE (BDMV), DVD-RAM · DVD-R/RW · SD card (AVC<strong>HD</strong>), DVD-R/RW (DVD-Video))<br />
Follow these steps when recording on BD-R/RE, DVD-R/RW discs or SD cards, or on DVD-RAM discs in AVC<strong>HD</strong> <strong>for</strong>mat.<br />
Example when recording in DVD-Video <strong>for</strong>mat<br />
When you click [Save] in step 5 (→Previous page)<br />
6<br />
A window is displayed <strong>for</strong> creating the<br />
top menu.<br />
● SD cards<br />
Because no top menu can be created, the following window is<br />
displayed.<br />
7 Click and select the media to record on.<br />
● Video cameras cannot be selected as the destination.<br />
61
Recording on optical discs and SD cards<br />
Previous/next page<br />
(if there are multiple pages)<br />
Example when recording in DVD-Video <strong>for</strong>mat<br />
1<br />
2<br />
3<br />
Recording video content<br />
8<br />
9<br />
Advanced Features<br />
Check the space available <strong>for</strong> recording<br />
on the media.<br />
●<br />
Content exceeding the available space is indicated in red. In this<br />
case, click [Close] and remove video content from the authoring<br />
area.<br />
When recording on SD card, go to step 12, because no top<br />
menu can be created.<br />
Click and select the video image<br />
quality.<br />
[High quality]: Priority to video quality<br />
[Standard quality]: Priority to recording capacity<br />
10 Determine a top menu design.<br />
● [No menu] is also available.<br />
No top menu is created, and content is played in the order it was<br />
recorded.<br />
1 Click [Bg/Layout].<br />
2 Select your preferred design.<br />
● To use a particular image file as the background:<br />
Select [User’s picture], specify a JPEG file on the computer,<br />
and click [Open]. (Images with an aspect ratio of 4:3 are<br />
displayed with black bars at right and left.)<br />
3 Click to select the thumbnail layout.<br />
● If there are many thumbnails, they will be distributed on<br />
multiple pages.<br />
● To choose different content, click [Close] and change your<br />
selection in the authoring area.<br />
62
Recording on optical discs and SD cards<br />
Example when recording in DVD-Video <strong>for</strong>mat<br />
1<br />
2<br />
3<br />
Recording video content<br />
11 Enter the title.<br />
●<br />
Advanced Features<br />
Click the title to enable input.<br />
1 Enter the page title.<br />
(Up to 64 single-byte characters.)<br />
● The same page title is displayed on all pages. For a titleless<br />
top menu, leave the title in<strong>for</strong>mation blank.<br />
2 Enter thumbnail titles.<br />
(Up to 24 single-byte characters.)<br />
● By default, thumbnails are labeled with the name of the video<br />
or scene.<br />
3 Click [Font/Title] and complete the font settings.<br />
(For details →92)<br />
● If not all text is displayed, or if text covers other images,<br />
change the font or reduce the size.<br />
12 Click [Record].<br />
●<br />
If the message “Insert a new disc” is displayed, recording on the<br />
current disc is not possible. The disc may already have been<br />
recorded. Insert a blank or <strong>for</strong>matted disc.<br />
● If the computer hard disk is compressed, a message regarding<br />
drive compression may be displayed and recording may not be<br />
possible.<br />
Clear the check <strong>for</strong> [Compress this drive to save disk space] in<br />
[Properties] <strong>for</strong> the hard disk drive.<br />
63
Recording on optical discs and SD cards<br />
13<br />
14<br />
Click [OK] when the confirmation<br />
message is displayed.<br />
● To cancel this process, click [No].<br />
Recording now begins, and the status is shown in the<br />
progress indicator.<br />
● Recording will take some time. Do not operate the computer<br />
until recording is finished.<br />
● A confirmation message is displayed if you have set [Seamless<br />
setting during SD, DVD or BD recording] to [Makes seamless<br />
even if the recording modes are different] because recording<br />
may take some time. If the recording time indicated is<br />
acceptable, click [Yes] to continue with recording. (→85)<br />
● With media other than DVD-R/RW and BD-R discs, recording<br />
can be stopped by clicking [Cancel]. With DVD-R/RW and BD-<br />
R discs, recording can be stopped by clicking [Cancel] when<br />
changing discs or during data conversion. Recording cannot be<br />
stopped when data is being written.<br />
Click [No] when a message is displayed<br />
indicating that recording is complete.<br />
●<br />
Click [No] if you are finished recording. Click [Yes] to record the<br />
same content to another media. Insert a new media and click<br />
[OK].<br />
● Some optical drives may switch to a new disc automatically<br />
be<strong>for</strong>e this final step in recording.<br />
Recording video content<br />
Advanced Features<br />
Tip<br />
● If a media problem causes recording to fail, follow the instructions<br />
to replace the media. The content you were recording when failure<br />
occurred will be recorded again on the new media.<br />
● Advanced settings <strong>for</strong> the recording speed and other details are<br />
available in the [Settings] window. (→82)<br />
● If there is unwanted content recorded on a DVD-RAM disc, <strong>for</strong>matting<br />
the disc will delete all content (→78). Content cannot be removed<br />
individually.<br />
Notes on recording<br />
Recording in BDMV <strong>for</strong>mat or AVC<strong>HD</strong> <strong>for</strong>mat<br />
●If<br />
there are gaps between content during playback, you can<br />
adjust playback in [Seamless setting during SD, DVD or BD<br />
recording] (→85).<br />
●<br />
●<br />
Recording in DVD-Video <strong>for</strong>mat<br />
If scenes with rapid motion are affected by blurry image edges<br />
or video noise, selecting [Convert MPEG2]→[Picture quality<br />
priority] may improve the image quality. (→83)<br />
Video content with Dolby Digital 5.1 channel audio is recorded<br />
in 5.1 channel DVD-Video <strong>for</strong>mat.<br />
64
Recording on optical discs and SD cards<br />
Recording selected video content (DVD-RAM (DVD-VR <strong>for</strong>mat))<br />
Follow these steps when recording on DVD-RAM discs in DVD-VR <strong>for</strong>mat.<br />
●Video<br />
recorded in DVD-VR <strong>for</strong>mat must be at least 3 seconds long.<br />
Additional portion to record<br />
Recorded<br />
Recording video content<br />
When you click [Save] in step 5 (→60)<br />
6<br />
Advanced Features<br />
A window is displayed <strong>for</strong> creating the<br />
media.<br />
7 Click and select the media to record<br />
on.<br />
● Any existing video on the media is also displayed.<br />
● To choose different content, click [Close] and change your<br />
selection in the authoring area.<br />
65
Recording on optical discs and SD cards<br />
Tip<br />
● If there is unwanted content recorded on a DVD-RAM disc, <strong>for</strong>matting<br />
the disc will delete all content (→78). Content cannot be removed<br />
individually.<br />
●<br />
The audio track of content in DVD-VR <strong>for</strong>mat is recorded in Dolby<br />
Digital <strong>for</strong>mat.<br />
Recording video content<br />
Advanced Features<br />
8 Check the space available on the media.<br />
●<br />
Content exceeding the available space is indicated in red. In this<br />
case, click [Close] and remove video content from the authoring<br />
area.<br />
9 Click [Record].<br />
Click [Yes] when the confirmation<br />
message is displayed.<br />
● To cancel this process, click [No].<br />
10<br />
11<br />
Recording now begins, and the status is shown in the<br />
progress indicator.<br />
● Recording will take some time. Do not operate the computer<br />
until recording is finished.<br />
● Recording cannot be stopped when data is being written.<br />
Click [OK] when a message is displayed<br />
indicating that recording is complete.<br />
66
Recording on optical discs and SD cards<br />
Recording photos<br />
Advanced Features<br />
Digital photos and other still pictures on your computer can be recorded on SD cards. These images are recorded in a <strong>for</strong>mat that can be<br />
viewed on digital cameras and similar devices (DCF <strong>for</strong>mat). Images in BMP or PNG <strong>for</strong>mat are converted to JPEG <strong>for</strong>mat be<strong>for</strong>e saving.<br />
●For<br />
a list of supported SD cards (→11)<br />
Preparation:<br />
● Insert the SD card. (See “SD card connection” →14)<br />
Authoring area<br />
1 Click [Picture].<br />
2<br />
Click [Create Media] and select [Create<br />
SD Card (Pictures)].<br />
The media authoring area is displayed.<br />
67
Recording on optical discs and SD cards<br />
Authoring area<br />
Tip<br />
● DCF: Design rule <strong>for</strong> Camera File system. This recording <strong>for</strong>mat<br />
con<strong>for</strong>ms to file system specifications of the Japan Electronics and<br />
In<strong>for</strong>mation Technology Industries Association (JEITA).<br />
● Photos in DCF <strong>for</strong>mat cannot be converted to video content.<br />
Recording photos<br />
3<br />
Drag photos <strong>for</strong> recording to the<br />
authoring area.<br />
●<br />
Advanced Features<br />
Repeat this process to choose desired photos (up to 99 photos).<br />
To select multiple items, hold the [Ctrl] key while clicking the<br />
thumbnails.<br />
● The current selection will be cancelled if you select content in<br />
folders not on the computer.<br />
Removing photos from the authoring area<br />
1 Click a photo to remove.<br />
● To select multiple items, hold the [Ctrl] key while clicking the<br />
thumbnails.<br />
2 Click [Delete].<br />
1 2<br />
● Thumbnails are only removed from the authoring area. The<br />
content itself is not deleted.<br />
● Removal is also possible by right-clicking thumbnails and<br />
selecting [Delete] in the menu displayed.<br />
4 Click [Save].<br />
The window <strong>for</strong> creating DCF content <strong>for</strong> SD cards is<br />
displayed.<br />
68
Recording on optical discs and SD cards<br />
Additional portion to record<br />
Recorded<br />
Folder structure and names of files created<br />
DCIM<br />
100CDPFQ (Up to 9,999 photos per folder)<br />
IMGA0001.JPG<br />
…<br />
IMGA9999.JPG<br />
101CDPFQ<br />
…<br />
999CDPFQ<br />
Saved photos<br />
● If there are multiple storage folders, photos are saved in the<br />
highest-numbered folder.<br />
● If there are no storage folders, a folder named [100CDPFQ] is<br />
created.<br />
● As the file name, the final number in the folder is assigned.<br />
Recording photos<br />
Advanced Features<br />
5 Click and select the destination SD<br />
card.<br />
If the SD card already contains photos, the photos are<br />
displayed.<br />
● To choose different content, click [Close] and change your<br />
selection in the authoring area.<br />
6 Check the space available on the card.<br />
● Content exceeding the available space on the SD card<br />
is indicated in red. In this case, click [Close] and remove<br />
thumbnails from the authoring area.<br />
7 Click [Record].<br />
8 Click [Yes] when the confirmation<br />
message is displayed.<br />
● To cancel this process, click [No].<br />
9<br />
Recording now begins, and the status is shown in the<br />
progress indicator.<br />
● Recording cannot be stopped when data is being written.<br />
● Do not operate the computer until recording is finished.<br />
Click [OK] when a message is displayed<br />
indicating that recording is complete.<br />
69
Using convenient features<br />
Viewing highlights of video content (Highlight Playback)<br />
Advanced Features<br />
You can watch highlights of the main situations in video content.<br />
The feature can only be used with video content captured by using video cameras with which this software is provided. This feature is available<br />
<strong>for</strong> video content which has been imported to the computer or stored on the internal recording media of the video camera or on the SD card<br />
installed in the video camera. (except <strong>for</strong> video content converted into the MPEG2 <strong>for</strong>mat.) Multiple scenes captured on the same day are<br />
treated as a single video. (However, in the case of content on the internal recording media of the video camera or on the SD card installed in<br />
the video camera, scenes captured in other recording modes are treated as separate video content, even if recorded on the same day.)<br />
Highlight settings<br />
The playback time and location may differ to those displayed<br />
on the video camera itself.<br />
Close the<br />
preview window.<br />
Saving portions viewed during highlight playback<br />
Click A , specify where to save the content, and click [OK].<br />
●Edited<br />
scenes are saved in separate folders from the original data.<br />
●Only<br />
content imported to your computer can be saved.<br />
●Music<br />
is not saved.<br />
A<br />
1 Follow steps 1 to 4 in “Playing content” (→ 34).<br />
2<br />
3<br />
4<br />
5<br />
Click [Play highlights].<br />
● Highlight settings are displayed below.<br />
Select the playback time.<br />
[APPROX 90 SEC.]:<br />
Display highlights <strong>for</strong> about a one-minute and half period<br />
[APPROX 3 MIN.]:<br />
Display highlights <strong>for</strong> about a three-minute period<br />
[AUTO]: Display highlights <strong>for</strong> a period determined by the<br />
software (up to approx. five minutes)<br />
● In the content timeline, highlights are indicated in orange.<br />
● Highlights may not be detected up to content.<br />
Specify the music.<br />
You can select “POP,” “CLASSICAL,” “NATURAL,”<br />
“DYNAMIC” or “NO MUSIC” to fit the nature of the video<br />
content. If you select “User selection,” you can use the WAV<br />
(LPCM), WMA and MP3 <strong>for</strong>mat files inside the computer. (The<br />
filename will be displayed in the music selection field.)<br />
● If “NO MUSIC” is set, the sound heard during shooting is used.<br />
Play back the video content.<br />
●<br />
The highlighted sections are played back using the settings<br />
established above.<br />
70
Using convenient features<br />
Viewing photos shot using high-speed burst shooting (Continuous photo playback)<br />
Advanced Features<br />
A series of consecutive photos shot using the high-speed burst function of a video camera with which this software is provided can be viewed<br />
continuously. (NTSC: Up to 180 shots, PAL: Up to 150 shots)<br />
The feature is available only with the high-speed burst photos imported to the computer or internal recording media of the video camera or SD<br />
card installed in the video camera.<br />
Tip<br />
● Double-clicking the folder containing the high-speed burst photos in<br />
step 1 will display all photos. Double-clicking a photo after this will<br />
display the window <strong>for</strong> previewing series of photos.<br />
● Ratios <strong>for</strong> slow playback are a guideline only; actual playback speed<br />
depends on the per<strong>for</strong>mance of your computer.<br />
1<br />
2<br />
Click the folder containing the highspeed<br />
burst photos.<br />
Click [Play].<br />
The window <strong>for</strong> previewing a series of photos is displayed.<br />
No. of current shot in the series<br />
Previous photo<br />
Current photo<br />
Next photo<br />
Reverse playback/pause Reverse/<strong>for</strong>ward shot<br />
by shot<br />
Play/pause<br />
Rotate left or<br />
right 90º<br />
Slow playback (full speed, 1/2, 1/3, and 1/4 speed)<br />
71
Using convenient features<br />
Creating still pictures from video<br />
You can save individual frames of video content as still image files. These images are saved in JPEG <strong>for</strong>mat.<br />
Tip<br />
● This operation is also possible by using [Capture] button.<br />
1<br />
Advanced Features<br />
In the preview window (→25), pause<br />
the video at the position to save a still<br />
image.<br />
2 Click [Capture].<br />
3 In the save dialog box displayed, specify<br />
where to save the image ( 1 ) and click<br />
[OK] ( 2 ).<br />
4<br />
2<br />
Name of storage folder<br />
(Can be changed as needed)<br />
Click [OK] when a message is displayed<br />
indicating that the image has been<br />
created.<br />
1<br />
72
Using convenient features<br />
Advanced Features<br />
You can search video content and photos by name, recording date (video content only), or comments entered in the properties window (→94).<br />
This feature applies to content in folders you have registered as destinations <strong>for</strong> saving content on the computer. (→82)<br />
1<br />
2<br />
3<br />
4<br />
5<br />
Searching <strong>for</strong> desired content<br />
6<br />
1 Click a folder to search.<br />
●<br />
When [PC Hard drive (<strong>HD</strong>)] or [PC Hard drive] has been clicked,<br />
the video content in the clicked folder is searched.<br />
2 Click [Video] or [Picture].<br />
3 Click [Search].<br />
● The window <strong>for</strong> entering search conditions is displayed.<br />
4 Enter the search conditions.<br />
1 Clicking [Search by Keyword] enables this option.<br />
2 Enter the keyword.<br />
● Enter up to three keywords, separated by a space.<br />
● Use double quotation marks (“”) when searching <strong>for</strong><br />
keywords containing spaces.<br />
3 Select the in<strong>for</strong>mation [Search by Keyword] applies to.<br />
● [Comments (Memo)] refers to notes entered in [Comments<br />
(Memo)] in the properties window.<br />
4 Clicking [Search by Recording date] enables this<br />
option. (It will be activated only when [Video] has been<br />
selected.)<br />
5 Specify a range of recording dates.<br />
6 Click [Close] to cancel searching.<br />
73
Using convenient features Searching <strong>for</strong> desired content<br />
5 Click [Search].<br />
Advanced Features<br />
Search results are<br />
displayed<br />
6 Click [Close].<br />
The search conditions window is closed. Search results are<br />
retained even after this window is closed.<br />
7 Click .<br />
The search results are now discarded.<br />
●<br />
Search results can also be cleared by clicking [Close] in the<br />
upper-right corner of the screen.<br />
74
Using convenient features<br />
Uploading content to YouTube<br />
Advanced Features<br />
Content imported to your computer can easily be uploaded to YouTube.<br />
●Because<br />
YouTube services and specifications are subject to change, operation of online services cannot be guaranteed in the future.<br />
Available services and screens are subject to change without notice. (These services are valid as of December 1, 2008.)<br />
●Unless<br />
you are the copyright holder or you have obtained permission from the copyright holder, do not upload videos protected under<br />
copyright.<br />
Preparation:<br />
●Create<br />
an account on the YouTube website in advance, and<br />
have your user name and password ready<br />
1 Click a scene to upload.<br />
●<br />
To select multiple scenes, hold the [Ctrl] key while clicking the<br />
thumbnails. Up to 10 scenes can be uploaded at once.<br />
2 Click [Network].<br />
[YouTube Uploader] is displayed.<br />
75
Using convenient features Uploading content to YouTube<br />
(For details about this window →next page)<br />
Tip<br />
● Video content is uploaded after being compressed to a size suitable<br />
<strong>for</strong> uploading. Compression may take some time, depending on the<br />
per<strong>for</strong>mance of your computer.<br />
3<br />
4<br />
Advanced Features<br />
Enter titles and other in<strong>for</strong>mation shown<br />
on YouTube <strong>for</strong> each scene.<br />
Enter your YouTube user name and<br />
password.<br />
● The user name is stored once you have entered them.<br />
5 Click [Upload].<br />
6 After reading the copyright verification<br />
message, click to indicate acceptance,<br />
and then click [OK].<br />
76
Using convenient features Uploading content to YouTube<br />
[YouTube Uploader] window<br />
Selected scenes will be<br />
uploaded.<br />
(Up to 10 scenes)<br />
(Click the check boxes to<br />
select or clear scenes, as<br />
desired)<br />
Total scenes to upload<br />
In<strong>for</strong>mation about the current<br />
scene<br />
User name and password<br />
<strong>for</strong> the YouTube account<br />
Used when reducing scenes<br />
to 10 minutes or less<br />
(→41–44)<br />
● The [Delete partially] window is displayed.<br />
● If you edit content, the results of editing are not saved.<br />
Also note that the file size after editing is not shown.<br />
Advanced Features<br />
Thumbnails of scenes to<br />
upload<br />
● Double-click a scene to play it.<br />
File names of scenes to<br />
upload<br />
Enter scene in<strong>for</strong>mation to<br />
show on YouTube<br />
Copy the in<strong>for</strong>mation to all<br />
scenes displayed<br />
Start uploading<br />
Close window<br />
Display the proxy settings<br />
window<br />
●<br />
For proxy server settings,<br />
use the settings in your web<br />
browser (such as Internet<br />
Explorer) or contact your<br />
Internet service provider <strong>for</strong><br />
configuration instructions.<br />
77
Other<br />
Formatting discs<br />
Format discs in the following situations. Use this software to <strong>for</strong>mat discs that you will use with this software.<br />
●<br />
●<br />
●<br />
●<br />
●<br />
When recording to new BD-R/RE discs<br />
When recording to new DVD-RAM discs in AVC<strong>HD</strong> <strong>for</strong>mat<br />
When reusing DVD-RW discs<br />
When using DVD-RAM discs that you have used in other equipment<br />
(Formatting is not required when adding content to DVD-RAM discs recorded with this software.)<br />
When deleting all data on BD-RE, DVD-RAM or DVD-RW discs<br />
Important<br />
Formatting deletes all data on a disc. This data cannot be<br />
restored. Check the content carefully be<strong>for</strong>e <strong>for</strong>matting.<br />
● Clear any protection by using the equipment originally used to<br />
protect the disc. Otherwise, activate the [Auto Protect] setting (→85)<br />
be<strong>for</strong>e <strong>for</strong>matting. (Auto protect is deactivated after <strong>for</strong>matting.)<br />
Tip<br />
● DVD-R discs can be used without <strong>for</strong>matting them. (Formatting is not<br />
possible <strong>for</strong> these discs.)<br />
● Format both sides of double-sided discs, one side after another.<br />
●<br />
When recording video content to SD cards, use a compatible video<br />
camera (→10) to <strong>for</strong>mat the cards.<br />
78
Formatting discs<br />
A<br />
Other<br />
1 In the [Simple Menu], click [Format disc].<br />
2 Select the optical drive.<br />
● If the optical drive is not listed, click [Refresh] ( A ).<br />
3<br />
Select the type and method of<br />
initialising.<br />
Specify the type of initialising <strong>for</strong> the following discs.<br />
● For BD-R/RE discs<br />
- To record in BDMV <strong>for</strong>mat, which enables additional recording<br />
on BD-R discs: UDF 2.6<br />
- To record in BDMV <strong>for</strong>mat on BD-RE discs: UDF 2.5<br />
● For DVD-RAM discs<br />
- To record in AVC<strong>HD</strong> <strong>for</strong>mat: UDF 2.5<br />
- To record in DVD-VR <strong>for</strong>mat: UDF 2.0<br />
Simple erasure:<br />
Simple erasure is per<strong>for</strong>med.<br />
In a brief period of about one minute, logical <strong>for</strong>matting is<br />
per<strong>for</strong>med. If data is recorded on a disc, only in<strong>for</strong>mation in<br />
the table of contents is deleted.<br />
Complete erasure:<br />
Complete erasure is per<strong>for</strong>med.<br />
Discs are physically <strong>for</strong>matted. Formatting may take a long<br />
time, depending on the speed of the drive and type of disc.<br />
Any data on a disc is deleted.<br />
4 Click [Start].<br />
79
Formatting discs<br />
5<br />
6<br />
Click [Yes] when the confirmation<br />
message is displayed.<br />
● If you click [No], the previous window is displayed.<br />
●<br />
A message is displayed indicating that complete erasure may<br />
take some time. Click [Yes] to continue.<br />
Click [OK] when a message is displayed<br />
indicating that initialising is complete.<br />
7 Click [Close].<br />
Tip<br />
●<br />
Formatting is also possible by clicking the [Initialize] button in the<br />
window <strong>for</strong> creating top menus displayed during authoring, <strong>for</strong><br />
example.<br />
Other<br />
80
Advanced settings<br />
In the [Settings] window, you can complete advanced settings <strong>for</strong> various functions.<br />
●To<br />
display all setting panels, click [Settings] in the [Simple Menu] window. To display only the setting panel <strong>for</strong> a particular operation<br />
window, click [Settings] in that window.<br />
General settings panel<br />
For general software settings.<br />
1<br />
2<br />
3<br />
Other<br />
1 [Work area setting]<br />
Click ▼ and specify where the work area is located. (This area is<br />
used temporarily during software operations.)<br />
● Selecting a drive with a FAT32 file system may prevent you from<br />
using [Create a DVD]. Select an NTFS drive.<br />
● Refer to [Free space] and select a drive with sufficient space. The<br />
amount of free space affects software operation in the following<br />
ways.<br />
- Less than 17 GB: Cannot record over multiple discs<br />
- Less than 5 GB: Some functions may not work correctly<br />
- Less than 300 MB: Some editing functions are not available<br />
2 [Playback method]<br />
Specify how videos are played.<br />
[Playback from the start]: Always play videos from the start<br />
[Playback from a previous point]: Resume playback from the<br />
previous position<br />
3 [Auto run Setting]<br />
Automatically start this software when a video camera is connected<br />
to the computer.<br />
By default, this option is selected.<br />
● Auto run can also be activated or deactivated by right-clicking this<br />
icon in the task tray:<br />
81
Advanced settings<br />
PC <strong>HD</strong>D panel<br />
Settings <strong>for</strong> registration of content folders on the computer and<br />
display of file names.<br />
1 [Registration folder]<br />
Register folders to use when importing content to the computer.<br />
Folders registered here are listed under [PC Hard drive (<strong>HD</strong>)] and<br />
[PC Hard drive] in the media/folder selection area of the main<br />
window. (→28)<br />
Registering folders<br />
1. Click [Add].<br />
2. Select a folder to register and click [OK].<br />
3. Click [OK] to close the settings panel.<br />
Registered folders are listed under [PC Hard drive (<strong>HD</strong>)] and [PC<br />
Hard drive] in the media/folder selection area.<br />
● Up to 10 folders can be registered.<br />
● Removable drives and network folders cannot be registered.<br />
Deregistering folders<br />
1. Select the folder in [Registration folder] and click [Delete].<br />
2. Click [OK] when the confirmation message is displayed.<br />
3. Click [OK] to close the settings panel.<br />
● Folders are only deregistered. The folder and the content itself is<br />
not deleted.<br />
1<br />
2<br />
2 [Display file extension]<br />
Include file extensions such as m2ts in the file names displayed.<br />
● By default, this option is [OFF].<br />
Disc creation panel<br />
For DVD-Video recording settings. (→20, 61)<br />
1<br />
2<br />
Other<br />
1 [Disc write speed setting]<br />
Specify the disc write speed.<br />
●<br />
By default, this option is [Max. speed]. Normally, keep the setting<br />
at [Max. speed]. If recording fails, specifying [Normal] may be<br />
effective.<br />
2 [Top menu setting]<br />
You can change the top menu background automatically created<br />
when you use [Simply Create BD/DVD/SD Card (AVC<strong>HD</strong>)]<br />
(→22–23) or [Simply Create DVD-Video Disc] (→20–21) to create<br />
media.<br />
82
Advanced settings<br />
MPEG2 conversion panel<br />
For conversion settings used <strong>for</strong> MPEG2 output or DVD-Video<br />
creation.<br />
1 [Motion detection settings]<br />
Specify image quality settings applied during conversion.<br />
[Picture quality priority]<br />
Prevent any video noise during conversion, as much as possible.<br />
Although conversion may take a long time with this option, we<br />
recommend it when converting scenes with rapid motion.<br />
[Normal] (Default setting)<br />
Content is converted in standard quality.<br />
[Speed priority]<br />
Content is converted as quickly as possible. Scenes with rapid<br />
motion are more susceptible to video noise.<br />
1<br />
Other<br />
83
Advanced settings<br />
DVD-VR panel<br />
For DVD-VR recording settings. (→65)<br />
1 [Settings <strong>for</strong> writing to media]<br />
[Merge multiple videos (files) into a single video.]<br />
Record all content dragged to the authoring area as a single file.<br />
(→59)<br />
1<br />
SD panel<br />
For specifying the SD card drive.<br />
1<br />
Other<br />
1 [Target drive selection]<br />
Select SD card drives shown in the media/folder selection area.<br />
●<br />
If selected drives are not recognised (as when you connect an SD<br />
card drive after this software starts up), select the drive again and<br />
click [OK].<br />
84
Advanced settings<br />
AVC<strong>HD</strong>/BD panel<br />
For AVC<strong>HD</strong> recording settings. (→22, 61)<br />
1 [Playback settings]<br />
Change the number of frames per second (frame rate) as desired.<br />
Normally, use the default setting of [Play with optimum speed].<br />
● The frame rate can be checked in the [Properties] window.<br />
● If playback fails, it may be improved by selecting [Specify number<br />
of frames] to use a lower frame rate than the current setting.<br />
● Selecting a higher frame rate than the current setting may cause<br />
dropped frames, and playback may not be smooth.<br />
2 [Seamless setting during SD, DVD or BD recording]<br />
Specify processing between scenes <strong>for</strong> uninterrupted playback when<br />
you collect multiple scenes <strong>for</strong> recording in BDMV <strong>for</strong>mat or AVC<strong>HD</strong><br />
<strong>for</strong>mat.<br />
Regardless of the settings made here, the [Simply Create BD/DVD/<br />
SD Card (AVC<strong>HD</strong>)] ([Save as BD/AVC<strong>HD</strong>]) operation will follow the<br />
setting [Makes seamless if the recording modes are the same].<br />
1<br />
2<br />
3<br />
Other<br />
[Makes seamless if the recording modes are the same]<br />
Processing <strong>for</strong> seamless playback between scenes longer than<br />
three seconds that are recorded in the same mode (with the same<br />
resolution, frame rate, and number of audio channels).<br />
There will be gaps in playback between scenes of different<br />
recording modes or scenes of three seconds or less.<br />
[Makes seamless even if the recording modes are different]<br />
Processing <strong>for</strong> seamless playback even between scenes recorded<br />
in different modes and shorter than three seconds. However,<br />
conversion will take some time, and the image quality will be inferior.<br />
With this option, we recommend using an Intel ® Core 2 Quad<br />
2.6 GHz or higher processor. (As a guideline, it takes about 50<br />
minutes to record 10 minutes of content with Intel ® ●<br />
Core 2 Quad<br />
2.6 GHz.)<br />
● The resolution, frame rate, and number of audio channels can be<br />
checked in the [Properties] window.<br />
3 [Auto protection settings <strong>for</strong> writing to DVD-RAM/RW]<br />
[Auto Protect ON]<br />
Disable protection temporarily when recording in AVC<strong>HD</strong> <strong>for</strong>mat<br />
to DVD discs protected according to AVC<strong>HD</strong> specifications, and in<br />
similar situations. When these discs are ejected, they are protected<br />
again. Even unprotected DVD discs (such as discs immediately<br />
after initialisation or <strong>for</strong>matting) are protected when ejected, after<br />
recording or other operations.<br />
[Auto Protect OFF]<br />
Prevent recording or similar operations on protected DVD discs.<br />
●<br />
DVD-RAM/RW discs recorded with [Auto Protect ON] selected are<br />
protected and it may not be possible to initialise or <strong>for</strong>mat them<br />
with other recording software or similar programs. In this case, you<br />
can <strong>for</strong>mat the discs using <strong>for</strong>matting functions of this software.<br />
(→78)<br />
Because complete erasure may take a long time, we recommend<br />
simple erasure.<br />
85
Windows in this software<br />
Simple Menu (→16)<br />
1<br />
2<br />
3<br />
4<br />
5<br />
6<br />
7 8 9 10<br />
Other<br />
1 [Import to PC]<br />
Import content on the internal recording media of the video<br />
camera or on the SD card installed in the video camera or on<br />
optical discs or SD cards to your computer. (→17)<br />
2 [Create a DVD]<br />
Record video content on the computer, or the internal recording<br />
media of the video camera, the SD card installed in the video<br />
camera, the SD card which has been connected using an SD<br />
card slot or a device such as an SD card reader/writer to DVD-<br />
R/RW discs in DVD-Video <strong>for</strong>mat. (→20)<br />
3 [Save as BD/AVC<strong>HD</strong>]<br />
Record video content on the computer, or the internal recording<br />
media of the video camera, the SD card installed in the video<br />
camera, the SD card which has been connected using an SD<br />
card slot or a device such as an SD card reader/writer to discs in<br />
BDMV or AVC<strong>HD</strong> <strong>for</strong>mat or to SD cards in AVC<strong>HD</strong> <strong>for</strong>mat. (→22)<br />
4 [Edit images]<br />
Editing on the main window (→37)<br />
5 [Playback on a PC]<br />
Play content on the computer, the internal recording media of the<br />
video camera, an SD card installed in the video camera, optical<br />
discs, or SD cards. (→24)<br />
6 [Settings]<br />
Display the settings window (→81)<br />
7 [Display this screen at startup]<br />
Clearing this option prevents the Simple Menu from being<br />
displayed at startup, from the next startup. (→27)<br />
8 [Format disc]<br />
Format discs (→78)<br />
9 [<strong>Operating</strong> <strong>Instructions</strong>]<br />
Display the operating instructions (this manual)<br />
10 [Close Simple Menu]<br />
86
Windows in this software<br />
Main window (→28)<br />
8<br />
1<br />
10<br />
7<br />
2 3 4 5 6 14<br />
1 Media/folder selection area<br />
2 [Video]/[Picture]<br />
Types of content shown in the content viewing area<br />
● [Picture] is not shown during video editing or when creating video<br />
content <strong>for</strong> recording to media.<br />
3 [Refresh]<br />
Update in<strong>for</strong>mation in the media/folder selection area and<br />
content viewing area<br />
4 [Settings]<br />
Display the settings window (→81)<br />
5 [<strong>Operating</strong> <strong>Instructions</strong>]<br />
Display the operating instructions (this manual)<br />
6 [Simple Menu]<br />
Display the Simple Menu<br />
12<br />
9<br />
13<br />
11<br />
Other<br />
7 [Import to PC] (→17–19, 30–33)<br />
[Play] (→34–35)<br />
[Edit] (→37–52)<br />
[Create Media] (→53–69)<br />
[Network] (→75–77)<br />
[Capture] (→72)<br />
[Search] (→73–74)<br />
[Delete] (→36)<br />
8 Indicates the selected media<br />
9 [By Name]/[By Date recorded]/[By size]/[By Date modified]<br />
For changing the display order<br />
10 [Thumbnail]/[Details]/[List]<br />
For changing the display <strong>for</strong>mat<br />
11 For changing the thumbnail size<br />
12 [Exit]<br />
Exit this software<br />
13 Content viewing area<br />
The content of selected discs, SD cards, or folders in the media/<br />
folder selection area<br />
14 Help button/Minimize button/Maximize button/Exit button<br />
●<br />
Video editing area (→38)<br />
Displayed at the bottom of the window when [Video editing] is<br />
selected.<br />
●<br />
Authoring area (→59)<br />
Displayed at the bottom of the window when [Create Media] is<br />
selected.<br />
87
Windows in this software<br />
[Import to PC] (→17)/[Create a DVD] (→20)/<br />
[Save as BD/AVC<strong>HD</strong>] (→22) window<br />
1<br />
3<br />
4<br />
6<br />
7<br />
9 10<br />
(Example of [Create a DVD] window)<br />
1 Source <strong>for</strong> importing<br />
● Drives with loaded media are labeled with this icon:<br />
● [Import to PC] window: Shows the internal recording media of the<br />
video camera, the SD card installed in the video camera, optical<br />
discs, and SD cards.<br />
● [Save as BD/AVC<strong>HD</strong>] window: Shows video cameras, discs, SD<br />
cards, and storage folders on the computer (→82).<br />
● [Create a DVD] window: Shows video cameras, SD cards, and<br />
storage folders on the computer (→82). Disc cannot be selected<br />
as sources <strong>for</strong> importing.<br />
2 Eject media<br />
5<br />
2<br />
8<br />
Other<br />
3 Content <strong>for</strong> importing<br />
● Thumbnails cannot be moved by dragging and dropping them.<br />
4 [Select All]/[Clear All]<br />
Select or clear all items <strong>for</strong> importing<br />
5 In<strong>for</strong>mation about items selected <strong>for</strong> importing, such as total size<br />
● Shown in yellow if no media is loaded, no content is selected, or<br />
there is another problem.<br />
6 Destination <strong>for</strong> importing<br />
● Drives with inserted media are labeled with this icon:<br />
7 Select the video image quality<br />
([Create a DVD] window only)<br />
8 In<strong>for</strong>mation about the destination selected <strong>for</strong> importing<br />
● Problems (items <strong>for</strong> which there is insufficient free space or the file<br />
system is different, <strong>for</strong> example) are shown in red.<br />
9 [Refresh]<br />
Refresh the in<strong>for</strong>mation shown<br />
● Click if a drive is not listed.<br />
●<br />
The content selection status returns to the default status.<br />
10 [Settings]<br />
Display the settings window (→81)<br />
88
Windows in this software<br />
11 13<br />
12<br />
(Example of [Create a DVD] window)<br />
11 [Start copying] (or [Start writing])<br />
Start importing or writing the content.<br />
● The button displayed varies depending on the window.<br />
● Be<strong>for</strong>e disc recording, this button is not available if only photos are<br />
selected.<br />
● If buttons cannot be clicked, check 5 and 8 .<br />
12 [Format disc]<br />
Format discs (→78)<br />
13 [End]<br />
Close window<br />
14 [Date folder]: Import to subfolders <strong>for</strong> each recording date<br />
[Specified folder]: Import all content to a single folder<br />
14<br />
Other<br />
(Example of [Import to PC] window)<br />
89
Windows in this software<br />
Window <strong>for</strong> copying to the computer<br />
For details about this window (→32)<br />
Preview window (video content)<br />
For details about this window (→25)<br />
Preview window (photos)<br />
For details about this window (→26)<br />
Editing video: window <strong>for</strong> creating titles<br />
For details about this window (→48)<br />
Editing video: window <strong>for</strong> inserting transitions<br />
For details about this window (→50)<br />
Editing video: partial deletion window<br />
For details about this window (→43)<br />
Other<br />
90
Windows in this software<br />
Window <strong>for</strong> creating top menus (→61–64)<br />
1<br />
3<br />
4<br />
5<br />
6<br />
(Example when recording in DVD-Video <strong>for</strong>mat)<br />
8 9 10<br />
1 Recording destination<br />
2 During disc recording : Open/close drive tray<br />
(Some drives may not close the tray automatically.)<br />
3 Top menu being edited<br />
4 Change to the previous or next page<br />
5 Indicates how much space is used<br />
● The ratio of space used to recording capacity is indicated as a bar.<br />
Any portion of content exceeding the recording capacity is shown<br />
in red.<br />
● If the disc already contains data, the total is indicated.<br />
● If no media is loaded, the recording capacity is set at 12 cm DVD<br />
disc.<br />
6 Select the video image quality<br />
7 Used space/recording capacity<br />
8 [Settings]<br />
Display the settings window (→81)<br />
7<br />
2<br />
9 [Record]<br />
Start recording<br />
10 [Close]<br />
Close window<br />
[Bg/Layout] area (→62)<br />
1 For selecting a background design<br />
2 For selecting a thumbnail layout<br />
●<br />
Selecting [No menu] omits top menu creation. Video content<br />
is played back in the order it was recorded. Additionally, the<br />
background design and title cannot be specified.<br />
1<br />
2<br />
Other<br />
91
Windows in this software<br />
[Font/Title] area (→63)<br />
4<br />
3<br />
6<br />
8<br />
7<br />
4<br />
6 8<br />
1 [Disc title]<br />
Text settings <strong>for</strong> page titles<br />
2 [Video title]<br />
Text settings <strong>for</strong> content titles<br />
3 [Font]<br />
For selecting the font<br />
4 [Size]<br />
For selecting the font size<br />
5 [Style]<br />
Click to add text styles<br />
(Click again to remove text styles)<br />
(Bold)/ (Italic)/ (Underlined)/ (Drop shadow)<br />
3<br />
7<br />
5<br />
5<br />
1<br />
2<br />
6 [Colour]<br />
For selecting the text colour<br />
●<br />
To create colours:<br />
1 3<br />
Adjust brightness<br />
Colour you have<br />
created<br />
1 Click [Define Custom Colors]<br />
2 Click a desired colour<br />
3 Click [Add to Custom Colors]<br />
The colour is added to [Custom colors].<br />
7 [Shading]<br />
When you have applied a drop shadow by clicking in 5 ,<br />
select the drop shadow colour (see 6 <strong>for</strong> colour settings)<br />
8 [Align]<br />
For selecting the text position<br />
2<br />
Other<br />
92
Windows in this software<br />
Authoring window <strong>for</strong> DVD-VR <strong>for</strong>mat (→65)<br />
1<br />
9<br />
6<br />
7 3 4 5<br />
1 Recording destination<br />
2 [Settings]<br />
Display the settings window (→81)<br />
3 Capacity in use/recording capacity<br />
4 [Record]<br />
Start recording<br />
5 [Close]<br />
Close the window (cancel this operation)<br />
6 Indicates how much space is used<br />
● The ratio of space used to recording capacity is indicated as a bar.<br />
Any portion of content exceeding the recording capacity is shown<br />
in red.<br />
● If the media already contains data, the total is indicated.<br />
7 Recording progress<br />
2<br />
8<br />
8 Open/close DVD drive tray<br />
(Some drives may not close the tray automatically.)<br />
9 Content already recorded:<br />
Content to record:<br />
Other<br />
93
Windows in this software<br />
[YouTube Uploader] window<br />
For details about this window (→77)<br />
Properties window (→52)<br />
Right-clicking video content, picture, a folder, or disc or SD card<br />
and selecting [Properties] displays the [Properties] window,<br />
enabling you to check relevant details. You can also rename<br />
these items or add comments.<br />
●Some<br />
in<strong>for</strong>mation may not be shown, depending on the type of<br />
content or media.<br />
Scene<br />
Photo<br />
1<br />
5<br />
2<br />
3<br />
4<br />
1<br />
5<br />
2<br />
3<br />
4<br />
Other<br />
1 [Title]<br />
Title of content<br />
● Video files, scenes, pictures and folders on the computer can be<br />
renamed. (Up to 64 single-byte characters.)<br />
2 [Protect Setting] (→52)<br />
3 [Comments (Memo)]<br />
Enter comments (up to 64 single-byte characters)<br />
● This in<strong>for</strong>mation can be used when searching <strong>for</strong> content. (→73)<br />
●<br />
If this software crashes or is <strong>for</strong>ced closed, entered comments<br />
may be deleted.<br />
4 [Close]<br />
Apply any changes and close the window<br />
5 [Recording date and time]<br />
94
Shortcut menus<br />
Shortcut menus are displayed by right-clicking folders, media, content, and other screen elements.<br />
Menu in the media/folder selection area<br />
Other<br />
[Set Target folder]<br />
(When [PC Hard drive (<strong>HD</strong>)], [PC Hard drive] or a folder is<br />
selected).<br />
Add a new folder. (→33)<br />
[Import to PC] (When media is selected)<br />
Import all content on the media, or folder to the computer.<br />
(→17–19)<br />
[Eject] (When an optical drive is selected)<br />
Open the drive tray.<br />
[Properties]<br />
Enables you to check details about the folder or media. (→94)<br />
95
Shortcut menus<br />
Menu in the content viewing area<br />
Example: when a video is selected<br />
Video<br />
Photo<br />
[Playback]<br />
Play the content. (→25–26)<br />
[Import to PC] (When media is selected)<br />
Import the selected content to the computer. (→17–19)<br />
[Edit picture] (When a photo is selected)<br />
For editing the selected photo. (→51)<br />
[Delete Videos]/[Delete scenes][Delete Pictures]<br />
Delete the selected content. (→36)<br />
[Properties]<br />
Enables you to check details about the content. (→94)<br />
Other<br />
96
Shortcut menus<br />
Video editing area menu Authoring area menu<br />
[Playback]<br />
Verify editing results. Scenes within the video editing area will be<br />
played back in order.<br />
[Insert Title]<br />
For adding a title to the first scene. (→47–48)<br />
[Insert Transition]<br />
For adding an effect as the transition between scenes. (→49–50)<br />
[Delete partially] (When video content is selected)<br />
Delete a portion of the selected video. (→41–43)<br />
[Divide scene] (When video content is selected)<br />
Divide the selected video. (→44)<br />
[Delete]<br />
Remove the selected content from video editing area. (→46)<br />
[Properties]<br />
Check details about the content, as needed. (→94)<br />
[Delete]<br />
Remove the selected content from the authoring area. (→59)<br />
[Properties]<br />
Check details about the content, as needed. (→94)<br />
Other<br />
97
Troubleshooting<br />
Startup<br />
The software does not start.<br />
Symptom Corrective Action<br />
The screen saver or the power-saving<br />
functions do not operate.<br />
Other<br />
Windows Vista ® :<br />
Log on with an administrator account or a standard user account be<strong>for</strong>e using this software.<br />
The software will not function with a Guest account.<br />
Windows ® XP/2000:<br />
Log on with an administrator account be<strong>for</strong>e using this software.<br />
●Multiple<br />
users cannot start the software at the same time. Make sure another user has not<br />
started the software.<br />
●It<br />
takes time <strong>for</strong> the software to start, or the software may not start, if there are any damaged<br />
or corrupted images.<br />
While this software is started, the screen saver or the power-saving functions (function to make<br />
the PC enter the standby or sleep modes after a certain time has elapsed without any operation<br />
on the PC) are disabled. Since this software may not operate properly, the screen saver and<br />
the power-saving functions must be disabled be<strong>for</strong>e starting this software.<br />
Display/playback<br />
Symptom Corrective Action<br />
●You<br />
can display only videos recorded with this software or a video camera that this software<br />
accompanied. This software cannot process videos created with other devices or software.<br />
Video cannot be displayed.<br />
●This<br />
software cannot process a video recorded with the video camera this software<br />
accompanied if it was edited with other devices or software.<br />
●Close<br />
any other software that is running.<br />
Update the device driver <strong>for</strong> the sound card or video card.<br />
Images do not play back properly.<br />
●<br />
●<br />
Images played may have frame drops, colour-dulling or a jerky effect depending on the<br />
[Windows Aero] functions of Windows Vista ® , the environment of the PC in use or the images<br />
themselves. Also, there may be noise in the sound or images may not be played back<br />
smoothly at the point where the resolution of the image and the sound are switched.<br />
Depending on the throughput of the PC, playback may be jerky due to a reduced frame rate.<br />
(→35)<br />
●<br />
98
Troubleshooting<br />
Voice is not audible.<br />
Symptom Corrective Action<br />
Pauses of a few seconds occur when<br />
playing back produced BDMV or AVC<strong>HD</strong><br />
standard SD card or a disc.<br />
Outlines of video are out of focus, or<br />
noise occurs.<br />
Media produced in the DVD-Video<br />
<strong>for</strong>mat cannot be played back using<br />
Windows Media ® Player.<br />
Video with an aspect ratio of 16:9 is<br />
displayed at 4:3.<br />
Even though the data is played back<br />
on the video camera, top menu is not<br />
played back.<br />
When the produced disc is played back<br />
on another device, zones surrounding<br />
the image are not displayed.<br />
●<br />
Other<br />
For Windows Vista ® : From the start menu, select [Control Panel] → [Hardware and Sound]<br />
→ [Sound] → [Speakers], and then click [Properties]. Confirm that [Use this device (enable)]<br />
is selected in [Device usage] on the [General] tab or that [Speakers] and [Line input] are not<br />
muted on the [Levels] tab.<br />
For Windows ® XP/2000: Confirm that [Volume Control] and [Line input] are not muted in<br />
[Volume Control] window of the PC.<br />
Voice will not play back while the image is paused.<br />
●<br />
●<br />
●<br />
Breaks of a few seconds can occur between scenes when playing back media produced by<br />
[Save as BD/AVC<strong>HD</strong>].<br />
When processing has been per<strong>for</strong>med so as to have more than 99 consecutive scenes<br />
play back seamlessly, a break will occur between playback of the 99th and 100th scenes.<br />
(However, if the 99th and 100th scene are from the same video, the break in playback will<br />
occur where the video starts.)<br />
If the [Seamless setting during SD, DVD or BD recording] has been set to [Makes seamless<br />
if the recording modes are the same] when recording, breaks in playback will occur between<br />
scenes which are under 3 seconds in length and of different recording modes (resolution,<br />
frame rate, or number of sound channels) (→85).<br />
●<br />
●<br />
To record fast moving images in DVD-Video <strong>for</strong>mat, the contours may be out of focus or noise<br />
may occur when converting images. When recording fast moving images, setting the [Picture<br />
quality priority] in the [Convert MPEG2] panel window may improve the quality (→83).<br />
The sound of MPEG2 files recorded on the media is in Dolby Digital <strong>for</strong>mat. This sound will not<br />
be played back on PCs which do not have Dolby Digital Codec installed.<br />
MPEG2 video with an aspect ratio of 16:9 may be played back at 4:3 in Windows Media Player<br />
and similar software.<br />
The top menu will be displayed on a player capable of playing back the top menu. The top<br />
menu will not display on a video camera.<br />
Portions of the area around the image may not be displayed on some playback equipment such<br />
as televisions.<br />
99
Troubleshooting<br />
Symptom Corrective Action<br />
The produced SD card or a disc in Playback of discs or SD cards created with this software in BDMV <strong>for</strong>mat or AVC<strong>HD</strong> <strong>for</strong>mat is<br />
BDMV or AVC<strong>HD</strong> standard does not play<br />
back.<br />
only possible on equipment which is compatible with each <strong>for</strong>mat.<br />
●Some<br />
video cameras do not support playback of video on SD cards.<br />
Cannot play discs created with this<br />
software.<br />
Play the disc in equipment compatible with the type of disc you have created.<br />
When the produced SD card or disc is<br />
played back with another device, audio<br />
may be heard from one side only.<br />
When the produced disc is played<br />
back, the end of the image is slightly<br />
truncated.<br />
Audio recorded in DolbyDigital 5.1 ch and played back through stereo (2 ch) speakers may<br />
be heard from one side only. If available on your TV receiver, we recommend turning on the<br />
surround sound function.<br />
Refer to the operating instructions of your TV receiver <strong>for</strong> instructions.<br />
When recorded in DVD-Video <strong>for</strong>mat, the end of an image may be truncated by about 0.5<br />
seconds.<br />
Connection/Import<br />
Symptom Corrective Action<br />
If other software is already running, this<br />
software does not start up automatically<br />
when the video camera is connected.<br />
The video camera is connected but not<br />
displayed on the window or recording<br />
fails.<br />
When an SD card is inserted, the card<br />
is not displayed in the media/folder<br />
selection area.<br />
●<br />
Other programs may prevent this software’s automatic start-up function from operating<br />
correctly when the video camera is connected. Please change the settings of the other<br />
software or uninstall it completely.<br />
●<br />
●<br />
●<br />
●<br />
●<br />
●<br />
Other<br />
Click [Refresh] in the main window or other windows. This will update the drive in<strong>for</strong>mation,<br />
which may enable display.<br />
If the video camera has not been set <strong>for</strong> connection with the PC, it will not be displayed. (For<br />
details, refer to the operating instructions <strong>for</strong> the video camera.)<br />
Some video cameras are not supported by Windows ® 2000.<br />
Video cameras cannot be used as the destination <strong>for</strong> recording video.<br />
SD cards are not displayed unless they are connected be<strong>for</strong>e this software is started. If you<br />
connect the SD device or insert an SD card after startup, select the drive on the [SD] tab of<br />
[Settings], and then click [OK]. (→84)<br />
An SDHC memory card (4 GB to 32 GB) will not be displayed unless using a reader/writer<br />
that supports SDHC.<br />
100
Troubleshooting<br />
Symptom Corrective Action<br />
●Since<br />
image data produced with video cameras other than compatible video cameras (→10)<br />
or other software does not have thumbnail folders, they are not displayed.<br />
●The<br />
wrong TV system, NTSC or PAL, may have been selected when the software was<br />
originally installed. Select “About <strong>HD</strong> <strong>Writer</strong> <strong>AE</strong> 1.0” from “ ” at the top right of the main<br />
Thumbnails are not correctly displayed<br />
window, and check the TV system. If the wrong system was selected, you will need to re-<br />
on the importing window.<br />
install the software.<br />
●When<br />
collecting content and recording in BDMV or AVC<strong>HD</strong> <strong>for</strong>mat, scenes processed <strong>for</strong><br />
seamless playback may be displayed as a single video in the importing window. (“Seamless<br />
setting during SD, DVD or BD recording”→85)<br />
Editing<br />
Images cannot be edited.<br />
Symptom Corrective Action<br />
Results of editing do not match the<br />
frames I selected.<br />
Images output in MPEG2 <strong>for</strong>mat cannot<br />
be handled with DVD-Video production<br />
software.<br />
Other<br />
Only content (video or photos) stored on the computer can be edited or used in media creation.<br />
Import content stored on other media to your computer be<strong>for</strong>e use. (→17, 30)<br />
With some types of video content, frames may not match the frames selected during editing.<br />
When 5.1 channel video is exported to MPEG2 <strong>for</strong>mat using [Save images in original <strong>for</strong>m], the<br />
aspect ratio is 16:9 and the sound is 5.1 channel. It may not be possible to use this content in<br />
software that does not specifically support this <strong>for</strong>mat. In this case, try exporting with [Save as<br />
2-channel audio]. (→39)<br />
101
Troubleshooting<br />
Recording<br />
Data cannot be recorded.<br />
Symptom Corrective Action<br />
Cannot record – message appears<br />
saying maximum limit has been<br />
exceeded.<br />
Video recorded in DVD-Video <strong>for</strong>mat must be at least 2 seconds long.<br />
Video recorded in DVD-VR <strong>for</strong>mat must be at least 3 seconds long.<br />
Other<br />
No further recording will be possible if the number of scenes or videos exceeds the maximum<br />
number allowed by this software or by the AVC<strong>HD</strong> standards.<br />
- Maximum number of scenes: 3630 (<strong>for</strong> Blu-ray discs or SD cards)<br />
999 (<strong>for</strong> DVD discs)<br />
- Maximum number of videos: 200 (<strong>for</strong> Blu-ray discs or SD cards)<br />
99 (<strong>for</strong> DVD discs)<br />
The number of videos that can be recorded may be reduced if individual videos contain scenes<br />
recorded in different recording modes.<br />
Cannot record photos to an optical disc. Photos cannot be recorded on an optical disc. Record photos to SD cards. (→67)<br />
An error message is displayed when I<br />
select the drive to record to.<br />
The image is distorted during burning<br />
and is not burned properly.<br />
Cannot record on a new DVD-RAM disc.<br />
Cannot record on the card or disc after<br />
<strong>for</strong>matting it using Windows ® Explorer.<br />
Cannot add content to a DVD-RAM disc.<br />
●<br />
●<br />
●<br />
Close any other software using the drive.<br />
An error message may be displayed when media is replaced. Reselect the drive.<br />
Other recording software may be interfering with operation. In this case, uninstall the other<br />
recording software.<br />
Close this software and restart the PC.<br />
Commercially available DVD-RAM discs are sold in UDF 2.0 <strong>for</strong>mat. To record in AVC<strong>HD</strong><br />
<strong>for</strong>mat with this software, <strong>for</strong>mat them as UDF 2.5. (→78)<br />
When using this software to record on optical discs, use this software to <strong>for</strong>mat the discs (→78).<br />
SD cards must be <strong>for</strong>matted by using video cameras compatible with this software (→10).<br />
Optical discs <strong>for</strong>matted by using applications other than this software (such as Windows<br />
Explorer) are not supported.<br />
If the disc is protected, recording is not possible. Clear any protection by using the equipment<br />
originally used to protect the disc. When you are recording in AVC<strong>HD</strong> <strong>for</strong>mat, data can be<br />
appended by enabling auto protection, even without clearing the protection. (→85)<br />
●<br />
Video recorded in DVD-Video <strong>for</strong>mat must be at least 2 seconds long. Video recorded in<br />
DVD-VR <strong>for</strong>mat must be at least 3 seconds long.<br />
102
Troubleshooting<br />
Symptom Corrective Action<br />
Cannot stop recording midway through.<br />
A disc error message is displayed.<br />
Error occurs while data are being<br />
recorded.<br />
●<br />
With DVD-R/RW and BD-R discs, recording can only be stopped by clicking [Cancel] when<br />
changing discs or during data conversion, not when data is being written.<br />
Recording is not possible using unsupported types of discs or discs in unsupported <strong>for</strong>mats.<br />
(For a list of supported discs: →11)<br />
Other<br />
Consider the following as factors <strong>for</strong> this problem.<br />
●The<br />
media is not supported. (For a list of supported media: →11)<br />
●When<br />
recording on SD cards, the cards must be <strong>for</strong>matted with a file system compatible with<br />
this software.<br />
Use compatible video cameras (→10) to <strong>for</strong>mat SD cards. (Recorded data will be deleted.)<br />
●There<br />
may be a compatibility problem between the drive and disc.<br />
Use discs recommended <strong>for</strong> the drive. (With some discs, playback may not be<br />
possible even if recording is completed normally. Check playback after recording.)<br />
●Recording<br />
may be affected by the state of the hard disk drive where the operating system is<br />
installed or the drive used <strong>for</strong> working space.<br />
Optimize the hard disk if necessary. From the Start menu, select [Computer]<br />
([My Computer]), right-click the hard disk icon and select [Properties]→[Tools]→<br />
[Defragment Now]→[Continue]→[Defragment now] ([Properties]→[Tools]→<br />
[Defragment Now]→[Defragment]). However, do not optimize the hard disk while this<br />
software is running.<br />
●Other<br />
software may be running.<br />
Exit other applications. Using other software at the same time may cause recording<br />
to fail, or it may damage discs. (In particular, do not use DVD or CD recording<br />
software or other recording or encoding software that requires a large amount of<br />
memory.)<br />
●Other<br />
DVD writing software, packet writing software, or similar software that uses the optical<br />
drive may be installed, or an ASPI driver may be installed.<br />
Uninstall the other software and drivers and then reinstall this software.<br />
●Other<br />
software with features <strong>for</strong> reading UDF discs may be installed.<br />
In this case, temporarily stop the software or uninstall it.<br />
103
Troubleshooting<br />
Symptom Corrective Action<br />
●Multiple<br />
peripherals may be connected to the computer.<br />
Particularly if you are using an external optical drive <strong>for</strong> recording, disconnect SD<br />
card readers or other USB devices and check software operation. However, do not<br />
connect or disconnect these devices during recording.<br />
●Video<br />
cameras, optical drives, hard disk drives, or SD card adapters may be connected via<br />
USB.<br />
Use a different USB port (<strong>for</strong> example, a USB port on the back of the computer).<br />
●Operation<br />
may be affected by the firmware (a control program stored on the equipment) of<br />
Error occurs while data are being<br />
your optical drive.<br />
recorded. (Continued)<br />
Update the firmware of your computer or optical drive. (Firmware updates may be<br />
available on the manufacturer’s website.)<br />
●Operation<br />
may be affected by CD recording functions provided by the operating system as a<br />
standard feature.<br />
Disable these functions.<br />
●Because<br />
some video cameras cannot play back video from SD cards, an error message is<br />
displayed if you attempt to use this software to record on SD cards <strong>for</strong>matted by using these<br />
video cameras. (Recording is possible, however.)<br />
Recording additional video content is only possible on the following media.<br />
●Blu-ray<br />
discs, DVD-RAM discs and SD cards which you have recorded to using this software<br />
Images cannot be added.<br />
●SD<br />
cards recorded on by using video cameras<br />
●DVD-RAM<br />
discs recorded on by a DVD burner compatible with the video camera<br />
Blu-ray discs recorded on by a BD burner compatible with the video camera<br />
●<br />
Recording (SD card)<br />
Symptom Corrective Action<br />
Cannot <strong>for</strong>mat an SD card.<br />
SD cards cannot be <strong>for</strong>matted on this software. Format them on the video camera that this<br />
software supports. (→10)<br />
Other<br />
104
Troubleshooting<br />
Other<br />
Symptom Corrective Action<br />
Cannot access the optical drive using<br />
Windows Explorer or other software.<br />
The free space displayed on this<br />
software is less than the free space<br />
displayed on Windows ® Explorer.<br />
Cannot see the produced media on<br />
Windows ® Explorer.<br />
A message during importing or editing<br />
indicates that no additional registration<br />
is possible, and content cannot be<br />
saved.<br />
DVD-RAM/RW discs recorded with<br />
this software cannot be initialised or<br />
<strong>for</strong>matted.<br />
If recording is started on a different date<br />
than when it is finished, which date is<br />
identified in [Recording date and time]?<br />
A message appears indicating<br />
insufficient memory.<br />
Other software cannot access an optical drive currently in use by this software. Exit this<br />
software be<strong>for</strong>e accessing the optical drive.<br />
If you record on discs in BDMV <strong>for</strong>mat or AVC<strong>HD</strong> <strong>for</strong>mat, the free space indicated by this<br />
software is the space available on discs <strong>for</strong> continuous recording, which may be less than the<br />
free space indicated by Windows Explorer.<br />
●<br />
●<br />
Other<br />
Since the media recorded in AVC<strong>HD</strong> standard is recorded in UDF 2.5 <strong>for</strong>mat, they cannot be<br />
displayed on a PC where the UDF 2.5 driver is not installed.<br />
Since video content is recorded in UDF 2.6 on BD-R or in UDF 2.5 on BD-RE, they cannot be<br />
displayed on a PC where each UDF driver is not installed.<br />
You have exceeded the maximum capacity in [PC Hard drive (<strong>HD</strong>)] or [PC Hard drive],<br />
[PC Hard drive] (about 9,999 items, respectively). Delete unnecessary videos or photos in<br />
these destinations and try saving the content again.<br />
DVD-RAM/RW discs recorded with [Auto Protect ON] selected are protected and it may not be<br />
possible to initialise or <strong>for</strong>mat them with other recording software or similar programs. In this<br />
case, you can initialise the discs using <strong>for</strong>matting functions of this software (→78). Because<br />
complete erasure may take a long time, we recommend simple erasure.<br />
[Recording date and time] indicates the date a recording is started.<br />
An error message indicating insufficient memory may appear when handling large volumes<br />
of video or pictures. Please increase the amount of available memory. (In some cases, this<br />
problem may also be solved by increasing the amount of virtual memory.) For instructions<br />
on how to increase the amount of memory or virtual memory, please consult your PC’s<br />
manufacturer.<br />
105
●<br />
Trademark and Licence In<strong>for</strong>mation<br />
Microsoft ® , Windows ® , Windows Vista ® , DirectX ® , DirectDraw ® and DirectSound ® are either registered trademarks or trademarks of Microsoft<br />
Corporation in the United States and/or other countries.<br />
IBM ® and PC/AT are registered trademarks of International Business Machines Corporation of the U.S.<br />
Intel ® , Core and Pentium ® are registered trademarks or trademarks of Intel Corporation in the United States and the other countries.<br />
SD logo is a trademark.<br />
SDHC logo is a trademark.<br />
AMD Athlon is a trademark of Advanced Micro Devices, Inc.<br />
“AVC<strong>HD</strong>” and the “AVC<strong>HD</strong>” logo are trademarks of <strong>Panasonic</strong> Corporation and Sony Corporation.<br />
Microsoft product screen shot(s) reprinted with permission from Microsoft Corporation.<br />
LEADTOOLS<br />
Copyright© 1991-2005 LEAD Technologies, Inc.<br />
Manufactured under license from Dolby Laboratories.<br />
Dolby and the double-D symbol are trademarks of Dolby Laboratories.<br />
Confidential unpublished works. Copyright 1993-2005 Dolby Laboratories. All rights reserved.<br />
YouTube and the YouTube logo are trademarks or registered trademarks of YouTube LLC.<br />
Other names of systems and products mentioned in these instructions are usually the registered trademarks or trademarks of the<br />
manufacturers who developed the system or product concerned.<br />
This product is licensed under the AVC patent portfolio license <strong>for</strong> the personal and non-commercial use of a consumer to (i) encode video in<br />
compliance with the AVC Standard (“AVC Video”) and/or (ii) decode AVC Video that was encoded by a consumer engaged in a personal and<br />
non-commercial activity and/or was obtained from a video provider licensed to provide AVC Video.<br />
No license is granted or shall be implied <strong>for</strong> any other use.<br />
Additional in<strong>for</strong>mation may be obtained from MPEG LA, LLC.<br />
See http://www.mpegla.com.<br />
●<br />
●<br />
●<br />
●<br />
●<br />
●<br />
●<br />
●<br />
●<br />
●<br />
●<br />
●<br />
Other<br />
MSC0202CD_E_SA P0109KZ7029<br />
106