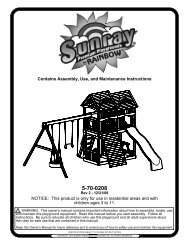
5pm cst SATURDAYS (April 11 - June 30)
5pm cst SATURDAYS (April 11 - June 30)
5pm cst SATURDAYS (April 11 - June 30)

Create successful ePaper yourself
Turn your PDF publications into a flip-book with our unique Google optimized e-Paper software.
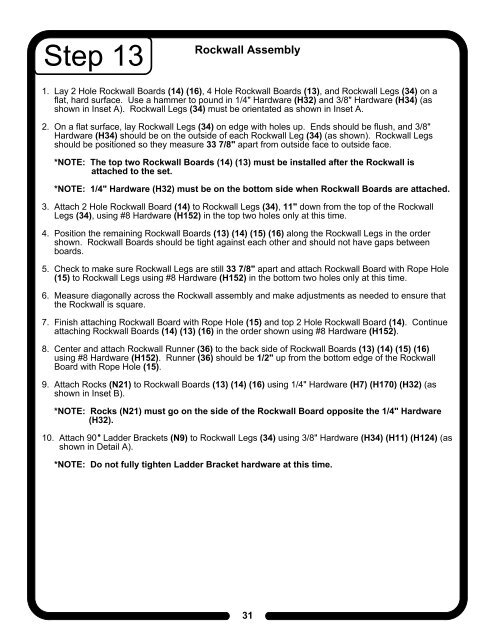
Step 13<br />
Rockwall Assembly<br />
1. Lay 2 Hole Rockwall Boards (14) (16), 4 Hole Rockwall Boards (13), and Rockwall Legs (34) on a<br />
flat, hard surface. Use a hammer to pound in 1/4" Hardware (H32) and 3/8" Hardware (H34) (as<br />
shown in Inset A). Rockwall Legs (34) must be orientated as shown in Inset A.<br />
2. On a flat surface, lay Rockwall Legs (34) on edge with holes up. Ends should be flush, and 3/8"<br />
Hardware (H34) should be on the outside of each Rockwall Leg (34) (as shown). Rockwall Legs<br />
should be positioned so they measure 33 7/8" apart from outside face to outside face.<br />
*NOTE: The top two Rockwall Boards (14) (13) must be installed after the Rockwall is<br />
attached to the set.<br />
*NOTE: 1/4" Hardware (H32) must be on the bottom side when Rockwall Boards are attached.<br />
3. Attach 2 Hole Rockwall Board (14) to Rockwall Legs (34), <strong>11</strong>" down from the top of the Rockwall<br />
Legs (34), using #8 Hardware (H152) in the top two holes only at this time.<br />
4. Position the remaining Rockwall Boards (13) (14) (15) (16) along the Rockwall Legs in the order<br />
shown. Rockwall Boards should be tight against each other and should not have gaps between<br />
boards.<br />
5. Check to make sure Rockwall Legs are still 33 7/8" apart and attach Rockwall Board with Rope Hole<br />
(15) to Rockwall Legs using #8 Hardware (H152) in the bottom two holes only at this time.<br />
6. Measure diagonally across the Rockwall assembly and make adjustments as needed to ensure that<br />
the Rockwall is square.<br />
7. Finish attaching Rockwall Board with Rope Hole (15) and top 2 Hole Rockwall Board (14). Continue<br />
attaching Rockwall Boards (14) (13) (16) in the order shown using #8 Hardware (H152).<br />
8. Center and attach Rockwall Runner (36) to the back side of Rockwall Boards (13) (14) (15) (16)<br />
using #8 Hardware (H152). Runner (36) should be 1/2" up from the bottom edge of the Rockwall<br />
Board with Rope Hole (15).<br />
9. Attach Rocks (N21) to Rockwall Boards (13) (14) (16) using 1/4" Hardware (H7) (H170) (H32) (as<br />
shown in Inset B).<br />
*NOTE: Rocks (N21) must go on the side of the Rockwall Board opposite the 1/4" Hardware<br />
(H32).<br />
10. Attach 90 Ladder Brackets (N9) to Rockwall Legs (34) using 3/8" Hardware (H34) (H<strong>11</strong>) (H124) (as<br />
shown in Detail A).<br />
*NOTE: Do not fully tighten Ladder Bracket hardware at this time.<br />
31