Pipeline User's Guide - Telestream
Pipeline User's Guide - Telestream
Pipeline User's Guide - Telestream

Create successful ePaper yourself
Turn your PDF publications into a flip-book with our unique Google optimized e-Paper software.
Windows<br />
User’s <strong>Guide</strong><br />
<strong>Pipeline</strong> SC<br />
<strong>Pipeline</strong> Quad<br />
<strong>Pipeline</strong> HD Dual<br />
Firmware Version 2.6.1<br />
Administrator Version 2.6.1<br />
Control for Windows Version 2.6.1
COPYRIGHT AND TRADEMARK NOTICE<br />
Preface<br />
Copyright 2012 <strong>Telestream</strong>, Inc. All rights reserved. No part of this publication may be reproduced,<br />
transmitted, transcribed, altered, or translated into any languages without written permission of<br />
<strong>Telestream</strong>, Inc. Information and specifications in this document are subject to change without notice and<br />
do not represent a commitment on the part of <strong>Telestream</strong>.<br />
<strong>Telestream</strong>, Vantage, Flip4Mac, FlipFactory, Episode, ScreenFlow, Wirecast, GraphicsFactory, MetaFlip,<br />
MotionResolve, and Split-and-Stitch are registered trademarks and <strong>Pipeline</strong>, Launch, and Videocue are<br />
trademarks of <strong>Telestream</strong>, Inc. All other trademarks are the property of their respective owners.<br />
QuickTime, Mac OS X, Final Cut Pro, and Safari are trademarks of Apple, Inc. Bonjour, the Bonjour logo,<br />
and the Bonjour symbol are trademarks of Apple, Inc.<br />
All other brand, product, and company names are property of their respective owners, and are used only<br />
for identification purposes.<br />
MPEG-2 License Requirements<br />
<strong>Telestream</strong> has obtained a license from MPEG LA, to produce MPEG-2 video, to meet the following<br />
requirement on behalf of its FlipFactory and <strong>Pipeline</strong> licensees: The use of this product in any manner that<br />
complies with the MPEG-2 standard is expressly prohibited without a license under applicable patents in<br />
the MPEG-2 patent portfolio, which license is available from MPEG LA, L.L.C., 250 Steele Street, Suite<br />
300, Denver, Colorado 80206.<br />
Obtaining <strong>Pipeline</strong> Support | Information | Assistance<br />
Web Site. http://www.telestream.net/telestream-support/pipeline/support.htm<br />
Terms and times of support services vary, per the terms of your current service contract with <strong>Telestream</strong>.<br />
i
ii<br />
Preface<br />
<strong>Pipeline</strong> Web Site – FAQs, Forums & Updates<br />
Web Site. http://www.telestream.net/telestream-support/pipeline/support.htm<br />
Returning Inoperative <strong>Pipeline</strong>s (RMA)<br />
If your <strong>Pipeline</strong> is inoperative, contact <strong>Telestream</strong> at the <strong>Pipeline</strong> support E-mail address provided below,<br />
or contact your authorized reseller. Provide your company and contact information, the serial number of<br />
the inoperative unit, and request instructions for Return Material Authorization.<br />
Company and Product Information<br />
For information about <strong>Telestream</strong> or its products, please contact us via:<br />
Web Site. www.telestream.net<br />
Sales and Marketing Email. info@telestream.net<br />
We’d Like to Hear From You!<br />
If you have comments or suggestions about improving this document, other <strong>Telestream</strong> documents, or our<br />
Web site – or if you've discovered an error or omission, please email us at techwriter@telestream.net<br />
Mail<br />
<strong>Telestream</strong>, Inc.<br />
848 Gold Flat Road, Suite 1<br />
Nevada City, CA. USA 95959<br />
International <strong>Telestream</strong> Distributors<br />
See the <strong>Telestream</strong> Web site at www.telestream.net for your regional authorized <strong>Telestream</strong> distributor.<br />
FCC Emission Information<br />
Ethernet connections to <strong>Pipeline</strong> devices must be made using a shielded Category 5 or Category 6 cable<br />
to ensure emissions are within applicable standards. This equipment has been tested and found to comply<br />
with the limits for a Class A digital device, pursuant to Part 15 of the FCC Rules.<br />
These limits are designed to provide reasonable protection against harmful interference when the<br />
equipment is operated in a commercial environment. This equipment generates, uses and can radiate<br />
radio frequency energy and, if not installed and used in accordance with the instruction manual, may cause<br />
harmful interference to radio communications.<br />
Operation of this equipment in a residential area is likely to cause harmful interference with other electronic<br />
equipment in which case the user will be required to correct the interference at his/her own expense.<br />
Changes or modifications not expressly approved by <strong>Telestream</strong> can affect emission compliance and could<br />
void the user's authority to operate this equipment.<br />
November, 2012
Canadian EMC Notice of Compliance<br />
95881<br />
Canadian EMC Notice of Compliance<br />
<strong>Pipeline</strong> User’s <strong>Guide</strong><br />
This digital apparatus does not exceed the Class A limits for radio noise emissions from digital apparatus<br />
set out in the Radio Interference Regulations of the Canadian Department of Communications.<br />
Le present appareil numerique n'emet pas de bruits radioelectriques depassant les limites applicables aux<br />
appareils numeriques de la classe A prescrites dans le Reglement sur le brouillage radioelectrique edicte<br />
par le Ministere des Communications du Canada.<br />
Important Safety Instructions<br />
Before using <strong>Pipeline</strong> devices, read the following safety instructions to ensure it is used safely:<br />
• Unplug the device before cleaning.<br />
• Use only a lightly-dampened cloth to clean the unit; never pour liquids onto the device.<br />
• Do not place the device on an unstable surface or near extreme heat.<br />
• Do not stack <strong>Pipeline</strong>s more than two units high to avoid over-heating.<br />
• Use only the power source supplied, and recommended in this manual.<br />
• Connect all electronic equipment to properly grounded power outlets.<br />
• <strong>Telestream</strong> recommends using surge protection equipment (may be feature of a UPS).<br />
Caution<br />
<strong>Pipeline</strong>s contain no user serviceable parts. Never open the chassis<br />
enclosure. Doing so without express permission from <strong>Telestream</strong> may<br />
void your warranty.<br />
EN55022 Class A Warning<br />
In a domestic environment this product may cause radio interference in which case the user may be<br />
required to take adequate measures.<br />
Regulatory Approved Standards for Electrical Safety<br />
This equipment complies with the minimum requirements of these standards:<br />
IEC950 (or EN60950/BS7002/VDE0805 May 1990)<br />
UL1950<br />
CSA C22.2-950-M89<br />
Radiation Emission Susceptibility Regulatory Approved Standards<br />
This equipment complies with the minimum requirements of these standards:<br />
FCC155, Class A<br />
EN55022, Class A<br />
EC DIR 89/336/EEC<br />
EN50082-1<br />
iii
iv<br />
Preface<br />
Limited Warranty and Disclaimers<br />
<strong>Telestream</strong>, Inc. (the Company) warrants to the original registered end user that the product will perform as stated<br />
below for a period of one (1) year from the date of shipment from factory:<br />
Hardware and Media. The Product hardware components, including equipment supplied but not manufactured by the<br />
Company but NOT including any third party equipment that has been substituted by the Distributor for such equipment<br />
(the “Hardware”), will be free from defects in materials and workmanship under normal operating conditions and use.<br />
Software. If software is supplied as part of the product, the software will operate in substantial conformance with<br />
specifications set forth in its product user's guide. The Company does not warrant that the software will operate<br />
uninterrupted or error-free, will meet your requirements, or that software errors will be corrected.<br />
Warranty Remedies<br />
Your sole remedies under this limited warranty are as follows:<br />
Hardware and Media. The Company will either repair or replace (at its option) any defective Hardware component or<br />
part, or Software Media, with new or like new Hardware components or Software Media. Components may not be<br />
necessarily the same, but will be of equivalent operation and quality.<br />
Software. If software is supplied as part of the product and it fails to substantially confirm to its specifications as stated<br />
in the product user's guide, the Company shall, at its own expense, use its best efforts to correct (with due allowance<br />
made for the nature and complexity of the problem) such defect, error or nonconformity.<br />
Software Updates<br />
If software is supplied as part of the product, the Company will supply the registered purchaser/licensee with<br />
maintenance releases of the Company’s proprietary Software Version Release in manufacture at the time of license for<br />
a period of one year from the date of license or until such time as the Company issues a new Version Release of the<br />
Software, whichever first occurs. To clarify the difference between a Software Version Release and a maintenance<br />
release, a maintenance release generally corrects minor operational deficiencies (previously non-implemented<br />
features and software errors) contained in the Software, whereas a Software Version Release adds new features and<br />
functionality. The Company shall have no obligation to supply you with any new Software Version Release of<br />
<strong>Telestream</strong> software or third party software during the warranty period, other than maintenance releases.<br />
Restrictions and Conditions of Limited Warranty<br />
This Limited Warranty will be void and of no force and effect if (i) Product Hardware or Software Media, or any part<br />
thereof, is damaged due to abuse, misuse, alteration, neglect, or shipping, or as a result of service or modification by a<br />
party other than the Company, or (ii) Software is modified without the written consent of the Company.<br />
Limitations of Warranties<br />
THE EXPRESS WARRANTIES SET FORTH IN THIS AGREEMENT ARE IN LIEU OF ALL OTHER WARRANTIES,<br />
EXPRESS OR IMPLIED, INCLUDING, WITHOUT LIMITATION, ANY WARRANTIES OF MERCHANTABILITY OR<br />
FITNESS FOR A PARTICULAR PURPOSE. No oral or written information or advice given by the Company, its<br />
distributors, dealers or agents, shall increase the scope of this Limited Warranty or create any new warranties.<br />
Geographical Limitation of Warranty. This limited warranty is valid only within the country in which the Product is<br />
purchased/licensed.<br />
Limitations on Remedies. YOUR EXCLUSIVE REMEDIES, AND THE ENTIRE LIABILITY OF TELESTREAM, INC.<br />
WITH RESPECT TO THE PRODUCT, SHALL BE AS STATED IN THIS LIMITED WARRANTY. Your sole and<br />
exclusive remedy for any and all breaches of any Limited Warranty by the Company shall be the recovery of<br />
reasonable damages which, in the aggregate, shall not exceed the total amount of the combined license fee and<br />
purchase price paid by you for the Product.<br />
Damages. TELESTREAM, INC. SHALL NOT BE LIABLE TO YOU FOR ANY DAMAGES, INCLUDING ANY LOST<br />
PROFITS, LOST SAVINGS, OR OTHER INCIDENTAL OR CONSEQUENTIAL DAMAGES ARISING OUT OF YOUR<br />
USE OR INABILITY TO USE THE PRODUCT, OR THE BREACH OF ANY EXPRESS OR IMPLIED WARRANTY,<br />
EVEN IF THE COMPANY HAS BEEN ADVISED OF THE POSSIBILITY OF THOSE DAMAGES, OR ANY REMEDY<br />
PROVIDED FAILS OF ITS ESSENTIAL PURPOSE.<br />
Further information regarding this limited warranty may be obtained by writing:<br />
<strong>Telestream</strong>, Inc.<br />
848 Gold Flat Road, Suite 1<br />
Nevada City, CA 95959<br />
You can call <strong>Telestream</strong>, Inc. via telephone at (530) 470-1300.<br />
November, 2012
Preface<br />
Contents<br />
Copyright and Trademark Notice ............................................................................................................i<br />
MPEG-2 License Requirements .......................................................................................................i<br />
Obtaining <strong>Pipeline</strong> Support | Information | Assistance......................................................................i<br />
Company and Product Information.................................................................................................. ii<br />
We’d Like to Hear From You!........................................................................................................... ii<br />
FCC Emission Information............................................................................................................... ii<br />
Canadian EMC Notice of Compliance ............................................................................................ iii<br />
Important Safety Instructions .......................................................................................................... iii<br />
Limited Warranty and Disclaimers .................................................................................................. iv<br />
..............................................................................................................................................................1<br />
Chapter 1 Introduction<br />
<strong>Pipeline</strong> Automates Real-time Media Workflows ...................................................................................1<br />
<strong>Telestream</strong>’s <strong>Pipeline</strong> Family of Products...............................................................................................2<br />
<strong>Pipeline</strong> SC......................................................................................................................................2<br />
<strong>Pipeline</strong> Quad ..................................................................................................................................2<br />
<strong>Pipeline</strong> HD Dual .............................................................................................................................3<br />
<strong>Pipeline</strong> Benefits ....................................................................................................................................3<br />
A better way to capture and playout baseband media ....................................................................3<br />
Accessible from any workstation on your network...........................................................................3<br />
Edit or transcode during capture for quick turnaround.....................................................................3<br />
Cost-effective network import/export station....................................................................................4<br />
Multi-channel scalability...................................................................................................................4<br />
Ingest into editing workflows............................................................................................................4<br />
Ingest into transcoding workflows....................................................................................................4<br />
v
vi<br />
Contents<br />
Chapter 2 <strong>Pipeline</strong> Hardware, Installation & Setup<br />
Environmental Operating Requirements ................................................................................................6<br />
Power Requirements..............................................................................................................................6<br />
Unpack the <strong>Pipeline</strong> ...............................................................................................................................6<br />
<strong>Pipeline</strong> SC Shipping Container Contents .......................................................................................7<br />
<strong>Pipeline</strong> Quad Shipping Container Contents ...................................................................................7<br />
<strong>Pipeline</strong> HD Dual Shipping Container Contents ..............................................................................7<br />
Locate the <strong>Pipeline</strong> SC...........................................................................................................................7<br />
Locate the <strong>Pipeline</strong> Quad | <strong>Pipeline</strong> HD Dual ........................................................................................7<br />
<strong>Pipeline</strong> SC Hardware............................................................................................................................8<br />
Processing VBI Closed Captions and Timecode Data ....................................................................8<br />
Front Panel Indicators .....................................................................................................................8<br />
Rear Panel Ports and Connectors...................................................................................................9<br />
<strong>Pipeline</strong> Quad Hardware........................................................................................................................9<br />
Using SDI Sync Input ....................................................................................................................10<br />
Using SDI Sync Out.......................................................................................................................10<br />
Processing Closed Caption and Timecode Data ...........................................................................10<br />
Front Panel Indicators ...................................................................................................................11<br />
Front Panel Reset Switches ..........................................................................................................11<br />
Rear Panel Ports and Connectors.................................................................................................12<br />
<strong>Pipeline</strong> HD Dual Hardware .................................................................................................................13<br />
Using SDI Sync Input ....................................................................................................................14<br />
Using SDI Sync Out.......................................................................................................................14<br />
Processing Closed Caption and Timecode Data ...........................................................................14<br />
Front Panel Indicators ...................................................................................................................15<br />
Front Panel Reset Switches ..........................................................................................................15<br />
Rear Panel Ports and Connectors.................................................................................................16<br />
Connecting <strong>Pipeline</strong> to Mac OS X or Windows Computers .................................................................18<br />
Adding <strong>Pipeline</strong> to a Network...............................................................................................................19<br />
Powering up the <strong>Pipeline</strong> .....................................................................................................................20<br />
Configuring & Connecting to <strong>Pipeline</strong>s.................................................................................................20<br />
Configuring <strong>Pipeline</strong> Network Settings ..........................................................................................21<br />
Registering Your <strong>Pipeline</strong> with <strong>Telestream</strong>...........................................................................................21<br />
Chapter 3 Installing <strong>Pipeline</strong> Software<br />
Installing <strong>Pipeline</strong> Software ..................................................................................................................23<br />
Upgrading <strong>Pipeline</strong> Software................................................................................................................24<br />
Removing <strong>Pipeline</strong> Software ................................................................................................................24<br />
November, 2012
Chapter 4 Implementing <strong>Pipeline</strong> Workflows<br />
95881<br />
<strong>Pipeline</strong> User’s <strong>Guide</strong> vii<br />
<strong>Pipeline</strong> Application Feature Comparison ............................................................................................25<br />
Workflow System Requirements ..........................................................................................................27<br />
General <strong>Pipeline</strong> System Setup Information ........................................................................................27<br />
Disk Buffering Details...........................................................................................................................36<br />
Platform and System Requirements ....................................................................................................37<br />
General <strong>Pipeline</strong> Host System Requirements ...............................................................................37<br />
System Requirements for FlipFactory <strong>Pipeline</strong> Workflows ............................................................37<br />
<strong>Pipeline</strong> Host computer recommendations ..........................................................................................38<br />
Chapter 5 Using <strong>Pipeline</strong> Administrator<br />
Supported Web Browsers ....................................................................................................................43<br />
Launching <strong>Pipeline</strong> Administrator.........................................................................................................44<br />
Using <strong>Pipeline</strong> Administrator................................................................................................................44<br />
Using the About Panel .........................................................................................................................45<br />
Using the Configure Panel.............................................................................................................46<br />
Using the Quad Panel ...................................................................................................................52<br />
Using the Counters Panel..............................................................................................................55<br />
Using the Upgrade Panel ..............................................................................................................57<br />
Chapter 6 Using <strong>Pipeline</strong> Control<br />
<strong>Pipeline</strong> Control Overview....................................................................................................................59<br />
Starting <strong>Pipeline</strong> Control.......................................................................................................................61<br />
Creating New <strong>Pipeline</strong> Control Documents..........................................................................................61<br />
Creating New Documents via the Task Selector............................................................................61<br />
Creating New Documents via the File Menu .................................................................................62<br />
<strong>Pipeline</strong> Control Menus........................................................................................................................63<br />
File Menu.......................................................................................................................................63<br />
Control Menu .................................................................................................................................64<br />
Device Menu and Keyboard Shortcuts ..........................................................................................64<br />
Clip Menu ......................................................................................................................................65<br />
Tools Menu ....................................................................................................................................65<br />
Help Menu .....................................................................................................................................65<br />
Using The <strong>Pipeline</strong> Settings Panel.......................................................................................................66<br />
Selecting a <strong>Pipeline</strong> .......................................................................................................................67<br />
Selecting and Configuring Codecs ................................................................................................67<br />
Selecting a Timecode Clock Source..............................................................................................69<br />
Setting up Handles ........................................................................................................................70<br />
Selecting a Publisher.....................................................................................................................70
viii<br />
Contents<br />
Configuring Publishers.........................................................................................................................70<br />
Using Vantage Publish within <strong>Pipeline</strong> Control for Windows .........................................................70<br />
Using Agility Publish within <strong>Pipeline</strong> Control for Windows.............................................................73<br />
Side Car XML Plugin .....................................................................................................................75<br />
Copy File Publisher .......................................................................................................................76<br />
Avid MXF Copy File Publisher.......................................................................................................76<br />
FlipFactory Publisher.....................................................................................................................77<br />
Using the <strong>Pipeline</strong> State Panel.............................................................................................................80<br />
Using The Video Preview Panel...........................................................................................................81<br />
Deck Controls ................................................................................................................................81<br />
Using the Audio Preview Panel............................................................................................................82<br />
Loading and Saving Clip List Files.......................................................................................................83<br />
Setting Up <strong>Pipeline</strong> Control Options.....................................................................................................83<br />
Capture Tab ...................................................................................................................................84<br />
Application Tab ..............................................................................................................................86<br />
Device Tab.....................................................................................................................................86<br />
Play Out Tab ..................................................................................................................................87<br />
Update Tab ....................................................................................................................................88<br />
Discovery Tab ................................................................................................................................88<br />
Security Tab...................................................................................................................................89<br />
Licensing Tab.................................................................................................................................89<br />
Using the Video Wall............................................................................................................................90<br />
Using the Label Editor..........................................................................................................................93<br />
Using the Diagnostics Panel ................................................................................................................94<br />
File Formats/Wrappers.........................................................................................................................95<br />
Format Wrappers...........................................................................................................................95<br />
Avid AAF+MXF (OP-Atom)............................................................................................................96<br />
MXF (OP-1a) .................................................................................................................................99<br />
Generic MXF (OP-Atom) .............................................................................................................102<br />
QuickTime....................................................................................................................................104<br />
<strong>Telestream</strong> Intermediary Format (TIFO) ......................................................................................105<br />
Chapter 7 Using Scheduled Capture Documents<br />
Using The Scheduled Capture Document..........................................................................................108<br />
About Schedules................................................................................................................................108<br />
Creating Capture Schedules..............................................................................................................109<br />
Using the Schedule Panel..................................................................................................................110<br />
November, 2012
Chapter 8 Using Log & Capture Documents<br />
95881<br />
<strong>Pipeline</strong> User’s <strong>Guide</strong> ix<br />
Creating Clip Lists for Log and Capture .............................................................................................117<br />
Using the Log & Capture Document ..................................................................................................118<br />
Using Log & Capture Controls in the Preview Panel..........................................................................119<br />
Using the Clip List Panel....................................................................................................................120<br />
Performing Other Clip Tasks........................................................................................................123<br />
Setting up and Capturing Timecode Break Recording.......................................................................125<br />
Chapter 9 Using Trigger Capture Documents<br />
Using the Trigger Document ..............................................................................................................128<br />
Using the Preview Panel....................................................................................................................129<br />
Setting up and Enabling Automatic Recording...................................................................................130<br />
Using CalDav Calendar......................................................................................................................131<br />
Manual & Timecode Break Recording ...............................................................................................133<br />
RS422 ................................................................................................................................................135<br />
Viewing and Updating Metadata Labels.............................................................................................136<br />
Chapter 10 Using Print to Tape Documents<br />
Playout & Print to Tape Overview.......................................................................................................138<br />
Creating Print to Tape Documents .....................................................................................................139<br />
Using the Clip Panel...........................................................................................................................140<br />
Chapter 11 Using Controlled Playout Documents<br />
Controlled Playout Overview..............................................................................................................144<br />
Creating Controlled Playout Documents ............................................................................................145<br />
Using the Clip Panel...........................................................................................................................147<br />
Appendix A Troubleshooting<br />
Gathering Information for Troubleshooting ........................................................................................149<br />
Workflow Information...................................................................................................................149<br />
<strong>Pipeline</strong> Device Firmware Information.........................................................................................151<br />
<strong>Pipeline</strong> Administrator Counters Panel Details............................................................................151<br />
Obtaining Debug Logs from <strong>Pipeline</strong> Control ..............................................................................151<br />
Appendix B <strong>Pipeline</strong> EDL Syntax<br />
<strong>Pipeline</strong> EDL Syntax Requirements ...................................................................................................153
x<br />
Contents<br />
Appendix C <strong>Pipeline</strong> Control Codec Profiles<br />
DNxHD Profiles ...........................................................................................................................158<br />
DV and DVCPro Profiles .............................................................................................................158<br />
DVCPro HD Profiles ....................................................................................................................158<br />
IMX Profiles .................................................................................................................................159<br />
ProRes Profiles............................................................................................................................159<br />
Motion JPEG Profiles ..................................................................................................................159<br />
SD Uncompressed 8-bit Profiles .................................................................................................160<br />
Linear PCM Profiles.....................................................................................................................160<br />
Index ................................................................................................................................................161<br />
November, 2012
Chapter 1 Introduction<br />
Figures<br />
Figure 1–1. <strong>Pipeline</strong> automates and adds value to real-time transcoding workflows.............................1<br />
Figure 1–2. <strong>Pipeline</strong> SC – compact, and easy to set up ........................................................................2<br />
Figure 1–3. <strong>Pipeline</strong> Quad – four-channels for high-volume applications..............................................2<br />
Figure 1–4. <strong>Pipeline</strong> HD Dual – two channels for high-volume HD applications....................................3<br />
Chapter 2 <strong>Pipeline</strong> Hardware, Installation & Setup<br />
Figure 2–1. <strong>Pipeline</strong> SC front panel .......................................................................................................8<br />
Figure 2–2. <strong>Pipeline</strong> SC rear panel ........................................................................................................9<br />
Figure 2–3. <strong>Pipeline</strong> Quad front panel .................................................................................................11<br />
Figure 2–4. <strong>Pipeline</strong> Quad reset switches behind front panel..............................................................11<br />
Figure 2–5. <strong>Pipeline</strong> Quad rear panel ..................................................................................................12<br />
Figure 2–6. <strong>Pipeline</strong> HD Dual front panel.............................................................................................15<br />
Figure 2–7. <strong>Pipeline</strong> HD Dual reset switches behind front panel .........................................................15<br />
Figure 2–8. <strong>Pipeline</strong> HD Dual rear panel .............................................................................................16<br />
Figure 2–9. <strong>Pipeline</strong> video, VTR & network connections .....................................................................19<br />
Figure 2–10. <strong>Pipeline</strong> video, VTR control & network LAN connections ...............................................20<br />
Chapter 4 Implementing <strong>Pipeline</strong> Workflows<br />
Figure 4–1. Eight channel <strong>Pipeline</strong> SD capture system .......................................................................29<br />
Figure 4–2. Four channel <strong>Pipeline</strong> HD capture system........................................................................29<br />
Figure 4–3. Configuration for capturing 4 HD streams onto Fibre-attached storage. ..........................30<br />
Figure 4–4. Configuration for capturing four HD streams onto NAS with Fibre-attached buffer. .........31<br />
Figure 4–5. Four channel <strong>Pipeline</strong> HD with direct attached Fibre RAID storage .................................32<br />
Figure 4–6. Four channel <strong>Pipeline</strong> HD with direct attached data buffer RAID .....................................33<br />
Figure 4–7. FIFO disk buffering enhances file writing performance.....................................................36<br />
Figure 4–8. <strong>Pipeline</strong> buffering process.................................................................................................36<br />
xi
xii<br />
Figures<br />
Chapter 5 Using <strong>Pipeline</strong> Administrator<br />
Figure 5–1. Connect dialog – enter your username and password to connect....................................44<br />
Figure 5–2. The About panel displays a link to product registration. ...................................................45<br />
Figure 5–3. Configure panel displays details & allows you to change settings....................................46<br />
Figure 5–4. Quad panel controls confidence monitoring......................................................................52<br />
Figure 5–5. Confidence monitoring is performed by channel 4 via internal Ethernet bridge................53<br />
Figure 5–6. Confidence monitor displays a banner when no media stream is present........................54<br />
Figure 5–7. Counters panel displays various processing values .........................................................55<br />
Figure 5–8. Upgrade panel allows you to upgrade <strong>Pipeline</strong> firmware..................................................57<br />
Chapter 6 Using <strong>Pipeline</strong> Control<br />
Figure 6–1. Typical <strong>Pipeline</strong> Control window for Windows (Schedule window shown)........................60<br />
Figure 6–2. Use the Task Selector to create new documents. ............................................................62<br />
Figure 6–3. Support Information. .........................................................................................................66<br />
Figure 6–4. Windows <strong>Pipeline</strong> Settings panel......................................................................................67<br />
Figure 6–5. Windows <strong>Pipeline</strong> browser and selection window.............................................................67<br />
Figure 6–6. <strong>Pipeline</strong> Control notifies you when your configuration is not supported by the <strong>Pipeline</strong>...68<br />
Figure 6–7. Vantage Workflow.............................................................................................................71<br />
Figure 6–8. Vantage Design Workflow.................................................................................................71<br />
Figure 6–9. Vantage Publish Setup .....................................................................................................72<br />
Figure 6–10. Vantage Window.............................................................................................................73<br />
Figure 6–11. Vantage Metadata Labels...............................................................................................73<br />
Figure 6–12. Agility Workflow...............................................................................................................74<br />
Figure 6–13. Agility Publish Setup .......................................................................................................75<br />
Figure 6–14. Agility Window.................................................................................................................75<br />
Figure 6–15. Side Car XML allows publishing of metadata labels. ......................................................76<br />
Figure 6–16. Copy File publisher allows you to duplicate just-completed clips. ..................................76<br />
Figure 6–17. Avid MXF Copy File publisher allows you to duplicate just-completed clips...................76<br />
Figure 6–18. FlipFactory publisher panel allows you to submit media to a specific factory.................78<br />
Figure 6–19. <strong>Pipeline</strong> Control – FlipFactory file sharing options..........................................................79<br />
Figure 6–20. The status window displays current <strong>Pipeline</strong> activity. .....................................................80<br />
Figure 6–21. Use the Video Preview panel to view the incoming video stream...................................81<br />
Figure 6–22. Use VTR controls to preview video from your attached deck or to control playback of<br />
captured clips.......................................................................................................................................82<br />
Figure 6–23. The Audio Preview panel displays decibels in real time for each audio channel............82<br />
Figure 6–24. Capture Options..............................................................................................................84<br />
Figure 6–25. Application Options.........................................................................................................86<br />
Figure 6–26. Device Options................................................................................................................86<br />
Figure 6–27. Play Out Options.............................................................................................................87<br />
Figure 6–28. Update Options...............................................................................................................88<br />
November, 2012
95881<br />
<strong>Pipeline</strong> User’s <strong>Guide</strong> xiii<br />
Figure 6–29. Discovery Options...........................................................................................................88<br />
Figure 6–30. Security Options..............................................................................................................89<br />
Figure 6–31. Licensing Options ...........................................................................................................89<br />
Figure 6–32. Video Wall Display ..........................................................................................................90<br />
Figure 6–33. Video Wall Display Borders ............................................................................................91<br />
Figure 6–34. Associated Channel Tab Activation ................................................................................92<br />
Figure 6–35. Right-click Menu .............................................................................................................92<br />
Figure 6–36. Properties Window Menu................................................................................................93<br />
Figure 6–37. Label Editor Window.......................................................................................................94<br />
Figure 6–38. Applied Labels Window...................................................................................................94<br />
Figure 6–39. Diagnostics window provides advanced information. .....................................................95<br />
Figure 6–40. Avid AAF+MXF Dialog Box.............................................................................................98<br />
Figure 6–41. MXF OP-1a Dialog Box.................................................................................................101<br />
Figure 6–42. MXF OP-Atom Dialog Box ............................................................................................103<br />
Figure 6–43. QuickTime Dialog Box ..................................................................................................105<br />
Figure 6–44. TIFO Dialog Box ...........................................................................................................106<br />
Chapter 7 Using Scheduled Capture Documents<br />
Figure 7–1. Schedule window panels and toolbars............................................................................108<br />
Figure 7–2. The schedule panel allows you to create clip events......................................................110<br />
Figure 7–3. Clip events in your schedule provide details about the clip. ...........................................111<br />
Figure 7–4. <strong>Pipeline</strong> Control displays the video clip’s folder. .............................................................114<br />
Figure 7–5. Clip event general properties..........................................................................................114<br />
Figure 7–6. Clip event label values....................................................................................................115<br />
Figure 7–7. Log Data. ........................................................................................................................115<br />
Figure 7–8. Schedule Toolbar............................................................................................................116<br />
Chapter 8 Using Log & Capture Documents<br />
Figure 8–1. Use the Log & Capture document to create clip lists and capture media from <strong>Pipeline</strong>. 119<br />
Figure 8–2. Timecode, VTR, jog wheel & control status indicators in the Log & Capture window.....119<br />
Figure 8–3. The Clip List panel allows you to work with and capture clips. .......................................120<br />
Figure 8–4. Use the General tab to ID your clip/tape & set mark points. ...........................................122<br />
Figure 8–5. Embedded Labels...........................................................................................................123<br />
Figure 8–6. Double-click to edit clip details in the General and Embedded tabs in place..................123<br />
Figure 8–7. Use clip controls to review your clip................................................................................124<br />
Figure 8–8. Timecode Break Recording settings panel. ....................................................................125
xiv<br />
Figures<br />
Chapter 9 Using Trigger Capture Documents<br />
Figure 9–1. Use the Trigger window to capture video in real time.....................................................128<br />
Figure 9–2. Naming Control...............................................................................................................129<br />
Figure 9–3. Jog and Shuttle in the Trigger window............................................................................130<br />
Figure 9–4. Automatic Recording settings panel. ..............................................................................131<br />
Figure 9–5. Clip Window....................................................................................................................132<br />
Figure 9–6. Calendar Controls...........................................................................................................132<br />
Figure 9–7. Manual Recording settings panel....................................................................................134<br />
Figure 9–8. Timecode Break Recording ............................................................................................134<br />
Figure 9–9. Labels Applied Panel. .....................................................................................................136<br />
Chapter 10 Using Print to Tape Documents<br />
Figure 10–1. Print to Tape window panels and toolbars....................................................................138<br />
Figure 10–2. Print to Tape configuration panel..................................................................................139<br />
Figure 10–3. Print to Tape Timecode panel.......................................................................................140<br />
Figure 10–4. The clip panel allows you to create a collection of clip files to print to tape. .................140<br />
Figure 10–5. The Clip Panel toolbar displays icons for frequently used commands..........................141<br />
Figure 10–6. Print Time Tape details.................................................................................................141<br />
Figure 10–7. Print Time tape during playout......................................................................................142<br />
Figure 10–8. Clip events in your schedule provide details about the clip. .........................................142<br />
Chapter 11 Using Controlled Playout Documents<br />
Figure 11–1. Controlled Playout window panels and toolbars. ..........................................................144<br />
Figure 11–2. Web services configuration panel.................................................................................145<br />
Figure 11–3. Manual control configuration panel...............................................................................145<br />
Figure 11–4. The clip panel allows you to create a collection of clip files to play out. .......................147<br />
Figure 11–5. The Clip Panel toolbar displays icons for frequently used commands..........................147<br />
Figure 11–6. Clip events in your document provide details about the clip. ........................................148<br />
November, 2012
Tables<br />
Chapter 2 <strong>Pipeline</strong> Hardware, Installation & Setup<br />
Table 2–1. Operating and Storage Temperature Parameters.................................................................6<br />
Chapter 4 Implementing <strong>Pipeline</strong> Workflows<br />
Table 4–1. Feature comparison of <strong>Pipeline</strong> client applications ............................................................26<br />
Table 4–2. Disk and Network Requirement by Media Format..............................................................38<br />
Chapter 5 Using <strong>Pipeline</strong> Administrator<br />
Table 5–1. Configure Panel controls and descriptions. ........................................................................47<br />
Table 5–2. Configure Panel controls and descriptions. ........................................................................53<br />
Table 5–3. Counters Panel controls and descriptions. .........................................................................55<br />
Chapter 6 Using <strong>Pipeline</strong> Control<br />
Table 6–1. Configuring clip file paths for <strong>Pipeline</strong> Control and FlipFactory access.l ............................80<br />
Table 6–2. Avid AAF+MXF Format Summary ......................................................................................97<br />
Table 6–3. Avid AAF+MXF Applicable Standards ................................................................................97<br />
Table 6–4. Generic MXF Format Summary........................................................................................100<br />
Table 6–5. MXF Applicable Standards ...............................................................................................100<br />
Table 6–6. MXF OP-Atom Format Summary .....................................................................................102<br />
Table 6–7. MXF OP-Atom Applicable Standards ...............................................................................102<br />
Table 6–8. QuickTime Open Format Summary..................................................................................104<br />
Table 6–9. QuickTime Open Applicable Standards............................................................................104<br />
Table 6–10. TIFO Format Summary...................................................................................................106<br />
Chapter 7 Using Scheduled Capture Documents<br />
Table 7–1. Status badges and their descriptions................................................................................112<br />
xv
xvi<br />
Tables<br />
Appendix C <strong>Pipeline</strong> Control Codec Profiles<br />
Table C–1. DNxHD Profiles................................................................................................................158<br />
Table C–2. DV and DVCPro Profiles..................................................................................................158<br />
Table C–3. DVCPro HD Profiles.........................................................................................................158<br />
Table C–4. IMX Profiles......................................................................................................................159<br />
Table C–5. ProRes Profiles................................................................................................................159<br />
Table C–6. Motion JPEG Profiles.......................................................................................................159<br />
Table C–7. SD Uncompressed Profiles..............................................................................................160<br />
Table C–8. Linear PCM Profiles .........................................................................................................160<br />
November, 2012
C H A P T E R<br />
Introduction<br />
Chapter 1, Introduction<br />
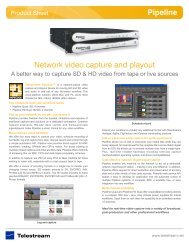
<strong>Pipeline</strong> is an industry-first network-based video capture and playout device for moving SD & HD SDI<br />
video & audio in and out of Mac OS X & Windows file-based workflows. <strong>Pipeline</strong> systems provide real-time<br />
SD and HD SDI ingest and capture into industry-standard QuickTime, MXF OP1a, and MXF OPAtom<br />
directly to any storage location.<br />
<strong>Pipeline</strong> can also be used as the front-end capture system supplying media files that can be immediately<br />
used directly with <strong>Telestream</strong>’s transcoding workflow automation tools. It can encode media into<br />
QuickTime or MXF for use in products including Apple’s Final Cut Pro, Avid Media Composer, and Adobe<br />
Premiere Pro.<br />
<strong>Pipeline</strong> captures media from tape or live sources, making it ideal for integration in broadcast, production,<br />
postproduction, government, and other professional media workflow applications. A <strong>Pipeline</strong> software<br />
development kit (SDK) is also available from <strong>Telestream</strong>, which enables integration in custom applications.<br />
PIPELINE AUTOMATES REAL-TIME MEDIA WORKFLOWS<br />
Designed into <strong>Pipeline</strong> is ease of use for broadcasters, post-production houses, government agencies,<br />
universities, and video professionals. Setting up a <strong>Pipeline</strong> is easy. Connect Ethernet and SDI, attach an<br />
optional VTR, and configure your network settings – you’re often up and running in under ten minutes.<br />
Figure 1–1. <strong>Pipeline</strong> automates and adds value to real-time transcoding workflows<br />
1
2<br />
Chapter 1<br />
Introduction<br />
TELESTREAM’S PIPELINE FAMILY OF PRODUCTS<br />
<strong>Pipeline</strong> SC<br />
<strong>Pipeline</strong> SC is a single-channel, single-session device. It is ideally suited for low-volume workflows where<br />
easy location and setup is important.<br />
Figure 1–2. <strong>Pipeline</strong> SC – compact, and easy to set up<br />
<strong>Pipeline</strong> SC offers these features:<br />
• Network-accessible SDI video encoding and playout<br />
• Real-time encoding from standard definition NTSC/PAL SDI to DV, DVCPro, IMX 30|40|50, ProRes 422<br />
SQ (SD), MJPEG A, and MPEG-2 50 mb/sec I-frame video<br />
• Real-time decoding from SD DV, DVCPro, IMX, and ProRes 422 SQ to PAL/NTSC SDI video<br />
• Extends FlipFactory, Final Cut Pro, and Episode to include workflows with tape or live sources<br />
• VBI closed caption and timecode data extraction<br />
• Shared network access to <strong>Pipeline</strong> saves time, effort and money<br />
• Digitizes tapes into online libraries for an end-to-end DAM solution<br />
• Records clips to tape for sharing with clients or colleagues.<br />
<strong>Pipeline</strong> Quad<br />
<strong>Pipeline</strong> Quad is a four-channel, rack-mounted device with Gigabit Ethernet and four independent <strong>Pipeline</strong><br />
channels. <strong>Pipeline</strong> Quad also has a Sync Input for synchronizing output streams and for extracting VITC<br />
timecode.<br />
Figure 1–3. <strong>Pipeline</strong> Quad – four-channels for high-volume applications<br />
The <strong>Pipeline</strong> Quad’s rack-mount form is ideal for high-volume, scalable workflows where throughput and<br />
performance are important factors.<br />
<strong>Pipeline</strong> Quad performs all encoding and decoding available in <strong>Pipeline</strong> SC, and adds these features:<br />
• Four concurrent, independent <strong>Pipeline</strong> channels on a single, rack-mount device<br />
• Digital SDI sync input channel (sync in only) for frame-synchronized playout across all channels<br />
• Optional, configurable confidence monitoring of client-bound video on a dedicated channel<br />
• Gigabit Ethernet and dual, common power supplies for increased fail-safe operation.<br />
November, 2012
<strong>Pipeline</strong> HD Dual<br />
95881<br />
<strong>Pipeline</strong> Benefits<br />
<strong>Pipeline</strong> User’s <strong>Guide</strong><br />
<strong>Pipeline</strong> HD Dual is a two-channel, rack-mounted system with dual Gigabit Ethernet enabling two<br />
independent <strong>Pipeline</strong> HD channels. <strong>Pipeline</strong> HD Dual also has an SDI Reference input for synchronizing<br />
output streams and for extracting VITC timecode.<br />
Figure 1–4. <strong>Pipeline</strong> HD Dual – two channels for high-volume HD applications<br />
The <strong>Pipeline</strong> HD Dual’s rack-mount form is ideal for high-volume, scalable workflows where throughput<br />
and performance are important factors.<br />
<strong>Pipeline</strong> HD Dual performs all encoding and decoding available in <strong>Pipeline</strong> SC, and adds these features:<br />
• HD codec support for Uncompressed SD 8-bit, DVCPro50, Apple ProRes 422 HD, Avid DNxHD, and<br />
DVCProHD<br />
• Two concurrent, independent <strong>Pipeline</strong> HD channels on a single, rack-mount device<br />
• Digital SD or HD SDI sync input channel (sync in only) for frame synchronized playout across all<br />
channels<br />
• Gigabit Ethernet for each channel and dual, common power supplies for increased fail-safe operation.<br />
PIPELINE BENEFITS<br />
A better way to capture and playout baseband media<br />
<strong>Telestream</strong> <strong>Pipeline</strong> is a network-based video capture and playout device for moving HD and SD video and<br />
audio in and out of any file-based workflow. This cross-platform solution offers Mac OS X and Windows<br />
users more choices for fast, robust, reliable video capture.<br />
Accessible from any workstation on your network<br />
<strong>Pipeline</strong> provides freedom from the hassles, limitations, and expense of traditional capture-card solutions<br />
on a dedicated workstation. Common network protocols, RS-422 deck control, and frame-accurate<br />
ingest/playout make <strong>Pipeline</strong> a smart choice for any video workflow.<br />
<strong>Pipeline</strong> provides direct support for MXF workflows, creating OPAtom and OP1a media. For users who<br />
need to maintain closed captions and other ancillary data, <strong>Pipeline</strong> offers methods of achieving this via<br />
MXF, TIFO, and Avid/Apple proprietary schemes.<br />
In addition to capture, <strong>Pipeline</strong> provides an easy Print to Tape interface for users who need to insert edit,<br />
assemble edit, controlled playout, or crash playout back to tape.<br />
Edit or transcode during capture for quick turnaround<br />
<strong>Pipeline</strong> allows you to edit or transcode your media files while they are being captured. There is no need to<br />
wait for the complete file to arrive. Batch ingest from an EDL file allows you to encode multiple clips from a<br />
3
4<br />
Chapter 1<br />
Introduction<br />
single tape. Plus, real-time reliable hardware encoding removes capture card/workstation operating<br />
system and driver incompatibilities.<br />
Cost-effective network import/export station<br />
<strong>Pipeline</strong> enables any machine on the network to act as a dedicated, network import/export station –<br />
making it very cost effective. In addition, <strong>Pipeline</strong> offers support for direct extraction and preservation of<br />
ancillary data and a wide variety of timecode sources. A powerful Web service API makes it easy to<br />
develop applications that automate control of multiple <strong>Pipeline</strong> systems. A comprehensive SDK is<br />
available for easy integration into any workflow.<br />
Multi-channel scalability<br />
<strong>Pipeline</strong> Quad and <strong>Pipeline</strong> HD Dual offer unparalleled encoding power in a compact 1RU box, plus they<br />
include dual power supplies for critical workflows. <strong>Pipeline</strong>s can be stacked or racked for scalability to an<br />
unlimited number of channels.<br />
Ingest into editing workflows<br />
<strong>Pipeline</strong> saves significant time and costs over traditional ingest solutions by importing media directly into<br />
your editing workflow. A single workstation or server can handle the demands of ingesting multiple SD or<br />
HD streams. QuickTime movie files are ready immediately, allowing incoming events and breaking news to<br />
be edited while they are being captured. External encoding allows you to use your workstation for editing<br />
instead of waiting for clips to be rendered. Additionally, <strong>Pipeline</strong>'s keyboard commands allow you to set up<br />
your workflow the way you want.<br />
Ingest into transcoding workflows<br />
Use <strong>Pipeline</strong> for high-quality baseband ingest into your transcoding workflow. <strong>Telestream</strong>'s FlipFactory,<br />
Vantage, Agility, and Episode products allow you to simultaneously create high-res files for storage while<br />
creating a low-res proxy, or create any number of additional file formats in near-realtime. Transcoding<br />
begins immediately while ingesting media, saving you time and money. <strong>Pipeline</strong> also preserves important<br />
metadata throughout your transcoding workflow.<br />
November, 2012
C H A P T E R<br />
<strong>Pipeline</strong> Hardware,<br />
Installation & Setup<br />
Chapter 2, <strong>Pipeline</strong> Hardware, Installation & Setup<br />
Use this chapter to unpack and set up <strong>Pipeline</strong> SC, <strong>Pipeline</strong> Quad, and <strong>Pipeline</strong> HD Dual devices, connect<br />
video equipment, and configure the <strong>Pipeline</strong> for a LAN connection. Before proceeding, work with your<br />
network administrator to determine network setting requirements: IP address, netmask, and the gateway<br />
address. You should also understand your media workflow requirements and read Disk and Network<br />
Requirement by Media Format (page 38).<br />
To set up and configure your <strong>Pipeline</strong> correctly, complete the tasks in this chapter, referring to Chapter 5,<br />
Using the Configure Panel on page 46 for network configuration tasks.<br />
Topics<br />
Note<br />
Topics in this chapter refer to all <strong>Pipeline</strong> devices unless specifically noted.<br />
� Environmental Operating Requirements (page 6)<br />
� Power Requirements (page 6)<br />
� Unpack the <strong>Pipeline</strong> (page 6)<br />
� Locate the <strong>Pipeline</strong> SC (page 7)<br />
� Locate the <strong>Pipeline</strong> Quad | <strong>Pipeline</strong> HD Dual (page 7)<br />
� <strong>Pipeline</strong> SC Hardware (page 8)<br />
� <strong>Pipeline</strong> Quad Hardware (page 9)<br />
� <strong>Pipeline</strong> HD Dual Hardware (page 13)<br />
� Connecting <strong>Pipeline</strong> to Mac OS X or Windows Computers (page 18)<br />
� Adding <strong>Pipeline</strong> to a Network (page 19)<br />
� Powering up the <strong>Pipeline</strong> (page 20)<br />
� Configuring & Connecting to <strong>Pipeline</strong>s (page 20)<br />
� Registering Your <strong>Pipeline</strong> with <strong>Telestream</strong> (page 21)<br />
2<br />
5
6<br />
Chapter 2<br />
<strong>Pipeline</strong> Hardware, Installation & Setup<br />
ENVIRONMENTAL OPERATING REQUIREMENTS<br />
Plan adequate space for cable routing from the back of the chassis. Ensure that the <strong>Pipeline</strong> is in close<br />
proximity to your Ethernet and video cables, and that cable connectors are not stressed, bent, or crimped.<br />
Also make sure that you have adequate space for a VTR deck, if necessary.<br />
Caution<br />
Do not place more than two <strong>Pipeline</strong> SCs in a stack. If you do, you risk<br />
overheating a unit, potentially leading to operational failure.<br />
Allow at least six inches (15 cm) of space between the <strong>Pipeline</strong> and the nearest object to ensure adequate<br />
airflow. Keep the temperature range within acceptable limits (table below), and keep humidity moderate in<br />
the vicinity. Temperature specifications are as follows:<br />
Table 2–1. Operating and Storage Temperature Parameters<br />
Modes Temperature Ranges<br />
Operating Temperature 0°C to 40°C (32°F to 104°F)<br />
Storage Temperature -40°C to 60°C (-40°F to 140°F)<br />
POWER REQUIREMENTS<br />
Input Voltage. Auto-sensing 100 to 240V AC, 50/60Hz<br />
Caution<br />
<strong>Telestream</strong> recommends connecting computer equipment to AC power through<br />
an uninterruptible power supply (UPS) with surge protection. Fluctuations in<br />
commercial supply voltage can damage unprotected electronic equipment.<br />
A high quality surge suppressor may be substituted if a UPS is not available, but<br />
it may not provide adequate protection.<br />
UNPACK THE PIPELINE<br />
Unpack the contents of the original shipping container; identify each component and determine that they<br />
are in satisfactory condition. If any shipping damage is visible, note it on your shipping documents and<br />
contact your shipping agent and <strong>Telestream</strong> or authorized <strong>Telestream</strong> distributor.<br />
Note<br />
Save all packaging materials and store them in a safe place. If you require service – or<br />
move your <strong>Pipeline</strong> – the packaging materials may be used for safe shipment.<br />
November, 2012
<strong>Pipeline</strong> SC Shipping Container Contents<br />
In addition to the <strong>Pipeline</strong> itself, each package contains the following:<br />
• Software Installation and User’s <strong>Guide</strong> CD-ROM<br />
• Power adapter with power cord<br />
• Quick Start <strong>Guide</strong> (in CD case)<br />
<strong>Pipeline</strong> Quad Shipping Container Contents<br />
In addition to the <strong>Pipeline</strong> itself, each package contains the following:<br />
• Software Installation and User’s <strong>Guide</strong> CD-ROM<br />
• Power cords<br />
• Quick Start <strong>Guide</strong> (in CD case)<br />
<strong>Pipeline</strong> HD Dual Shipping Container Contents<br />
In addition to the <strong>Pipeline</strong> itself, each package contains the following:<br />
• Software Installation and User’s <strong>Guide</strong> CD-ROM<br />
• Power cords<br />
• Quick Start <strong>Guide</strong> (in CD case)<br />
LOCATE THE PIPELINE SC<br />
95881<br />
Locate the <strong>Pipeline</strong> SC<br />
<strong>Pipeline</strong> User’s <strong>Guide</strong><br />
For permanent locations, select a stable and level, smooth, hard surface. Avoid carpeted or cloth-covered<br />
surfaces which inhibit airflow or reduce heat dissipation, which contributes to overheating. Select an<br />
isolated area that provides a proper operating environment and protection from accidental damage to the<br />
<strong>Pipeline</strong>. Route power, Ethernet, and other cables to protect users from a tripping hazard and damage to<br />
the <strong>Pipeline</strong>.<br />
LOCATE THE PIPELINE QUAD | PIPELINE HD DUAL<br />
For permanent locations, mount the <strong>Pipeline</strong> Quad|HD Dual in a single rack-unit slot in a computer rack<br />
and secure it in place. Make sure the following issues are adequately addressed:<br />
Elevated Operating Ambient Temperature. If installed in a closed or multi-unit rack assembly, the<br />
operating ambient temperature of the rack environment may be greater than room ambient. Therefore,<br />
consideration should be given to installing the equipment in an environment compatible with the maximum<br />
ambient temperature specified (Operating and Storage Temperature Parameters on page 6).<br />
Reduced Air Flow. Installation of the equipment in a rack should be such that the amount of air flow<br />
required for safe operation of the equipment is not compromised.<br />
Mechanical Loading. Mounting of the equipment in the rack should be such that a hazardous condition is<br />
not achieved due to uneven mechanical loading.<br />
Circuit Overloading. Consideration should be given to the connecting equipment to the supply circuit and<br />
the effect that overloading of the circuits might have on over-current protection and supply wiring.<br />
Appropriate consideration of equipment nameplate ratings should be given when addressing this concern.<br />
7
8<br />
Chapter 2<br />
<strong>Pipeline</strong> Hardware, Installation & Setup<br />
Reliable Earthing. Reliable earthing of rack-mounted equipment should be maintained. Particular<br />
attention should be given to supply connections other than direct connections to the branch circuit (e.g.<br />
use of power strips).<br />
PIPELINE SC HARDWARE<br />
The <strong>Pipeline</strong> SC is 7.5 inches (19.1 cm) wide, 5.5 inches (14.0 cm) deep, and 1.5 inches (3.8 cm) high.<br />
<strong>Pipeline</strong> SC is a compact, network-ready SDI encoder/decoder device equipped with 10/100Mb Ethernet<br />
using TCP/IP, UDP, RTSP, and RTP. It uses Bonjour for service discovery. Additionally, it employs Serial<br />
Digital Interface (BNC, SMPTE-259M 270mb/sec) with 8-channel embedded audio input and output ports,<br />
plus automatic detection of 525/625. It also has an RS-422 deck control port using Sony 9 Pin Protocol.<br />
<strong>Pipeline</strong> can capture and play out NTSC/PAL having DV/DVCPRO 25Mb, IMX 30|40|50 and MPEG-2<br />
I-Frame 50Mb MJPEG, ProResSQ video (capture only) video, and 48 KHz, 16/24 bit, uncompressed<br />
audio.<br />
Processing VBI Closed Captions and Timecode Data<br />
<strong>Pipeline</strong> automatically processes Vertical Blanking Interval (VBI) data on ingest operations to obtain closed<br />
caption and timecode data. Closed captions are extracted from line 21, and timecode from lines 16 through<br />
20 (5 lines beginning with line 16). The last line (usually 20) with a valid timecode is the line whose data is<br />
used. <strong>Pipeline</strong> encodes the closed caption and timecode data into the data stream of the digital output,<br />
making it available for processing by client applications, such as FlipFactory, Vantage, Agility, and Episode.<br />
Front Panel Indicators<br />
The front panel contains LED indicators, making it easy to check its status.<br />
Figure 2–1. <strong>Pipeline</strong> SC front panel<br />
SDI In<br />
LED<br />
There are three LEDs you use to determine the state of the <strong>Pipeline</strong>:<br />
Power. Displays green light when power is present.<br />
SDI Out<br />
LED<br />
Power On<br />
LED<br />
SDI In. Display green light when <strong>Pipeline</strong> is configured to encode SDI In and send it out via Ethernet. How<br />
media is encoded is determined by the selected codec. If the LED lights orange, data is being lost. The<br />
reason should be corrected before continuing operation. During a firmware upgrade, this LED lights yellow<br />
until you reboot.<br />
SDI Out. Displays green light when the <strong>Pipeline</strong> is configured to decode digital media from the Ethernet<br />
port, and send decoded media to the SDI Out port. If the LED lights orange, data is being lost. The reason<br />
should be corrected before continuing operation.<br />
November, 2012
Rear Panel Ports and Connectors<br />
The rear panel contains the power jack, plus video and network connector ports.<br />
Figure 2–2. <strong>Pipeline</strong> SC rear panel<br />
95881<br />
DC Power<br />
Connector<br />
10/100<br />
Ethernet<br />
<strong>Pipeline</strong> Quad Hardware<br />
<strong>Pipeline</strong> User’s <strong>Guide</strong><br />
When connecting video equipment, Ethernet, and RS-422 cables, be sure that the power supply is<br />
disconnected from the <strong>Pipeline</strong>. Failure to do so may result in equipment malfunction or damage.<br />
DC Power Port. Use to connect and turn on the <strong>Pipeline</strong>. Only connect the <strong>Pipeline</strong> to power using the<br />
<strong>Telestream</strong>-supplied power supply.<br />
10/100 Ethernet Port. The Ethernet port has two LEDs:<br />
Link (left LED): If the LED is not lit, no link is available. If the LED is lit orange, link has been established.<br />
Connection/Activity (right LED): If the port is connected at 100 Mb, the LED lights green, and blinks on<br />
activity. If the port is connected at 10 Mb, the LED is unlit, but blinks green during activity.<br />
RS-422. Female DB-9 RS-422 port for VTR, using Sony 9 Pin protocol.<br />
SDI In. BNC jack for SDI input signal.<br />
SDI Out. BNC jack for SDI output.<br />
Caution<br />
If the Connection LED is unlit, the <strong>Pipeline</strong> is operating at 10 Mb, which is<br />
unacceptable for real time video traffic. Resolve the problem before continuing,<br />
to avoid video stream data loss.<br />
PIPELINE QUAD HARDWARE<br />
VTR RS-422<br />
The <strong>Pipeline</strong> Quad is 17.3 inches (43.9 cm) wide, 13.2 inches (33.5 cm) deep, and 1.5 inches (3.8 cm)<br />
high. <strong>Pipeline</strong> Quad is a single rack unit device, with four onboard SDI encoder/decoder devices equipped<br />
with an external Gigabit Ethernet port and an onboard switch routing 100Mb Ethernet to each device, using<br />
TCP/IP, UDP, RTSP, and RTP and Bonjour for service discovery. Serial Digital Interfaces are provided for<br />
each device (BNC, SMPTE-259M 270mb/sec).<br />
There are 4 SDI in and out ports (per Quad, not per channel), each supporting up to 16 channels of<br />
embedded audio, with four SDI in and out ports (per Quad) with automatic detection of 525/625, and RS-<br />
422 deck control ports, using Sony 9 Pin Protocol.<br />
SDI<br />
In<br />
SDI<br />
Out<br />
9
10<br />
Chapter 2<br />
<strong>Pipeline</strong> Hardware, Installation & Setup<br />
<strong>Pipeline</strong> Quads can encode and decode NTSC or PAL with DV/DVCPRO 25Mb, IMX 30, 40, 50, MPEG2 I-<br />
Frame 50Mb MJPEG, and ProRes SQ video (encode only, in FlipFactory workflows), and 48 kHZ, 16 and<br />
24 bit, uncompressed audio, in up to four concurrent sessions; each individual <strong>Pipeline</strong> channel operates<br />
independently, each communicating via a common physical Ethernet port on the Quad’s backplane.<br />
The <strong>Pipeline</strong> Quad and HD Dual provides common, dual power supplies for redundancy and fail-safe<br />
operation. <strong>Telestream</strong> highly recommends that both power supplies be connected during operations. The<br />
<strong>Pipeline</strong> can operate normally on a single power supply, however you will lose the redundant safety of the<br />
second power supply.<br />
Using SDI Sync Input<br />
The SDI Sync Input is used in both capture and playout modes, but for two different purposes.<br />
In capture mode, the SDI Sync Input is used as a method for supplying a common timecode reference to<br />
all input channels. For the timecode to be extracted, the SDI signal connected to the SDI Sync Input must<br />
contain a valid timecode in the ancillary data area of the signal. The SDI signal must be a digital signal that<br />
is frame synchronized with the SDI signals used as input video sources connected to each channel's input.<br />
An analog sync/reference signal, such as bi-level or tri-level, cannot be connected to the SDI Sync input.<br />
In playout mode, the SDI Sync Input is used as a frame synchronization source for each channel's SDI<br />
outputs. Any timecode on the SDI Sync Input is ignored in this mode. If no signal is connected to the SDI<br />
Sync Input, each channel's SDI output will free run (i.e. they will not be synchronized with each other or<br />
with any common reference). An analog sync/reference signal, such as bi-level or tri-level, cannot be<br />
connected to the SDI Sync input<br />
Using SDI Sync Out<br />
Re-clocked loop-through port of SDI Sync In. You can use this re-clocked reference for additional <strong>Pipeline</strong>s<br />
or other devices. This output is only active when the <strong>Pipeline</strong> device is powered up and is in an operational<br />
state.<br />
Processing Closed Caption and Timecode Data<br />
<strong>Pipeline</strong> automatically processes Ancillary Data on ingest operations to obtain closed captions and<br />
timecode data. <strong>Pipeline</strong> encodes the closed caption and timecode data into the data stream of the digital<br />
output, making it available for further processing by client applications, such as FlipFactory, Vantage,<br />
Agility, and Episode.<br />
The <strong>Pipeline</strong> automatically analyzes the signal during the Vertical Blanking Interval (VBI) on ingest<br />
operations to obtain closed captions and timecode data. Closed caption data is extracted from line 21, and<br />
timecode data from lines 16 through 20 (the 5 lines beginning with line 16). The last line (usually line 20)<br />
with a valid timecode is the line whose data is used.<br />
November, 2012
Front Panel Indicators<br />
The front panel contains LED indicators, making it easy to check its status.<br />
Figure 2–3. <strong>Pipeline</strong> Quad front panel<br />
SDI In LED (1 per channel) Link LED<br />
SDI Out LED (1 per channel)<br />
95881<br />
<strong>Pipeline</strong> Quad Hardware<br />
<strong>Pipeline</strong> User’s <strong>Guide</strong><br />
SDI In. One per channel. Lights green when the <strong>Pipeline</strong> is configured to encode SDI In and send it out via<br />
the Ethernet port. Media is encoded based on the selected codec. If the LED lights orange, data is being<br />
lost. Correct problem before continuing. During a firmware upgrade, the LED lights yellow until the upgrade<br />
completes and the <strong>Pipeline</strong> is automatically rebooted.<br />
SDI Out. One per channel. Lights green when the <strong>Pipeline</strong> is configured to decode digital media from the<br />
Ethernet port, and send decoded media to the SDI Out port. If the LED lights orange, data is being lost.<br />
The problem should be corrected before continuing operation.<br />
The LED blinks orange at one second intervals when the internal Ethernet switch and network that<br />
connects the four <strong>Pipeline</strong>s has failed. Usually, at least one of the <strong>Pipeline</strong>s can’t communicate, indicating<br />
that potentially an input channel has failed, and confidence monitoring is not operational. Reboot <strong>Pipeline</strong><br />
to solve the problem, or contact <strong>Telestream</strong> customer service.<br />
Link. Lights green when Ethernet link has been established.<br />
Sync. Lights green when an SDI signal is detected on the sync reference input channel.<br />
PWR 1 & 2. Lights green when power is present and the power supply is operating normally. PWR1<br />
indicates power supply 1; PWR2 indicates power supply 2. An orange PWR LED indicates a failed power<br />
supply or that no power is present.<br />
If a power supply fails, complete jobs in progress. RMA the <strong>Pipeline</strong> to <strong>Telestream</strong> for repair as soon as<br />
practical.<br />
Front Panel Reset Switches<br />
Sync LED<br />
Power 1 & 2 LEDs<br />
With the front panel bezel removed, five recessed reset buttons are exposed. They are not labeled.<br />
Figure 2–4. <strong>Pipeline</strong> Quad reset switches behind front panel<br />
Channel 1 reset Factory defaults<br />
Channel 2 reset Channel 4 reset<br />
Channel 3 reset<br />
Channel 1 Reset. Insert a pointed object to depress the recessed button to perform a hardware reset on<br />
Channel 1. The channel will be disconnected from any client currently attached.<br />
11
12<br />
Chapter 2<br />
<strong>Pipeline</strong> Hardware, Installation & Setup<br />
Channel 2 Reset. Insert a pointed object to depress the recessed button to perform a hardware reset on<br />
Channel 2. The channel will be disconnected from any client currently attached.<br />
Channel 3 Reset. Insert a pointed object to depress the recessed button to perform a hardware reset on<br />
Channel 3. The channel will be disconnected from any client currently attached.<br />
Channel 4 Reset. Insert a pointed object to depress the recessed button to perform a hardware reset on<br />
Channel 4. The channel will be disconnected from any client currently attached.<br />
Factory Default Reset. Insert a pointed object to depress the recessed button to restore the factory<br />
defaults of the <strong>Pipeline</strong> device. Both channels are returned to their original factory default values, including<br />
IP address and global options selected. During reset all LEDs glow green. When reset is complete, the<br />
LEDs return to their normal state.<br />
Rear Panel Ports and Connectors<br />
The rear panel contains power plugs, plus video and network connector ports.<br />
Figure 2–5. <strong>Pipeline</strong> Quad rear panel<br />
AC Power<br />
Connectors<br />
Note<br />
Resetting factory defaults does not change the firmware or app loader versions.<br />
Sync In/Out<br />
SDI In (one per channel)<br />
VTR RS-422<br />
(one per channel)<br />
SDI Out (one per channel)<br />
When connecting video equipment, Ethernet, and RS-422 cables, be sure that the power supply is<br />
disconnected from the <strong>Pipeline</strong>. Failure to do so may result in equipment malfunction or damage.<br />
Gigabit<br />
Ethernet<br />
AC Power Plugs. Use to connect and turn on the <strong>Pipeline</strong>. Only connect the <strong>Pipeline</strong> Quad to power using<br />
the <strong>Telestream</strong>-supplied power cords. To insure fail-safe operation, be sure to use both power supplies.<br />
These supply common power to the <strong>Pipeline</strong>; if one power supply fails, the <strong>Pipeline</strong> continues to operate.<br />
Sync In. The SDI Sync Input is used in both capture and playout modes, but for two different purposes.<br />
In capture mode, the SDI Sync Input is used as a method for supplying a common timecode reference to<br />
all input channels. For the timecode to be extracted, the SDI signal connected to the SDI Sync Input must<br />
contain a valid timecode in the ancillary data area of the signal. The SDI signal must be a digital signal that<br />
is frame-synchronized with any SDI signals used as video sources connected to each channel’s input. An<br />
analog signal cannot be connected to the SDI Sync input.<br />
In playout mode, the SDI Sync Input is used as a frame-synchronization source for each channel’s SDI<br />
outputs. Any timecode on the SDI Sync Input is ignored in this mode. If no signal is connected to the SDI<br />
November, 2012
95881<br />
<strong>Pipeline</strong> HD Dual Hardware<br />
<strong>Pipeline</strong> User’s <strong>Guide</strong><br />
Sync Input, each channel’s SDI output will free run (they will not be synchronized with each other or with<br />
any common reference).<br />
Note<br />
<strong>Pipeline</strong> does not support any analog (bi-level or tri-level) reference. Do not attempt to<br />
use any form of analog reference with <strong>Pipeline</strong>.<br />
Sync Out. Re-clocked loop-through port of SDI Sync In. You can use this re-clocked reference for<br />
additional <strong>Pipeline</strong>s or other devices.<br />
RS-422. Female DB-9 RS-422 port for VTR, using Sony 9 Pin Protocol (one per channel).<br />
SDI In. BNC jack for SDI input (one per channel).<br />
SDI Out. BNC jack for SDI output (one per channel).<br />
WARNING<br />
SDI-OUT is intended to be used for monitoring of the looped SDI-IN input source<br />
and should not be used to distribute this source to additional capture channels.<br />
Do not connect the looped SDI-OUT signal into any other <strong>Pipeline</strong> SDI-IN port.<br />
This may cause unintended capture interruptions on the channel connected to<br />
the looped source.<br />
Gigabit Ethernet Port. The Ethernet RJ-45 jack has two LEDs: If the left, orange LED is lit and the right,<br />
green LED is lit, the port is operating at 1Gbs (gigabit). If only the orange LED is lit, the Ethernet port is not<br />
connected. Be sure to use CAT-6 cabling end-to-end from <strong>Pipeline</strong> to your Macintosh or Windows PC<br />
client for best results.<br />
Caution<br />
If only the green LED is lit or the LED is unlit, the <strong>Pipeline</strong> is operating at 100 or<br />
10 Mb respectively. These data rates are unacceptable for real time video traffic<br />
from all four channels. Resolve the problem by connecting at 1 Gbs before<br />
processing jobs to avoid data loss.<br />
PIPELINE HD DUAL HARDWARE<br />
The <strong>Pipeline</strong> HD Dual is 17.3 inches (43.9 cm) wide, 13.2 inches (33.5 cm) deep, and 1.5 inches (3.8 cm)<br />
high. <strong>Pipeline</strong> HD Dual is a single rack unit device with two onboard HD/SD-SDI encoder/decoder devices<br />
equipped with two external Gigabit Ethernet ports. It uses TCP/IP, UDP, RTSP, and RTP and Bonjour for<br />
service discovery. Serial Digital Interfaces are provided for each device (BNC, SMPTE-259M 270mb/sec)<br />
with 2 SDI in and out ports (per HD Dual), each supporting up to 16 channels of embedded audio, with<br />
automatic input format detection. It also provides RS-422 deck control ports using Sony 9-Pin Protocol.<br />
<strong>Pipeline</strong> HD Dual can encode DV/DVCPRO 25/50, IMX 30|40|50, MPEG-2 50M I-frame (FlipFactory<br />
workflows) MJPEG, ProRes HQ/SQ/LT/Proxy, Avid DNxHD and DVCProHD video, and 48 KHz, 16/24 bit,<br />
uncompressed audio.<br />
13
14<br />
Chapter 2<br />
<strong>Pipeline</strong> Hardware, Installation & Setup<br />
The <strong>Pipeline</strong> Quad and HD Dual provides dual power supplies for redundancy and fail-safe operation.<br />
<strong>Telestream</strong> highly recommends that both power supplies be connected during operations. <strong>Pipeline</strong> can<br />
operate normally on a single power supply, however you will lose the redundant safety of the second<br />
power supply.<br />
Using SDI Sync Input<br />
The SDI Sync Input is used in both capture and playout modes, but for two different purposes.<br />
In capture mode, the SDI Sync Input is used as a method for supplying a common timecode reference to<br />
all input channels. For the timecode to be extracted, the SDI signal connected to the SDI Sync Input must<br />
contain a valid timecode in the ancillary data area of the signal. The SDI signal must be a digital signal that<br />
is frame synchronized with the SDI signals used as input video sources connected to each channel's input.<br />
An analog sync/reference signal, such as bi-level or tri-level, cannot be connected to the SDI Sync input.<br />
In playout mode, the SDI Sync Input is used as a frame synchronization source for each channel's SDI<br />
outputs. Any timecode on the SDI Sync Input is ignored in this mode. If no signal is connected to the SDI<br />
Sync Input, each channel's SDI output will free run (i.e. they will not be synchronized with each other or<br />
with any common reference). An analog sync/reference signal, such as bi-level or tri-level, cannot be<br />
connected to the SDI Sync input<br />
Using SDI Sync Out<br />
Re-clocked loop-through port of SDI Sync In. You can use this re-clocked reference for additional <strong>Pipeline</strong>s<br />
or other devices. This output is only active when the <strong>Pipeline</strong> device is powered up and is in an operational<br />
state.<br />
Processing Closed Caption and Timecode Data<br />
<strong>Pipeline</strong> automatically processes Ancillary Data on ingest operations to obtain closed captions and<br />
timecode data. <strong>Pipeline</strong> encodes the closed caption and timecode data into the data stream of the digital<br />
output, making it available for further processing by client applications, such as FlipFactory and Episode.<br />
When a Standard Definition SDI signal is connected, the <strong>Pipeline</strong> automatically analyzes the signal during<br />
the Vertical Blanking Interval (VBI) on ingest operations to obtain closed captions and timecode data.<br />
Closed caption data is extracted from line 21, and timecode data from lines 16 through 20 (the 5 lines<br />
beginning with line 16). The last line (usually line 20) with a valid timecode is the line whose data is used.<br />
When an HD SDI signal is connected, the <strong>Pipeline</strong> automatically processes all ancillary data packets to<br />
obtain closed captions and timecode data. Closed caption data is extracted from Ancillary data packets<br />
with a DID of 0x161 and timecode data is extracted from Ancillary data packets with a DID of 0x260.<br />
November, 2012
Front Panel Indicators<br />
The front panel contains LED indicators, making it easy to check its status.<br />
Figure 2–6. <strong>Pipeline</strong> HD Dual front panel<br />
95881<br />
<strong>Pipeline</strong> HD Dual Hardware<br />
<strong>Pipeline</strong> User’s <strong>Guide</strong><br />
In LED (1 per channel)<br />
Power 1 & 2 LEDs<br />
Out LED (1 per channel) LAN LED<br />
Reference LED<br />
Mode LED<br />
SDI In. One per channel. Lights green continuously when an HD source is connected. Flashes green when<br />
an SD source is connected. If the LED flashes orange, data is being lost. The problem should be corrected<br />
before continuing operation.<br />
SDI Out. One per channel. Lights green continuously when HD format media is being output. Flashes<br />
green when SD format media is being output. If the LED lights orange, data is being lost. The problem<br />
should be corrected before continuing operation.<br />
Mode. Lights green continuously when the selected codec is creating HD content. Flashes green when the<br />
selected codec is creating SD content.<br />
Reference. Lights green continuously when an HD source signal is detected on the sync input reference<br />
channel. Flashes green when the source signal is SD.<br />
Sync. Lights green when an HD source signal is detected on the sync input reference channel. Flashes<br />
green when the source signal is SD.<br />
LAN. Flashes green to indicate LAN activity.<br />
PWR 1 & 2. Lights green when power is present and the power supply is operating normally. PWR1<br />
indicates power supply 1; PWR2 indicates power supply 2. Orange indicates a failed power supply or that<br />
power is not present. If a power supply fails, complete jobs in progress and RMA the <strong>Pipeline</strong> to<br />
<strong>Telestream</strong> for repair as soon as practical.<br />
Front Panel Reset Switches<br />
With the front panel bezel removed, three recessed reset buttons are exposed. They are not labeled.<br />
Figure 2–7. <strong>Pipeline</strong> HD Dual reset switches behind front panel<br />
Channel 1 reset Factory defaults<br />
Unused<br />
Channel 2 reset<br />
Unused<br />
Channel 1 Reset. Insert a pointed object to depress the recessed button to perform a hardware reset on<br />
Channel 1. The channel will be disconnected from any client currently attached.<br />
15
16<br />
Chapter 2<br />
<strong>Pipeline</strong> Hardware, Installation & Setup<br />
Channel 2 Reset. Insert a pointed object to depress the recessed button to perform a hardware reset on<br />
Channel 2. The channel will be disconnected from any client currently attached.<br />
Factory Default Reset. Insert a pointed object to depress the recessed button to restore the factory<br />
defaults of the <strong>Pipeline</strong> device. Both channels are returned to their original factory default values, including<br />
IP address and global options selected. During reset all LEDs glow green. When reset is complete, the<br />
LEDs return to their normal state.<br />
Note<br />
Rear Panel Ports and Connectors<br />
The rear panel contains power plugs, plus video and network connector ports.<br />
Figure 2–8. <strong>Pipeline</strong> HD Dual rear panel<br />
AC Power Connectors<br />
Resetting factory defaults does not change the firmware or app loader versions.<br />
Gigabit Ethernet<br />
(one per channel)<br />
When connecting video equipment, Ethernet, and RS-422 cables, be sure that the power supply is<br />
disconnected from the <strong>Pipeline</strong>. Failure to do so may result in equipment malfunction or damage.<br />
AC Power Plugs. Use to connect and turn on the <strong>Pipeline</strong>. Only connect the <strong>Pipeline</strong> Quad to power using<br />
the <strong>Telestream</strong>-supplied power cords. To insure fail-safe operation, be sure to use both power supplies.<br />
These supply common power to the <strong>Pipeline</strong>; if one power supply fails, the <strong>Pipeline</strong> continues to operate.<br />
Sync In. The SDI Sync Input is used in both capture and playout modes, but for two different purposes.<br />
In capture mode, the SDI Sync Input is used as a method for supplying a common timecode reference to<br />
all input channels. For the timecode to be extracted, the SDI signal connected to the SDI Sync Input must<br />
contain a valid timecode in the ancillary data area of the signal. The SDI signal must be a digital signal that<br />
is frame-synchronized with any SDI signals used as video sources connected to each channel’s input. An<br />
analog signal cannot be connected to the SDI Sync input.<br />
In playout mode, the SDI Sync Input is used as a frame-synchronization source for each channel’s SDI<br />
outputs. Any timecode on the SDI Sync Input is ignored in this mode. If no signal is connected to the SDI<br />
Sync Input, each channel’s SDI output will free run (they will not be synchronized with each other or with<br />
any common reference).<br />
Note<br />
VTR RS-422<br />
(one per channel)<br />
SDI Out (one per channel)<br />
Sync In/Out<br />
SDI In (one per channel)<br />
<strong>Pipeline</strong> does not support any analog (bi-level or tri-level) reference. Do not attempt to<br />
use any form of analog reference with <strong>Pipeline</strong>.<br />
November, 2012
95881<br />
<strong>Pipeline</strong> HD Dual Hardware<br />
<strong>Pipeline</strong> User’s <strong>Guide</strong><br />
Sync Out. Re-clocked loop-through port of SDI Sync In. Use for additional <strong>Pipeline</strong>s or other devices.<br />
RS-422. Female DB-9 RS-422 port for VTR, using Sony 9 Pin Protocol (one per channel).<br />
SDI In. BNC jack for SD-SDI or HD-SDI input (one per channel).<br />
SDI Out. BNC jack for SD-SDI or HD-SDI output (one per channel).<br />
WARNING<br />
SDI-OUT is intended to be used for monitoring of the looped SDI-IN input source<br />
and should not be used to distribute this source to additional capture channels.<br />
Do not connect the looped SDI-OUT signal into any other <strong>Pipeline</strong> SDI-IN port.<br />
This may cause unintended capture interruptions on the channel connected to<br />
the looped source.<br />
Gigabit Ethernet Ports. Each Ethernet RJ-45 jack has two LEDs: If the left, orange LED is lit and the<br />
right, green LED is lit, the port is operating at 1Gbs (gigabit). If only the orange LED is lit, the Ethernet port<br />
is not connected. Be sure to use CAT-6 cabling end-to-end from <strong>Pipeline</strong> to your Macintosh or Windows<br />
PC client for best results.<br />
Caution<br />
If only the green LED is lit or the LED is unlit, the <strong>Pipeline</strong> is operating at 100MB<br />
or less – rates unacceptable for real time video on all four channels. Resolve the<br />
problem by connecting at 1 Gb/sec. before processing jobs to avoid data loss.<br />
17
18<br />
Chapter 2<br />
<strong>Pipeline</strong> Hardware, Installation & Setup<br />
CONNECTING PIPELINE TO MAC OS X OR WINDOWS<br />
COMPUTERS<br />
<strong>Pipeline</strong> can be connected to a Mac OS X computer – a Final Cut Pro workstation or Episode Engine<br />
server, for example. Or, it can be connected to a Windows computer – a FlipFactory server or <strong>Pipeline</strong><br />
Control workstation, for example. You can connect <strong>Pipeline</strong>s directly or via LAN using a Gigabit Ethernet<br />
(Gig-E) switch for <strong>Pipeline</strong> Quad|HD Dual or 100MB Ethernet for <strong>Pipeline</strong> SC.<br />
Note<br />
For workstations or servers with multiple network adapters, you should always connect<br />
the <strong>Pipeline</strong> (or switch) to the second interface on the system (Windows: Local Area<br />
Connection 2, Mac OS X: en1).<br />
If you are not able to connect to <strong>Pipeline</strong>s using this configuration you may have<br />
devices on your first network using the same address scheme as your <strong>Pipeline</strong>s. To<br />
correct this, run the following commands in a command window (verify with your<br />
network administrator).<br />
This example is for modifying your system's routing table for a <strong>Pipeline</strong> configuration<br />
using the default 169.254.xxx.xxx self-assigned address scheme. Modify these<br />
commands accordingly for your configuration:<br />
Mac OS X:<br />
To remove:<br />
sudo route delete -net 169.254.0.0/16<br />
To add it back to en1:<br />
sudo route add -net 169.254.0.0/16 -interface en1<br />
Windows:<br />
When <strong>Pipeline</strong> Control discovers <strong>Pipeline</strong>s on the network, it records the Network<br />
Interface Card (NIC) that the <strong>Pipeline</strong> responded on. The computer's routing tables are<br />
then examined to see if a valid route is available to the <strong>Pipeline</strong> Control application on<br />
which to communicate. If a valid route is not found then Update Route is displayed.<br />
Click Update Route to add a valid entry into the computer's routing table.<br />
Click R<br />
Click<br />
Update<br />
Route<br />
Click R to refresh status. A green bullet icon indicates that this <strong>Pipeline</strong> is available. A<br />
red bullet indicates that it is currently busy (connected to another client application).<br />
Gray indicates offline; yellow indicates an unknown state. To enable you to select a<br />
<strong>Pipeline</strong> to set up a document for use later, you can select a <strong>Pipeline</strong> regardless of its<br />
state. This dialog reports the <strong>Pipeline</strong>'s current status (idle, capturing, recording,<br />
unknown), name, input source, firmware version, device type (SD or HD) and system<br />
NIC connection.<br />
If any type of Bonjour is installed, the R icon is greyed out and the refresh functionality<br />
is not available.<br />
November, 2012
95881<br />
Adding <strong>Pipeline</strong> to a Network<br />
<strong>Pipeline</strong> User’s <strong>Guide</strong><br />
Use the instructions in this section to make Ethernet and video connections to your <strong>Pipeline</strong> when<br />
connecting it to a Mac OS X or Windows computer – either directly or via a switch.<br />
Figure 2–9. <strong>Pipeline</strong> video, VTR & network connections<br />
RS-422<br />
VTR Control<br />
SDI<br />
Video/Audio<br />
Ethernet<br />
1. Make sure the <strong>Pipeline</strong> is not plugged in.<br />
2. Connect the <strong>Pipeline</strong> Ethernet port directly, or via a switch, to the computer with an Ethernet cable. (A<br />
crossover cable may be required for direct connections with some NICs.)<br />
3. Connect your VTR SDI Out port to the <strong>Pipeline</strong> SDI In port with a BNC coax cable connected to your<br />
video source – a VTR, for example.<br />
4. (Optional) Connect the VTR RS-422 port to the <strong>Pipeline</strong> RS-422 port.<br />
5. (<strong>Pipeline</strong> Quad/HD – Optional) Connect video equipment to your Sync In and Sync Out video ports.<br />
ADDING PIPELINE TO A NETWORK<br />
RS-422<br />
VTR Control<br />
SDI<br />
Video/Audio<br />
Ethernet<br />
One or more <strong>Pipeline</strong>s can connect to a LAN. To assure acceptable performance, be sure to connect<br />
<strong>Pipeline</strong>s to a media network or a single Gigabit switch dedicated specifically for <strong>Pipeline</strong>s, edit stations,<br />
and media servers. If you connect to a backbone, ensure it is Gigabit, to handle the real-time traffic. Make<br />
certain that switches do not have a firewall, and that TCP and UDP ports 7000/7002 (video), 7004/7006<br />
(audio), 7008/7010 (status), 554 (RTSP), and 80 (http) are open.<br />
Each <strong>Pipeline</strong> channel is assigned a unique, automatically assigned, link-local IP address in the range<br />
169.254.1.0 to 169.254.255.255, so that it can communicate directly with your computer without a<br />
gateway. Each of the <strong>Pipeline</strong>s (channels) in a <strong>Pipeline</strong> HD Dual and <strong>Pipeline</strong> Quad is assigned an<br />
incremental IP address.<br />
You can also set up the <strong>Pipeline</strong> with a static address. Make IP address modifications with <strong>Pipeline</strong><br />
Administrator, a Web application built into each <strong>Pipeline</strong> (Using the Configure Panel on page 46).<br />
WARNING<br />
Do not enable Windows or Internet Explorer Proxy server on a <strong>Pipeline</strong> System<br />
host machine. This may cause various network and performance issues related<br />
to the <strong>Pipeline</strong> Control application.<br />
19
20<br />
Chapter 2<br />
<strong>Pipeline</strong> Hardware, Installation & Setup<br />
Use these instructions to make power, Ethernet, and video connections to one or more <strong>Pipeline</strong>s when<br />
connecting it to a LAN where FlipFactory server or Final Cut Pro editing stations are located.<br />
Figure 2–10. <strong>Pipeline</strong> video, VTR control & network LAN connections<br />
RS-422<br />
VTR Control<br />
100MB<br />
Ethernet<br />
SDI<br />
Video/Audio<br />
1. Make sure the <strong>Pipeline</strong> is not plugged in.<br />
2. Connect the <strong>Pipeline</strong> Ethernet port to a network switch with an Ethernet cable on the same LAN as<br />
your Final Cut Pro editing station or FlipFactory server.<br />
3. Connect each <strong>Pipeline</strong> SDI IN port to an SDI source such as your VTR or SDI router with a BNC cable.<br />
4. (Optional) Connect each <strong>Pipeline</strong>’s RS-422 port to an RS-422 control, such as your VTR.<br />
5. (<strong>Pipeline</strong> Quad and HD Dual – Optional) Connect video equipment to your Sync In and Sync Out video<br />
ports.<br />
Note<br />
POWERING UP THE PIPELINE<br />
RS-422<br />
VTR Control<br />
100MB<br />
Ethernet<br />
SDI<br />
Video/Audio<br />
Do not enable Windows or Internet Explorer Proxy server on a <strong>Pipeline</strong> System host<br />
machine. This may cause various network and performance issues related to the<br />
<strong>Pipeline</strong> Control application.<br />
For <strong>Pipeline</strong> SC, plug the <strong>Telestream</strong>-supplied power adapter jack into the power port on the rear panel,<br />
and then connect the power cord to an AC source (or power converter) to power the <strong>Pipeline</strong> on.<br />
For <strong>Pipeline</strong> HD Dual and <strong>Pipeline</strong> Quad (with redundant power supplies) plug both <strong>Telestream</strong>-supplied<br />
power cords into the power plugs on the rear panel, and then connect each power cord to an AC source (or<br />
power converter) to power the <strong>Pipeline</strong> on.<br />
CONFIGURING & CONNECTING TO PIPELINES<br />
GigaBit Ethernet Backbone<br />
As with other network devices, each <strong>Pipeline</strong> has a fixed MAC address and a default IP address, which<br />
you can change. Before using <strong>Pipeline</strong>, you’ll need to contact your IT administrator (especially when<br />
connecting to a LAN) to determine which IP address and net mask to use for each <strong>Pipeline</strong> and how to set<br />
it up (automatic link-local, DHCP F/W v2.4 or earlier, or static), based on your facility’s network address<br />
policy.<br />
November, 2012
Configuring <strong>Pipeline</strong> Network Settings<br />
95881<br />
Registering Your <strong>Pipeline</strong> with <strong>Telestream</strong><br />
<strong>Pipeline</strong> User’s <strong>Guide</strong><br />
To view and modify the <strong>Pipeline</strong>’s network configuration, log on and display the Configure panel (click<br />
Configure in the toolbar at the top of <strong>Pipeline</strong> Administrator). See Using the Configure Panel on page 46.<br />
After plugging the <strong>Pipeline</strong> into the network and powering it on, you can connect to <strong>Pipeline</strong> via Bonjour, or<br />
you can use the <strong>Pipeline</strong>’s default IP address.<br />
When you connect, <strong>Pipeline</strong> Administrator displays in your browser. For details on using <strong>Pipeline</strong><br />
Administrator, see Chapter 5, Using <strong>Pipeline</strong> Administrator on page 43.<br />
Note<br />
In the unlikely event that you can’t connect, try these steps:<br />
Make sure the <strong>Pipeline</strong> is connected to a switch on your LAN and powered on, and the<br />
Power LED on the front is lit.<br />
Ping the <strong>Pipeline</strong> using the IP address. If you can’t ping it, there may be an IP address<br />
conflict, causing <strong>Pipeline</strong> to use a secondary address. Unplug the <strong>Pipeline</strong> and connect<br />
the <strong>Pipeline</strong> directly to a computer via an Ethernet cable, plug it in and ping it again.<br />
If you’re connected directly to a computer, but can’t ping it, you may be using a standard<br />
Ethernet cable, but due to computer limitations, you need to use a cross-over cable.<br />
If you can ping the <strong>Pipeline</strong> but still can’t connect, you may have a firewall blocking the<br />
connection.<br />
See Appendix A, TroubleShooting, for assistance.<br />
REGISTERING YOUR PIPELINE WITH TELESTREAM<br />
When the <strong>Pipeline</strong> is operational and you can connect via <strong>Pipeline</strong> Administrator, register the <strong>Pipeline</strong> with<br />
<strong>Telestream</strong> – display the About panel and click the Register button. Follow the steps on the Web page to<br />
complete registration.<br />
If the computer you’re using is on a LAN without Internet access, use a computer that has Internet access<br />
and go to dynamic.telestream.net/pipeline-register/register.asp to register your <strong>Pipeline</strong>. You should<br />
register your <strong>Pipeline</strong> to ensure ongoing warranty service and customer service, per the terms of service.<br />
21
22<br />
Chapter 2<br />
<strong>Pipeline</strong> Hardware, Installation & Setup<br />
November, 2012
Chapter 3, Installing <strong>Pipeline</strong> Software<br />
Use this chapter to install, upgrade, or uninstall <strong>Pipeline</strong> software.<br />
Topics<br />
� Installing <strong>Pipeline</strong> Software (page 23)<br />
� Upgrading <strong>Pipeline</strong> Software (page 24)<br />
� Removing <strong>Pipeline</strong> Software (page 24)<br />
Notes<br />
INSTALLING PIPELINE SOFTWARE<br />
C H A P T E R<br />
Installing <strong>Pipeline</strong><br />
Software<br />
<strong>Telestream</strong> recommends that <strong>Pipeline</strong> Control be installed on a computer that is not<br />
hosting FlipFactory, Vantage, Agility, Episode Engine, or other media processing<br />
applications: intense disk and CPU consumption can interfere with proper operation of<br />
both applications.<br />
Be sure to review your platform, system and workflow requirements before installing<br />
<strong>Pipeline</strong> software (Chapter 4, Implementing <strong>Pipeline</strong> Workflows on page 25). When<br />
you install or upgrade <strong>Pipeline</strong> client software, you may have to upgrade the firmware<br />
revision in your <strong>Pipeline</strong> hardware.<br />
<strong>Pipeline</strong> Control software captures data coming from one or more <strong>Pipeline</strong> channels,<br />
and write this data to disk in real-time. To prevent interference with the <strong>Pipeline</strong><br />
Control, any process (such as real-time anti-virus scanning) should be disabled while<br />
<strong>Pipeline</strong> Control is in use. Other processes that periodically run (such as operating<br />
updates) should also be disabled.<br />
<strong>Pipeline</strong> Control for Windows is distributed from <strong>Telestream</strong>’s Web site (www.telestream.net) as an EXE<br />
file, and is also distributed on the <strong>Pipeline</strong> CD. After verifying that you have all of the required subsystems<br />
(below), download or open the installer and run it. Follow the steps to install <strong>Pipeline</strong> Control for Windows.<br />
Note<br />
<strong>Pipeline</strong> Control requires local Admin privileges for installation.<br />
3<br />
23
24<br />
Chapter 3<br />
Installing <strong>Pipeline</strong> Software<br />
UPGRADING PIPELINE SOFTWARE<br />
<strong>Pipeline</strong> software upgrades are periodically posted on the <strong>Telestream</strong> Web site at www.telestream.net. On<br />
the <strong>Telestream</strong> site, click Support > Support Home, then select <strong>Pipeline</strong> under the <strong>Pipeline</strong> section –<br />
<strong>Pipeline</strong> software updates are displayed in the left column.<br />
Before running the installer, be sure to remove the previous version of <strong>Pipeline</strong>, using Add/Remove<br />
Programs in Control Panels. Then, follow the instructions in Installing <strong>Pipeline</strong> Software (above) to upgrade<br />
your <strong>Pipeline</strong> software.<br />
REMOVING PIPELINE SOFTWARE<br />
To uninstall <strong>Pipeline</strong> Control, display Control Panel > Add/Remove programs (Programs and Features in<br />
Windows 7). Select <strong>Pipeline</strong> Control and click Remove. Removing the <strong>Pipeline</strong> application does not<br />
remove any schedules you’ve made, or any media you’ve saved on the computer from which you are<br />
removing <strong>Pipeline</strong> Control.<br />
November, 2012
Chapter 4, Implementing <strong>Pipeline</strong> Workflows<br />
C H A P T E R<br />
Implementing <strong>Pipeline</strong><br />
Workflows<br />
To implement <strong>Pipeline</strong> workflows, which capture or play out media on Mac OS X or Windows, you’ll need to<br />
install <strong>Pipeline</strong> software. Use this chapter to determine your workflow and system requirements, and to<br />
install, update, or uninstall <strong>Pipeline</strong> software.<br />
Topics<br />
Note<br />
<strong>Telestream</strong> recommends that you only install <strong>Pipeline</strong> Control on a computer that is not<br />
hosting FlipFactory, Vantage, Agility, Episode Engine, or other media processing<br />
applications: intense disk and CPU consumption can interfere with proper operation of<br />
both applications.<br />
When you install or update <strong>Pipeline</strong> client software, you may have to upgrade the<br />
firmware revision in your <strong>Pipeline</strong> hardware.<br />
� <strong>Pipeline</strong> Application Feature Comparison (page 25)<br />
� Workflow System Requirements (page 27)<br />
� General <strong>Pipeline</strong> System Setup Information (page 27)<br />
� Disk Buffering Details (page 36)<br />
� Disk and Network Requirement by Media Format (page 38)<br />
Note<br />
If you haven’t installed the <strong>Pipeline</strong> yet, proceed to Chapter 2, <strong>Pipeline</strong> Hardware,<br />
Installation & Setup on page 5 before continuing.<br />
Before you use a <strong>Pipeline</strong> to capture and play out media, the device must be<br />
configured using <strong>Pipeline</strong> Administrator (Chapter 5, Using <strong>Pipeline</strong> Administrator on<br />
page 44).<br />
PIPELINE APPLICATION FEATURE COMPARISON<br />
<strong>Pipeline</strong> software includes two applications – <strong>Pipeline</strong> Control and <strong>Pipeline</strong> Plugin for Episode and Final<br />
Cut Pro, compared below.<br />
4<br />
25
26<br />
Chapter 4<br />
Implementing <strong>Pipeline</strong> Workflows<br />
<strong>Pipeline</strong> Control. <strong>Pipeline</strong> Control is available for Mac OS X Snow Leopard, Windows 2008 Server, and<br />
Windows 7. You can use <strong>Pipeline</strong> Control to capture or play out media from/to <strong>Pipeline</strong> SC, <strong>Pipeline</strong> Quad,<br />
and <strong>Pipeline</strong> HD Dual.<br />
<strong>Pipeline</strong> Plugin for Final Cut Pro and Episode | Episode Pro. The feature set of <strong>Telestream</strong>'s <strong>Pipeline</strong><br />
applications vary by platform, and by program type - application or plugin. The following table identifies the<br />
features implemented in each <strong>Pipeline</strong> program:<br />
Table 4–1. Feature comparison of <strong>Pipeline</strong> client applications<br />
<strong>Pipeline</strong> Software Features<br />
<strong>Pipeline</strong> Control<br />
(Windows)<br />
<strong>Pipeline</strong> Control<br />
(Mac OS X)<br />
<strong>Pipeline</strong><br />
Log &<br />
Capture<br />
Plugin<br />
Supports <strong>Pipeline</strong> HD Dual � � �<br />
Supports <strong>Pipeline</strong> SC and <strong>Pipeline</strong> Quad � � �<br />
24-hour recurring record � �<br />
24-hour recurring playout �<br />
Log & Capture with deck control � � �<br />
Triggered manual and automated capture � �<br />
Print to Tape – Insert Edit � � �<br />
Print to Tape – Assemble Edit � � �<br />
Print to Tape – Crash Playout � � �<br />
Web Service API � �<br />
Open directly from Final Cut Pro �<br />
Open directly from Episode Desktop �<br />
Edit while capturing � �<br />
� �<br />
Transcode while capturing<br />
(FlipFactory|Episode Engine)<br />
Import <strong>Pipeline</strong> G4G EDL files � � �<br />
Import|Export Final Cut Interchange files � � �<br />
Create QuickTime Open files directly � �<br />
Create QuickTime Closed files directly � � �<br />
Create TIFO files directly � �<br />
Controlled Playout (Virtual VTR) �<br />
Video Wall �<br />
Create Avid AAF/MXF OPAtom files directly<br />
(Available only on 32 bit OS)<br />
Create Generic MXF DNxHDOP1a files with<br />
with DV|DVCPro|IMX video essence<br />
� �<br />
� �<br />
November, 2012
<strong>Pipeline</strong> Log and Capture Plugin<br />
95881<br />
Workflow System Requirements<br />
<strong>Pipeline</strong> User’s <strong>Guide</strong><br />
You can install the <strong>Pipeline</strong> Plugin in Final Cut Pro Version 5.01 or later, and you can install it in Episode<br />
v5.x (this plug-in is not compatible with Episode v6).<br />
When you install the plugin, you can use all of the <strong>Pipeline</strong> features listed in the table above. For complete<br />
details, Using <strong>Pipeline</strong> in Final Cut Pro & Episode on page 63.<br />
WORKFLOW SYSTEM REQUIREMENTS<br />
<strong>Pipeline</strong> applications can be used with these versions of FlipFactory, Vantage, Episode, and Final Cut Pro:<br />
• FlipFactory 6.0 with Service Pack 5, FlipFactory 6.1, 7.0 and 7.1.<br />
• Episode Engine version 5.0 or greater<br />
• Final Cut Pro Version 5.1.4 or newer<br />
• Vantage 1.0 or later<br />
GENERAL PIPELINE SYSTEM SETUP INFORMATION<br />
<strong>Pipeline</strong> is a unique, network-attached encoder that can be used in a variety of capture and playout<br />
workflows. As a network device, architectural constraints figure prominently in configuring an efficient and<br />
reliable <strong>Pipeline</strong> workflow.<br />
<strong>Pipeline</strong> System Architecture<br />
<strong>Pipeline</strong> capture workflows consist of ingesting baseband HD/SD-SDI input, compressing it, creating a file<br />
with the compressed data, and delivering the completed file to a folder location. You can connect one or<br />
more <strong>Pipeline</strong>s (Single, Quad, or HD Dual) to a <strong>Pipeline</strong> host computer (Mac OS X or Windows).<br />
<strong>Pipeline</strong>s should be connected directly via CAT6 Ethernet to a <strong>Pipeline</strong> host computer or via an enterprise<br />
class, fully non-blocking, professional-quality Ethernet switch.<br />
The key components include the <strong>Pipeline</strong> device itself, the network, the <strong>Pipeline</strong> host computer, the<br />
<strong>Pipeline</strong> Control application, software and the <strong>Pipeline</strong> media disk storage device. Each of these<br />
components is described below.<br />
The <strong>Pipeline</strong> Device<br />
Each <strong>Pipeline</strong> has one to four channels each (single channel, Quad or HD Dual) with SDI I/O for capture<br />
and play out. The SDI connectors ingest baseband SD/HD-SDI signals, compress them into one of many<br />
supported formats and stream the compressed data out their respective Ethernet ports using Real Time<br />
Streaming Protocol (RTSP). Each channel's RTSP stream contains video, audio and application/control<br />
data in RTP transport packets. These streams are ingested by the <strong>Pipeline</strong> Control application running on<br />
a <strong>Pipeline</strong> host computer.<br />
27
28<br />
Chapter 4<br />
Implementing <strong>Pipeline</strong> Workflows<br />
<strong>Pipeline</strong> Host & <strong>Pipeline</strong> Application Software<br />
The <strong>Pipeline</strong> Control wraps each RTSP stream into the appropriate file wrapper and delivers these files to<br />
their respective media storage locations. The <strong>Pipeline</strong> host computer is primarily responsible for delivering<br />
one or more <strong>Pipeline</strong> channel's RTSP streams via Ethernet to the <strong>Pipeline</strong> application it is hosting.<br />
A <strong>Pipeline</strong> host computer can control multiple <strong>Pipeline</strong> channels concurrently. See the examples below to<br />
determine how best to configure a <strong>Pipeline</strong> System to meet your particular needs.<br />
<strong>Pipeline</strong> applications, such as <strong>Pipeline</strong> Control, perform many tasks. These tasks include scheduled<br />
capture and play out, log/capture from tape sources, manual and automated capture from live sources,<br />
print to tape, and controlled playout.<br />
<strong>Pipeline</strong> applications also provide interfaces to (or within) video edit software, FlipFactory, Vantage, Agility,<br />
Episode Engine, Episode desktop, and disk file systems.<br />
There are five key factors to consider when configuring your <strong>Pipeline</strong> host system:<br />
• CPU cores and speed<br />
• Disk storage systems (both for the media destination and for disk buffering)<br />
• Network connection<br />
• System RAM<br />
• System Video Card<br />
Use the system descriptions, recommended systems chart, and network and storage sections to configure<br />
your <strong>Pipeline</strong> host system appropriately for your workflow requirements.<br />
<strong>Pipeline</strong> Network<br />
For best results, <strong>Pipeline</strong>s should be connected directly to a <strong>Pipeline</strong> host computer or via a single<br />
enterprise class, fully non-blocking professional-quality Ethernet switch via CAT6 Ethernet cabling. Multiple<br />
hops via routers and switches increase the risk that video frames will not be processed in a timely manner<br />
resulting in lost frames. It is highly recommended that the <strong>Pipeline</strong> host's network adapter be based on<br />
Intel Gigabit cards.<br />
Capturing across multiple switches or routers is possible with <strong>Pipeline</strong> only when the link is a full 1 gigabit.<br />
Always consult with your network administrator when attempting to utilize <strong>Pipeline</strong> across multiple<br />
switches, networks or VLAN's.<br />
Recommended network switches:<br />
• Extreme Networks<br />
• Force 10, Cisco<br />
• Foundry (Brocade)<br />
Use of a private <strong>Pipeline</strong> video VLAN is highly recommended<br />
Special care must be taken to insure that a real-time process can be achieved. Other network processes,<br />
such as file copying, can consume unbounded bandwidth and excessive network stack cycles which can<br />
cause <strong>Pipeline</strong> real-time streams to be interrupted. When constructing a <strong>Pipeline</strong> system utilizing an<br />
existing information network, be aware of local processes using the network that could affect <strong>Pipeline</strong><br />
traffic. The best practice is to separate <strong>Pipeline</strong> traffic from data traffic by using more than one network<br />
adapter within the <strong>Pipeline</strong> host computer. Design your system with one (or more) Ethernet ports dedicated<br />
to the incoming <strong>Pipeline</strong> streams and separate Ethernet port(s) for general data and media delivery traffic.<br />
As a rule of thumb, never exceed 50% usage of any one Ethernet port or network switch. For example<br />
when capturing Pro Res 422 HQ at 220Mbps use one GigE Ethernet port for every two (2) streams.<br />
Multiple port Ethernet is required for this purpose.<br />
November, 2012
Network examples<br />
Figure 4–1. Eight channel <strong>Pipeline</strong> SD capture system<br />
Figure 4–2. Four channel <strong>Pipeline</strong> HD capture system<br />
95881<br />
General <strong>Pipeline</strong> System Setup<br />
Information<br />
29
30<br />
Chapter 4<br />
Implementing <strong>Pipeline</strong> Workflows<br />
Capture-only Workflows<br />
For capture-only workflows, when writing to internal or direct attached (non-shared) RAID arrays, you only<br />
need to calculate the overall write speed requirements. Configure your media storage array based on the<br />
write performance required for the number of streams being captured.<br />
Figure 4–3. Configuration for capturing 4 HD streams onto Fibre-attached storage.<br />
Concurrent Edit/Transcode Workflows<br />
For capture with concurrent edit or transcode workflows, calculate the total read/write speed requirements<br />
based on the write processes of <strong>Pipeline</strong> streams and read processes for edit and transcode operations.<br />
Note<br />
Disk buffering is required when the destination path is located on a NAS, shared<br />
network folder, or when edit/transcode while capture operations are to be performed on<br />
the incoming <strong>Pipeline</strong> media files.<br />
Some format wrappers do not support this feature. Take special care when writing<br />
these file types to shared disks.<br />
To guarantee error-free operations when writing to NAS, you must use disk buffering. Use an internal or<br />
direct-attached non-shared RAID array that meets the read/write performance requirement (Disk Buffering<br />
Details on page 36).<br />
<strong>Pipeline</strong>'s media storage location (NAS, direct-attached shared storage, or shared network folder) must<br />
also meet certain read/write performance requirements. When using NAS, direct-attached shared storage<br />
or shared network folder, be sure to verify that your system has the communications bandwidth for writing<br />
all <strong>Pipeline</strong> media data to the media storage location in real-time.<br />
For SD, <strong>Telestream</strong> recommends that the host's disk storage system provide and maintain a sustained 10<br />
MB/sec. transfer rate per stream from the <strong>Pipeline</strong> host computer to the media disk (read/write).<br />
For DVCPro HD, ProRes 422/SQ/LT/Proxy and standard quality DNxHD, <strong>Telestream</strong> recommends that the<br />
<strong>Pipeline</strong> host's disk storage system provide and maintain a sustained 40 MB/sec. transfer rate per stream<br />
from the <strong>Pipeline</strong> host computer to media disk (read/write). For ProRes 422 HQ and high quality DNxHD,<br />
<strong>Telestream</strong> recommends at least a 50 MB/second sustained transfer rate.<br />
November, 2012
95881<br />
General <strong>Pipeline</strong> System Setup<br />
Information<br />
Capture Workflows Utilizing NAS|Direct-Attach Storage|Network Folders<br />
For capture writing to NAS, direct-attached shared storage or shared network folder, you should enable<br />
<strong>Pipeline</strong> disk buffering (Disk Buffering Details on page 36).<br />
Note<br />
Disk buffering is required when the destination path is located on a NAS, a shared<br />
network folder, or when edit/transcode while capture operations are to be performed on<br />
the incoming <strong>Pipeline</strong> media files.<br />
Some format wrappers do not support this feature. Take special care when writing<br />
these file types to shared disks.<br />
Disk buffering requires a separate RAID array to guarantee error-free write operations of media streams.<br />
Figure 4–4. Configuration for capturing four HD streams onto NAS with Fibre-attached buffer.<br />
When calculating disk buffer RAID array read/write performance requirements, you should use two times<br />
the required <strong>Pipeline</strong> streams write requirements. This is required to support a write and a read operation<br />
on the data buffer array for each <strong>Pipeline</strong> stream.<br />
The <strong>Pipeline</strong>'s media storage location (NAS, direct-attached shared storage or shared network folder)<br />
must meet the write performance requirements. When using NAS, direct-attached shared storage or<br />
shared network folder, be sure to verify that your system has the communications bandwidth for writing all<br />
<strong>Pipeline</strong> media data to the media storage location in real-time.<br />
Caution<br />
Capturing video is a disk intensive operation. It is important that you create a<br />
system with adequate disk performance for writing and reading real-time video<br />
files. In addition to the information provided below, make sure that the disks<br />
used for <strong>Pipeline</strong> operations are defragmented often. A fragmented drive can<br />
decrease performance and may cause capture and playout operations to fail.<br />
31
32<br />
Chapter 4<br />
Implementing <strong>Pipeline</strong> Workflows<br />
<strong>Pipeline</strong> Media Storage<br />
In determining storage requirements, there are two main factors to consider – the overall sustained read/<br />
write performance and local data disk buffering.<br />
To ensure performance and quality, the disk storage systems used with the <strong>Pipeline</strong> host computer must<br />
be able to meet the demands of reading and writing one or more real-time SD and HD media streams.<br />
For SD, <strong>Telestream</strong> recommends that the <strong>Pipeline</strong> host's disk storage system provide and maintain a<br />
sustained 10 MB/sec transfer rate per stream from the <strong>Pipeline</strong> host computer to the media disk (read/<br />
write).<br />
For DVCPro HD, ProRes 422/SQ/LT/Proxy, and standard quality DNxHD, <strong>Telestream</strong> recommends that<br />
the <strong>Pipeline</strong> host's disk storage system provide and maintain a sustained 40 MB/sec transfer rate per<br />
stream from the <strong>Pipeline</strong> host computer to media disk (read/write) for each stream. For ProRes 422 HQ<br />
and high quality DNxHD, <strong>Telestream</strong> recommends at least a 50 MB/sec transfer rate for each stream.<br />
To evaluate your needs, first take into account the data rate for the format that you'll be using and the<br />
number of streams your system will be capturing concurrently. Disk and Network Requirement by Media<br />
Format on page 38 provides approximate data rates for a variety of formats and resolutions. Use these<br />
tables to calculate the overall read/write performance requirements for your main storage disk system and<br />
if needed for your local data buffering storage disk system.<br />
Capture-only, writing to internal or direct-attached RAID array. For systems utilizing internal or direct<br />
attached (non-shared) storage for capture only operations, you only need to calculate the overall write<br />
speed requirements. Configure your media storage array based on the write performance requirement for<br />
the number of streams being captured.<br />
Figure 4–5. Four channel <strong>Pipeline</strong> HD with direct attached Fibre RAID storage<br />
Capture with concurrent edit or transcode. For systems that are capturing with concurrent edit or<br />
transcode operations, you should calculate the overall read/write speed requirements based on the write<br />
processes of <strong>Pipeline</strong> streams, and the read processes for the edit and transcode operations. To<br />
guarantee error-free operations you must use <strong>Pipeline</strong>'s data buffering feature utilizing an internal or direct<br />
attached non-shared storage RAID array for data buffering that meets the desired read/write performance<br />
requirement (see Disk Buffering Details on page 36). The <strong>Pipeline</strong>'s media storage location (NAS, direct<br />
attached shared storage or shared network folder) must also meet these minimum read/write performance<br />
requirements. When using NAS, direct attached shared storage or shared network folder, be sure to verify<br />
that your system has the communications bandwidth for writing all <strong>Pipeline</strong> media data to the media<br />
storage location in real-time.<br />
November, 2012
95881<br />
General <strong>Pipeline</strong> System Setup<br />
Information<br />
Capture writing to NAS, direct attached shared storage or shared network folder. For systems that<br />
are capturing media written to a NAS or shared network folder, the <strong>Pipeline</strong> data buffering feature must be<br />
enabled (see Disk Buffering Details on page 36). Data Buffering requires a separate data buffer RAID array<br />
to guarantee error-free write operations of <strong>Pipeline</strong> media streams. Calculating the disk buffer RAID array<br />
read/write performance requirements use 2X the required <strong>Pipeline</strong> streams write requirements. This is<br />
needed to support a write and a read operation on the data buffer array for each <strong>Pipeline</strong> stream.<br />
The <strong>Pipeline</strong>'s media storage location (NAS, direct attached shared storage or shared network folder) must<br />
meet the minimum write performance requirements. When using NAS, direct attached shared storage or<br />
shared network folder, be sure to verify that your system has the communications bandwidth for writing all<br />
<strong>Pipeline</strong> media data to the media storage location in real-time.<br />
Figure 4–6. Four channel <strong>Pipeline</strong> HD with direct attached data buffer RAID<br />
Example Systems<br />
Distributed <strong>Pipeline</strong> model. Individual workstations controlling individual channels, each workstation<br />
meeting the <strong>Pipeline</strong> channel specification with a network to support all traffic:<br />
33
34<br />
Chapter 4<br />
Implementing <strong>Pipeline</strong> Workflows<br />
Centralized <strong>Pipeline</strong> ingest model. A central workstation controlling multiple <strong>Pipeline</strong> channels. The<br />
central workstation meets the multiple <strong>Pipeline</strong> channel specification with a network and storage system to<br />
support the workflow:<br />
Four channel HD with data buffering. Four channels of HD hosted by a central workstation with delivery<br />
to a NAS. Data Buffering is enabled through directly attached RAID storage:<br />
November, 2012
General <strong>Pipeline</strong> System Setup<br />
Information<br />
Multiple channel Transcode while capture. Multiple <strong>Pipeline</strong> channels hosted by a central workstation<br />
with delivery to a directly attached storage device. The storage is shared to the transcoding servers for<br />
concurrent processing:<br />
Multiple channel edit while capture. Multiple <strong>Pipeline</strong> channels hosted by a central workstation with<br />
delivery to shared storage device. Internal 15K RAID array is used as a Disk Buffer in case the shared<br />
storage cannot maintain real time writes:<br />
95881<br />
35
36<br />
Chapter 4<br />
Implementing <strong>Pipeline</strong> Workflows<br />
DISK BUFFERING DETAILS<br />
When Disk Buffering is checked, video and audio data are written into a FIFO disk buffer file in a local<br />
folder before the data is written to the media file destination.<br />
Note<br />
Disk Buffering must be enabled when the destination path is a located on a NAS, a<br />
shared network folder, or when edit/transcode while capture operations are to be<br />
performed on the incoming <strong>Pipeline</strong> media files.<br />
During capture operations, when the file destination drive's performance is reduced<br />
due to additional read processes (when performing transcoding, file editing or other<br />
disk-intensive activity), data is placed into the FIFO (First In, First Out) buffer.<br />
Figure 4–7. FIFO disk buffering enhances file writing performance<br />
Disk buffering prevents the RAM buffer from overflowing when disk writes are temporarily blocked or<br />
performance is reduced on the media file destination disk.<br />
The read/write performance for a volume used for disk buffering needs to be able to support the media<br />
format and number of channels being captured. As a rule of thumb, the buffer disk should be RAID-0 with<br />
the appropriate number of drives to support the read and write requirements for the number of channels<br />
with the respective media format used (Disk and Network Requirement by Media Format (page 38)).<br />
Enable Disk Buffering whenever your media file destination is not a local drive or array – such as a NAS, or<br />
shared network folder.<br />
Figure 4–8. <strong>Pipeline</strong> buffering process<br />
Incoming media<br />
stream<br />
Note<br />
The disk used for buffering should be used exclusively for <strong>Pipeline</strong> buffering. Using the<br />
disk buffer drive for other read/write processes may cause unpredictable results.<br />
<strong>Pipeline</strong> Host Computer<br />
RAM buffer Disk buffer<br />
Media file<br />
destination<br />
system<br />
November, 2012
PLATFORM AND SYSTEM REQUIREMENTS<br />
General <strong>Pipeline</strong> Host System Requirements<br />
• <strong>Pipeline</strong> firmware v2.6 or later<br />
• CPU: Intel Core 2 Duo, Intel Quad Core, or greater<br />
• Operating System:<br />
95881<br />
Caution<br />
Platform and System Requirements<br />
<strong>Pipeline</strong> User’s <strong>Guide</strong><br />
The disk selected for buffering should be used exclusively for <strong>Pipeline</strong> video/<br />
audio data buffering. Using the disk buffer drive for other read/write processes<br />
may cause unpredictable results.<br />
Never write to a disk buffer that does not meet the minimum performance<br />
requirement for the number of channels and media format being captured. See<br />
Disk and Network Requirement by Media Format (page 38).<br />
The disk buffering drive must never be the same as the media file destination<br />
drive. This will result in doubling the amount of read and writes operations to<br />
this drive and will severely degrade overall disk performance.<br />
When schedule events are touching (one file stops and the other starts at the<br />
same moment) and there is a handle setting of more than zero, the amount of<br />
data being processed and written to disk doubles for the duration of the handle.<br />
Double capturing may result in data loss in workflows on slow computers, or in<br />
workflows with multiple simultaneous ingests, since the application may be<br />
pushing the limits of CPU capacity or disk write speed.<br />
— Mac OS X Version 10.6 (Snow Leopard). Requires QuickTime Version 7.5.5 or newer<br />
with ProRes decoder component.<br />
— Windows 7 32/64 bit, Windows Server 2008 (32 bit and 64 bit editions). NET<br />
Framework v3.5 SP1<br />
• Video card with minimum 256MB RAM (for Mac OS X - card must support Quartz Extreme/OpenGL<br />
accelerated surfaces and be attached to a compatible video display)<br />
• GigE or faster Ethernet adapter<br />
• Final Cut Pro Version 5.0.1 or newer is required when using <strong>Pipeline</strong> plug-in<br />
System Requirements for FlipFactory <strong>Pipeline</strong> Workflows<br />
FlipFactory supports workflows utilizing <strong>Pipeline</strong> SD systems.<br />
• FlipFactory v6.0 with Update Packs 1-5 or FlipFactory v6.1<br />
• Concurrent <strong>Pipeline</strong> ingest streams may vary depending on CPU and disk speeds<br />
• Recommended server spec:<br />
• Dual 2.3Ghz (or higher) Intel Quad Core CPU<br />
• Dedicated RAID-0 media storage<br />
• 2GB RAM<br />
37
38<br />
Chapter 4<br />
Implementing <strong>Pipeline</strong> Workflows<br />
PIPELINE HOST COMPUTER RECOMMENDATIONS<br />
Network and Hard Disk Performance Requirements (per stream)<br />
Table 4–2. Disk and Network Requirement by Media Format<br />
CODECS<br />
Recommended Hardware Systems.<br />
Standard Definition<br />
Single channel system<br />
• CPU - Intel Dual Core 2.0Ghz CPU or faster<br />
• RAM - 3GB RAM minimum<br />
• Network's sustained bandwidth for <strong>Pipeline</strong> channel – 75Mb/s<br />
• Media Storage sustained read and/or write speeds (separate from OS drive)<br />
— Capture only – 10MB/s<br />
— Play out only – 12MB/s<br />
— Transcode/Edit/Disk Buffering while Capture – 20MB/s<br />
Two channel system<br />
• CPU - Intel Dual Core 2.0Ghz CPU or faster<br />
Disk<br />
Read/Write<br />
Mbps<br />
Network<br />
Throughput<br />
Mbps<br />
Storage (per hour)<br />
Required for<br />
8-Channel Audio<br />
SD Codecs<br />
Motion JPEG A 0.75 8 5GB<br />
DV/DVC Pro 4.4 35 15GB<br />
IMX30 5.3 43 16GB<br />
IMX40 7.0 56 20GB<br />
IMX50/DVCPro50 8.3 67 25GB<br />
ProRes422 SQ 7.3 58 21GB<br />
Uncompressed 8-bit 422<br />
HD Codecs<br />
(range based on codec and bit rate)<br />
22 175 80GB<br />
DVCPro HD 16.5 135 73GB<br />
ProRes 422 HQ 10-36 62-240 50-100GB<br />
DNxHD 10-36 62-240 50-100GB<br />
Note<br />
All systems assume media storage local (internal or direct attached) to the host system<br />
with adequate storage to support 24 hours of content at the chosen format, and drive<br />
array is less than 80% full without serious fragmentation.<br />
November, 2012
• RAM - 6GB RAM minimum<br />
• Network's sustained bandwidth for <strong>Pipeline</strong> channels – 150Mb/s<br />
• Media Storage sustained read and/or write speeds (separate from OS drive)<br />
95881<br />
— Capture only – 20MB/s<br />
— Play out only – 24MB/s<br />
— Transcode/Edit/Disk Buffering while Capture – 40MB/s<br />
Four channel system<br />
• CPU - Intel Quad Core (4 cores) 2.33 GHz CPU or faster<br />
• RAM - 8GB RAM minimum<br />
• Network's sustained bandwidth for <strong>Pipeline</strong> channels – 300Mb/s<br />
• Operating System<br />
<strong>Pipeline</strong> Host computer recommendations<br />
<strong>Pipeline</strong> User’s <strong>Guide</strong><br />
— Mac OS X 10.6<br />
— Windows 7, Server 2008<br />
• Media Storage sustained read and/or write read and/or write speeds (separate from OS drive)<br />
— Capture only – 40MB/s<br />
— Play out only – 48MB/s<br />
— Transcode/Edit/Disk Buffering while Capture – 80MB/s<br />
Eight channel system<br />
• CPU - Intel Quad Core (4 cores) 2.33 GHz CPU or faster<br />
• RAM - 10GB RAM minimum<br />
• Dual Port 1Gb NIC for exclusive use of <strong>Pipeline</strong> traffic<br />
• Network's sustained bandwidth for <strong>Pipeline</strong> channels – 600Mb/s<br />
— Use an adapter with a minimum of two (2) 1Gb ports<br />
— Port aggregation many be necessary<br />
• Operating System<br />
— Mac OS X 10.6<br />
— Windows 7, Server 2008<br />
• Media Storage sustained read and/or write speeds (separate from OS drive)<br />
— Capture only – 80MB/s<br />
— Play out only – 100MB/s<br />
— Transcode/Edit/Disk Buffering while Capture – 175MB/s<br />
39
40<br />
Chapter 4<br />
Implementing <strong>Pipeline</strong> Workflows<br />
High Definition – DVCPro HD (ingest only)<br />
Note<br />
Single channel system<br />
• CPU - Intel Dual Core 2.53Ghz CPU or faster<br />
• RAM - 4GB RAM minimum<br />
• Network's sustained bandwidth for <strong>Pipeline</strong> channels – 150Mb/s<br />
• Media Storage sustained read and/or write speeds (separate from OS drive)<br />
— Capture only – 20MB/s<br />
— Play out only – 30MB/s<br />
— Transcode/Edit/Disk Buffering while Capture – 45MB/s<br />
Two channel system<br />
• CPU - Intel Quad Core 2.8 GHz CPU or faster<br />
• RAM - 8GB RAM minimum<br />
• Dual Port 1Gb NIC for exclusive use of <strong>Pipeline</strong> traffic<br />
• Network's sustained bandwidth for <strong>Pipeline</strong> channels – 300Mb/s<br />
• Operating System<br />
— Mac OS X 10.6<br />
— Windows 7, Server 2008<br />
• Media Storage sustained read and/or write speeds (separate from OS drive)<br />
— Capture only – 40MB/s<br />
— Play out only – 60MB/s<br />
— Transcode/Edit/Disk Buffering while Capture – 100MB/s<br />
Three/Four channel system<br />
Edit while ingest and transcode while ingest workflows require increased disk I/O<br />
performance to support the additional read processes, and may require disk buffer<br />
cache drive system (see <strong>Pipeline</strong> User <strong>Guide</strong> disk buffering details). Viewing HD<br />
preview stream(s) can consume high levels of CPU which may cause dropped frames.<br />
It is recommended that preview be turned off during capture.<br />
• CPU - Dual Intel Quad Core 2.8 GHz CPU or faster<br />
• RAM - 12GB RAM minimum<br />
• Quad Port 1Gb NIC for exclusive use of <strong>Pipeline</strong> traffic<br />
• Network's sustained bandwidth for <strong>Pipeline</strong> channels – 600Mb/s<br />
— Use an adapter with a minimum of two (2) 1Gb ports<br />
— Port aggregation many be necessary<br />
• Operating System<br />
— Mac OS X 10.6<br />
— Windows 7, Server 2008<br />
• Media Storage sustained read and/or write speeds (separate from OS drive)<br />
November, 2012
95881<br />
— Capture only – 80MB/s<br />
— Play out only – 120MB/s<br />
— Transcode/Edit/Disk Buffering while Capture – 200MB/s<br />
Five channel system<br />
• CPU - Dual Intel Quad Core (8 cores) 3.0 GHz CPU or faster<br />
• RAM - 16GB RAM minimum<br />
• Quad Port 1Gb NIC for exclusive use of <strong>Pipeline</strong> traffic<br />
• Network's sustained bandwidth for <strong>Pipeline</strong> channels – 750Mb/s<br />
— Use an adapter with a minimum of two (2) 1Gb ports<br />
— Port aggregation many be necessary<br />
• Operating System<br />
— Mac OS X 10.6<br />
— Windows 7, Server 2008<br />
• Media Storage sustained read and/or write speeds (separate from OS drive)<br />
— Capture only – 120MB/s<br />
— Play out only – 180MB/s<br />
— Transcode/Edit/Disk Buffering while Capture – 300MB/s<br />
High Definition – DNxHD 220/Pro Res 422 HQ (ingest only)<br />
Note<br />
Single channel system<br />
• CPU - Intel Dual Core 2.53Ghz CPU or faster<br />
• RAM - 6GB RAM minimum<br />
• Network's sustained bandwidth for <strong>Pipeline</strong> channels – 260Mb/s<br />
• Media Storage sustained read and/or write speeds (separate from OS drive)<br />
— Capture only – 40MB/s<br />
— Play out only – 60MB/s<br />
— Transcode/Edit/Disk Buffering while Capture – 100MB/s<br />
Two channel system<br />
• CPU - Dual Intel Quad Core (8 cores) 2.8 GHz CPU or faster<br />
• RAM - 12GB RAM minimum<br />
• Dual Port 1Gb NIC for exclusive use of <strong>Pipeline</strong> traffic<br />
• Network's sustained bandwidth for <strong>Pipeline</strong> channels – 520Mb/s<br />
<strong>Pipeline</strong> Host computer recommendations<br />
<strong>Pipeline</strong> User’s <strong>Guide</strong><br />
Edit while ingest and transcode while ingest workflows require increased disk I/O<br />
performance to support the additional read processes, and may require disk buffer<br />
cache drive system (see <strong>Pipeline</strong> User <strong>Guide</strong> disk buffering details). Viewing HD<br />
preview stream(s) can consume high levels of CPU which may cause dropped frames.<br />
It is recommended that preview be turned off during capture.<br />
41
42<br />
Chapter 4<br />
Implementing <strong>Pipeline</strong> Workflows<br />
— Use an adapter with a minimum of two (2) 1Gb ports<br />
— Port aggregation many be necessary<br />
• Operating System<br />
— Mac OS X 10.6<br />
— Windows 7, Server 2008<br />
• Media Storage sustained read and/or write speeds (separate from OS drive)<br />
— Capture only – 100MB/s<br />
— Play out only – 140MB/s<br />
— Transcode/Edit/Disk Buffering while Capture – 220MB/s<br />
Three channel system<br />
• CPU - Dual Intel Quad Core (8 cores) 3.0 GHz CPU or faster<br />
• RAM - 16GB RAM minimum<br />
• Quad Port 1Gb NIC for exclusive use of <strong>Pipeline</strong> traffic<br />
• Network's sustained bandwidth for <strong>Pipeline</strong> channels – 800Mb/s<br />
— Use an adapter with a minimum of two (2) 1Gb ports<br />
— Port aggregation many be necessary<br />
• Operating System<br />
— Mac OS X 10.6<br />
— Windows 7, Server 2008<br />
• Media Storage sustained read and/or write speeds (separate from OS drive)<br />
— Capture only – 140MB/s<br />
— Play out only – 200MB/s<br />
— Transcode/Edit/Disk Buffering while Capture – 320MB/s<br />
November, 2012
C H A P T E R<br />
5<br />
Using <strong>Pipeline</strong><br />
Administrator<br />
Chapter 5,<br />
<strong>Pipeline</strong> Administrator is a Web application embedded in each <strong>Pipeline</strong>, which enables you to connect to<br />
<strong>Pipeline</strong> devices on your network with a Web browser.<br />
You can use <strong>Pipeline</strong> Administrator to perform administrative tasks on the <strong>Pipeline</strong>, including network<br />
configuration and firmware upgrades.<br />
Topics<br />
� Supported Web Browsers (page 43)<br />
� Launching <strong>Pipeline</strong> Administrator (page 44)<br />
� Using <strong>Pipeline</strong> Administrator (page 43)<br />
� Using the About Panel (page 45)<br />
� Using the Configure Panel (page 46)<br />
� Using the Quad Panel (page 52)<br />
� Using the Counters Panel (page 55)<br />
� Using the Upgrade Panel (page 57)<br />
SUPPORTED WEB BROWSERS<br />
You can configure <strong>Pipeline</strong> using your Browser of choice. However, you may need a plug-in for Bonjour if<br />
you want to discover <strong>Pipeline</strong>s automatically.<br />
Note<br />
Web browsers are supported only on the platform specified. You may encounter<br />
situations where features may not function correctly in all cases. In particular when<br />
running Windows 7 or Windows Server 2008 with Internet Explorer, you may encounter<br />
security issues that prevent <strong>Pipeline</strong> Administrator from displaying correctly or from<br />
saving configuration changes. In these cases consult with your IT administrator to adjust<br />
the browser's security setting to allow <strong>Pipeline</strong> Administrator to run properly.<br />
Alternatively you can install another browser such as Mozilla Firefox or Google Chrome<br />
as your default.<br />
43
44<br />
Chapter 5<br />
Using <strong>Pipeline</strong> Administrator<br />
You can run <strong>Pipeline</strong> Administrator from anywhere on your network. You can run it directly on a <strong>Pipeline</strong><br />
host system or any computer with visibility to the <strong>Pipeline</strong> device.<br />
LAUNCHING PIPELINE ADMINISTRATOR<br />
The <strong>Pipeline</strong> Administrator can be accessed through a web browser. To connect to a <strong>Pipeline</strong> and launch<br />
<strong>Pipeline</strong> Administrator perform one of the following steps:<br />
• Using a known <strong>Pipeline</strong> channel IP address: Open a web browser and enter the IP Address in the<br />
browsers address bar.<br />
• In Mac OS X: Open Safari and select Bookmarks > Show All Bookmarks. In the Collections panel, click<br />
Bonjour. From the list of available devices double-click the <strong>Pipeline</strong> you wish to connect to, to display<br />
<strong>Pipeline</strong> Administrator.<br />
• In Windows: Open <strong>Pipeline</strong> Control and select any document type (Schedule, Log and Capture, Trigger,<br />
Print-to-Tape or Controlled Playout). Select the <strong>Pipeline</strong> you wish to connect to from the <strong>Pipeline</strong><br />
dropdown list. Open the Diagnostics panel and click on the Administer button. This will open the<br />
selected <strong>Pipeline</strong>'s Administrator page in your default browser.<br />
If this is the first time connecting to this <strong>Pipeline</strong> since starting the browser, and if the <strong>Pipeline</strong> is passwordprotected<br />
(configure panel > Security), the browser displays a <strong>Pipeline</strong> Authentication dialog. Enter the<br />
username (always administrator) and a password (if you added one), and click OK to connect to the<br />
<strong>Pipeline</strong> and display <strong>Pipeline</strong> Administrator:<br />
Figure 5–1. Connect dialog – enter your username and password to connect<br />
Enter the username (administrator) and password if<br />
you added one, and click OK to connect.<br />
USING PIPELINE ADMINISTRATOR<br />
<strong>Pipeline</strong> Administrator has several panels you can use to perform various tasks:<br />
� Using the About Panel – provides general information about <strong>Pipeline</strong> and registration.<br />
� Using the Configure Panel – displays <strong>Pipeline</strong> and network settings, allows you to change network settings<br />
and options.<br />
� Using the Quad Panel – displays when connected to a <strong>Pipeline</strong> Quad, to control confidence monitoring.<br />
� Using the Counters Panel – displays statistical information about <strong>Pipeline</strong> activity.<br />
� Using the Upgrade Panel – enables you to upgrade the firmware and <strong>Pipeline</strong> Administrator.<br />
November, 2012
95881<br />
Using the About Panel<br />
<strong>Pipeline</strong> User’s <strong>Guide</strong><br />
You can access the <strong>Pipeline</strong> User’s <strong>Guide</strong> (the document you are currently reading) from each panel by<br />
clicking the User’s <strong>Guide</strong> link at the bottom of each panel.<br />
USING THE ABOUT PANEL<br />
To display the About panel, click about in the menu bar at the top of the window:<br />
Figure 5–2. The About panel displays a link to product registration.<br />
Register the <strong>Pipeline</strong> by clicking the Register button. Follow the steps on the Web page to complete<br />
registration. If you’ve already registered this <strong>Pipeline</strong>, the Register button no longer displays.<br />
If the computer you’re using is on a LAN without Internet access, use a computer that has Internet access<br />
and go to dynamic.telestream.net/pipeline-register/register.asp to register your <strong>Pipeline</strong>. You should<br />
register your <strong>Pipeline</strong> to ensure ongoing warranty service and customer support.<br />
The About panel – as well as the other panels – provides online access to the <strong>Pipeline</strong> User’s <strong>Guide</strong> (this<br />
document), by clicking the link in the lower left corner.<br />
45
46<br />
Chapter 5<br />
Using <strong>Pipeline</strong> Administrator<br />
Using the Configure Panel<br />
To display the Configure panel, click configure in the menu bar at the top of the window:<br />
Figure 5–3. Configure panel displays details & allows you to change settings<br />
SD Options<br />
HD Options<br />
November, 2012
95881<br />
Using the About Panel<br />
<strong>Pipeline</strong> User’s <strong>Guide</strong><br />
Use the Configure panel to view and make changes to <strong>Pipeline</strong>’s identity, IP settings, and options. Click the<br />
LAN, Security, Options, and EDL toolbar to view their respective control panels, as shown in the callouts in<br />
the figure above. Each control is described in the following table:<br />
Table 5–1. Configure Panel controls and descriptions.<br />
Control Description<br />
<strong>Pipeline</strong> Identity<br />
Name Editable field. Default for <strong>Pipeline</strong> SC: <strong>Pipeline</strong>-XXXX, where XXXX is the<br />
serial number printed on the bottom of the <strong>Pipeline</strong>.<br />
Default for <strong>Pipeline</strong> Quad: <strong>Pipeline</strong>QuadXXXX_N where N is the device<br />
number 1 through 4.<br />
Default for <strong>Pipeline</strong> HD Dual: <strong>Pipeline</strong>HDDual_XXXX_N where N is the<br />
device number 1 through 2.<br />
To change the name, enter a new name, and click Save Changes. The<br />
name is updated in the <strong>Pipeline</strong>, and is reflected in the Bonjour panel.<br />
Limit: 255 characters.<br />
If you enter a friendly name that already exists, <strong>Pipeline</strong> adds (1), (2,), as<br />
necessary to maintain uniqueness.<br />
For best naming practices, you should identify the <strong>Pipeline</strong> model (SC or<br />
Quad), uniquely name it, and, in the case of the Quad, refer to the<br />
channel number. For example, <strong>Pipeline</strong>Quad_Prod7_Channel2.<br />
App (firmware version) Displays <strong>Pipeline</strong>’s firmware version number, composed of ,,.<br />
For example: 2,2,33165,00 indicates Version 2.2, Build 33165, channel 0.<br />
On <strong>Pipeline</strong> SC, the channel number ID is always 0. Upgrades are<br />
identified by major version and minor version numbers: 2.2, for example.<br />
Loader (version) Displays <strong>Pipeline</strong>’s boot loader version number, composed of ,,.<br />
CPLD Version CPLD chip version number on the <strong>Pipeline</strong>, for <strong>Telestream</strong> use.<br />
FPGA FPGA chip version number on the <strong>Pipeline</strong>, for <strong>Telestream</strong> use.<br />
Serial Number Four digit serial number of the device, not changeable.<br />
LAN When changing the IP address, you should click Save Changes to<br />
update the <strong>Pipeline</strong>, then close Internet Explorer or Safari. Wait about 30<br />
seconds, then restart your Web browser and log back on. If you don’t,<br />
your Control application will behave incorrectly, and <strong>Pipeline</strong><br />
Administrator will periodically display an error: “Can’t communicate with<br />
<strong>Pipeline</strong>”.<br />
Self-Assigned Select to utilize the default link-local IP address, generated based on the<br />
<strong>Pipeline</strong>’s serial number; incremented on <strong>Pipeline</strong> 2, 3, and 4 on Quad.<br />
DHCP Select to have the DHCP server assign an IP address. If DHCP fails after<br />
about 1 minute, the IP address reverts to the self-assigned address. The<br />
DHCP selection is only available with firmware revision 2.4 or earlier.<br />
Static Select to use the IP address, subnet mask, & gateway, entered manually.<br />
IP Address Enter the IP address assigned by your network administrator.<br />
Mask Enter the subnet mask assigned by your network administrator.<br />
Gateway Enter the gateway address provided by your network administrator.<br />
47
48<br />
Chapter 5<br />
Using <strong>Pipeline</strong> Administrator<br />
Control Description<br />
Security<br />
Password Editable field. No password is assigned by default. (Username is always<br />
administrator.) Limited to 15 characters; standard HTTP password rules<br />
apply. May be empty to disable authentication.<br />
Confirm Password Editable field. Enter second time to confirm.<br />
November, 2012
Control Description<br />
Options<br />
Default format when no<br />
input connected<br />
Default to black if SDI not<br />
present (SD units) / Render<br />
black and silence if SDI not<br />
present (HD units)<br />
Ignore input discontinuities<br />
(SD units) / Continue<br />
capture even if input<br />
frames are lost (HD units)<br />
95881<br />
Using the About Panel<br />
<strong>Pipeline</strong> User’s <strong>Guide</strong><br />
Select the default format from the menu. On HD <strong>Pipeline</strong>s, you can<br />
choose an SD NTSC|PAL or various HD 720|1080 profiles. On SC/Quad<br />
<strong>Pipeline</strong>s, choose SD NTSC|PAL. If the channel boots with no SDI input it<br />
will default to the value specified here. If the channel is already running<br />
with SDI input, selecting this setting will do nothing until the next time it<br />
boots without SDI input. If the channel is already running with SDI input<br />
and the input is removed, selecting a setting and clicking the save button<br />
will set the channel to the selected format.<br />
Note: If play out of 1080PsF at 23.98/24fps is desired you must select<br />
1080psf@23.98.<br />
<strong>Pipeline</strong> generates a test pattern when SDI input signal is not present. If<br />
this option is checked, the test pattern is a black frame. Otherwise, the<br />
generated test pattern is color bars. The pattern is generated in NTSC or<br />
PAL (or HD formats on HD Dual), based on the <strong>Pipeline</strong> mode. The last<br />
valid SDI signal sets the mode, unless there is no SDI present when it<br />
boots. In this case it reverts to the setting specified above. Audio is muted<br />
when this option is checked.<br />
Unchecked by default, to insure capture quality. Check when you do not<br />
want <strong>Pipeline</strong> to report missing/partial frames in input stream during<br />
capture. This is useful if, for example, you are capturing from a satellite<br />
feed or an unreliable SDI signal where errors occur more often and you<br />
do not want <strong>Pipeline</strong> to report an input error causing the capture session<br />
to abort the capture.<br />
Disable loopback Prevents input SDI from being present on the output SDI during capture.<br />
Consider enabling when exporting (or capturing) to a deck and the deck<br />
complains about the reference signal.<br />
Note: Due to hardware limitations it is never fully disabled. Even a small<br />
amount of signal causes some decks to complain. If this happens the<br />
user should physically remove either the SDI input or output (depending<br />
on capture or playout) from either the video source or the <strong>Pipeline</strong>.<br />
Assume F2 dominant input<br />
(SD units) / Check if input<br />
video is F2 dominant (HD<br />
units)<br />
Burn in Timecode (SD<br />
capture only)<br />
Remove VBI data before<br />
compression (SD units) /<br />
Replace VBI data with<br />
black before compression<br />
(HD units)<br />
Capture uncompressed<br />
VBI lines (HD units only)<br />
When checked during encoding, <strong>Pipeline</strong> constructs a frame by using a<br />
field pair consisting of an F2 field followed temporally by an F1 field. This<br />
is in contrast to normal operation, which constructs a frame using a field<br />
pair consisting of an F1 field followed temporally by an F2 field.<br />
When checked, <strong>Pipeline</strong> overlays the timecode it is using as its primary<br />
clock on the video image. This option applies for SD codecs only.<br />
When checked, <strong>Pipeline</strong> strips each frame of VBI data, replacing it with<br />
black before passing it to the encoder for compression.<br />
When checked, <strong>Pipeline</strong> passes the Uncompressed VBI data contained<br />
in an SD SDI signal to the control software to be included in appropriate<br />
output formats.<br />
49
50<br />
Chapter 5<br />
Using <strong>Pipeline</strong> Administrator<br />
Control Description<br />
VANC playout from<br />
essence metadata (HD<br />
units only)<br />
Check this option if you wish to play out the VANC data contained in the<br />
video essence of the file. This option overrides the play out of track based<br />
VANC metadata contained in QuickTime Closed Caption tracks or MXF<br />
SMPTE-436M packets.<br />
November, 2012
Control Description<br />
EDL<br />
Use IP address instead of<br />
<strong>Pipeline</strong> name<br />
Signal to abort on dropped<br />
frames<br />
95881<br />
Using the About Panel<br />
<strong>Pipeline</strong> User’s <strong>Guide</strong><br />
Check when you want communication to utilize the IP address of the<br />
<strong>Pipeline</strong>, instead of using the <strong>Pipeline</strong> name and resolving it via Bonjour.<br />
Check when you want FlipFactory to abort the capture process if a<br />
dropped frame occurs.<br />
Buttons If another user is connected and processing media with this <strong>Pipeline</strong>,<br />
using these buttons will interrupt the process, and it must be re-started.<br />
Save Changes Click to update the <strong>Pipeline</strong> with the new settings. If you change the IP<br />
address (by any means – returning to self-assigned, enabling DHCP, or<br />
assigning a static address), in about 30 seconds, <strong>Pipeline</strong> Administrator<br />
displays an error: “Unable to communicate with <strong>Pipeline</strong>”. Click OK, then<br />
reconnect to the <strong>Pipeline</strong> using the new IP address.<br />
Default Return settings to default. After returning the settings to default, be sure<br />
to click Save to make the settings take effect.<br />
Reboot This reboot performs a hardware-level reset, which disconnects <strong>Pipeline</strong><br />
from any client which may attach without warning. You are warned if you<br />
attempt to reboot the channel while it's in use. Click to reboot the <strong>Pipeline</strong><br />
if you change the password, to log on using the new password. You do<br />
not need to reboot when changing IP settings.<br />
Soft Reboot This reboot resets the <strong>Pipeline</strong> and any clients WILL lose their<br />
connection. <strong>Pipeline</strong> Administrator displays an alert to warn you.<br />
In cases where the <strong>Pipeline</strong> is non-responsive, click Soft Reboot to clear<br />
the problem.<br />
Note<br />
Always exit <strong>Pipeline</strong> Control before changing any parameters. If you leave it open and<br />
rename channels (or IP's), it will create duplicates in the UI. This can result in wrong<br />
channel connections.<br />
51
52<br />
Chapter 5<br />
Using <strong>Pipeline</strong> Administrator<br />
Using the Quad Panel<br />
The Quad panel only displays when <strong>Pipeline</strong> Administrator is connected to one of the <strong>Pipeline</strong> channels on<br />
a <strong>Pipeline</strong> Quad. When you’re connected to any other <strong>Pipeline</strong> device, this page does not display.<br />
To display the Quad panel, click quad in the menu bar at the top of the window:<br />
Figure 5–4. Quad panel controls confidence monitoring<br />
Choose which channel if any, to<br />
monitor.<br />
Be sure to click Save Changes<br />
to make the change.<br />
November, 2012
Use the Quad panel to set up confidence monitoring.<br />
Table 5–2. Configure Panel controls and descriptions.<br />
Confidence Monitoring<br />
95881<br />
Using the About Panel<br />
<strong>Pipeline</strong> User’s <strong>Guide</strong><br />
Control Description<br />
Confidence Monitoring<br />
Normal Operation – no Check to disable confidence monitoring. When confidence monitoring is<br />
monitoring<br />
disabled, channel 4 (<strong>Pipeline</strong> 4 on the Quad) operates normally, and can<br />
be used for capture/playout operations.<br />
Note: This option is only enabled when you log on to channel 4. You<br />
cannot make this change from other channels.<br />
Monitor channel 1 | 2 | 3 Check to enable confidence monitoring and encode and send the<br />
rendered stream of the selected channel on channel 4 SDI Out as well.<br />
Click Save Changes when you’re done to update the settings.<br />
Confidence monitoring is the process of employing channel 4 on the <strong>Pipeline</strong> Quad to sniff the exact same<br />
video packets being captured from any of the other <strong>Pipeline</strong> channels on the Quad and processed by the<br />
client application during a capture operation (crash recording), for the purpose of verifying that the output is<br />
a true representation of the input, or that the output meets certain quality limits or other metrics.<br />
Confidence monitoring can be enabled when you are performing a capture operation or crash recording<br />
from channels 1, 2, or 3 on a <strong>Pipeline</strong> Quad. When enabled, <strong>Pipeline</strong> 4 is also dedicated to the capture<br />
operation for the duration of the capture operation.<br />
Figure 5–5. Confidence monitoring is performed by channel 4 via internal Ethernet bridge<br />
<strong>Pipeline</strong> Quad’s Channel 1 is performing a capture operation –<br />
decoding SDI from the SDI Input to Ethernet out, to <strong>Pipeline</strong> Control.<br />
Channel 1 SDI In<br />
<strong>Pipeline</strong> Quad<br />
Confidence monitoring of channel 1 enabled.<br />
Internal Ethernet bridge<br />
Ethernet Out<br />
Channel 4 is confidence monitoring channel 1 –<br />
sniffing the outbound traffic on the internal<br />
Ethernet bridge and re-encoding it, outputting the<br />
resulting SDI on SDI Out for review.<br />
As SDI is being fed into the capture channel’s SDI In port, it is encoded and sent out in TCP packets on the<br />
Ethernet port to the client application (<strong>Pipeline</strong> Control, <strong>Pipeline</strong> Administrator, FlipFactory, Episode, Final<br />
Cut Pro, and other media systems). Unlike other confidence monitoring that just re-encodes the media<br />
directly in the same device, the channel 4 <strong>Pipeline</strong> sniffs the very same packets on the Ethernet just as the<br />
client does; it then decodes the Ethernet input, and outputs the resulting SDI on its own SDI Out port.<br />
53
54<br />
Chapter 5<br />
Using <strong>Pipeline</strong> Administrator<br />
Operators can attach monitors and vector scopes to the SDI out to view and measure the actual media in a<br />
full-circle operation, confident that they are testing and viewing exactly the same input as the client system<br />
is receiving.<br />
Note<br />
To enable confidence monitoring, you must log on to channel 4 to display the enabled<br />
confidence monitoring option on the Quad panel. Channel 4 must be idle before you can<br />
enable confidence monitoring. You can confidence monitor both capture operations and<br />
crash recording operations.<br />
When confidence monitoring is enabled and the preview media stream from the channel selected is being<br />
consumed by <strong>Pipeline</strong> Control, <strong>Pipeline</strong> Administrator, or in FlipFactory, the confidence monitor (channel 4<br />
SDI Out) displays black.<br />
If the monitored channel’s stream is DV, DVCPro, IMX, MPEG-2, or ProRes then the confidence monitor<br />
displays the full frame video as it is encoded.<br />
If the monitored channel is not streaming media on the LAN, then the confidence monitor displays a<br />
banner on the image. The frame background is either the last frame of the previous stream or black.<br />
Figure 5–6. Confidence monitor displays a banner when no media stream is present<br />
November, 2012
Using the Counters Panel<br />
To display the Counters panel, click counters in the menu bar at the top of the window:<br />
Figure 5–7. Counters panel displays various processing values<br />
95881<br />
Using the About Panel<br />
<strong>Pipeline</strong> User’s <strong>Guide</strong><br />
Use the Counters panel to view various values related to encoding and decoding to determine if operations<br />
are normal or if there are failures that must be corrected. These values are reset each time a new RTSP<br />
connection is made. This information may also be utilized when you are working with <strong>Telestream</strong> Customer<br />
Service to resolve an issue.<br />
Table 5–3. Counters Panel controls and descriptions.<br />
Value Description<br />
Frames The number of frames processed during this RTSP session.<br />
Process The number of frames dropped because of excessive CPU load. If this<br />
number is greater than zero, you’re losing frames and quality. Determine<br />
the cause of the error and reprocess the media.<br />
Video Sent Number of video frames sent over RTP connection during an capture<br />
operation.<br />
Audio Sent The number of audio frames sent during capture over RTP.<br />
Status Sent The number of status frames sent during capture over RTP.<br />
55
56<br />
Chapter 5<br />
Using <strong>Pipeline</strong> Administrator<br />
Value Description<br />
Video Encode Time Number of microseconds it took to process the current video frame.<br />
Video Queue The number of video frames dropped due to excessive network traffic. If<br />
this number is greater than zero, you’re losing frames and quality.<br />
Determine the cause of the error and reprocess the media<br />
Audio Queue The number of audio frames dropped due to excessive network traffic. If<br />
this number is greater than zero, you’re losing frames and quality.<br />
Determine the cause of the error and reprocess the media<br />
Status Queue The number of status frames dropped due to excessive network traffic.<br />
Video Sequence Count of frames where the timecode (as observed on the RS-422<br />
connection) was not incrementally increasing.<br />
Audio Align Number of times the audio processor re-synchronized due to an<br />
Embedded SDI audio error.<br />
Video Align Number of times the video processor had to re-synchronize due to an<br />
SDI video error.<br />
Video Frame Exceeded CBR codec error counter.<br />
Audio Frames Requested During playout, <strong>Pipeline</strong> requests audio and video frames serially. This is<br />
the number of audio frames requested, and should be the same number<br />
as Audio Frames Received.<br />
Audio Frames Received Number of audio frames received during playout.<br />
Video Frames Requested Number of video frames requested during playout. Should be the same<br />
number as Video Frames Received<br />
Video Frames Received Number of video frames received during playout.<br />
TCP retransmissions Number of times TCP packets had to be retransmitted.<br />
November, 2012
Using the Upgrade Panel<br />
To display the Upgrade panel, click upgrade in the menu bar at the top of the window:<br />
Figure 5–8. Upgrade panel allows you to upgrade <strong>Pipeline</strong> firmware<br />
95881<br />
Using the About Panel<br />
<strong>Pipeline</strong> User’s <strong>Guide</strong><br />
<strong>Pipeline</strong> is designed so its firmware and <strong>Pipeline</strong> Administrator Web application can be upgraded easily<br />
when new revisions of <strong>Pipeline</strong> software are made available by <strong>Telestream</strong>.<br />
Note<br />
To determine the current version of your <strong>Pipeline</strong>, log on and display the Configure<br />
page. The version number is the value in the App field, which displays the firmware<br />
version number: ,. For<br />
example: 2,2,33165,00 indicates Version 2.2, Build 33165.<br />
You can periodically check the <strong>Pipeline</strong> support page at www.telestream.net/telestream-support/pipeline/<br />
updates.htm to determine if there is newer software. (Registered users are notified of upgrades via E-mail.)<br />
On the site, click Support > Support Home in the main menu at the top of the page, then select <strong>Pipeline</strong> ><br />
Updates on the right, under Enterprise Product Support. <strong>Pipeline</strong> firmware updates are available on this<br />
page.<br />
To upgrade a <strong>Pipeline</strong>, follow these steps:<br />
57
58<br />
Chapter 5<br />
Using <strong>Pipeline</strong> Administrator<br />
1. Connect to the target <strong>Pipeline</strong> with a Web browser and determine the current firmware version via the<br />
Configure panel (Using the Configure Panel on page 46).<br />
2. Log on to the <strong>Pipeline</strong> support page at www.telestream.net/telestream-support/pipeline/updates.htm.<br />
3. Download the <strong>Pipeline</strong> firmware file (firmware-xxxxx.pln) to your computer.<br />
After downloading the firmware file, upgrade the firmware by following these steps:<br />
1. Log on to the target <strong>Pipeline</strong> using a Web browser.<br />
2. Select Upgrade from the menu to display the Upgrade panel.<br />
3. Click Choose File to locate and select the firmware file (firmware.xxxxx.pln) you plan to use.<br />
4. Click Upgrade and observe the progress bar and notes about the process.<br />
During a firmware upgrade, the front SDI In LED (on left) lights yellow during the upgrade process.<br />
When the <strong>Pipeline</strong> has been upgraded, <strong>Pipeline</strong> Administrator reboots the <strong>Pipeline</strong> channel and<br />
displays a rebooting message on the Upgrade page. In about 15 to 30 seconds, both the In and Power<br />
LEDs light green. <strong>Pipeline</strong> Administrator reconnects automatically and displays the Configure panel.<br />
November, 2012
C H A P T E R<br />
Using <strong>Pipeline</strong> Control<br />
Chapter 6, Using <strong>Pipeline</strong> Control<br />
Use this chapter to learn about <strong>Pipeline</strong> Control and how to use <strong>Pipeline</strong> Control’s general features.<br />
<strong>Pipeline</strong> Control is the host application for controlling digital media capture and play out from <strong>Pipeline</strong><br />
devices. <strong>Pipeline</strong> Control is available for both Mac OS X and Windows users. <strong>Pipeline</strong> control provides<br />
different document types to provide log and capture, scheduled capture and play out, triggered manual and<br />
automated capture, various types of Print to Tape operations, and Controlled Playout.<br />
<strong>Pipeline</strong> Control supports both SD and HD – <strong>Pipeline</strong> SC, <strong>Pipeline</strong> Quad, and <strong>Pipeline</strong> HD Dual.<br />
Topics<br />
� <strong>Pipeline</strong> Control Overview (page 59)<br />
� Starting <strong>Pipeline</strong> Control (page 61)<br />
� Creating New <strong>Pipeline</strong> Control Documents (page 61)<br />
� <strong>Pipeline</strong> Control Menus (page 63)<br />
� Using The <strong>Pipeline</strong> Settings Panel (page 66)<br />
� Configuring Publishers (page 70)<br />
� Using the <strong>Pipeline</strong> State Panel (page 80)<br />
� Using The Video Preview Panel (page 81)<br />
� Using the Audio Preview Panel (page 82)<br />
� Loading and Saving Clip List Files (page 83)<br />
� Setting Up <strong>Pipeline</strong> Control Options (page 83)<br />
� Using the Video Wall (page 90)<br />
� Using the Label Editor (page 93)<br />
� File Formats/Wrappers (page 95)<br />
� Using the Diagnostics Panel (page 94)<br />
� <strong>Telestream</strong> Intermediary Format (TIFO) (page 105)<br />
PIPELINE CONTROL OVERVIEW<br />
<strong>Pipeline</strong> Control enables you to select a specific <strong>Pipeline</strong> and configure it for your workflow requirements.<br />
6<br />
59
60<br />
Chapter 6<br />
Using <strong>Pipeline</strong> Control<br />
<strong>Pipeline</strong> Control provides specific document types to support various digital media recording and playout<br />
tasks: Scheduled Capture (usually called a Schedule, for short), Log & Capture, Trigger (for manual or<br />
automated capture), Print to Tape, and Controlled Playout.<br />
<strong>Pipeline</strong> Control allows you to open multiple documents at the same time and work with them in a tabbed<br />
window.<br />
Figure 6–1. Typical <strong>Pipeline</strong> Control window for Windows (Schedule window shown)<br />
<strong>Pipeline</strong>s are discovered and tracked on your network by two methods: Bonjour or manually. Bonjour is<br />
preferred on most networks, because it’s automatic. You can use the manual discovery feature (Discovery<br />
Tab on page 88) to discover and select <strong>Pipeline</strong>s devices across sub-nets or when Bonjour communication<br />
traffic is blocked.<br />
<strong>Pipeline</strong> Control executes the tasks you specify in each document independently of tasks in other open<br />
documents. Tasks are executed when you activate (or turn on) a document. The panels on the left are<br />
generally the same in all document types. The panels and controls on the right are unique to each<br />
document type. Tasks specified in a document are executed when the document is activated.<br />
Before you start working in a tab, make sure the tab is actually the one you want to update.<br />
Note<br />
Drag and Drop is supported in some windows. On Windows Server platforms,<br />
Windows Explorer does not run as administrator. However, <strong>Pipeline</strong> Control by default<br />
runs as administrator. When running <strong>Pipeline</strong> as administrator, files cannot be dragged<br />
from a Windows Explorer window into <strong>Pipeline</strong> Control window.<br />
November, 2012
STARTING PIPELINE CONTROL<br />
95881<br />
Starting <strong>Pipeline</strong> Control<br />
<strong>Pipeline</strong> User’s <strong>Guide</strong><br />
You can start <strong>Pipeline</strong> Control by selecting Start > Programs > <strong>Telestream</strong> > <strong>Pipeline</strong> > <strong>Pipeline</strong> Control.<br />
You can also start <strong>Pipeline</strong> Control by double-clicking a <strong>Pipeline</strong> document you’ve saved. Or, by dropping a<br />
<strong>Pipeline</strong> document onto the <strong>Pipeline</strong> Control icon in the Programs folder or a <strong>Pipeline</strong> Control shortcut on<br />
your desktop, for example.<br />
Note<br />
<strong>Pipeline</strong> Control can only be used with <strong>Pipeline</strong>s whose firmware is compatible.<br />
When you install or upgrade <strong>Pipeline</strong> software, you may need to upgrade your <strong>Pipeline</strong><br />
firmware as well. If you select a <strong>Pipeline</strong> with older firmware that is incompatible with<br />
the current version of <strong>Pipeline</strong> Control, you will be warned that this may cause<br />
problems.<br />
When you open schedules created in previous versions of <strong>Pipeline</strong> Control, you may<br />
need to reset the audio and video settings before using them.<br />
By default, <strong>Pipeline</strong> documents are saved in the My Documents folder. When you open <strong>Pipeline</strong> Control in<br />
this manner, the <strong>Pipeline</strong> document you double-clicked is displayed.<br />
Note<br />
If you’re opening <strong>Pipeline</strong> Control for the first time, you should set up your <strong>Pipeline</strong><br />
Control preferences. For details on setting up <strong>Pipeline</strong> Control preferences, see Setting<br />
Up <strong>Pipeline</strong> Control Options (page 83).<br />
CREATING NEW PIPELINE CONTROL DOCUMENTS<br />
<strong>Pipeline</strong> Control provides specific document types to support various tasks you can perform.<br />
Creating New Documents via the Task Selector<br />
When you start <strong>Pipeline</strong> Control (or when no documents are open), it displays a Task Selector panel that<br />
allows you to choose which task you want to perform (and thus, which type of document to display):<br />
61
62<br />
Chapter 6<br />
Using <strong>Pipeline</strong> Control<br />
Figure 6–2. Use the Task Selector to create new documents.<br />
Scheduled Capture (Page 107). Click the Scheduled Capture button to create and display a new, untitled<br />
Scheduled Capture document.<br />
Log & Capture. (Page 117) . Click the Log & Capture button to create and display a new, untitled Log &<br />
Capture document.<br />
Triggered Capture (Page 127). Click the Triggered Capture button to create and display a new, untitled<br />
Triggered Capture document.<br />
Print to Tape (Page 137). Click the Print to Tape button to create and display a new, untitled Print to Tape<br />
document.<br />
Controlled Playout (Page 143). Click Controlled Playout to create and display a new, untitled Controlled<br />
Playout document.<br />
Note<br />
For details on how to use the panels, controls, and features of each type of document,<br />
go to their respective chapters.<br />
Creating New Documents via the File Menu<br />
You can also create a new, untitled document by selecting the menu item of the appropriate window type in<br />
the File menu.<br />
For details about how to use these documents to perform various recording tasks, see these chapters:<br />
November, 2012
� Scheduled Capture – Page 107<br />
� Log & Capture – Page 117<br />
� Triggered Capture – Page 127<br />
� Print to Tape – Page 137<br />
� Controlled Playout – Page 143<br />
PIPELINE CONTROL MENUS<br />
95881<br />
<strong>Pipeline</strong> Control Menus<br />
<strong>Pipeline</strong> User’s <strong>Guide</strong><br />
Use this section as a quick reference for menu items. (General menus and menu items are not described.)<br />
File Menu<br />
Open. Displays an Open File dialog so you can browse and open saved <strong>Pipeline</strong> Control documents.<br />
New Schedule Document. Displays a new, untitled Schedule Capture document.<br />
New Log & Capture Document. Displays a new, untitled Log & Capture document.<br />
New Trigger Document. Displays a new, untitled Triggered Capture document.<br />
New Print to Tape Document. Displays a new, untitled Print to Tape document.<br />
New Controlled Playout Document. Displays a new, untitled Controlled Playout document.<br />
Import GVG 4 EDL. Displays an Open dialog so you can import a GVG 4 EDL file. (Loading and Saving<br />
Clip List Files (page 83)). EDLs are generated by Final Cut Pro and Avid software.<br />
Import Final Cut Pro XML. Displays an Open dialog, so you can import a Final Cut Pro XML Interchange<br />
file. (Loading and Saving Clip List Files (page 83)).<br />
Export GVG 4 EDL. Displays an File dialog so you can save the current clip list as a GVG 4 EDL file.<br />
(Loading and Saving Clip List Files (page 83)).<br />
Export Final Cut Pro XML. Displays a File dialog so you can save the current clip list as a Final Cut Pro<br />
XML Interchange file. (Loading and Saving Clip List Files (page 83)).<br />
Note<br />
When exporting one of the capture documents, the value of the name element (in the<br />
XML file) of a clip is determined by:<br />
1. If a clip has already been written to disk, the name element takes on the clip's file<br />
name without the extension.<br />
2. If the clip has not yet been written to disk and if its title is in tokenized format, then<br />
the value of the name element becomes the tokenized format converted to a string.<br />
For example, if the clip's title was <strong>Pipeline</strong> plus the counter token, the name element<br />
used is <strong>Pipeline</strong> COUNTER.<br />
3. The default name element used is A Clip.<br />
63
64<br />
Chapter 6<br />
Using <strong>Pipeline</strong> Control<br />
Exit. Closes the program. If any document has not been saved or has unsaved changes, <strong>Pipeline</strong> Control<br />
asks you if you want to save the document before closing.<br />
Save. Saves the changes to the active window in a new document.<br />
Save All. Saves all of the opened <strong>Pipeline</strong> documents simultaneously. Only saves documents previously<br />
saved with a name other than the default.<br />
Save As. Displays a Save File dialog so you can save the document with a different name or in a different<br />
directory.<br />
Save Settings as Template. Saves your current settings as default: <strong>Pipeline</strong>, wrapper, video (codec,<br />
frame size, frame rate, quality), audio (type, channels, bit depth), clock, handles, and publish. After saving<br />
your settings as a template, new documents that you create inherit these settings.<br />
Control Menu<br />
Note<br />
Templates are stored in a file named template.pipeline located in:<br />
Win7: C:\Users\\AppData\Roaming\<strong>Telestream</strong><br />
To return <strong>Pipeline</strong> Control to the default document settings, delete this file.<br />
Control Menu items control the state of the selected tab.<br />
Preview. Click to connect to the selected <strong>Pipeline</strong> and display the source media, if any. You can preview<br />
video and audio whether the document is activated or deactivated. Select again to stop preview.<br />
Active. Click to activate the document. When a document is active, it can’t be edited, and it is being<br />
processed. To deactivate the document (to stop processing or to modify it), select it again.<br />
Note<br />
When opening Saved Schedule and Trigger documents they can be automatically<br />
activated by editing the AutoActivate element in the document with an XML or text<br />
editor. Simply change the AutoActivate element from false to true:<br />
Document will auto activate - true<br />
Device Menu and Keyboard Shortcuts<br />
The Device menu provides commands for controlling the VTR of the connected device using the following<br />
keyboard commands and keyboard shortcuts.<br />
Play – Space bar. Put VTR in play mode and play the video forward at normal forward speed.<br />
Stop – K. Stop the VTR at the current play point.<br />
Rewind – J. Play video backward at the deck’s rewind speed.<br />
Fast Forward – L. Play forward at deck’s fast forward speed.<br />
Step Backward – [ (Left Brace). Step one frame backward.<br />
November, 2012
Step Forward – ] (Right Brace). Step one frame forward.<br />
95881<br />
<strong>Pipeline</strong> Control Menus<br />
<strong>Pipeline</strong> User’s <strong>Guide</strong><br />
Go To Start (local playback only) – Control-[ (Left Brace). Return the clip to the beginning.<br />
Go To End (local playback only) – Control-] (Right Brace). Go to the end of the tape.<br />
Clip Menu<br />
The Clip menu commands enable you to edit or delete clips, and provide keyboard shortcuts when you are<br />
creating a new clip.<br />
Add. Creates a new event.<br />
Clear. Remove the selected clip (the file is not deleted from the file system.)<br />
Edit. Edit the selected clip details and metadata.<br />
Review. Select to review a captured clip in the Preview panel.<br />
The following menu items are only available in Log and Capture documents:<br />
Quick Mark – M. Single-click feature for logging a clip and setting a new mark in point. Click to set the<br />
current point on the tape as the mark out point and logs the clip. The last clip’s mark out point becomes the<br />
new mark in point, so that you only have to click Quick Mark again to set the out point and log the clip.<br />
Set Mark In – I. Set the tape’s current timecode as the clip’s in point.<br />
Set Mark Out – O. Set the tapes current timecode as the clip’s out point.<br />
Go To Mark In. Roll the tape to the point specified in the Mark In timecode field.<br />
Go To Mark Out. Roll the tape to the point specified in the Mark Out timecode field.<br />
Log Clip – P. Create a clip under the current tape name in the tape field, using the values in the General<br />
and metadata tabs.<br />
Tools Menu<br />
Options. Displays the Options window, so you can configure your capture, device, update, discovery, and<br />
security settings (Setting Up <strong>Pipeline</strong> Control Options (page 83)).<br />
Video Wall. Displays a panel with multiple video streams (Using the Video Wall (page 90)).<br />
Label Editor. Displays an editor that allows you to create your own metadata labels (Using the Label<br />
Editor (page 93)).<br />
Help Menu<br />
User’s <strong>Guide</strong>. Displays the <strong>Pipeline</strong> User’s <strong>Guide</strong> (the guide you are reading).<br />
Gather Support Information. Displays the Support Information dialog window that enables you to<br />
automatically gather information for use by technical support. The following information is gathered:<br />
• <strong>Pipeline</strong> Trace logs<br />
• Host system profile information<br />
• Screen shot of the <strong>Pipeline</strong> document<br />
65
66<br />
Chapter 6<br />
Using <strong>Pipeline</strong> Control<br />
• Saved document file<br />
• Windows System and Application Event Logs<br />
• <strong>Pipeline</strong> Device Crash log<br />
• <strong>Pipeline</strong> F/W and Software versions<br />
• Gather Telent 911 information<br />
Obtain a case number from <strong>Telestream</strong> Support and enter it into the Case Number field. Click Export To<br />
Desktop to save information in a zip file on your desktop. Email this zip file to <strong>Telestream</strong> Support.<br />
Figure 6–3. Support Information.<br />
Enter case number<br />
About <strong>Pipeline</strong> Control. Displays the About dialog with <strong>Pipeline</strong> Control’s version number.<br />
USING THE PIPELINE SETTINGS PANEL<br />
At the top of <strong>Pipeline</strong> Control is the <strong>Pipeline</strong> Settings panel. This panel displays the <strong>Pipeline</strong> settings for the<br />
active tab. There are several selectors in the panel. These selectors enable you to select a specific<br />
<strong>Pipeline</strong> and configure the document to use it specifically for the tasks or workflow you intend. Some<br />
selectors do not display in certain document types. For example, in a Trigger document, the Handles<br />
selector doesn’t display.<br />
Note<br />
Click Export To<br />
Desktop<br />
In preview mode, these settings are disabled and you can’t make changes. To make<br />
changes, you must first return to idle mode. If <strong>Pipeline</strong> Control is has been locked<br />
(Security Tab on page 89), you also can’t make changes to <strong>Pipeline</strong> settings. Use the<br />
password to unlock <strong>Pipeline</strong> Control if you need to make changes to <strong>Pipeline</strong> settings.<br />
November, 2012
Figure 6–4. Windows <strong>Pipeline</strong> Settings panel.<br />
<strong>Pipeline</strong> Selector. Click<br />
to select a <strong>Pipeline</strong>.<br />
Audio. Click to select and<br />
configure the audio codec.<br />
95881<br />
Using The <strong>Pipeline</strong> Settings Panel<br />
<strong>Pipeline</strong> User’s <strong>Guide</strong><br />
These settings are saved with the document. When the document is connected to a <strong>Pipeline</strong>, the <strong>Pipeline</strong><br />
is configured for the task, based on these settings.<br />
Selecting a <strong>Pipeline</strong><br />
To select a <strong>Pipeline</strong>, click the <strong>Pipeline</strong> drop-down list and pick one from the list. Additionally, when <strong>Pipeline</strong><br />
Control discovers <strong>Pipeline</strong>s on the network, it records the Network Interface Card (NIC) that the <strong>Pipeline</strong><br />
responded on. The computer's routing tables are then examined to see if a valid route is available to the<br />
<strong>Pipeline</strong> Control application on which to communicate. If a valid route is not found then Update Route is<br />
displayed. Click Update Route to add a valid entry into the computer's routing table.<br />
Figure 6–5. Windows <strong>Pipeline</strong> browser and selection window.<br />
Click R<br />
Wrapper. Click to<br />
select a file type.<br />
Publish. Click to select an action to<br />
perform when each clip is ready.<br />
Click R to refresh status. A green bullet icon indicates that this <strong>Pipeline</strong> is available. A red bullet indicates<br />
that it is currently busy (connected to another client application). Gray indicates offline; yellow indicates an<br />
unknown state. To enable you to select a <strong>Pipeline</strong> to set up a document for use later, you can select a<br />
<strong>Pipeline</strong> regardless of its state. This dialog reports the <strong>Pipeline</strong>'s current status (idle, capturing, recording,<br />
unknown), name, input source, firmware version, device type (SD or HD) and system NIC connection.<br />
Selecting and Configuring Codecs<br />
Clock. Click to select a<br />
timecode clock source.<br />
Video. Click to select and<br />
configure the video codec.<br />
Handles. Adjust the time<br />
value of handles.<br />
Select a <strong>Pipeline</strong><br />
Click Update<br />
Route<br />
When you don't have a <strong>Pipeline</strong> selected (None), all codecs display. When you select a specific <strong>Pipeline</strong>,<br />
only those codecs supported by the target <strong>Pipeline</strong> are hinted with a green star icon. When choosing the<br />
frame rate, make sure you’re providing an appropriate source.<br />
67
68<br />
Chapter 6<br />
Using <strong>Pipeline</strong> Control<br />
Figure 6–6. <strong>Pipeline</strong> Control notifies you when your configuration is not supported by the <strong>Pipeline</strong>.<br />
Based on your <strong>Pipeline</strong>, you can select from Motion JPEG, DV, DVCPro, DVCPro HD, IMX, MPEG2 I-<br />
Frame, ProRes, Avid DNxHD, and Uncompressed codecs. Each codec has one or more profiles from<br />
which you can choose.<br />
Note<br />
Settings are hinted when they are known to work with the selected <strong>Pipeline</strong> or wrapper<br />
and its current input signal. However, you may be creating documents for later use,<br />
when the signal is different, so you can select settings that may work if you change the<br />
<strong>Pipeline</strong>’s input signal.<br />
Hints also indicate the settings that are known to work given the selected wrapper<br />
format, such as QuickTime, TIFO, MXF OP-Atom, or MXF-OP1a. If both the selected<br />
wrapper and the selected <strong>Pipeline</strong> support the setting, it is hinted.<br />
If you’ve already selected a codec and settings – and you select a <strong>Pipeline</strong> that doesn't<br />
support it – <strong>Pipeline</strong> Control will notify you when you connect that it doesn’t support the<br />
selected codec.<br />
Each codec’s profile details are located in Appendix C, <strong>Pipeline</strong> Control Codec Profiles (page 157).<br />
When you select a codec only the resolutions that apply to that codec are selectable. Frame Rate and<br />
Quality settings are filtered based on the resolution you select. Based on the SDI signal of the connected<br />
<strong>Pipeline</strong>, resolutions and frame rates that display a green star are compatible with the current signal.<br />
Note<br />
If your source is HD and you choose an SD codec, <strong>Pipeline</strong> down-converts the video<br />
according to your settings. However, <strong>Pipeline</strong>'s down-convert is not intended for<br />
production use.<br />
The SDI stream being ingested by the <strong>Pipeline</strong> may be from one of many possible sources. if you select an<br />
NTSC frame rate to encode PAL, or a PAL frame rate to encode NTSC, or other incompatible parameters,<br />
<strong>Pipeline</strong> Control displays an error and prevents the capture from occurring.<br />
When selecting a Quality setting for NTSC or PAL captures be sure to select a setting with an Anamorphic<br />
suffix if the SDI source of the <strong>Pipeline</strong> requires anamorphic encoding. When selected, video preview is<br />
displayed at the correct aspect ratio and <strong>Pipeline</strong> Control embeds a display size flag in the QuickTime file<br />
so that other QuickTime applications can determine the correct display aspect ratio.<br />
Selecting and Configuring a Video Codec<br />
Click the Video drop-down menu to select the video codec you want to use. Based on your selection, the<br />
frame size, frame rate, and quality drop-down menus populate with available values. Select the frame size,<br />
rate, and quality from the drop-down menus to meet your workflow requirements.<br />
November, 2012
Configuring the Audio Codec<br />
95881<br />
Using The <strong>Pipeline</strong> Settings Panel<br />
<strong>Pipeline</strong> User’s <strong>Guide</strong><br />
In the Windows version, DolbyE is also available. Select the number of channels, bit rate, and sample size<br />
from the drop-down menus. Valid options display with a green star icon (hinted).<br />
When you don't have a specific <strong>Pipeline</strong> selected (None), all Quality settings can be selected. Audio<br />
parameters include Channels (2, 4. 8, or 16), Sample Rate (always 48K) and Quality (16-bit or 24-bit, Big<br />
Endian and Little Endian).<br />
Audio Tracks<br />
When 2 channels are selected, audio track selection can be: Mono tracks (PCM) for all channels to be in<br />
individual audio tracks, or Stereo tracks (PCM) to pair audio channels into stereo tracks. If 4, 8, or 16<br />
channels are selected, a third option is available which combines all channels in one track.<br />
Each of these audio track selections (mono, stereo, and n-tracks) has an additional selection of PCM<br />
(default) or DolbyE that can be made for each channel. Select DolbyE only if you are sure DolbyE is<br />
present on the selected track.<br />
Selecting a Timecode Clock Source<br />
Click the Clock drop-down menu to select which device provides the timecode clock source signal. You<br />
must be connected to a <strong>Pipeline</strong> in order to obtain a timecode clock source, except when you choose<br />
Computer Clock. Choose from Auto, RS-422 Device, Sync Input (<strong>Pipeline</strong> Quad and <strong>Pipeline</strong> HD Dual),<br />
Video Input, Internal Clock, Computer Clock, <strong>Pipeline</strong> Channel 1 (when connected to a <strong>Pipeline</strong> Quad), or<br />
Zero Based timecode. When you change your timecode clock source, save your file to save changes.<br />
Auto. When you select Auto the <strong>Pipeline</strong> system will search for the first appropriate time source in the<br />
following order: RS422, Ext Sync SDI VITC, Input Signal VITC, Zero Based.<br />
For example, if you’re connected to a <strong>Pipeline</strong> SC and RS-422 has a timecode, it will be used because it is<br />
highest priority (column on right). If not, SDI timecode will be used (2nd priority), etc.<br />
RS-422 Device. Uses the timecode provided by the device attached to the RS-422 port on the target<br />
<strong>Pipeline</strong>; usually a VTR. If the timecode is not available, a zero-based timecode is provided.<br />
Sync Input. For use with <strong>Pipeline</strong> Quad and HD Dual only. Uses the timecode provided through the<br />
Reference Input signal in VBI or VANC. If the timecode is not available, a zero-based timecode is provided.<br />
Do not select Sync Input if you are connected to a single-channel <strong>Pipeline</strong>.<br />
Video Input. Uses the timecode provided on the <strong>Pipeline</strong>’s video input signal in VBI or VANC. If the<br />
timecode is not available a zero-based timecode is provided.<br />
<strong>Pipeline</strong> Clock. Uses the timecode provided by the <strong>Pipeline</strong> itself.<br />
Computer Clock. Uses the timecode provided by the host computer on which <strong>Pipeline</strong> Control is running.<br />
<strong>Pipeline</strong> Channel 1. When connected to a <strong>Pipeline</strong> Quad you can select Channel 1’s timecode. This<br />
enables multiple channels of a Quad to share a common timecode when an external timecode, either on<br />
the video input or the Reference input, is not available.<br />
Zero Based . Captures will not necessarily start at 00:00:00:00. The timecode will start at 00:00:00:00 and<br />
then free run when the document is first activated. The timecode of the capture will be whatever the<br />
timecode is when the capture is initiated.<br />
69
70<br />
Chapter 6<br />
Using <strong>Pipeline</strong> Control<br />
Setting up Handles<br />
The Handles control displays only in Log & Capture and Schedule documents. Enter the value in minutes<br />
and seconds, up to 5:59 minutes to capture before and after the actual scheduled capture time.<br />
Selecting a Publisher<br />
Click the Publish drop-down menu to select the system that you want to notify for each clip event.<br />
FlipFactory and Copy publishers automatically send jobs when the file is ready. For details about setting up<br />
each type of publisher, see Configuring Publishers (page 70).<br />
If you don’t want to directly connect to another system in your workflow to pass the saved media file and<br />
optional metadata, select None.<br />
CONFIGURING PUBLISHERS<br />
Publishers are methods of notifying a specific system that an event has occurred, or that media is available<br />
for processing. Methods differ, based on the notification requirements of the system you’ve selected. When<br />
you select a publisher, you’re prompted to configure it. You can select and use one publisher per schedule.<br />
� Using Vantage Publish within <strong>Pipeline</strong> Control for Windows (page 70)<br />
� Using Agility Publish within <strong>Pipeline</strong> Control for Windows (page 73)<br />
� Side Car XML Plugin (page 75)<br />
� Copy File Publisher (page 76)<br />
� Avid MXF Copy File Publisher (page 76)<br />
� FlipFactory Publisher (page 77)<br />
Using Vantage Publish within <strong>Pipeline</strong> Control for Windows<br />
Set up and use the Vantage publisher in <strong>Pipeline</strong> Control when you want to submit media and metadata<br />
directly into an active Vantage Workflow.<br />
<strong>Pipeline</strong> Vantage Publish can speed your jobs to near real-time by starting Vantage Workflow processes as<br />
soon as your capture begins. To do this select TIFO as the wrapper type. When capturing media into a<br />
TIFO container Vantage is notified as soon as the file is created, allowing the Workflow to begin processing<br />
media and metadata immediately, thus shortening the total processing time. When capturing media in any<br />
other file format, Vantage is notified when capture is complete and the file is closed.<br />
There are two simple steps to configuring a <strong>Pipeline</strong> Control for use with the Vantage Publish:<br />
1. Select the folder location where <strong>Pipeline</strong> Control will be writing the captured media file to. This is done<br />
from within the wrapper dialog (QuickTime, MXF OP1a or TIFO). The location must be accessible from<br />
the Vantage system and should be a network UNC path.<br />
2. Select the Vantage Domain and Workflow you wish to drive from within the Vantage Publish plug-in<br />
dialog.<br />
The workflow<br />
<strong>Pipeline</strong> Control captures and writes a media file to a media storage location and submits a job to a<br />
selected Vantage Workflow. The job request includes the Workflow name, any metadata required by the<br />
Workflow and the location where Vantage can find the captured media file. Vantage will start the job and<br />
November, 2012
95881<br />
Configuring Publishers<br />
<strong>Pipeline</strong> User’s <strong>Guide</strong><br />
processes it through the respective Workflow using the captured media file and metadata at the location<br />
given to it by <strong>Pipeline</strong> Control's Vantage Publish.<br />
Figure 6–7. Vantage Workflow.<br />
Creating a Vantage Workflow<br />
You can submit a job to any active Vantage workflow. If you wish to pass metadata from <strong>Pipeline</strong> Control to<br />
a Vantage workflow then your Workflow design must begin with a Receive Action containing at least one<br />
metadata label.<br />
Any metadata label contained in the Receive Action will be pushed forward to the <strong>Pipeline</strong> Control's Label<br />
interface allowing the user to enter the appropriate data.<br />
Figure 6–8. Vantage Design Workflow.<br />
Selecting the <strong>Pipeline</strong> Control storage location<br />
Create and configure the <strong>Pipeline</strong> Control document (Schedule, Log&Capture or Trigger) you plan to use<br />
for this workflow, including the wrapper and media format, and the storage location you plan to use. In the<br />
Wrapper dialog, specify the storage location (see Selecting a Wrapper section in Chapter 8 of the <strong>Pipeline</strong><br />
User <strong>Guide</strong>) on a network share, or a share directly on the Vantage server (recommended specifically for<br />
TIFO files, processed in real time). This storage location will be referenced by the Vantage Publish as<br />
described below.<br />
Setting up Vantage Publish<br />
Follow these steps to configure <strong>Pipeline</strong> Control's Vantage Publish:<br />
71
72<br />
Chapter 6<br />
Using <strong>Pipeline</strong> Control<br />
1. Open the appropriate <strong>Pipeline</strong> Control document.<br />
2. Select Vantage as a publisher by selecting Publish > Vantage.<br />
3. From the Vantage Publish setup dialog enter the target Vantage serve name or IP address. The Port<br />
number defaults to 8676 and should be changed only if this has been modified when your Vantage<br />
server was installed.<br />
4. Press the Connect button to display all of the Workflows on your Vantage system.<br />
5. Select a Workflow from the list that appears. Note that the Workflow list indicates the current Status of<br />
the Workflow (Active, Editing or Idle) and number of Labels that are available to <strong>Pipeline</strong>. If the<br />
workflow's Status is Idle it can be activated by selecting the Activate button under the workflow<br />
selection panel. Workflows with a Status of Editing cannot be used until they are in the Idle or Active<br />
status mode.<br />
6. Select OK to close the Vantage Publish dialog.<br />
7. If you have not already done so configure all other <strong>Pipeline</strong> Control parameters. Pay particular<br />
attention when selecting the location where <strong>Pipeline</strong> Control will be writing the media file. Make sure<br />
that the location where <strong>Pipeline</strong> Control is writing the file is equivalent to the location where Vantage<br />
will be looking for it.<br />
Figure 6–9. Vantage Publish Setup<br />
Select Vantage<br />
8. In the Vantage window, enter the host machine name, the port address, and click Connect. Select a<br />
Vantage workflow, and (optionally) browse to a file location. If no location is defined, the file location<br />
defined in the Wrapper menu is used (hover over Wrapper Settings to see a visual of this menu).<br />
November, 2012
Figure 6–10. Vantage Window<br />
Vantage Metadata Labels<br />
95881<br />
Configuring Publishers<br />
<strong>Pipeline</strong> User’s <strong>Guide</strong><br />
If there were any metadata labels as part of the Workflow they will appear in the <strong>Pipeline</strong> Control Label UI.<br />
Their names will be [ - ].<br />
Figure 6–11. Vantage Metadata Labels<br />
Using Agility Publish within <strong>Pipeline</strong> Control for Windows<br />
Set up and use the Agility publisher in <strong>Pipeline</strong> Control when you want to submit media directly into an<br />
Agility Job Profile.<br />
There are two simple steps to configuring a <strong>Pipeline</strong> Control for use with the Agility Publish:<br />
1. Select the folder location where <strong>Pipeline</strong> Control will be writing the captured media file to. This is done<br />
from within the wrapper dialog (QuickTime or MXF OP1a). The location must be accessible from the<br />
Agility system as a network UNC path.<br />
2. Select the Agility Node and Job Profile from within the Agility Publish plug-in dialog.<br />
The workflow<br />
Enter host, port,<br />
and click Connect<br />
Hover to see<br />
menu visual<br />
Browse to file<br />
location<br />
<strong>Pipeline</strong> Control captures and writes a media file to a media storage location and submits a job to a<br />
selected Agility Job Profile. The job request includes the Job Profile name and the location where Agility<br />
73
74<br />
Chapter 6<br />
Using <strong>Pipeline</strong> Control<br />
can find the captured media file. Agility will start the job and processes it through the respective Profile<br />
using the captured media file at the location given to it by <strong>Pipeline</strong> Control's Agility Publish.<br />
Figure 6–12. Agility Workflow.<br />
Selecting the <strong>Pipeline</strong> Control storage location<br />
Create and configure the <strong>Pipeline</strong> Control document (Schedule, Log&Capture or Trigger) you plan to use<br />
for this job, including the wrapper and media format, and the storage location you plan to use. In the<br />
Wrapper dialog, specify the storage location (see Selecting a Wrapper section in Chapter 8 of the <strong>Pipeline</strong><br />
User <strong>Guide</strong> on a network share, or a share directly on the Agility server (recommended). This storage<br />
location will be referenced by the Agility Publish as described below.<br />
Setting up Agility Publish<br />
Follow these steps to configure <strong>Pipeline</strong> Control's Agility Publish:<br />
1. Open the appropriate <strong>Pipeline</strong> Control document.<br />
2. Select Agility as a publisher by selecting Publish > Agility.<br />
3. From the Agility Publish setup dialog enter the target Agility serve name or IP address. The Port<br />
number defaults to 80 and should be changed only if this has been modified when your Agility server<br />
was installed.<br />
4. Press the Connect button to display all of the Job Profiles on your Agility system.<br />
5. Select a Job Profile from the list that appears.<br />
6. Now you must select the location where Agility can find the captured media file that <strong>Pipeline</strong> Control<br />
will create. The File Location field needs to be entered from the perspective of the Agility Server and<br />
must be the same location that was entered in the Wrapper dialog. Complete the File Location field by<br />
following the instructions below based on where <strong>Pipeline</strong> Control will be writing the media file.<br />
7. Select OK to close the Agility Publish dialog.<br />
8. If you have not already done so configure all other <strong>Pipeline</strong> Control parameters. Pay particular<br />
attention when selecting the location where <strong>Pipeline</strong> Control will be writing the media file. Make sure<br />
that the location where <strong>Pipeline</strong> Control is writing the file is equivalent to the location where Agility will<br />
be looking for it.<br />
November, 2012
Figure 6–13. Agility Publish Setup<br />
95881<br />
Configuring Publishers<br />
<strong>Pipeline</strong> User’s <strong>Guide</strong><br />
9. In the Agility window, enter the host machine name, the port address, and click Connect. Select a<br />
profile space and a job profile, and (optionally) browse to a file location. If no location is defined, the file<br />
location defined in the Wrapper menu is used (hover over Wrapper Settings to see a visual of this<br />
menu).<br />
Figure 6–14. Agility Window<br />
Note<br />
Side Car XML Plugin<br />
Select Agility<br />
Enter host, port,<br />
and click Connect<br />
Select a profile space<br />
and a job profile<br />
Hover to see<br />
menu visual<br />
Browse to file<br />
location<br />
If you make a call to retrieve the list of profile spaces (at http:///AgilityRest/<br />
profilespaces), the user defined space is always returned even if the Use System<br />
Default option in the Web UI is checked.<br />
The Side Car XML publishing plugin will take any populated metadata label, create a XML file, and deliver<br />
it to a specified location. The file can be delivered upon file creation or when the file is completely captured.<br />
75
76<br />
Chapter 6<br />
Using <strong>Pipeline</strong> Control<br />
Figure 6–15. Side Car XML allows publishing of metadata labels.<br />
Use the Side Car XML plugin for workflows that require XML metadata in conjunction with a media file.<br />
Custom metadata labels can be created by using the <strong>Pipeline</strong> Control's Label Editor.<br />
Copy File Publisher<br />
The Copy File publisher is used to copy a captured clip to another local folder or network share. To select<br />
Copy File as a publisher, select Publish > Copy File. The following edit panel displays.<br />
Figure 6–16. Copy File publisher allows you to duplicate just-completed clips.<br />
Complete the panel and click OK. Save the document to save these settings. Make sure you test your<br />
configuration before putting the document into production.<br />
Copy File To. Click to display the File System dialog, and select the folder where you want to copy the file.<br />
If File Already Exists. Select the action to take if there is already a file of the same name in this folder:<br />
Replace the existing file, save the new file with a unique name, or don’t copy the new file.<br />
Append date and time to file name. The date and time is appended, in the format YYYY-MM-DD HH-<br />
MM-SS. For example, if the file <strong>Pipeline</strong>10.MOV was created on December 5, 2008 at 13:15 when copied,<br />
it would be named <strong>Pipeline</strong>10 2008-12-05 13-15-00.MOV.<br />
Avid MXF Copy File Publisher<br />
The Avid MXF Copy File publisher is used to copy a captured clip to another local folder or network share.<br />
To select this as a publisher, select Publish > Avid MXF Copy File. The following edit panel displays.<br />
Figure 6–17. Avid MXF Copy File publisher allows you to duplicate just-completed clips.<br />
Complete the panel and click OK. Save the document to save these settings. Make sure you test your<br />
configuration before putting the document into production.<br />
November, 2012
95881<br />
Configuring Publishers<br />
<strong>Pipeline</strong> User’s <strong>Guide</strong><br />
Copy AAF Files To. Click to display the File System dialog, and select the folder where you want to copy<br />
the AAF files.<br />
Copy MXF Files To. Click to display the File System dialog, and select the folder where you want to copy<br />
the MXF files.<br />
If File Already Exists. Select the action to take if there is already a file of the same name in this folder:<br />
Replace the existing file, save the new file with a unique name, or don’t copy the new file.<br />
Append date and time to file name. The date and time is appended, in the format YYYY-MM-DD HH-<br />
MM-SS. For example, if the file <strong>Pipeline</strong>10.MOV was created on December 5, 2008 at 13:15 when copied,<br />
it would be named <strong>Pipeline</strong>10 2008-12-05 13-15-00.MOV.<br />
FlipFactory Publisher<br />
Set up and use the FlipFactory publisher in <strong>Pipeline</strong> Control when you want to implement <strong>Pipeline</strong> Control<br />
> FlipFactory workflows that automatically submit media to a factory for processing. Optionally, you can<br />
implement submit metadata on a per-job basis.<br />
Note<br />
<strong>Telestream</strong> recommends installing <strong>Pipeline</strong> Control on a computer that is not hosting<br />
FlipFactory or other media processing applications: intense disk and CPU consumption<br />
can interfere with proper operation of both applications.<br />
FlipFactory publisher requires FlipFactory version 6.0 (with update packs 1-4 installed),<br />
or greater. (See FlipFactory support Web page at www.telestream.net for updates.)<br />
When submitting jobs with TIFO files, it is important to save the file directly on the<br />
FlipFactory or Episode Engine server for efficient processing by FlipFactory or<br />
Episode.<br />
Refer to General <strong>Pipeline</strong> System Setup Information (page 27) when writing media files<br />
to a shared storage location.<br />
Factories used by FlipFactory publishers should not have a monitor enabled. The FlipFactory publisher<br />
submits job messages directly to the Flip Engine server, eliminating the requirement for a monitor.<br />
Alternatively, you can configure a factory with a monitor that monitors the storage location specified in your<br />
wrapper format, and do not implement a FlipFactory publisher in your <strong>Pipeline</strong> Control document.<br />
The FlipFactory publisher can integrate with the factory you've specified in <strong>Pipeline</strong> Control using any file<br />
format and wrapper (except for Avid AAF+MXF) you need for your workflow requirements. To speed your<br />
workflow to near real-time by starting transcoding as soon as capture starts, select TIFO as the file type.<br />
Using TIFO files, FlipFactory is notified as soon as the file is created and transcoding occurs as soon as it<br />
is available, thus shortening total processing time. When capturing media in QuickTime files or other<br />
wrappers, FlipFactory is notified when the operation is complete and the file is closed.<br />
Design your <strong>Pipeline</strong> Control > FlipFactory Workflow<br />
Set up your FlipFactory Factory. Configure a factory to produce the media and optionally process<br />
metadata per your workflow requirements. Do not enable a monitor – the FlipFactory publisher submits<br />
jobs automatically.<br />
77
78<br />
Chapter 6<br />
Using <strong>Pipeline</strong> Control<br />
Set up your <strong>Pipeline</strong> Control Document. Create and configure a <strong>Pipeline</strong> Control document for this<br />
workflow, including the wrapper and media format, and the storage location for captured clip files. In the<br />
Wrapper dialog, specify the storage location: local on your <strong>Pipeline</strong> Control host system, on a network<br />
share, or a share directly on the FlipFactory server (recommended specifically for TIFO files, processed in<br />
real time).<br />
Enable and configure the FlipFactory publisher to automatically submit media files you’ve captured in your<br />
document to a specific location, and a specific FlipFactory factory for processing.<br />
The FlipFactory publisher implements automatic file integration by instructing your factory to ingest media<br />
from the server (local, network share, or FlipFactory) where you have configured the <strong>Pipeline</strong> Control<br />
document to write clip files, using the Wrapper dialog.<br />
To select FlipFactory as a publisher, select Publish > FlipFactory. The following panel displays:<br />
Figure 6–18. FlipFactory publisher panel allows you to submit media to a specific factory.<br />
FlipFactory Server. Select the target FlipFactory from the list.<br />
Address. Displays the selected FlipFactory server; allows you to enter it manually – enter its IP address or<br />
server name and port number in the form .local:.<br />
If you’re submitting jobs to a FactoryArray, enter the FactoryArray’s virtual IP Address in the Address field.<br />
After selecting or entering the FlipFactory server’s ID, the FlipFactory Publisher will connect to the<br />
FlipFactory database to obtain the accounts and associated factories and display them.<br />
Account. Select the account on the selected FlipFactory from the popup menu. When you select an<br />
account, <strong>Pipeline</strong> Control queries FlipFactory for a list of factories in the account, and takes a few seconds.<br />
Select the factory from the list of factories in the selected account. If this factory has metadata labels, they<br />
will be displayed so that you can provide metadata values to submit to the factory.<br />
File Location. When selecting a directory from the File location list, note that the path is formed from the<br />
perspective of the FlipFactory server.<br />
Note<br />
The servers, drives, and folders are local to the FlipFactory server. Only select a local<br />
drive/folder when <strong>Pipeline</strong> Control is configured in the Wrapper to write clip files directly<br />
to a FlipFactory server share.<br />
All metadata labels associated with the selected account are displayed in <strong>Pipeline</strong><br />
Control for data entry.<br />
If the <strong>Pipeline</strong> Control wrapper Location has been configured to write files to a shared network folder<br />
(either directly on the <strong>Pipeline</strong> Control host system or other network file server), manually enter a path to<br />
November, 2012
95881<br />
Configuring Publishers<br />
<strong>Pipeline</strong> User’s <strong>Guide</strong><br />
the file in UNC format. If the <strong>Pipeline</strong> Control wrapper Location has been configured to write files to a<br />
shared network folder directly on the FlipFactory server, click Browse to navigate and select the local<br />
directory in drive-letter format.<br />
Figure 6–19. <strong>Pipeline</strong> Control – FlipFactory file sharing options.<br />
Use this table to determine how to specify the <strong>Pipeline</strong> Control file read and write directory in <strong>Pipeline</strong><br />
Controls’ Wrapper dialog and FlipFactory publisher dialog:<br />
79
80<br />
Chapter 6<br />
Using <strong>Pipeline</strong> Control<br />
Table 6–1. Configuring clip file paths for <strong>Pipeline</strong> Control and FlipFactory access.l<br />
<strong>Pipeline</strong> Control File Write Directory FlipFactory File Read Directory<br />
<strong>Pipeline</strong> Control Local Directory. In the<br />
Wrapper dialog, browse and select a letterdrive<br />
directory on this computer. The directory<br />
must be configured as a share for FlipFactory<br />
and the user name Flip Engine service<br />
operates under must have Read permission.<br />
Syntax: \\...<br />
Example: C:\<strong>Pipeline</strong>Control\ScheduleClips<br />
Network Share. In the Wrapper dialog,<br />
browse and select the share on the network<br />
file server. The user names <strong>Pipeline</strong> Control<br />
operates under must have Full Control<br />
permission and Flip Engine service operates<br />
under must have Read permission.<br />
Syntax: \\\
USING THE VIDEO PREVIEW PANEL<br />
95881<br />
Using The Video Preview Panel<br />
<strong>Pipeline</strong> User’s <strong>Guide</strong><br />
The Video Preview panel displays video during preview, capture, and playout operations with the current<br />
timecode in HH:MM:SS:FF format. VTR controls are directly below.<br />
To open or close the Video Preview panel, click the expand/collapse arrow (top left corner of the panel).<br />
Disable preview by closing the panel to decrease CPU load during capture.<br />
You can also play local clip files (clips that have already been captured) in the document. Hover over the<br />
clip and select Play.<br />
Figure 6–21. Use the Video Preview panel to view the incoming video stream.<br />
When video is being encoded and streamed from the <strong>Pipeline</strong>, you can preview the media.<br />
Deck Controls<br />
Note<br />
Video. Displays video during<br />
preview, capture or playout.<br />
Timecode/Deck Status.<br />
Displays timecode in HH:MM:SS:FF format.<br />
Jog Wheel<br />
Deck Controls When reviewing a clip these<br />
controls manipulate the locally playing clip.<br />
These controls are only enabled when the <strong>Pipeline</strong> channel is connected to a device<br />
via RS-422 and that device is in Remote mode. They are also enabled when reviewing<br />
a captured clip. However they control the playback of the local clip and not a deck.<br />
Use the VTR controls to preview video from the deck, connected via RS-422. The exact performance<br />
depends on the implementation of the commands on the deck itself. For example, Fast Forward on one<br />
deck may advance the tape at a different speed than Fast Forward on another deck.<br />
81
82<br />
Chapter 6<br />
Using <strong>Pipeline</strong> Control<br />
Figure 6–22. Use VTR controls to preview video from your attached deck or to control playback of<br />
captured clips.<br />
Fast Reverse Fast Forward<br />
Stop<br />
Play<br />
Note<br />
Fast Reverse. Click to roll tape backward.<br />
Stop. Click to stop the deck.<br />
Play. Click to play video at normal forward speed.<br />
Fast Forward. Click to roll tape forward.<br />
Jog/Shuttle Wheel<br />
Jog. Click and hold the mouse button as you move the mouse in a circular motion to roll the tape forward<br />
or reverse, frame by frame.<br />
Shuttle. Advance or Rewind the tape using the Shuttle mode. Range +3.0 to -3.0.<br />
Cue. Enter a time code to cue the deck.<br />
The current time code can be marked using the button:<br />
Go. Click Go, to cue the deck.<br />
When playing back captured clips a pause button is also displayed.<br />
USING THE AUDIO PREVIEW PANEL<br />
Use the Audio Preview panel when playing video to see the decibel output of up to 16 channels of audio.<br />
To open or close the Audio Preview panel, click the expand/collapse arrow at the top left corner of the<br />
panel.<br />
Figure 6–23. The Audio Preview panel displays decibels in real time for each audio channel.<br />
The scale of the meter is -72 dBFS to 0S dBFs.<br />
November, 2012
Disable preview by closing the panel to decrease CPU load during capture.<br />
LOADING AND SAVING CLIP LIST FILES<br />
95881<br />
Loading and Saving Clip List Files<br />
<strong>Pipeline</strong> User’s <strong>Guide</strong><br />
In all capture documents, <strong>Pipeline</strong> Control enables you to load the clip list from an EDL or a Final Cut Pro<br />
XML Interchange file. You can also save a clip list you’ve made, in XML and EDL formats. Loading and<br />
saving clip lists via files promotes interchange between applications and systems, without manually recreating<br />
them. These interchange files can be used for time-shifting your work, to avoid performing the<br />
same actions multiple times, or to participate in workflow tasks with others.<br />
For example, one person can define a list of clips, save the list as an XML file, and then pass the file on to<br />
someone else on the network who performs the actual capture.<br />
To load a clip list, use one of the following menu items:<br />
File > Import GVG 4 EDL. Select to populate the clip list with entries from a <strong>Pipeline</strong> EDL file (or other<br />
GVG 4 compatible files such as those found in Final Cut Pro or Avid Media Composer). Make sure your<br />
<strong>Pipeline</strong> configurations are set prior to importing your EDL.<br />
File > Export GVG 4 EDL. Select to save a clip list with entries to a <strong>Pipeline</strong> EDL file (or other GVG 4<br />
compatible files such as those found in Final Cut Pro or Avid Media Composer).<br />
File > Import Final Cut Pro XML. Select to populate the clip list with entries from an EDL file in Final Cut<br />
Pro XML Interchange Format.<br />
<strong>Pipeline</strong> Control displays an open dialog. Navigate to the location where the file you want to open is stored,<br />
select it, and click Open to load the clip list.<br />
You can also save clip list entries as a file in GVG 4 EDL or Final Cut Pro XML Interchange Format.<br />
File > Export Final Cut Pro XML. Select to save the clip list in Final Cut Pro XML Interchange Format.<br />
<strong>Pipeline</strong> Control displays a Save dialog. Enter the name of the file to save, and select the location where<br />
you want to save the file. Click Save to save the clip list in XML Interchange Format.<br />
XML Interchange Format can be generated from Final Cut Pro, or any other application that supports this<br />
format. XML Interchange Format is the file format that <strong>Pipeline</strong> import/export or capture/playout documents<br />
load from and save in, in order to promote interoperability with other applications. Clip list files can also be<br />
generated and edited manually.<br />
For further details, refer to Apple’s documentation on XML Interchange Format:<br />
http://developer.apple.com/documentation/AppleApplications/Reference/FinalCutPro_XML/AboutThisDoc/<br />
chapter_1_section_1.html<br />
SETTING UP PIPELINE CONTROL OPTIONS<br />
Select Tools > Options to set up <strong>Pipeline</strong> Control the way you want to use it.<br />
83
84<br />
Chapter 6<br />
Using <strong>Pipeline</strong> Control<br />
Capture Tab<br />
Figure 6–24. Capture Options<br />
Default File Naming Conventions. Enter a phrase to use as the base name for new video files and any<br />
token types. Token types can be Date, Time, Mark In (inclusive First Frame TC), Mark Out (exclusive Last<br />
Frame TC), Counter (increments by 1), <strong>Pipeline</strong> (name), Tape (name), Codec, Frame Rate, and External.<br />
Only the counter token ensures unique names.<br />
Offset. Set the offset size (number of frames): minimum is -5 frames, maximum is +5 frames, default is 0<br />
frames. Since frames can occur early or late, depending on the deck used, this adjustment offsets the<br />
capture based on the number of frames chosen and then compensates for decks that are not 100% frame<br />
accurate (or for systems with routing latency compared to the timecode). This adjustment must be made<br />
by a process of trial and error.,<br />
Note<br />
The frame offset is only applied when a connection with <strong>Pipeline</strong> is established. To<br />
apply a new frame offset setting, disconnect, then re-connect with <strong>Pipeline</strong>.<br />
Ignore Lost Frames. When checked, a capture session continues even if frames have been lost. If<br />
unchecked, the capture session aborts when any lost frames occur.<br />
November, 2012
95881<br />
Setting Up <strong>Pipeline</strong> Control Options<br />
<strong>Pipeline</strong> User’s <strong>Guide</strong><br />
Ignore frames when servo is not locked. When checked, frames are ignored when the servo is not<br />
locked.<br />
Alert User to Errors. Check to cause a warning message to display if any frame compression errors are<br />
detected when decompressing the video for preview.<br />
Automatically Eject Tapes. When checked, <strong>Pipeline</strong> Control ejects the tape when capture is complete.<br />
The VTR must be in remote mode and connected to the <strong>Pipeline</strong> via RS-422.<br />
Default Clip Duration. Sets the schedule’s default clip duration when they are added to the schedule<br />
using the plus (+) button.<br />
Use Duration as frame count. This option applies to files captured by the Trigger document. It is used<br />
when you want the captured file to contain a certain amount of frames that add up to the duration entered<br />
into the Duration field. If you know that there will be time code jumps in the incoming media stream, using<br />
this option will allow your file to have a total duration that includes the time code jumps.<br />
,<br />
Note<br />
Capturing with this option enabled will result in files that contain a frame count that<br />
equals the duration entered into the Duration field. Scheduled events or other captured<br />
events may continue beyond the original time code represented by the OUT time code.<br />
Do not use this option if a specific OUT time code is to be used as the stop point.<br />
Additionally, calendar trigger captures will fail to update if the calendar event is edited,<br />
and the end parameter will not work for Web service captures.<br />
Trigger History Size. Use slider bar to limit the number of events that are stored in trigger history from 1 to<br />
100. Default is 100 events.<br />
Advanced File Flags. Select Write Through to provide caching only when reading from the disk. Select<br />
None to use caching for disk reading and writing. Select No Buffering to eliminate all read and write<br />
caching. The default is None.<br />
Note<br />
These options control the flag sent to the native operating system where the <strong>Pipeline</strong><br />
files will be written. They should only be used by advance users who have a full<br />
understanding of their system and what is required for efficient file writing<br />
85
86<br />
Chapter 6<br />
Using <strong>Pipeline</strong> Control<br />
Application Tab<br />
Figure 6–25. Application Options<br />
Default Storage Path. Specifies the default storage path for any container when it is opened. To set, click<br />
Browse and navigate to the desired storage location.<br />
Web Service Port. The Web Service Port is the TCP port used to communicated to the Master Web API.<br />
This API allow automated control of the <strong>Pipeline</strong> Control applications. It also enables the user to add or<br />
remove <strong>Pipeline</strong> documents, to activate or deactivate documents, and to get document status. The full API<br />
command documentation can be listed by entering the URL http://localhost:[port number] into a browser on<br />
the <strong>Pipeline</strong> Control computer.<br />
Device Tab<br />
Figure 6–26. Device Options<br />
Preroll Duration. Specify the seconds to preroll video from start timecode during import operations.<br />
Postroll Duration. Specify the seconds to postroll video from end timecode during import operations.<br />
Note<br />
The above settings affect log and capture for capture operations, and insert and<br />
assemble for playout operations.<br />
November, 2012
Play Out Tab<br />
Figure 6–27. Play Out Options<br />
95881<br />
Setting Up <strong>Pipeline</strong> Control Options<br />
<strong>Pipeline</strong> User’s <strong>Guide</strong><br />
Buffer Size. Set the buffer size (number of frames) -- minimum 8 frames, maximum 22 frames. The default<br />
is set at 22 frames to provide maximum reliability.<br />
During playout, the <strong>Pipeline</strong> queues frames in memory to compensate for network latencies. If the buffer<br />
size is set for a large number, it can ‘ride out’ higher transient latencies. However, a large number also<br />
introduces a longer delay between the time the frame is emitted on the network and the time that the frame<br />
appears on the SDI connection (about 1/4 second for 8 frames, up to about 3/4 second for 22 frames).<br />
If you are concerned with latency between the time video is exported from the computer and the time it is<br />
sent out the <strong>Pipeline</strong>, you should adjust the value lower. However, lowering this value makes the<br />
connection more susceptible to errors due to insufficient CPU power or network bandwidth.<br />
Offset. Set the offset size (number of frames). The minimum is -5 frames and the maximum is +5 frames.<br />
The default is 0 frames.<br />
Frames can occur early or late depending on the deck used. This adjustment offsets the playout based on<br />
the number of frames chosen and compensates for decks that are not 100% frame accurate to the<br />
timecode provided. This adjustment is made by a process of trial and error.<br />
Note<br />
Only applicable when time base is RS422.<br />
Ignore lost frames. Check this option to force <strong>Pipeline</strong> to ignore all lost frames. When unchecked (normal<br />
mode) <strong>Pipeline</strong> halts and alerts the user when a frame is lost.<br />
Preroll Skip. Preroll skip is used when the Controlled Playout document is controlled through RS422 and<br />
is commanded to preroll back to a timecode prior to the first frame of the clip. This setting should be set to<br />
the same value set in the Buffer Size setting in General section above. Adjust this setting if needed to<br />
insure frame accurate RS422 playout.<br />
87
88<br />
Chapter 6<br />
Using <strong>Pipeline</strong> Control<br />
Update Tab<br />
Figure 6–28. Update Options<br />
The Update panel enables you to determine which version of <strong>Pipeline</strong> Control is installed, when it was last<br />
checked, and when to check for updates from the <strong>Telestream</strong> Web site.<br />
Check for Updates. Select Daily, Weekly, Monthly, or Never, to check for application updates.<br />
Check Now. Click Check Now to check <strong>Telestream</strong>’s Web site for application updates right now, and let<br />
you know if <strong>Pipeline</strong> is up to date or updates are available.<br />
Discovery Tab<br />
Figure 6–29. Discovery Options<br />
Use Bonjour for Discovery. Check when you want to automatically discover a list of <strong>Pipeline</strong>s, which you<br />
can view when you browse, by clicking the <strong>Pipeline</strong> drop-down list in the <strong>Pipeline</strong> panel.<br />
Link Local Interface. In most circumstances, auto discovery utilizes the correct link local interface from<br />
the NIC card on your computer. If you have more than one NIC card or active interface, you may have to<br />
November, 2012
95881<br />
Setting Up <strong>Pipeline</strong> Control Options<br />
<strong>Pipeline</strong> User’s <strong>Guide</strong><br />
select the correct interface. Auto discovery does not operate over routers and gateways, so this feature<br />
does not enable you to access <strong>Pipeline</strong>s beyond the link local interface – over a VPN, for example.<br />
Static IP Addresses. If you have <strong>Pipeline</strong>s that you must access and they are not accessible via auto<br />
discovery, you can add them manually. To add a new <strong>Pipeline</strong> to the <strong>Pipeline</strong> drop-down list, enter the IP<br />
address of the <strong>Pipeline</strong> in the text field at the bottom left, then click Add. To remove a <strong>Pipeline</strong> from the list,<br />
select it and click Remove. Click OK to update the list and close the Options window.<br />
When you click the <strong>Pipeline</strong> drop-down list in the <strong>Pipeline</strong> panel, it will display the <strong>Pipeline</strong>s you added<br />
manually. Capture performance may be poor when connecting to <strong>Pipeline</strong>s via routers and gateways.<br />
Security Tab<br />
Figure 6–30. Security Options<br />
Prevent Configuration Changes. Check to prevent users from altering <strong>Pipeline</strong> settings without knowing<br />
the password. <strong>Pipeline</strong> Control prompts for a password. When you open a document, you can use it and<br />
make changes to the document itself, but you can’t change <strong>Pipeline</strong> settings. To turn this security feature<br />
off, uncheck Prevent Configuration Settings, supply the appropriate password, and click OK.<br />
Licensing Tab<br />
Figure 6–31. Licensing Options<br />
If a <strong>Pipeline</strong> feature requires a licence, it can be obtained by contacting <strong>Telestream</strong>, who will need the<br />
MAC address of the computer running the <strong>Pipeline</strong> Control software. Once you obtain the license file,<br />
click Import to navigate to the location of the license file on your computer, then select it and click Open.<br />
After you install a license you will see the message This machine is licensed displayed in the Licensing<br />
tab window.<br />
89
90<br />
.<br />
Chapter 6<br />
Using <strong>Pipeline</strong> Control<br />
Note<br />
The Calendar control requires a license. Without a license, the Calendar checkbox is<br />
greyed out and the message Calendar Trigger is not Licensed is displayed in red.<br />
USING THE VIDEO WALL<br />
Select Tools > Video Wall to display the Video Wall. The Video Wall enables you to view multiple video<br />
sources in one panel and display any channel configured as part of <strong>Pipeline</strong> Control. Each display<br />
provides: channel name, status, time code, and audio meters.<br />
To add a new video source to the Video Wall, save the document with a unique name then click and drag<br />
the Video Preview panel onto the Video Wall, or right-click and select Add to Video Wall. The new source is<br />
displayed in the upper left hand corner. Additional sources can be added in the same way or by clicking in<br />
the Open icon at the top of the Video Wall and navigating to the location of the desired source.<br />
When all document displays have been added you can rearrange them by selecting and dragging them to<br />
a new location. Click the Save icon at the top to save the Video Wall settings. The Activate All switch<br />
activates all video clips displayed on the wall. Auto Activate, when checked, causes saved video clips to<br />
activate when Video Wall is re-opened. The slider resizes all video clips in the video wall. They cannot be<br />
resized individually.<br />
Figure 6–32. Video Wall Display<br />
Open icon<br />
Save icon<br />
Activate All switch<br />
Auto Activate checkbox<br />
Video Size slider<br />
Start All<br />
Stop All<br />
November, 2012
95881<br />
Using the Video Wall<br />
<strong>Pipeline</strong> User’s <strong>Guide</strong><br />
All Preview displays are framed in a color border. The border color indicates it’s current state: a Yellow<br />
border indicates a waiting state, green indicates the playout state, red indicates the capturing state, and<br />
white indicates the previewing state. No border indicates an idle state.<br />
Figure 6–33. Video Wall Display Borders<br />
Yellow border - waiting Green border - playout<br />
Red - capturing White - previewing<br />
Selecting a preview display will automatically highlight the associated channel tab on the Main application<br />
window.<br />
91
92<br />
Chapter 6<br />
Using <strong>Pipeline</strong> Control<br />
Figure 6–34. Associated Channel Tab Activation<br />
Preview display selected<br />
Associated channel tab activated<br />
Each display on the video wall has a right click menu containing: Activate/Deactivate video, Start/Stop<br />
Capture, and Properties:<br />
Figure 6–35. Right-click Menu<br />
When Properties is selected, a properties window is displayed:<br />
Activate/Deactivate video<br />
Start/Stop Capture<br />
Properties<br />
November, 2012
Figure 6–36. Properties Window Menu<br />
USING THE LABEL EDITOR<br />
95881<br />
Using the Label Editor<br />
<strong>Pipeline</strong> User’s <strong>Guide</strong><br />
The Label Editor enables you to make your own metadata labels. Select Tools > Label Editor to display the<br />
Label Editor window.<br />
To create a new label, click the plus (+) button located under Label Files on the left side of the panel. When<br />
a new label displays, double-click in the name field, enter a new label name, and press Enter. Click the<br />
minus (-) button to delete labels.<br />
Double-click on the new parameter name displayed and rename. Using the drop-down menu on the right<br />
side of the window, set the parameter type to Text or True/False. Additional parameters are added by<br />
clicking the Add button. Parameters are deleted by clicking the Delete button.<br />
93
94<br />
Chapter 6<br />
Using <strong>Pipeline</strong> Control<br />
Figure 6–37. Label Editor Window<br />
Click + to<br />
add a label<br />
Click - to<br />
delete a label<br />
Labels are used throughout <strong>Pipeline</strong> Control as metadata that can be attached to clips. In the clip panel<br />
use the Labels applied to new clips drop-down menu to select a label to be used. Configure or set up the<br />
label as desired by checking any check boxes and entering parameter metadata.<br />
Figure 6–38. Applied Labels Window<br />
Note<br />
The Reel field in the Log Data label has special properties. Data entered into this field<br />
will be automatically embedded in QuickTime and Avid MXF OP-Atom files as the Tape<br />
Name.<br />
USING THE DIAGNOSTICS PANEL<br />
The diagnostics panel provides easy access to a <strong>Pipeline</strong> device’s diagnostic and administration interfaces<br />
for trouble shooting and technical support. The diagnostic panel provides debugging information about<br />
<strong>Pipeline</strong> hardware and <strong>Pipeline</strong> Control that may be useful to <strong>Telestream</strong> Customer Service (Obtaining<br />
<strong>Pipeline</strong> Support | Information | Assistance (page i)).<br />
For more details on troubleshooting, see Gathering Information for Troubleshooting (page 149).<br />
.<br />
Click Add to add a<br />
parameter<br />
Click Delete to<br />
delete a parameter<br />
Select Text or<br />
True/False<br />
November, 2012
95881<br />
File Formats/Wrappers<br />
<strong>Pipeline</strong> User’s <strong>Guide</strong><br />
To display or hide the diagnostics panel, click the collapse/expand arrow in the Diagnostics Panel title bar<br />
located in the lower left-hand corner of the <strong>Pipeline</strong> system window. (You may need to scroll down to bring<br />
the Diagnostics Panel into view).<br />
Figure 6–39. Diagnostics window provides advanced information.<br />
Host Memory. .This meter indicates fullness of the frame buffer on the host computer during capture<br />
operations.<br />
Disk Buffer. This meter indicates how many frames are in the buffer but have not been written to the<br />
destination.<br />
<strong>Pipeline</strong> Buffer. This meter indicates fullness of the frame buffer in the <strong>Pipeline</strong> system.<br />
<strong>Pipeline</strong> Heap. This meter indicates how much memory in <strong>Pipeline</strong> is being used and will expose memory<br />
leaks when it gradually moves toward maximum.<br />
Lost Video, Lost Audio, Lost Status. These fields display the number of lost frame packets of each type<br />
(if any). The display also shows the name of the Network interface the <strong>Pipeline</strong> channel is using and the<br />
connected data rate (100Mb, 1000Mb, etc.).<br />
Telnet. Click Telnet to display a Telnet session window providing access to the <strong>Pipeline</strong> that is connected.<br />
This information can be used to diagnose problems.<br />
Log. Click Log to display information recorded during a <strong>Pipeline</strong> system crash.<br />
Administrator. Click Administer to launch <strong>Pipeline</strong> Administrator in your Web browser.<br />
During capture operations, low Host Memory meter readings are better; during playout operations, higher<br />
readings are better. The memory meters display the percentage of the video or audio (whichever is more<br />
full) frame buffer that is currently full.<br />
During normal operations, the meter displays green. If the meter displays yellow, marginal conditions exist;<br />
red indicates that <strong>Pipeline</strong> Control is likely to underflow/overflow the buffer, which will cause the current<br />
operation to abort.<br />
If disk buffering is enabled (available for certain wrapper formats), the Disk meter displays how much data<br />
is remaining to be transferred to its final destination (see Disk Buffering, below). When this grows, it<br />
indicates that <strong>Pipeline</strong> Control is no longer able to write to the final destination at the same speed it is<br />
receiving the data, which is usually caused by a network or I/O issue.<br />
FILE FORMATS/WRAPPERS<br />
Format Wrappers<br />
<strong>Pipeline</strong> Control supports several industry-standard and proprietary wrappers: Avid AAF+MXF (OP-Atom),<br />
MXF (OP-1a), generic MXF (OP-Atom), QuickTime and TIFO (<strong>Telestream</strong> Intermediary Format). <strong>Pipeline</strong><br />
95
96<br />
Chapter 6<br />
Using <strong>Pipeline</strong> Control<br />
also supports many codecs to meet your compression needs: DV/DVCPro, DVCProHD, IMX, ProRes 422,<br />
DNxHD, Motion JPEG A (proxy format), MPEG-2 50Mbps I-Frame SD and Uncompressed 8 bit SD.<br />
Avid AAF+MXF (OP-Atom)<br />
Avid AAF+MXF produces MXF Operational Pattern Atom (OP-Atom) files compatible with Avid<br />
professional edit systems. It can be used with DV25, DVCPro HD, IMX or DNxHD (VC-3) video essences.<br />
Avid AAF+MXF creates a unique set of files consisting of an AAF master clip file and individual MXF files<br />
for video and audio.<br />
Workflow Considerations<br />
The AAF file and associated media files can be delivered to separate folders that are specified in the Avid<br />
AAF+MXF selection dialog. Avid AAF+MXF files cannot be opened while they are being captured. Use<br />
Avid AAF+MXF when your workflow requires compatibility with Avid edit systems.<br />
Output file naming:<br />
• AAF/XML - .AAF and .XML,<br />
(These files are used when importing into Avid edit software.)<br />
• Video – Filename is generated by Avid Media Toolkit<br />
• Audio – Filename is generated by Avid Media Toolkit<br />
Note<br />
The Avid AAF+MXF wrapper requires <strong>Pipeline</strong> Control to be installed onto a Windows<br />
32bit edition OS. This option is not available when <strong>Pipeline</strong> Control is installed on a<br />
Windows 64bit editions.<br />
November, 2012
Table 6–2. Avid AAF+MXF Format Summary<br />
Video DV, DVCPro, DVCProHD, IMX, DNxHD<br />
Audio 16 channels, 16/24 bit, 48 kHz, PCM/Dolby E<br />
Timecode SMPTE 377M timecode track<br />
Closed captions Essence storage only<br />
Ancillary data SMPTE 436M ANC track/atom<br />
Table 6–3. Avid AAF+MXF Applicable Standards<br />
Usage Considerations<br />
95881<br />
File Formats/Wrappers<br />
<strong>Pipeline</strong> User’s <strong>Guide</strong><br />
Standard Title Notes<br />
SMPTE 377M-2004 Material Exchange Format (MXF)<br />
SMPTE 390M-2004 MXF Operational Pattern Atom<br />
SMPTE 382M-2007 Mapping AES3 and Broadcast Each channel contained in a separate<br />
Wave Audio into the MXF Generic<br />
Container.<br />
AES3 track/atom.<br />
SMPTE 383M-2008 Mapping DV-DIF Data into the Defines clip-wrapped DV-DIF<br />
MXF Generic Container<br />
essence.<br />
SMPTE 386M-2004 Mapping Type D-10 Essence Clip-wrapped D-10 is not defined<br />
Data to the MXF Generic Con- (Avid is 2KB KAG padded, Apple is<br />
tainer<br />
512B KLV filled).<br />
SMPTE 436M-2006 MXF Mappings for VBI Lines and<br />
Ancillary Data Packets<br />
SMPTE 2019-4- Mapping VC-3 Coding Units into Defines clip-wrapped VC-3 essence.<br />
2008<br />
the MXF Generic Container<br />
The Avid AAF+MXF file wrapper can't be used in conjunction with <strong>Pipeline</strong> Control's Disk Buffer feature.<br />
Take extra care when writing Avid AAF+MXF files to shared disk subsystems.<br />
The maximum length of an Avid AAF+MXF file captured in <strong>Pipeline</strong> Control is 9 hours. When using a<br />
Scheduled Capture document, no event can exceed 9 hours. Capturing an Avid AAF+MXF file in a Trigger<br />
document without first specifying a duration results in a file that reports the exact duration of the recorded<br />
event.<br />
When you select Avid AAF+MXF format, <strong>Pipeline</strong> Control displays this configuration dialog:<br />
97
98<br />
Chapter 6<br />
Using <strong>Pipeline</strong> Control<br />
Figure 6–40. Avid AAF+MXF Dialog Box<br />
AAF File Location. Click Browse to navigate to the desired storage location for the Avid AAF file. This file<br />
must be saved to a local destination on the <strong>Pipeline</strong> host. Though the AAF file is not used when registering<br />
assets via Interplay, <strong>Pipeline</strong> Control still requires a local path.<br />
MXF Media File Location. Click Browse to navigate to a media directory for the MXF audio and video files<br />
associated with this clip. Typically, this is the AvidMediafiles/MXF/1 folder used by the Avid edit system.<br />
This folder can be local or shared storage.<br />
Interplay Settings. Interplay is a production asset management system from Avid. With Interplay media<br />
assets can be instantly checked into the asset management database and made available to Interplay<br />
clients for immediate access, even while they are still being captured.<br />
Requirements for using <strong>Pipeline</strong> with Interplay asset check-in<br />
In order to check-in <strong>Pipeline</strong> Control captured media assets into an Interplay Production Asset<br />
Management system you must first have an Interplay system, version 2.2 or later, with all the appropriate<br />
Avid processes to support Interplay access to indexed media assets.<br />
In addition to a working Interplay system you will also need to have Interplay Web Services installed on<br />
your Interplay system. Interplay Web Services are not installed or distributed by default. Your Interplay<br />
administrator will need to acquire, install and configure Interplay Web Services before <strong>Pipeline</strong> with<br />
Interplay asset check-in can be used.<br />
Interplay Web Services must be configured to run using an open port on the Interplay server or servers.<br />
Your Interplay administrator should install and configure Interplay Web Services on an appropriate server<br />
using any available port.<br />
November, 2012
95881<br />
File Formats/Wrappers<br />
<strong>Pipeline</strong> User’s <strong>Guide</strong><br />
The <strong>Pipeline</strong> host system (running <strong>Pipeline</strong> Control software) must be a client of the Avid storage system<br />
allowing it to write media files to the Avid Interplay workspace.<br />
Configuring the <strong>Pipeline</strong> Avid AAF+MXF with Interplay Settings<br />
AAF File location The AAF file must be saved to a local destination on the <strong>Pipeline</strong> host. Though the AAF<br />
file is not used when registering assets via Interplay, <strong>Pipeline</strong> Control still requires it to be written to a local<br />
path.<br />
MXF Media file location When checking captured media assets into Interplay this location must be an<br />
Avid storage workspace being indexed by Interplay.<br />
Web Services Host This is the Interplay Web Service host name or IP Address.<br />
Web Service Port This is the port to which the Interplay Web Service is set.<br />
Interplay URI Interplay Web Services uses a string referred to as the Interplay URI to reference media<br />
assets. This URI can have several forms, but it always begins with interplay:// where<br />
is the workgroup name configured to point to the Interplay Engine. The workgroup setting<br />
should follow the location of the project folder where captured media assets are referenced.<br />
You can either enter the URI directly, in the form of: interplay:///, or you can<br />
click Browse and navigate to the URI location.<br />
Username and Password These are the Username and Password required to log into the Interplay<br />
Server.<br />
Testing your Interplay settings When all Interplay information is entered, select Verify Interplay Settings<br />
to verify that all setting are entered correctly.<br />
MXF (OP-1a)<br />
Note<br />
Workflow Considerations<br />
Avid recommends that:<br />
• Interplay Web Services are installed on a completely separate machine to the Interplay<br />
database.<br />
• No more than 5 consecutive connections can be triggered at the same time on an<br />
Avid Web service machine. If capturing multi-feeds the first 5 can start simultaneous<br />
with the start of the 6th or more staggered by 1 second or more.<br />
Always connect to Interplay and Web Services using a fully qualifies DNS name.<br />
(Register with Forward and Reversed look up tables in the DNS.).<br />
Opened Open MXF produces an MXF Operational Pattern 1a (OP-1a, SMPTE 379M-2004) file with a<br />
generic container mapped to DV, DVCPro, DVCPro HD, IMX or DNxHD (VC-3) video essence.<br />
Use Open MXF when your workflow requires the video and audio essence to be wrapped in a single file<br />
meeting the SMPTE 379M-2004 generic MXF specification. To produce an MXF D-10 file use Open MXF<br />
in conjunction with the IMX video codec.<br />
99
100<br />
Chapter 6<br />
Using <strong>Pipeline</strong> Control<br />
Closed Produces an MXF Operational Pattern 1a (OP-1a) file compatible with Sony XDCAM with essence<br />
containers mapped to DV, DVCPro, DVCProHD, IMX or DNxHD (VC-3). These files can't be opened while<br />
they are being captured.<br />
Use 'Closed' when your workflow requires the video and audio essence to be wrapped in a single file<br />
compatible with Sony XDCAM MXF or when capturing MXF (OP-1a) clips to be imported into an Avid<br />
system.<br />
Table 6–4. Generic MXF Format Summary<br />
Video DV, DVCPro,<br />
DVCProHD<br />
IMX DNxHD<br />
Audio 16/24 bit, 48 kHz<br />
16 channels 8 channels 16 channels<br />
PCM/Dolby E PCM/DolbyE PCM/Dolby E<br />
Timecode SMPTE 377M Timecode track<br />
SMPTE 385M System item SMPTE 405M System item<br />
Table 6–5. MXF Applicable Standards<br />
Standard Description Notes<br />
SMPTE 331M-2004 Elements and Metadata Definitions for SDTI-CP<br />
SMPTE 377M-2004 Material Exchange Format (MXF)<br />
SMPTE 378M-2004 MXF Operational Pattern 1a<br />
SMPTE 379M-2004 MXF Generic Container<br />
SMPTE 382M-2007 Mapping AES3 and Broadcast Wave Audio into DV (AES3), DNxHD<br />
MXF Generic Container<br />
(BWF)<br />
SMPTE 383M-2008 Mapping DV-DIF Data into MXF Generic Container<br />
DV<br />
SMPTE 385M-2004 Mapping SDTI-CP Essence and Metadata into<br />
MXF Generic Container<br />
DV, IMX<br />
SMPTE 386M-2004 Mapping Type D-10 Essence Data to MXF<br />
Generic Container<br />
IMX<br />
SMPTE 394M-2006 System Scheme 1 for MXF Generic Container DNxHD<br />
SMPTE 405M-2006 Elements and Individual Data Items for MXF<br />
Generic Container System Scheme 1<br />
DNxHD<br />
SMPTE 436M-2006 MXF Mappings for VBI Lines and Ancillary Data<br />
Packets.<br />
SMPTE 2019-4- Mapping VC-3 Coding Units into MXF Generic DNxHD<br />
2008<br />
Container<br />
SMPTE RDD03 eVTR MXF Interoperability Specification DV, IMX<br />
The resulting MXF (OP-1a) file can contain VANC data (SMPTE 436M) if present within the incoming SDI<br />
stream.<br />
November, 2012
Usage Considerations<br />
95881<br />
File Formats/Wrappers<br />
<strong>Pipeline</strong> User’s <strong>Guide</strong><br />
The MXF OP1a Closed file wrapper cannot be used in conjunction with <strong>Pipeline</strong> Control's Disk Buffer<br />
feature. Take extra care when writing MXF (OP-1a) Closed files to network disk subsystems.<br />
The maximum length of an MXF (OP-1a), open or closed file, captured in <strong>Pipeline</strong> Control is 9 hours.<br />
Capturing an MXF (OP-1a) file in a Trigger document without first specifying the duration always results in<br />
a MXF file that reports the exact duration of the recorded event.<br />
These files can be added to Final Cut Pro systems by using Flip4Mac MXF or MXF4Mac components, and<br />
to Avid Media Composer systems utilizing the Avid AMA MXF plug-in.<br />
Note<br />
MXF OP1a files created for ingest into Avid Media Composer via AMA cannot contain a<br />
VANC track. This is a limitation of the currently release of Avid Media Composer.<br />
When you select MXF (OP1a) format, <strong>Pipeline</strong> Control displays this configuration dialog:<br />
Figure 6–41. MXF OP-1a Dialog Box<br />
File Location. Click Browse to navigate to a storage directory for your media files.<br />
Format – Open. MXF OP1a produces an MXF Operational Pattern 1a (OP1a, SMPTE 379M-2004) file<br />
with a generic container mapped to DV, DVCPRO, DVCPRO HD, IMX or DNxHD (VC-3) video essence.<br />
Use Open MXF when your workflow requires the video and audio essence to be wrapped in a single file<br />
meeting the SMPTE 379M-2004 generic MXF specification. To produce an MXF D-10 file use the IMX<br />
video codec.<br />
Format – Closed. MXF OP1a produces an MXF Operational Pattern 1a (OP1a) file compatible with Sony<br />
XDCAM with essence containers mapped to DV, DVCPRO, DVCPRO HD, IMX or DNxHD (VC-3). These<br />
files cannot be opened while they are being captured.<br />
Use Closed when your workflow requires the video and audio essence to be wrapped in a single file<br />
compatible with Sony XDCAM MXF or when capturing MXF OP1a clips to be imported into an Avid<br />
system.<br />
101
102<br />
Chapter 6<br />
Using <strong>Pipeline</strong> Control<br />
Settings. Within the Settings section you can choose None, Insert HD VANC track, or Insert<br />
Uncompressed VBI track. These settings are only applicable when capturing from a <strong>Pipeline</strong> HD Dual<br />
channel.<br />
Select None if you do not require SMPTE 436M data.<br />
Select Insert HD VANC track if you require HD VANC data to be inserted in accordance with SMPTE 436M<br />
standard. Use the slide bar to set VANC data size from 64 to 65K.<br />
Select Insert Uncompressed VBI track if you require SD Uncompressed VBI data to be inserted in<br />
accordance with SMPTE 436M standards. Use the VBI Line slide bar to select the first VBI line. Use the<br />
Count slide bar to select the number of lines. When inserting Uncompressed VBI you must also set the<br />
firmware option Capture uncompressed VBI lines (HD units only) for SD codecs only.<br />
Advanced. Select if Data Disk Buffering will be used. Browse to the local disk buffering disk location. See<br />
Disk Buffering Details (page 36) for details.<br />
Generic MXF (OP-Atom)<br />
Workflow Considerations<br />
MXF (OP-Atom) produces MXF Operational Pattern Atom (OP-Atom) files compatible with professional<br />
edit systems. MXF (OP-Atom) can be used with DV/DVCPro, DVCProHD, IMX or DNxHD (VC-3) video<br />
essences. MXF (OP-Atom) creates a unique set of files consisting of individual MXF files for video, audio<br />
and Data. A separate MXF file will be created that contains any VANC data present within the incoming<br />
SDI stream.<br />
Output file naming:<br />
• Video - .MXF<br />
• Audio - nn.MXF, where 'nn' is a number between 00 and 15<br />
• Data - Filename>D.MXF<br />
<strong>Pipeline</strong>'s MXF (OP-Atom) files are not intended to be used with Avid Media Composer MXF AMA plug-in.<br />
Use Avid Media Tool directly or Interplay to add them to your media database.<br />
Table 6–6. MXF OP-Atom Format Summary<br />
Video DV, DVCPro, DVCProHD, IMX, DNxHD<br />
Audio 16 channels, 16/24 bit, 48 kHz, PCM/Dolby E<br />
Timecode SMPTE 377M timecode track<br />
Closed captions Essence storage only<br />
Ancillary data SMPTE 436M ANC track/atom<br />
Table 6–7. MXF OP-Atom Applicable Standards<br />
Standard Title Notes<br />
SMPTE 377M-2004 Material Exchange Format (MXF)<br />
SMPTE 390M-2004 MXF Operational Pattern Atom<br />
November, 2012
SMPTE 382M-2007 Mapping AES3 and Broadcast<br />
Wave Audio into the MXF Generic<br />
Container.<br />
SMPTE 383M-2008 Mapping DV-DIF Data into the<br />
MXF Generic Container<br />
SMPTE 386M-2004 Mapping Type D-10 Essence<br />
Data to the MXF Generic Container<br />
SMPTE 436M-2006 MXF Mappings for VBI Lines and<br />
Ancillary Data Packets<br />
SMPTE 2019-4-<br />
2008<br />
Usage Considerations<br />
95881<br />
Mapping VC-3 Coding Units into<br />
the MXF Generic Container<br />
File Formats/Wrappers<br />
<strong>Pipeline</strong> User’s <strong>Guide</strong><br />
Each channel contained in a separate<br />
AES3 track/atom.<br />
Defines clip-wrapped DV-DIF<br />
essence.<br />
Clip-wrapped D-10 is not defined<br />
(Avid is 2KB KAG padded, Apple is<br />
512B KLV filled).<br />
Defines clip-wrapped VC-3 essence.<br />
The MXF (OP-Atom) file wrapper can be used in conjunction with <strong>Pipeline</strong> Control's Disk Buffer feature.<br />
The maximum length of an MXF (OP-Atom) file captured in <strong>Pipeline</strong> Control is 9 hours. When using a<br />
Scheduled Capture document, no event can exceed 9 hours. Capturing an MXF (OP-Atom) file in a Trigger<br />
document without first specifying a duration results in an file that reports the exact duration of the recorded<br />
event.<br />
When you select MXF (OP-Atom) format, <strong>Pipeline</strong> Control displays this configuration dialog.<br />
Figure 6–42. MXF OP-Atom Dialog Box<br />
File Location. Click Browse to navigate to a storage directory for your media files.<br />
Format – Open. Open pre-allocates a fixed file size. Use Open MXF OP-Atom when your storage system<br />
requires that you pre-allocate all the space you will need up front.<br />
Format – Closed. Closed allocates the file size as the video is ingested. This is the default method of<br />
creating MXF OP-Atom.<br />
Settings Insert VANC. VANC data can be inserted in accordance with SMPTE 436M standard. Use slide<br />
bar to set VANC data size from 64 to 65K.<br />
103
104<br />
Chapter 6<br />
Using <strong>Pipeline</strong> Control<br />
Advanced. Not applicable for this wrapper type.<br />
QuickTime<br />
QuickTime 'Open' files created by <strong>Pipeline</strong> Control can be edited in Final Cut Pro as they are being<br />
captured. Use 'Open' files if you will be editing or reviewing (playing out in QuickTime player) while<br />
capturing. Because of this unique characteristic <strong>Pipeline</strong>'s 'Open' QuickTime files initially set the header<br />
with the duration entered or if an overall duration is not specified with the maximum duration of 9 hours. In<br />
most circumstances the actual final duration is updated after the capture is complete. The one exception is<br />
when Disk Buffering is employed. In this case the duration will be that which was initially updated or the<br />
maximum duration of 9 hours.<br />
Workflow Considerations<br />
Be aware of the disk I/O implications of an edit while capture workflow by reading Typical <strong>Pipeline</strong> Systems<br />
and Considerations in the <strong>Pipeline</strong> Control User <strong>Guide</strong>.<br />
QuickTime 'Closed' files are traditional QuickTime files that can't be opened while they are being captured.<br />
Use 'Closed' files if you will not be editing or reviewing (playing out in QuickTime player) while capturing.<br />
Note<br />
Table 6–8. QuickTime Open Format Summary<br />
Table 6–9. QuickTime Open Applicable Standards<br />
Usage Considerations<br />
When writing files to a shared folder on a Windows computer, the security settings<br />
must allow full read/write for the user accessing the file for edit.<br />
Video SD, Motion JPEG-A, DV, DVCPro, IMX, MPEG2-I, DVCProHD, ProRes,<br />
DNxHD<br />
Audio 16 channels, 16/24 bit, 48 kHz, 1/2 channels per track<br />
Timecode Timecode ('tmcd') track<br />
Closed captions Closed caption ('clcp') track, EIA-608 caption data<br />
Ancillary data Essence storage only<br />
Standard Title<br />
IEC 14496-14 MP4 File Format<br />
QuickTime File Format Specification<br />
The maximum length of an open QuickTime file captured in <strong>Pipeline</strong> Control is 9 hours.<br />
If closed captions are available in the source during capture, they are automatically embedded into a<br />
QuickTime closed caption track. When played in QuickTime Player, the closed caption data is overlaid on<br />
the video by selecting View > Show Closed Captioning.<br />
November, 2012
95881<br />
File Formats/Wrappers<br />
<strong>Pipeline</strong> User’s <strong>Guide</strong><br />
These files can be added to Final Cut Pro systems directly or to Avid Media Composer v5 systems utilizing<br />
the Avid AMA QuickTime plug-in.<br />
When you select QuickTime format, <strong>Pipeline</strong> Control displays this configuration dialog.<br />
Figure 6–43. QuickTime Dialog Box<br />
File Paths Storage. Click Browse to navigate to a storage directory for your media files.<br />
Format Open/Closed. Select Open or Closed QuickTime format.<br />
Settings - Insert Caption Track. Check Insert Caption Track to insert a track for captioning.<br />
Settings - Open File Timecode Coherence. Check Open File Timecode Coherence to cause the<br />
QuickTime file writer to lay down incoming frames at the correct position in the QuickTime movie. When<br />
input discontinuities occur, empty frames are inserted so that the timecode stays in sync. If input<br />
discontinuities are ignored, empty frames in the middle of the movie will result, but the timecode will be<br />
correct for all good frames.<br />
Advanced. Select if Data Disk Buffering will be used. Browse to the local disk buffering disk location. See<br />
Disk Buffering Details (page 36) for details.<br />
<strong>Telestream</strong> Intermediary Format (TIFO)<br />
<strong>Telestream</strong> Intermediary Format (TIFO) is an intermediate media wrapper format designed by <strong>Telestream</strong><br />
as a uniform, interchangeable file format to ensure inter-operability among <strong>Telestream</strong>'s media processing<br />
solutions, including FlipFactory, Vantage, Wirecast, Episode, and <strong>Pipeline</strong>. TIFO provides a lightweight,<br />
low-overhead wrapper that is essence-agnostic, with out-of-band metadata, timecode, and closed caption<br />
support.<br />
Using TIFO improves the ability to move media files between <strong>Telestream</strong>'s media processing solutions with<br />
all media essence elements and metadata intact, preserving the widest range of transcoding options.<br />
Workflow Considerations<br />
TIFO format should be used when you are encoding your files for use with FlipFactory, Vantage or<br />
Episode. TIFO files are unique, in that they can be transcoded as they are being captured in FlipFactory,<br />
Vantage, Episode 6 and Episode Engine, enabling you to create multiple output files in real-time. TIFO files<br />
105
106<br />
Chapter 6<br />
Using <strong>Pipeline</strong> Control<br />
can also contain metadata such as closed captions, ancillary data and timecode, which can be processed<br />
by FlipFactory, Vantage or Episode for processing in workflows that retain this data.<br />
Table 6–10. TIFO Format Summary<br />
Video SD, Motion JPEG-A, DV, DVCPro, IMX, MPEG2-I, DVCProHD, ProRes,<br />
DNxHD<br />
Audio 16 channels, 16/24 bit, 48 kHz<br />
Timecode Video sample header<br />
Closed captions Video sample parameter (“ATOM”)<br />
Ancillary data Video sample parameter (“ATOM”)<br />
When you select TIFO format, <strong>Pipeline</strong> Control displays this configuration dialog:<br />
Figure 6–44. TIFO Dialog Box<br />
File Location. Click Browse to navigate to a storage directory for your files.<br />
Estimate Duration in header. Check this box if you are writing files to be processed by Episode. TIFO<br />
version 4 adds an anticipated duration to the file header which allows applications using TIFO to display an<br />
accurate progress bar while processing these files.<br />
Advanced. Select if Data Disk Buffering will be used. Browse to the local disk buffering disk location. See<br />
Disk Buffering Details (page 36) for details.<br />
November, 2012
C H A P T E R<br />
Using Scheduled<br />
Capture Documents<br />
Chapter 7, Using Scheduled Capture Documents<br />
Use this chapter to learn how to use <strong>Pipeline</strong> Control to create schedules for capturing media from<br />
<strong>Pipeline</strong>. Capturing media on a schedule is achieved using the Scheduled Capture document in <strong>Pipeline</strong><br />
Control.<br />
Topics<br />
Note<br />
You can only play out schedule documents in <strong>Pipeline</strong> Control on Mac OS X. Use the<br />
Controlled Playout document for similar results on Windows OS.<br />
� Using The Scheduled Capture Document (page 108)<br />
� About Schedules (page 108)<br />
� Creating Capture Schedules (page 109)<br />
� Using the Schedule Panel (page 110)<br />
7<br />
107
108<br />
Chapter 7<br />
Using Scheduled Capture Documents<br />
USING THE SCHEDULED CAPTURE DOCUMENT<br />
The Scheduled Capture (schedule, for short) document is designed to facilitate the creation of clip capture<br />
schedules.<br />
Figure 7–1. Schedule window panels and toolbars.<br />
Settings Panel. Use to configure <strong>Pipeline</strong><br />
for use in this schedule.<br />
Status Panel.<br />
Displays status.<br />
Video Panel.<br />
Displays video.<br />
Timecode.<br />
Displays when<br />
connected.<br />
VTR Controls.<br />
Use to play video.<br />
Audio Panel.<br />
Displays volume<br />
by channel.<br />
Diagnostics<br />
Panel.<br />
Schedule Details. Displays number of clips, total<br />
capture hours, and approx. space required.<br />
<strong>Pipeline</strong> Control displays several panels and toolbars to help you perform the tasks the document was<br />
designed to facilitate.<br />
The schedule document is composed of a 24-hour schedule panel (on the right), with <strong>Pipeline</strong> Status,<br />
Video Preview, Audio Preview, and Diagnostics panels on the left. You can open multiple documents at a<br />
time – each is displayed in its own tab.<br />
ABOUT SCHEDULES<br />
Schedule Toolbar. Provides buttons<br />
for frequently used functions.<br />
Schedule/List<br />
View buttons.<br />
Schedule<br />
panel.<br />
Displays<br />
all clips in<br />
a timeline.<br />
Clips. Add these clips to capture on<br />
schedule.<br />
Activation<br />
Slider.<br />
Event<br />
Timer.<br />
Indicates<br />
current time<br />
in schedule.<br />
A schedule is a list of one or more clip events to be processed in a recurring 24-hour period. Each<br />
schedule also has information about <strong>Pipeline</strong> selection and settings, and optional publisher specifications.<br />
Each schedule document is displayed in a different tab. Because <strong>Pipeline</strong> Control is a multi-document<br />
application, you can open, edit, and execute several schedules (or other documents) at the same time.<br />
November, 2012
95881<br />
Creating Capture Schedules<br />
<strong>Pipeline</strong> User’s <strong>Guide</strong><br />
The number of media files you can capture or play out simultaneously is based on the power of the CPU<br />
and disk write speed in your computer and your network bandwidth (Disk and Network Requirement by<br />
Media Format on page 38).<br />
Creating Schedules. To create a schedule, select File > New Schedule to display a new schedule<br />
document. To save a schedule, select File > Save or Save as, name the document and select a folder to<br />
save it in. When you save a schedule, it is saved as a document. You can copy <strong>Pipeline</strong> Control<br />
documents and move them to other folders or other computers. You can work with <strong>Pipeline</strong> Control<br />
documents just like you do any other document.<br />
When you close a schedule window, if it hasn’t been saved before, you’ll be asked to name it. If you’ve<br />
changed it, you’ll be asked if you want to save changes<br />
Note<br />
Active schedules must first be deactivated to close them. You may be interrupting a clip<br />
capture — so check first.<br />
Each schedule contains several groups of information: the selected <strong>Pipeline</strong> and its settings, plus a list of<br />
one or more clips arranged in a 24-hour time line, their name and optional metadata, and publishers, if any.<br />
<strong>Pipeline</strong> Control uses the schedule information to execute each clip event (at the correct time) to either<br />
capture or playout the clip (playout is available on Mac OS X only).<br />
Schedules are Symmetrical. That is, if you capture a given schedule, <strong>Pipeline</strong> Control runs the schedule<br />
and ingests encoded media from a specific <strong>Pipeline</strong>’s SDI port based on the clip events you’ve created in<br />
the schedule, and saves it as a specific type of file, based on your settings. On Mac OS X, you can also<br />
play out the same schedule and the reverse occurs: each file you specify with a clip event is opened at the<br />
correct time and the media is played out to the specified <strong>Pipeline</strong> for decoding and playout as SDI.<br />
You can create and configure as many schedules as you need to organize your <strong>Pipeline</strong>s, workflows, and<br />
tasks efficiently. You might create schedules for each <strong>Pipeline</strong> you’re using, or you might create schedules<br />
for a specific set of clips you need to capture or play out each day (or work shift). Or, you can create<br />
schedules based on how you want the media encoded, for use in an edit system, for example.<br />
<strong>Pipeline</strong> Control will automatically reconnect a schedule document if network connectivity or video signal is<br />
lost, and continue processing events. If an event is being recorded or played out, the file (or output of the<br />
file) is invalid.<br />
CREATING CAPTURE SCHEDULES<br />
A capture schedule is a schedule with one or more clips, which you use to capture SDI video in real time.<br />
The SDI video is converted to a specific media format, depending on the codec you specify in the <strong>Pipeline</strong>,<br />
and saved as a digital media QuickTime or TIFO file by <strong>Pipeline</strong> Control.<br />
Here are the steps you’ll take to create and use a capture schedule:<br />
1. If <strong>Pipeline</strong> Control isn’t running, start it now (Starting <strong>Pipeline</strong> Control on page 61).<br />
2. Create a new, untitled Scheduled capture document (Select File > New Schedule) if one isn’t open.<br />
3. Select the <strong>Pipeline</strong> device which is supplying the video feed you want to capture (Selecting a <strong>Pipeline</strong><br />
(page 67)).<br />
4. Select the video codec and configure it to meet your video encoding requirements (Selecting and<br />
Configuring a Video Codec (page 68)).<br />
109
110<br />
Chapter 7<br />
Using Scheduled Capture Documents<br />
5. Likewise, configure the audio codec to meet your audio encoding requirements (Configuring the Audio<br />
Codec (page 69)).<br />
6. Specify your timecode clock source (Selecting a Timecode Clock Source (page 69)).<br />
7. Select your wrapper (file) format (Selecting and Configuring Codecs (page 67)), configure it, and<br />
specify the storage location where you want your media clips saved.<br />
8. Set up handles as necessary (Setting up Handles (page 70)).<br />
9. Optionally, select and configure a publisher to perform additional actions as part of a workflow<br />
(Selecting a Publisher (page 70)).<br />
10. Save your schedule and name it, then continue.<br />
11. Add one or more clip events to the schedule (Creating Clip Events (page 112)).<br />
12. For each clip, enter a file name if you want it to be different than the default, and optionally, select a<br />
metadata label and enter metadata (Editing a Clip Event’s Property Sheet (page 114)).<br />
13. Save the schedule.<br />
14. Click Capture to place the schedule into capture mode.<br />
<strong>Pipeline</strong> Control displays the incoming video stream – verify the stream is what you expect. <strong>Pipeline</strong><br />
Control waits for each clip event, and saves each clip as a file using the settings you specified.<br />
USING THE SCHEDULE PANEL<br />
The schedule panel (on the right side of the window) is a vertically-oriented view of a 24-hour period. A<br />
time scale displays on the left, with space on the right to add clip events. The time is controlled by the<br />
timecode clock source you specify.<br />
Figure 7–2. The schedule panel allows you to create clip events.<br />
Schedule/List View. Click to display the full event list<br />
in schedule view or just display the list of clip events.<br />
Schedule Toolbar.<br />
Provides buttons for<br />
frequently used<br />
functions.<br />
Activation Slider. Indicates current<br />
state; slide to activate/deactivate.<br />
Event Timer. Indicates current time<br />
in schedule.<br />
Clip Event. Click and drag to<br />
create a new event.<br />
At the far left is a toolbar with buttons for frequently used functions. Above the event area is a Schedule/<br />
List view button that enables you to display the complete schedule or just a table of events.<br />
November, 2012
95881<br />
Using the Schedule Panel<br />
<strong>Pipeline</strong> User’s <strong>Guide</strong><br />
Activation Slider. Click to activate (place the schedule in active mode) the schedule, when connected to a<br />
<strong>Pipeline</strong>. Clip events are captured as files as they occur in the schedule. In this mode, locks display on<br />
clips and you can’t edit the schedule (add, edit, delete or play clips) or change your settings. When a clip<br />
event is executed, the current settings in the <strong>Pipeline</strong> Settings panel are used, even if they are not saved.<br />
<strong>Pipeline</strong> Control does not automatically save settings. To save settings, select File > Save.<br />
When you activate a schedule, <strong>Pipeline</strong> Control checks to make sure you have enough space for the clip<br />
events on your schedule.<br />
For a schedule to remain active, the <strong>Pipeline</strong> Control application must be open and the Schedule<br />
document must also be open. If the <strong>Pipeline</strong> Control application or the Schedule document is closed, clip<br />
events aren’t executed.<br />
Clip Events<br />
You add clip events by clicking and dragging the mouse in the schedule panel.<br />
Figure 7–3. Clip events in your schedule provide details about the clip.<br />
Thumbnail.<br />
Details. Start and stop time code, event name.<br />
Displays thumbnail<br />
Status Badge. Indicates capture status.<br />
of clip.<br />
Progress Bar. Helps you<br />
track capture progress.<br />
When you add a new clip event by clicking the Add Clip button, it is created on the nearest half hour. You<br />
can resize a clip (up to 9 hours long) by dragging either the top or bottom and resizing it. You can also snap<br />
to present lengths at half the displayed timescale. For example, with the timescale displaying 1 minute<br />
increments, snap to 30 second increments by pressing the control key while resizing the clip. To snap the<br />
top time, control-click and drag the top of the event.<br />
You can zoom in to increase your view of the schedule with greater detail, and create smaller clip lengths.<br />
You can also edit the time down to the second by right-clicking the clip event and selecting Edit (or select<br />
the clip then select Clip > Edit) to display its property sheet.<br />
Preview Thumbnail. Assigned when you created the mark-in point.<br />
Status Badge. Status badge (Table 7–1 on page 112) to indicate the state of this clip.<br />
Progress Bar. When capturing, colored yellow for captured and green for written to disk, indicating<br />
progress toward completion.<br />
Review Controls. When file has been captured and closed, use these controls to view your clip locally.<br />
Clip Status Badges<br />
Review Controls. For local clip playback.<br />
Each clip is marked with status badges to help you identify the state of each clip at a glance.<br />
111
112<br />
Chapter 7<br />
Using Scheduled Capture Documents<br />
Table 7–1. Status badges and their descriptions.<br />
Status Badge Description<br />
<strong>Pipeline</strong> Control attempted to capture the clip, but failed. This may be due to lack<br />
of storage, network or <strong>Pipeline</strong> problems, or excessive pre-roll at the beginning of<br />
a tape, for example. Resolve the problem and retry. Using the mouse, hover over<br />
the icon to display additional information.<br />
This clip is being closed. All media has been captured, but it has not been completely<br />
written to the file yet – possibly due to use of buffering.<br />
Schedule Panel Keyboard Shortcuts<br />
You can work with clips in your schedule using the following keyboard shortcuts:<br />
Delete | Backspace. Deletes the selected clip event<br />
Page Up. Select the previous clip event<br />
Home. Select the first clip event<br />
Page Down. Select the next clip event<br />
End. Select the last clip event<br />
Up Arrow. Move the selected clip up the schedule by the current block size (half hour, quarter hour,<br />
minute, thirty seconds, etc.), based on your current zoom increment.<br />
Down Arrow. Moves the selected clip event down by the current block size.<br />
Creating Clip Events<br />
This clip event has not been captured yet.<br />
This clip is currently being opened/created, but no media has been captured yet.<br />
This clip is in the process of being captured.<br />
This clip has been successfully captured and the file has been closed.<br />
To add a clip event to a schedule, choose one of two actions:<br />
• Move your cursor into the schedule panel and position it at the approximate start time. Now, click and<br />
drag downward for a maximum of 9 hours or until the end of the clip event (you can adjust the time<br />
accurately later) and release the button.<br />
OR<br />
November, 2012
95881<br />
Using the Schedule Panel<br />
<strong>Pipeline</strong> User’s <strong>Guide</strong><br />
• Click the Add Clip icon (the plus sign icon) at the top of the schedule toolbar or select Clip > Add.<br />
Once a clip has been added to the schedule, you can drag it up and down the timeline to change the start/<br />
stop time. Or, open the property sheet (right-click and select Edit or select the clip then select Clip > Edit)<br />
and adjust the start and stop time. You can’t create a single clip event lasting longer than 9 hours.<br />
When clips are captured, they are saved in the folder specified by the storage location in your wrapper.<br />
You can move a clip by clicking in the clip event and dragging it up or down. This avoids the necessity of<br />
moving a clip by adjusting both the start and stop times correctly. You can’t overlap clip events on a<br />
schedule.<br />
To play a clip that has been captured, use the review controls.<br />
Deleting Clip Events.<br />
Note<br />
This will not delete the captured clip, just the event.<br />
To delete a clip event you’ve selected, choose one of these actions:<br />
• Press the Delete key or the Backspace key.<br />
• Click the X icon to the left of the schedule<br />
• Right-click and select Clear from the context menu.<br />
Once a clip has been placed on the schedule, you can drag it around to change their times. Or, you can<br />
open the property sheet and adjust their start and stop time. You can’t create a single clip event lasting<br />
longer than 9 hours.<br />
Showing Media on Your Desktop<br />
When an event is connected to a local file, you can open the folder that contains the file directly.<br />
113
114<br />
Chapter 7<br />
Using Scheduled Capture Documents<br />
<strong>Pipeline</strong> Control sends a command to the operating system to display the clip in the enclosing folder:<br />
Figure 7–4. <strong>Pipeline</strong> Control displays the video clip’s folder.<br />
Editing a Clip Event’s Property Sheet<br />
Each clip event has its own property sheet. To display a clip event’s property sheet:<br />
• Select the event and select Clip > Edit<br />
• Select the clip and click the i icon in the toolbar to the left of the timeline<br />
• Right-click to display the context menu and select Edit.<br />
Properties are displayed in General and Embedded tabs, and other metadata tabs based on publishers.<br />
Viewing and Updating General Properties<br />
To view or update the general properties of an event, select the clip, then select Clip > Edit. Click the<br />
General tab to display this sheet. Alternatively, hover over the event and right-click to select Edit on the<br />
context menu.<br />
Figure 7–5. Clip event general properties.<br />
Start and End Time. Edit the digital clock to adjust the start and end times of the clip event.<br />
Lock. Click the lock (to display the locked icon) to cause <strong>Pipeline</strong> Control to adjust the start or end time<br />
while maintaining the duration. Click again (to display the unlocked icon) to modify the duration.<br />
November, 2012
Name. Enter a name for the clip in the text field and, optionally, select naming tokens..<br />
Color. Select a color to use when displaying this clip event in the schedule panel.<br />
Click OK to save your changes or click Cancel to leave them unchanged.<br />
Viewing and Updating Metadata Labels<br />
95881<br />
Using the Schedule Panel<br />
<strong>Pipeline</strong> User’s <strong>Guide</strong><br />
To view or update the label values of a clip event, edit the clip. Then, to display this sheet, click the Labels<br />
tab you want to edit (there may be more than one metadata label). The Embedded label is always<br />
available. Other labels (including FlipFactory labels, Final Cut Pro, and QuickTime) are displayed<br />
appropriately.<br />
Values you enter in the Embedded label are stored directly in the file that is created.<br />
Figure 7–6. Clip event label values.<br />
Click OK to save these values or click Cancel to leave them unchanged.<br />
Log Data.<br />
Note<br />
If you want the video files to be overwritten on a 24-hour basis you can use the mark-in<br />
token.<br />
At any time when a clip list is displayed, you can view or edit metadata. To view or edit metadata, click the<br />
Log Data tab to display the log data:<br />
Figure 7–7. Log Data.<br />
Enter metadata values.<br />
Edit the values for each metadata tag, Click OK to close the window and save the metadata.<br />
115
116<br />
Chapter 7<br />
Using Scheduled Capture Documents<br />
Using the Schedule Toolbar<br />
The schedule toolbar displays vertically, on the left of the schedule panel. It provides easy access to<br />
various schedule commands you use to create and manage clip events.<br />
Figure 7–8. Schedule Toolbar.<br />
Add a new clip event<br />
Display properties of the selected event<br />
Review local clips<br />
Delete the selected event<br />
Select first event<br />
Select previous event<br />
Go to the current time<br />
Select next event<br />
Select last event<br />
Zoom Slider<br />
Add Clip. Use to add a new clip event. Each time you add an event, it is added as early in the schedule as<br />
possible, where space is available. The newly-created clip is automatically selected so that you can<br />
immediately display its properties and add metadata, or adjust start and stop times.<br />
Information. Click to display the property sheet for the selected clip.<br />
Review. Play the local clip (after its been captured) of the selected event in the Video Preview panel.<br />
Delete. Click to remove the selected clip event from the schedule. When you remove a clip event, the<br />
actual file that it references (if present) is left intact – it is not deleted.<br />
Zoom. When you zoom out all the way, on most monitors you can view the entire schedule from an hourly<br />
perspective. As you zoom in closer and closer, you can view half and quarter hours, 5 minutes, one<br />
minute. Zoom to the magnification that is best for the size of clips you’re working with.<br />
You can also zoom the schedule by repeatedly clicking the left arrow (to zoom out) or right arrow key (to<br />
zoom in).<br />
Select and show the first event. Click to select and zoom in on the first event in the schedule.<br />
Select and show the previous event. Click to select and zoom in on the event immediately prior to the<br />
currently-selected clip.<br />
Go to Current Time. With the time source (Auto, RS-422, etc.) and <strong>Pipeline</strong> selected, click to scroll the<br />
schedule so that the current time is as close to the center of the schedule as possible, so that it is visible. If<br />
you are not connected to a <strong>Pipeline</strong> device, <strong>Pipeline</strong> Control displays the schedule beginning at midnight.<br />
Select and show the next event. Click to select and zoom in on the next event after the selected clip.<br />
Select and show the last event. Click to select and zoom in on the last event in the schedule.<br />
November, 2012
C H A P T E R<br />
Using Log & Capture<br />
Documents<br />
Chapter 8, Using Log & Capture Documents<br />
You can use Log & Capture documents in <strong>Pipeline</strong> Control to create and save clip lists, and capture media<br />
defined by the clips in various formats via <strong>Pipeline</strong>, independently of your video editing/encoding software.<br />
You can capture and encode clips in any supported SD or HD essence and file format/wrapper.<br />
Topics<br />
Note<br />
When capturing media from <strong>Pipeline</strong> Quad, you can perform confidence monitoring to<br />
qualify your video. See Confidence Monitoring (page 53).<br />
� Creating Clip Lists for Log and Capture (page 117)<br />
� Using the Log & Capture Document (page 118)<br />
� Using Log & Capture Controls in the Preview Panel (page 119)<br />
� Using the Clip List Panel (page 120)<br />
CREATING CLIP LISTS FOR LOG AND CAPTURE<br />
To encode and capture media clips from a VTR, follow these steps:<br />
1. Create New Log & Capture Document. If a Log & Capture document isn’t open, select File > New<br />
Log & Capture to create a new, untitled Log & Capture document or open an existing Log & Capture<br />
document.<br />
The Clip List panel, on the right, includes the General Tab for mark-in and mark-out points, metadata<br />
tabs, plus the clip list at the bottom. For details, see Using the Clip List Panel (page 120).<br />
2. Select and Configure your <strong>Pipeline</strong>. If you haven’t already selected and configured <strong>Pipeline</strong> for this<br />
task, do so now. After configuring <strong>Pipeline</strong> for your workflow requirements, save the file. For details,<br />
see (Using The <strong>Pipeline</strong> Settings Panel (page 66)).<br />
3. Preview your Media Stream. When you connect, streaming media (if present) displays in the video<br />
panel. If you’re connected to a VTR and it is in Remote mode, you can control your video using the<br />
VTR controls directly in <strong>Pipeline</strong> Control.<br />
8<br />
117
118<br />
Chapter 8<br />
Using Log & Capture Documents<br />
4. Create a Clip List. Insert tapes in your VTR, then use the VTR controls to scrub media, create mark in<br />
and mark out points (General Tab), add metadata as necessary, then click the Log button to create the<br />
clip and add it to the list.<br />
If you want to capture clips from multiple tapes, enter the name of the tape (or category) in the<br />
General > Tape field for the clip you’re creating. Before capturing clips, select the tape (or category)<br />
from the clip list on the left, to display the clips you want to capture. You can use the tape name to filter<br />
your list. Alternatively, import an EDL to automatically create your clip list. (See Loading and Saving Clip<br />
List Files (page 83) for details.)<br />
5. Capture the Clips. Click the Activation slider (top right) to activate the document and capture the clips<br />
displayed in the clip list and save each one as a file. To capture clips from multiple tapes in one session,<br />
select All Tapes (Click the word All) before activating the document to capture your clips. You will be<br />
prompted to insert the correct tape when necessary and (if selected in preferences) the previous tape<br />
will be ejected.<br />
USING THE LOG & CAPTURE DOCUMENT<br />
The Log & Capture document is designed to facilitate logging and capturing clips.<br />
Note<br />
Generally, Log and Capture will be performed using a VTR controlled by an RS422<br />
interface. However, as a convenience to our customers, the <strong>Pipeline</strong> Log and Capture<br />
interface allows clips to be logged and captured in workflows that are not being<br />
controlled using RS422. In these cases a warning is displayed indicating the lack of<br />
RS422 control. This allows the user to continue operation using manual control of the<br />
incoming signal.<br />
November, 2012
95881<br />
Using Log & Capture Controls in the<br />
Preview Panel<br />
Figure 8–1. Use the Log & Capture document to create clip lists and capture media from <strong>Pipeline</strong>.<br />
Activation Slider<br />
Click to begin<br />
capturing clips.<br />
Mark In Button<br />
Mark Out Button<br />
Log. Click to add a clip<br />
to the clip list.<br />
Clip List Panel<br />
Document Details. Displays number of clips, total capture hours, and approx. space required.<br />
<strong>Pipeline</strong> Control displays several panels and toolbars to help you perform the tasks the document was<br />
designed to facilitate. Each panel, toolbar, and feature is described below.<br />
For details on how to use the <strong>Pipeline</strong> Settings panel and all panels and controls on the left, see Chapter 6,<br />
Using <strong>Pipeline</strong> Control (page 59).<br />
The log and capture document is composed of data entry tabs and a clip list (on the right), including tape<br />
names when logging clips from multiple tapes, with <strong>Pipeline</strong> State, Video Preview, Audio Preview, and<br />
Diagnostics panels on the left. You can open multiple document at a time – each is displayed in its own tab.<br />
USING LOG & CAPTURE CONTROLS IN THE PREVIEW PANEL<br />
In addition to the panels and controls described in (Using The Video Preview Panel on page 81), the<br />
Preview panel in Log & Capture window has additional controls to support log and capture activities.<br />
Figure 8–2. Timecode, VTR, jog wheel & control status indicators in the Log & Capture window.<br />
VTR Tape Status<br />
Indicator<br />
VTR Remote<br />
Status Indicator<br />
Deck RS-422 Control<br />
Status Indicator<br />
Alarm Status<br />
Jog Wheel/Shuttle<br />
119
120<br />
Chapter 8<br />
Using Log & Capture Documents<br />
VTR Tape Status<br />
Tape In. Displays when a tape is in the attached VTR.<br />
Tape Out. Displays when a tape is not in the attached VTR.<br />
Deck RS-422 Control Status<br />
NO RS-422. Displays when <strong>Pipeline</strong> does not have control over the attached VTR.<br />
RS-422. Displays when <strong>Pipeline</strong> has control over the attached VTR.<br />
Alarm Status<br />
ALARM. Displays when the deck has an outstanding alarm.<br />
. Displays when there is no outstanding alarm.<br />
USING THE CLIP LIST PANEL<br />
The Clip List panel displays on the bottom of the Log & Capture window – it includes the clip list. Each of<br />
the tabs holds metadata for the selected clip.<br />
Figure 8–3. The Clip List panel allows you to work with and capture clips.<br />
Replace the current<br />
preview thumbnail<br />
with the frame<br />
currently displayed<br />
in the Preview<br />
panel.<br />
Remove the current<br />
preview thumbnail.<br />
Remove all clips from<br />
the selected batch list.<br />
You can create clips<br />
from multiple tapes,<br />
identified by tape<br />
name. Select the tape<br />
you want to capture<br />
from (or All Tapes)<br />
before clicking the<br />
active slider above<br />
Current preview thumbnail.<br />
Click to activate this document and capture each clip<br />
from the selected tape (or all tapes).<br />
General & other<br />
metadata tabs.<br />
Clip name & tape ID<br />
Mark in & out controls.<br />
Click to add a new<br />
clip to the clip list.<br />
Click to enable<br />
timecode break<br />
detection.<br />
Click a clip to select it;<br />
double-click to edit its<br />
values.<br />
November, 2012
General Controls and Detail Fields<br />
95881<br />
Using the Clip List Panel<br />
<strong>Pipeline</strong> User’s <strong>Guide</strong><br />
The following controls in the General tab perform certain functions or contain details about the clip:<br />
Control Description<br />
Clip Status Badges<br />
Located at upper right, slide the activation slider to the right (to activate the<br />
document) when you’re done creating or modifying your clip list. Activate your<br />
document to capture the clips for the selected tape or all tapes and save the files.<br />
Slide to the left to deactivate the document – stopping any capture in progress –<br />
when you want to edit the document or close it.<br />
<strong>Pipeline</strong> Control captures clips by controlling the VTR via the <strong>Pipeline</strong> to encode<br />
the clip and stream each clip’s media to <strong>Pipeline</strong> Control, which writes the media<br />
out to a file, and saves each file in the destination folder.<br />
When the capture process completes, <strong>Pipeline</strong> Control disconnects from the<br />
<strong>Pipeline</strong>.<br />
Located directly under the thumbnail frame, click to replace the current thumbnail<br />
frame with the frame currently displayed in the Video Preview panel.<br />
Located directly under the thumbnail frame, click to remove the current thumbnail<br />
frame.<br />
Located below the thumbnail frame, directly above the clip list, just right of the<br />
Clear button. Click to add the new clip to the clip list along with clip values and<br />
metadata. Make sure to use the correct tape name, if you’re using multiple tapes.<br />
Located between Log and Clear buttons. Check to create a new clip (between<br />
Mark In and Mark Out times) for every timecode break found.<br />
Located below Timecode Break checkbox. Defines the number of missed frames<br />
required to constitute a timecode break, Range is 1 to 32 frames. Default is 1.<br />
Located below the thumbnail frame, directly above the clip list. Click to clear all<br />
clips from the selected tape.<br />
Located below the thumbnail frame, directly above the clip list. Click to switch<br />
between a clip view and a list view, depending on the task at hand.<br />
Each clip is marked with status badges to help you identify the state of each clip at a glance.<br />
Status Badge Description<br />
<strong>Pipeline</strong> Control attempted to capture the clip, but failed. This may be due to lack<br />
of storage, network or <strong>Pipeline</strong> problems, or excessive pre-roll at the beginning of<br />
a tape, for example. Resolve the problem and retry. Using the mouse, hover over<br />
the icon to display additional information.<br />
This clip is being closed. All media has been captured, but it has not been completely<br />
written to the file yet – possibly due to use of buffering.<br />
This clip has not been captured yet.<br />
121
122<br />
Chapter 8<br />
Using Log & Capture Documents<br />
Status Badge Description<br />
General Tab Controls<br />
This clip is currently being opened/created, but no media has been captured yet.<br />
This clip is in the process of being captured.<br />
This clip has been successfully captured and the file has been closed.<br />
Use the controls on the General tab to identify your clip, and set its in and out points.<br />
Figure 8–4. Use the General tab to ID your clip/tape & set mark points.<br />
Click to name or rename clip<br />
Enter the tape ID<br />
Mark in/out controls<br />
Lock to add the duration to the mark out point.<br />
Name. In the Name field, enter a text phrase to name the root file name (not including the suffix). For<br />
additional files with the same root, <strong>Pipeline</strong> Control adds a unique number if you specify the counter token.<br />
File names are entered via the keyboard, but can also contain other parameters (date, codec, etc.)<br />
selected by using the pull-down menu provided<br />
Tape. Enter the tape name to organize clips by tape, if you’re capturing from multiple tapes. These tape<br />
names display in the tree just to the left of the clips in the clip list. Tape names are not known by the deck<br />
or <strong>Pipeline</strong> Control, they are only used for human identification purposes.<br />
Mark In. Click the arrow to update the Mark In point to the tape’s current timecode for the selected clip. Or,<br />
manually enter the timecode. To go to the point, click the Go button.<br />
Mark Out. If you’re not using the duration, click to update the Mark Out point to the tape’s current timecode<br />
for the selected clip. Or, manually enter the timecode. To go to the point, click the Go button.<br />
Duration. Click to disengage the lock (black). The duration is calculated as the end time minus the start<br />
time. While the lock button is disengaged (black), changes to the start timecode will cause the end<br />
timecode to remain the same, and the duration timecode to change. Any changes to the end timecode will<br />
similarly cause the start timecode to remain the same and the duration timecode to change.<br />
Click again to engage the lock (blue). Duration always stays the same. When the lock button is engaged<br />
(blue), changes to the start or end timecode leave the duration timecode locked – as is. If you change the<br />
start timecode, the end timecode will adjust to match the new start time and the locked duration. If you<br />
change the end timecode, the start timecode will adjust to match the new end timecode and the locked<br />
duration.<br />
For example, given a clip at 29.97 fps, if the duration is set to 00:00:30;00 with the In point at 01:00:00;00,<br />
the Out point will be 01:00:29;29. If the In point is changed to 01:00:10;00 the Out point will change to<br />
01:00:39;29. Likewise, if the out point is changed from 01:00:39;29 to 01:00:49;29 the In point will change<br />
to 01:00:20;00.<br />
November, 2012
95881<br />
Using the Clip List Panel<br />
<strong>Pipeline</strong> User’s <strong>Guide</strong><br />
A blue lock does not mean that the duration fields are locked (not editable). When the lock is blue, the<br />
duration value can be changed manually by entering a new duration in the duration fields.<br />
Embedded Labels<br />
Figure 8–5. Embedded Labels<br />
To view or update the label values for each clip event, click the embedded tab to display each metadata<br />
sheet. There may be more than one metadata label. Enter the labels you want to use. The Embedded label<br />
is always available; others (including FlipFactory labels, Final Cut Pro, and QuickTime) are dynamically<br />
generated as appropriate.<br />
For Quicktime only, values in the Embedded label are embedded in the file that is created.<br />
Editing Clip Details<br />
Clips can be viewed in clip view or list view – click the Clip or List view button at the top of the list to switch<br />
views. Click a clip to select it. Double-click a clip to edit it in place.<br />
Figure 8–6. Double-click to edit clip details in the General and Embedded tabs in place.<br />
When you’re done editing click Save to save your updates or Cancel to discard them and return to viewonly.<br />
Performing Other Clip Tasks<br />
The dotted yellow lines indicate you’re<br />
in edit mode.<br />
Drop-Frame Mode Select.<br />
Click semicolon to toggle drop-frame mode.<br />
When you’re done editing, click Save<br />
or Cancel.<br />
There are a variety of actions you can take on a selected clip, when you right-click on it:<br />
Clear. Select to permanently remove the clip from the list. Files associated with the event are not deleted.<br />
Edit. Select to display an editor dialog, so that you can modify the properties of the clip.<br />
Show in Explorer. After the clip has been recorded, select to display the folder that contains the clip.<br />
123
124<br />
Chapter 8<br />
Using Log & Capture Documents<br />
Recapture. After the clip has been recorded, select to re-capture the clip.<br />
Using Clip View<br />
In clip view (shown following), several controls are presented.<br />
Figure 8–7. Use clip controls to review your clip.<br />
Preview thumbnail.<br />
Preview Thumbnail. Assigned when you created the mark-in point.<br />
Status Badge. Status badges to indicate the state of this clip.<br />
Progress Bar. When capturing, colored yellow for captured and green for written to disk, indicating<br />
progress toward completion.<br />
Review Controls. When file has been captured and closed, use these controls to view your clip locally.<br />
Creating a Clip<br />
To create a clip, insert your tape, make sure the <strong>Pipeline</strong> is connected, and follow these steps:<br />
1. Click the General tab to display mark-in and mark-out controls.<br />
2. Play/scrub the video using the VTR controls, then click the Mark In button to mark the start timecode<br />
(at right of Mark In code value field in the General tab of the Clip List panel).<br />
3. Click the Mark Out button to mark the end timecode (at right of end timecode value field). When you<br />
have a start and end timecode value (and the start timecode is previous to the end timecode).<br />
4. Optionally, enter a start timecode and a duration – the end timecode will be calculated for you.<br />
5. Optionally, enter metadata on the any of the available metadata tabs.<br />
6. Click Log to create the clip and add it to the list.<br />
When not in edit mode, any data entry or edits you perform in any tab is for the next clip you may create.<br />
Deleting a Clip<br />
To delete a clip, select it from the clip list and press the Delete key or select Clip > Clear.<br />
Note<br />
Status badge.<br />
Review Controls<br />
Progress bar.<br />
This does not delete the clip if it has already been captured.<br />
November, 2012
95881<br />
Setting up and Capturing Timecode Break<br />
Recording<br />
SETTING UP AND CAPTURING TIMECODE BREAK RECORDING<br />
To set up timecode break recording, which is performed by timecode breaks in the video, insert the tape<br />
and make sure the <strong>Pipeline</strong> is configured and connected. After you’ve set up your configuration and logged<br />
your clips (details below), click Activate to initiate timecode break recording.<br />
Generally these tapes have been recorded using time of day time code. Once activated the Timecode<br />
Break feature will create separate files when a break in the time code is detected. To accommodate for<br />
dropped frames when the tape was recorded, a Frame Threshold parameter is available.<br />
Figure 8–8. Timecode Break Recording settings panel.<br />
Check Timecode break<br />
Select Frame Threshold<br />
Timecode Break Checkbox. Check the Timecode Break checkbox to enable timecode break recording.<br />
Frame Threshold. Defines how many discontinuous timecode frames required to constitute a break. Use<br />
the slide bar to set the frame threshold from 1 to 32. Default is 1.<br />
Enter the minimum number of frames between time code breaks that will trigger a new clip to begin. For<br />
example if the Frame Threshold is set to '3' a new clip will be created when a break of 3 or more frames is<br />
detected. If a Time code breaks of less than '3' frames is detected it will be ignored and capturing will<br />
continue until a break of more than 3 frames is detected, the Max Duration is achieved for this clip, the end<br />
of tape is detected or the document is deactivated.<br />
125
126<br />
Chapter 8<br />
Using Log & Capture Documents<br />
November, 2012
C H A P T E R<br />
Using Trigger Capture<br />
Documents<br />
Chapter 9, Using Trigger Capture Documents<br />
<strong>Pipeline</strong> Control’s Trigger document enables you to manually or automatically record media in real time<br />
from a live source or VTR. You use the Trigger document to record media in real time from a VTR deck or<br />
live sources. You can perform the recording process in four ways: manually, automatically via Web<br />
services, by using timecode breaks, or under RS422 control.<br />
You use the Web services by writing an application using the <strong>Pipeline</strong> Web Services API, in any supported<br />
SD or HD essence and file/wrapper format, directly from a <strong>Pipeline</strong> that is attached via Ethernet.<br />
Topics<br />
Note<br />
When capturing media from <strong>Pipeline</strong> Quad, you can perform confidence monitoring to<br />
qualify your video. See Confidence Monitoring (page 53).<br />
� Using the Trigger Document (page 128)<br />
� Using the Preview Panel (page 129)<br />
� Setting up and Enabling Automatic Recording (page 130)<br />
� Using CalDav Calendar (page 131)<br />
� Manual & Timecode Break Recording (page 133)<br />
� RS422 (page 135)<br />
� Viewing and Updating Metadata Labels (page 136)<br />
9<br />
127
128<br />
Chapter 9<br />
Using Trigger Capture Documents<br />
USING THE TRIGGER DOCUMENT<br />
The Trigger document is designed to facilitate manual and automatic clip recording. <strong>Pipeline</strong> Control can<br />
record files of any supported profile in any format/wrapper, up to 9 hours in length.<br />
Figure 9–1. Use the Trigger window to capture video in real time.<br />
At the top of the window is the <strong>Pipeline</strong> Settings panel; on the left side is the Preview panel. For details on<br />
how to use the <strong>Pipeline</strong> Settings panel and the Preview panel, see Chapter 6, Using <strong>Pipeline</strong> Control (page<br />
59). The right side of the window is the Clip panel which is designed to support crash recording and<br />
automation. The clip panel has settings to enable and configure automatic, calendar, manual, timecodebreak,<br />
and RS422 controlled recording.<br />
<strong>Pipeline</strong> Control will automatically reconnect a Trigger document if network connectivity or video signal is<br />
lost, but it will not continue processing future events. When your VTR is connected via RS-422 in remote<br />
mode, the VTR controls allow you to scrub media.<br />
Naming Control<br />
Activate / Deactivate the<br />
document for recording.<br />
Naming<br />
Web service<br />
Calendar<br />
Manual recording<br />
Timecode break recording<br />
RS422 controlled recording<br />
Clip list<br />
The naming control enables you to enter a text phrase to name the root file (not including the suffix). For<br />
additional files with the same root, <strong>Pipeline</strong> Control adds a unique number if the counter token is used. File<br />
names are entered via the keyboard, but can also contain other parameters (date, codec, etc.) using the<br />
pull-down menu provided.<br />
The default name is automatically entered based on the parameters set in Preferences. To change the file<br />
name to be used, modify the basename and any token types desired. Token types can be Date, Time,<br />
Mark In (inclusive First Frame TC), Mark Out (exclusive Last Frame TC), Counter (increments by 1),<br />
<strong>Pipeline</strong> (name), Tape (name), Codec, Frame Rate, and External. The counter token ensures unique<br />
names.<br />
Tokens are added by selecting them from the pull-down menu and are moved by clicking and dragging<br />
them to change their order in the filename.<br />
November, 2012
95881<br />
Using the Preview Panel<br />
<strong>Pipeline</strong> User’s <strong>Guide</strong><br />
The External token adds a name passed in by an external trigger source (from a CalDav Calendar or Web<br />
Service command, for example). The name used as a token is taken from the START command argument<br />
name. If no external name token is added to the Name field, the Event name will be ignored.<br />
In the Web service trigger, the external token gets its value based on the value of the name parameter (if<br />
specified). In the calendar trigger, the external token gets its value based on the event name in the<br />
calendar (if specified). If these values are not specified, or if the capture is initiated with a trigger other than<br />
Web service or calendar, the external token is ignored.<br />
Figure 9–2. Naming Control<br />
Clip Status Badges<br />
Enter filename Select token<br />
Clip thumbnails are marked with status badges to help you identify the state of each clip at a glance.<br />
Status Badge Description<br />
<strong>Pipeline</strong> Control attempted to capture the clip, but failed. This may be due to lack<br />
of storage, network or <strong>Pipeline</strong> problems, or excessive pre-roll at the beginning of<br />
a tape, for example. Resolve the problem and retry. Using the mouse, hover over<br />
the icon to display additional information.<br />
This clip is being closed. All media has been captured, but it has not been completely<br />
written to the file yet – possibly due to use of buffering.<br />
This clip has not been captured yet.<br />
This clip is currently being opened/created, but no media has been captured yet.<br />
This clip is in the process of being captured.<br />
This clip has been successfully captured and the file has been closed.<br />
USING THE PREVIEW PANEL<br />
You can use the video and audio preview buttons to enable or disable audio and video preview from the<br />
video feed.<br />
129
130<br />
Chapter 9<br />
Using Trigger Capture Documents<br />
In addition to the panels and controls described in (Using The Video Preview Panel on page 81), the<br />
preview panel in the Trigger window has additional controls. If an optional VTR is attached, you can use<br />
the VTR controls to view VTR status, and in Remote mode, control it.<br />
Figure 9–3. Jog and Shuttle in the Trigger window.<br />
VTR Tape Status<br />
Indicator<br />
VTR Remote<br />
Status Indicator<br />
VTR Tape Status<br />
Tape In. Displays when a tape is in the attached VTR.<br />
Tape Out. Displays when a tape is not in the attached VTR.<br />
Deck RS-422 Control Status<br />
NO RS-422. Displays when <strong>Pipeline</strong> does not have control over the attached VTR.<br />
RS-422. Displays when <strong>Pipeline</strong> has control over the attached VTR.<br />
VTR Remote Status<br />
LOCAL. Displays when VTR is in Local mode.<br />
REMOTE. Displays when VTR is in Remote mode.<br />
Alarm Status<br />
ALARM. Displays when the deck has an outstanding alarm.<br />
. Displays when there is no outstanding alarm.<br />
Deck RS-422 Control<br />
Status Indicator<br />
Alarm Status<br />
Jog Wheel/Shuttle<br />
SETTING UP AND ENABLING AUTOMATIC RECORDING<br />
To set up automatic recording, which is performed by using <strong>Pipeline</strong> Web Services API requests from<br />
another application, check Web Service. Then, connect the feed or insert your tape, make sure the<br />
<strong>Pipeline</strong> is configured and connected. After you’ve set up your configuration (details below), click Activate<br />
to enable automatic recording.<br />
November, 2012
For details on using the Web service, see <strong>Pipeline</strong> Web Service Application Note..<br />
95881<br />
Note<br />
Using CalDav Calendar<br />
<strong>Pipeline</strong> User’s <strong>Guide</strong><br />
If you want to use the Web Service in <strong>Pipeline</strong>, you must run the application with an<br />
administrator account because the Web Service requires elevated privileges.<br />
Windows 7 Example:<br />
1. Navigate to \Program Files\<strong>Telestream</strong>\<strong>Pipeline</strong> Control<br />
2. Right-click <strong>Pipeline</strong>Control.exe<br />
3. Click the Compatibility tab<br />
4. In the Privilege Level section, check Run this program as an administrator<br />
Web Services and Port Number. Check Web services, and set the port number that the Web service<br />
should listen for incoming HTTP GET requests on. The port number value must be between 1025 and<br />
49151, and the TCP port must be open on the host system and not blocked by a firewall.<br />
Figure 9–4. Automatic Recording settings panel.<br />
Enable/Disable automatic recording via Web service.<br />
Specify the port number.<br />
You can record all formats and file wrappers in this manner, depending on your <strong>Pipeline</strong> settings. All files<br />
have a 9 hour maximum clip length.<br />
When the Web service is enabled and the <strong>Pipeline</strong> document is placed into an active state, the Web<br />
service begins listening for requests on the specified port. You are warned if the port is in use by another<br />
Trigger document or by some other service on the host computer.<br />
USING CALDAV CALENDAR<br />
The CalDav Calendar option enables you to record based on events on a CalDav compatible calendar<br />
(such as Google or iCal). The <strong>Pipeline</strong> Control software checks the calendar every ten seconds for<br />
changes in existing events and for new events then loads them into the Clip window within a two-hour lookahead<br />
window of time. If a calendar event has been placed into the <strong>Pipeline</strong> Control’s Clip window, then<br />
subsequently removed or changed, <strong>Pipeline</strong> Control will indicate the new state on the associate entry in<br />
the Clip window. If a calendar event has been deleted from the CalDav calendar, the clip entry will not be<br />
131
132<br />
Chapter 9<br />
Using Trigger Capture Documents<br />
removed from <strong>Pipeline</strong> Control’s Clip window, but it will display a large X over the record icon. You can<br />
hover over the large X to view the tool reporting that the clip was removed before being captured.<br />
Figure 9–5. Clip Window<br />
.<br />
Note<br />
The Calendar control requires a license. Without a license, the Calendar checkbox is<br />
greyed out and the message Calendar Trigger is not Licensed is displayed in red.<br />
To use CalDav Calendar with <strong>Pipeline</strong> Control Trigger, follow these steps:<br />
1. Open a New Trigger Document. If a Trigger document isn’t open, select File > New Trigger<br />
Document to create a new, untitled Trigger document. Or, you can open a previously-saved document.<br />
2. Calendar checkbox. Check the Calendar check box, then click the down arrow to display the<br />
calendar controls.<br />
Figure 9–6. Calendar Controls.<br />
Click down arrow.<br />
Check Calendar<br />
Large X<br />
3. CalDav URL. In the Calendar field enter the URL to the CalDav calendar you want to use. Example:<br />
https://www.google.com/calendar/dav//events.<br />
Here are some examples:<br />
• Google:<br />
— https://www.google.com/calendar/dav/@group.calendar.google.com/events<br />
— https://www.google.com/calendar/dav/1jk6tfqu7qqa0fihp2lthqju4o@group.calendar.google.com/events/<br />
November, 2012
• Bedework Personal Calendar:<br />
95881<br />
— http://:/ucaldav/user/vbede/calendar<br />
— http://QA-RONT1:8080/ucaldav/user/vbede/calendar<br />
• Yahoo Calendar:<br />
.<br />
Manual & Timecode Break Recording<br />
<strong>Pipeline</strong> User’s <strong>Guide</strong><br />
— https://caldav.calendar.yahoo.com/dav/telestreamcalendar@yahoo.com/Calendar/telestreamcalendar<br />
Note<br />
Your Google Calendar ID for your primary calendar is your email address, but for all<br />
other calendars the Calendar ID is in the form of: <br />
@group.calendar.google.com. You can get the Calendar ID by clicking the down<br />
arrow next to your calendar at calendar.google.com and selecting Calendar Settings.<br />
Be sure to use “https” in your URL, because “http” will not work.<br />
Additionally, when you are using the calendar trigger, make sure the Use Duration as<br />
frame count instead of Mark Out point checkbox (located near the bottom of the<br />
Tools > Options > Capture tab) is unchecked. This will enable events to be updated in<br />
<strong>Pipeline</strong> Control.<br />
4. Username. In the Username field enter the email address you use with CalDav Calendar. This is the<br />
complete email address you use with CalDav Calendar, including the part after the @ sign. If you are<br />
using Google Apps, be sure to enter your Google Apps email address.<br />
5. Password. In the Password field enter is the password you use to sign in to Google Calendar.<br />
6. Connect. Click Test Connection. If the calendar URL, Username and Password are correct, then “Your<br />
settings are OK!” will display next to the Test Connection button. If an error message displays, go back<br />
and correct the URL, Username and Password, and reconnect.<br />
.<br />
Note<br />
<strong>Pipeline</strong> does not support reoccurring events in Google Calendar. To do multiple<br />
events you must create a new separate event for each occurrence in Google Calendar<br />
MANUAL & TIMECODE BREAK RECORDING<br />
To manually record – encode and capture media – from <strong>Pipeline</strong> in real time, follow these steps:<br />
1. Open a New Trigger Document. If a Trigger document isn’t open, select File > New Trigger<br />
Document to create a new, untitled Trigger document. Or, you can open a previously-saved document.<br />
2. Select and Configure your <strong>Pipeline</strong>. If you have not already done so, select and configure a <strong>Pipeline</strong><br />
and save your configuration. For details, see Using The <strong>Pipeline</strong> Settings Panel (page 66).<br />
3. Connect to the <strong>Pipeline</strong>. When you connect, streaming media (if present) displays in the video panel.<br />
If you’re connected to a VTR and it is in Remote mode, you can control your video using VTR controls.<br />
133
134<br />
Chapter 9<br />
Using Trigger Capture Documents<br />
4. Set up your live feed. Connect your live feed or insert tapes in your VTR, then use the VTR controls<br />
to scrub the media to the starting point.<br />
5. Enable Manual recording. Check Manual to enable direct, user-control of this document. Specify the<br />
file name and enter a duration, then connect the live feed (or insert a tape).<br />
Figure 9–7. Manual Recording settings panel.<br />
Enable/Disable manual recording.<br />
Enter duration<br />
Enter filename<br />
Duration. You can enter a duration for the amount of time <strong>Pipeline</strong> Control should record media to the<br />
file. Or, just click the Record button to stop recording when you choose. Default is 00:00:00:00 which<br />
creates a clip with a maximum duration of nine hours.<br />
Segment Duration. Optionally, you can enter a segmented duration which causes multiple clips to be<br />
captured during the full Duration time. If more than one segment is specified, the value specified in the<br />
duration field is divided by the number of segments. For example, a duration of sixty minutes with a<br />
segments value of 60, results in sixty one-minute clips. A duration of 60 minutes with a segments value<br />
of 2, results in two 30-minute clips. Default is 00:00:00:00, which disables segmented duration.<br />
6. Capture the Video. Click the Activate slider, then click the Record button to start recording. The<br />
recording will continue until the specified duration is reached or the capture is stopped manually by<br />
clicking the record button a second time. To use the Record button to start and stop recording, enter 0<br />
in the Duration field. When recording using Open QuickTime, if you stop recording before the duration<br />
value is reached, the file will retain the original duration value.<br />
When capture is complete, the file is closed.<br />
To set up timecode break recording, which is performed by timecode breaks in the feed, make sure the<br />
<strong>Pipeline</strong> is configured and connected. After you’ve set up your configuration (details below), click Activate<br />
to enable timecode break recording.<br />
Generally these feeds have been recorded using time of day time code. Once activated the Timecode<br />
Break feature will create separate files when a break in the time code is detected. To accommodate for<br />
dropped frames when the tape was recorded, a Frame Threshold parameter is available.<br />
Figure 9–8. Timecode Break Recording<br />
Check<br />
Timecode break<br />
Select filename tokens<br />
Select Frame<br />
Threshold<br />
Click to start/stop recording.<br />
Displays only when document is active.<br />
Enter segment duration<br />
Duration. Duration is the maximum duration of any one individual clip. If the max duration is reached<br />
before a time code break is detected any clip being captured will stop. The system will continue in capture<br />
mode and will start a new clip at the next time code break. Duration default is 00:00:00:00, which allows for<br />
a maximum duration of nine hours. The duration control is inactive when the Record button is clicked.<br />
Timecode Break Checkbox. Check the Timecode Break checkbox to enable timecode break recording.<br />
November, 2012
95881<br />
RS422<br />
<strong>Pipeline</strong> User’s <strong>Guide</strong><br />
Frame Threshold. Defines how many discontinuous timecode frames required to constitute a break. Use<br />
the slide bar to set the frame threshold from 1 to 32. Default is 1.<br />
Enter the minimum number of frames between time code breaks that will trigger a new clip to begin. For<br />
example if the Frame Threshold is set to '3' a new clip will be created when a break of 3 or more frames is<br />
detected. If a Time code breaks of less than '3' frames is detected it will be ignored and capturing will<br />
continue until a break of more than 3 frames is detected, the Max Duration is achieved for this clip, the end<br />
of tape is detected or the document is deactivated.<br />
RS422<br />
Note<br />
A dropped or skipped frame will cause the capture session to stop. If you are capturing<br />
more than one segment and the capture session has stopped prematurely, some<br />
segments will not be captured. To prevent the capture session from being prematurely<br />
stopped by a lost or skipped frame, select the Ignore lost frames option from Tools-<br />
>Options->Capture (see Setting Up <strong>Pipeline</strong> Control Options on page 83), or enable<br />
the firmware option Ignore input discontinuities on the Configure Panel (see Using<br />
the Configure Panel on page 46).<br />
Check RS422 to enable <strong>Pipeline</strong> system remote control for automation capability using a standard BVW<br />
(Sony 9-pin) connector. If the REC command (20.02) or the EDIT ON command (20.65) is received on the<br />
<strong>Pipeline</strong>'s RS422 command, then a clip will be started. If the STOP command (20.00) is received on the<br />
<strong>Pipeline</strong>'s RS422 command then a clip will be stopped. If a REC command is received while another<br />
RS422 capture is in progress, the previous capture will be stopped and a new one will begin.<br />
Note<br />
When using RS422 to control a <strong>Pipeline</strong> system, you must use an RS-422 cable (or<br />
adapter) that swaps the RS422 transmit and receive lines. Adapters are available from<br />
<strong>Telestream</strong> by contacting Technical Support (Part Number: 53-0024-00 RS-422).<br />
135
136<br />
Chapter 9<br />
Using Trigger Capture Documents<br />
VIEWING AND UPDATING METADATA LABELS<br />
Figure 9–9. Labels Applied Panel.<br />
To view or update the label values for each clip event, click the embedded tab to display each metadata<br />
sheet. There may be more than one metadata label. The Embedded label is always available; others<br />
(including FlipFactory labels, Final Cut Pro, and QuickTime) are dynamically generated as appropriate.<br />
For Quicktime only, values in the Embedded label are embedded in the file that is created.<br />
November, 2012
C H A P T E R<br />
10<br />
Using Print to Tape<br />
Documents<br />
Chapter 10, Using Print to Tape Documents<br />
<strong>Pipeline</strong> Control’s Print to Tape document enables you to implement various types of print-to-tape<br />
operations from media files played out via <strong>Pipeline</strong> to your VTR. You can use the Print to Tape document to<br />
specify a set of clips and perform assembly and insert edits or crash print to tape.<br />
Topics<br />
� Playout & Print to Tape Overview (page 138)<br />
� Creating Print to Tape Documents (page 139)<br />
� Using the Clip Panel (page 140)<br />
137
138<br />
Chapter 10<br />
Using Print to Tape Documents<br />
PLAYOUT & PRINT TO TAPE OVERVIEW<br />
The Print to Tape document is designed to facilitate print to tape operations via <strong>Pipeline</strong>. You can set up the<br />
following print-to-tape operations:<br />
� Assemble edits<br />
� Insert edits<br />
� Crash records.<br />
Figure 10–1. Print to Tape window panels and toolbars.<br />
<strong>Pipeline</strong> Settings Panel. Use to configure<br />
<strong>Pipeline</strong> for use in this document.<br />
<strong>Pipeline</strong> Status.<br />
Displays status.<br />
Preview panel.<br />
Displays video.<br />
Timecode.<br />
Displays when<br />
connected.<br />
Print to Tape Details. Displays number of<br />
clips and total capture hours.<br />
Print Time Tape.<br />
Visual depiction of<br />
layout on tape.<br />
Clip List Toolbar. Provides buttons<br />
for frequently used functions.<br />
Clip Events. Add these clip<br />
events to play out media.<br />
Print to Tape<br />
Configuration<br />
Panel.<br />
Activation<br />
Slider.<br />
Clip list<br />
panel.<br />
Displays<br />
all clip<br />
events<br />
ordinally.<br />
At the top of the window is the <strong>Pipeline</strong> Settings panel, and to the left is the Preview panel. For details on<br />
how to use these panels, see Chapter 6, Using <strong>Pipeline</strong> Control (page 59).<br />
When your VTR (or VTR-enabled camera) is connected via RS-422 in remote mode, VTR controls below<br />
the Preview panel enable you to scrub the tape.<br />
The Print to Tape document panel (bottom right) displays configuration settings and timecode settings.<br />
Below the timecode settings is the clip list, which displays a list of clips you have added.<br />
November, 2012
95881<br />
Creating Print to Tape Documents<br />
<strong>Pipeline</strong> User’s <strong>Guide</strong><br />
<strong>Pipeline</strong> Control automatically reconnects a Print to Tape document if network connectivity or video signal<br />
is lost when you are previewing the tape, but it will not reconnect if the document has been activated.<br />
Note<br />
There are two ways to playout VANC data with a <strong>Pipeline</strong> system.<br />
1. Track based VANC Data is obtained from the data tracks of the respective file<br />
formats. For QuickTime this includes the time code and closed caption tracks. For MXF<br />
OP1a this includes all data stored in the SMPTE 436M track data.<br />
2. Video Essence based VANC Data plays out VANC data embedded into DVCProHD,<br />
ProRes, and DNxHD video essence frames. This method requires you to enable VANC<br />
essence playout option from the <strong>Pipeline</strong> Administration page. This option overrides<br />
<strong>Pipeline</strong>’s track based playout. (See Using the Configure Panel on page 46.)<br />
(For more detail see: http://www.telestream.net/pdfs/app-notes/app_<strong>Pipeline</strong>_VBI-<br />
VANC_Support.pdf).<br />
CREATING PRINT TO TAPE DOCUMENTS<br />
A Print to Tape document contains one or more clip file events in QuickTime (mov) or OP-1a MXF format,<br />
which you use to play out SDI video from <strong>Pipeline</strong> in real time. The video format is automatically detected,<br />
and decoded by the appropriate codec in the <strong>Pipeline</strong>, and played out under control of <strong>Pipeline</strong> Control.<br />
Here are the steps you’ll take to create and use a Print to Tape document:<br />
1. Open a New Print to Tape document. If a Print to Tape document isn’t open, select File > New Print<br />
to Tape Document to display a new, untitled Print to Tape document window.<br />
Or, you can open a previously-saved document.<br />
2. Select your <strong>Pipeline</strong>. If you haven’t already selected your <strong>Pipeline</strong> for this workflow, do so now. After<br />
configuring <strong>Pipeline</strong> for your workflow requirements, save the file. For details, see Using The <strong>Pipeline</strong><br />
Settings Panel (page 66).<br />
3. Select insert, assemble, or crash print type. Insert allows the replacement of video and/or audio.<br />
Assemble takes the entire video/audio stream for a given amount of time. Crash starts the deck in<br />
record mode and writes everything to tape. It is not guaranteed to be frame accurate. Only Insert<br />
allows the video and audio operation to be configured.<br />
4. Select the type of operation you want. If Insert print type has been selected, configure your Print to<br />
Tape operation by checking the Preview, Video, and Audio check boxes as desired.<br />
Figure 10–2. Print to Tape configuration panel.<br />
Check to preview during playout.<br />
Select the type of print to tape operation.<br />
Check video and audio to play out,<br />
as appropriate.<br />
Preview. When Preview is selected the <strong>Pipeline</strong> Control software will put your VTR into its Preview mode.<br />
This allows you to review your edit via the VTR's preview mode prior to committing it to tape.<br />
139
140<br />
Chapter 10<br />
Using Print to Tape Documents<br />
Video. Check to play out video (available in Insert edit mode only).<br />
Analog Audio. Check audio flag 1 and/or 2 to route audio channels based on the deck configuration.<br />
(Available in Insert edit mode only).<br />
Digital Audio. Check audio flag 1 and/or 2 to play out these channels (available in Insert edit mode only).<br />
5. Set timecode values. Set timecode values for Mark In, Leader, Padding, and Trailer as desired.<br />
Figure 10–3. Print to Tape Timecode panel.<br />
Set your tape’s<br />
mark in time code.<br />
Specify the length of black leader<br />
to print before the first clip.<br />
Mark In. Enter the timecode of the first frame on the tape where media will begin to be laid down.<br />
Leader. Enter the length of black leader to play out before the first clip.<br />
Padding. Enter the length of space to leave between clips as they are played out.<br />
Trailer. Enter the length of black trailer to play out at the end of the last clip.<br />
6. Add your Clips. Using the Clip panel, add your files to the list, trimming each file as appropriate. You<br />
can only add QuickTime and OP-1a MXF movies that conform to the requirements of the Print to Tape<br />
document, and all clips must have the same essence. For details, see (Using the Clip Panel (page<br />
140)).<br />
7. Play Out the Video as Print to Tape. Click the Activate slider to start playing out your clips.<br />
USING THE CLIP PANEL<br />
The clip panel (on bottom, right side of the window) allows you to specify a set of clip files to play out in a<br />
print to tape operation, view a virtual tape track, and adjust trim points on each clip (clip markers).<br />
Figure 10–4. The clip panel allows you to create a collection of clip files to print to tape.<br />
Tape Stripe. Visual track for each<br />
leader, clip, and padding, by timecode.<br />
Clip Toolbar.<br />
Provides<br />
buttons for<br />
frequently<br />
used<br />
functions.<br />
Specify the padding to print<br />
between each clip.<br />
Clips. Drag QuickTime mov files or click + to<br />
add them to the list. Click and drag to rearrange.<br />
Specify the length of black<br />
trailer to print after the last clip.<br />
Timecode<br />
Summary.<br />
November, 2012
95881<br />
Using the Clip Panel<br />
<strong>Pipeline</strong> User’s <strong>Guide</strong><br />
At the bottom of the clip list is the document’s time code summary. The timecode summary includes Mark<br />
In – (start of leader or first clip), First Clip Start, Last Clip End, and Mark Out. By convention, the terms<br />
Mark In and Mark Out are inclusive-exclusive. Thus, Mark Out is the time code of the first frame NOT<br />
recorded. Clip start and clip end times are inclusive-inclusive.<br />
Adding, Organizing, and Deleting Clips<br />
To add a clip, drag an OP-1a MXF or QuickTime movie file (containing media essences supported by<br />
<strong>Pipeline</strong>) onto the clip space. You can only drag one clip file at a time using this method. Or, click + (Plus<br />
icon) in the toolbar to display a File System dialog. Navigate and select files to add to the clip list.<br />
To delete a clip, select it in the clip list and press Delete or click the - (Minus icon) in the toolbar.<br />
To rearrange clips, click and drag them to the position you want them in.<br />
Clip Panel Toolbar<br />
At the far left is a toolbar with buttons for frequently used functions.<br />
Figure 10–5. The Clip Panel toolbar displays icons for frequently used commands.<br />
Mark In Timecode. Click to copy the current timecode to the mark in timecode.<br />
Add Clip. Click to navigate and select clips to add to the list.<br />
Stop Preview. Stops preview and returns to beginning of clip.<br />
Play Preview. Plays currently selected clip in preview panel.<br />
Pause Preview. Pauses preview of the current clip.<br />
Delete Clip. Click to delete the selected clip from the list.<br />
Print Time Tape<br />
To the right of the toolbar is the Print Time Tape. The Print Time Tape is a virtual representation of the order<br />
and time the leaders, padding, trailer, and clips will be applied to the tape.<br />
Figure 10–6. Print Time Tape details.<br />
Tape. Displays<br />
clips, leaders,<br />
and padding<br />
ordinally.<br />
Clip Pointers.<br />
Identifies the<br />
clip associated<br />
with a given<br />
block on the<br />
tape.<br />
Clip<br />
Events.<br />
141
142<br />
Chapter 10<br />
Using Print to Tape Documents<br />
The print time tape helps you visualize how the clips will be printed, and includes leader, trailer and<br />
padding so that you can visualize and confirm the result of the print to tape operation before you actually<br />
perform it.<br />
Figure 10–7. Print Time tape during playout.<br />
Frames in RAM.<br />
Representation of<br />
the number of frames<br />
currently in RAM.<br />
Timecode.<br />
Identifies the current<br />
timecode of the tape.<br />
During a print to tape operation, the current timecode of the tape displays, along with a bar indicating the<br />
relative number of frames held in RAM. Additionally, the clip being printed displays a progress bar.<br />
Clip Events<br />
Each clip file you add to the clip list is identified by a clip event.<br />
Figure 10–8. Clip events in your schedule provide details about the clip.<br />
Thumbnail.<br />
File. Clip file path and filename.<br />
Displays thumbnail<br />
at mark in point.<br />
Clip In. Start<br />
time code.<br />
Each clip event has several controls:<br />
Clip Trimmer. Scrub to set<br />
clip in and out points.<br />
Progress Bar. Displays<br />
playout progress.<br />
Preview Thumbnails. Displays previews of the mark-in and mark-out frames.<br />
File Path. Displays the full path and file name of the clip for this clip event.<br />
Duration. Specifies the duration of playout, as calculated by the clip in and clip out points.<br />
Clip In & Clip Out. Set by using the scrubber controls to adjust clip in and clip out points.<br />
Thumbnail.<br />
Displays thumbnail<br />
at mark out point.<br />
Clip Out. End<br />
time code.<br />
Trimmer. Use the scrubber controls at the left and right to set your clip in and clip out points.<br />
Progress Bar. When a file is playing out, displays relative progress and amount of media frames currently<br />
held in RAM.<br />
November, 2012
C H A P T E R<br />
11<br />
Using Controlled Playout<br />
Documents<br />
Chapter 11, Using Controlled Playout Documents<br />
<strong>Pipeline</strong> Control's Controlled Playout document enables you to assemble a sequence of media files and<br />
play them out in a controlled fashion. Controlled Playout, when activated, acts as a virtual tape deck that<br />
provides play, stop, pause, rewind, fast forward, jog and shuttle controls. External control using JLCooper<br />
MCS2 USB controller, standard RS422 (Sony 9-pin/BVW) controllers, or <strong>Pipeline</strong> Web Service is also<br />
provided.<br />
Topics<br />
Note<br />
The Controlled Playout doc requires v2.5 or later firmware<br />
� Controlled Playout Overview (page 144)<br />
� Creating Controlled Playout Documents (page 145)<br />
� Using the Clip Panel (page 147)<br />
143
144<br />
Chapter 11<br />
Using Controlled Playout Documents<br />
CONTROLLED PLAYOUT OVERVIEW<br />
The Controlled Playout document is designed to provide a method to play out media via <strong>Pipeline</strong>'s SDI<br />
output with standard deck controls:<br />
Figure 11–1. Controlled Playout window panels and toolbars.<br />
<strong>Pipeline</strong> Settings Panel. Use to configure<br />
<strong>Pipeline</strong> for use in this schedule.<br />
<strong>Pipeline</strong> Status.<br />
Displays status.<br />
Preview panel.<br />
Displays video.<br />
Timecode.<br />
Displays when<br />
connected.<br />
Controlled Playout Details. Displays<br />
storage location, number of clips, total<br />
capture hours, and approx. space required.<br />
Clip List Toolbar. Provides<br />
buttons for frequently used<br />
functions.<br />
Controlled Playout<br />
Configuration Panel.<br />
Activation<br />
Slider.<br />
Clip list<br />
panel.<br />
Displays<br />
all clip<br />
events<br />
ordinally.<br />
At the top of the window is the <strong>Pipeline</strong> Settings panel, and to the left is the Preview panel. For details on<br />
how to use these panels, see Chapter 6, Using <strong>Pipeline</strong> Control (page 59).<br />
The Controlled Playout document panel (bottom right) displays configuration settings. Below these settings<br />
is the clip list, which displays a list of clips you have added.<br />
<strong>Pipeline</strong> Control will automatically reconnect a Controlled Playout document if network connectivity is lost<br />
while in the preview state (<strong>Pipeline</strong> State displays Previewing). However, if the document has been<br />
activated into a play out state (<strong>Pipeline</strong> State displays Playing Out) and network connectivity is lost, you<br />
must manually re-activate the document.<br />
November, 2012
.<br />
CREATING CONTROLLED PLAYOUT DOCUMENTS<br />
95881<br />
Note<br />
Creating Controlled Playout Documents<br />
<strong>Pipeline</strong> User’s <strong>Guide</strong><br />
There are two ways to playout VANC data with a <strong>Pipeline</strong> system.<br />
1. Track based VANC Data is obtained from the data tracks of the respective file<br />
formats. For QuickTime this includes the time code and closed caption tracks. For MXF<br />
OP1a this includes all data stored in the SMPTE 436M track data.<br />
2. Video Essence based VANC Data plays out VANC data embedded into DVCProHD,<br />
ProRes, and DNxHD video essence frames. This method requires you to enable VANC<br />
essence playout option from the <strong>Pipeline</strong> Administration page. This option overrides<br />
<strong>Pipeline</strong>’s track based playout. (See Using the Configure Panel on page 46.)<br />
(For more detail see: http://www.telestream.net/pdfs/app-notes/app_<strong>Pipeline</strong>_VBI-<br />
VANC_Support.pdf).<br />
A Controlled Playout document contains one or more clip file events in QuickTime (mov) or OP-1a MXF<br />
format, which you use to play out SDI video from <strong>Pipeline</strong> in real time. The video format is automatically<br />
detected, and decoded by the appropriate codec in the <strong>Pipeline</strong>, and is played out under control of <strong>Pipeline</strong><br />
Control.<br />
Here are the steps you’ll take to create and use a Controlled Playout document:<br />
1. Open a New Controlled Playout document. Select File > New Controlled Playout Document to<br />
display a new, untitled document window. (You can also open a previously-saved document by<br />
selecting File > Open.)<br />
2. Select your <strong>Pipeline</strong>. If you haven’t already selected your <strong>Pipeline</strong> for this workflow, do so now. After<br />
configuring <strong>Pipeline</strong> Control for your workflow requirements, save the file. For details, see Using The<br />
<strong>Pipeline</strong> Settings Panel (page 66).<br />
3. Enable Web service. If <strong>Pipeline</strong> Web service is used, check the Web Service checkbox and enter the<br />
port number to be used in the Port field. (See Web Service application note for API details):<br />
Figure 11–2. Web services configuration panel.<br />
Check Web Services checkbox<br />
Enter port number<br />
4. Enable manual control. Check Manual checkbox to enable manual control and click Jog/Shuttle<br />
button to select mode:<br />
Figure 11–3. Manual control configuration panel.<br />
Check to enable<br />
Playout Controls<br />
Jog/Shuttle wheel<br />
Click Jog/Shuttle button<br />
to select mode.<br />
The Controlled Playout document can be controlled from an external JL Cooper MSC2 USB controller.<br />
This device provides Play, Stop, FWD, Rewind, Jog and Shuttle controls. All necessary drivers are<br />
145
146<br />
Chapter 11<br />
Using Controlled Playout Documents<br />
installed when <strong>Pipeline</strong> Control is installed on your workstation. Simply plug the device into any available<br />
USB port on your workstation.<br />
If you have a <strong>Pipeline</strong> Controlled Playout document open when the JL Cooper MSC2 USB controller is<br />
connected, you will see this image appear:<br />
When a JL Cooper MSC2 USB controller is installed, Connected to a shuttle device on COMx is displayed<br />
in the Manual control user interface:<br />
5. Enable remote control automation. Check the RS422 checkbox to enable remote control via the<br />
RS422 port. This functionality allows for external control using an RS422 playout controller:<br />
Check to enable<br />
If playout is being controlled via an automation system that utilizes the full set of Sony 9-pin BVW<br />
commands through RS422, the following restrictions apply:<br />
• Only a single clip can be loaded into the clip list. Adding more than one clip into the clip list can cause<br />
an error when an automation command attempts to pre-roll to a time code prior to the first frame time<br />
code of the clip to be played out.<br />
• Playout Mode must be set to Play out all clips once.<br />
• Clip Transition Mode must be set to Stops playout after each clip.<br />
Note<br />
When using RS422 to control a <strong>Pipeline</strong> system in the Controlled Playout mode, you<br />
must use an RS-422 cable (or adapter) that swaps the RS422 transmit and receive<br />
lines. Adapters are available from <strong>Telestream</strong> by contacting Technical Support (Part<br />
Number: 53-0024-00 RS-422).<br />
6. Add your Clips. Using the Clip panel, add your files to the list, trimming each file as appropriate. You<br />
can only add QuickTime or MXF OP1a files that conform to the requirements of the Controlled Playout<br />
document, and all clips must have the same essence. For details, see Using the Clip Panel (page<br />
147).<br />
7. Play Out the Video as a virtual Tape deck. Click the Activate slider to activate the Controlled Playout<br />
document. For manual Control use playout controls and the jog/shuttle wheel to control the play out.<br />
Use an RS-422 controller or the <strong>Pipeline</strong> Web Service commands to play out clips from an external<br />
source.<br />
November, 2012
USING THE CLIP PANEL<br />
95881<br />
Using the Clip Panel<br />
<strong>Pipeline</strong> User’s <strong>Guide</strong><br />
The clip panel (on bottom, right side of the window) allows you to specify a set of clip files to view as tracks,<br />
adjust trim points on each clip (clip markers), and play out in a virtual tape deck operation.<br />
Figure 11–4. The clip panel allows you to create a collection of clip files to play out.<br />
Clip Toolbar. Provides buttons for frequently used functions.<br />
Adding, Organizing, and Deleting Clips<br />
Clips. Drag QuickTime<br />
mov or MXF OP1a<br />
files, or click + to add<br />
them to the list. (Click<br />
and drag to rearrange.)<br />
To add a clip, drag a QuickTime or MXF OP1a file (containing media essences supported by <strong>Pipeline</strong>) onto<br />
the clip space. You can only drag one clip file at a time using this method. Or, click + (Plus icon) in the<br />
toolbar to display a File System dialog. Navigate and select files to add to the clip list.<br />
To delete a clip, select it in the clip list and press Delete, or click the - (Minus icon) in the toolbar.<br />
To rearrange clips, click and drag them to the position where you want them.<br />
Clip Panel Toolbar<br />
At the far left is a toolbar with buttons for frequently used functions.<br />
Figure 11–5. The Clip Panel toolbar displays icons for frequently used commands.<br />
Playout Mode: Click to select tri-state playout mode (play out all clips once, loop<br />
through all the clips continuously, or loop through the currently selected clip).<br />
Clip Transition Mode: Click to toggle action taken after clip ends<br />
(automatically start playing next clip, or stop playout after each clip).<br />
Add Clip. Click to navigate and select clips to add to the list.<br />
Stop Preview. Stops preview and returns to beginning of clip.<br />
Play Preview. Plays currently selected clip in preview panel.<br />
Pause Preview. Pauses preview of the current clip.<br />
Delete Clip. Click to remove the selected clip from the list.<br />
147
148<br />
Chapter 11<br />
Using Controlled Playout Documents<br />
Clip Events<br />
Each clip file you add to the clip list is identified by a clip event.<br />
Figure 11–6. Clip events in your document provide details about the clip.<br />
Thumbnail.<br />
File. Clip file path and filename.<br />
Displays thumbnail<br />
at mark in point.<br />
Clip In. Start<br />
time code.<br />
Each clip event has several controls:<br />
Clip Trimmer. Scrub to set<br />
clip in and out points.<br />
Progress Bar. Displays<br />
playout progress.<br />
Preview Thumbnails. Displays previews of the mark-in and mark-out frames.<br />
File Path. Displays the full path and file name of the clip for this clip event.<br />
Duration. Specifies the duration of playout, as calculated by the clip in and clip out points.<br />
Clip In & Clip Out. Set by using the scrubber controls to adjust clip in and clip out points.<br />
Thumbnail.<br />
Displays thumbnail<br />
at mark out point.<br />
Clip Out. End<br />
time code.<br />
Trimmer. Use the scrubber controls at the left and right to set your clip in and clip out points.<br />
Progress Bar. When a file is playing out, displays relative progress and amount of media frames currently<br />
held in RAM.<br />
November, 2012
A P P E N D I X<br />
A<br />
Troubleshooting<br />
Appendix A, Troubleshooting<br />
This appendix provides instructions for gathering information to assist in troubleshooting. For a complete<br />
and current list of potential issues and recommendations, go to http://www.telestream.net/download-files/<br />
pipeline/guides/<strong>Pipeline</strong>_FAQ.pdf<br />
This information may be useful to <strong>Telestream</strong> Customer Service when you’re obtaining support (Obtaining<br />
<strong>Pipeline</strong> Support | Information | Assistance (page i)).<br />
GATHERING INFORMATION FOR TROUBLESHOOTING<br />
These topics enable you to gather various details that aid in troubleshooting, depending on your workflow<br />
and environment.<br />
� Workflow Information (immediately following)<br />
� <strong>Pipeline</strong> Device Firmware Information (page 151)<br />
� <strong>Pipeline</strong> Administrator Counters Panel Details (page 151)<br />
� Obtaining Debug Logs from <strong>Pipeline</strong> Control (page 151)<br />
Workflow Information<br />
First, briefly document the workflow and obtain system information about your source and/or destination<br />
system: FlipFactory (immediately following), Episode Engine (Page 150), <strong>Pipeline</strong> Control for Mac OS X<br />
(Page 150), <strong>Pipeline</strong> Control for Windows (Page 150), or Final Cut Pro (Page 151).<br />
FlipFactory<br />
Obtain FlipFactory information using FlipFactory's automatic support email or obtain it manually.<br />
To obtain the information automatically, send email to <strong>Telestream</strong> by using the Email Tech Support button<br />
on the FlipFactory System Settings window (see the FlipFactory User’s <strong>Guide</strong>, Chapter 5, Using<br />
FlipFactory, in the Sending Email to Tech Support section).<br />
To obtain this information manually:<br />
• Get FlipFactory version and all update packs which are installed<br />
• Get a copy of the FlipFactory license file<br />
• Get account and factory details – obtain an XML output of the account when possible<br />
• Obtain the FlipFactory server and/or <strong>Pipeline</strong> client system information:<br />
149
150<br />
Appendix A<br />
Troubleshooting<br />
1. Click Start > Help and Support.<br />
2. On the Help and Support panel, click Support from the top menu.<br />
3. Click Advanced System Information.<br />
4. Click View detailed system information.<br />
5. On the System Information dialog, select File > Save to save an nfo file containing your system<br />
information to the desktop of the computer.<br />
Episode Engine<br />
Obtain the Episode Engine version and export your compression template to a file.<br />
Obtain the Mac OS X system profile:<br />
1. Launch the System Profiler, which is located at: /Applications/Utilities/System Profiler.<br />
2. Select Save As... from the File menu.<br />
3. Select Rich Text Format (RTF) from the Format popup menu.<br />
4. Save the file to the desktop.<br />
<strong>Pipeline</strong> Control for Mac OS X<br />
Obtain the <strong>Pipeline</strong> Control for Mac OS X version and the <strong>Pipeline</strong> device firmware version (<strong>Pipeline</strong><br />
Device Firmware Information (page 151)).<br />
Obtain the Mac OS X system profile:<br />
1. Launch the System Profiler, which is located at: /Applications/Utilities/System Profiler.<br />
2. Select Save As... from the File menu.<br />
3. Select Rich Text Format (RTF) from the Format popup menu.<br />
4. Save the file to the desktop.<br />
Save the <strong>Pipeline</strong> document(s) containing all of your settings, and send the system profile document and<br />
all <strong>Pipeline</strong> documents to <strong>Telestream</strong> support with other debug information.<br />
If you are using a FlipFactory or Episode Engine publisher, obtain all of the system information associated<br />
with these systems (FlipFactory (page 149) and Episode Engine (page 150)).<br />
<strong>Pipeline</strong> Control for Windows<br />
Obtain the <strong>Pipeline</strong> Control for Windows version and the <strong>Pipeline</strong> device firmware version (<strong>Pipeline</strong> Device<br />
Firmware Information (page 151)).<br />
Obtain the Windows system information profile:<br />
1. Run the System Information tool: Start > All Programs > Accessories > System Tools > System<br />
Information.<br />
2. Select Export from the File menu.<br />
3. Save the System Information file to the desktop.<br />
Save the <strong>Pipeline</strong> document(s) containing your settings and send the system profile document and<br />
<strong>Pipeline</strong> documents to <strong>Telestream</strong> support with other debug information.<br />
If you are using a FlipFactory publisher, obtain all of the system information associated with these systems<br />
(FlipFactory (page 149)).<br />
November, 2012
Final Cut Pro<br />
95881<br />
Gathering Information for Troubleshooting<br />
<strong>Pipeline</strong> User’s <strong>Guide</strong><br />
Obtain the Final Cut Pro version and <strong>Pipeline</strong> plug-in revision.<br />
Obtain the Mac OS X system profile:<br />
1. Launch the System Profiler, which is located at: /Applications/Utilities/System Profiler<br />
2. Select Save As... from the File menu.<br />
3. Select Rich Text Format (RTF) from the Format popup menu.<br />
4. Save the file to the desktop.<br />
<strong>Pipeline</strong> Device Firmware Information<br />
Obtain the <strong>Pipeline</strong>’s firmware revision number. Locate the Main and App Loader revision numbers on the<br />
Configure panel of <strong>Pipeline</strong> Administrator (Using the Configure Panel (page 46)).<br />
Obtain Network Details<br />
<strong>Pipeline</strong> IP address – default, static or DHCP (F/W v2.4 or earlier).<br />
Document whether the connection is direct or through a switch.<br />
If the connection is through a switch, is the route through more than one?<br />
Are there any managed switches between the <strong>Pipeline</strong> and the target system?<br />
What is the speed of each leg of the connection: 100Mb or 1000Mb (Gigabit).<br />
Document whether the LAN is used for general data traffic and video traffic or only video traffic.<br />
<strong>Pipeline</strong> Administrator Counters Panel Details<br />
If a video or audio issue is being reported, repeat the encode or playout process while running <strong>Pipeline</strong><br />
Administrator and viewing the counters on the Counters panel (see Using the Counters Panel (page 55) for<br />
a description of these parameters). To display the Counters panel, click counters in <strong>Pipeline</strong><br />
Administrator’s menu.<br />
Obtaining Debug Logs from <strong>Pipeline</strong> Control<br />
Debugging <strong>Pipeline</strong> components (hardware, client applications, etc.) can rarely be done independently.<br />
Since they all work as a system, they must be debugged as a system. The information obtained through<br />
these techniques can point to a problem anywhere in the system, and even to problems in multiple points<br />
in the system.<br />
151
152<br />
Appendix A<br />
Troubleshooting<br />
Mac OS X<br />
Debug logs for <strong>Pipeline</strong> Control are generated only when you enable them, by editing property list files:<br />
• Net.telestream.system.plist<br />
• Net.telestream.<strong>Pipeline</strong>Control.plist<br />
• Net.telestream.tifo.plist<br />
• Net.telestream.dvcprohd.plist<br />
• Net.telestream.imx.plist<br />
Each of these files controls, among other things, the output of debug information for different subsystems.<br />
The system plist handles enabling and disabling debug logging for the <strong>Pipeline</strong> Engine, the lowest layer of<br />
the <strong>Pipeline</strong> software suite. The second plist, <strong>Pipeline</strong>Control, handles application level logging – the<br />
<strong>Pipeline</strong> Control application itself. The media format plists (tifo, devprohd, and imx, for example), handle<br />
debug logging for various QuickTime decompressor components.<br />
To enable debug logging, first exit <strong>Pipeline</strong> Control. If you want to obtain debug logging for QuickTime<br />
decompressors, then you’ll need to also exit QuickTime-enabled applications including QuickTime Player<br />
or Final Cut Pro.<br />
Now, add a DebugLevel key to the plist as a number (for example, NSNumber), and a value 5. Save the<br />
changes to the plist and start <strong>Pipeline</strong>Control again. Optionally, you can add a DebugLog key as a string<br />
(for example, NSString) to the plist, with a complete absolute path to a target text file. This causes debug<br />
logging to be output to the target text file instead of to the default location, which is viewable by the<br />
Console application.<br />
To view the logs, you can open the Console application (located in Applications/Utilities) and select the log<br />
from the panel on the left. This panel may need to be opened first – click the Show Log List icon in the<br />
upper left. After selecting the desired log file in the list, select File > Save As to save a copy to send to<br />
Customer Service.<br />
Windows<br />
<strong>Pipeline</strong> Control for Windows saves details in trace (...trace.log) files, located at:<br />
Win7: C:\Users\\AppData\Local\<strong>Telestream</strong>\<strong>Pipeline</strong> Control.<br />
When requested, E-mail the latest log file, along with other details, to Customer Service.<br />
November, 2012
A P P E N D I X<br />
<strong>Pipeline</strong> EDL Syntax<br />
Appendix B, <strong>Pipeline</strong> EDL Syntax<br />
This appendix provides information about the proper syntax for the content of <strong>Pipeline</strong> EDL documents.<br />
PIPELINE EDL SYNTAX REQUIREMENTS<br />
<strong>Pipeline</strong> EDL files contain an entry for each clip to be captured. Each entry consists of a single-line event,<br />
a clip name field, and optional <strong>Telestream</strong> specific metadata fields. Columns are significant.<br />
Note<br />
Event Line Fields<br />
<strong>Pipeline</strong> EDL files contain an entry for each clip to be captured. Each entry consisting of a single-line<br />
event, a clip name field and optional <strong>Telestream</strong> specific metadata fields.<br />
Event Line Form<br />
1111 222222 333333 4444 555 66666666666 77777777777 88888888888 99999999999<br />
Event Parameters<br />
Line endings for a <strong>Pipeline</strong> EDL file must be CRLF (Carriage Return followed by Line<br />
Feed), which is the DOS/Windows standard. Therefore, if you create an EDL file from<br />
scratch on a Macintosh, you may have to convert the line endings.<br />
1111 = Column 1, 4-digit event number 0001 to 9999<br />
222222 = Column 6, six character alphanumeric tape name (can be overridden by optional TAPENAME)<br />
333333 = Column 13, six characters, leading with an A (audio) or V (video)<br />
4444 = Column 20, must always be "C " (C followed by three spaces)<br />
555 = Column 25, Must always be " ", three spaces<br />
66666666666 = Column 29, SMPTE timecode of source Mark-In (hh:mm:ss:ff)<br />
77777777777 = Column 41, SMPTE timecode of source Mark-Out<br />
88888888888 = Column 53, not used<br />
B<br />
153
154<br />
Appendix B<br />
<strong>Pipeline</strong> EDL Syntax<br />
99999999999 = Column 65, not used.<br />
Example: 0001 Reel01 A12V C 00:00:38;22 00:00:41;14 00:00:38;22 00:00:41;14<br />
Clip Name Field (optional)<br />
*CLIP: <br />
This name will be used by FlipFactory as the file name.<br />
Begin Additional Fields Parameter<br />
<strong>Telestream</strong> metadata fields (optional):<br />
*TELESTREAM_METADATA: BEGIN<br />
If optional TELESTREAM fields are included, the BEGIN parameter is required to be first.<br />
<strong>Pipeline</strong><br />
Note<br />
This parameter determines which <strong>Pipeline</strong> to connect to for this clip entry. The name used for this field is<br />
the Bonjour friendly name assigned to the <strong>Pipeline</strong> device. This name defaults to <strong>Pipeline</strong>_XXXX where<br />
XXXX is the <strong>Pipeline</strong>'s serial number.<br />
The friendly name can be obtained by issuing the config CGI GET command to the <strong>Pipeline</strong>. The friendly<br />
name is contained within the Identity element of the returned XML descriptor. Config command example:<br />
http:///command.cgi?config.<br />
*TELESTREAM_METADATA: PIPELINE <br />
Example: *TELESTREAM_METADATA: PIPELINE <strong>Pipeline</strong>_3005<br />
Pre-roll Value to VTR<br />
*TELESTREAM_METADATA: PREROLL <br />
Example: *TELESTREAM_METADATA: PREROLL 2<br />
Offset for Frame Accuracy<br />
*TELESTREAM_METADATA: OFFSET <br />
Example: *TELESTREAM_METADATA: OFFSET 0<br />
Anamorphic Flag<br />
Each parameter (1 through 9) must be separated by a single space.<br />
Produced when video is specified as 16 x 9 format because the 16 x 9 check box has been selected on the<br />
live page for proper video display. Any EDL produced with this option checked will also set the<br />
ANAMORPHIC flag to TRUE:<br />
*TELESTREAM_METADATA: ANAMORPHIC TRUE<br />
This flag insures that anamorphic flags are set in appropriate output files in FlipFactory.<br />
November, 2012
Abort Switch for Dropped Frames<br />
95881<br />
<strong>Pipeline</strong> EDL Syntax Requirements<br />
<strong>Pipeline</strong> User’s <strong>Guide</strong><br />
A true value will abort the process if a frame is dropped, false will continue even if a frame is dropped<br />
*TELESTREAM_METADATA: ABORT <br />
Example: *TELESTREAM_METADATA: ABORT false<br />
Name of Tape<br />
*TELESTREAM_METADATA: TAPENAME <br />
Example: *TELESTREAM_METADATA: TAPENAME TAPE1234<br />
Description of Clip<br />
*TELESTREAM_METADATA: DESCRIPTION <br />
Example: *TELESTREAM_METADATA: DESCRIPTION This is a test<br />
Scene Number or Name<br />
*TELESTREAM_METADATA: SCENE <br />
Example: *TELESTREAM_METADATA: SCENE Good cop bad cop<br />
Take Number<br />
*TELESTREAM_METADATA: TAKE <br />
Example: *TELESTREAM_METADATA: TAKE 2<br />
Additional Notes<br />
*TELESTREAM_METADATA: NOTES <br />
Example: *TELESTREAM_METADATA: NOTES Additional information goes here.<br />
End of Additional Fields Parameter<br />
*TELESTREAM_METADATA: END<br />
If optional TELESTREAM fields are included this parameter is require to be last.<br />
155
156<br />
Appendix B<br />
<strong>Pipeline</strong> EDL Syntax<br />
November, 2012
A P P E N D I X<br />
C<br />
<strong>Pipeline</strong> Control<br />
Codec Profiles<br />
Appendix C, <strong>Pipeline</strong> Control Codec Profiles<br />
This appendix describes each <strong>Pipeline</strong> codec’s preset profiles. SD profiles are available in <strong>Pipeline</strong> SC and<br />
<strong>Pipeline</strong> Quad. Both SD and HD codec profiles are available in <strong>Pipeline</strong> HD Dual.<br />
Some wrapper/file formats do not support all possible audio / video options. For example, MXF wrappers<br />
(Avid, XDCam, and Op1a) do not support 16 channels of audio.<br />
Video Profiles<br />
� DNxHD Profiles (page 158)<br />
� DV and DVCPro Profiles (page 158)<br />
� DVCPro HD Profiles (page 158)<br />
� IMX Profiles (page 159)<br />
� ProRes Profiles (page 159)<br />
� Motion JPEG Profiles (page 159)<br />
� SD Uncompressed Profiles (page 160)<br />
Audio Profiles<br />
� Linear PCM Profiles (page 160)<br />
157
158<br />
Appendix C<br />
<strong>Pipeline</strong> Control Codec Profiles<br />
DNxHD Profiles<br />
Table C–1. DNxHD Profiles<br />
Vertical Horizontal Aspect Ratios<br />
Frame<br />
Rates<br />
720p 1280 16:9 23.976, 25,<br />
29.97, 50,<br />
59.94<br />
*1080i Field Order: Upper Field First<br />
DV and DVCPro Profiles<br />
Table C–2. DV and DVCPro Profiles<br />
*NTSC Field Order: Lower Field First<br />
**PAL Field Order: Upper Field First<br />
*** Available with <strong>Pipeline</strong> HD Dual Channel Only<br />
DVCPro HD Profiles<br />
Table C–3. DVCPro HD Profiles<br />
*1080i Field Order: Upper Field First<br />
Quality<br />
8bit SQ, 8bit<br />
HQ, 10bit HQ<br />
1080i* 1440 16:9 25, 29.97 8bit SQ<br />
1080i* 1920 16:9 25, 29.97 8bit SQ, 8bit<br />
HQ, 10bit HQ<br />
1080p 1920 16:9 23.976, 24,<br />
25<br />
8bit LQ<br />
1080p 1920 16:9 23.976, 24,<br />
25, 29.97<br />
Vertical Horizontal Aspect Ratios<br />
Frame<br />
Rates<br />
8bit SQ, 8bit<br />
HQ, 10bit HQ<br />
Quality<br />
(Mbps)<br />
480i*, 486i* 720 4:3, 16:9 29.97 25, 50***<br />
576i** 720 4:3, 16:9 25 25, 50***<br />
Vertical Horizontal Aspect Ratios<br />
Frame<br />
Rates<br />
720p 960 16:9 23.976, 25,<br />
29.97, 50,<br />
59.94<br />
Quality<br />
(Mbps)<br />
1080p 1280 16:9 23.976 100<br />
1080i*, 1080p 1280 16:9 29.97 100<br />
1080i*, 1080p 1440 16:9 25 100<br />
100<br />
November, 2012
IMX Profiles<br />
Table C–4. IMX Profiles<br />
Vertical Horizontal Aspect Ratios<br />
*NTSC Field Order: Lower Field First<br />
**PAL Field Order: Upper Field First<br />
ProRes Profiles<br />
ProRes SQ is supported in SD profiles; SQ and HQ are supported in HD profiles.<br />
Table C–5. ProRes Profiles<br />
*NTSC Field Order: Lower Field First<br />
**PAL Field Order: Upper Field First<br />
***1080i Field Order: Upper Field First<br />
Motion JPEG Profiles<br />
Motion JPEG A is supported in SD profiles; Standard and HQ are supported in HD profiles.<br />
Table C–6. Motion JPEG Profiles<br />
95881<br />
Frame<br />
Rates<br />
<strong>Pipeline</strong> User’s <strong>Guide</strong><br />
Quality<br />
(Mbps)<br />
486i* 720 4:3, 16:9 29.97 30, 40, 50<br />
576i** 720 4:3, 16:9 25 30, 40, 50<br />
Vertical Horizontal Aspect Ratios<br />
Frame<br />
Rates<br />
Quality<br />
(Mbps)<br />
486i* 720 4:3, 16:9 29.97 SQ, HQ<br />
576i** 720 4:3, 16:9 25 SQ, HQ<br />
720p 960, 1280 16:9 23.976, 25,<br />
29.97, 50,<br />
59.94<br />
SQ, HQ, LT,<br />
Proxy<br />
1080p 1440, 1920 16:9 23.976 SQ, HQ, LT,<br />
Proxy<br />
1080i***, 1080p 1440, 1920 16:9 25, 29.97 SQ, HQ, LT,<br />
Proxy<br />
Vertical Horizontal Aspect Ratios<br />
Frame<br />
Rates<br />
Quality<br />
(Mbps)<br />
240p 320 4:3 25, 29.97 Q80<br />
240p 427 16:9 25, 29.97 Q80<br />
159
160<br />
Appendix C<br />
<strong>Pipeline</strong> Control Codec Profiles<br />
SD Uncompressed 8-bit Profiles<br />
Table C–7. SD Uncompressed Profiles<br />
Vertical Horizontal Aspect Ratios<br />
*NTSC Field Order: Lower Field First<br />
**PAL Field Order: Upper Field First<br />
Linear PCM Profiles<br />
Table C–8. Linear PCM Profiles<br />
Frame<br />
Rates<br />
Quality<br />
(Mbps)<br />
480i*, 486i* 720 4:3, 16:9 29.97 uncompressed<br />
576i** 720 4:3, 16:9 25 uncompressed<br />
Parameter Value<br />
Channels 2 | 4 | 8 | 16<br />
Sample Rate 48 KHz<br />
Quality 16 | 24 bit, Big Endian | Little Endian<br />
November, 2012
Symbols<br />
.Net Framework 3.5, required 3-24<br />
Numerics<br />
525/625, automatic detection of 2-8–2-9<br />
554 port (RTSP) must be open 2-19<br />
80, http port, must be open 2-19<br />
A<br />
About panel, generally 5-45<br />
assemble edits, in <strong>Pipeline</strong> Control 10-138<br />
audio flag, in print to tape 10-140<br />
auto timecode clock source 6-69<br />
Avid, MXF file support 4-26<br />
B<br />
back plane, HD Dual, ports and connectors 2-16<br />
back plane, SC, ports and connectors 2-9<br />
Big Endian C-160<br />
BNC, SMPTE-259M 270MBPS 2-9, 2-13<br />
Bonjour panel 4-30–4-31<br />
C<br />
Canadian EMC Notice of Compliance i-iii<br />
Cat-5 cable, must be used with <strong>Pipeline</strong> i-ii<br />
Channel 1 (Quad), timecode clock source 6-69<br />
clip list files, loading and saving 6-83<br />
clip list panel, using generally 8-120<br />
clip list, creating for log and capture 8-117<br />
clip panel, in print to tape documents 10-140,<br />
11-147<br />
clip, creating 8-124<br />
clip, deleting 8-124<br />
closed caption 1-2, 2-8<br />
Index<br />
closed caption data extraction 2-8<br />
closed caption, processing 2-14<br />
comparison of features 4-26<br />
computer clock, timecode source 6-69<br />
confidence monitoring 1-2, 2-11, 5-52–5-54, 8-117,<br />
9-127<br />
confidence monitoring, disabling 5-53<br />
confidence monitoring, enabling 5-53<br />
Configure panel, generally 5-46<br />
Connect dialog, authenticating with 5-44<br />
Copy File, configuring publisher for 6-76<br />
copyright notice i-i<br />
Counters panel 5-55<br />
CPLD chip version 5-47<br />
crash records, in <strong>Pipeline</strong> Control 10-138<br />
D<br />
DAM 1-2<br />
DHCP address 2-20, 5-47, 5-51, A-151<br />
dimensions, of <strong>Pipeline</strong> Quad 2-9, 2-13<br />
dimensions, of <strong>Pipeline</strong> SC 2-8<br />
DNxHD, Avid DNxHD 1-3<br />
DV 2-10, 5-54<br />
DVCPro 2-10, 5-54<br />
DVCProHD 1-3<br />
E<br />
edit decision list 5-57<br />
EDL 5-57<br />
EDL files B-153<br />
EDL for <strong>Pipeline</strong> syntax B-153<br />
EDL, loading and saving 6-83<br />
electrical safety, standards complied with i-iii<br />
emission information i-ii<br />
emission standards complied with i-iii<br />
161
162<br />
Index<br />
EN55022 Class A Warning i-iii<br />
environmental operating requirements 2-6<br />
Episode 2-8, 5-53<br />
Episode | Episode Pro, <strong>Pipeline</strong> Plugin for 4-26<br />
Episode, version requirements for use with<br />
<strong>Pipeline</strong> 4-27<br />
Ethernet 2-6, 2-8–2-9, 2-11<br />
Ethernet port (SC) 2-9<br />
Ethernet port, LED indicators for 2-13, 2-17<br />
Ethernet, gigabit 1-2, 2-9, 2-13<br />
Ethernet, gigabit in Quad 1-2<br />
Ethernet, gigabit port (HD Dual) 2-17<br />
Ethernet, gigabit port (Quad) 2-13<br />
F<br />
FCC Emission Information i-ii<br />
features, comparison of <strong>Pipeline</strong> applications 4-26<br />
Final Cut Pro 1-2, 2-18, 2-20, 5-53, A-149, A-151<br />
Final Cut Pro version 5.0.1, requirement for using<br />
with <strong>Pipeline</strong> 4-27<br />
Final Cut Pro, <strong>Pipeline</strong> Plugin for 4-26<br />
firmware update 2-8, 2-11, 5-58<br />
FlipFactory 1-2, 2-8, 2-18, 2-20, 5-53, A-149<br />
FlipFactory / <strong>Pipeline</strong> workflow, system<br />
requirements for 4-37<br />
FlipFactory console 5-54<br />
FlipFactory, configuring publisher for 6-77<br />
FlipFactory, requirements for using with<br />
<strong>Pipeline</strong> 4-27<br />
FlipFactory, version requirements 4-27<br />
FPGA chip version 5-47<br />
front panel indicators 2-11, 2-15<br />
front panel indicators for SC 2-8<br />
G<br />
gigabit Ethernet 1-2, 2-9, 2-13, 2-18<br />
gigabit Ethernet port (HD Dual) 2-17<br />
gigabit Ethernet port (Quad) 2-13<br />
H<br />
hardware for Quad 2-9, 2-13<br />
hardware for SC 2-8<br />
HD Dual, reset switches 2-11, 2-15<br />
HTTP password rules 5-48<br />
http port 80, must be open 2-19<br />
I<br />
IMX 2-10, 5-54<br />
insert edit 10-140<br />
insert edits, in <strong>Pipeline</strong> Control 10-138<br />
installing <strong>Pipeline</strong> software on 3-23<br />
installing <strong>Pipeline</strong> software on Windows 3-23<br />
installing <strong>Pipeline</strong> software, generally 4-25<br />
Internet Explorer 5-47<br />
Internet Explorer 6 5-43<br />
Internet Explorer, req’d settings for <strong>Pipeline</strong><br />
Administrator 5-44<br />
L<br />
LAN LED (HD Dual) 2-15<br />
LED SDI, front, on Quad, lights orange 2-11<br />
LED, Ethernet on Quad 2-13, 2-17<br />
LED, Ethernet on SC, lights orange 2-9<br />
LED, Ethernet, on SC, unlit 2-9<br />
LED, front, on Quad, lights yellow 2-11<br />
LED, on HD Dual front panel 2-15<br />
LED, on Quad front panel 2-11<br />
LED, on SC, lights orange 2-8<br />
LED, on SC, lights yellow 2-8<br />
LED, SDI on front, Quad, blinks orange 2-11<br />
LEDs 2-11, 2-15<br />
LEDs, for SC 2-8<br />
license requirements, for MPEG-2 i-i<br />
Link LED (Quad) 2-11<br />
link-local 2-19–2-20, 5-47<br />
link-local IP address, default 2-19<br />
Little Endian C-160<br />
log and capture window, using generally 8-118<br />
log and capture, generally 8-117<br />
loopback, disabling 5-49<br />
M<br />
MAC address 2-20<br />
Mac OS X 2-18<br />
Mac OS X, <strong>Pipeline</strong> Control, supported 4-26<br />
Mode LED (HD Dual) 2-15<br />
MPEG-2, license requirements i-i<br />
MXF file support 4-26<br />
N<br />
name of <strong>Pipeline</strong>, editing 5-47<br />
network settings, configuring 2-21<br />
notices<br />
November, 2012
Canadian EMC Notice of Compliance i-iii<br />
FCC emission information i-ii<br />
notices, legal, generally i-i<br />
NTSC 2-10<br />
O<br />
operating temperatures 2-6<br />
overheating warning 2-6<br />
overheating, or <strong>Pipeline</strong>, avoiding 2-6<br />
P<br />
PAL 2-10<br />
password, none by default, assigning 5-48<br />
<strong>Pipeline</strong><br />
adding to LAN 2-19<br />
configuring and connecting 2-20<br />
connecting directly to computer 2-18<br />
dimensions of Quad 2-9, 2-13<br />
dimensions of SC 2-8<br />
LEDs 2-8<br />
name, editing 5-47<br />
network settings 2-21<br />
power requirements 2-6<br />
rebooting 5-51<br />
registering 2-21<br />
soft rebooting 5-51<br />
version 5-47<br />
<strong>Pipeline</strong> Administrator<br />
About panel 5-45<br />
Configure panel 5-46<br />
Upgrade panel 5-57<br />
<strong>Pipeline</strong> Administrator, generally 5-43<br />
<strong>Pipeline</strong> Administrator, launching 5-44<br />
<strong>Pipeline</strong> applications, features compared 4-26<br />
<strong>Pipeline</strong> clock, timecode source 6-69<br />
<strong>Pipeline</strong> Control, feature comparison 4-26<br />
<strong>Pipeline</strong> Control, supported 4-26<br />
<strong>Pipeline</strong> HD Dual<br />
contents of shipping container 2-7<br />
features 1-3<br />
front panel indicators 2-15<br />
locating for operation 2-7<br />
rear panel 2-16<br />
<strong>Pipeline</strong> Plugin, feature comparison 4-26<br />
<strong>Pipeline</strong> Quad<br />
contents of shipping container 2-7<br />
features 1-2<br />
95881<br />
<strong>Pipeline</strong> User’s <strong>Guide</strong> 163<br />
front panel indicators 2-11<br />
hardware, specifications 2-9, 2-13<br />
locating for operation 2-7<br />
rear panel 2-12<br />
<strong>Pipeline</strong> SC<br />
contents of shipping container 2-7<br />
features 1-2<br />
front panel indicators 2-8<br />
hardware, specifications 2-8<br />
locating for operation 2-7<br />
rear panel 2-9<br />
<strong>Pipeline</strong> software, general hardware and OS<br />
requirements for 4-37<br />
<strong>Pipeline</strong> software, installing 4-25<br />
<strong>Pipeline</strong> software, installing on Windows 3-23<br />
<strong>Pipeline</strong> software, uninstalling from Windows 3-24<br />
<strong>Pipeline</strong> software, upgrading on Windows 3-24<br />
<strong>Pipeline</strong>Administrator 5-55<br />
Quad panel 5-52<br />
ports, that must be open 2-19<br />
Postroll Duration 6-86<br />
power connector (HD Dual) 2-16<br />
power connector (Quad) 2-12<br />
power connector (SC) 2-9<br />
Power LED (SC) 2-8<br />
power requirements for <strong>Pipeline</strong> 2-6<br />
pre-roll 7-112<br />
preroll duration 6-86<br />
pre-roll value to VTR B-154<br />
pre-roll, excessive, problem 7-112, 8-121, 9-129<br />
Preview Panel, using generally 6-81<br />
preview panel, using in log and capture 8-119,<br />
9-129<br />
Print Time Tape, in print to tape documents 10-141<br />
Print to Tape configuration panel 10-139, 11-145<br />
print to tape documents, creating,<br />
generally 10-139, 11-145<br />
Print to Tape Timecode panel 10-140, 11-145<br />
print-to-tape operations, generally 10-137<br />
print-to-tape, requires QuickTime clips 10-139,<br />
11-145<br />
ProRes 422 HD, Apple ProRes 422 HD 1-3<br />
publisher, configuring Copy File as 6-76<br />
publisher, configuring for FlipFactory 6-77<br />
publisher, configuring, generally 6-70<br />
publisher, selecting 6-70<br />
PWR LEDs (HD Dual) 2-15<br />
PWR LEDs, on Quad 2-11
164<br />
Q<br />
Index<br />
Quad panel, generally 5-52<br />
QuickTime file support 4-26<br />
QuickTime format, used exclusively in print-to-tape<br />
ops 10-139, 11-145<br />
R<br />
Radiation Emission Susceptibility Regulatory<br />
Approved Standards<br />
complied with i-iii<br />
rear panel, HD Dual, ports and connectors 2-16<br />
rear panel, Quad, ports and connectors,back<br />
plane, Quad, ports and connectors 2-12<br />
rear panel, SC, ports and connectors 2-9<br />
rebooting, <strong>Pipeline</strong> 5-51<br />
Reference LED (HD Dual) 2-15<br />
Register, using button on About panel 5-45<br />
registering your <strong>Pipeline</strong> 2-21<br />
registering, URL for 5-45<br />
reset switches, HD Dual 2-11, 2-15<br />
RS-422 2-9, 2-12–2-13, 2-16, 2-20, 5-56, 6-81,<br />
8-119–8-120, 9-128, 9-130, 10-138<br />
RS-422 deck control 2-8<br />
RS-422 port (HD Dual) 2-17<br />
RS-422 port (Quad) 2-13<br />
RS-422 port (SC) 2-9<br />
RS422, timecode clock source 6-69<br />
RTSP port 554 must be open 2-19<br />
S<br />
Safari 5-47<br />
safety instructions when using <strong>Pipeline</strong> i-iii<br />
SDI In (HD Dual), indicators for 2-15<br />
SDI In (SC) 2-8<br />
SDI In LED (Quad) 2-11<br />
SDI In port (HD Dual) 2-17<br />
SDI In port (Quad) 2-13<br />
SDI In port (SC) 2-9<br />
SDI LED (SC) 2-8<br />
SDI Out (HD Dual), indicators for 2-15<br />
SDI Out (SC) 2-8<br />
SDI Out LED (Quad) 2-11<br />
SDI Out port (Quad) 2-13<br />
SDI Out port (SC) 2-9<br />
SDI Out, indicators for 2-17<br />
SDI Sync Input (HD Dual) 2-16<br />
SDI time code 6-69<br />
Serial Digital Interface 2-8–2-9, 2-13<br />
settings, returning to default 5-51<br />
SMPTE-259M 270MBps 2-8<br />
soft rebooting, <strong>Pipeline</strong> 5-51<br />
Sony Protocol 2-8<br />
Sony protocol 2-9<br />
stack limit two, overheating 2-6<br />
Static IP address 5-47<br />
static IP address 2-19–2-20, 5-51, A-151<br />
surge protector, recommended 2-6<br />
Sync In (HD Dual) 2-16<br />
Sync In port (Quad) 2-12<br />
Sync LED (HD Dual) 2-15<br />
Sync LED (Quad) 2-11<br />
Sync Out (HD Dual) 2-17<br />
Sync Out port (Quad) 2-13<br />
sync reference 1-2, 2-11, 2-15<br />
sync reference, using in HD 2-14<br />
sync reference, using in Quad 2-10<br />
T<br />
TCP ports that must be open 2-19<br />
<strong>Telestream</strong><br />
contacting i-iv<br />
International i-ii<br />
sales and marketing i-i–i-ii<br />
technical support i-i–i-ii<br />
Web site i-i–i-ii<br />
<strong>Telestream</strong>, contacting i-ii<br />
temperature, operating requirements for 2-6<br />
TIFO file support 4-26<br />
time code 1-2, 2-14, B-153<br />
time code, processing 2-8, 2-14<br />
timecode clock source, Auto 6-69<br />
timecode clock source, Channel 1 (Quad) 6-69<br />
timecode clock source, RS422 6-69<br />
timecode clock source, video input 6-69<br />
timecode clock source, Zero based 6-69<br />
timecode clock sources, options 6-69<br />
timecode source, computer clock 6-69<br />
timecode source, <strong>Pipeline</strong> clock 6-69<br />
trademark notice i-i<br />
trigger document, in <strong>Pipeline</strong> Control,<br />
generally 9-127<br />
trigger window, using generally 9-128<br />
November, 2012
U<br />
UDP ports that must be open 2-19<br />
Uncompressed SD 8- and 10-bit 1-3<br />
uninstalling <strong>Pipeline</strong> software from Windows 3-24<br />
Upgrade panel 5-57<br />
upgrading software on Windows 3-24<br />
V<br />
VANC Closed Caption and Time Code, processing<br />
with <strong>Pipeline</strong> 2-14<br />
VBI Closed Caption and Time Code, processing<br />
with <strong>Pipeline</strong> 2-8<br />
version 5-47<br />
Vertical Blanking Interval, processing 2-8<br />
Video Input, timecode clock source 6-69<br />
VITC time code 1-2<br />
VTR 6-64, 6-69, 6-81, 7-108, 8-117, 8-119–8-121,<br />
8-124, 9-127–9-128, 9-130, 9-133,<br />
10-137–10-138, B-154<br />
VTR RS-422 2-19<br />
W<br />
warranty i-iv<br />
Warranty and Disclaimers i-iv<br />
Web browsers<br />
supported 5-43<br />
Windows 2-18<br />
Windows, installing <strong>Pipeline</strong> software on 3-23<br />
Windows, uninstalling <strong>Pipeline</strong> software from 3-24<br />
Windows, upgrading <strong>Pipeline</strong> software on 3-24<br />
workflows for FlipFactory, version<br />
requirements 4-27<br />
Z<br />
Zero based, timecode clock source 6-69<br />
95881<br />
<strong>Pipeline</strong> User’s <strong>Guide</strong> 165