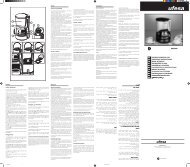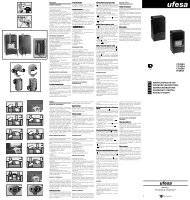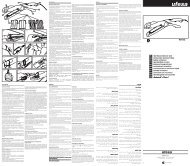
PL1380 PL1381 PL1382 - Ufesa
PL1380 PL1381 PL1382 - Ufesa
PL1380 PL1381 PL1382 - Ufesa

You also want an ePaper? Increase the reach of your titles
YUMPU automatically turns print PDFs into web optimized ePapers that Google loves.
ENGLISH<br />
CONNECTION TO THE MAINS<br />
Only connect it to the voltage stated on the<br />
characteristics plate. An earthed plug is<br />
recommended.<br />
This boiler is designed for ironing with ordinary<br />
tap water. If the water to be used is very hard<br />
(superior to 17º HD) then water mixed with<br />
distilled or de-mineralised water is<br />
recommended. Never use watter for batteries.<br />
PREPARATION<br />
Always check to see if the garment has a label<br />
giving ironing instructions. Set the thermostat<br />
control (12) to the appropriate temperature.<br />
• Synthetic fibres<br />
Low temperature<br />
••<br />
•••<br />
Silk - Wool<br />
Medium temperature<br />
Cotton - Linen<br />
High temperature<br />
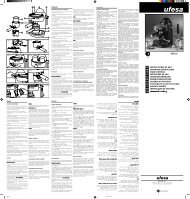
ADVICE ON USE<br />
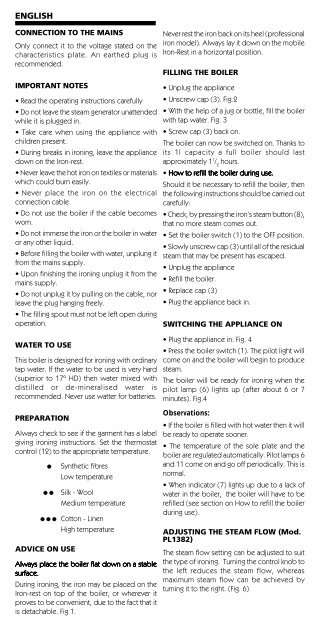
Always place the boiler flat down on a stable<br />
surface.<br />
During ironing, the iron may be placed on the<br />
Iron-rest on top of the boiler, or wherever it<br />
proves to be convenient, due to the fact that it<br />
is detachable. Fig 1.<br />
Never rest the iron back on its heel (professional<br />
iron model). Always lay it down on the mobile<br />
Iron-Rest in a horizontal position.<br />
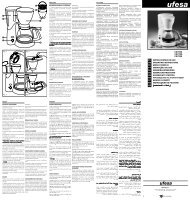
FILLING THE BOILER<br />
IMPORTANT NOTES<br />
• Unplug the appliance<br />
• Read the operating instructions carefully • Unscrew cap (3). Fig.2<br />
• Do not leave the steam generator unattended • With the help of a jug or bottle, fill the boiler<br />
while it is plugged in.<br />
with tap water. Fig. 3<br />
• Take care when using the appliance with • Screw cap (3) back on.<br />
children present.<br />
The boiler can now be switched on. Thanks to<br />
• During breaks in ironing, leave the appliance its 1l capacity a full boiler should last<br />
down on the Iron-rest.<br />
approximately 1 1 / 2<br />
hours.<br />
• Never leave the hot iron on textiles or materials • How to refill the boiler during use.<br />
which could burn easily.<br />
Should it be necessary to refill the boiler, then<br />
• Never place the iron on the electrical the following instructions should be carried out<br />
connection cable.<br />
carefully:<br />
• Do not use the boiler if the cable becomes • Check, by pressing the iron’s steam button (8),<br />
worn.<br />
that no more steam comes out.<br />
• Do not immerse the iron or the boiler in water • Set the boiler switch (1) to the OFF position.<br />
or any other liquid.<br />
• Slowly unscrew cap (3) until all of the residual<br />
• Before filling the boiler with water, unplung it steam that may be present has escaped.<br />
from the mains supply.<br />
• Unplug the appliance<br />
• Upon finishing the ironing unplug it from the<br />
• Refill the boiler.<br />
mains supply.<br />
• Do not unplug it by pulling on the cable, nor<br />
• Replace cap (3)<br />
leave the plug hanging freely.<br />
• Plug the appliance back in.<br />
• The filling spout must not be left open during<br />
operation.<br />
SWITCHING THE APPLIANCE ON<br />
• Plug the appliance in. Fig. 4<br />
WATER TO USE<br />
• Press the boiler switch (1). The pilot light will<br />
come on and the boiler will begin to produce<br />
steam.<br />
The boiler will be ready for ironing when the<br />
pilot lamp (6) lights up (after about 6 or 7<br />
minutes). Fig.4<br />
Observations:<br />
• If the boiler is filled with hot water then it will<br />
be ready to operate sooner.<br />
• The temperature of the sole plate and the<br />
boiler are regulated automatically. Pilot lamps 6<br />
and 11 come on and go off periodically. This is<br />
normal.<br />
• When indicator (7) lights up due to a lack of<br />
water in the boiler, the boiler will have to be<br />
refilled (see section on How to refill the boiler<br />
during use).<br />
ADJUSTING THE STEAM FLOW (Mod.<br />
<strong>PL1382</strong>)<br />
The steam flow setting can be adjusted to suit<br />
the type of ironing. Turning the control knob to<br />
the left reduces the steam flow, whereas<br />
maximum steam flow can be achieved by<br />
turning it to the right. (Fig. 6)