

MANUAL DE USUARIO TC-P42C1(es) - Panasonic
MANUAL DE USUARIO TC-P42C1(es) - Panasonic
MANUAL DE USUARIO TC-P42C1(es) - Panasonic

You also want an ePaper? Increase the reach of your titles
YUMPU automatically turns print PDFs into web optimized ePapers that Google loves.
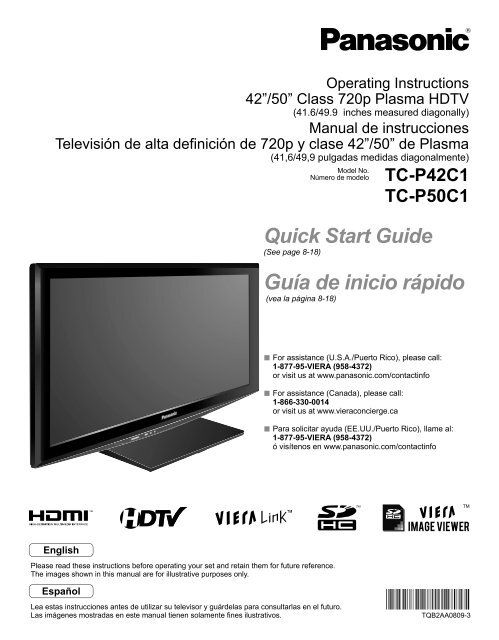
Operating Instructions<br />
42”/50” Class 720p Plasma HDTV<br />
(41.6/49.9 inch<strong>es</strong> measured diagonally)<br />
Manual de instruccion<strong>es</strong><br />
Televisión de alta definición de 720p y clase 42”/50” de Plasma<br />
(41,6/49,9 pulgadas medidas diagonalmente)<br />
Model No.<br />
Número de modelo<br />
<strong>TC</strong>-<strong>P42C1</strong><br />
<strong>TC</strong>-P50C1<br />
Quick Start Guide<br />
(See page 8-18)<br />
Guía de inicio rápido<br />
(vea la página 8-18)<br />
For assistance (U.S.A./Puerto Rico), please call:<br />
1-877-95-VIERA (958-4372)<br />
or visit us at www.panasonic.com/contactinfo<br />
For assistance (Canada), please call:<br />
1-866-330-0014<br />
or visit us at www.vieraconcierge.ca<br />
Para solicitar ayuda (EE.UU./Puerto Rico), llame al:<br />
1-877-95-VIERA (958-4372)<br />
ó visítenos en www.panasonic.com/contactinfo<br />
TM<br />
English<br />
Please read th<strong>es</strong>e instructions before operating your set and retain them for future reference.<br />
The imag<strong>es</strong> shown in this manual are for illustrative purpos<strong>es</strong> only.<br />
Español<br />
Lea <strong>es</strong>tas instruccion<strong>es</strong> ant<strong>es</strong> de utilizar su televisor y guárdelas para consultarlas en el futuro.<br />
Las imágen<strong>es</strong> mostradas en <strong>es</strong>te manual tienen solamente fin<strong>es</strong> ilustrativos.<br />
TQB2AA0809-3
Turn your own living room into a movie theater!<br />
Experience an amazing level of multimedia excitement<br />
HDMI, the HDMI logo and High-<br />
Definition Multimedia Interface are<br />
trademarks or registered trademarks of<br />
HDMI Licensing LLC.<br />
VIERA Link is a trademark of<br />
<strong>Panasonic</strong> Corporation.<br />
SDHC Logo is a trademark.<br />
2<br />
HDAVI Control is a trademark of<br />
<strong>Panasonic</strong> Corporation.<br />
Manufactured under license from Dolby<br />
Laboratori<strong>es</strong>.<br />
Dolby and the double-D symbol are<br />
trademarks of Dolby Laboratori<strong>es</strong>.
Enjoy rich multimedia<br />
Contents<br />
Please read before using the unit<br />
Safety Precautions ······································· 4<br />
Not<strong>es</strong> ···························································· 7<br />
SD memory card<br />
Camcorder<br />
Quick Start Guide<br />
Acc<strong>es</strong>sori<strong>es</strong>/Optional Acc<strong>es</strong>sory ····· 8<br />
Basic Connection ····························11<br />
Identifying Controls ························ 15<br />
First Time Setup····························· 16<br />
Quick Start<br />
Guide<br />
Amplifier<br />
Home theater<br />
system<br />
VCR<br />
Set Top Box<br />
DVD recorder/<br />
Blu-ray Disc recorder<br />
DVD player/<br />
Blu-ray Disc player<br />
This product qualifi<strong>es</strong> for ENERGY STAR<br />
in the “Home Use” setting and this is the<br />
setting in which energy savings will be<br />
achieved. Any modifications to the “Home<br />
Use” setting or other factory default settings<br />
could r<strong>es</strong>ult in greater energy consumption<br />
beyond levels that meet ENERGY STAR<br />
qualifications.<br />
Enjoy your TV!<br />
Basic Featur<strong>es</strong><br />
Watching TV ··············································· 19<br />
Using VIERA TOOLS ································· 21<br />
Viewing from an SD Card ·························· 22<br />
Watching Videos and DVDs ······················· 24<br />
Advanced Featur<strong>es</strong><br />
How to Use Menu Functions<br />
(picture, sound quality, etc.) ······················· 26<br />
VIERA Link TM “HDAVI Control TM ” ················ 30<br />
Lock ··························································· 36<br />
Editing and Setting Channels····················· 38<br />
Closed Caption ·········································· 40<br />
Input Labels ··············································· 41<br />
Using Timer ················································ 42<br />
Recommended AV Connections ················ 43<br />
FAQs, etc.<br />
Ratings List for Lock ·································· 44<br />
Technical Information ································· 45<br />
Care and Cleaning ····································· 49<br />
FAQ ···························································· 50<br />
Specifications ············································· 52<br />
Limited Warranty<br />
(for U.S.A. and Puerto Rico only)··············· 53<br />
Customer Servic<strong>es</strong> Directory<br />
(for U.S.A. and Puerto Rico) ······················ 54<br />
Limited Warranty (for Canada) ··················· 55<br />
Viewing Advanced FAQs, etc.<br />
3
Safety Precautions<br />
WARNING:<br />
CAUTION<br />
RISK OF ELECTRIC SHOCK<br />
DO NOT OPEN<br />
WARNING: To reduce the risk of electric shock, do not remove cover or back.<br />
No user-serviceable parts inside. Refer servicing to qualified service personnel.<br />
To reduce the risk of fire or electric shock, do not expose this apparatus to rain or moisture.<br />
Do not place liquid containers (flower vase, cups, cosmetics, etc.) above the set<br />
(including on shelv<strong>es</strong> above, etc.).<br />
1) Read th<strong>es</strong>e instructions.<br />
2) Keep th<strong>es</strong>e instructions.<br />
3) Heed all warnings.<br />
4) Follow all instructions.<br />
5) Do not use this apparatus near water.<br />
6) Clean only with dry cloth.<br />
7) Do not block any ventilation openings. Install in<br />
accordance with the manufacturer’s instructions.<br />
8) Do not install near any heat sourc<strong>es</strong> such as radiators,<br />
heat registers, stov<strong>es</strong>, or other apparatus (including<br />
amplifiers) that produce heat.<br />
9) Do not defeat the safety purpose of the polarized or<br />
grounding-type plug. A polarized plug has two blad<strong>es</strong> with<br />
one wider than the other. A grounding type plug has two<br />
blad<strong>es</strong> and a third grounding prong. The wide blade or the<br />
third prong are provided for your safety. If the provided<br />
plug do<strong>es</strong> not fit into your outlet, consult an electrician for<br />
replacement of the obsolete outlet.<br />
10) Protect the power cord from being walked on or pinched<br />
particularly at plugs, convenience receptacl<strong>es</strong>, and the<br />
point where they exit from the apparatus.<br />
Important Safety Instructions<br />
FCC STATEMENT<br />
The lightning flash with<br />
arrowhead within a triangle is<br />
intended to tell the user that<br />
parts inside the product are a<br />
risk of electric shock to persons.<br />
The exclamation point within<br />
a triangle is intended to<br />
tell the user that important<br />
operating and servicing<br />
instructions are in the<br />
papers with the appliance.<br />
11) Only use attachments / acc<strong>es</strong>sori<strong>es</strong> specified by the<br />
manufacturer.<br />
12) Use only with the cart, stand, tripod,<br />
bracket, or table specified by the<br />
manufacturer, or sold with the<br />
apparatus. When a cart is used,<br />
use caution when moving the cart /<br />
apparatus combination to avoid injury<br />
from tip-over.<br />
13) Unplug this apparatus during lightning storms or when<br />
unused for long periods of time.<br />
14) Refer all servicing to qualified service personnel. Servicing<br />
is required when the apparatus has been damaged in any<br />
way, such as power-supply cord or plug is damaged, liquid<br />
has been spilled or objects have fallen into the apparatus,<br />
the apparatus has been exposed to rain or moisture, do<strong>es</strong><br />
not operate normally, or has been dropped.<br />
15) To prevent electric shock, ensure the grounding pin on the<br />
AC cord power plug is securely connected.<br />
This equipment has been t<strong>es</strong>ted and found to comply with the limits for an Other Class B digital device, pursuant to Part 15 of the<br />
FCC Rul<strong>es</strong>. Th<strong>es</strong>e limits are d<strong>es</strong>igned to provide reasonable protection against harmful interference in a r<strong>es</strong>idential installation.<br />
This equipment generat<strong>es</strong>, us<strong>es</strong> and can radiate radio frequency energy and, if not installed and used in accordance with the<br />
instructions, may cause harmful interference to radio communications. However, there is no guarantee that interference will not<br />
occur in a particular installation. If this equipment do<strong>es</strong> cause harmful interference to radio or television reception, which can be<br />
determined by turning the equipment off and on, the user is encouraged to try to correct the interference by one or more of the<br />
following measur<strong>es</strong>:<br />
• Reorient or relocate the receiving antenna.<br />
• Increase the separation between the equipment and receiver.<br />
• Connect the equipment into an outlet on a circuit different from that to which the receiver is connected.<br />
• Consult the <strong>Panasonic</strong> Service Center or an experienced radio/TV technician for help.<br />
FCC Caution:<br />
To assure continued compliance, follow the attached installation instructions and use only shielded interface cabl<strong>es</strong><br />
when connecting to peripheral devic<strong>es</strong>. Any chang<strong>es</strong> or modifications not expr<strong>es</strong>sly approved by <strong>Panasonic</strong> Corp. of<br />
North America could void the user’s authority to operate this device.<br />
R<strong>es</strong>ponsible Party:<br />
Contact Source:<br />
email:<br />
<strong>Panasonic</strong> Corporation of North America<br />
One <strong>Panasonic</strong> Way, Secaucus, NJ 07094<br />
<strong>Panasonic</strong> Consumer Electronics Company<br />
1-877-95-VIERA (958-4372)<br />
consumerproducts@panasonic.com<br />
4<br />
CANADIAN NOTICE:<br />
For Model <strong>TC</strong>-<strong>P42C1</strong>, <strong>TC</strong>-P50C1<br />
This Class B digital apparatus compli<strong>es</strong> with Canadian ICES-003.
WARNING/CAUTION<br />
WARNING<br />
Small parts can pr<strong>es</strong>ent choking hazard if accidentally<br />
swallowed.<br />
Keep small parts away from young children.<br />
Discard unneeded small parts and other objects, including<br />
packaging materials and plastic bags/sheets to prevent<br />
them from being played with by young children, creating<br />
the potential risk of suffocation.<br />
Set up<br />
This Plasma TV may fall and can cause personal injury or<br />
even death if not installed correctly. To prevent personal injury<br />
or death, follow th<strong>es</strong>e warnings:<br />
Install the Plasma TV in accordance with the<br />
manufacturer’s recommended ped<strong>es</strong>tal or stand,<br />
corr<strong>es</strong>ponding hardware and installation instructions.<br />
This Plasma TV is for use only with the following optional<br />
acc<strong>es</strong>sori<strong>es</strong>. Use with any other type of optional acc<strong>es</strong>sori<strong>es</strong><br />
may cause instability. The following acc<strong>es</strong>sori<strong>es</strong> are<br />
manufactured by <strong>Panasonic</strong> Corporation.<br />
• Wall-hanging bracket (Angled) TY-WK4P1RW<br />
Be sure to ask a qualified technician to carry out the<br />
installation and set-up.<br />
Two or more people are required to install or remove the<br />
television.<br />
Some wall mounts (wall-hanging brackets) are not<br />
d<strong>es</strong>igned to be mounted to walls with steel studs or old<br />
cinder block constructions.<br />
Ask your dealer or licensed contractor to properly secure the<br />
wall-hanging bracket.<br />
Do not place the Plasma TV or its stand on a sloped or<br />
unstable surface.<br />
The Plasma TV may fall or tip over.<br />
Do not support the Plasma TV on a non-specified<br />
ped<strong>es</strong>tal.<br />
Do not place the Plasma TV on furniture that can easily<br />
be used as steps, such as a ch<strong>es</strong>t of drawers.<br />
Do not climb or allow children to climb on the Plasma TV<br />
Place or install the Plasma TV where it cannot be pushed,<br />
pulled over or knocked down.<br />
Route all cords and cabl<strong>es</strong> such that they cannot be<br />
tripped over or pulled by curious children.<br />
Do not place any objects on top of the Plasma TV.<br />
If water spills onto the Plasma TV or foreign objects get<br />
inside it, a short-circuit may occur which could r<strong>es</strong>ult in fire<br />
or electric shock. If any foreign objects get inside the Plasma<br />
TV, please consult an Authorized Service Center.<br />
AC Power Supply Cord<br />
To prevent fire or electric shock:<br />
The Plasma TV is d<strong>es</strong>igned to operate on a 120 V AC,<br />
60 Hz service. Insert the power cord plug as far as it will<br />
go into the wall socket.<br />
If the plug is not fully inserted, heat may generate, which<br />
could cause a fire.<br />
The included power cord is for use with this unit only.<br />
Do not use any power cord other than that provided with<br />
this TV.<br />
Do not handle the power cord plug with wet hands.<br />
Do not do anything that might damage the power supply<br />
cord.<br />
When disconnecting the power supply cord, hold the<br />
plug, not the cord.<br />
Do not use the power supply cord if the plug or cord is<br />
damaged.<br />
Replace the cord or contact your Authorized Service Center<br />
Handling the power supply cord<br />
Insert the power plug fully into the socket outlet. (If the<br />
power plug is loose, it could generate heat and cause fire.)<br />
Ensure that the power plug is easily acc<strong>es</strong>sible.<br />
Ensure the earth pin on the power plug is securely<br />
connected to prevent electrical shock.<br />
• An apparatus with CLASS I construction shall be connected to<br />
a power socket outlet with a protective earthing connection.<br />
Do not touch the power plug with a wet hand. (This may<br />
cause electrical shock.)<br />
Do not use any power cord other than that provided with<br />
this TV. (This may cause fire or electrical shock.)<br />
Do not damage the power cord. (A damaged cord may<br />
cause fire or electrical shock.)<br />
• Do not move the TV with the cord plugged in the socket outlet.<br />
• Do not place a heavy object on the cord or place the cord<br />
near a high-temperature object.<br />
• Do not twist the cord, bend it exc<strong>es</strong>sively, or stretch it.<br />
• Do not pull on the cord. Hold onto the power plug body<br />
when disconnecting cord.<br />
• Do not use a damaged power plug or socket outlet.<br />
If Problems Occur During Use<br />
If a problem occurs (such as no picture or no sound),<br />
or if smoke or an abnormal odor is detected from the<br />
Plasma TV, unplug the power supply cord immediately.<br />
Continued use of the TV under th<strong>es</strong>e conditions might cause<br />
a fire or permanent damage to the TV. Have the TV evaluated<br />
by an Authorized Service Center. Servicing of the TV by<br />
unauthorized personnel is strongly discouraged due to its<br />
high voltage.<br />
If water or an object gets inside the Plasma TV, if the<br />
Plasma TV is dropped, or if the enclosure becom<strong>es</strong><br />
damaged, unplug the power supply cord immediately.<br />
A short-circuit may occur, which could cause a fire. Contact<br />
an Authorized Service Center for an evaluation.<br />
CAUTION<br />
Do not cover the ventilation hol<strong>es</strong>.<br />
Doing so may cause the Plasma TV to overheat, which can<br />
cause a fire or damage to the Plasma TV.<br />
Leave a space of 3 15/16” (10 cm) or more at the top, left<br />
and right, and 2 3/4” (7 cm) or more at the rear.<br />
When using the ped<strong>es</strong>tal, keep the space between the<br />
bottom of the TV and the ped<strong>es</strong>tal or stand surface clear<br />
from objects that may obstruct ventilation.<br />
When Moving the Plasma TV<br />
Be sure to disconnect all cabl<strong>es</strong> before moving the<br />
Plasma TV.<br />
Moving the TV with its cabl<strong>es</strong> attached might damage the<br />
cabl<strong>es</strong> which, in turn, can cause fire or electric shock<br />
To prevent an electric shock, disconnect the power<br />
plug from the wall outlet as a safety precaution before<br />
carrying out any cleaning.<br />
5
Safety Precautions (Continued)<br />
Transport only in upright position<br />
Transporting the unit with its display panel facing upright or<br />
downward may cause damage to the internal circuitry.<br />
Using a dry cloth, clean any dust from the power supply<br />
cord and plug regularly.<br />
Build-up of dust on the power cord plug can increase<br />
humidity, which might damage the insulation and cause a fire.<br />
This Plasma TV radiat<strong>es</strong> infrared rays;<br />
therefore, it may affect other infrared communication<br />
equipment. Install your infrared sensor in a place away from<br />
direct or reflected light from your Plasma TV.<br />
The TV will still consume some power as long as the power<br />
supply cord is connected to the wall outlet.<br />
Display panel is made of glass. Do not apply strong force<br />
or impact to the display panel.<br />
This may cause damage r<strong>es</strong>ulting in injury.<br />
The TV is heavy. TV should be handled by 2 or more<br />
people. Support as shown to avoid injury by the TV<br />
tipping or falling.<br />
CEA CHILD SAFETY NOTICES: Flat panel displays are not always supported on the proper stands or<br />
installed according to the manufacturer’s recommendations. Flat panel displays that are inappropriately<br />
situated on dr<strong>es</strong>sers, bookcas<strong>es</strong>, shelv<strong>es</strong>, d<strong>es</strong>ks, speakers, ch<strong>es</strong>ts or carts may fall over and may cause<br />
personal injury or even death.<br />
The consumer electronics industry (of which <strong>Panasonic</strong> is a member) is committed to making home<br />
entertainment enjoyable and safe. To prevent personal injury or death, be sure to follow the following safety<br />
guidelin<strong>es</strong>:<br />
TUNE INTO SAFETY:<br />
• One size do<strong>es</strong> NOT fit all. Follow the manufacturer’s recommendations for the safe installation and use<br />
of your flat panel display.<br />
• Carefully read and understand all enclosed instructions for proper use of this product.<br />
• Don’t allow children to climb on or play with furniture and television sets.<br />
• Don’t place flat panel displays on furniture that can easily be used as steps, such as a ch<strong>es</strong>t of drawers.<br />
• Remember that children can become excited while watching a program, <strong>es</strong>pecially on “larger than life”<br />
flat panel displays. Care should be taken to install the display where it cannot be pushed, pulled over,<br />
or knocked down.<br />
• Care should be taken to route all cords and cabl<strong>es</strong> connected to the flat panel display so that they<br />
cannot be pulled or grabbed by curious children.<br />
WALL MOUNTING: IF YOU <strong>DE</strong>CI<strong>DE</strong> TO WALL MOUNT YOUR FLAT PANEL DISPLAY, ALWAYS:<br />
• Use a mount that has been recommended by the display manufacturer and/or listed by an independent<br />
laboratory (such as UL, CSA, ETL).<br />
• Follow all instructions supplied by the display and wall mount manufacturers.<br />
• If you have any doubts about your ability to safely install your flat panel display, contact your retailer<br />
about prof<strong>es</strong>sional installation.<br />
• Make sure the wall where you are mounting the display is appropriate. Some wall mounts are not<br />
d<strong>es</strong>igned to be mounted to walls with steel studs or old cinder block construction. If you are unsure,<br />
contact a prof<strong>es</strong>sional installer.<br />
• A minimum of two people are required for installation. Flat panel displays can be heavy.<br />
<strong>Panasonic</strong> recommends that a qualified installer perform the wall-mount<br />
installation. See page 5.<br />
6
Not<strong>es</strong><br />
Do not display a still picture for a long time<br />
This caus<strong>es</strong> the image to remain on the plasma screen<br />
(“Image retention”). This is not considered a malfunction and is not covered by the warranty.<br />
12<br />
To prevent “Image retention”, the screen saver is<br />
4 : 3<br />
automatically activated after a few minut<strong>es</strong> if no signals are<br />
sent or no operations are performed. (p. 51)<br />
Typical still imag<strong>es</strong><br />
Channel number and other logos<br />
Image displayed in 4:3 mode<br />
• SD Card photo • Video game •<br />
Computer image<br />
■ Set up<br />
Do not place the unit where it’s exposed to sunlight or other bright light (including reflections).<br />
Use of some typ<strong>es</strong> of fluor<strong>es</strong>cent lighting may reduce the remote control’s transmission range.<br />
7
Acc<strong>es</strong>sori<strong>es</strong>/Optional Acc<strong>es</strong>sory<br />
Check you have all the items shown.<br />
Acc<strong>es</strong>sori<strong>es</strong><br />
Acc<strong>es</strong>sori<strong>es</strong><br />
Remote Control<br />
Transmitter<br />
N2QAYB000321<br />
Batteri<strong>es</strong> for the<br />
Remote Control<br />
Transmitter (2)<br />
AA Battery<br />
AC cord<br />
Ped<strong>es</strong>tal How to assemble (p. 9)<br />
TBLX0088<br />
(<strong>TC</strong>-<strong>P42C1</strong>)<br />
TBLX0089<br />
(<strong>TC</strong>-P50C1)<br />
Cleaning cloth<br />
Operating Instructions<br />
Viera Concierge and basic<br />
instruction for HDTV<br />
Product Registration Card (U.S.A.)<br />
Customer Care Plan Card (U.S.A.)<br />
Optional Acc<strong>es</strong>sory<br />
Wall-hanging bracket<br />
(angle)<br />
TY-WK4P1RW<br />
Note<br />
In order to maintain the TV’s performance and safety, be absolutely sure<br />
to ask your dealer or a licensed contractor to secure the wall-hanging<br />
brackets.<br />
Carefully read the instructions accompanying the plasma TV stand or<br />
ped<strong>es</strong>tal, and be absolutely sure to take steps to prevent the TV from<br />
tipping over.<br />
Handle the TV carefully during installation since subjecting it to impact<br />
or other forc<strong>es</strong> may cause its panel to crack.<br />
Installing the remote’s batteri<strong>es</strong><br />
Hook<br />
Open<br />
Note the correct polarity<br />
(+ or -).<br />
Close<br />
Caution<br />
Incorrect installation may cause battery<br />
leakage and corrosion, r<strong>es</strong>ulting in damage<br />
to the remote control.<br />
Do not mix old and new batteri<strong>es</strong>.<br />
• Do not mix different battery typ<strong>es</strong> (such<br />
as alkaline and mangan<strong>es</strong>e batteri<strong>es</strong>).<br />
• Do not use rechargeable (Ni-Cd) batteri<strong>es</strong>.<br />
Do not burn or break batteri<strong>es</strong>.<br />
8
Attaching the ped<strong>es</strong>tal to TV<br />
■Assembling the ped<strong>es</strong>tal<br />
Fix securely with assembly screws A . (Total 4 screws)<br />
Tighten screws firmly.<br />
Pole<br />
R<br />
■Set-up<br />
A<br />
L Pole<br />
Base<br />
Front<br />
Carry out work on a horizontal and level surface.<br />
Tighten screws firmly.<br />
B<br />
Arrow<br />
mark<br />
Bottom view<br />
Rear side<br />
Hole for ped<strong>es</strong>tal<br />
installation<br />
Pole<br />
Acc<strong>es</strong>sori<strong>es</strong><br />
Assembly screws<br />
(4 of each)<br />
A<br />
B<br />
Pol<strong>es</strong> (2)<br />
M5 x 18 (Silver)<br />
M5 x 25 (Black)<br />
L<br />
R<br />
L or R is printed at the<br />
bottom of the pol<strong>es</strong>.<br />
Base (1)<br />
Quick Start<br />
Guide<br />
Acc<strong>es</strong>sori<strong>es</strong>/Optional Acc<strong>es</strong>sory<br />
Pole<br />
Base<br />
Fix securely with assembly screws B .<br />
(Total 4 screws)<br />
Warning<br />
Do not disassemble or modify the ped<strong>es</strong>tal.<br />
Otherwise the TV may fall over and become damaged, and personal injury may r<strong>es</strong>ult.<br />
Caution<br />
Do not use any other TV and displays.<br />
Otherwise the TV may fall over and become damaged, and personal injury may r<strong>es</strong>ult.<br />
Do not use the ped<strong>es</strong>tal if it becom<strong>es</strong> warped or physically damaged.<br />
If you use the ped<strong>es</strong>tal when it is physically damaged, personal injury may r<strong>es</strong>ult. Contact your near<strong>es</strong>t <strong>Panasonic</strong><br />
Dealer immediately.<br />
During set-up, make sure that all screws are securely tightened.<br />
If sufficient care is not taken to ensure screws are properly tightened during assembly, the ped<strong>es</strong>tal will not be<br />
strong enough to support the TV, and it might fall over and become damaged, and personal injury may r<strong>es</strong>ult.<br />
9
Acc<strong>es</strong>sori<strong>es</strong>/Optional Acc<strong>es</strong>sory (Continued)<br />
AC cord connection<br />
To attach<br />
To remove<br />
Insert it firmly until the<br />
tabs on both sid<strong>es</strong> click<br />
into place.<br />
Keep pushing both<br />
side snaps and pull<br />
down<br />
Reference of connection<br />
Antenna terminal Pin terminals HDMI terminal<br />
red<br />
blue green<br />
green<br />
Firmly tighten by hand. Match colors of plugs and terminals.<br />
Insert firmly.<br />
Insert firmly.<br />
10
Basic Connection<br />
TV<br />
Example 1<br />
Connecting Antenna (To watch TV)<br />
VHF/UHF Antenna<br />
Cable TV<br />
VHF/UHF Antenna<br />
• NTSC (National Television System Committee):<br />
Conventional broadcasting<br />
• ATSC (Advanced Television Systems Committee):<br />
Digital TV Standards include digital high-definition television<br />
(HDTV), standard-definition television (SDTV), data broadcasting,<br />
multi-channel surround-sound audio and interactive television.<br />
To connect the antenna terminal and Cable Box<br />
VHF/UHF Antenna<br />
AC 120 V<br />
60 Hz<br />
Quick Start<br />
Guide<br />
Cable TV<br />
or<br />
(If no Cable Box)<br />
or<br />
Back of the TV<br />
* See page 10<br />
(AC cord<br />
connection)<br />
VI<strong>DE</strong>O<br />
Y<br />
PB<br />
H<br />
AC Cord<br />
(Connect after all the<br />
other connections<br />
have been made.)<br />
Basic Connection (Antenna + TV)<br />
Acc<strong>es</strong>sori<strong>es</strong>/Optional Acc<strong>es</strong>sory<br />
PR<br />
L<br />
AUDIO<br />
R<br />
Note<br />
ANT IN<br />
Cable Box<br />
ANT OUT<br />
Cable Box/Cable<br />
• You need to subscribe to a cable TV service to enjoy viewing their<br />
programming.<br />
If using a Cable Box, set the TV channel to CH3 or CH4 for regular cable.<br />
• You can enjoy high-definition programming by subscribing to a highdefinition<br />
cable Service.<br />
The connection for high-definition can be done with the use of HDMI or<br />
Component Video cable. (p. 14)<br />
• To view high-definition programming select the correct video input. (p. 24)<br />
Not all cabl<strong>es</strong> and external equipment shown in this book are supplied with the TV.<br />
For more details on the external equipment’s connections, please refer to the operating manuals for the equipment.<br />
When disconnecting the power cord, be absolutely sure to disconnect the power cord plug from the wall outlet first.<br />
For additional assistance, visit us at: www.panasonic.com<br />
www.panasonic.ca<br />
11
Basic Connection (Continued)<br />
Example 2<br />
Connecting DVD recorder (VCR) (To record/playback)<br />
TV<br />
AV Equipment<br />
(e.g. DVD Recorder<br />
or VCR)<br />
VHF/UHF Antenna<br />
DVD Recorder<br />
If the source has a higher r<strong>es</strong>olution signal (480p/720p/<br />
1080i/1080p), connection can be made with the use of<br />
a Component Video or HDMI cable. (p. 14)<br />
VCR<br />
Connection can be made with the use of an RF cable<br />
and Composite Video/S Video cable. (p. 14)<br />
To connect the antenna terminal and DVD recorder or VCR<br />
VHF/UHF Antenna<br />
AC 120 V<br />
60 Hz<br />
AC Cord<br />
Back of the TV<br />
* See page 10<br />
(AC cord<br />
connection)<br />
HDMI 1 HDMI 2<br />
B<br />
A<br />
Y<br />
Y<br />
S VI<strong>DE</strong>O<br />
PB<br />
PB<br />
C<br />
VI<strong>DE</strong>O<br />
PR<br />
L<br />
PR<br />
L L<br />
AUDIO<br />
R<br />
R<br />
R<br />
COMPONENT VI<strong>DE</strong>O IN 1<br />
1 IN 2<br />
D<br />
ANT IN<br />
ANT OUT<br />
Connecting TV and AV equipment<br />
Please refer to A - D on p. 14<br />
12<br />
AV Equipment<br />
(e.g. DVD Recorder or VCR)<br />
(with TV tuner)
Example 3<br />
Connecting DVD recorder (VCR) and satellite receiver<br />
TV<br />
DVD Recorder<br />
or<br />
VCR<br />
Satellite<br />
Receiver<br />
VHF/UHF Antenna<br />
You can enjoy high-definition<br />
programming by subscribing to<br />
high-definition satellite service.<br />
Connection can be done with the<br />
use of HDMI or Component Video<br />
cable. (p. 14)<br />
To connect the antenna terminal and Satellite Receiver and DVD recorder or VCR<br />
VHF/UHF Antenna<br />
AC 120 V<br />
60 Hz<br />
Quick Start<br />
Guide<br />
AC Cord<br />
ANT IN<br />
Satellite Receiver<br />
ANT IN<br />
ANT OUT<br />
Back of the TV<br />
DVD Recorder or VCR<br />
(with TV tuner)<br />
VI<strong>DE</strong>O<br />
AUDIO<br />
Y<br />
PB<br />
PR<br />
L<br />
B<br />
* See page 10<br />
(AC cord<br />
connection)<br />
HDMI 1 HDMI 2<br />
Y<br />
S VI<strong>DE</strong>O<br />
PB<br />
PR<br />
L L<br />
R<br />
R<br />
R<br />
COMPONENT VI<strong>DE</strong>O IN 1<br />
1 IN 2<br />
D<br />
A<br />
C<br />
Connecting TV and AV equipment<br />
Please refer to A - D on p. 14.<br />
Basic Connection (TV + DVD Recorder or VCR + Satellite Receiver)<br />
(TV + DVD Recorder or VCR)<br />
Note<br />
For details of external equipment connections, please refer to the operating manuals for the equipment.<br />
13
Basic Connection (Continued)<br />
A To use HDMI terminals<br />
AV cable connections<br />
High-Definition Standard-Definition<br />
HDMI 1 HDMI 2<br />
HDMI<br />
AV OUT<br />
AV Equipment<br />
e.g. Blu-ray Disc player<br />
Connecting to HDMI terminals will enable you to enjoy high-definition digital imag<strong>es</strong> and high-quality sound.<br />
The HDMI connection is required for a 1080p signal.<br />
For “VIERA Link TM connections”, please refer to p. 31.<br />
B To use COMPONENT terminals<br />
VI<strong>DE</strong>O<br />
AUDIO<br />
Y<br />
PB<br />
PR<br />
L<br />
R<br />
COMPONENT<br />
IN 1 2<br />
P<br />
P<br />
green<br />
blue<br />
red<br />
white<br />
red<br />
green<br />
blue<br />
red<br />
white<br />
red<br />
Y<br />
green<br />
PB<br />
blue<br />
PR<br />
red<br />
L<br />
white<br />
R<br />
red<br />
COMPONENT<br />
VI<strong>DE</strong>O OUT<br />
AUDIO<br />
OUT<br />
Recorders may also be connected to COMPOSITE or S VI<strong>DE</strong>O terminals. (see below)<br />
C To use S VI<strong>DE</strong>O terminals<br />
PB<br />
PR<br />
L L<br />
S VI<strong>DE</strong>O<br />
R R<br />
ENT VI<strong>DE</strong>O IN 1<br />
white<br />
red<br />
D To use COMPOSITE terminals<br />
PB<br />
PR<br />
L L<br />
R R<br />
ENT VI<strong>DE</strong>O IN 1<br />
2<br />
yellow<br />
white<br />
red<br />
white<br />
red<br />
L<br />
white<br />
red<br />
R<br />
yellow yellow<br />
L<br />
white<br />
red<br />
white<br />
R<br />
red<br />
S VI<strong>DE</strong>O<br />
OUT<br />
AUDIO<br />
OUT<br />
COMPOSITE<br />
OUT<br />
AV Equipment<br />
e.g. Blu-ray Disc player<br />
AV Equipment<br />
e.g. DVD Recorder<br />
or<br />
e.g. VCR<br />
AV Equipment<br />
e.g. DVD Recorder<br />
or<br />
e.g. VCR<br />
The S Video input will override the composite video signal when S Video cable is connected. Connect<br />
either S Video or Video cable.<br />
Connecting to S VI<strong>DE</strong>O terminals will enable you to enjoy greater picture quality than using Composite<br />
terminals.<br />
14<br />
Note<br />
Some programs contain a copyright protection signal to prevent recording.<br />
When the copyright protection program is displayed, do not connect the other TV monitor through a VCR. Video signals fed<br />
through VCRs may be affected by copyright protection systems and the picture will be distorted on the other TV monitor.<br />
For more details on the external equipment’s connections, please refer to the operating manuals for the equipment.
Identifying Controls<br />
Front of the TV<br />
TV controls/indicators<br />
Back of the TV<br />
SD card slot<br />
Selects channels<br />
in sequence<br />
Volume up/down<br />
POWER<br />
button<br />
Switch<strong>es</strong> TV On or Off (Standby)<br />
Chang<strong>es</strong> the input mode (p. 24)<br />
VIERA Link menu (p. 34-35)<br />
Displays Sub Menu (p. 19, 28)<br />
Colored buttons<br />
(used for various functions)<br />
(for example, p. 18, 22, 35)<br />
Volume up/down<br />
Sound mute On/Off<br />
Remote control sensor<br />
Within about 23 feet<br />
(7 meters) in front of<br />
the TV set.<br />
Power indicator<br />
(on: red, off: no light)<br />
Chang<strong>es</strong> aspect ratio (p. 20, 45)<br />
Switch<strong>es</strong> to previously viewed channel<br />
or input mod<strong>es</strong>.<br />
Displays the Main<br />
menu.<br />
Remote control<br />
Video Input 2 connector<br />
C.A.T.S. sensor<br />
Chang<strong>es</strong> the input mode<br />
Plasma C.A.T.S. (Contrast Automatic<br />
Choos<strong>es</strong> menu and submenu entri<strong>es</strong>.<br />
Tracking System). (p. 26)<br />
Note<br />
The TV consum<strong>es</strong> a limited amount of power as long as the power cord is inserted into the wall outlet.<br />
Do not place any objects between the TV remote control sensor and remote control.<br />
Closed Caption On/Off (p. 19)<br />
Selects Audio Mode for TV viewing (p. 19)<br />
Exits from menu screen<br />
Displays Main Menu (p. 26)<br />
Displays VIERA TOOLS (p. 21)<br />
Viewing from SD Card (p. 22-23)<br />
Selects/OK/Change<br />
Returns to previous menu<br />
Channel up/down<br />
Displays or remov<strong>es</strong> the channel<br />
banner (p. 20)<br />
Operat<strong>es</strong> the Favorite channel list<br />
function. (p. 20)<br />
Numeric keypad to select any channel<br />
(p. 19) or pr<strong>es</strong>s to enter alphanumeric<br />
input in menus.<br />
(p. 18, 24, 34, 36, 38, 41, 42)<br />
Use for digital channels. (p. 19)<br />
Quick Start<br />
Guide<br />
Identifying Controls<br />
Basic Connection (AV cable connections)<br />
External equipment operations<br />
(p. 35)<br />
15
First Time Setup<br />
“First time setup” is displayed only when the TV is turned on for the first time after the power cord is<br />
inserted into a wall outlet and when “Auto power on” (p. 28-29) is set to “No”.<br />
or<br />
Turn the TV On with the POWER button<br />
or<br />
(TV)<br />
(Remote)<br />
* This setting will be skipped next time if you select “Home Use”.<br />
Select your language<br />
Language<br />
English<br />
Español<br />
Français<br />
select<br />
ok<br />
Be sure to select “Home Use”<br />
Please select your viewing environment<br />
Home Use Store Demonstration<br />
select<br />
Select “Home Use” when using this TV in your home.<br />
ok<br />
Please confirm your selection (Home Use) before pr<strong>es</strong>sing OK button.<br />
■ If you select “Store” by mistake in<br />
displayed.<br />
You are selecting the mode for store demonstration<br />
Y<strong>es</strong><br />
No<br />
If you select “Y<strong>es</strong>”, the picture mode will regularly r<strong>es</strong>et<br />
to “Vivid” and a Picture Refr<strong>es</strong>h m<strong>es</strong>sage will be<br />
displayed on the screen.<br />
, confirmation screen will be<br />
select<br />
ok<br />
Select “No” and return to previous screen .<br />
If you select “Y<strong>es</strong>”, Screen enters store demonstration mode.<br />
To display the “Please select your viewing environment” screen again as<br />
shown above and select “Home Use”, do one of the following:<br />
• Pr<strong>es</strong>s and hold down the front POWER button.<br />
• Unplug the TV and plug it again.<br />
■ Pr<strong>es</strong>s to exit from<br />
a menu screen<br />
■ Pr<strong>es</strong>s to return<br />
to the previous<br />
screen<br />
16
Adjust the clock<br />
First time setup<br />
Language<br />
next<br />
Clock<br />
ANT/Cable setup<br />
Input labels<br />
select<br />
Clock<br />
Year<br />
Month<br />
Day<br />
Hour<br />
Minute<br />
2009<br />
1<br />
7<br />
10 AM<br />
10<br />
Auto channel setup<br />
Select “ANT/Cable setup”<br />
First time setup<br />
Language<br />
Clock<br />
ANT/Cable setup<br />
Input labels<br />
Select “ANT in”<br />
ANT/Cable setup<br />
ANT in<br />
Auto program<br />
Cable<br />
set<br />
select item<br />
next<br />
select<br />
set<br />
select<br />
Year: Select the year<br />
Month: Select the month<br />
Day: Select the day<br />
Hour: Adjust the hour<br />
Minute: Adjust the minute<br />
ANT in<br />
Cable: Cable TV<br />
Antenna: Antenna<br />
Not used: Skip TV tuning<br />
go to<br />
Quick Start<br />
Guide<br />
First Time Setup<br />
■ Pr<strong>es</strong>s to exit from<br />
a menu screen<br />
Note<br />
To change setting<br />
(Language/Clock/<br />
ANT/Cable setup/<br />
Input labels) later, go<br />
to Menu screen<br />
(p. 28)<br />
Select “Not used” when no wire is connected to the “Antenna/Cable” terminal.<br />
Typical when Cable/Satellite box is connected to a TV input.<br />
Prevents accidental tuning to an unavailable signal.<br />
Select “Auto program”<br />
ANT/Cable setup<br />
ANT in<br />
Auto program<br />
Cable<br />
next<br />
select<br />
17
First Time Setup (Continued)<br />
Select scanning mode (ALL channels/Analog only/Digital only)<br />
Auto program<br />
All channels<br />
Analog only<br />
Digital only<br />
ok<br />
select<br />
Auto program<br />
Progr<strong>es</strong>s<br />
Number of analog channels<br />
Number of digital channels<br />
Pr<strong>es</strong>s RETURN to quit.<br />
RETURN<br />
32%<br />
10<br />
0<br />
Start scanning the channels<br />
Available channels (analog/digital) are automatically set.<br />
All channels: Scans digital and analog channels<br />
Analog only: Scans Analog channels only<br />
Digital only: Scans Digital channels only<br />
Confirm registered channels<br />
program<br />
Apply<br />
Cancel<br />
l Caption Favorite Add<br />
... ...<br />
Y<strong>es</strong><br />
... ...<br />
Y<strong>es</strong><br />
... ...<br />
Y<strong>es</strong><br />
select “Apply”<br />
ok<br />
If OK is not pr<strong>es</strong>sed after selecting “Apply”, the channels will not be saved.<br />
The channel will be saved when no operation is performed for 60 seconds and<br />
the “Manual program” menu will also exit automatically.<br />
If you perform scanning more than twice, previously saved channels are erased.<br />
Set the Input labels<br />
First time setup<br />
Language<br />
Clock<br />
ANT/Cable setup<br />
Input labels<br />
next<br />
select<br />
■ Pr<strong>es</strong>s to exit from<br />
a menu screen<br />
Note<br />
About broadcasting<br />
systems<br />
Analog (NTSC):<br />
Conventional<br />
broadcasting<br />
Digital (ATSC):<br />
New<br />
programming<br />
that allows<br />
you to view<br />
more channels<br />
featuring<br />
high-quality video<br />
and sound<br />
Input labels<br />
Component 1<br />
Component 2<br />
HDMI 1<br />
HDMI 2<br />
Video 1<br />
Video 2<br />
or<br />
select<br />
set<br />
Video 1<br />
Video 2<br />
Select<br />
OK<br />
RETURN<br />
G A A<br />
R G B Y<br />
ABC → abc<br />
Delete<br />
Switch<strong>es</strong> Input mode alphabet to<br />
numeric<br />
Label: [BLANK] SKIP/VCR/DVD/CABLE/SATELLITE/DVR/GAME/AUX/RECEIVER/<br />
COMPUTER/Blu-ray/CAMERA/DVD REC/HOME THTR/MONITOR/MEDIA<br />
CTR/MEDIA EXT/OTHER<br />
18
Watching TV<br />
Connect the TV to a cable box/cable, set-top-box, satellite box or antenna cable (p. 11-14)<br />
To watch TV and other functions<br />
Turn power on<br />
or<br />
Note<br />
If the mode is not TV, pr<strong>es</strong>s<br />
select TV. (p. 24)<br />
and<br />
(TV)<br />
Select a channel number<br />
up<br />
or<br />
down<br />
■ To directly input the digital<br />
channel number<br />
When tuning to a digital<br />
channel, pr<strong>es</strong>s the button to<br />
enter the minor number in a<br />
compound channel number.<br />
Quick Start<br />
Guide<br />
Listen<br />
with SAP<br />
(Secondary<br />
Audio<br />
Program)<br />
(TV)<br />
example: CH15-1:<br />
Note<br />
R<strong>es</strong>elect “Cable” or “Antenna” in “ANT in” of “ANT/Cable setup” to switch the<br />
signal reception between cable TV and antenna. (p. 17, 39)<br />
The channel number and volume level remain the same even after the TV is<br />
turned off.<br />
■ Select Audio Mode for watching TV<br />
Digital mode<br />
Pr<strong>es</strong>s SAP to select the next audio track (if available) when receiving a digital<br />
channel.<br />
Audio track 1 of 2<br />
(English)<br />
Analog mode<br />
Pr<strong>es</strong>s SAP to select the d<strong>es</strong>ired audio mode.<br />
• Each pr<strong>es</strong>s of SAP will change the audio mode. (Stereo/SAP/Mono)<br />
Viewing Watching TV<br />
First Time Setup<br />
Closed<br />
Caption<br />
■ Switch<strong>es</strong> Closed Caption mode On or Off<br />
CC On<br />
CC Off<br />
Display the<br />
SUB MENU<br />
■ Pr<strong>es</strong>s SUB MENU to show sub menu screen. (p. 28)<br />
This menu consists of shortcuts to convenient functions.<br />
SUB<br />
MENU<br />
Setup SUB MENU<br />
Channel surf mode<br />
All<br />
Set favorite<br />
Edit CH caption<br />
Signal meter<br />
19
Watching TV (Continued)<br />
■ Other Useful Functions (Operate after )<br />
Information<br />
Recall<br />
■ Displays or remov<strong>es</strong> the channel banner.<br />
Channel<br />
15-2 THE NEWS<br />
12:30 PM<br />
ABC-HD CC SAP TV-G 1080i Standard 4:3 30<br />
Station<br />
identifier<br />
SAP<br />
indication<br />
Signal<br />
r<strong>es</strong>olution<br />
Closed caption Rating Level<br />
Picture<br />
mode<br />
Clock<br />
Sleep timer<br />
remaining time<br />
Aspect ratio<br />
Change<br />
aspect<br />
ratio<br />
■ Pr<strong>es</strong>s FORMAT to cycle through the aspect mod<strong>es</strong>. (p. 45)<br />
• 480i, 480p: FULL/JUST/4:3/ZOOM<br />
• 1080p, 1080i, 720p: FULL/H-FILL/JUST/4:3/ZOOM<br />
Call up<br />
a favorite<br />
channel<br />
■ FAVORITE<br />
Channel numbers registered in Favorite are displayed on the favorite tune<br />
screen. Select the d<strong>es</strong>ired broadcast station with the cursor or use number<br />
buttons. (see below)<br />
Favorite Feature<br />
■Set Favorite Feature<br />
Display the SUB MENU.<br />
1<br />
SUB<br />
MENU<br />
■Use Favorite Feature<br />
1<br />
Display “Favorite channels”<br />
2<br />
3<br />
Select “Set favorite”<br />
Setup SUB MENU<br />
Channel surf mode<br />
All<br />
Set favorite<br />
Edit CH caption<br />
Signal meter<br />
Set the displayed channel<br />
Set favorite 1/3<br />
1 26-1<br />
2<br />
3<br />
4<br />
5<br />
Delete a favorite channel<br />
Set favorite 1/3<br />
1 26-1<br />
2<br />
3<br />
4<br />
5<br />
or<br />
select<br />
ok<br />
select the list<br />
number<br />
save the displayed<br />
channel<br />
select the list number<br />
(to save the channel<br />
without pr<strong>es</strong>sing OK)<br />
select<br />
delete<br />
(while holding down)<br />
2<br />
3<br />
Select the channel<br />
Favorite channels 1/3<br />
1 26-1<br />
2<br />
3<br />
4<br />
5<br />
Set Favorite channel<br />
Favorite channels 1/3<br />
1 26-1<br />
2<br />
3<br />
4<br />
5<br />
■To change the page<br />
ok<br />
select<br />
or<br />
Pr<strong>es</strong>s repeatedly to change between<br />
pag<strong>es</strong>(1/3, 2/3, 3/3 or exit)<br />
Chang<strong>es</strong> the page forward/backward<br />
20
Using VIERA TOOLS<br />
VIERA TOOLS are the easy way to acc<strong>es</strong>s high use menu items. They are displayed as shortcut icons on<br />
the TV screen.<br />
Unlike a conventional menu, you can enjoy using, playing or setting a function quickly.<br />
Display VIERA TOOLS<br />
Select the item<br />
select<br />
next<br />
Lock<br />
■ Pr<strong>es</strong>s to exit from<br />
a menu screen<br />
Displayed “VIERA Link” menu (p. 34-35)<br />
Start Slid<strong>es</strong>how (p. 22-23)<br />
Set “Sleep”(Off timer) (p. 42)<br />
Displayed “Lock” menu. (p. 36)<br />
Viewing Using VIERA TOOLS<br />
Watching TV<br />
■ Pr<strong>es</strong>s to return<br />
to the previous<br />
screen<br />
21
Slid<strong>es</strong>how<br />
Viewing from an SD Card<br />
You can view photos taken with a digital camera or digital video camera and saved on an SD card.<br />
(Media other than SD Cards may not be reproduced properly.)<br />
Insert the SD card<br />
* This setting will be skipped next time unl<strong>es</strong>s you select “Set later”.<br />
Set “SD card setting” and select “Play SD card now”<br />
“SD card setting” will be displayed automatically each time an SD card is<br />
inserted for the first time.<br />
SD card setting<br />
Play SD card automatically<br />
Set later<br />
Play SD card now<br />
Photo viewer<br />
select<br />
change<br />
Off:<br />
■ Manual operation (“Play SD card automatically” is “Off”)<br />
Display “Photo viewer” Start Slid<strong>es</strong>how<br />
set<br />
Slid<strong>es</strong>how: A Slid<strong>es</strong>how will start<br />
automatically next time.<br />
Thumbnail: The Photo viewer menu will be<br />
displayed automatically next time.<br />
Set later: “SD card setting” menu will be<br />
displayed repeatedly.<br />
The data can be played manually.<br />
select<br />
next<br />
Select the data to be viewed<br />
Photo viewer<br />
Thumbnail view<br />
select<br />
22<br />
■ Pr<strong>es</strong>s to exit from<br />
a menu screen<br />
■ Pr<strong>es</strong>s to return<br />
to the previous<br />
screen<br />
Total 50<br />
Name<br />
Pana0001<br />
Date<br />
03/04/2009<br />
Size<br />
1600×1200<br />
Prev.<br />
R<br />
Acc<strong>es</strong>sing<br />
Rotate<br />
G<br />
Slid<strong>es</strong>how<br />
Next<br />
RETURN<br />
B Y<br />
Pana0001 Pana0002 Pana0003 Pana0004<br />
Pana0005 Pana0006 Pana0007 Pana0008<br />
Pana0009 Pana0010 Pana0011 Pana0012<br />
Selected picture information is displayed.<br />
Name: Image number or file name is<br />
displayed.<br />
Date: Date of recording is displayed.<br />
Size: Display r<strong>es</strong>olution is displayed.<br />
Total number of imag<strong>es</strong><br />
Note<br />
Navigation area<br />
R<br />
Acc<strong>es</strong>sing<br />
Rotate<br />
Prev.<br />
G<br />
Slid<strong>es</strong>how<br />
view<br />
Next<br />
RETURN<br />
B Y<br />
To Slid<strong>es</strong>how<br />
Pr<strong>es</strong>ent status<br />
(While reading the data)<br />
Prev.<br />
R<br />
Acc<strong>es</strong>sing<br />
G<br />
Single<br />
Pause<br />
Next<br />
RETURN<br />
B Y<br />
To Single<br />
photo play<br />
Depending on the JPEG format, “Information” contents may not be displayed<br />
correctly. Refer to p. 46 (Data format for SD card browsing) for details.<br />
View<br />
Rotate 90 degre<strong>es</strong> (counter-clockwise)<br />
Rotate<br />
Prev.<br />
R G<br />
Slid<strong>es</strong>how<br />
Next<br />
RETURN<br />
B Y<br />
Navigation area<br />
Displays one at a time<br />
To next photo<br />
Rotate 90 degre<strong>es</strong> (clockwise)<br />
To previous photo<br />
To display/hide Navigation area
Insert the card Remove the card<br />
Label surface<br />
SD Card<br />
Push until a click is<br />
heard<br />
Pr<strong>es</strong>s in lightly on SD<br />
Card, then release.<br />
Compliant card type (maximum capacity): SDHC Card (16 GB), SD Card (2 GB), miniSD Card<br />
(1 GB) (requiring miniSD Card adapter)<br />
For cautions and details on SD Cards (p. 46)<br />
Photo<br />
settings<br />
In or ■Adjust the picture<br />
Display “Photo settings”<br />
Select the item<br />
Photo settings<br />
Picture<br />
Slid<strong>es</strong>how settings<br />
Set<br />
■Set up Slid<strong>es</strong>how<br />
Slid<strong>es</strong>how settings<br />
Speed<br />
Fast<br />
Repeat<br />
On<br />
Speed<br />
Repeat<br />
Select<br />
set<br />
Select<br />
Adjust<br />
Picture 1/2<br />
R<strong>es</strong>et to defaults<br />
Picture mode Vivid<br />
Contrast 0<br />
Brightn<strong>es</strong>s 0<br />
Color<br />
0<br />
Tint<br />
0<br />
Sharpn<strong>es</strong>s 0<br />
Picture menu (p. 26)<br />
You can set how many seconds each image is displayed in Slid<strong>es</strong>how mode.<br />
(Very fast/Fast/Medium/Slow/Very slow)<br />
Turn the slid<strong>es</strong>how Repeat function<br />
On or Off.<br />
Select<br />
Adjust<br />
Viewing Viewing from SD Card<br />
Note<br />
To stop in mid-cycle<br />
Pr<strong>es</strong>s<br />
VIERA IMAGE VIEWER<br />
The VIERA Image Viewer is a function that lets you easily view still and motion imag<strong>es</strong> on a VIERA television by<br />
simply inserting an SD card into the VIERA SD card slot.<br />
23
Watching Videos and DVDs<br />
If you have applicable equipment connected to the TV, you can watch videos and DVDs on the TV’s<br />
screen.<br />
You can select the external equipment to acc<strong>es</strong>s.<br />
Input Select<br />
With the connected equipment turned On<br />
Display the Input select menu<br />
Select the input mode<br />
Input select<br />
1 TV<br />
2<br />
3<br />
4<br />
5<br />
6<br />
7<br />
Component 1<br />
Component 2<br />
HDMI 1<br />
HDMI 2<br />
Video 1<br />
Video 2<br />
HDMI 1<br />
GAME<br />
AUX<br />
(example)<br />
Terminal<br />
Label<br />
(example)<br />
or<br />
select<br />
enter<br />
Pr<strong>es</strong>s corr<strong>es</strong>ponding NUMBER<br />
button on the remote control to<br />
select the input of your choice.<br />
Select the input of your choice,<br />
then pr<strong>es</strong>s OK.<br />
During the selection, if no action<br />
is taken for several seconds, the<br />
“Input select” menu disappears.<br />
The terminal and label of the<br />
connected equipment are<br />
displayed.<br />
To label each of the inputs,<br />
please refer to p. 41.<br />
Note<br />
The input label will be displayed on “Input select” screen if Input label is set on p. 41.<br />
For more details for Input label, refer to p. 41.<br />
Operate the connected equipment using the remote<br />
control supplied with the equipment<br />
Note<br />
For details, see the manual of the connected equipment.<br />
■ To return to TV<br />
24
VIERA Link TM Setting<br />
If you connect equipment that has the “HDAVI Control” function to a TV using an HDMI cable,<br />
you will find it easier to use. Please refer to p. 30-35. Before using th<strong>es</strong>e functions, you need to<br />
set “VIERA Link” setting to “On” as shown below.<br />
Display menu<br />
Select “Setup”<br />
Menu<br />
select<br />
■Pr<strong>es</strong>s to exit from<br />
a menu screen<br />
■ Pr<strong>es</strong>s to return<br />
to the previous<br />
screen<br />
VIERA Link<br />
Picture<br />
Lock<br />
SD card<br />
Closed Caption<br />
Setup<br />
Select “VIERA Link settings”<br />
Setup 2/2<br />
VIERA Link settings<br />
ECO/power saving<br />
Advanced setup<br />
About<br />
Select “VIERA Link”<br />
VIERA Link settings<br />
VIERA Link<br />
On<br />
Power on link<br />
Y<strong>es</strong><br />
Power off link Y<strong>es</strong><br />
Stand-by power save<br />
No<br />
Auto power stand-by<br />
No<br />
Default speakers<br />
Select “On”<br />
(default is On)<br />
TV<br />
next<br />
select<br />
next<br />
select<br />
change<br />
Viewing Watching Videos and DVDs<br />
Now you can set each “VIERA Link” function according to your preference<br />
(p. 32-35).<br />
Note<br />
If no HDMI equipment is connected or standard HDMI equipment (non- “VIERA<br />
Link”) is used, set it to “Off”.<br />
For more details on the external equipment’s connections, please refer to the<br />
operating manuals for the equipment.<br />
25
How to Use Menu Functions<br />
Various menus allow you to make settings for the picture, sound, and<br />
other functions so that you can enjoy watching TV b<strong>es</strong>t suited for you.<br />
Display menu<br />
■ Menu list<br />
Menu<br />
VIERA<br />
Link<br />
Item<br />
VIERA Link control<br />
Speaker output<br />
Displays the functions that can be set<br />
(vari<strong>es</strong> depending on the input signal)<br />
R<strong>es</strong>et to defaults<br />
Picture mode<br />
■ Pr<strong>es</strong>s to exit from<br />
a menu screen<br />
■ Pr<strong>es</strong>s to return<br />
to the previous<br />
screen<br />
Select the menu<br />
Menu<br />
VIERA Link<br />
Picture<br />
Audio<br />
Timer<br />
Lock<br />
SD card<br />
Closed Caption<br />
Setup<br />
Select the item<br />
Picture 1/2<br />
R<strong>es</strong>et to defaults<br />
Picture mode Vivid<br />
Contrast 0<br />
Brightn<strong>es</strong>s 0<br />
Color<br />
0<br />
Tint<br />
0<br />
Sharpn<strong>es</strong>s 0<br />
(example: Picture menu)<br />
Adjust or select<br />
Picture 1/2<br />
R<strong>es</strong>et to defaults<br />
Picture mode Vivid<br />
Contrast 0<br />
Brightn<strong>es</strong>s 0<br />
Color<br />
0<br />
Tint<br />
0<br />
Sharpn<strong>es</strong>s 0<br />
(example: Picture menu)<br />
select<br />
next<br />
select<br />
adjust<br />
or<br />
select<br />
Picture<br />
Audio<br />
Contrast, Brightn<strong>es</strong>s,<br />
Color, Tint, Sharpn<strong>es</strong>s<br />
Color temp.<br />
C.A.T.S.<br />
Video NR<br />
Zoom adjustments<br />
3D Y/C filter<br />
Advanced picture<br />
Color matrix<br />
MPEG NR<br />
Black level<br />
H size<br />
R<strong>es</strong>et to defaults<br />
Bass<br />
Treble<br />
Balance<br />
Advanced audio<br />
Surround<br />
Volume leveler<br />
TV speakers<br />
HDMI 1 in<br />
HDMI 2 in<br />
Timer Sleep, Timer 1-5<br />
Lock<br />
SD card SD card<br />
Closed<br />
Caption<br />
Closed Caption<br />
26
Adjustments/Configurations (alternativ<strong>es</strong>)<br />
[VIERA Link control]<br />
Selects equipment to acc<strong>es</strong>s and operate. (Recorder/Home theater/Player/Camcorder/LUMIX) (p. 34-35)<br />
[Speaker output]<br />
Selects an audio output. (Home theater/TV) (p. 34-35)<br />
• VIERA Link menu is acc<strong>es</strong>sible directly by pr<strong>es</strong>sing the VIERA Link button on the remote control. (p. 34)<br />
R<strong>es</strong>ets all picture adjustments to factory default settings except for “Advanced picture”.<br />
R<strong>es</strong>et to defaults<br />
Basic picture mode (Vivid/Standard/Cinema/Custom) (p. 47) Picture mode Vivid<br />
Adjusts color, brightn<strong>es</strong>s, etc. for each picture mode to suit your taste<br />
• Display range<br />
Contrast/Brightn<strong>es</strong>s/Color/Sharpn<strong>es</strong>s: 0 - 100<br />
Tint: -50 - +50<br />
Contrast +20<br />
Brightn<strong>es</strong>s 0<br />
Color 0<br />
Tint 0<br />
Sharpn<strong>es</strong>s 0<br />
Selects a choice of Cool(blue), Normal, or Warm(red) color. (Cool/Normal/Warm) Color temp. Cool<br />
Adjusts the brightn<strong>es</strong>s and gradation according to the ambient lighting condition. (Off/On) C.A.T.S. Off<br />
Reduc<strong>es</strong> noise, commonly called snow. Leave it off when receiving a strong signal. (Off/On) Video NR Off<br />
Adjusts vertical alignment and size when aspect setting is “ZOOM” (p. 45)<br />
Zoom adjustments<br />
Minimiz<strong>es</strong> noise and cross-color in the picture. (On/Off) 3D Y/C filter On<br />
Selects image r<strong>es</strong>olution of component-connected devic<strong>es</strong> (HD/SD)<br />
SD: Standard Definition HD: High Definition<br />
• Only 480p signal accepted; regular TV (NTSC) is not available. Color matrix SD<br />
Reduc<strong>es</strong> noise of specific digital signals of DVD, STB, etc. (On/Off) MPEG NR Off<br />
Selects Dark or Light. Valid only for external input signals. (Dark/Light) Black level Light<br />
Adjust horizontal display range to reduce noise of both side edg<strong>es</strong> of an image. (Size 1/Size 2)<br />
Size 2: Adjust image size according to aspect mode for reducing noise. (p. 48)<br />
R<strong>es</strong>ets Bass, Treble and Balance adjustments to factory default settings.<br />
H size Size 1<br />
R<strong>es</strong>et to defaults<br />
How to Use Menu Functions<br />
(picture, sound quality, etc.)<br />
Increas<strong>es</strong> or decreas<strong>es</strong> the bass r<strong>es</strong>ponse. Bass 0<br />
Increas<strong>es</strong> or decreas<strong>es</strong> the treble r<strong>es</strong>ponse. Treble 0<br />
Emphasiz<strong>es</strong> the left / right speaker volume. Balance 0<br />
Enhanc<strong>es</strong> audio r<strong>es</strong>ponse when listening to stereo. (On/Off) Surround Off<br />
Minimiz<strong>es</strong> volume disparity after switching to external inputs. Volume leveler 0<br />
Switch to “Off” when using external speakers (On/Off)<br />
• “Surround” and “Volume leveler” do not work if “Off” is selected. TV speakers On<br />
The default setting is “Digital” for HDMI connection. (Digital input signal)<br />
HDMI1 in<br />
Select audio input terminal when DVI cable is connected. (Analog audio input signal)<br />
HDMI2 in<br />
(Digital/Component 1/Component 2/Video 1/Video 2)<br />
The TV can automatically turn On/Off at the d<strong>es</strong>ignated date and time (p. 42)<br />
Digital<br />
Digital<br />
Advanced<br />
Locks the channels and programs (p. 36)<br />
Displays SD card data (p. 22-23)<br />
SD card<br />
Displays subtitl<strong>es</strong> (Closed Caption) (p. 40)<br />
Closed Caption<br />
In AV mode, the Audio menu and Setup menu give fewer options.<br />
27
How to Use Menu Functions<br />
Various menus allow you to make settings for the picture, sound, and<br />
other functions so that you can enjoy watching TV b<strong>es</strong>t suited for you.<br />
Display menu<br />
■ Menu list<br />
Menu<br />
Item<br />
Channel surf mode<br />
Language<br />
Clock<br />
Displays the functions that can be set<br />
(vari<strong>es</strong> depending on the input signal)<br />
Select “Setup”<br />
Menu<br />
VIERA Link<br />
Picture<br />
Audio<br />
Timer<br />
Lock<br />
SD card<br />
Closed Caption<br />
Setup<br />
next<br />
select<br />
ANT/Cable setup<br />
Connected<br />
devic<strong>es</strong><br />
Anti Image<br />
retention<br />
Input labels<br />
Pixel orbiter<br />
Time (minut<strong>es</strong>)<br />
4:3 side bars<br />
Scrolling bar<br />
VIERA Link<br />
■ Pr<strong>es</strong>s to exit from<br />
a menu screen<br />
■ Pr<strong>es</strong>s to return<br />
to the previous<br />
screen<br />
Select the item<br />
Setup 1/2<br />
Channel surf mode<br />
Language<br />
All<br />
Clock<br />
ANT/Cable setup<br />
Connected devic<strong>es</strong><br />
Anti image retention<br />
next<br />
select<br />
Setup<br />
VIERA Link settings<br />
Power on link<br />
Power off link<br />
Stand-by power<br />
save<br />
Auto power<br />
stand-by<br />
Default speakers<br />
Display Sub Menu<br />
SUB<br />
MENU<br />
ECO/power saving<br />
No signal for 10<br />
minut<strong>es</strong><br />
No activity for 3<br />
hours<br />
28<br />
Select the item<br />
Setup SUB MENU<br />
Channel surf mode<br />
All<br />
Set favorite<br />
Edit CH caption<br />
Signal meter<br />
select<br />
set<br />
or<br />
next<br />
R<strong>es</strong>et to defaults<br />
■ Sub menu list<br />
Menu<br />
Item<br />
Channel surf mode<br />
Set favorite<br />
Edit CH caption<br />
Signal meter<br />
Setup<br />
SUB MENU<br />
Advanced<br />
setup<br />
About<br />
Auto power on<br />
Play SD card<br />
automatically
(Continued)<br />
Adjustments/Configurations (alternativ<strong>es</strong>)<br />
Sets the mode to select the channel with Channel up/down button<br />
Channel<br />
(All/Favorite/Digital only/Analog only)<br />
• Favorite: Only channels registered as FAVORITE (p. 20)<br />
Selects the screen menu language (p. 16)<br />
Adjusts the clock (p. 17)<br />
Sets channels (p. 39)<br />
surf mode<br />
All<br />
Language<br />
Clock<br />
ANT/Cable setup<br />
Selects the terminal and label of the external equipment (p. 41)<br />
Prevents “Image retention” with Wobbling. (Automatic/Periodic)<br />
Automatic: Shifts the display image automatically.<br />
• Periodic: Shifts the display image every (1/2/3/4) minut<strong>es</strong> according to what was set in the “Time (minut<strong>es</strong>)” menu. Pixel orbiter Automatic<br />
Sets the time for “Pixel orbiter-Periodic” setting. (1/2/3/4) Time (minut<strong>es</strong>) 4<br />
Change the brightn<strong>es</strong>s of the side bar (Off/Dark/Mid/Bright) (4:3 mode only)<br />
• The recommended setting is “Bright” to prevent panel “Image retention”. (p. 48) 4:3 side bars Bright<br />
Pr<strong>es</strong>s “OK” to start horizontal “Scrolling” on the screen (p. 48)<br />
Scrolling bar<br />
Controls equipment connected to HDMI terminals (p. 32) (On/Off)<br />
• “Power off link”, “Power on link”, “Stand-by power save”, “Auto power stand-by” and “Default speakers” VIERA Link On<br />
cannot be selected if “Off” is set.<br />
Sets “Power on link” of HDMI connection equipment (p. 32) (Y<strong>es</strong>/No) Power on link Y<strong>es</strong><br />
Sets “Power off link” of HDMI connection equipment (p. 32) (Y<strong>es</strong>/No) Power off link Y<strong>es</strong><br />
Set “Stand-by power save” of HDMI connection equipment. (p. 32) (No/Y<strong>es</strong>)<br />
Set “Auto power stand-by” of HDMI connection equipment. (p. 32)<br />
(No/Y<strong>es</strong> (with reminder)/Y<strong>es</strong> (no reminder)<br />
Stand-by power save<br />
No<br />
Auto power stand-by<br />
No<br />
Selects the default speakers (p. 32) (TV/Theater) Default speakers TV<br />
To conserve energy, the TV automatically turns off when NO SIGNAL and NO OPERATION is performed<br />
for more than 10 minut<strong>es</strong>. (Enable/Disable)<br />
Note<br />
Not in use when setting “Auto power on”, “On/Off Timer”, “Lock”, “SD mode” or Digital channel.<br />
• “No signal for 10 minut<strong>es</strong> was activated” will be displayed for about 10 seconds when the TV is turned<br />
on for the first time after turning the power off by “No signal for 10 minut<strong>es</strong>”.<br />
No<br />
• The on-screen display will flash 3, 2 and 1 to indicate the last three (3) remaining minut<strong>es</strong> prior to the shut-off.<br />
To conserve energy, the TV automatically turns off when no operation of remote or side panel key<br />
continu<strong>es</strong> for more than 3 hours. (Enable/Disable)<br />
Note<br />
Not in use when setting “Auto power on” or “On/Off Timer”.<br />
•<br />
•<br />
signal for 10 minut<strong>es</strong><br />
Enable<br />
activity for 3 hours<br />
Disable<br />
No<br />
“No activity for 3 hours was activated” will be displayed for about 10 seconds when the TV is turned on<br />
for the first time after turning the power off by “No activity for 3 hours”.<br />
The on-screen display will flash 3, 2 and 1 to indicate the last three (3) remaining minut<strong>es</strong> prior to the shut-off.<br />
Turns TV On automatically when the cable box or a connected device is turned On (No/Y<strong>es</strong>)<br />
TV AC cord must be plugged into this device. TV com<strong>es</strong> on every time the power is r<strong>es</strong>tored.<br />
Auto power on No<br />
• The “Sleep” timer, “On / Off timer”, and “First time setup” will not function if “Auto power on” is set. (p. 42)<br />
Set “Thumbnail” or “Slid<strong>es</strong>how” to play back SD cards automatically. (Slid<strong>es</strong>how/Thumbnail/Set later/Off)<br />
Play SD card automatically<br />
Set later<br />
How to Use Menu Functions<br />
(picture, sound quality, etc.)<br />
Advanced<br />
Displays TV version and software license.<br />
Performing R<strong>es</strong>et will clear all items set with Setup, such as channel settings. (p. 38)<br />
About<br />
R<strong>es</strong>et to defaults<br />
Adjustments/Configurations (alternativ<strong>es</strong>)<br />
Sets the mode to select the channel with Channel up/down button (All/Favorite/Digital only/Analog only)<br />
Sets favorite channels. (p. 20)<br />
Chang<strong>es</strong> the station identifier. (p. 39)<br />
Checks the signal strength if interference or freezing occurs on a digital image. (p. 39)<br />
29
VIERA Link TM “HDAVI Control TM ”<br />
Simultaneously control all <strong>Panasonic</strong> “HDAVI Control” equipped components using one button on the TV remote.<br />
Enjoy additional HDMI Inter-Operability with <strong>Panasonic</strong> products which have the “HDAVI Control” function.<br />
This TV supports “HDAVI Control 4” function.<br />
Connections to equipment (DVD recorder DIGA, HD Camcorder, Player theater, RAM theater, Amplifier, etc.) with<br />
HDMI cabl<strong>es</strong> allow you to interface with them automatically.<br />
Equipment with the “HDAVI Control” function enabl<strong>es</strong> the following operations:<br />
Version<br />
Operations<br />
HDAVI Control or later Automatic Input Switching (p. 33)<br />
Power on link (p. 33)<br />
Power off link (p. 33)<br />
Default speakers (p. 33)<br />
One-touch theater playback (p. 33)<br />
• Speaker control (p. 35)<br />
HDAVI Control 2 or later VIERA Link control only with the TV’s remote control(P. 35)<br />
• Auto power stand-by (for available equipment only) (p. 33)<br />
HDAVI Control 3 or later Providing the setting information (p. 33)<br />
• Automatic lip-sync function (p. 33)<br />
HDAVI Control 4 • Stand-by power save (with quick start mode) (p. 33)<br />
■ For the first time/When adding new equipment, reconnecting equipment or changing the setup<br />
after the connection, turn the equipment on and then switch the TV on. Set the input mode to<br />
HDMI1 or HDMI2 (p. 24), and make sure that the image is displayed correctly.<br />
VIERA Link “HDAVI Control”, based on the control functions provided by HDMI which is an industry standard known<br />
as HDMI CEC (Consumer Electronics Control), is a unique function that we have developed and added. As such, its<br />
operation with other manufacturers’ equipment that supports HDMI CEC cannot be guaranteed.<br />
Please refer to the individual manuals for other manufacturers’ equipment supporting the VIERA Link function.<br />
■ HDMI cable<br />
This function needs an HDMI compliant (fully wired) cable. Non-HDMI-compliant cabl<strong>es</strong> cannot be utilized.<br />
It is recommended that you use <strong>Panasonic</strong>’s HDMI cable. Recommended part number:<br />
RP-CDHF15 (4.9 ft/1.5 m), RP-CDHG15 (4.9 ft/1.5 m), RP-CDHF30 (9.8 ft/3.0 m),<br />
RP-CDHG30 (9.8 ft/3.0 m), RP-CDHG50 (16.4 ft/5.0 m)<br />
* For more details on the external equipment’s connections, please refer to the operating manuals for the equipment.<br />
30
VIERA Link TM Connections<br />
Follow the connection diagrams below for HDAVI control If<br />
of a single piece of AV equipment such as a DVD recorder<br />
(DIGA), RAM theater, or Player theater system.<br />
Refer to page 32-35 for Setup Menu settings and additional<br />
control information.<br />
• Optional HDMI and/or optical cabl<strong>es</strong> are not included.<br />
Note<br />
connection (or setting) of equipment compatible with<br />
HDAVI control is changed, switch the power of this unit Off<br />
and On again while the power of all equipment is On (so that<br />
the unit can correctly recognize the connected equipment)<br />
and check that the DVD recorder (DIGA), RAM theater, and<br />
Player theater playback operate.<br />
HDMI 1 is recommended.<br />
When connecting to HDMI 2, set the input mode to HDMI 2 (p. 24) initially before connecting to HDMI 2. After<br />
connection, confirm the HDMI control functions (p. 32-35).<br />
■ Connecting this unit to the DVD recorder (DIGA), RAM<br />
theater, or Player theater<br />
For DVD recorder (DIGA): Connect with HDMI cable<br />
For RAM theater and Player theater:<br />
Connect with the HDMI and audio cabl<strong>es</strong>.<br />
If audio cable is not connected, you cannot listen to the TV program<br />
through the theater system.<br />
Back of the TV<br />
Digital Audio out<br />
VI<strong>DE</strong>O<br />
Y<br />
PB<br />
PR<br />
L<br />
■ Connecting this unit to a DVD<br />
recorder (DIGA) and AV amp<br />
When using a “VIERA Link” audiovideo<br />
amplifier and a compatible DVD<br />
recorder (DIGA) use a daisy chain<br />
connection as shown below.<br />
HDMI 1 HDMI 2<br />
Y<br />
S VI<strong>DE</strong>O<br />
PB<br />
PR<br />
L<br />
L<br />
or<br />
VIERA Link TM “HDAVI Control TM ”<br />
AUDIO<br />
HDMI cable<br />
HDMI<br />
(AV IN)<br />
HDMI<br />
(AV OUT)<br />
HDMI<br />
(AV OUT)<br />
R<br />
R R<br />
COMPONENT<br />
VI<strong>DE</strong>O IN 1<br />
1 IN<br />
2<br />
or<br />
HDMI<br />
(AV OUT)<br />
or<br />
HDMI<br />
(AV OUT)<br />
or<br />
HDMI<br />
(AV OUT)<br />
Advanced<br />
or<br />
DVD recorder (DIGA)<br />
with VIERA Link<br />
function<br />
AV amp with<br />
VIERA Link function<br />
Home theater systems<br />
with VIERA Link<br />
function<br />
HD Camcorder<br />
with VIERA Link<br />
function<br />
LUMIX DVD recorder (DIGA)<br />
with VIERA with VIERA Link<br />
Link function function<br />
One AV amp and one DVD recorder (DIGA) can be operated with this unit.<br />
Be sure to connect the AV amp between this unit and the DVD recorder (DIGA).<br />
■ Setting of this unit after connection<br />
After making connections as shown above, set “VIERA Link” (under “VIERA Link settings”) to “On” using the Setup<br />
menu. (p. 25, 32-33).<br />
Note<br />
Individual HDMI equipment may require additional menu settings specific to each model. Please refer to their<br />
r<strong>es</strong>pective operating instruction manuals.<br />
When audio from other equipment connected to this unit via HDMI is output using “DIGITAL AUDIO OUT” of this<br />
unit, the system switch<strong>es</strong> to 2CH audio.<br />
(When connecting to an AV amp via HDMI, you can enjoy higher sound quality.)<br />
About HDMI cable for connecting <strong>Panasonic</strong> HD camcorder, read the manual of the equipment.<br />
31
VIERA Link TM “HDAVI Control TM ”<br />
Display menu<br />
Select “Setup”<br />
Menu<br />
VIERA Link<br />
Picture<br />
Lock<br />
SD card<br />
Closed Caption<br />
Setup<br />
select<br />
next<br />
Select “VIERA Link settings”<br />
Setup 2/2<br />
VIERA Link settings<br />
ECO/power saving<br />
Advanced setup<br />
About<br />
Select “VIERA Link”<br />
VIERA Link settings<br />
VIERA Link<br />
On<br />
Power on link<br />
Y<strong>es</strong><br />
Power off link Y<strong>es</strong><br />
Stand-by power save<br />
No<br />
Auto power stand-by<br />
No<br />
Default speakers<br />
TV<br />
select<br />
next<br />
select<br />
Automatic<br />
Input<br />
Switching<br />
Power on<br />
link<br />
Power off<br />
link<br />
Stand-by<br />
power save<br />
(for “HDAVI<br />
Control 4” (with<br />
quick start mode))<br />
Auto power<br />
stand-by<br />
(for “HDAVI<br />
Control 2 or<br />
later”)<br />
Default<br />
speakers<br />
One-touch<br />
theater<br />
playback<br />
Select “On”<br />
(default is On)<br />
change<br />
■ Pr<strong>es</strong>s to exit from<br />
a menu screen<br />
Select settings<br />
■ Pr<strong>es</strong>s to return<br />
to the previous<br />
screen<br />
VIERA Link settings<br />
VIERA Link<br />
On<br />
Power on link<br />
Y<strong>es</strong><br />
Power off link Y<strong>es</strong><br />
Stand-by power save<br />
No<br />
Auto power stand-by<br />
No<br />
select<br />
Providing<br />
the setting<br />
information<br />
(for “HDAVI<br />
Control 3 or<br />
later”)<br />
Default speakers<br />
TV<br />
Set<br />
VIERA Link settings<br />
VIERA Link<br />
Power on link<br />
On<br />
Y<strong>es</strong><br />
change<br />
Power off link<br />
Y<strong>es</strong><br />
32<br />
Stand-by power save<br />
No<br />
Auto power stand-by<br />
No<br />
Default speakers Theater<br />
Automatic lipsync<br />
function<br />
(for “HDAVI<br />
Control 3 or later”)
(Continued)<br />
At the start of the DIGA, Player theater, or RAM theater playback, the TV’s input automatically switch<strong>es</strong> to the input<br />
based on the playback equipment.<br />
For the RAM theater, the speakers automatically switch to the theater system.<br />
If using the DIGA operation, the TV’s input automatically switch<strong>es</strong> to the DIGA and DIGA menu is displayed.<br />
When “Y<strong>es</strong>” is selected (p. 29), TV is turned on automatically and switch<strong>es</strong> to the appropriate HDMI input whenever<br />
VIERA Link compatible equipment is initially turned on and Play mode is selected.<br />
When “Y<strong>es</strong>” is selected (p. 29) and the TV is turned off, all connected VIERA Link compatible equipment is also<br />
automatically turned off.<br />
DIGA (<strong>Panasonic</strong> DVD Recorder) will not turn off if it is still in rec mode.<br />
Caution: The TV remains on even if the VIERA Link compatible equipment is turned off.<br />
Condition<br />
Power off link: Y<strong>es</strong>, Stand-by power save: Y<strong>es</strong><br />
The equipment has “HDAVI Control 4 (with quick start mode)” connected with HDMI cable.<br />
When TV is turned off, all connected VIERA Link compatible equipment is moved to ECO standby mode*<br />
automatically under above conditions.<br />
* Minimum power consumption of standby condition for the equipment.<br />
Condition<br />
Auto power stand-by: Y<strong>es</strong>,<br />
The equipment has “HDAVI Control 2 or later” (for available equipment only) connected with HDMI cable.<br />
[ Exampl<strong>es</strong> of timing for operation ]<br />
• When the input is switched from HDMI.<br />
• When the "Speaker output" is changed from "Home theater" to "TV".<br />
The connected VIERA Link compatible equipment will be turned off automatically when not in use.<br />
“TV” is the default setting. To set the Home Theater system as default speakers, change the default speakers<br />
setting from “TV” to “Theater”. Sound will be output from the Home Theater whenever the TV is powered on.<br />
If the “ONE TOUCH PLAY” key is pr<strong>es</strong>sed on the remote control for <strong>Panasonic</strong> Home Theater system, the following<br />
sequence of operations is performed automatically.<br />
Home Theater power switch<strong>es</strong> On, and playback begins.<br />
TV power switch<strong>es</strong> On, and the playback screen is displayed.<br />
Audio is muted on the TV and switch<strong>es</strong> to the theater system.<br />
The following information about the TV settings can be transmitted to each piece of equipment (Recorder/Home<br />
theater/Player) that has “HDAVI Control 3 or later” function connected to a TV with HDMI cable.<br />
Transmittable data<br />
Recorder<br />
Home<br />
theater<br />
Player<br />
On Screen Display Language setting<br />
(English/Español/Français)<br />
○ ○ ○<br />
Panel Aspect Ratio<br />
(16:9 fixed)<br />
○ ○ ○<br />
Closed caption information<br />
(Mode/CC type/Digital setting)<br />
○ --- ---<br />
Channel information<br />
(Input signal/Channel list/Caption information)<br />
○ --- ---<br />
Note<br />
There is a possibility that all the GUI language information might be set from equipment that has HDMI CEC<br />
function connected to TV with HDMI cable. Depending on operating conditions or the specification for each piece<br />
of equipment the setting may or may not be applied.<br />
For more details on the external equipment’s operation, please refer to the operating manuals for the equipment.<br />
[For Recorder]<br />
You cannot operate other functions while transmitting TV’s information above except Power On/Off key operation.<br />
When you turn off this unit, the transmission will be interrupted (only when you are transmitting Channel information).<br />
VIERA Link TM “HDAVI Control TM ”<br />
Advanced<br />
Minimiz<strong>es</strong> lip-sync delays between the picture and audio when you connect to a <strong>Panasonic</strong> theater system or<br />
Amplifier.<br />
33
VIERA Link TM “HDAVI Control TM ”<br />
You can enjoy more convenient operation with the “HDAVI Control” function in the “VIERA Link”<br />
menu.<br />
For more details on the “HDAVI Control” function, refer to p. 30<br />
Display VIERA Link menu<br />
Speaker<br />
control<br />
or<br />
select<br />
next<br />
VIERA Link<br />
Select the item<br />
VIERA Link control<br />
Recorder<br />
Speaker output<br />
TV<br />
select<br />
Select<br />
■ Pr<strong>es</strong>s to exit from<br />
a menu screen<br />
VIERA Link control<br />
Home theater<br />
Speaker output<br />
TV<br />
Set<br />
change<br />
VIERA Link<br />
control<br />
only with the<br />
TV’s remote<br />
control<br />
(for “HDAVI<br />
Control 2 or<br />
later”)<br />
■ Pr<strong>es</strong>s to return<br />
to the previous<br />
screen<br />
34
(Continued)<br />
You can select Home theater or TV speakers for audio output.<br />
Control theater speakers with the TV’s remote control.<br />
This function is available only when <strong>Panasonic</strong> Amplifier or Player theater is connected.<br />
Select “Speaker output”<br />
Select “Home theater” or “TV”<br />
VIERA Link control<br />
Recorder<br />
Speaker output<br />
TV<br />
select<br />
change<br />
■Home theater: Adjustment for equipment<br />
Volume up / down<br />
Mute<br />
The sound of the TV is muted.<br />
When the equipment is turned off, the TV speakers<br />
take over.<br />
Selecting “Home theater” turns the equipment on<br />
automatically if it is in standby mode.<br />
■TV: The TV speakers are on.<br />
In the VIERA Link menu, you can select HDMI connected equipment and acc<strong>es</strong>s it quickly. Continue using your<br />
TV’s remote control to operate the equipment, pointing it at the TV.<br />
Select “VIERA Link control”<br />
Select the equipment you want to acc<strong>es</strong>s.<br />
(Recorder/Home theater/Player/Camcorder/LUMIX)<br />
VIERA Link control<br />
Recorder<br />
Speaker output<br />
TV<br />
select<br />
change<br />
You can select available items only.<br />
If there is more than one equipment item, a<br />
number after the name indicat<strong>es</strong> the number of<br />
items. (e.g. Recorder 1/Recorder 2/Recorder 3...)<br />
The number of equipment items that can be<br />
connected is three for recorders, and a total of<br />
three for Home theater/Player/Camcorder/LUMIX.<br />
Note<br />
There is a limit to the number of HDMI<br />
connectors.<br />
Operate the equipment with the TV’s remote control, pointing it at the TV.<br />
To operate the equipment, read the manual of the equipment.<br />
■ Available TV’s remote control buttons<br />
Whether an operation is available differs depending on the connected equipment.<br />
Move the cursor/Select<br />
Play<br />
VIERA Link TM “HDAVI Control TM ”<br />
Advanced<br />
SUB<br />
MENU<br />
Set/Acc<strong>es</strong>s<br />
Return to previous menu<br />
Display the functions<br />
menu on the equipment<br />
Available when the purpose of the keys is<br />
displayed on screen<br />
Exit<br />
Stop<br />
Reverse/Forward<br />
Skip Reverse/Forward<br />
Pause<br />
Closed Caption<br />
Channel Up/Down<br />
SAP (Select Audio Mode)<br />
- 0-9 Select digital subchannel<br />
35
Lock<br />
You can lock specified channels or shows to prevent children from watching objectionable content.<br />
Display menu<br />
Select “Lock”<br />
Menu<br />
VIERA Link<br />
Picture<br />
Audio<br />
Timer<br />
Lock<br />
SD card<br />
Closed Caption<br />
Setup<br />
next<br />
select<br />
You will be asked to enter your<br />
password each time you display<br />
the Lock menu.<br />
Input your 4-digit password<br />
A 4-digit code must be entered to view a blocked program or change rating settings.<br />
Password<br />
If it is your first time entering the<br />
Enter password.<br />
password, enter the password<br />
twice in order to register it.<br />
- - - -<br />
RETURN<br />
■ Pr<strong>es</strong>s to exit from<br />
a menu screen<br />
Caution<br />
Make a note of your<br />
password in case<br />
you forget it. (If you<br />
have forgotten your<br />
password, consult<br />
your local dealer.)<br />
Select the Lock mode<br />
Lock<br />
Mode<br />
Channel<br />
Game<br />
Program<br />
Change password<br />
Off<br />
Off<br />
Off<br />
Off<br />
Select the item<br />
Lock<br />
Mode<br />
Custom<br />
Channel<br />
Off<br />
Game<br />
Off<br />
Program<br />
Off<br />
Change password<br />
set<br />
select<br />
select<br />
Off:<br />
All:<br />
Unlocks all the lock<br />
settings of “Channel”,<br />
“Game” and “Program”.<br />
Locks all the inputs<br />
regardl<strong>es</strong>s of the lock<br />
settings of “Channel”,<br />
“Game” and “Program”.<br />
Custom: Locks specified inputs of<br />
“Channel”, ”Game” and<br />
“Program”.<br />
“Channel”, ”Game” and<br />
“Program” are not acc<strong>es</strong>sible<br />
unl<strong>es</strong>s “Custom” is selected in<br />
“Mode”.<br />
36<br />
Note<br />
When you select a<br />
locked channel,<br />
a m<strong>es</strong>sage will be<br />
displayed that allows<br />
you to view the<br />
channel if you input<br />
your password.<br />
Set<br />
set
■ To select the channel or the rating of the program to be locked<br />
Channel<br />
lock<br />
Select up to 7 (1-7) channels to be blocked. Th<strong>es</strong>e channels will be blocked regardl<strong>es</strong>s of the<br />
program rating.<br />
Select “Mode” and set to “Custom”<br />
Select channel to lock.<br />
Channel lock<br />
Mode<br />
Channel 1<br />
Channel 2<br />
Channel 3<br />
Channel 4<br />
Channel 5<br />
Custom<br />
3<br />
4<br />
-<br />
-<br />
-<br />
select<br />
set<br />
To lock/unlock all channels:<br />
Select “Mode” and set to “All” or “Off”.<br />
All: Locks all channels<br />
Off: Unlocks all channels<br />
Game lock<br />
Locks Channel 3, Channel 4 and external<br />
inputs.<br />
Select “Game” in 5 and set to “On”.<br />
select<br />
set<br />
On: Locks<br />
Off: Unlocks<br />
■ To set a rating level<br />
“V-chip” technology enabl<strong>es</strong> r<strong>es</strong>tricted shows<br />
to be locked according to TV ratings.<br />
Select “Mode” and set to “On”.<br />
Select the rating to be locked<br />
select<br />
Program<br />
lock<br />
Program lock<br />
Mode<br />
MPAA<br />
U.S.TV<br />
C.E.L.R.<br />
C.F.L.R.<br />
On<br />
Off<br />
Off<br />
Off<br />
Off<br />
set<br />
select<br />
Select the rating category you wish<br />
to follow<br />
next<br />
Program lock<br />
Mode<br />
MPAA<br />
U.S.TV<br />
C.E.L.R.<br />
C.F.L.R.<br />
On<br />
Off<br />
Off<br />
Off<br />
Off<br />
MPAA: U.S movie ratings<br />
U.S.TV: U.S TV program ratings<br />
C.E.L.R.:Canadian English ratings<br />
C.F.L.R.: Canadian French ratings<br />
select<br />
Example of “MPAA” (U.S movie ratings)<br />
NR No rating<br />
G General Audience: All ag<strong>es</strong> admitted<br />
PG Parental Guidance Sugg<strong>es</strong>ted<br />
PG- Parents Strongly Cautioned: Inappropriate<br />
13 for children under 13<br />
R<br />
R<strong>es</strong>tricted: Under 17 requir<strong>es</strong><br />
accompanying parent or adult guardian<br />
NC-<br />
17<br />
No one 17 and under admitted<br />
X Adults only<br />
To get more information (p. 44)<br />
Lock<br />
Advanced<br />
Change<br />
password<br />
■ To change the password<br />
In , select “Change password” and<br />
pr<strong>es</strong>s OK<br />
Input the new 4-digit password twice<br />
Lock<br />
Mode<br />
Channel<br />
Game<br />
Program<br />
Change password<br />
Off<br />
Off<br />
Off<br />
Off<br />
Change password<br />
Enter new password.<br />
- - - -<br />
RETURN<br />
Note<br />
This television is d<strong>es</strong>igned to support the “Downloadable U.S. Region Rating System” when available.<br />
(Available only in U.S.A.)<br />
The Off rating is independent of other ratings.<br />
When placing a lock on a specific-age-based-rating level, the Off rating and any other more r<strong>es</strong>trictive ratings will<br />
also be blocked.<br />
37
Editing and Setting Channels<br />
The current channel settings can be changed according to your needs and reception<br />
conditions.<br />
Display menu<br />
Auto<br />
program<br />
Set<br />
automatically<br />
Select “Setup”<br />
Menu<br />
VIERA Link<br />
Picture<br />
Audio<br />
Timer<br />
Lock<br />
SD card<br />
Closed Caption<br />
Setup<br />
next<br />
select<br />
Select “ANT/Cable setup”<br />
Setup 1/2<br />
next<br />
Channel surf mode<br />
All<br />
Language<br />
select<br />
Clock<br />
ANT/Cable setup<br />
Connected devic<strong>es</strong><br />
Anti image retention<br />
Manual<br />
program<br />
Set<br />
manually<br />
■ Pr<strong>es</strong>s to exit from<br />
a menu screen<br />
R<strong>es</strong>et to defaults<br />
Select the function<br />
ANT/Cable setup<br />
ANT in<br />
Auto program<br />
Manual program<br />
Signal meter<br />
Cable<br />
next<br />
select<br />
Set<br />
38<br />
■To r<strong>es</strong>et the settings of setup menu<br />
Select “R<strong>es</strong>et to defaults” in Setup menu ( ) and<br />
pr<strong>es</strong>s OK<br />
Input your 4-digit password with number buttons<br />
Select “YES” on the confirmation screen and pr<strong>es</strong>s OK<br />
Signal<br />
meter<br />
Check<br />
signal<br />
strength
Automatically search<strong>es</strong> and adds available channels to the memory.<br />
Select “ANT in”<br />
Select a scanning mode (p. 18)<br />
Select Cable or Antenna<br />
Auto program<br />
Or select “Not used” (p. 17).<br />
ok<br />
All channels<br />
Select “Auto program”<br />
Analog only<br />
ANT/Cable setup<br />
ANT in<br />
Auto program<br />
Manual program<br />
Signal meter<br />
S l<br />
Cable<br />
next<br />
select<br />
Digital only<br />
select<br />
Settings are made automatically<br />
After the scanning is completed, select “Apply”<br />
(see below ).<br />
All previously saved channels are erased.<br />
Use this procedure when changing the channel setup or<br />
changing the channel display.<br />
Also, use this to add or skip channels from the channel<br />
list manually.<br />
You can select a channel tuning mode (Digital only/<br />
Analog only) in “Channel surf mode”(p. 29)<br />
Select “Edit”<br />
Manual program<br />
Edit<br />
Apply<br />
Cancel<br />
Channel Caption Favorite Add<br />
... ...<br />
Y<strong>es</strong><br />
2<br />
... Y<strong>es</strong><br />
3 ...<br />
... Y<strong>es</strong><br />
4 ...<br />
... Y<strong>es</strong><br />
5 ...<br />
Select the item to be edited<br />
Manual program<br />
Edit<br />
Apply<br />
Cancel<br />
Channel Caption Favorite Add<br />
... ...<br />
Y<strong>es</strong><br />
2<br />
... Y<strong>es</strong><br />
3 ...<br />
... Y<strong>es</strong><br />
4 ...<br />
... Y<strong>es</strong><br />
5 ...<br />
...<br />
Favorite<br />
6 ... Y<strong>es</strong><br />
... Y<strong>es</strong><br />
7 ...<br />
...<br />
Caption<br />
8 ...<br />
Y<strong>es</strong><br />
... Y<strong>es</strong><br />
9 ...<br />
Select OK<br />
RETURN<br />
Add<br />
R Prev.page G Next page B Y<br />
Proceed to<br />
next page<br />
Go back to previous page<br />
select<br />
next<br />
select the item<br />
to edit (Caption/<br />
Favorite/Add)<br />
next<br />
• Caption:<br />
Chang<strong>es</strong> the station identifier<br />
• Favorite:<br />
Registers channel to Favorite<br />
List<br />
• Add:<br />
Adds or skips channels<br />
Edit<br />
Caption<br />
Edit CH caption<br />
Channel<br />
Caption<br />
Select<br />
OK<br />
RETURN<br />
80-101<br />
---<br />
R G B Y<br />
ABC → abc<br />
Delete<br />
Caption<br />
Select or edit the station identifier.<br />
(maximum 7 characters available)<br />
Favorite<br />
el<br />
Set favorite 1/3<br />
1 26-1<br />
2<br />
select<br />
change<br />
set/next<br />
select<br />
next<br />
Set favorite Select the number<br />
Add<br />
Pr<strong>es</strong>s OK to select “Y<strong>es</strong> (add)” or “No (skip)”<br />
Move cursor to channel number<br />
Manual program<br />
Edit<br />
Apply<br />
Cancel<br />
Channel Caption Favorite Add<br />
... ...<br />
Y<strong>es</strong><br />
2<br />
... Y<strong>es</strong><br />
3 ...<br />
program<br />
Select “Apply”<br />
Apply<br />
Cancel<br />
Caption Favorite Add<br />
... ...<br />
Y<strong>es</strong><br />
select<br />
or<br />
Pr<strong>es</strong>s OK to tune<br />
to the channel.<br />
select “Apply”<br />
ok<br />
Editing and Setting Channels<br />
Advanced<br />
To cancel the Edit<br />
Manual program<br />
Edit<br />
Apply<br />
Cancel<br />
Favorite Add<br />
Channel<br />
select<br />
Caption<br />
... ...<br />
Y<strong>es</strong><br />
2<br />
... Y<strong>es</strong><br />
3 ...<br />
next<br />
4 ...<br />
... Y<strong>es</strong><br />
... Y<strong>es</strong><br />
5 ...<br />
Chang<strong>es</strong> will be lost. Continue?<br />
Y<strong>es</strong> No<br />
ok<br />
(returns to “ANT/<br />
Cable setup”)<br />
select “Y<strong>es</strong>”<br />
Check the signal strength if an interference is found or freezing occurs on a digital image.<br />
Signal meter<br />
Channel<br />
Signal strength<br />
1-1<br />
Current 30%<br />
Peak level 45%<br />
or<br />
Signal intensity<br />
change<br />
channel<br />
ok<br />
If the signal is weak, check the antenna.<br />
If no problem is found, consult your local dealer.<br />
Note<br />
Not available if “Cable” is selected in “ANT in”<br />
(see above).<br />
Available only for digital antenna channels.<br />
If “Lock” (p. 36) is activated and “ANT/Cable setup” is selected, “Enter password.” will be displayed.<br />
39
Closed Caption<br />
Display menu<br />
■ Pr<strong>es</strong>s to exit from<br />
a menu screen<br />
Select “Closed Caption”<br />
Menu<br />
VIERA Link<br />
Picture<br />
Audio<br />
Timer<br />
Lock<br />
SD card<br />
Closed Caption<br />
Setup<br />
next<br />
select<br />
Closed Caption<br />
Display<br />
Closed<br />
Caption<br />
The television includ<strong>es</strong> a built-in decoder that is capable of providing a text display of the audio.<br />
The program being viewed must be transmitting Closed Caption (CC) information. (p. 45)<br />
■ Select the item and set<br />
Closed Caption<br />
select<br />
Mode Select “On” (when not using, select<br />
R<strong>es</strong>et to defaults<br />
“Off”).<br />
Mode<br />
Analog<br />
Digital<br />
Digital setting<br />
On<br />
CC1<br />
Primary<br />
The settings in “Analog” or “Digital”<br />
depend on the broadcaster.<br />
set<br />
Analog<br />
CC1-4:<br />
T1-4:<br />
(Choose the Closed Caption<br />
service of Analog broadcasting.)<br />
Information related to pictur<strong>es</strong><br />
(Appears at bottom of screen)<br />
Textual information<br />
(Appears over entire screen)<br />
Digital (The Digital Closed Caption<br />
menu lets you configure the way<br />
you choose to view the digital<br />
captioning.)<br />
Select the setting.<br />
“Primary”, “Second.”, “Service 3”, “Service<br />
4”, “Service 5”, “Service 6”<br />
■ To make more in-depth display settings in digital programs<br />
Select “Digital setting” and pr<strong>es</strong>s OK<br />
Select the item and set<br />
Digital setting<br />
Size<br />
Font<br />
Style<br />
Foreground<br />
Fore. opacity<br />
Background<br />
Back. opacity<br />
Outline<br />
Automatic<br />
Automatic<br />
Automatic<br />
Automatic<br />
Automatic<br />
Automatic<br />
Automatic<br />
Automatic<br />
select<br />
set<br />
■ To r<strong>es</strong>et the settings<br />
Select “R<strong>es</strong>et to defaults” and pr<strong>es</strong>s OK<br />
Size: Text size<br />
Font: Text font<br />
Style: Text style (Raised, Depr<strong>es</strong>sed, etc.)<br />
Foreground: Color of text<br />
Fore. opacity: Opacity of text<br />
Background: Color of text box<br />
Back. opacity: Opacity of text box<br />
Outline: Outline color of text<br />
(Identify the setting options on the screen.)<br />
40
Input Labels<br />
Display menu<br />
Select “Setup”<br />
Menu<br />
next<br />
VIERA Link<br />
Picture<br />
Audio<br />
Timer<br />
Lock<br />
SD card<br />
Closed Caption<br />
Setup<br />
select<br />
■ Pr<strong>es</strong>s to exit from<br />
a menu screen<br />
Input labels<br />
Display<br />
labels of<br />
Connected<br />
devic<strong>es</strong><br />
Devic<strong>es</strong> connected to external input terminals can be labeled for easier identification during<br />
input selection. (In selecting input mode from p. 24 )<br />
■ Select the terminal and label of the external equipment<br />
Input labels<br />
Component 1<br />
Component 2<br />
HDMI 1<br />
HDMI 2<br />
Video 1<br />
Video 2<br />
Label<br />
Video 1<br />
VCR<br />
[example]<br />
Select “Connected devic<strong>es</strong>”<br />
Setup 1/2<br />
Channel surf mode<br />
GAME<br />
Terminal<br />
Language<br />
All<br />
Clock<br />
ANT/Cable setup<br />
Connected devic<strong>es</strong><br />
Anti image retention<br />
Select “Input labels”<br />
Connected devic<strong>es</strong><br />
Input labels<br />
or<br />
select<br />
set<br />
Input labels<br />
Component 1<br />
Select<br />
next<br />
select<br />
next<br />
select<br />
OK<br />
RETURN<br />
G A A<br />
R G B Y<br />
ABC → abc<br />
Delete<br />
Switch<strong>es</strong> Input mode from alphabetical to numeric<br />
Terminals: Component 1-2/HDMI 1-2/Video 1-2<br />
Label: [BLANK] SKIP/VCR/DVD/CABLE/SATELLITE/DVR/GAME/<br />
AUX/RECEIVER/COMPUTER/Blu-ray/CAMERA/DVD REC/<br />
HOME THTR/MONITOR/MEDIA CTR/MEDIA EXT/OTHER<br />
* If “SKIP” is selected, the INPUT button pr<strong>es</strong>s will skip its input.<br />
Each selected label will be displayed on “Input select” screen.<br />
(p. 24)<br />
Input Labels<br />
Closed Caption<br />
Advanced<br />
41
Using Timer<br />
The TV can automatically turn On/Off at the d<strong>es</strong>ignated date and time.<br />
The Clock must be set before On time/Off time settings. (p. 17)<br />
The “Sleep” timer and “On / Off timer” will not work if the “Auto power on” (p. 28) is set.<br />
Display menu<br />
Select “Timer”<br />
Menu<br />
next<br />
42<br />
■ Pr<strong>es</strong>s to exit from<br />
a menu screen<br />
■ Pr<strong>es</strong>s to return<br />
to the previous<br />
screen<br />
Note<br />
The TV automatically<br />
turns Off after 90<br />
minut<strong>es</strong> when turned<br />
On by the Timer.<br />
This operation will be<br />
cancelled if the Off<br />
time is selected or if a<br />
key is pr<strong>es</strong>sed.<br />
VIERA Link<br />
Picture<br />
Audio<br />
Timer<br />
Lock<br />
SD card<br />
Closed Caption<br />
Select the timer to set<br />
Timer<br />
Sleep<br />
Timer 1<br />
Timer 2<br />
Timer 3<br />
Timer 4<br />
Timer 5<br />
Sleep<br />
Timer 1<br />
~<br />
Timer 5<br />
Set the timer<br />
■ To set “Sleep” (Off Timer)<br />
select<br />
select<br />
next<br />
Turns Off automatically<br />
Turns On/Off automatically<br />
(5 timers can be set.)<br />
Set to shut the unit off after a pre-selected amount of time.<br />
0/30/60/90 (minut<strong>es</strong>)<br />
Sleep<br />
Sleep (minut<strong>es</strong>)<br />
60<br />
set<br />
■ To set “Timer 1-5” (On/Off Timer)<br />
Select the item and set<br />
Timer 1<br />
Timer set<br />
Inputs<br />
Channel<br />
Day<br />
On time<br />
Off time<br />
On<br />
TV<br />
10-3<br />
7/6[FRI]<br />
1:15 AM<br />
12:45 AM<br />
Timer set<br />
Inputs<br />
Channel<br />
Day<br />
or<br />
select<br />
SUN/MON/TUE/WED/THU/FRI/SAT<br />
(displays the near<strong>es</strong>t future date)<br />
MON-FRI/SAT-SUN/DAILY/Every SUN/Every MON/<br />
Every TUE/Every WED/Every THU/Every FRI/ Every SAT<br />
On time<br />
Off time<br />
AM/PM<br />
set<br />
Clear<br />
Timer setting (On/Off)<br />
Select the inputs<br />
Select the channel<br />
Select the day<br />
The time to turn On<br />
The time to turn Off
Recommended AV Connections<br />
Th<strong>es</strong>e diagrams show our recommendations or how to connect the TV unit to your various equipment.<br />
For other connections, consult the instructions for each piece of equipment and its specifications.<br />
For additional assistance, please visit our website at: www.panasonic.com<br />
www.panasonic.ca<br />
Front of the TV<br />
Cable TV<br />
Back of the TV<br />
AC 120 V 60 Hz<br />
■ To watch camcorder<br />
imag<strong>es</strong><br />
Camcorder<br />
VCR<br />
DVD Player<br />
or<br />
Cable Box<br />
or<br />
or<br />
VI<strong>DE</strong>O<br />
AUDIO<br />
Y<br />
PB<br />
PR<br />
L<br />
HDMI 1 HDMI 2<br />
Y<br />
S VI<strong>DE</strong>O<br />
PB<br />
PR<br />
L L<br />
R<br />
R R<br />
COMPONENT VI<strong>DE</strong>O IN 1<br />
1 IN 2<br />
AC Cord<br />
(Connect after all the<br />
other connections are<br />
complete.)<br />
or<br />
Recommended AV Connections<br />
Using Timer<br />
Optical digital<br />
audio cable<br />
OPTICAL<br />
IN<br />
■ DVD Recorder /<br />
VCR<br />
Amplifier<br />
B<br />
HDMI-DVI<br />
Conversion<br />
cable +<br />
Audio cable*<br />
or<br />
Connect<br />
with<br />
A or B<br />
A<br />
HDMI<br />
cable<br />
Advanced<br />
■ To listen to the TV<br />
through speakers<br />
■ To watch DVDs<br />
DVD Player/Set<br />
Top Box<br />
■ To watch digital video image<br />
DVD Player or Set Top Box<br />
(HDMI compatible machin<strong>es</strong><br />
only)<br />
* Please see p. 26-27 for setup when using an external analog audio cable with an HDMI to DVI cable.<br />
43
Ratings List for Lock<br />
“V-chip” technology enabl<strong>es</strong> you to lock channels or shows according to standard ratings set by the<br />
entertainment industry. (p. 37)<br />
■ U.S. MOVIE RATINGS (MPAA)<br />
NR<br />
NO RATING (NOT RATED) AND NA (NOT APPLICABLE) PROGRAMS. Movie which has not been rated or<br />
where rating do<strong>es</strong> not apply.<br />
G GENERAL AUDIENCES. All ag<strong>es</strong> admitted.<br />
PG PARENTAL GUIDANCE SUGGESTED. Some material may not be suitable for children.<br />
PG-13 PARENTS STRONGLY CAUTIONED. Some material may be inappropriate for children under 13.<br />
R RESTRICTED. Under 17 requir<strong>es</strong> accompanying parent or adult guardian.<br />
NC-17 NO ONE 17 AND UN<strong>DE</strong>R ADMITTED.<br />
X ADULTS ONLY.<br />
■ U.S. TV PROGRAMS RATINGS (U. S. TV)<br />
Age-based Age-based Possible Content<br />
Group Ratings Selections<br />
D<strong>es</strong>cription<br />
NR<br />
TV-NR<br />
Viewable<br />
(Not Rated)<br />
Blocked<br />
Not Rated.<br />
TV-Y<br />
Viewable<br />
Blocked<br />
All children. The them<strong>es</strong> and elements in this program are specifically<br />
d<strong>es</strong>igned for a very young audience, including children from ag<strong>es</strong> 2-6.<br />
Youth<br />
FV Blocked<br />
TV-Y7<br />
Viewable<br />
Directed to older children. Them<strong>es</strong> and elements in this program may<br />
Blocked<br />
include mild physical or comedic violence, or may frighten children<br />
under the age of 7.<br />
TV-G<br />
Viewable<br />
Blocked<br />
General audience. It contains little or no violence, no strong language,<br />
and little or no sexual dialogue or situations.<br />
D,L,S,V (all selected) Parental guidance sugg<strong>es</strong>ted. The program may contain infrequent<br />
TV-PG • Any combination of coarse language, limited violence, some sugg<strong>es</strong>tive sexual dialogue<br />
D, L, S, V<br />
and situations.<br />
Guidance<br />
D,L,S,V (all selected)<br />
TV-14 • Any combination of<br />
Parents strongly cautioned. This program may contain sophisticated<br />
D, L, S, V<br />
them<strong>es</strong>, sexual content, strong language and more intense violence.<br />
L,S,V (all selected)<br />
TV-MA • Any combination of<br />
Mature audienc<strong>es</strong> only. This program may contain mature them<strong>es</strong>,<br />
L, S, V<br />
profane language, graphic violence, and explicit sexual content.<br />
FV: Fantasy/Cartoon Violence. V: Violence S: Sex L: Offensive Language D: Dialogue with sexual content.<br />
44<br />
■ CANADIAN ENGLISH RATINGS (C. E. L. R.)<br />
E<br />
Exempt - Exempt programming includ<strong>es</strong>: news, sports, documentari<strong>es</strong> and other information programming,<br />
talk shows, music videos, and variety programming.<br />
C Programming intended for children under age 8. No offensive language, nudity or sexual content.<br />
C8+<br />
Programming generally considered acceptable for children 8 years and over. No profanity, nudity or sexual<br />
content.<br />
G General programming, suitable for all audienc<strong>es</strong>.<br />
PG Parental Guidance sugg<strong>es</strong>ted. Some material may not be suitable for children.<br />
14+<br />
Programming contains them<strong>es</strong> or content which may not be suitable for viewers under the age of 14. Parents<br />
are strongly cautioned to exercise discretion in permitting viewing by pre-teens and early teens.<br />
18+ 18+ years old. Programming r<strong>es</strong>tricted to adults. Contains constant violence or scen<strong>es</strong> of extreme violence.<br />
■ CANADIAN FRENCH RATINGS (C. F. L. R.)<br />
E Exempt - Exempt programming.<br />
G<br />
General - Programming intended for audience of all ag<strong>es</strong>. Contains no violence, or the violence content is<br />
minimal or is depicted appropriately.<br />
8 ans+<br />
8+ General - Not recommended for young children. Programming intended for a broad audience but contains<br />
light or occasional violence. Adult supervision recommended.<br />
13 ans+<br />
Programming may not be suitable for children under the age of 13 - Contains either a few violent scen<strong>es</strong> or one<br />
or more sufficiently violent scen<strong>es</strong> to affect them. Adult supervision strongly sugg<strong>es</strong>ted.<br />
16 ans+<br />
Programming may not be suitable for children under the age of 16 - Contains frequent scen<strong>es</strong> of violence or<br />
intense violence.<br />
18 ans+ Programming r<strong>es</strong>tricted to adults. Contains constant violence or scen<strong>es</strong> of extreme violence.<br />
Caution<br />
The V-Chip system that is used in this set is capable of blocking “NR” programs (non rated, not applicable and<br />
none) as per FCC Rul<strong>es</strong> Section15.120(e)(2). If the option of blocking “NR” programs is chosen “unexpected and<br />
possibly confusing r<strong>es</strong>ults may occur, and you may not receive emergency bulletins or any of the following typ<strong>es</strong> of<br />
programming:”<br />
• Emergency Bulletins (Such as EAS m<strong>es</strong>sag<strong>es</strong>, weather warnings and others)<br />
• Locally originated programming • News • Political • Public Service Announcements • Religious • Sports • Weather
Technical Information<br />
Closed Caption (CC)<br />
For viewing the CC of digital broadcasting, set the aspect to FULL (If viewing with H-FILL, JUST, ZOOM or 4:3;<br />
characters might be cut off).<br />
The CC can be displayed on the TV if the receiver (such as a set-top box or satellite receiver) has the CC set On<br />
using the Component or HDMI connection to the TV.<br />
If the CC is set to On on both the receiver and TV when the signal is 480i (except for the HDMI connection), the CC<br />
may overlap on the TV.<br />
If a digital program is being output in analog format, the CC data will also be output in analog format.<br />
If the recorder or output monitor is connected to the TV, the CC needs to be set up on the recorder or output<br />
monitor.<br />
Aspect Ratio (FORMAT)<br />
Pr<strong>es</strong>s the FORMAT button to cycle through the aspect mod<strong>es</strong>. This lets you choose the aspect depending on the<br />
format of the received signal and your preference. (p. 20)<br />
(e.g.: in case of 4:3 image)<br />
FULL JUST<br />
FULL<br />
JUST<br />
Enlarg<strong>es</strong> the 4:3 image horizontally to the screen’s side edg<strong>es</strong>. Stretch<strong>es</strong> to justify the 4:3 image to the four corners of the<br />
(Recommended for anamorphic picture)<br />
screen.<br />
(Recommended for normal TV broadcast)<br />
H-FILL 4:3<br />
H-FILL<br />
Side bar<br />
Enlarg<strong>es</strong> the 4:3 image horizontally to the screen’s side edg<strong>es</strong>.<br />
The side edg<strong>es</strong> of the image are cut off.<br />
ZOOM<br />
ZOOM<br />
Enlarg<strong>es</strong> the 4:3 image to the entire screen.<br />
(Recommended for Letter Box)<br />
Standard<br />
(Note that “Image retention” of the side bar may occur from<br />
displaying it for a long time.)<br />
Note<br />
480i (4:3), 480i (16:9), 480p (4:3), 480p (16:9):<br />
FULL, JUST, 4:3 or ZOOM<br />
1080p / 1080i / 720p:<br />
FULL, H-FILL, JUST, 4:3 or ZOOM<br />
Zoom adjustments<br />
Vertical image position and size can be adjusted in “ZOOM”.<br />
Select “Zoom adjustments” on the “Picture” menu. (p. 26-27)<br />
V-position: Vertical position adjustment<br />
V-size: Vertical size adjustment<br />
Technical Information<br />
Ratings List for Lock<br />
FAQs, etc.<br />
To r<strong>es</strong>et the aspect ratio<br />
(OK)<br />
45
Technical Information<br />
Data format for SD Card browsing<br />
Photo:<br />
Still imag<strong>es</strong> recorded with digital still cameras compatible with JPEG fil<strong>es</strong> of DCF* and EXIF**<br />
standards<br />
Data format: Baseline JPEG (Sub-sampling: 4:4:4, 4:2:2 or 4:2:0)<br />
Max. number of fil<strong>es</strong>: 9,999<br />
Image r<strong>es</strong>olution: 160 x 120 to 10,000,000<br />
* DCF (D<strong>es</strong>ign rule for camera file system): A Japan Electronics and Information Technology Industri<strong>es</strong> Association’s standard<br />
** EXIF (Exchangeable Image File Format)<br />
Caution<br />
A JPEG image modified with a PC may not be displayed.<br />
Partly degraded fil<strong>es</strong> might be displayed at a reduced r<strong>es</strong>olution.<br />
Note<br />
Folder structure viewed in PC<br />
DCIM<br />
100_P ANA<br />
P1000001.JPG<br />
P1000002.JPG<br />
P1000003.JPG<br />
P1000004.JPG<br />
Created automatically<br />
3-digit folder number + 5-digit arbitrary characters<br />
4-digit arbitrary characters + 4-digit file number<br />
Usable characters: 1-byte “a to z”, “A to Z”, “0 to 9,” and “_”<br />
The folder and file nam<strong>es</strong> may be different depending on the digital camera used.<br />
For the suitable SD Memory Cards, please confirm the lat<strong>es</strong>t information on the following website.<br />
http://panasonic.jp/support/global/cs (This site is in English only)<br />
Cautions in handling SD Card:<br />
Do not remove the card while the unit is acc<strong>es</strong>sing data (this can damage card or unit).<br />
Do not touch the terminals on the back of the card.<br />
Do not subject the card to high pr<strong>es</strong>sure or impact.<br />
Insert the card in the correct direction (otherwise, card may be damaged).<br />
Electrical interference, static electricity or erroneous operation may damage the data or card.<br />
Back up the recorded data at regular intervals in case of deteriorated or damaged data or erratic operation of the unit.<br />
(<strong>Panasonic</strong> is not liable for any deterioration or damage of recorded data.)<br />
M<strong>es</strong>sage<br />
SD Card warning m<strong>es</strong>sag<strong>es</strong><br />
Meaning<br />
SD card slot is empty. The card is not inserted.<br />
No photos The card has no data or this type of data is not supported.<br />
Cannot read file<br />
The file is broken or unreadable.<br />
The TV do<strong>es</strong> not support the format.<br />
46
(Continued)<br />
VIERA Link TM “HDAVI Control TM ”<br />
HDMI connections to some <strong>Panasonic</strong> equipment allow you to interface automatically. (p. 30)<br />
This function may not work normally depending on the equipment condition.<br />
The equipment can be operated by other remote controls with this function on even if TV is in Standby mode.<br />
Image or sound may not be available for the first few seconds when the playback starts.<br />
Image or sound may not be available for the first few seconds when Input mode is switched.<br />
Volume function will be displayed when adjusting the volume of the equipment.<br />
If you connect the same kind of equipment at once (for example: one DIGA to HDMI 1 / another DIGA to HDMI 2), VIERA Link TM<br />
is available for the terminal with the smaller number.<br />
If you connect equipment that has “HDAVI Control 2 or later” function to the TV with HDMI cable, the sound from DIGITAL<br />
AUDIO OUT terminal can be output as multi channel surround.<br />
“HDAVI Control 4” is the new<strong>es</strong>t standard (current as of December, 2008) for the HDAVI Control compatible equipment.<br />
This standard is compatible with the conventional HDAVI equipment.<br />
HDMI connection<br />
HDMI (high-definition multimedia interface) allows you to enjoy high-definition digital imag<strong>es</strong> and high-quality sound by connecting<br />
the TV unit and the devic<strong>es</strong>.<br />
HDMI-compatible equipment (*1) with an HDMI or DVI output terminal, such as a set-top box or a DVD player, can be connected<br />
to the HDMI connector using an HDMI compliant (fully wired) cable.<br />
HDMI is the world’s first complete digital consumer AV interface complying with a non-compr<strong>es</strong>sion standard.<br />
If the external equipment has only a DVI output, connect to the HDMI terminal via a DVI to HDMI adapter cable (*2).<br />
When the DVI to HDMI adapter cable is used, connect the audio cable to the audio input terminal.<br />
Audio settings can be made on the “HDMI 1 in” or “HDMI 2 in” menu screen. (p. 26)<br />
Applicable audio signal sampling frequenci<strong>es</strong> (L.PCM): 48 kHz, 44.1 kHz, 32 kHz<br />
(*1): The HDMI logo is displayed on an HDMI-compliant device.<br />
(*2): Enquire at your local digital equipment retailer shop.<br />
Caution<br />
Use with a PC is not assumed.<br />
All signals are reformatted before being displayed on the screen.<br />
If the connected device has an aspect adjustment function, set the aspect ratio to “16:9”.<br />
Th<strong>es</strong>e HDMI connectors are “type A”.<br />
Th<strong>es</strong>e HDMI connectors are compatible with HDCP (High-Bandwidth Digital Content Protection) copyright protection.<br />
A device having no digital output terminal may be connected to the input terminal of either “COMPONENT”, “S VI<strong>DE</strong>O”, or<br />
“VI<strong>DE</strong>O” to receive analog signals.<br />
The HDMI input terminal can be used with only the following image signals: 480i, 480p, 720p, 1080i and 1080p.<br />
Match the output setting of the digital device.<br />
For details of the applicable HDMI signals, see p. 48.<br />
DIGITAL AUDIO OUT terminals<br />
You can enjoy your home theater by connecting a Dolby Digital (5.1 channel) decoder and “Multi Channel” amplifier to the<br />
DIGITAL AUDIO OUT terminals.<br />
Caution<br />
Depending on your DVD player and DVD-Audio software the copyright protection function may operate and disable optical output.<br />
When an ATSC channel is selected, the output from the DIGITAL AUDIO OUT jack will be Dolby Digital. When an NTSC<br />
channel is selected, the output will be PCM.<br />
Picture mode<br />
Vivid:<br />
Provid<strong>es</strong> enhanced picture contrast and sharpn<strong>es</strong>s for viewing in a well-lit room.<br />
Standard: Recommended for normal viewing conditions with subdued room lighting.<br />
Cinema: For watching movi<strong>es</strong> in a darkened room. It provid<strong>es</strong> a soft, film-like picture.<br />
Custom (Photo): Customiz<strong>es</strong> each item according to your taste.<br />
Photo is displayed in JPEG menu.<br />
Technical Information<br />
FAQs, etc.<br />
47
Technical Information (Continued)<br />
Aspect Ratio: 4:3<br />
Size 1 Size 2<br />
H size<br />
The width will be decreased on both sid<strong>es</strong> to<br />
reduce noise.<br />
Aspect Ratio: FULL/JUST(H-FILL/ZOOM)<br />
Size 1 Size 2 The width will be increased on both sid<strong>es</strong> to<br />
reduce noise.<br />
See pag<strong>es</strong> 26-27 for more information<br />
4:3 side bars<br />
Do not display a picture in 4:3 mode for an extended period, as this can cause<br />
“Image retention” to remain on either or both sid<strong>es</strong> of the display field.<br />
To reduce the risk of such “Image retention”, change the brightn<strong>es</strong>s of the side<br />
bars.<br />
See pag<strong>es</strong> 28-29 for more information<br />
The side bar may flash (alternate black/white) depending on the picture. Using<br />
Cinema mode will reduce such flashing (See below).<br />
Side Bar<br />
4:3<br />
Screen<br />
Display<br />
Image retention<br />
Scrolling bar<br />
Scrolling bar: To prevent “Image retention”, scrolls white vertical bar from left to right on a black<br />
screen.<br />
Pr<strong>es</strong>s any key except the POWER key to return to previous screen.<br />
You will return to the previous screen if no key operation has been performed for 15 minut<strong>es</strong>.<br />
See pag<strong>es</strong> 28-29 for more information<br />
[Scrolling bar]<br />
Input signals that can be displayed<br />
* Mark: Applicable input signal for Component (Y, PB, PR) and HDMI<br />
horizontal<br />
frequency (kHz)<br />
vertical<br />
frequency (Hz)<br />
COMPONENT<br />
HDMI<br />
525 (480) / 60i 15.73 59.94 * *<br />
525 (480) /60p 31.47 59.94 * *<br />
750 (720) /60p 45.00 59.94 * *<br />
1,125 (1,080) /60i 33.75 59.94 * *<br />
1,125 (1,080)/60p 67.43 59.94 *<br />
1,125 (1,080)/60p 67.50 60.00 *<br />
1,125(1,080)/24p 26.97 23.98 *<br />
1,125(1,080)/24p 27.00 24.00 *<br />
Note<br />
Signals other than those shown above may not be displayed properly.<br />
The above signals are reformatted for optimal viewing on your display.<br />
48
Care and Cleaning<br />
First, unplug the Power cord plug from the wall outlet.<br />
Display panel<br />
Wipe the panel surface gently using only a cleaning cloth or a soft, lint-free cloth.<br />
If the surface is particularly dirty, soak a soft, lint-free cloth in diluted mild liquid dish soap (1 part mild liquid dish soap diluted<br />
by 100 tim<strong>es</strong> the amount of water) and then wring the cloth to remove exc<strong>es</strong>s liquid. Use this cloth to wipe the surface of the<br />
display panel, then wipe it evenly with a dry cloth of the same type until the surface is dry.<br />
Do not scratch or hit the surface of the panel with fingernails or other hard objects. Furthermore, avoid contact with volatile<br />
substanc<strong>es</strong> such as insect sprays, solvents, and thinner; otherwise, the quality of the surface may be adversely affected.<br />
Cabinet<br />
If the cabinet becom<strong>es</strong> dirty, wipe it with a soft, dry cloth.<br />
If the cabinet is particularly dirty, soak the cloth in a weak mild liquid dish soap and then wring the cloth dry.<br />
Use this cloth to wipe the cabinet and then wipe it dry with a dry cloth.<br />
Do not allow any mild liquid dish soap to come into direct contact with the surface of the Plasma TV.<br />
If water droplets get inside the unit, operating problems may r<strong>es</strong>ult.<br />
Avoid contact with volatile substanc<strong>es</strong> such as insect sprays, solvents, and thinner; otherwise, the quality of the cabinet surface<br />
may be adversely affected or the coating may peel off. Furthermore, do not leave it for long periods in contact with articl<strong>es</strong> made<br />
from rubber or PVC.<br />
Ped<strong>es</strong>tal<br />
Cleaning<br />
Wipe the surfac<strong>es</strong> with a soft, dry cloth. If the unit is particularly dirty, clean it using a cloth soaked with water to<br />
which a small amount of mild liquid dish soap has been added and then wipe with a dry cloth.<br />
Do not use products such as solvents, thinner, or household wax for cleaning, as they can damage the surface<br />
coating. (If using a chemically-treated cloth, follow the instructions supplied with the cloth.)<br />
Do not attach sticky tape or labels, as they can make the surface of the ped<strong>es</strong>tal dirty. Do not allow long-term<br />
contact with rubber, vinyl products, or the like. (Doing so will cause deterioration.)<br />
Care and Cleaning<br />
Technical Information<br />
FAQs, etc.<br />
49
FAQ<br />
Before requ<strong>es</strong>ting service or assistance, please follow th<strong>es</strong>e simple guid<strong>es</strong> to r<strong>es</strong>olve the problem.<br />
If the problem still persists, please contact your local <strong>Panasonic</strong> dealer or <strong>Panasonic</strong> Service Center for assistance.<br />
For details (p. 54, 55)<br />
For additional assistance, please contact us via the website at:<br />
www.panasonic.com/contactinfo<br />
www.panasonic.ca<br />
White spots or<br />
shadow imag<strong>es</strong><br />
(noise)<br />
50<br />
Check the position, direction,<br />
and connection of the antenna.<br />
Interference or<br />
frozen digital<br />
channels<br />
(intermittent sound)<br />
Change the direction of antenna<br />
for digital channels.<br />
Check “Signal meter” (p. 39).<br />
If the signal is weak, check the<br />
antenna and consult your local<br />
dealer.<br />
The remote control<br />
do<strong>es</strong> not work<br />
Are the batteri<strong>es</strong> installed correctly?<br />
(p. 8)<br />
Are the batteri<strong>es</strong> new?<br />
Pictur<strong>es</strong> from external<br />
equipment are distorted<br />
when the unit is<br />
connected via HDMI<br />
Is the HDMI cable connected properly?<br />
(p. 31, 43)<br />
Turn Off the TV unit and equipment, then<br />
turn them On again.<br />
Check an input signal from the equipment. (p. 48)<br />
Use equipment compliant with<br />
EIA/CEA-861/861B.<br />
When the channel is changed on<br />
an STB that is connected with<br />
HDMI, "HDMI" may be displayed<br />
on the top left of the screen<br />
This is not a malfunction.<br />
Recording do<strong>es</strong> not<br />
start immediately<br />
Check the settings of the recorder. For<br />
details, read the manual of the recorder.
If there is a problem with your TV, please refer to the table below to determine the symptoms, then carry out the<br />
sugg<strong>es</strong>ted check. If this do<strong>es</strong> not solve the problem, please contact your local <strong>Panasonic</strong> dealer, quoting the model<br />
number and serial number (both found on the rear of the TV).<br />
Problem<br />
“Pr<strong>es</strong>s any button to<br />
return” mov<strong>es</strong> on the<br />
screen<br />
Some spots remain<br />
bright or dark<br />
Actions<br />
The function to prevent “Image retention” is activated.<br />
(Not a faulty symptom)<br />
• The screen saver is activated if the TV unit is not operated for<br />
a certain time in SD mode.<br />
• “Image retention” (p. 7)<br />
The Plasma panel is made up of a few million pixels and<br />
is produced with advanced technology through an intricate<br />
proc<strong>es</strong>s. Sometim<strong>es</strong> a few pixels may be bright or dark.<br />
Th<strong>es</strong>e pixels do not indicate a defective panel and will<br />
have no impact on the performance of the TV.<br />
Screen<br />
Chaotic image, noisy<br />
No image can be<br />
displayed<br />
Check nearby electrical products<br />
(car or motorcycle ignition systems, fluor<strong>es</strong>cent lamp, etc.)<br />
Check Picture menu (p. 26)<br />
Check the cable connections. (p. 11-14)<br />
Check that the correct input has been selected. (p. 24)<br />
Only spots are displayed<br />
instead of imag<strong>es</strong><br />
Neither image nor<br />
sound is produced<br />
Check the channel settings. (p. 38)<br />
Check the antenna cabl<strong>es</strong>.<br />
Is the AC power cord plugged into the outlet?<br />
Is the TV unit turned On?<br />
Check Picture menu (p. 26) and volume.<br />
Check the AV cable connections. (p. 11-14)<br />
Check that the correct input has been selected. (p. 24)<br />
Sound<br />
Black Box appears Change settings of Closed Caption (CC). (p. 40)<br />
No sound is produced<br />
Sound is unusual<br />
Are the speakers’ cabl<strong>es</strong> connected correctly? (p. 43)<br />
Is “Sound Mute” active? (p. 15)<br />
Is the volume set to the minimum?<br />
Is “TV speakers” set to “Off”? (p. 26)<br />
Change “SAP” settings. (p. 19)<br />
Check “HDMI 1 in” or “HDMI 2 in” settings. (p. 26)<br />
Set “SAP” setting to “Stereo” or “Mono”.<br />
Check the HDMI device connected to the unit.<br />
Set the audio setting of the HDMI device to “Linear PCM”.<br />
If digital sound connection has a problem,<br />
select analog sound connection.<br />
Frequently Asked Qu<strong>es</strong>tions<br />
Unknown sound heard<br />
1- Sounds from TV<br />
cabinet<br />
2- Whirring sound<br />
3- Tick/Click sound<br />
4- Buzzing sound<br />
1- Chang<strong>es</strong> in the temperature and humidity of the room may cause<br />
the TV’s cabinet to expand or contract and produce metallic<br />
sounds. This is not a sign of faulty operation or a malfunction.<br />
2- The TV may have a cooling fan that mak<strong>es</strong> a soft whir.<br />
This is not a sign of faulty operation or a malfunction.<br />
3- When the TV is powered on, an electrical component in the TV activat<strong>es</strong><br />
producing a tick/click sound. This is not a sign of faulty operation or a malfunction.<br />
4- Electrical circuits are active while the TV set is on.<br />
This is not a sign of faulty operation or a malfunction.<br />
FAQs, etc.<br />
51
Specifications<br />
Power Source<br />
AC 120 V, 60 Hz<br />
<strong>TC</strong>-<strong>P42C1</strong><br />
<strong>TC</strong>-P50C1<br />
Power<br />
Consumption<br />
Plasma Display<br />
panel<br />
Maximum 283 W 387 W<br />
Standby condition 0.3 W 0.3 W<br />
Drive method<br />
AC type<br />
Aspect Ratio 16:9<br />
Visible screen size<br />
(W × H × Diagonal)<br />
(No. of pixels)<br />
42 ” class (41.6 inch<strong>es</strong> measured diagonally) 50 ” class (49.9 inch<strong>es</strong> measured diagonally)<br />
36.2 ” × 20.4 ” × 41.6 ”<br />
(921 mm × 518 mm × 1,057 mm)<br />
786,432 (1,024 (W) × 768 (H))<br />
[3,072 × 768 dots]<br />
43.5 ” × 24.4 ” × 49.9 ”<br />
(1,106 mm × 622 mm × 1,269 mm)<br />
1,049,088 (1,366 (W) × 768 (H))<br />
[4,098 × 768 dots]<br />
Sound<br />
Audio Output 20 W [ 10 W + 10 W ] ( 10 % THD )<br />
Channel Capability<br />
(Digital/Analog)<br />
Operating Conditions<br />
Connection Terminals<br />
VI<strong>DE</strong>O IN 1<br />
VI<strong>DE</strong>O IN 2<br />
COMPONENT IN 1-2<br />
VHF/ UHF: 2 - 69, CATV: 1 - 135<br />
Temperature:<br />
Humidity:<br />
32 °F – 104 °F (0 °C – 40 °C)<br />
20 % – 80 % RH (non-condensing)<br />
VI<strong>DE</strong>O: RCA PIN Type × 1 1.0 V [p-p] (75 Ω)<br />
S-VI<strong>DE</strong>O: Mini DIN 4-pin Y: 1.0 V [p-p] (75 Ω) C: 0.286 V [p-p] (75 Ω)<br />
AUDIO L-R: RCA PIN Type × 2 0.5 V [rms]<br />
VI<strong>DE</strong>O: RCA PIN Type × 1 1.0 V [p-p] (75 Ω)<br />
AUDIO L-R: RCA PIN Type × 2 0.5 V [rms]<br />
Y: 1.0 V [p-p] (including synchronization)<br />
PB, PR: ±0.35 V [p-p]<br />
AUDIO L-R: RCA PIN Type × 2 0.5 V [rms]<br />
HDMI 1-2<br />
TYPE A Connector × 2<br />
• This TV supports “HDAVI Control 4” function.<br />
Card slot SD CARD slot × 1<br />
DIGITAL AUDIO OUT PCM / Dolby Digital, Fiber Optic<br />
FEATURES<br />
Dimensions<br />
( W × H × D ) Mass<br />
Including ped<strong>es</strong>tal<br />
TV Set only<br />
3D Y/C FILTER<br />
CLOSED CAPTION V-Chip<br />
Photo Viewer HDAVI Control 4<br />
40.6 ” × 28.0 ” × 12.9 ”<br />
(1,029 mm × 709 mm × 327 mm)<br />
40.6 ” × 26.1 ” × 3.8 ” (4.2 ”)<br />
(1,029 mm × 661 mm × 94 mm (106 mm))<br />
48.0 ” × 32.4 ” × 15.3 ”<br />
(1,218 mm × 822 mm × 387 mm)<br />
Including ped<strong>es</strong>tal 61.8 lb. (28.0 ) 79.4 lb. (36.0 )<br />
TV Set only 57.4 lb. (26.0 ) 75.0 lb. (34.0 )<br />
48.0 ” × 30.3 ” × 3.8 ” (4.2 ”)<br />
(1,218 mm × 769 mm × 94 mm (106 mm))<br />
[<strong>TC</strong>-<strong>P42C1</strong>]<br />
40.6 ” (1,029 mm)<br />
28.0 ” (709 mm)<br />
26.1 ” (661 mm)<br />
4.2 ” (106 mm)<br />
3.8 ”<br />
(94 mm)<br />
[<strong>TC</strong>-P50C1]<br />
32.4 ” (822 mm)<br />
30.3 ” (769 mm)<br />
48.0 ” (1,218 mm)<br />
4.2 ” (106 mm)<br />
3.8 ”<br />
(94 mm)<br />
52<br />
Note<br />
18.0 ”<br />
(456 mm)<br />
12.9 ” (327 mm)<br />
18.0 ”<br />
(456 mm)<br />
15.3 ” (387 mm)<br />
D<strong>es</strong>ign and Specifications are subject to change without notice. Mass and Dimensions shown are approximate.
Limited Warranty (for U.S.A. and Puerto Rico only)<br />
PANASONIC CONSUMER ELECTRONICS COMPANY,<br />
DIVISION OF<br />
PANASONIC CORPORATION OF NORTH AMERICA<br />
One <strong>Panasonic</strong> Way<br />
Secaucus, New Jersey 07094<br />
<strong>Panasonic</strong> Plasma Television<br />
Limited Warranty<br />
Limited Warranty Coverage<br />
If your product do<strong>es</strong> not work properly because of a defect in materials or workmanship, <strong>Panasonic</strong> Consumer<br />
Electronics Company (referred to as “the warrantor”) will, for the length of the period indicated on the chart below,<br />
which starts with the date of original purchase (“Limited Warranty period”), at its option either (a) repair your product<br />
with new or refurbished parts, or (b) replace it with a new or a refurbished product. The decision to repair or replace<br />
will be made by the warrantor.<br />
PLASMA TV CATEGORIES PARTS LABOR SERVICE<br />
Up to 37’ (diagonal)<br />
Carry-In<br />
1 (ONE) YEAR 1 (ONE) YEAR<br />
42” (diagonal) and larger On-Site<br />
During the “Labor” Limited Warranty period there will be no charge for labor. During the “Parts” Limited Warranty<br />
period, there will be no charge for parts.<br />
You must carry-in your product or arrange for on-site service during the Limited Warranty period. If non-rechargeable<br />
batteri<strong>es</strong> are included, they are not warranted. This Limited Warranty only appli<strong>es</strong> to products purchased and<br />
serviced in the United Stat<strong>es</strong> or Puerto Rico. This Limited Warranty is extended only to the original purchaser and<br />
only covers product purchased as new. A purchase receipt or other proof of the original purchase date is required for<br />
Limited Warranty service.<br />
On-Site or Carry-in Service<br />
For On-Site or Carry-In Service in the United Stat<strong>es</strong> and Puerto Rico call 1-877-95-VIERA (1-877-958-4372).<br />
On-site service where applicable requir<strong>es</strong> clear, complete and easy acc<strong>es</strong>s to the product by the authorized servicer<br />
and do<strong>es</strong> not include removal or re-installation of an installed product. It is possible that certain on-site repairs will not<br />
be completed on-site, but will require that the product or parts of the product, at the servicer’s discretion be removed<br />
for shop diagnosis and/or repair and then returned.<br />
Limited Warranty Limits And Exclusions<br />
This Limited Warranty ONLY COVERS failur<strong>es</strong> due to defects in materials or workmanship, and DOES NOT COVER<br />
normal wear and tear or cosmetic damage, nor do<strong>es</strong> it cover markings or retained imag<strong>es</strong> on the glass panel<br />
r<strong>es</strong>ulting from viewing fixed imag<strong>es</strong> (including, among other things, non-expanded standard 4:3 pictur<strong>es</strong> on wide<br />
screen TV’s, or onscreen data in a stationary and fixed location). The Limited Warranty ALSO DOES NOT COVER<br />
damag<strong>es</strong> which occurred in shipment, or failur<strong>es</strong> which are caused by products not supplied by the warrantor, or<br />
failur<strong>es</strong> which r<strong>es</strong>ult from accidents, misuse, abuse, neglect, bug inf<strong>es</strong>tation, mishandling, misapplication, alteration,<br />
faulty installation, set-up adjustments, misadjustment of consumer controls, improper maintenance, power line surge,<br />
lightning damage, modification, or commercial use (such as in a hotel, office, r<strong>es</strong>taurant, or other busin<strong>es</strong>s), rental<br />
use of the product, service by anyone other than a Factory Service Center or other Authorized Servicer, or damage<br />
that is attributable to acts of God.<br />
THERE ARE NO EXPRESS WARRANTIES EXCEPT AS LISTED UN<strong>DE</strong>R “LIMITED WARRANTY COVERAGE”.<br />
THE WARRANTOR IS NOT LIABLE FOR INCI<strong>DE</strong>NTAL OR CONSEQUENTIAL DAMAGES RESULTING FROM<br />
THE USE OF THIS PRODUCT, OR ARISING OUT OF ANY BREACH OF THIS LIMITED WARRANTY. (As<br />
exampl<strong>es</strong>, this exclud<strong>es</strong> damag<strong>es</strong> for lost time, cost of having someone remove or re-install an installed unit if<br />
applicable, or travel to and from the servicer. The items listed are not exclusive, but are for illustration only.) ALL<br />
EXPRESS AND IMPLIED WARRANTIES, INCLUDING THE LIMITED WARRANTY OF MERCHANTABILITY, ARE<br />
LIMITED TO THE PERIOD OF THE LIMITED WARRANTY.<br />
Some stat<strong>es</strong> do not allow the exclusion or limitation of incidental or consequential damag<strong>es</strong>, or limitations on how<br />
long an implied Limited Warranty lasts, so the exclusions may not apply to you.<br />
This Limited Warranty giv<strong>es</strong> you specific legal rights and you may also have others rights which vary from state<br />
to state. If a problem with this product develops during or after the Limited Warranty period, you may contact your<br />
dealer or Service Center. If the problem is not handled to your satisfaction, then write to the warrantor’s Consumer<br />
Affairs Department at the addr<strong>es</strong>s<strong>es</strong> listed for the warrantor.<br />
PARTS AND SERVICE (INCLUDING COST OF AN ON-SITE SERVICE CALL, WHERE APPLICABLE) WHICH<br />
ARE NOT COVERED BY THIS LIMITED WARRANTY ARE YOUR RESPONSIBILITY.<br />
Limited Warranty (for U.S.A. and Puerto Rico only)<br />
Specifications<br />
FAQs, etc.<br />
53
Customer Servic<strong>es</strong> Directory (for U.S.A. and Puerto Rico)<br />
Customer Servic<strong>es</strong> Directory (United Stat<strong>es</strong> and Puerto Rico)<br />
Obtain Product Information and Operating Assistance; locate your near<strong>es</strong>t Dealer or Service Center;<br />
purchase Parts and Acc<strong>es</strong>sori<strong>es</strong>; or make Customer Service and Literature requ<strong>es</strong>ts by visiting our Web<br />
Site at:<br />
http://www.panasonic.com/help<br />
or, contact us via the web at:<br />
http://www.panasonic.com/contactinfo<br />
You may also contact us directly at:<br />
1-877-95-VIERA (958-4372)<br />
Monday-Friday 9 am-9 pm; Saturday-Sunday 10 am-7 pm, EST.<br />
■For hearing or speech impaired TTY users, TTY: 1-877-833-8855<br />
Acc<strong>es</strong>sory Purchas<strong>es</strong> (United Stat<strong>es</strong> and Puerto Rico)<br />
Purchase Parts, Acc<strong>es</strong>sori<strong>es</strong> and Instruction Books on line for all <strong>Panasonic</strong> Products by visiting our Web<br />
Site at:<br />
http://www.pstc.panasonic.com<br />
or, send your requ<strong>es</strong>t by E-mail to:<br />
npcparts@us.panasonic.com<br />
You may also contact us directly at:<br />
1-800-332-5368 (Phone) 1-800-237-9080 (Fax Only) (Monday - Friday 9 am to 9 pm, EST.)<br />
<strong>Panasonic</strong> Service and Technology Company<br />
20421 84th Avenue South,<br />
Kent, WA 98032<br />
(We Accept Visa, MasterCard, Discover Card, American Expr<strong>es</strong>s, and Personal Checks)<br />
■For hearing or speech impaired TTY users, TTY: 1-866-605-1277<br />
54
Limited Warranty (for Canada)<br />
<strong>Panasonic</strong> Canada Inc.<br />
PANASONIC PRODUCT - LIMITED WARRANTY<br />
<strong>Panasonic</strong> Canada Inc. warrants this product to be free from defects in material and workmanship and agre<strong>es</strong> to<br />
remedy any such defect for a period as stated below from the date of original purchase.<br />
Viera TV (42” & over) In-home service One (1) year, parts (including panel) and labour.<br />
Viera TV (under 42”) Carry-in service One (1) year, parts (including panel) and labour.<br />
In-home Service will be carried out only to locations acc<strong>es</strong>sible by roads and within 50 km of an authorized<br />
<strong>Panasonic</strong> service facility.<br />
LIMITATIONS AND EXCLUSIONS<br />
This warranty do<strong>es</strong> not apply to products purchased outside Canada or to any product which has been improperly<br />
installed, subjected to usage for which the product was not d<strong>es</strong>igned, misused or abused, damaged during shipping,<br />
or which has been altered or repaired in any way that affects the reliability or detracts from the performance, nor<br />
do<strong>es</strong> it cover any product which is used commercially. Dry cell batteri<strong>es</strong> are also excluded from coverage under this<br />
warranty.<br />
This warranty is extended to the original end user purchaser only. A purchase receipt or other proof of date of original<br />
purchase is required before warranty service is performed.<br />
THIS EXPRESS, LIMITED WARRANTY IS IN LIEU OF ALL OTHER WARRANTIES, EXPRESS OR IMPLIED,<br />
INCLUDING ANY IMPLIED WARRANTIES OF MERCHANTABILITY AND FITNESS FOR A PARTICULAR PURPOSE.<br />
IN NO EVENT WILL PANASONIC CANADA INC. BE LIABLE FOR ANY SPECIAL, INDIRECT OR CONSEQUENTIAL<br />
DAMAGES.<br />
In certain instanc<strong>es</strong>, some jurisdictions do not allow the exclusion or limitation of incidental or consequential<br />
damag<strong>es</strong>, or the exclusion of implied warranti<strong>es</strong>, so the above limitations and exclusions may not be applicable.<br />
In-home service requir<strong>es</strong> clear, complete and easy acc<strong>es</strong>s to the product by the Authorized Servicentre and do<strong>es</strong> not<br />
include removal or re-installation of an installed product. If removal is required to service the product, it will be at the<br />
discretion of the Servicentre and in no event will <strong>Panasonic</strong> Canada Inc. or the Servicentre be liable for any special,<br />
indirect or consequential damag<strong>es</strong>.<br />
WARRANTY SERVICE<br />
For product operation and information assistance, please contact:<br />
Our Customer Care Centre: 1-800 #: 1-866-330-0014<br />
Email link: www.vieraconcierge.ca<br />
FOR PRODUCT REPAIRS, please contact Viera Customer Care Agent using the above contact info.<br />
IF YOU SHIP THE PRODUCT TO A SERVICENTRE<br />
Carefully pack and send prepaid, adequately insured and preferably in the original carton.<br />
Include details of the defect claimed, and proof of date of original purchase.<br />
Limited Warranty (for Canada)<br />
Customer Servic<strong>es</strong> Directory (for U.S.A. and Puerto Rico)<br />
FAQs, etc.<br />
55
Note
Note
Note
Note
Customer’s Record<br />
The model number and serial number of this product can be found on its back cover. You should note this serial number in<br />
the space provided below and retain this book, plus your purchase receipt, as a permanent record of your purchase to aid<br />
in identification in the event of theft or loss, and for Warranty Service purpos<strong>es</strong>.<br />
Model Number<br />
Serial Number<br />
Anotación del cliente<br />
El modelo y el número de serie de <strong>es</strong>te producto se encuentran en su panel posterior. Deberá anotarlos en el <strong>es</strong>pacio<br />
provisto a continuación y guardar <strong>es</strong>te manual, más el recibo de su compra, como prueba permanente de su adquisición,<br />
para que le sirva de ayuda al identificarlo en el caso de que le sea sustraído o lo pierda, y también para disponer de los<br />
servicios que le ofrece la garantía.<br />
Modelo<br />
Número de serie<br />
<strong>Panasonic</strong> Consumer Electronics Company,<br />
Division of <strong>Panasonic</strong> Corporation of North America<br />
One <strong>Panasonic</strong> Way, Secaucus<br />
New Jersey 07094 U.S.A.<br />
<strong>Panasonic</strong> Canada Inc.<br />
5770 Ambler Drive<br />
Mississauga, Ontario<br />
L4W 2T3 CANADA<br />
© 2009 <strong>Panasonic</strong> Corporation of North America. All Rights R<strong>es</strong>erved.<br />
© 2009 <strong>Panasonic</strong> Corporation of North America. Todos los Derechos R<strong>es</strong>ervados. Printed in U.S.A.<br />
Impr<strong>es</strong>o en EE.UU.
Instruccion<strong>es</strong> en Español<br />
Televisión de alta definición de<br />
720p y clase 42”/50” de Plasma<br />
Número de modelo<br />
<strong>TC</strong>-<strong>P42C1</strong><br />
<strong>TC</strong>-P50C1
¡Convierta su propia sala de <strong>es</strong>tar en un cine!<br />
Sienta un nivel increíble de excitación multimedia<br />
HDMI, el símbolo HDMI y la Interface de<br />
Multimedios de Alta Definición son<br />
marcas comercial<strong>es</strong><br />
ó marcas registradas de HDMI<br />
Licensing LLC.<br />
VIERA Link <strong>es</strong> una marca de fábrica<br />
de <strong>Panasonic</strong> Corporation.<br />
El logotipo SDHC <strong>es</strong> una marca<br />
comercial.<br />
2<br />
HDAVI Control TM <strong>es</strong> una marca de<br />
fábrica de <strong>Panasonic</strong> Corporation.<br />
Fabricado bajo licencia de Dolby Laboratori<strong>es</strong>.<br />
DOLBY y el símbolo de la D doble son marcas<br />
comercial<strong>es</strong> de Dolby Laboratori<strong>es</strong>.
Disfrute de multimedia<br />
Índice<br />
Asegúr<strong>es</strong>e de leer<br />
Precaucion<strong>es</strong> para su seguridad ················· 4<br />
Notas ···························································· 7<br />
Tarjeta de<br />
memoria SD<br />
Cámara de vídeo<br />
Videograbadora Receptor digital<br />
Amplificador<br />
multimedia Reproductor DVD/<br />
Unidad de cine<br />
Blu-ray Disc<br />
para casa<br />
Grabadora DVD/<br />
Blu-ray Disc<br />
Guía de inicio rápido<br />
Acc<strong>es</strong>orios/Acc<strong>es</strong>orio opcional ········ 8<br />
Conexión básica ·····························11<br />
Identificación de los control<strong>es</strong> ······· 15<br />
Configuración por primera vez ······ 16<br />
¡Disfrute de su televisor!<br />
Características básicas<br />
Para ver la televisión·································· 19<br />
Utilización de VIERA TOOLS ····················· 21<br />
Para ver imágen<strong>es</strong> de tarjeta SD ··············· 22<br />
Para ver vídeo y DVDs ······························ 24<br />
Funcion<strong>es</strong> avanzadas<br />
Cómo utilizar las funcion<strong>es</strong> de los menús<br />
(imagen, sonido, etc.) ································ 26<br />
VIERA Link TM “HDAVI Control TM ” ················ 30<br />
Bloqueo ······················································ 36<br />
Edición y configuración de canal<strong>es</strong>············ 38<br />
CC/Subtítulos ············································· 40<br />
Títulos de entradas ···································· 41<br />
Utilización del temporizador ······················· 42<br />
Conexion<strong>es</strong> AV recomendadas ·················· 43<br />
Guía de inicio<br />
rápido<br />
Visión<br />
Funcion<strong>es</strong><br />
avanzadas<br />
Este producto cumple con los requisitos de ENERGY<br />
STAR cuando se emplea la configuración “Uso en<br />
Hogar”, una configuración con la que se logra ahorrar<br />
energía. Cualquier modificación en la configuración<br />
“Uso en Hogar” ó en cualquier otra configuración<br />
predeterminada en fábrica podría r<strong>es</strong>ultar en un<br />
consumo de energía superior a los nivel<strong>es</strong> que<br />
cumplen con los requisitos de ENERGY STAR.<br />
Preguntas frecuent<strong>es</strong>, etc.<br />
Lista de clasificacion<strong>es</strong> para el bloqueo ···· 44<br />
Información técnica ···································· 45<br />
Cuidados y limpieza ··································· 49<br />
Preguntas frecuent<strong>es</strong> ································· 50<br />
Especificacion<strong>es</strong> ········································ 52<br />
Preguntas<br />
frecuent<strong>es</strong>, etc.<br />
3
Precaucion<strong>es</strong> para su seguridad<br />
ADVERTENCIA<br />
RIESGO <strong>DE</strong> <strong>DE</strong>SCARGA<br />
ELÉCTRICA NO ABRIR<br />
ADVERTENCIA: Para reducir el ri<strong>es</strong>go de sufrir una d<strong>es</strong>carga eléctrica, no retire la<br />
cubierta ni el panel posterior. En el interior no hay piezas que deba reparar el usuario.<br />
Solicite las reparacion<strong>es</strong> al personal de servicio calificado.<br />
ADVERTENCIA: Para reducir el ri<strong>es</strong>go de que se produzca un incendio ó de sufrir una d<strong>es</strong>carga eléctrica, no exponga<br />
<strong>es</strong>te aparato a la lluvia ni a la humedad. No ponga encima del aparato (incluyendo <strong>es</strong>tanterías que se<br />
encuentren encima del mismo, etc.) recipient<strong>es</strong> con agua (floreros, tazas, cosméticos, etc.).<br />
1) Lea <strong>es</strong>tas instruccion<strong>es</strong>.<br />
2) Guarde <strong>es</strong>tas instruccion<strong>es</strong>.<br />
3) Cumpla con todas las advertencias.<br />
4) Siga todas las instruccion<strong>es</strong>.<br />
5) No utilice <strong>es</strong>te aparato cerca del agua.<br />
6) Limpie el aparato solamente con un paño seco.<br />
7) No tape las aberturas de ventilación. Haga la instalación<br />
siguiendo las instruccion<strong>es</strong> del fabricante.<br />
8) No instale el aparato cerca de fuent<strong>es</strong> de calor como, por<br />
ejemplo, radiador<strong>es</strong>, salidas de aire caliente, <strong>es</strong>tufas y otros<br />
aparatos (incluyendo amplificador<strong>es</strong>) que produzcan calor.<br />
9) No anule la característica de seguridad del enchufe polarizado<br />
ó del enchufe del tipo de pu<strong>es</strong>ta a tierra. Un enchufe<br />
polarizado tiene dos clavijas, una más ancha que la otra. Un<br />
enchufe de pu<strong>es</strong>ta a tierra tiene dos clavijas y una <strong>es</strong>piga de<br />
pu<strong>es</strong>ta a tierra. La clavija ancha y la <strong>es</strong>piga de <strong>es</strong>tos enchuf<strong>es</strong><br />
han sido suministradas para su seguridad. Si el enchufe<br />
suministrado no puede conectarse al tomacorriente, consulte<br />
a un electricista para que le cambie el tomacorriente obsoleto.<br />
10) Proteja el cable de alimentación para que no lo pisen ni lo<br />
pellizquen, <strong>es</strong>pecialmente en el enchufe, tomacorriente y<br />
en el punto donde sale del aparato.<br />
Instruccion<strong>es</strong> de seguridad important<strong>es</strong><br />
<strong>DE</strong>CLARACIÓN <strong>DE</strong> LA FCC<br />
11) Utilice solamente los acc<strong>es</strong>orios <strong>es</strong>pecificados por el<br />
fabricante.<br />
12) Utilice solamente el aparato con<br />
el carrito, base, trípode, soporte ó<br />
m<strong>es</strong>a <strong>es</strong>pecificado por el fabricante<br />
ó vendido con el aparato. Cuando<br />
se utilice un carrito, tenga cuidado<br />
al mover la combinación del carrito /<br />
aparato para evitar heridas en el caso<br />
de que ésta se dé la vuelta.<br />
13) D<strong>es</strong>enchufe <strong>es</strong>te aparato durante las tormentas eléctricas<br />
ó cuando no lo utilice durante un largo periodo de tiempo.<br />
14) Solicite todas las reparacion<strong>es</strong> al personal de servicio<br />
calificado. Las reparacion<strong>es</strong> r<strong>es</strong>ultan nec<strong>es</strong>arias cuando<br />
el aparato se ha <strong>es</strong>tropeado de cualquier forma: se ha<br />
<strong>es</strong>tropeado el cable ó el enchufe de alimentación, se<br />
ha derramado líquido ó han caído objetos dentro del<br />
aparato, el aparato ha quedado expu<strong>es</strong>to a la lluvia ó a la<br />
humedad, no funciona normalmente ó se ha caído.<br />
15) Para impedir las d<strong>es</strong>cargas eléctricas, asegúr<strong>es</strong>e de<br />
que la patilla de pu<strong>es</strong>ta a tierra de la clavija del cable de<br />
alimentación de CA <strong>es</strong>té firmemente conectada.<br />
Este equipo ha sido probado y ha demostrado cumplir con los límit<strong>es</strong> <strong>es</strong>tablecidos para dispositivos digital<strong>es</strong> de la Clase B, de<br />
conformidad con el Apartado 15 de las Normas de la FCC. Estos límit<strong>es</strong> han sido diseñados para proporcionar una protección<br />
razonable contra las interferencias perjudicial<strong>es</strong> en una instalación r<strong>es</strong>idencial. Este equipo genera, utiliza y puede radiar energía<br />
radioeléctrica, y si no se instala y utiliza de acuerdo con las instruccion<strong>es</strong>, puede causar interferencias perjudicial<strong>es</strong> en las<br />
comunicacion<strong>es</strong> por radio. Sin embargo, no existe ninguna garantía de que las interferencias no se produzcan en una instalación<br />
particular. Si <strong>es</strong>te equipo causa interferencias perjudicial<strong>es</strong> en la recepción de la radio o la televisión, lo que puede determinarse<br />
apagando y encendiendo el equipo, al usuario se le recomienda intentar corregir la interferencia tomando una o más de las<br />
medidas siguient<strong>es</strong>:<br />
• Cambie la orientación o el lugar de instalación de la antena.<br />
• Aumente la separación entre el equipo y el receptor.<br />
• Conecte el equipo a una toma de corriente diferente de aquella a la que <strong>es</strong>tá conectada el receptor.<br />
• Consulte al Centro de Servicio <strong>Panasonic</strong> o a un técnico de radio/TV con experiencia para solicitar ayuda.<br />
Aviso de la FCC:<br />
Para asegurar el cumplimiento ininterrumpido, siga las instruccion<strong>es</strong> de instalación adjuntas y utilice solamente cabl<strong>es</strong> de interfaz<br />
blindados cuando conecte a dispositivos periféricos. Cualquier cambio o modificación que no haya sido aprobado explícitamente<br />
por <strong>Panasonic</strong> Corp. of North America podría anular la autorización que tiene el usuario para utilizar <strong>es</strong>te dispositivo.<br />
R<strong>es</strong>ponsable:<br />
Dirección de<br />
contacto:<br />
email:<br />
<strong>Panasonic</strong> Corporation of North America<br />
One <strong>Panasonic</strong> Way, Secaucus, NJ 07094<br />
<strong>Panasonic</strong> Consumer Electronics Company<br />
1-877-95-VIERA (958-4372)<br />
consumerproducts@panasonic.com<br />
El rayo con punta de flecha dentro<br />
de un triángulo equilátero tiene la<br />
finalidad de avisar al usuario de que<br />
hay piezas en el interior del producto<br />
que si las tocan las personas éstas<br />
pueden recibir una d<strong>es</strong>carga eléctrica.<br />
El signo de exclamación dentro de un<br />
triángulo equilátero tiene la finalidad<br />
de avisar al usuario de la existencia<br />
de instruccion<strong>es</strong> de utilización y<br />
servicio important<strong>es</strong> en el material<br />
impr<strong>es</strong>o que acompaña al aparato.<br />
4<br />
AVISO PARA CANADÁ:<br />
Para los Modelo <strong>TC</strong>-<strong>P42C1</strong>, <strong>TC</strong>-P50C1<br />
Este aparato digital de la Clase B cumple con la norma canadiense ICES-003.
ADVERTENCIA/PRECAUCION<br />
ADVERTENCIA<br />
Las piezas pequeñas pueden pr<strong>es</strong>entar un peligro de asfixia si<br />
se tragan por accidente.<br />
Guarde las piezas pequeñas donde no puedan alcanzarlas los<br />
niños pequeños.<br />
Tire las piezas pequeñas y otros objetos que no sean<br />
nec<strong>es</strong>arios, incluyendo los material<strong>es</strong> de embalaje y las<br />
bolsas/hojas de plástico, para impedir que los niños pequeños<br />
jueguen con ellas corriendo el ri<strong>es</strong>go de que puedan asfixiarse.<br />
Instalación<br />
Si no se instala correctamente, el televisor de plasma podría<br />
caer y provocar daños personal<strong>es</strong> e incluso la muerte.<br />
R<strong>es</strong>pete las siguient<strong>es</strong> advertencias para evitar posibl<strong>es</strong><br />
daños personal<strong>es</strong> o incluso la muerte:<br />
Instale el televisor de plasma correctamente utilizando el<br />
ped<strong>es</strong>tal o la base recomendada por el fabricante, el hardware<br />
apropiado y de acuerdo con las instruccion<strong>es</strong> de instalación.<br />
Esta la televisor de plasma puede utilizarse sólo con los<br />
siguient<strong>es</strong> acc<strong>es</strong>orios opcional<strong>es</strong>. El uso con otros tipos<br />
de acc<strong>es</strong>orios opcional<strong>es</strong> puede provocar in<strong>es</strong>tabilidad.<br />
<strong>Panasonic</strong> Corporation fabrica todos los acc<strong>es</strong>orios siguient<strong>es</strong>.<br />
• Abrazadera de suspensión de pared (Anglado): TY-WK4P1RW<br />
Asegúr<strong>es</strong>e de que un técnico cualificado se encargue de<br />
la instalación y la configuración.<br />
Es nec<strong>es</strong>aria la ayuda de dos o más personas para instalar y<br />
d<strong>es</strong>montar el televisor.<br />
Algunos soport<strong>es</strong> de pared (soport<strong>es</strong> de suspensión) no<br />
<strong>es</strong>tán diseñados para la instalación en pared<strong>es</strong> utilizando<br />
<strong>es</strong>párragos de acero o <strong>es</strong>tructuras cilíndricas antiguas.<br />
Solicite a su distribuidor o contratista autorizado que sujete el<br />
soporte de pared correctamente.<br />
No coloque el televisor de plasma ni la base del mismo<br />
sobre superfici<strong>es</strong> inclinadas o in<strong>es</strong>tabl<strong>es</strong>.<br />
La televisor de plasma puede caerse ó darse vuelta.<br />
No monte el televisor de plasma en un ped<strong>es</strong>tal inapropiado.<br />
No coloque el televisor de plasma en muebl<strong>es</strong> que se puedan<br />
utilizar fácilmente como <strong>es</strong>calón, como por ejemplo una <strong>es</strong>tantería.<br />
No se suba sobre el televisor de plasma ni permita que lo<br />
hagan los niños.<br />
Coloque o instale el televisor de plasma en un lugar<br />
donde no se pueda empujar, volcar o golpear y caer.<br />
Coloque todos los cabl<strong>es</strong> de forma que nadie pueda tropezar y que no<br />
atraigan la atención de niños curiosos, ya que podrían tirar de ellos.<br />
No coloque objetos encima de la televisor de plasma.<br />
Si se derrama agua en la televisor de plasma ó entran objetos extraños<br />
en su interior, se puede provocar un cortocircuito que causará fuego<br />
ó d<strong>es</strong>carga eléctrica. Si entran objetos extraños en el interior de la<br />
televisor de plasma, consulte con su tienda local de <strong>Panasonic</strong>.<br />
Cable de alimentación de CA<br />
Para prevenir que se produzca un incendio o una d<strong>es</strong>carga eléctrica:<br />
El televisor de plasma <strong>es</strong>tá diseñado para trabajar en una<br />
red de 120 V CA y 60 Hz. Inserte la clavija del cable de<br />
alimentación al máximo en la toma de corriente.<br />
Si el enchufe no ha entrado completamente puede generar<br />
calor y ser el origen de un incendio.<br />
El cable de alimentación de CA suministrado <strong>es</strong> para ser<br />
utilizado con <strong>es</strong>te aparato solamente.<br />
No utilice ningún otro cable de alimentación que no sea<br />
el suministrado con <strong>es</strong>te televisor.<br />
No toque el enchufe del cable eléctrico con las manos mojadas.<br />
No haga nada que pueda dañar el cable de alimentación de eléctrico.<br />
Cuando d<strong>es</strong>enchufe el cable de alimentación de<br />
eléctrico, sujete del enchufe y no el cable.<br />
No utilice el cable de alimentación si la clavija o el propio<br />
cable <strong>es</strong>tán dañados.<br />
Cambie el cable o póngase en contacto con un centro de<br />
servicio técnico autorizado.<br />
Manejo del cable de alimentación<br />
Inserte el enchufe de alimentación completamente en la toma de corriente.<br />
(Si el enchufe <strong>es</strong>tuvi<strong>es</strong>e flojo, podría generar calor y causar un incendio.)<br />
Cerciór<strong>es</strong>e de que el enchufe <strong>es</strong>té fácilmente acc<strong>es</strong>ible.<br />
Cerciór<strong>es</strong>e de que el terminal de pu<strong>es</strong>ta a tierra del enchufe de alimentación<br />
<strong>es</strong>té conectado con seguridad para evitar d<strong>es</strong>cargas eléctricas.<br />
• Un aparato con construcción CLASE I deberá conectarse a<br />
una toma de corriente con conexión de protección a tierra.<br />
No toque el enchufe de alimentación con las manos<br />
húmedas. (Esto podría causar una d<strong>es</strong>carga eléctrica.)<br />
No utilice ningún cable de alimentación que no sea el suministrado<br />
con <strong>es</strong>te TV. (Esto podría causar una d<strong>es</strong>carga eléctrica.)<br />
No dañe el cable de alimentación. (Un cable dañado<br />
podría causar un incendio o d<strong>es</strong>carga eléctrica.)<br />
• No mueva el TV con el cable de alimentación enchufado en<br />
una toma de corriente.<br />
• No coloque ningún objeto p<strong>es</strong>ado sobre el cable de alimentación,<br />
ni coloque éste cerca de un objeto de gran temperatura.<br />
• No retuerza el cable, no lo doble exc<strong>es</strong>ivamente, ni lo <strong>es</strong>tire.<br />
• No tire del cable. Sujételo por el enchufe de alimentación<br />
cuando vaya a d<strong>es</strong>conectarlo.<br />
• No utilice un enchufe de alimentación ni una toma de corriente dañados.<br />
Si se producen problemas durante el uso<br />
Si se produce un problema (por ejemplo falta la imagen ó sonido),<br />
ó si sale humo ó hay olor<strong>es</strong> no normal<strong>es</strong> de la televisor de plasma,<br />
d<strong>es</strong>enchufe inmediatamente el cable eléctrico del tomacorriente.<br />
El uso continuado del televisor bajo <strong>es</strong>tas condicion<strong>es</strong> puede causar un<br />
incendio ó un daño permanente en la unidad. Lleve el televisor a que<br />
lo revisen en un centro de servicio autorizado. Debido a la alta tensión<br />
que soporta el televisor, se recomienda evitar las intervencion<strong>es</strong><br />
técnicas en el mismo por parte de personal no autorizado.<br />
En caso de penetrar agua o algún objeto en el televisor de<br />
plasma, si se cae al suelo o si la carcasa r<strong>es</strong>ulta dañada,<br />
d<strong>es</strong>conecte el cable de alimentación de forma inmediata.<br />
Podría producirse un cortocircuito y provocar un incendio.<br />
Encargue su inspección a un centro de servicio técnico autorizado.<br />
PRECAUCION<br />
No cubra los orificios de ventilación.<br />
La televisor de plasma puede calentarse exc<strong>es</strong>ivamente<br />
provocado fuego ó daños en la televisor de plasma.<br />
Deje un <strong>es</strong>pacio de 3 15/16” (10 cm) o más en las part<strong>es</strong> superior,<br />
izquierda y derecha, y 2 3/4” (7 cm) o más en la parte posterior.<br />
Siempre que utilice el ped<strong>es</strong>tal, asegúr<strong>es</strong>e de que no haya ningún<br />
objeto que pueda obstruir la ventilación en el <strong>es</strong>pacio entre la parte<br />
inferior del televisor y la superficie del ped<strong>es</strong>tal o la base.<br />
Cuando utilice la televisor de plasma<br />
D<strong>es</strong>conecte todos los cabl<strong>es</strong> ant<strong>es</strong> de mover la televisor de plasma.<br />
Si fuera nec<strong>es</strong>ario mover la televisor de plasma a otro lugar y<br />
se dejan algunos cabl<strong>es</strong> conectados, éstos pueden dañarse,<br />
provocar un incendio ó una d<strong>es</strong>carga eléctrica.<br />
A fin de evitar que se produzca una d<strong>es</strong>carga eléctrica,<br />
d<strong>es</strong>conecte la clavija de red de la toma de corriente<br />
como medida de precaución ant<strong>es</strong> de limpiar el televisor.<br />
5
Precaucion<strong>es</strong> para su seguridad (Continuación)<br />
Transporte la televisor de plasma solamente en posición vertical.<br />
Transportar la unidad con su pantalla hacia arriba o hacia<br />
abajo puede dañar el sistema de circuitos interno.<br />
Con ayuda de un paño seco, limpie el polvo del cable de<br />
alimentación y la clavija de forma regular.<br />
El polvo acumulado en la clavija del cable de alimentación<br />
puede incrementar la humedad y, en consecuencia, provocar<br />
daños en el aislamiento y causar un incendio.<br />
Esta televisor de plasma radia rayos infrarrojos,<br />
y por lo tanto puede afectar a otros equipos de comunicación por<br />
infrarrojos. Instale su sensor de infrarrojos en un lugar alejado de la<br />
luz directa de su televisor de plasma ó de la luz reflejada por ella.<br />
El televisor seguirá consumiendo energía eléctrica<br />
mientras el cable de alimentación permanezca conectado a<br />
la toma de corriente.<br />
El panel de la pantalla <strong>es</strong>tá hecho de cristal. No ejerza<br />
una pr<strong>es</strong>ión fuerte o golpee el panel de la pantalla.<br />
Esto podría causar daños que pueden r<strong>es</strong>ultar en l<strong>es</strong>ion<strong>es</strong>.<br />
El televisor <strong>es</strong> p<strong>es</strong>ado. Deberá ser manejado por 2 o más<br />
personas. Sujeten el televisor como se mu<strong>es</strong>tra para<br />
evitar que se vuelque o caiga y produzca l<strong>es</strong>ion<strong>es</strong>.<br />
ADVERTENCIA<br />
AVISOS <strong>DE</strong> SEGURIDAD <strong>DE</strong> LA CEA PARA NIÑOS: Las pantallas planas no siempre <strong>es</strong>tán montadas<br />
sobre bas<strong>es</strong> adecuadas o instaladas de acuerdo con las recomendacion<strong>es</strong> del fabricante. Las pantallas<br />
planas mal colocadas en <strong>es</strong>tanterías, librerías, <strong>es</strong>tant<strong>es</strong>, <strong>es</strong>critorios, altavoc<strong>es</strong>, baúl<strong>es</strong> o muebl<strong>es</strong> con<br />
ruedas pueden caer y provocar daños personal<strong>es</strong> e incluso la muerte.<br />
La industria de sistemas electrónicos para consumidor<strong>es</strong> (de la cual <strong>es</strong> miembro <strong>Panasonic</strong>) trabaja por<br />
que el entretenimiento en casa sea entretenido y seguro. Siga siempre las siguient<strong>es</strong> normas de<br />
seguridad para prevenir posibl<strong>es</strong> daños personal<strong>es</strong> e incluso la muerte:<br />
AJUSTES <strong>DE</strong> SEGURIDAD:<br />
• Un mismo tamaño NO sirve para todo. Siga las recomendacion<strong>es</strong> del fabricante para garantizar una<br />
instalación y un uso seguro de la pantalla plana.<br />
• Lea atentamente todas las instruccion<strong>es</strong> adjuntas y asegúr<strong>es</strong>e de que las comprende para garantizar<br />
un uso correcto del producto.<br />
• No permita que los niños se suban o jueguen con los muebl<strong>es</strong> y los equipos de televisión.<br />
• No coloque la pantalla plana en muebl<strong>es</strong> que se puedan utilizar fácilmente como <strong>es</strong>calón, como por<br />
ejemplo una <strong>es</strong>tantería.<br />
• Recuerde que los niños se dejan llevar por las emocion<strong>es</strong> al ver la tele, <strong>es</strong>pecialmente en una pantalla<br />
plana “más grande que el mundo”. Asegúr<strong>es</strong>e de instalar la pantalla en un lugar donde no se pueda<br />
empujar, volcar o golpear y caer.<br />
• Tenga cuidado de colocar todos los cabl<strong>es</strong> de la pantalla plana de forma que los niños no puedan<br />
cogerlos o tirar de ellos si sienten curiosidad.<br />
MONTAJE EN LA PARED: SI <strong>DE</strong>CI<strong>DE</strong> INSTALAR LA PANTALLA PLANA EN LA PARED, TENGA<br />
PRESENTE QUE SIEMPRE <strong>DE</strong>BE:<br />
• Utilizar un soporte recomendado por el fabricante de la pantalla y/o por un organismo independiente<br />
(por ejemplo UL, CSA, ETL).<br />
• Seguir todas las instruccion<strong>es</strong> de los fabricant<strong>es</strong> de la pantalla y el soporte de pared.<br />
• Si no se siente capaz de instalar con seguridad la pantalla plana, póngase en contacto con su<br />
distribuidor para contratar un servicio de instalación <strong>es</strong>pecializado.<br />
• Asegúr<strong>es</strong>e que la pared donde se va a instalar el soporte <strong>es</strong> apropiada. Algunos soport<strong>es</strong> de pared no<br />
<strong>es</strong>tán diseñados para la instalación en pared<strong>es</strong> utilizando <strong>es</strong>párragos de acero o <strong>es</strong>tructuras cilíndricas<br />
antiguas. En caso de dudas, póngase en contacto con un instalador prof<strong>es</strong>ional.<br />
• Para instalar la pantalla se nec<strong>es</strong>itan dos personas como mínimo. Las pantallas planas pueden ser<br />
muy p<strong>es</strong>adas.<br />
<strong>Panasonic</strong> recomienda encargar la instalación en la pared a un instalador<br />
calificado. Véase la página 5.<br />
6
Notas<br />
■ No mu<strong>es</strong>tre una imagen fija durante mucho tiempo<br />
Esto hará que la imagen permanezca en la pantalla de plasma (“Retención de imagen”). Esto no se considera como una falla<br />
de funcionamiento y no <strong>es</strong>tá cubierto por la garantía.<br />
12<br />
Para impedir la “Retención de imagen”, el salvapantallas se activa<br />
4 : 3<br />
automáticamente d<strong>es</strong>pués de pasar unos pocos minutos si no se<br />
envían señal<strong>es</strong> ó no se realizan operacion<strong>es</strong>. (pág. 51)<br />
Imágen<strong>es</strong> fijas típicas<br />
Números de canal<strong>es</strong> y otros logotipos<br />
Imagen visualizada en el modo 4:3<br />
• Fotos de tarjetas SD • Videojuego • Imagen de ordenador<br />
■ Configuración<br />
No ponga la unidad donde quede expu<strong>es</strong>ta a la luz solar directa ó a luc<strong>es</strong> brillant<strong>es</strong> (incluyendo reflejos).<br />
La utilización de algunos tipos de iluminación fluor<strong>es</strong>cente puede reducir el alcance de transmisión del mando a distancia.<br />
7
Acc<strong>es</strong>orios/Acc<strong>es</strong>orio opcional<br />
Compruebe que ha recibido todos los elementos que se indican.<br />
Acc<strong>es</strong>orios<br />
Transmisor de<br />
mando a distancia<br />
N2QAYB000321<br />
Acc<strong>es</strong>orios<br />
Pilas para el transmisor<br />
de mando a distancia (2)<br />
Pila AA<br />
Cable de CA<br />
Ped<strong>es</strong>tal<br />
TBLX0088<br />
(<strong>TC</strong>-<strong>P42C1</strong>)<br />
TBLX0089<br />
(<strong>TC</strong>-P50C1)<br />
Ensamblaje (pág. 9)<br />
Paño de limpieza<br />
Manual de instruccion<strong>es</strong><br />
Viera Concierge y instruccion<strong>es</strong><br />
básica para HDTV<br />
Tarjeta del cliente (para EE. UU.)<br />
Tarjeta para el plan de asistencia al<br />
cliente (para EE. UU.)<br />
Acc<strong>es</strong>orio opcional<br />
Abrazadera de suspensión de pared<br />
(Anglado)<br />
TY-WK4P1RW<br />
Nota<br />
Para mantener el rendimiento y la seguridad de la unidad, cerciór<strong>es</strong>e<br />
absolutamente de pedir a su conc<strong>es</strong>ionario o a un contratista calificado<br />
que asegure las abrazaderas de suspensión de pared.<br />
Lea atentamente las instruccion<strong>es</strong> suministradas con el soporte o ped<strong>es</strong>tal del<br />
televisor de pantalla de plasma, y cerciór<strong>es</strong>e absolutamente de tomar los pasos<br />
nec<strong>es</strong>arios para impedir que el televisor se caiga.<br />
Maneje cuidadosamente el televisor durante su instalación, ya que si lo<br />
somete a impactos u otros <strong>es</strong>fuerzos su panel podría agrietarse.<br />
Instalación de las pilas del mando a distancia<br />
Gancho<br />
Abrir.<br />
Cierre<br />
Ponga las polaridad<strong>es</strong> (+ ó -)<br />
en las posicion<strong>es</strong> correctas<br />
Precaución<br />
La instalación mal hecha puede<br />
causar fugas de electrolito y<br />
corrosión, lo que podría dañar el<br />
mando a distancia.<br />
No mezcle pilas viejas y nuevas.<br />
• No mezcle pilas de tipos diferent<strong>es</strong><br />
(pilas alcalinas y de mangan<strong>es</strong>o, por<br />
ejemplo).<br />
• No utilice baterías (Ni-Cd).<br />
No queme ni rompa las pilas.<br />
8
■Montaje del ped<strong>es</strong>tal<br />
Colocación del ped<strong>es</strong>tal en el televisor con pantalla de plasma<br />
Fije firmemente con los tornillos de ensamblaje A . (4 tornillos en total)<br />
Apriete firmemente los tornillos.<br />
Soporte<br />
R<br />
■Instalación<br />
A<br />
L Soporte<br />
Base<br />
Adelante<br />
Haga el trabajo en una superficie horizontal y nivelada.<br />
Apriete firmemente los tornillos.<br />
B<br />
Flecha<br />
Vista de la parte inferior<br />
Lado trasero<br />
Orificio para la<br />
instalación del<br />
ped<strong>es</strong>tal<br />
Soporte<br />
Acc<strong>es</strong>orios<br />
Tornillo de montaje<br />
(4 de cada uno)<br />
A<br />
B<br />
M5 × 18 (plateado)<br />
M5 × 25 (negro)<br />
Soporte (2)<br />
L<br />
R<br />
L o R <strong>es</strong>tán impr<strong>es</strong>as<br />
en la parte inferior de los<br />
soport<strong>es</strong>.<br />
Base (1)<br />
Guía de inicio<br />
rápido<br />
Acc<strong>es</strong>orios/Acc<strong>es</strong>orio opcional<br />
Soporte<br />
Base<br />
Fije firmemente con los tornillos de ensamblaje B .<br />
(4 tornillos en total)<br />
Advertencia<br />
No d<strong>es</strong>arme ni modifique el ped<strong>es</strong>tal.<br />
De lo contrario, la unidad podría caerse y dañarse, y también podría causar heridas a personas.<br />
Precaución<br />
No utilice ningún otro televisor ni pantalla.<br />
En caso de no ser asi, Ia unidad puede caerse y dañarse, pudiendo sufrir daños personal<strong>es</strong>.<br />
No utilice el ped<strong>es</strong>tal si <strong>es</strong>tá doblado, partido o <strong>es</strong>tá roto.<br />
Si utiliza un ped<strong>es</strong>tal roto, puede dañarse todavía más y puede r<strong>es</strong>ultar usted dañado. Llame a la tienda donde lo<br />
compró, Io ant<strong>es</strong> posible.<br />
Durante la instalación, asegúr<strong>es</strong>e de apretar bien todos los tornillos.<br />
Si no se tiene cuidado y los tornillos no <strong>es</strong>tán bien apretados durante el armado, la instalación no será lo<br />
suficientemente fuerte como para sostener el televisor con pantalla de plasma y éste podrá caerse y dañarse, y<br />
podrá causar daños a las personas.<br />
9
Acc<strong>es</strong>orios/Acc<strong>es</strong>orio opcional (Continuación)<br />
Conexión del cable de alimentación de CA<br />
Para colocar<br />
Para remover<br />
Insértelo firmemente<br />
hasta que las lengüetas<br />
de ambos lados queden<br />
fijadas en posición<br />
haciendo un ruido seco.<br />
Mantenga<br />
pr<strong>es</strong>ionados los dos<br />
cierr<strong>es</strong> lateral<strong>es</strong> y tire<br />
hacia abajo.<br />
Referencia de las conexion<strong>es</strong><br />
Terminal de antena Terminal de contactos Terminal HDMI<br />
rojo<br />
azul verde<br />
verde<br />
Apriete firmemente a mano. Haga que concuerden los color<strong>es</strong> de<br />
las clavijas y las terminal<strong>es</strong>.<br />
Inserte firmemente.<br />
Inserte firmemente.<br />
10
Conexión básica<br />
TV<br />
Ejemplo 1<br />
Conexión de antena (Para ver la televisión)<br />
Antena de VHF/UHF<br />
TV por<br />
cable<br />
Antena de VHF/UHF<br />
• NTSC (National Television System Committee):<br />
Emisión convencional<br />
• ATSC (Advanced Television Systems Committee):<br />
Las normas de televisión digital incluyen la televisión de alta definición<br />
digital (HDTV), la televisión de definición <strong>es</strong>tándar (SDTV), la emisión de<br />
datos, el audio multicanal de sonido envolvente y la televisión interactiva.<br />
Para conectar la terminal de la antena y la caja de cabl<strong>es</strong><br />
TV por<br />
cable<br />
Antena de VHF/UHF<br />
ó<br />
120 V CA<br />
60 Hz<br />
Guía de inicio<br />
rápido<br />
(Si no se utiliza receptor<br />
de televisión por cable)<br />
ó<br />
Parte posterior<br />
de la unidad<br />
* Vea pág. 10<br />
( Conexión del cable de<br />
alimentación de CA)<br />
Y<br />
PB<br />
H<br />
Cable de alimentación<br />
de CA<br />
(Conecte d<strong>es</strong>pués<br />
de haber terminado<br />
todas las demás<br />
conexion<strong>es</strong>.)<br />
Conexión básica (Antena + TV)<br />
Acc<strong>es</strong>orios/Acc<strong>es</strong>orio opcional<br />
VI<strong>DE</strong>O<br />
PR<br />
L<br />
AUDIO<br />
R<br />
Nota<br />
ANT IN<br />
ANT OUT<br />
Receptor de televisión por cable<br />
Receptor de televisión por cable/cable<br />
• Usted nec<strong>es</strong>ita suscribirse a un servicio de televisión por cable para poder<br />
ver sus programas.<br />
• Si utiliza un receptor de televisión por cable elija el canal de televisión<br />
CH3 ó CH4 para ver la televisión por cable normal.<br />
• Podrá disfrutar de los programas de alta definición suscribiéndose a los servicios de<br />
una emisora de televisión por cable de alta definición. La conexión para alta definición<br />
se puede hacer empleando un cable de HDMI o de vídeo componente. (pág. 14)<br />
• Para ver la programación de alta definición seleccione la entrada de vídeo correcta. (pág. 24)<br />
Con el televisor no se suministran todos los cabl<strong>es</strong> y equipos externos mostrados en <strong>es</strong>te manual.<br />
Para conocer los detall<strong>es</strong> de las conexion<strong>es</strong> de los equipos externos, consulte los manual<strong>es</strong> de instruccion<strong>es</strong> de cada equipo.<br />
Cuando d<strong>es</strong>conecte el cable de alimentación, asegúr<strong>es</strong>e absolutamente de d<strong>es</strong>conectar primero la clavija de<br />
alimentación de la toma de corriente.<br />
Para obtener más ayuda, visítenos en: www.panasonic.com<br />
11
Conexión básica (Continuación)<br />
Ejemplo 2<br />
Conexión de una grabadora DVD (videograbadora) (Para grabar/reproducir)<br />
TV<br />
Equipo de AV<br />
(ej. Grabadora DVD<br />
ó Videograbadora)<br />
Antena de VHF/UHF<br />
Grabadora DVD<br />
Si la fuente tiene una señal de r<strong>es</strong>olución más alta<br />
(480p/720p/1080i/1080p), la conexión se puede hacer<br />
usando un cable de vídeo componente o de HDMI. (pág. 14)<br />
Videograbadora<br />
La conexión se puede hacer utilizando un cable RF<br />
ó video compu<strong>es</strong>to/S Vídeo. (pág. 14)<br />
Para conectar la terminal de la antena y la grabadora DVD ó videograbadora<br />
Antena de VHF/UHF<br />
120 V CA<br />
60 Hz<br />
Parte posterior<br />
de la unidad<br />
* Vea pág. 10<br />
(Conexión del cable<br />
de alimentación de CA)<br />
Cable de<br />
alimentación<br />
de CA<br />
HDMI 1 HDMI 2<br />
B<br />
A<br />
Y<br />
Y<br />
S VI<strong>DE</strong>O<br />
PB<br />
PB<br />
C<br />
VI<strong>DE</strong>O<br />
PR<br />
L<br />
PR<br />
L L<br />
AUDIO<br />
R<br />
R<br />
R<br />
COMPONENT VI<strong>DE</strong>O IN 1<br />
1 IN 2<br />
D<br />
ANT IN<br />
ANT OUT<br />
Conexión del televisor y el equipo AV<br />
Consulte A - D en la pág. 14<br />
12<br />
Equipo de AV<br />
(ej. Grabadora DVD ó Videograbadora)<br />
(con sintonizador de televisión)
Ejemplo 3<br />
Conexión de una grabadora DVD (videograbadora) y un receptor de satélite<br />
TV<br />
Receptor de<br />
Grabadora DVD satélite<br />
ó<br />
Videograbadora<br />
Antena de VHF/UHF<br />
Puede disfrutar de los programas de<br />
alta definición suscribiéndose a los<br />
servicios de compañías de emisión<br />
por satélite de alta definición.<br />
La conexión se puede hacer<br />
utilizando HDMI o video<br />
componente. (pág. 14)<br />
Para conectar la terminal de la antena, el receptor de satélite y la grabadora DVD ó videograbadora<br />
Antena de VHF/UHF<br />
120 V CA<br />
60 Hz<br />
Guía de inicio<br />
rápido<br />
Nota<br />
ANT IN<br />
Receptor de satélite<br />
ANT IN<br />
ANT OUT<br />
Parte posterior<br />
de la unidad<br />
Grabadora DVD/Videograbadora<br />
(con sintonizador de televisión)<br />
VI<strong>DE</strong>O<br />
AUDIO<br />
Y<br />
PB<br />
PR<br />
L<br />
B<br />
* Vea pág. 10<br />
(Conexión del cable<br />
de alimentación de<br />
CA)<br />
HDMI 1 HDMI 2<br />
Y<br />
S VI<strong>DE</strong>O<br />
PB<br />
PR<br />
L L<br />
R<br />
R<br />
R<br />
COMPONENT VI<strong>DE</strong>O IN 1<br />
1 IN 2<br />
Para conocer los detall<strong>es</strong> de las conexion<strong>es</strong> de los equipos externos, consulte los manual<strong>es</strong> de instruccion<strong>es</strong> de<br />
cada equipo.<br />
D<br />
Cable de<br />
alimentación<br />
de CA<br />
Conexión del televisor y el equipo AV<br />
Consulte A - D en la pág. 14.<br />
A<br />
C<br />
Conexión básica (TV + Grabadora DVD ó Videograbadora + Receptor de satélite)<br />
(TV + Grabadora DVD ó Videograbadora)<br />
13
Conexión básica (Continuación)<br />
A Para utilizar terminal<strong>es</strong> HDMI<br />
Conexion<strong>es</strong> del cable AV<br />
Alta definición Definición <strong>es</strong>tándar<br />
HDMI 1 HDMI 2<br />
HDMI<br />
AV OUT<br />
Equipo de AV<br />
ej. Reproductor de<br />
disco Blu-ray<br />
La conexión a las terminal<strong>es</strong> HDMI le permitirá disfrutar de imágen<strong>es</strong> digital<strong>es</strong> de alta definición y de sonido de alta calidad.<br />
Para una señal de 1080p se requiere una conexión de HDMI.<br />
Para las “Conexion<strong>es</strong> VIERA Link”, consulte la pág. 31.<br />
B Para utilizar terminal<strong>es</strong> de VI<strong>DE</strong>O COMPONENTE<br />
VI<strong>DE</strong>O<br />
AUDIO<br />
Y<br />
PB<br />
PR<br />
L<br />
R<br />
COMPONENT<br />
IN 1 2<br />
P<br />
P<br />
verde<br />
azul<br />
rojo<br />
blanco<br />
rojo<br />
verde<br />
azul<br />
rojo<br />
Y<br />
verde<br />
azul<br />
rojo<br />
PB<br />
PR<br />
L<br />
blanco blanco<br />
R<br />
rojo rojo<br />
COMPONENT<br />
VI<strong>DE</strong>O OUT<br />
AUDIO<br />
OUT<br />
Equipo de AV<br />
ej. Reproductor de<br />
disco Blu-ray<br />
Las grabadoras también se pueden conectar a los terminal<strong>es</strong> de VI<strong>DE</strong>O COMPUESTO ó S VI<strong>DE</strong>O. (vea más abajo)<br />
C Para utilizar terminal<strong>es</strong> S VI<strong>DE</strong>O<br />
PB<br />
PR<br />
L L<br />
S VI<strong>DE</strong>O<br />
R R<br />
ENT VI<strong>DE</strong>O IN 1<br />
blanco<br />
rojo<br />
blanco<br />
rojo<br />
L<br />
blanco<br />
D Para utilizar terminal<strong>es</strong> de VI<strong>DE</strong>O COMPUESTO<br />
PB<br />
PR<br />
L L<br />
R R<br />
ENT VI<strong>DE</strong>O IN 1<br />
2<br />
amarillo<br />
blanco<br />
rojo<br />
amarillo<br />
blanco<br />
rojo<br />
rojo<br />
R<br />
S VI<strong>DE</strong>O<br />
OUT<br />
AUDIO<br />
OUT<br />
amarillo<br />
L COMPOSITE<br />
OUT<br />
blanco<br />
R<br />
rojo<br />
Equipo de AV<br />
ej. Grabadora DVD<br />
ó<br />
ej. Videograbadora<br />
Equipo de AV<br />
ej. Grabadora DVD<br />
ó<br />
ej. Videograbadora<br />
La entrada de S Vídeo anulará la señal de vídeo compu<strong>es</strong>to cuando se conecte un cable de S Vídeo.<br />
Conecte un cable de S Vídeo ó uno de vídeo.<br />
La conexión a los terminal<strong>es</strong> S VI<strong>DE</strong>O le permitirá disfrutar de una calidad de imagen más alta que si<br />
utilizará los terminal<strong>es</strong> de video compu<strong>es</strong>to.<br />
14<br />
Nota<br />
Algunos programas contienen una señal de protección de derechos de autor para impedir la grabación.<br />
Cuando se visualiza el programa de protección de los derechos de autor, no conecte el otro monitor de TV a través<br />
de una videograbadora. Las señal<strong>es</strong> de vídeo enviadas a través de una videograbadora pueden ser afectadas por<br />
los sistemas de protección de los derechos de autor, y las imágen<strong>es</strong> se distorsionarán en el otro monitor de TV.<br />
Para conocer los detall<strong>es</strong> de las conexion<strong>es</strong> de los equipos externos, consulte los manual<strong>es</strong> de instruccion<strong>es</strong> de cada equipo.
Identificación de los control<strong>es</strong><br />
Parte delantera del TV<br />
Control<strong>es</strong>/indicador<strong>es</strong> del televisor<br />
Ranura de tarjeta SD<br />
Parte posterior de <strong>es</strong>ta unidad<br />
Selecciona canal<strong>es</strong><br />
en orden.<br />
El botón<br />
POWER<br />
Sensor del control<br />
remoto<br />
Dentro de unos 7 metros<br />
enfrente del televisor<br />
Conecta la alimentación del<br />
televisor ó la pone en <strong>es</strong>pera<br />
Cambia la señal de entrada<br />
(pág. 24)<br />
Menú VIERA Link (pág. 34-35)<br />
Visualización de submenú (pág. 19, 28)<br />
Boton<strong>es</strong> de color<br />
(utilizados para varias funcion<strong>es</strong>)<br />
(por ejemplo, pág. 18, 22, 35)<br />
Subida/bajada del volumen<br />
Encendido/Apagado del<br />
silenciamiento del sonido<br />
Cambia la relación de aspecto<br />
(pág. 20, 45)<br />
Cambia al canal visto previamente<br />
ó modo de entrada<br />
Operacion<strong>es</strong> con equipos externos<br />
(pág. 35)<br />
Subida/bajada del<br />
volumen<br />
Visualiza el menú<br />
principal<br />
Terminal<strong>es</strong> VI<strong>DE</strong>O IN 2<br />
Indicador de alimentación<br />
(conectada: rojo, d<strong>es</strong>conectada: apagado)<br />
Sensor del S.S.A.C<br />
Cambia la señal de entrada.<br />
El S.S.A.C (sistema de seguimiento<br />
Selecciona el menú y la entrada de submenú.<br />
automático de contraste). (pág. 26)<br />
Nota<br />
El televisor consumirá algo de corriente siempre que el enchufe del cable de alimentación <strong>es</strong>té introducido en la toma de corriente.<br />
No coloque ningún objeto entre el sensor de control remoto del televisor y el mando a distancia.<br />
Transmisor de mando a distancia<br />
Subtítulos Sí/No (pág. 19)<br />
Seleccione el modo de audio para<br />
ver la televisión (pág. 19)<br />
Menús de salida<br />
Visualiza el menú principal. (pág. 26)<br />
Visualice VIERA TOOLS (pág. 21)<br />
Visión de imágen<strong>es</strong> de tarjetas SD<br />
(pág. 22-23)<br />
Selección/OK/Cambio<br />
Sale de la pantalla del menú<br />
Selecciona canal<strong>es</strong> en orden<br />
Visualiza ó elimina la bandera de<br />
canal. (pág. 20)<br />
Controla la función de la lista de<br />
canal<strong>es</strong> favoritos. (pág. 20)<br />
Teclado numérico para seleccionar<br />
cualquier canal (pág. 19) ó para hacer<br />
introduccion<strong>es</strong> alfanuméricas en los<br />
menús. (pág. 18, 24, 34, 36, 38, 41, 42)<br />
Utilización con canal<strong>es</strong> digital<strong>es</strong><br />
(pág. 19)<br />
Guía de inicio<br />
rápido<br />
Identificación de los control<strong>es</strong><br />
Conexión básica (Conexion<strong>es</strong> del cable AV)<br />
15
Configuración por primera vez<br />
“Ajuste inicial” se visualiza solamente cuando el TV se enciende por primera vez d<strong>es</strong>pués de enchufar el<br />
cable de alimentación en una toma de corriente y cuando “Autoencendido” (págs. 28-29) se pone en “No”.<br />
ó<br />
Encienda el televisor con el interruptor POWER.<br />
ó<br />
(TV)<br />
(mando a distancia)<br />
* Este ajuste será omitido la próxima vez si usted selecciona “Uso en Hogar”.<br />
Seleccione su idioma.<br />
Language<br />
English<br />
Español<br />
Français<br />
Seleccione<br />
Aceptar<br />
Asegúr<strong>es</strong>e de seleccionar “Uso en Hogar”.<br />
Por favor seleccione el ambiente de uso<br />
Uso en Hogar Exhibición en Mostrador<br />
Seleccione<br />
Seleccione “Uso en Hogar” cuando utilice el TV en su<br />
hogar.<br />
Aceptar<br />
Confirme su selección (Uso en Hogar) ant<strong>es</strong> de pulsar el botón OK.<br />
■ Si selecciona “Exhibición en Mostrador” por equivocación en<br />
se visualizará la pantalla de confirmación.<br />
Ha elegido el modo para Exhibición en Mostrador<br />
Sí<br />
No<br />
Si selecciona “Sí”, el modo de imagen se r<strong>es</strong>taurará<br />
regularmente a “Vívido” y un mensaje de “Refr<strong>es</strong>car<br />
imagen” se mostrará en la pantalla.<br />
Seleccione<br />
Aceptar<br />
Seleccione “No” y vuelva a la pantalla anterior .<br />
Si selecciona “Sí”, la pantalla entra en el modo de demostración de<br />
mostrador.<br />
Para visualizar otra vez “Por favor seleccione el ambiente de uso” como se<br />
mu<strong>es</strong>tra arriba.<br />
Realice algo de lo siguiente para volver a seleccionar “Uso en Hogar”.<br />
• Pr<strong>es</strong>ione y mantenga apretado el botón frontal POWER.<br />
• D<strong>es</strong>enchufe el televisor y vuélvalo a enchufar.<br />
■ Pulse para salir<br />
de la pantalla de<br />
menú<br />
■ Para volver a la<br />
pantalla anterior<br />
16
Ajuste el reloj.<br />
Ajuste inicial<br />
Idioma<br />
Reloj<br />
Ajuste ANT/Cable<br />
Títulos de entradas<br />
Siguiente<br />
Seleccione<br />
■ Pulse para salir<br />
de la pantalla de<br />
menú<br />
Reloj<br />
Año<br />
M<strong>es</strong><br />
Día<br />
Hora<br />
Minuto<br />
2009<br />
1<br />
7<br />
10 AM<br />
10<br />
Establezca<br />
Seleccione<br />
elemento<br />
Configuración automática de canal<strong>es</strong><br />
Seleccione “Ajuste ANT/Cable”<br />
Ajuste inicial<br />
Idioma<br />
Reloj<br />
Ajuste ANT/Cable<br />
Títulos de entradas<br />
Seleccione “Entrada ANT”<br />
Ajuste ANT/Cable<br />
Entrada ANT Cable<br />
Programa auto<br />
Siguiente<br />
Seleccione<br />
Establezca<br />
Seleccione<br />
Año: Seleccione el año<br />
M<strong>es</strong>: Seleccione el m<strong>es</strong><br />
Día: Seleccione el día<br />
Hora: Ajuste la hora<br />
Minuto: Ajuste el minuto<br />
Entrada ANT<br />
Cable:<br />
Televisión por<br />
cable<br />
Antena: Antena<br />
No utilizado: omitir la<br />
sintonización del<br />
televisor<br />
vaya a<br />
Seleccione "No utilizado" si no hay ningún cable conectado al terminal "Antena/<br />
Cable".<br />
Típico cuando el d<strong>es</strong>codificador de cable/satélite <strong>es</strong>tá conectado a una entrada<br />
de TV.<br />
Evita la sintonización accidental a una señal no disponible.<br />
Guía de inicio<br />
rápido<br />
Configuración por primera vez<br />
Nota<br />
Para cambiar la<br />
configuración<br />
(Idioma/Reloj/<br />
Ajuste ANT/Cable/<br />
Títulos de entradas)<br />
más adelante, vaya a<br />
la pantalla de menú<br />
(pág. 28)<br />
Seleccione “Programa auto”<br />
Ajuste ANT/Cable<br />
Entrada ANT Cable<br />
Programa auto<br />
Siguiente<br />
Seleccione<br />
17
Configuración por primera vez (Continuación)<br />
Seleccione el modo de exploración (Todos los canal<strong>es</strong>/Sólo analógico/Sólo digital)<br />
Programa auto<br />
Todos los canal<strong>es</strong><br />
Sólo analógico<br />
Sólo digital<br />
Aceptar<br />
Seleccione<br />
Programa auto<br />
Progr<strong>es</strong>o<br />
Número de canal<strong>es</strong> análogos<br />
Número de canal<strong>es</strong> digital<strong>es</strong><br />
Pr<strong>es</strong>ione RETURN para salir<br />
RETURN<br />
32%<br />
10<br />
0<br />
Inicie la exploración de los canal<strong>es</strong>.<br />
Los canal<strong>es</strong> disponibl<strong>es</strong> (análogos/digital<strong>es</strong>) se<br />
<strong>es</strong>tablecen automáticamente.<br />
Todos los canal<strong>es</strong>: Explora canal<strong>es</strong> digital<strong>es</strong> y análogos<br />
Sólo analógico: Explora canal<strong>es</strong> análogos solamente<br />
Sólo digital: Explora canal<strong>es</strong> digital<strong>es</strong> solamente<br />
Confirme los canal<strong>es</strong> registrados<br />
ma manual<br />
Aceptar Cancelar<br />
Títulos Favoritos Agregar<br />
... ...<br />
Sí<br />
... ...<br />
Sí<br />
... ...<br />
Sí<br />
Seleccione<br />
“Aceptar”<br />
Aceptar<br />
Si no se pulsa OK d<strong>es</strong>pués de seleccionar “Aceptar”, los canal<strong>es</strong> no se<br />
memorizarán.<br />
El canal se guardará cuando no se haga ninguna operación durante 60<br />
segundos, y se saldrá automáticamente del menú “Programa manual”.<br />
Si realiza la exploración más de 2 vec<strong>es</strong>, los canal<strong>es</strong> guardados previamente se<br />
borrarán.<br />
18<br />
■ Pulse para salir<br />
de la pantalla de<br />
menú<br />
Nota<br />
Acerca de los<br />
sistemas de emisión<br />
Analógico (NTSC):<br />
programación de<br />
TV tradicional<br />
Digital (ATSC):<br />
nueva<br />
programación<br />
que le permite<br />
ver más canal<strong>es</strong><br />
con imagen y<br />
sonido de alta<br />
calidad<br />
Ajustar las etiquetas de entrada<br />
Ajuste inicial<br />
Idioma<br />
Reloj<br />
Ajuste ANT/Cable<br />
Títulos de entradas<br />
Títulos de entradas<br />
Componente 1<br />
Componente 2<br />
HDMI 1<br />
HDMI 2<br />
Video 1<br />
Video 2<br />
ó<br />
Siguiente<br />
Seleccione<br />
Seleccione<br />
Establezca<br />
Video 1<br />
Video 2<br />
Seleccione<br />
OK<br />
RETURN<br />
G A A<br />
R G B Y<br />
ABC → abc<br />
Borrar<br />
Cambia el modo de entrada de alfabético<br />
a numérico<br />
Etiqueta: [BLANCO] BRINCAR/VCR/DVD/CABLE/SATELITE/VGD/JUEGO/AUX/<br />
RECEPTOR/PC/Blu-ray/CAMARA/Grab de DVD/HOME THTR/MONITOR/<br />
MEDIA CTR/MEDIA EXT/OTROS
Para ver la televisión<br />
Conecte el TV a un receptor de televisión por cable, receptor digital multimedia, receptor de satélite o<br />
cable de antena (pág. 11-14)<br />
Para ver la televisión y otras funcion<strong>es</strong><br />
Conecte la alimentación<br />
Nota<br />
Si el modo no <strong>es</strong> TV, pulse<br />
ó<br />
seleccione TV. (pág. 24)<br />
y<br />
Escucha<br />
con SAP<br />
(Programa<br />
de audio<br />
secundario)<br />
CC/<br />
Subtítulos<br />
(TV)<br />
Seleccione un número de canal<br />
(TV)<br />
Arriba<br />
Abajo<br />
ó<br />
■ Para introducir directamente el<br />
número de un canal digital<br />
Cuando se sintonicen canal<strong>es</strong><br />
digital<strong>es</strong>, pr<strong>es</strong>ione el botón para<br />
introducir el número menor en<br />
un número de canal complejo.<br />
Ejemplo: CH15-1:<br />
Nota<br />
Vuelva a seleccionar “Cable” ó “Antena” en “Entrada ANT” de “Ajuste ANT/Cable” para<br />
cambiar la recepción de la señal entre televisión por cable y antena. (pág. 17, 39)<br />
El número del canal y el nivel del volúmen se fijan incluso d<strong>es</strong>pués de apagar el<br />
televisor.<br />
■ Seleccione el modo de audio para ver la televisión.<br />
Modo digital<br />
Pulse SAP para seleccionar la siguiente pista de audio (si <strong>es</strong>tá disponible)<br />
cuando se recibe un canal digital.<br />
Pista de audio 1 de 2<br />
(Inglés)<br />
Modo analógico<br />
Pulse SAP para seleccionar el modo de audio como se d<strong>es</strong>cribe a continuación.<br />
• Cada vez que se pulsa el botón SAP, el modo de audio cambiará como se<br />
mu<strong>es</strong>tra a continuación. (Estéreo/SPA/Mono)<br />
■ Activa o d<strong>es</strong>activa el modo CC/Subtítulos<br />
CC Sí<br />
CC No<br />
Guía de inicio<br />
rápido<br />
Visión Para ver la televisión<br />
Configuración por primera vez<br />
Visualización<br />
de SUB<br />
MENU<br />
■ Pulse SUB MENU para mostrar la pantalla del submenú. (pág. 28)<br />
Este menú consiste en atajos a funcion<strong>es</strong> de uso convenient<strong>es</strong>.<br />
SUB<br />
MENU<br />
Ajuste SUB MENU<br />
Modo de navegación<br />
Todos<br />
Configurar favorito<br />
Editar título del canal<br />
Medidor de señal<br />
19
Para ver la televisión (Continuación)<br />
■ Otras funcion<strong>es</strong> útil<strong>es</strong> (Utilícelas d<strong>es</strong>pués de )<br />
Recuperación<br />
de<br />
información<br />
Cambio de<br />
la relación<br />
de aspecto<br />
■ Visualice ó elimine la bandera de canal<strong>es</strong>.<br />
Canal<br />
15-2 THE NEWS<br />
12:30 PM<br />
ABC-HD CC SPA TV-G 1080i Estándar 4:3 30<br />
Identificador<br />
de emisora<br />
Indicación<br />
SAP<br />
R<strong>es</strong>olución<br />
de señal<strong>es</strong><br />
Modo de<br />
imagen<br />
Tiempo r<strong>es</strong>tante del<br />
temporizador de apagado<br />
Subtítulos Nivel de clasificación Relación de aspecto<br />
■ Pulse FORMAT para cambiar entre los modos de aspecto. (pág. 45)<br />
Reloj<br />
• 480i, 480p: COMP/JUSTO/4:3/ACERC<br />
• 1080p, 1080i, 720p: COMP/H-LLENO/JUSTO/4:3/ACERC<br />
Llamada<br />
a un canal<br />
favorito<br />
■ FAVORITOS<br />
Los números de canal<strong>es</strong> de Favoritos se visualizan en la pantalla de<br />
sintonización de favoritos. Seleccione la emisora d<strong>es</strong>eada con el cursor ó<br />
usando las teclas de números. (vea debajo)<br />
Función de favoritos<br />
■Configuración de la función de favoritos<br />
Visualice el submenú<br />
1<br />
SUB<br />
MENU<br />
■Utilización de la función de favoritos<br />
1<br />
Visualice “Canal<strong>es</strong> favoritos”<br />
2<br />
3<br />
Seleccione “Configurar favorito”<br />
Ajuste SUB MENU<br />
Modo de navegación<br />
Todos<br />
Configurar favorito<br />
Editar título del canal<br />
Medidor de señal<br />
Ajustar el canal visualizado<br />
Configurar favorito 1/3<br />
1 26-1<br />
2<br />
3<br />
4<br />
5<br />
Eliminar un canal favorito<br />
Configurar favorito 1/3<br />
1 26-1<br />
2<br />
ó<br />
Seleccione<br />
Aceptar<br />
Seleccionar el<br />
número de la lista<br />
Guardar el canal<br />
visualizado<br />
Seleccionar el número<br />
de la lista (para<br />
guardar el canal sin<br />
pulsar OK)<br />
Seleccione<br />
2<br />
3<br />
Seleccionar el canal<br />
Canal<strong>es</strong> favoritos 1/3<br />
1 26-1<br />
2<br />
3<br />
4<br />
5<br />
Ajustar el canal favorito<br />
Canal<strong>es</strong> favoritos 1/3<br />
1 26-1<br />
2<br />
3<br />
4<br />
5<br />
■Para cambiar la página<br />
Seleccione<br />
ó<br />
Aceptar<br />
Pulsar repetidamente para cambiar<br />
entre páginas (1/3, 2/3, 3/3 o salir)<br />
Avanza/retrocede la página<br />
3<br />
4<br />
5<br />
Eliminar<br />
(manteniendo pulsado)<br />
20
Utilización de VIERA TOOLS<br />
VIERA TOOLS <strong>es</strong> un método sencillo para acceder a los menús más utilizados mediante un icono de<br />
acc<strong>es</strong>o directo en la pantalla del televisor.<br />
Al contrario que con los menús convencional<strong>es</strong>, podrá disfrutar usando el televisor, jugando o ajustando<br />
las funcion<strong>es</strong> con rapidez.<br />
Visualice VIERA TOOLS<br />
Seleccione el elemento<br />
Seleccione<br />
Siguiente<br />
Bloqueo<br />
■ Pulse para salir<br />
de la pantalla de<br />
menú<br />
Menú “VIERA Link” visualizado (pág. 34-35)<br />
Comenzar pase de diapositivas (pág. 22-23)<br />
Establezca “Apagado” (Temporizador de<br />
apagado) (pág. 42)<br />
Menú “Bloqueo” visualizado (pág. 36)<br />
Visión Utilización de VIERA TOOLS<br />
Para ver la televisión<br />
■ Para volver a la<br />
pantalla anterior<br />
21
Diapositiva<br />
Para ver imágen<strong>es</strong> de tarjeta SD<br />
Puede ver fotos tomadas con una cámara digital ó con una cámara de vídeo digital que <strong>es</strong>tén guardadas en una<br />
tarjeta SD. (El contenido de otros medios que no sean tarjetas SD puede que no se reproduzca correctamente.)<br />
Inserte la tarjeta SD<br />
* Este ajuste se omitirá la próxima vez si no se selecciona “Ajustar d<strong>es</strong>pués”.<br />
Ajustar “Ajuste de tarjeta SD” y seleccionar “Reproducir tarjeta SD ahora”<br />
“Ajuste de tarjeta SD” se visualizará automáticamente cada vez que se inserte<br />
una tarjeta SD por primera vez.<br />
Ajuste de tarjeta SD<br />
Reproducir tarjeta SD auto<br />
Ajustar d<strong>es</strong>pués<br />
Visualizador de fotos<br />
Reproducir tarjeta SD ahora<br />
Seleccione<br />
Cambie<br />
Establezca<br />
Diapositiva:<br />
La próxima vez se iniciará<br />
automáticamente una pr<strong>es</strong>entación.<br />
Miniaturas:<br />
En adelante se mostrará automáticamente<br />
el menú Visualizador de fotos.<br />
Ajustar d<strong>es</strong>pués:<br />
Se mostrará repetidamente el menú<br />
“Ajuste de tarjeta SD”.<br />
No: Los datos se pueden reproducir<br />
manualmente.<br />
■ Operación manual (“Reproducir tarjeta SD auto” se encuentra en “No”)<br />
Visualice “Visualizador de fotos” Comenzar pase de diapositivas<br />
Seleccione<br />
Siguiente<br />
Seleccione los datos que va a ver.<br />
Visualizador de fotos<br />
Vista de imagen miniatura<br />
Seleccione<br />
22<br />
■ Pulse para salir<br />
de la pantalla de<br />
menú<br />
■ Para volver a la<br />
pantalla anterior<br />
Total 50<br />
Nombre<br />
Pana0001<br />
Fecha<br />
03/04/2009<br />
Tamaño<br />
1600×1200<br />
Rota.<br />
Previo<br />
R<br />
Adquiriendo<br />
G<br />
Diapositivas<br />
Siguíente<br />
RETURN<br />
B Y<br />
Pana0001 Pana0002 Pana0003 Pana0004<br />
Pana0005 Pana0006 Pana0007 Pana0008<br />
Pana0009 Pana0010 Pana0011 Pana0012<br />
Se visualiza información de la imagen<br />
seleccionada.<br />
Nombre: Se visualiza el número de la<br />
imagen ó el nombre del archivo.<br />
Fecha: Se visualiza la fecha de la<br />
grabación.<br />
Tamaño: Se visualiza la r<strong>es</strong>olución de<br />
la visualización.<br />
Número total de imágen<strong>es</strong><br />
Nota<br />
Rota.<br />
Previo<br />
R<br />
Adquiriendo<br />
G<br />
Diapositivas<br />
Ver<br />
Área de navegación<br />
Siguíente<br />
RETURN<br />
B Y<br />
(a diapositiva)<br />
Estado actual<br />
(Mientras se leen los datos)<br />
R<br />
Adquiriendo<br />
Previo<br />
G<br />
individual<br />
Pausa<br />
Siguíente<br />
RETURN<br />
B Y<br />
(a visualización<br />
de una sola foto)<br />
Dependiendo del formato JPEG, el contenido de “Información” puede que no se visualice correctamente.<br />
Consulte la pág. 46 (Formato de datos para examinar tarjetas SD) para conocer detall<strong>es</strong>.<br />
Vea la imagen.<br />
Rota.<br />
Previo<br />
R G<br />
Diapositivas<br />
Siguíente<br />
RETURN<br />
B Y<br />
Visualizado uno cada vez<br />
Área de navegación<br />
Gire 90° (hacia la izquierda)<br />
A la siguiente foto<br />
Gire 90° (a la derecha)<br />
A la foto anterior<br />
Para visualizar/ocultar el área de<br />
navegación
Inserte la tarjeta Retire la tarjeta<br />
Tarjeta<br />
SD<br />
Superficie de<br />
la etiqueta<br />
Empuje hasta oír un<br />
ruido seco<br />
Pulse ligeramente<br />
sobre la tarjeta SD y<br />
luego suéltela.<br />
Tarjetas que pueden utilizarse (capacidad máxima): Tarjeta SDHC (16 GB), Tarjeta SD (2 GB),<br />
Tarjeta miniSD (1 GB) (se requiere adaptador para Tarjeta miniSD)<br />
Para conocer detall<strong>es</strong> y precaucion<strong>es</strong> relacionados con las tarjetas SD. (pág. 46)<br />
Menu de<br />
imágen<strong>es</strong><br />
fijas<br />
En ó ■Ajustar la imagen<br />
Visualice “Menu de imágen<strong>es</strong> fijas”<br />
Seleccione el elemento<br />
Menu de imágen<strong>es</strong> fijas<br />
Imagen<br />
Ajuste de diapositivas<br />
Establezca<br />
Seleccione<br />
Establezca<br />
■Configurar pase de diapositivas<br />
Seleccione<br />
Ajuste de diapositivas<br />
Visualización Rápida<br />
Repetir<br />
Sí<br />
Visualización<br />
Repetir<br />
Nota<br />
Ajuste<br />
Imagen 1/2<br />
Regr<strong>es</strong>o prefijados<br />
Modo<br />
Vívido<br />
Contraste 0<br />
Brillo<br />
0<br />
Color<br />
0<br />
Tinte<br />
0<br />
Nitidez 0<br />
Menú Imagen (pág. 26)<br />
Puede ajustar los segundos que se va a visualizar cada imagen en el modo de<br />
diapositiva. (Muy rápida/Rápida/Mediana/Lenta/Muy lenta)<br />
Sí ó No la función de repetición de diapositiva.<br />
Para detenerse en medio del ciclo<br />
Pulse<br />
Seleccione<br />
Ajuste<br />
Visión Para ver imágen<strong>es</strong> de tarjeta SD<br />
VIERA IMAGE VIEWER<br />
VIERA Image Viewer <strong>es</strong> una función que le permitirá ver fácilmente imágen<strong>es</strong> fijas y en movimiento en VIERA<br />
insertando simplemente una tarjeta SD en la ranura para tarjeta VIERA SD.<br />
23
Para ver vídeo y DVDs<br />
Si tiene algún equipo conectado al televisor, usted podrá ver la reproducción de vídeos y DVDs en la<br />
pantalla del televisor.<br />
Seleccionar entrada<br />
Puede seleccionar el equipo externo al que quiera acceder.<br />
Con el equipo conectado encendido<br />
Visualización del menú de selección de entrada<br />
Seleccione el modo de entrada<br />
Seleccionar entrada<br />
1 TV<br />
2<br />
3<br />
4<br />
5<br />
6<br />
7<br />
Componente 1<br />
Componente 2<br />
HDMI 1<br />
HDMI 2<br />
Video 1<br />
Video 2<br />
HDMI 1<br />
JUEGO<br />
AUX<br />
(ejemplo)<br />
Terminal<br />
Etiqueta<br />
(ejemplo)<br />
ó<br />
Pulse la flecha ascendente/<br />
Seleccione d<strong>es</strong>cendente para seleccionar la<br />
entrada de su elección, y luego<br />
pulse OK.<br />
Introducir<br />
Pulse la tecla de número<br />
corr<strong>es</strong>pondiente en el mando<br />
a distancia para seleccionar la<br />
entrada de su elección.<br />
Durante la selección, el<br />
menú “Seleccionar entrada”<br />
d<strong>es</strong>aparece si no se realiza<br />
ninguna acción durante varios<br />
segundos.<br />
El terminal y el título del equipo<br />
conectado se visualizan.<br />
Para cambiar la etiqueta de<br />
entrada (pág. 41)<br />
Nota<br />
Cuando se <strong>es</strong>tablezca el título de entrada (consulte la pág. 41), el título de<br />
entrada se visualizará en la pantalla “Seleccionar entrada”.<br />
Para conocer detall<strong>es</strong> del ajuste “Títulos de entradas”, consulte la pág. 41.<br />
■ Para volver al TV<br />
Utilice el equipo conectado empleando el mando a<br />
distancia del mismo.<br />
Nota<br />
Para conocer detall<strong>es</strong>, vea el manual del equipo conectado.<br />
24
Ajuste VIERA Link TM<br />
Si conecta el equipo que tiene la función “HDAVI Control” al televisor con un cable HDMI, usted puede<br />
disfrutar utilizando la función más conveniente. Consulte “Control VIERA Link” en las pág. 30-35.<br />
Ant<strong>es</strong> de utilizar <strong>es</strong>tas funcion<strong>es</strong>, usted nec<strong>es</strong>ita poner “VIERA Link” en “Sí” como se mu<strong>es</strong>tra más abajo.<br />
Visualice el menú.<br />
Seleccione “Ajuste”<br />
Menú<br />
Seleccione<br />
■ Pulse para salir<br />
de la pantalla de<br />
menú<br />
■ Para volver a la<br />
pantalla anterior<br />
VIERA Link<br />
Imagen<br />
Bloqueo<br />
Tarjeta SD<br />
CC/Subtítulos<br />
Ajuste<br />
Siguiente<br />
Seleccione “Ajuste VIERA Link”<br />
Ajuste 2/2<br />
Ajuste VIERA Link<br />
Eco/ahorro energía<br />
Ajuste avanzado<br />
R<strong>es</strong>taurar<br />
Seleccione “VIERA Link”<br />
Ajuste VIERA Link<br />
VIERA Link<br />
Prende control<br />
Apaga control<br />
Sí<br />
Sí<br />
Sí<br />
Ahorro energía en <strong>es</strong>pera<br />
No<br />
Energía en <strong>es</strong>pera automática<br />
Altavoz inicial<br />
No<br />
Interno<br />
Seleccione “Sí”.<br />
(La opción predeterminada<br />
<strong>es</strong> “Sí”)<br />
Seleccione<br />
Siguiente<br />
Seleccione<br />
Cambie<br />
Ahora puede <strong>es</strong>tablecer cada función “VIERA Link” según sus<br />
preferencias (pág. 32-35)<br />
Visión Para ver vídeo y DVDs<br />
Nota<br />
Si no se ha conectado un equipo HDMI o si se utiliza un equipo HDMI <strong>es</strong>tándar<br />
(sin “VIERA Link”), seleccione “No”.<br />
Para conocer detall<strong>es</strong> de las conexion<strong>es</strong> del equipo externo, consulte los<br />
manual<strong>es</strong> de instruccion<strong>es</strong> del equipo.<br />
25
Cómo utilizar las funcion<strong>es</strong> de los menús<br />
Varios menús le permiten seleccionar configuracion<strong>es</strong> para la imagen,<br />
el sonido y otras funcion<strong>es</strong>, para que usted pueda disfrutar viendo la<br />
televisión como usted d<strong>es</strong>ee.<br />
Visualice el menú<br />
■ Lista de menús<br />
Menú<br />
VIERA<br />
Link<br />
Elemento<br />
Control VIERA Link<br />
Salida altavoz<br />
Regr<strong>es</strong>o prefijados<br />
■ Pulse para salir<br />
de la pantalla de<br />
menú<br />
■ Para volver a la<br />
pantalla anterior<br />
Visualiza las funcion<strong>es</strong> que pueden<br />
<strong>es</strong>tablecerse (cambia según la señal de<br />
entrada).<br />
Seleccione el menú<br />
Menú<br />
VIERA Link<br />
Imagen<br />
Audio<br />
Cronómetro<br />
Bloqueo<br />
Tarjeta SD<br />
CC/Subtítulos<br />
Ajuste<br />
Seleccione el elemento<br />
Imagen 1/2<br />
Regr<strong>es</strong>o prefijados<br />
Modo<br />
Vívido<br />
Contraste 0<br />
Brillo<br />
0<br />
Color<br />
0<br />
Tinte<br />
0<br />
Nitidez 0<br />
(Ejemplo: Menú Imagen)<br />
Ajuste ó seleccione<br />
Imagen 1/2<br />
Regr<strong>es</strong>o prefijados<br />
Modo<br />
Vívido<br />
Contraste 0<br />
Brillo<br />
0<br />
Color<br />
0<br />
Tinte<br />
0<br />
Nitidez 0<br />
(Ejemplo: Menú Imagen)<br />
Seleccione<br />
Siguiente<br />
Seleccione<br />
Ajuste<br />
ó<br />
Seleccione<br />
Imagen<br />
Audio<br />
Modo<br />
Contraste, Brillo,<br />
Color, Tinte, Nitidez<br />
Temp. color<br />
S.S.A.C<br />
Reduc de ruido<br />
Ajuste acercamiento<br />
3D Y/C filtro<br />
Imagen avanzada<br />
Matriz color<br />
MPEG NR<br />
Nivel obscuro<br />
Tamaño de H<br />
Regr<strong>es</strong>o prefijados<br />
Bajos<br />
Altos<br />
Balance<br />
Audio avanzado<br />
Envolvente<br />
Nivel de volumen<br />
Altavoc<strong>es</strong> de TV<br />
Entrada HDMI 1<br />
Entrada HDMI 2<br />
Cronómetro Apagado, Cronómetro 1-5<br />
Bloqueo<br />
Tarjeta<br />
SD<br />
Tarjeta SD<br />
CC/<br />
Subtítulos<br />
CC/Subtítulos<br />
26
Ajust<strong>es</strong>/Configuracion<strong>es</strong> (alternativas)<br />
[Control VIERA Link]<br />
Seleccione el equipo y utilícelo. (Grabador/Cine para casa/Reproductor/Videocámara/LUMIX) (pág. 34-35)<br />
[Salida altavoz]<br />
Seleccione la salida de audio. (Externo/Interno) (pág. 34-35)<br />
• Al menú VIERA Link se puede acceder directamente pulsando el botón VIERA Link del control remoto. (pág. 34)<br />
R<strong>es</strong>tablece la configuración del menú de imagen (excepto para “Imagen avanzada”).<br />
Regr<strong>es</strong>o prefijados<br />
Modo de imagen básico (Vívido/Estándar/Cinema/Usuario) (pág. 47) Modo Vívido<br />
Ajusta el color, el brillo, etc. para que cada modo de imagen se ajuste a sus gustos.<br />
• Gama de visualizacion<strong>es</strong><br />
Contraste/Brillo/Color/Nitidez: 0 - 100<br />
Tinte: -50 - +50<br />
Contraste +20<br />
Brillo 0<br />
Color 0<br />
Tinte 0<br />
Nitidez 0<br />
Selecciona una opción de color frío (azul), normal o cálido (rojo). (Azul/Normal/Rojo) Temp. color Azul<br />
Ajusta el brillo y la gradación de acuerdo con la condición de iluminación ambiental. (No/Sí) S.S.A.C No<br />
Reduce el ruido en el canal, comúnmente llamado efecto de nieve. Permanece en No cuando se recibe una señal intensa. (No/Sí) Reduc de ruido No<br />
Ajusta la alineación vertical y el tamaño cuando el ajuste del aspecto <strong>es</strong> “ACERC” (pág. 45)<br />
Ajuste acercamiento<br />
Minimiza el ruido y la diafonía cromática de la imagen. (Sí/No) 3D Y/C filtro Sí<br />
Selecciona la r<strong>es</strong>olución de la imagen de los dispositivos conectados a component<strong>es</strong>. (HD/SD)<br />
SD: Visión normal HD: Visión de alta definición<br />
• Sólo se acepta la señal 480p, la televisión convencional (NTSC) no se <strong>es</strong>tá disponible. Matriz color SD<br />
Reduce el ruido de las señal<strong>es</strong> digital<strong>es</strong> <strong>es</strong>pecíficas de DVD, STB, etc. (Sí/No) MPEG NR No<br />
Seleccione Obscuro ó Claro. Sólo <strong>es</strong> válido para las señal<strong>es</strong> de entrada externas. (Obscuro/Claro) Nivel obscuro Claro<br />
Ajustar el margen de visualización horizontal para reducir el ruido a ambos lados de una imagen.<br />
(Tamaño 1/Tamaño 2)<br />
Tamaño 2: Ajustar el tamaño de la imagen en función del modo de aspecto para eliminar el ruido. (pág. 48)<br />
Repone los ajust<strong>es</strong> de Bajos, Altos y Balance a los ajust<strong>es</strong> predeterminados en la fábrica.<br />
Tamaño de H Tamaño 1<br />
Regr<strong>es</strong>o prefijados<br />
Aumenta ó disminuye la r<strong>es</strong>pu<strong>es</strong>ta de los grav<strong>es</strong>. Bajos 0<br />
Aumenta ó disminuye la r<strong>es</strong>pu<strong>es</strong>ta de los agudos. Altos 0<br />
Realza el volúmen de los altavoc<strong>es</strong> izquierdo/derecho. Balance 0<br />
Mejora la r<strong>es</strong>pu<strong>es</strong>ta de audio cuando se <strong>es</strong>cucha sonido <strong>es</strong>téreo. (Sí/No) Envolvente No<br />
Minimiza la diferencia de volúmen d<strong>es</strong>pués de cambiar a entradas externas. Nivel de volumen 0<br />
Cambia a “No” cuando se utilizan altavoc<strong>es</strong> externos. (Sí/No)<br />
• “Envolvente” y “Nivel de volumen” no funcionan si se selecciona “No”. Altavoc<strong>es</strong> de TV Sí<br />
El ajuste predeterminado para la conexión HDMI <strong>es</strong> “Digital”. (Señal de entrada digital)<br />
Entrada HDMI 1<br />
El terminal de entrada de audio se puede seleccionar cuando <strong>es</strong>tá conectado el cable DVI. (Señal de<br />
Entrada HDMI 2<br />
entrada analógica) (Digital/Componente 1/Componente 2/Video 1/Video 2)<br />
Enciende/Apaga automáticamente el televisor (pág. 42)<br />
Digital<br />
Digital<br />
Cómo utilizar las funcion<strong>es</strong> de los menús<br />
(imagen, sonido, etc.)<br />
Funcion<strong>es</strong><br />
avanzadas<br />
Bloquea canal<strong>es</strong> y programas. (pág. 36)<br />
Visualiza datos de tarjetas SD. (pág. 22-23)<br />
Tarjeta SD<br />
Visualiza subtítulos ocultos. (pág. 40)<br />
CC/Subtítulos<br />
En el modo AV, el menú Audio y el menú Ajuste ofrecen un número menor de opcion<strong>es</strong>.<br />
27
Cómo utilizar las funcion<strong>es</strong> de los menús<br />
Varios menús le permiten hacer ajust<strong>es</strong> para la imagen, el sonido y<br />
otras funcion<strong>es</strong>, para poder disfrutar viendo la TV de la forma que a<br />
usted más le convenga.<br />
■ Pulse para salir<br />
de la pantalla de<br />
menú<br />
■ Para volver a la<br />
pantalla anterior<br />
Visualice el menú<br />
Visualiza las funcion<strong>es</strong> que pueden<br />
<strong>es</strong>tablecerse (cambia según la señal de<br />
entrada).<br />
Seleccione “Ajuste”<br />
Menú<br />
VIERA Link<br />
Imagen<br />
Audio<br />
Cronómetro<br />
Bloqueo<br />
Tarjeta SD<br />
CC/Subtítulos<br />
Ajuste<br />
Seleccione el elemento<br />
Ajuste 1/2<br />
Modo de navegación<br />
Todos<br />
Idioma<br />
Reloj<br />
Ajuste ANT/Cable<br />
Aparatos conectados<br />
Anti retención de imag<br />
Visualización de submenú<br />
SUB<br />
MENU<br />
Siguiente<br />
Seleccione<br />
Siguiente<br />
Seleccione<br />
■ Lista de menús<br />
Menú Elemento<br />
Ajuste<br />
Modo de navegación<br />
Idioma<br />
Reloj<br />
Ajuste ANT/Cable<br />
Aparatos<br />
conectados<br />
Anti retención de<br />
imag<br />
Ajuste VIERA Link<br />
Eco/ahorro energía<br />
Títulos de entradas<br />
Pixel orbiter<br />
Tiempo (minutos)<br />
Barra lateral 4:3<br />
Barra vertical en movimiento<br />
VIERA Link<br />
Prende control<br />
Apaga control<br />
Ahorro energía en<br />
<strong>es</strong>pera<br />
Energía en <strong>es</strong>pera<br />
automática<br />
Altavoz inicial<br />
Si no hay señal por<br />
10 minutos<br />
Si no hay operación<br />
por 3 horas<br />
28<br />
Seleccione el elemento<br />
Ajuste SUB MENU<br />
Modo de navegación<br />
Todos<br />
Configurar favorito<br />
Editar título del canal<br />
Medidor de señal<br />
Seleccione<br />
Establezca<br />
ó<br />
Siguiente<br />
■ Lista de submenús<br />
Menú Elemento<br />
Modo de navegación<br />
Configurar favorito<br />
Editar título del canal<br />
Medidor de señal<br />
Ajuste<br />
SUB MENU<br />
Ajuste<br />
avanzado<br />
Autoencendido<br />
Reproducir tarjeta<br />
SD auto<br />
Acerca de<br />
Regr<strong>es</strong>o prefijados
(Continuación)<br />
Ajust<strong>es</strong>/Configuracion<strong>es</strong> (alternativas)<br />
Selecciona el canal con el botón de canal arriba/abajo. (Todos/Favoritos/Sólo digital/Sólo analógico) Modo<br />
• Favoritos: Sólo cuando se registran canal<strong>es</strong> como FAVORITE (pág. 20).<br />
Selecciona el idioma para los menús de la pantalla. (pág. 16)<br />
Ajusta el reloj (pág. 17)<br />
Establece los canal<strong>es</strong> (pág. 39)<br />
Seleccione la terminal y la etiqueta del equipo externo. (pág. 41)<br />
de navegación<br />
Idioma<br />
Reloj<br />
Todos<br />
Ajuste ANT/Cable<br />
Impide la “Retención de imagen” con d<strong>es</strong>plazamiento. (Automático/Periodico)<br />
Automático: Cambia automáticamente la imagen visualizada.<br />
• Periodico: Cambia la imagen visualizada cada (1/2/3/4) minutos conforme a lo <strong>es</strong>tablecido en el menú de “Tiempo (minutos)”. Pixel orbiter Automático<br />
Establece el tiempo para el ajuste “Pixel orbiter - Periodico”. (1/2/3/4) Tiempo (minutos) 4<br />
Aumenta el brillo de la barra lateral (No/Bajo/Medio/Alto) (modo 4:3 solamente)<br />
• El ajuste recomendado <strong>es</strong> “Alto” para impedir la “Retención de imagen”. (pág. 48) Barra lateral 4:3 Alto<br />
Pulse OK para iniciar el “D<strong>es</strong>plazamiento” horizontal en la pantalla. (pág. 48)<br />
Barra vertical en movimiento<br />
Controla el equipo conectado a los terminal<strong>es</strong> HDMI (pág. 32) (Sí/No)<br />
• “Apaga control”, “Prende control”, “Ahorro energía en <strong>es</strong>pera”, “Energía en <strong>es</strong>pera automática” y<br />
“Altavoz inicial” no se pueden seleccionar si <strong>es</strong>tá seleccionado “No”.<br />
VIERA Link Sí<br />
Establece “Prende control” de los equipos de conexión HDMI (pág. 32). (Sí/No) Prende control Sí<br />
Establece “Apaga control” de los equipos de conexión HDMI (pág. 32). (Sí/No) Apaga control Sí<br />
Ajustar “Ahorro energía en <strong>es</strong>pera” del equipo de conexión HDMI. (pág. 32) (Sí/No)<br />
Ajustar “Energía en <strong>es</strong>pera automática” del equipo de conexión HDMI. (pág. 32)<br />
(No/ Sí (con aviso) / Sí (sin aviso)<br />
Ahorro energía en <strong>es</strong>pera<br />
No<br />
Energía en <strong>es</strong>pera automática<br />
No<br />
Selecciona los altavoc<strong>es</strong> predeterminados (pág. 32) (Interno/Externo) Altavoz inicial Interno<br />
Para conservar energía, el televisor se apaga automáticamente cuando no se recibe ninguna señal y no<br />
se realiza ninguna operación durante más de 10 minutos. (Sí/No)<br />
Nota<br />
No se utiliza cuando se configura “Autoencendido”, “Cronómetro”, “Bloqueo”, “Modo SD”, o el canal digital.<br />
• “Si no hay señal por 10 minutos fue activado” se visualizará durante unos 10 segundos cuando el televisor se<br />
encienda por primera vez d<strong>es</strong>pués de d<strong>es</strong>conectarse la alimentación mediante “Si no hay señal por 10 minutos”.<br />
• La visualización en pantalla mostrará parpadeando los números 3, 2 y 1 para indicar los últimos tr<strong>es</strong><br />
(3) minutos que quedan hasta que se produzca el apagado<br />
Para ahorrar energía, el TV se apaga automáticamente cuando no se realiza ninguna operación con las<br />
teclas del mando a distancia o del panel delantero durante más de 3 horas. (Sí/No)<br />
Nota<br />
No se utiliza cuando se configura “Autoencendido” o “Cronómetro”.<br />
• “Si no hay operación por 3 horas fue activado” se visualizará durante unos 10 segundos cuando el televisor se<br />
encienda por primera vez d<strong>es</strong>pués de d<strong>es</strong>conectarse la alimentación mediante “Si no hay operación por 3 horas”.<br />
• La visualización en pantalla mostrará parpadeando los números 3, 2 y 1 para indicar los últimos tr<strong>es</strong><br />
(3) minutos que quedan hasta que se produzca el apagado.<br />
Si no hay señal por 10 minutos<br />
Sí<br />
Si no hay operación por 3 horas<br />
No<br />
Enciende automáticamente el televisor cuando se enciende el receptor de televisión por cable ó un dispositivo conectado. (No/Si)<br />
El cable de CA del televisor debe <strong>es</strong>tar enchufado en <strong>es</strong>te dispositivo. El televisor se enciende cada vez que se r<strong>es</strong>taura la alimentación. Autoencendido No<br />
• El cronómetro de apagado y el temporizador de encendido/apagado no funcionará si se <strong>es</strong>tablece “Autoencendido”. (pág. 42) Ajuste “Miniaturas” o “Diapositiva” para reproducir automáticamente tarjetas SD.<br />
Reproducir tarjeta SD auto<br />
(Diapositiva/Miniaturas/Ajustar d<strong>es</strong>pués/No)<br />
Ajustar d<strong>es</strong>pués<br />
Visualiza la versión del televisor y la licencia del software.<br />
Al realizar la reposición se cancelarán todos los elementos <strong>es</strong>tablecidos con Ajuste como, por ejemplo,<br />
los ajust<strong>es</strong> de canal<strong>es</strong>. (pág. 38)<br />
Acerca de<br />
Regr<strong>es</strong>o prefijados<br />
Cómo utilizar las funcion<strong>es</strong> de los menús<br />
(imagen, sonido, etc.)<br />
Funcion<strong>es</strong><br />
avanzadas<br />
Ajust<strong>es</strong>/Configuracion<strong>es</strong> (alternativas)<br />
Selecciona el modo para seleccionar canal<strong>es</strong> con el botón de canal arriba/abajo (Todos/Favoritos/Sólo digital/Sólo analógico)<br />
Llama a un canal favorito. (pág. 20)<br />
Cambia el identificador de emisora. (pág. 39)<br />
Compruebe la intensidad de la señal si se encuentran interferencias o se congela una imagen digital. (pág. 39)<br />
29
VIERA Link TM “HDAVI Control TM ”<br />
Control simultáneo de todos los component<strong>es</strong> de <strong>Panasonic</strong> equipados con “HDAVI Control” utilizando un botón de<br />
un mando a distancia.<br />
Disfrute de la interoperabilidad HDMI adicional con los productos <strong>Panasonic</strong> que tienen la función VIERA Link<br />
“HDAVI Control”.<br />
Este televisor soporta la función “HDAVI Control 4”.<br />
Las conexion<strong>es</strong> a algunos equipos (grabadora DVD DIGA, videocámara HD, dispositivo de cine para casa RAM,<br />
reproductor de cine para casa, amplificador, etc.) con cabl<strong>es</strong> HDMI le permiten hacer interfaz automáticamente.<br />
El equipo con la función “HDAVI Control” permite las operacion<strong>es</strong> siguient<strong>es</strong>:<br />
Versión<br />
Operacion<strong>es</strong><br />
HDAVI Control ó posterior Cambio de entrada automático (pág. 33)<br />
Prende control (pág. 33)<br />
Apaga control (pág. 33)<br />
Altavoz inicial (pág. 33)<br />
Reproducción de cine para casa con un toque (pág. 33)<br />
• Control de altavoc<strong>es</strong> (pág. 35)<br />
HDAVI Control 2 ó posterior Control VIERA Link sólo con el mando a distancia del TV (pág. 35)<br />
• Energía en <strong>es</strong>pera automática (para equipo disponible solamente) (pág. 33)<br />
HDAVI Control 3 ó posterior Suministro de la información de ajuste (pág. 33)<br />
• Función de sincronización automática de voz (pág. 33)<br />
HDAVI Control 4 • Ahorro energía en <strong>es</strong>pera (con modo de arranque rápido) (pág. 33)<br />
■ Para la primera vez/Cuando se agrega un equipo nuevo, se reconecta un equipo o se cambia la instalación<br />
d<strong>es</strong>pués de hacer la conexión, encienda el equipo y luego encienda el televisor.<br />
Seleccione el modo de entrada al HDMI 1 ó HDMI 2 (pág. 24) y asegúr<strong>es</strong>e de que la imagen se visualice<br />
correctamente.<br />
VIERA Link “HDAVI Control”, basada en las funcion<strong>es</strong> de control provistas por HDMI, una norma industrial conocida<br />
como HDMI CEC (control electrónico de consumidor<strong>es</strong>), <strong>es</strong> una función única que nosotros hemos d<strong>es</strong>arrollado y<br />
agregado. Como tal, su funcionamiento con equipos de otros fabricant<strong>es</strong> que soportan HDMI CEC no puede ser<br />
garantizado.<br />
Consulte los manual<strong>es</strong> individual<strong>es</strong> de los equipos de otros fabricant<strong>es</strong> que soportan la función VIERA Link.<br />
■ HDMI cable<br />
Esta función nec<strong>es</strong>ita de un cable que cumpla con la norma HDMI (completamente cableado).<br />
Los cabl<strong>es</strong> que no cumplan con la norma HDMI no se pueden utilizar.<br />
Se recomienda utilizar un cable HDMI de <strong>Panasonic</strong>. Número de pieza recomendada:<br />
RP-CDHF15 (4,9 pi<strong>es</strong>/1,5 m), RP-CDHG15 (4,9 pi<strong>es</strong>/1,5 m), RP-CDHF30 (9,8 pi<strong>es</strong>/3,0 m),<br />
RP-CDHG30 (9,8 pi<strong>es</strong>/3,0 m), RP-CDHG50 (16,4 pi<strong>es</strong>/5,0 m)<br />
* Para conocer detall<strong>es</strong> de las conexion<strong>es</strong> del equipo externo, consulte los manual<strong>es</strong> de instruccion<strong>es</strong> del equipo.<br />
30
VIERA Link TM Conexion<strong>es</strong><br />
Siga los diagramas de conexion<strong>es</strong> de abajo para hacer el Si<br />
control HDAVI de un solo equipo AV como, por ejemplo, una<br />
Grabadora DVD(DIGA), un equipo de cine para casa RAM ó<br />
un reproductor de cine para casa.<br />
Consulte la página 32-35 para conocer la configuración del<br />
menú Ajuste e información de control adicional.<br />
• Los cabl<strong>es</strong> HDMI y/u ópticos no son suministrados.<br />
Nota<br />
se cambia la conexión (o configuración) del equipo compatible<br />
con el control HDAVI, d<strong>es</strong>conecte la alimentación de <strong>es</strong>ta<br />
unidad y vuelva a conectarla mientras la alimentación de todos<br />
los equipos <strong>es</strong>tá conectada (para que <strong>es</strong>ta unidad reconozca<br />
correctamente el equipo conectado) y compruebe que funcione<br />
el Grabadora DVD(DIGA), el equipo de cine para casa RAM y el<br />
reproductor de cine para casa.<br />
Se recomienda HDMI 1.<br />
Cuando se conecta a HDMI 2, ponga el modo de entrada en HDMI 2 (pág. 24) inicialmente ant<strong>es</strong> de conectar a<br />
HDMI 2. D<strong>es</strong>pués de hacer la conexión, confirme las funcion<strong>es</strong> de control de HDMI (pág. 32-35).<br />
■ Conexión de <strong>es</strong>ta unidad Grabadora DVD(DIGA), sistema<br />
de cine para casa RAM ó reproductor de cine para casa<br />
Para Grabadora DVD (DIGA): Conecte con cable HDMI<br />
Para equipo de cine para casa RAM ó reproductor de cine para casa:<br />
Conecte con cable HDMI y con cable de audio.<br />
Si no conecta el cable de audio no puede oír el programa de<br />
televisión a través del sistema de cine para casa.<br />
Parte posterior de <strong>es</strong>ta unidad<br />
Salida de audio digital<br />
VI<strong>DE</strong>O<br />
Y<br />
PB<br />
PR<br />
L<br />
■ Conexión de <strong>es</strong>ta unidad a<br />
una Grabadora DVD (DIGA) y<br />
amplificador AV<br />
Cuando utilice un receptor de audio-vídeo<br />
“VIERA Link” y una Grabadora DVD<br />
(DIGA) compatible, utilice una conexión en<br />
cadena como se mu<strong>es</strong>tra abajo.<br />
HDMI 1 HDMI 2<br />
Y<br />
S VI<strong>DE</strong>O<br />
PB<br />
PR<br />
L<br />
L<br />
ó<br />
VIERA Link TM “HDAVI Control TM ”<br />
AUDIO<br />
Cable HDMI<br />
HDMI<br />
(AV IN)<br />
HDMI<br />
(AV OUT)<br />
HDMI<br />
(AV OUT)<br />
R<br />
R R<br />
COMPONENT<br />
VI<strong>DE</strong>O IN 1<br />
1 IN<br />
2<br />
ó<br />
ó<br />
HDMI<br />
(AV OUT)<br />
ó<br />
HDMI<br />
(AV OUT)<br />
HDMI<br />
(AV OUT)<br />
Funcion<strong>es</strong><br />
avanzadas<br />
ó<br />
Grabadora DVD<br />
(DIGA) con funcíón<br />
VIERA Link<br />
Amplificador AV<br />
con funcíón<br />
VIERA Link<br />
Equipo de cine para<br />
casa con funcíón<br />
VIERA Link<br />
Videocámara<br />
HD con funcíón<br />
VIERA Link<br />
LUMIX con<br />
función<br />
VIERA Link<br />
Grabadora DVD<br />
(DIGA) con funcíón<br />
VIERA Link<br />
Con <strong>es</strong>ta unidad se puede controlar un amplificador AV y un Grabadora DVD(DIGA).<br />
Asegúr<strong>es</strong>e de conectar el amplificador AV entre la unidad y el grabador DVD (DIGA).<br />
■ Configuración de <strong>es</strong>ta unidad d<strong>es</strong>pués de la conexión<br />
D<strong>es</strong>pués de hacer las conexion<strong>es</strong> como se mu<strong>es</strong>tra arriba, ponga “VIERA Link” (bajo “Ajuste VIERA Link”) en “Sí”<br />
utilizando el menú Ajuste (pág. 25, 32-33).<br />
Nota<br />
Los equipos HDMI individual<strong>es</strong> tal vez requieran configuracion<strong>es</strong> de menús <strong>es</strong>pecíficas adicional<strong>es</strong> para cada<br />
modelo. Consulte sus manual<strong>es</strong> de instruccion<strong>es</strong> r<strong>es</strong>pectivos.<br />
Cuando el audio de otro equipo conectado a <strong>es</strong>ta unidad a través de HDMI salga utilizando “DIGITAL AUDIO OUT”<br />
de <strong>es</strong>ta unidad, el sistema cambiará a audio 2CH.<br />
(Cuando conecte a un amplificador AV a través de HDMI podrá disfrutar de un sonido de calidad más alto.)<br />
Para conocer detall<strong>es</strong> de los cabl<strong>es</strong> HDMI utilizados para conectar equipos externos, consulte las instruccion<strong>es</strong> de<br />
funcionamiento del equipo.<br />
31
VIERA Link TM “HDAVI Control TM ”<br />
Visualice el menú<br />
Seleccione “Ajuste”<br />
Menú<br />
Seleccione<br />
Cambio<br />
de entrada<br />
automático<br />
Prende<br />
control<br />
Apaga<br />
control<br />
VIERA Link<br />
Imagen<br />
Bloqueo<br />
Tarjeta SD<br />
CC/Subtítulos<br />
Ajuste<br />
Siguiente<br />
Seleccione “Ajuste VIERA Link”.<br />
Ajuste 2/2<br />
Ajuste VIERA Link<br />
Eco/ahorro energía<br />
Ajuste avanzado<br />
R<strong>es</strong>taurar<br />
Seleccione “VIERA Link”<br />
Ajuste VIERA Link<br />
VIERA Link<br />
Prende control<br />
Apaga control<br />
Altavoz inicial<br />
No<br />
No<br />
Sí<br />
Sí<br />
Sí<br />
Ahorro energía en <strong>es</strong>pera<br />
Energía en <strong>es</strong>pera automática<br />
Interno<br />
Seleccione<br />
Siguiente<br />
Seleccione<br />
Ahorro energía<br />
en <strong>es</strong>pera<br />
(para “HDAVI Control<br />
4” (con modo de<br />
arranque rápido))<br />
Energía<br />
en <strong>es</strong>pera<br />
automática<br />
(para “HDAVI<br />
Control 2 o<br />
posterior”)<br />
Altavoz<br />
inicial<br />
Reproducción<br />
de cine para<br />
casa con un<br />
toque<br />
■ Pulse para salir<br />
de la pantalla de<br />
menú<br />
■ Para volver a la<br />
pantalla anterior<br />
Seleccione “Sí”.<br />
(La opción<br />
predeterminada <strong>es</strong> “Sí”)<br />
Seleccion ajust<strong>es</strong><br />
Ajuste VIERA Link<br />
VIERA Link<br />
Sí<br />
Prende control Sí<br />
Apaga control Sí<br />
Ahorro energía en <strong>es</strong>pera<br />
No<br />
Energía en <strong>es</strong>pera automática<br />
No<br />
Altavoz inicial Interno<br />
Cambie<br />
Seleccione<br />
Suministro<br />
de<br />
información<br />
de ajuste<br />
(para “HDAVI<br />
Control 3 o<br />
posterior”)<br />
Establezca<br />
Ajuste VIERA Link<br />
VIERA Link<br />
Prende control<br />
Sí<br />
Sí<br />
Cambie<br />
32<br />
Apaga control<br />
No<br />
No<br />
Sí<br />
Ahorro energía en <strong>es</strong>pera<br />
Energía en <strong>es</strong>pera automática<br />
Altavoz inicial<br />
Externo<br />
Función de<br />
sincronización<br />
automática de voz<br />
(para “HDAVI Control 3<br />
o posterior”)
(Continuación)<br />
Al empezar la reproducción de DIGA, reproductor de cine para casa ó equipo de cine para casa RAM, la entrada<br />
del televisor cambia automáticamente a la entrada corr<strong>es</strong>pondiente al equipo de reproducción.<br />
Para el equipo de cine para casa RAM, los altavoc<strong>es</strong> cambian automáticamente al modo de cine para casa.<br />
Si se utiliza la operación DIGA, la entrada del televisor cambia automáticamente a DIGA y se visualiza el menú DIGA.<br />
Cuando se selecciona “Sí” (pág. 29), el televisor se enciende automáticamente y cambia a la entrada HDMI apropiada<br />
siempre que el equipo compatible con “VIERA Link” se enciende inicialmente y se selecciona el modo de reproducción.<br />
Cuando se selecciona “Sí” (pág. 29) y se apaga el televisor, todos los equipos compatibl<strong>es</strong> con VIERA Link que<br />
<strong>es</strong>tán conectados se apagan también automáticamente.<br />
La DIGA (Grabadora DVD de <strong>Panasonic</strong>) no se apagará si aún <strong>es</strong>tá en el modo de grabación.<br />
•<br />
Aviso: El televisor permanece encendido aunque se apague el equipo compatible con VIERA Link.<br />
Condición<br />
Apaga control: Sí<br />
Ahorro energía en <strong>es</strong>pera: Sí<br />
El equipo tiene “HDAVI Control 4 (con modo de arranque rápido)” y <strong>es</strong>tá conectado con un cable HDMI.<br />
Bajo las condicion<strong>es</strong> mencionadas arriba, cuando se apaga el televisor, todos los equipos conectados que sean<br />
compatibl<strong>es</strong> con VIERA Link pasan automáticamente al modo de <strong>es</strong>pera ECO*.<br />
* En el <strong>es</strong>tado en <strong>es</strong>pera, el consumo eléctrico del equipo <strong>es</strong> mínimo.<br />
Condición<br />
Energía en <strong>es</strong>pera automática: Sí<br />
El equipo tiene “HDAVI Control 2 o posterior” (para equipo disponible solamente) conectado con cable HDMI.<br />
[ Ejemplos de temporización para operación ]<br />
• Cuando cambie la entrada d<strong>es</strong>de HDMI.<br />
• Cuando la “Salida altavoz” se cambia de “Externo” a “Interno”.<br />
El equipo conectado que sea compatible con VIERA Link se apaga automáticamente cuando no <strong>es</strong>tá en uso.<br />
“Interno” <strong>es</strong> el ajuste predeterminado. Para poner el sistema de cine para casa como altavoc<strong>es</strong> predeterminados,<br />
cambie la configuración de altavoc<strong>es</strong> predeterminada de “Interno” a “Externo”. El sonido saldrá del sistema de cine<br />
para casa siempre que se suministre alimentación al televisor.<br />
Si se pulsa la tecla “ONE TOUCH PLAY” en el control remoto del equipo para el sistema de cine para casa, la<br />
secuencia de operacion<strong>es</strong> siguient<strong>es</strong> se realiza automáticamente.<br />
La alimentación del sistema de cine para casa se conecta y empieza la reproducción.<br />
El televisor se enciende y se mu<strong>es</strong>tra la pantalla de reproducción.<br />
El audio se silencia y el televisor cambia al modo de cine para casa.<br />
Alguna información de ajuste del televisor se puede transmitir a cada equipo (grabadora/equipo de cine para casa/<br />
reproductor) con la función “HDAVI Control 3 o posterior” conectada al televisor mediante un cable HDMI.<br />
Datos que se pueden transmitir<br />
grabadora<br />
equipo de cine<br />
para casa<br />
reproductor<br />
Pu<strong>es</strong>ta del idioma de visualización en pantalla (English/<br />
Español/Français)<br />
○ ○ ○<br />
Relación de aspecto del panel (16:9, fija) ○ ○ ○<br />
Información de subtítulos<br />
(Modo/Tipo de CC/Ajust<strong>es</strong> digital<strong>es</strong>)<br />
○ --- ---<br />
Información de canal<br />
(Señal de entrada/Lista de canal<strong>es</strong>/Información de títulos)<br />
○ --- ---<br />
Nota<br />
Hay una posibilidad de que la información del idioma GUI se pueda poner d<strong>es</strong>de todos los equipos con la<br />
función HDMI CEC conectada al televisor mediante un cable HDMI. Dependiendo de las condicion<strong>es</strong> de<br />
funcionamiento o de la <strong>es</strong>pecificación de cada pieza del equipo, el ajuste puede que sea aplicable o no lo sea.<br />
Para conocer detall<strong>es</strong> del funcionamiento del equipo externo, lea los manual<strong>es</strong> de instruccion<strong>es</strong> del equipo.<br />
[Para grabadora]<br />
Mientras transmite información del televisor no puede hacer ninguna otra operación con el control remoto,<br />
excepto usar la tecla de conexión/d<strong>es</strong>conexión de la alimentación. Además, cuando apaga la unidad, la<br />
transmisión se interrumpirá (sólo cuando maneje información de canal<strong>es</strong> ).<br />
VIERA Link TM “HDAVI Control TM ”<br />
Funcion<strong>es</strong><br />
avanzadas<br />
Reduce al mínimo los retardos de sincronización de voz entre la imagen y el sonido cuando se hace la conexión a<br />
un sistema de cine para casa o a un amplificador de <strong>Panasonic</strong>.<br />
33
VIERA Link TM “HDAVI Control TM ”<br />
Con la función “HDAVI Control” del menú “VIERA Link” puede disfrutar de un funcionamiento<br />
más conveniente. Para conocer más detall<strong>es</strong> de la función “HDAVI Control”, consulte la pág. 30.<br />
Visualización del menú VIERA Link<br />
Control de<br />
altavoc<strong>es</strong><br />
ó<br />
Seleccione<br />
Siguiente<br />
VIERA Link<br />
Seleccione el elemento<br />
Control VIERA Link<br />
Grabador<br />
Salida altavoz<br />
Interno<br />
Seleccione<br />
Seleccione<br />
■ Pulse para salir<br />
de la pantalla de<br />
menú<br />
Control VIERA Link<br />
Cine para casa<br />
Salida altavoz<br />
Interno<br />
Establezca<br />
Cambie<br />
Control<br />
VIERA Link<br />
sólo con<br />
el mando<br />
a distancia<br />
del TV (para<br />
“HDAVI<br />
Control 2 o<br />
posterior”)<br />
■ Para volver a la<br />
pantalla anterior<br />
34
(Continuación)<br />
Para la salida de audio puede seleccionar los altavoc<strong>es</strong> de cine para casa o del televisor.<br />
Controle los altavoc<strong>es</strong> de cine para casa con el control remoto del televisor.<br />
Esta función sólo <strong>es</strong>tá disponible cuando <strong>es</strong>tá conectado un amplificador o reproductor de cine para casa de <strong>Panasonic</strong>.<br />
Seleccione “Salida altavoz”<br />
Seleccione “Externo” ó “Interno”<br />
Control VIERA Link<br />
Grabador<br />
Salida altavoz<br />
Interno<br />
Seleccione<br />
Cambie<br />
■Externo: Ajuste para el equipo<br />
Subida/bajada del volumen<br />
Silenciamiento del sonido<br />
El sonido del televisor se silencia.<br />
Cuando se apaga el equipo, los altavoc<strong>es</strong> del<br />
televisor se activan.<br />
Al seleccionar “Externo”, el equipo se enciende<br />
automáticamente si <strong>es</strong>tá en el modo de <strong>es</strong>pera.<br />
■ Interno: Los altavoc<strong>es</strong> del televisor <strong>es</strong>tán activados.<br />
En el menú VIERA Link, usted puede seleccionar el equipo conectado mediante HDMI y acceder a él rápidamente.<br />
Continúe utilizando el control remoto de su televisor para utilizar el equipo, apuntándolo al televisor.<br />
Seleccione “Control VIERA Link”<br />
Seleccione el equipo al que quiera acceder.<br />
(Grabador/Cine para casa/Reproductor/Videocámara/LUMIX)<br />
Control VIERA Link<br />
Grabador<br />
Salida altavoz<br />
Interno<br />
Seleccione<br />
Cambie<br />
Sólo puede seleccionar los elementos<br />
disponibl<strong>es</strong>.<br />
Si hay más de un elemento del equipo, un<br />
número d<strong>es</strong>pués del nombre indica el número<br />
de elementos. (p. ej., Grabadora 1/Grabadora 2/<br />
Grabadora 3)<br />
El número de elementos del equipo que<br />
podrán conectarse <strong>es</strong> tr<strong>es</strong> para grabadoras, y<br />
tr<strong>es</strong> en total para Cine para casa/Reproductor/<br />
Videocámara/LUMIX.<br />
Nota<br />
Hay un límite en el número de conector<strong>es</strong><br />
HDMI.<br />
Utilice el equipo con el control remoto del televisor, apuntándolo al televisor.<br />
Para utilizar el equipo, lea el manual del mismo.<br />
■ Control remoto del televisor disponible<br />
El que funcione o no dependerá del equipo conectado.<br />
VIERA Link TM “HDAVI Control TM ”<br />
Funcion<strong>es</strong><br />
avanzadas<br />
SUB<br />
MENU<br />
Mover el cursor/Seleccionar<br />
Configurar/Acceder<br />
Volver al menú anterior<br />
Visualizar el menú de funcion<strong>es</strong> del<br />
equipo<br />
Disponible cuando se visualiza la<br />
finalidad de las teclas<br />
Salir<br />
Reproducción<br />
Parada<br />
Atrás/adelante<br />
Omitir atrás/adelante<br />
Pausa<br />
CC/Subtítulos<br />
Canal superior/inferior<br />
SAP (Seleccione el modo de audio)<br />
- 0-9 Seleccionar subcanal digital<br />
35
Bloqueo<br />
Puede bloquear canal<strong>es</strong> ó programas <strong>es</strong>pecificados para impedir que los niños vean su contenido censurable.<br />
Visualice el menú<br />
Seleccione “Bloqueo”<br />
Menú<br />
VIERA Link<br />
Imagen<br />
Audio<br />
Cronómetro<br />
Bloqueo<br />
Tarjeta SD<br />
CC/Subtítulos<br />
Ajuste<br />
Siguiente Cada vez que visualice el<br />
menú Bloqueo se le pedirá que<br />
introduzca su contraseña.<br />
Seleccione<br />
Introduzca su contraseña de 4 dígitos<br />
Para ver un programa bloqueado ó cambiar los ajust<strong>es</strong> de calificación deberá<br />
introducir un código de 4 dígitos.<br />
Contraseña<br />
Ingr<strong>es</strong>ar contraseña.<br />
- - - -<br />
Si <strong>es</strong> la primera vez que<br />
introduce una contraseña,<br />
introduzca el número dos vec<strong>es</strong><br />
en orden para registrarlo.<br />
RETURN<br />
36<br />
■ Pulse para salir<br />
de la pantalla de<br />
menú<br />
Precaución<br />
Anote su contraseña<br />
por si la olvida.<br />
(Si ha olvidado su<br />
contraseña, consulte<br />
a su conc<strong>es</strong>ionario<br />
local.)<br />
Nota<br />
Cuando seleccione<br />
un canal bloqueado<br />
se visualizará un<br />
mensaje que le<br />
permitirá ver el canal<br />
si usted introduce su<br />
contraseña.<br />
Seleccione el modo de bloqueo<br />
Bloqueo<br />
Modo<br />
Canal<br />
Juego<br />
Programa<br />
Cambio de contraseña<br />
No<br />
No<br />
No<br />
No<br />
Seleccione el elemento<br />
Bloqueo<br />
Modo<br />
Canal<br />
Juego<br />
Programa<br />
Cambio de contraseña<br />
Establezca<br />
Usuario<br />
No<br />
No<br />
No<br />
No: D<strong>es</strong>bloquea toda la<br />
configuración de bloqueo<br />
Establezca de “Canal”, “Juego” y<br />
Seleccione “Programa”.<br />
Total: Bloquea todas las entradas<br />
independientemente<br />
de la configuración de<br />
bloqueo “Canal”, “Juego” y<br />
“Programa”.<br />
Usuario: Bloquea las entradas<br />
<strong>es</strong>pecificadas de “Canal”,<br />
“Juego” y “Programa”.<br />
Seleccione<br />
Establezca<br />
“Canal”, “Juego” y “Programa” se<br />
pondrán gris<strong>es</strong> a menos que se<br />
seleccione “Usuario” en “Modo”.
■ Para seleccionar el canal ó la clasificación del programa que va a bloquear<br />
Bloqueo de<br />
canal<br />
Seleccione hasta 7 (1-7) canal<strong>es</strong> para bloquearlos. Estos canal<strong>es</strong> se bloquearán<br />
independientemente de la clasificación del programa.<br />
Seleccione “Modo” y póngalo en “Usuario”<br />
Seleccione el canal que va a bloquear.<br />
Bloquear canal<br />
Modo<br />
Canal 1<br />
Canal 2<br />
Canal 3<br />
Canal 4<br />
Canal 5<br />
Usuario<br />
3<br />
4<br />
-<br />
-<br />
-<br />
Seleccione<br />
Establezca<br />
Para bloquear/d<strong>es</strong>bloquear todos los canal<strong>es</strong>:<br />
Seleccione “Modo” y póngalo en “Total” o en “No”.<br />
Total: Bloquea todos los canal<strong>es</strong><br />
No: D<strong>es</strong>bloquea todos los canal<strong>es</strong><br />
Juego<br />
Bloquea Canal 3, Canal 4 y las entradas<br />
externas.<br />
Seleccione “Juego” en 5 y póngalo en<br />
“Sí”.<br />
Seleccione<br />
Establezca<br />
Sí: Bloquea<br />
No: D<strong>es</strong>bloquea<br />
Bloqueo de<br />
programa<br />
■ Para <strong>es</strong>tablecer el nivel de clasificación<br />
La tecnología “V-chip” permite que los<br />
programas r<strong>es</strong>tringidos sean bloqueados<br />
según las clasificacion<strong>es</strong> de televisión.<br />
Seleccione “Modo” y póngalo en “Sí”.<br />
Bloquear prog.<br />
Modo<br />
MPAA<br />
U.S.TV<br />
C.E.L.R.<br />
C.F.L.R.<br />
Sí<br />
No<br />
No<br />
No<br />
No<br />
Establezca<br />
Seleccione<br />
Seleccione la categoría de<br />
calificación que quiera seguir.<br />
Siguiente<br />
Bloquear prog.<br />
Modo<br />
MPAA<br />
U.S.TV<br />
C.E.L.R.<br />
C.F.L.R.<br />
Sí<br />
No<br />
No<br />
No<br />
No<br />
Seleccione<br />
MPAA: Clasificacion<strong>es</strong> para películas de los EE.UU.<br />
U.S.TV: Clasificacion<strong>es</strong> para programas de<br />
televisión de los EE.UU.<br />
C.E.L.R.:Clasificacion<strong>es</strong> para el inglés de Canadá<br />
C.F.L.R.: Clasificacion<strong>es</strong> para el francés de Canadá<br />
Seleccione la clasificación que va a bloquear.<br />
Seleccione<br />
Ejemplo de “MPAA” (clasificacion<strong>es</strong> para películas<br />
de los EE.UU.)<br />
No Sin clasificación<br />
G Público en general: Todos los públicos<br />
PG<br />
Se recomienda el acompañamiento de los<br />
padr<strong>es</strong><br />
PG- Aviso para los padr<strong>es</strong>: No <strong>es</strong> apropiado<br />
13 para menor<strong>es</strong> de 13 años<br />
R<strong>es</strong>tringido: Los menor<strong>es</strong> de 17 años<br />
R nec<strong>es</strong>itan ser acompañados por los<br />
padr<strong>es</strong> ó una persona adulta<br />
NC- No se admite que ningún menor de 17<br />
17 años vea el programa<br />
X Adultos solamente<br />
Para obtener otra información (pág. 44)<br />
Bloqueo<br />
Funcion<strong>es</strong><br />
avanzadas<br />
Cambio de<br />
contraseña<br />
■ Para cambiar la contraseña<br />
En , seleccione “Cambio de<br />
contraseña” y pulse OK<br />
Introduzca dos vec<strong>es</strong> la nueva<br />
contraseña de 4 dígitos.<br />
Bloqueo<br />
Modo<br />
Canal<br />
Juego<br />
Programa<br />
Cambio de contraseña<br />
No<br />
No<br />
No<br />
No<br />
Cambio de contraseña<br />
Ingr<strong>es</strong>ar nueva contraseña.<br />
- - - -<br />
RETURN<br />
Nota<br />
Este televisor ha sido diseñado para soportar el “Downloadable U.S. Region Rating System” cuando se encuentre<br />
disponible. (Sólo <strong>es</strong>tá disponible en los EE.UU.)<br />
La clasificación No <strong>es</strong> independiente de otras clasificacion<strong>es</strong>.<br />
Cuando bloquee un nivel de clasificación <strong>es</strong>pecífico basado en la edad, la clasificación No y cualquier otra<br />
clasificación más r<strong>es</strong>trictiva también se bloquearán.<br />
37
Edición y configuración de canal<strong>es</strong><br />
Los ajust<strong>es</strong> del canal actual se pueden cambiar según sus nec<strong>es</strong>idad<strong>es</strong> y las<br />
condicion<strong>es</strong> de la recepción.<br />
Visualice el menú<br />
Programa<br />
auto<br />
Ajuste<br />
automático<br />
Seleccione “Ajuste”<br />
Menú<br />
VIERA Link<br />
Imagen<br />
Audio<br />
Cronómetro<br />
Bloqueo<br />
Tarjeta SD<br />
CC/Subtítulos<br />
Ajuste<br />
Siguiente<br />
Seleccione<br />
Seleccione “Ajuste ANT/Cable”<br />
Ajuste 1/2<br />
Modo de navegación<br />
Todos<br />
Idioma<br />
Reloj<br />
Ajuste ANT/Cable<br />
Aparatos conectados<br />
Anti retención de imag<br />
Siguiente<br />
Seleccione<br />
Programa<br />
manual<br />
Ajuste<br />
manual<br />
Regr<strong>es</strong>o prefijados<br />
Seleccione la función<br />
■ Pulse para salir<br />
de la pantalla de<br />
menú<br />
Ajuste ANT/Cable<br />
Entrada ANT Cable<br />
Programa auto<br />
Programa manual<br />
Medidor de señal<br />
Siguiente<br />
Seleccione<br />
Establezca<br />
■Para r<strong>es</strong>tablecer los ajust<strong>es</strong> del menú Ajuste<br />
Seleccione “Regr<strong>es</strong>o prefijados” en el menú Ajuste ( )<br />
y pulse OK<br />
Introduzca su contraseña de 4 dígitos con los<br />
boton<strong>es</strong> de números<br />
Seleccione “Sí” en la pantalla de confirmación y pulse OK<br />
Medidor<br />
de señal<br />
Compruebe<br />
la intensidad<br />
de la señal.<br />
38
Busca y agrega automáticamente los canal<strong>es</strong> que pueden recibirse en la memoria.<br />
Seleccione “Entrada ANT”<br />
Seleccione el modo de exploración (pág. 18)<br />
Seleccione Cable ó Antena<br />
Programa auto<br />
O seleccione “No utilizado” (pág. 17).<br />
Aceptar<br />
Todos los canal<strong>es</strong><br />
Seleccione “Programa auto”<br />
Sólo analógico<br />
Ajuste ANT/Cable<br />
Entrada ANT Cable<br />
Programa auto<br />
Programa manual<br />
Medidor de señal<br />
S l<br />
i<br />
Siguiente<br />
Seleccione<br />
Utilice <strong>es</strong>te procedimiento cuando cambie la<br />
configuración de los canal<strong>es</strong> de recepción ó cuando<br />
cambie la visualización de los canal<strong>es</strong>. Además, utilícelo<br />
también para agregar ó brincar manualmente canal<strong>es</strong><br />
que se encuentran en la lista de canal<strong>es</strong>.<br />
Puede seleccionar un modo de sintonización de canal<br />
(Sólo digital/Sólo analógico) en “Modo de navegación”.<br />
(pág. 29)<br />
Seleccione “Editar”<br />
Programa manual<br />
Editar<br />
Aceptar Cancelar<br />
Canal Títulos Favoritos Agregar<br />
... ...<br />
Sí<br />
2<br />
... Sí<br />
3 ...<br />
... Sí<br />
4 ...<br />
... Sí<br />
5 ...<br />
Programa manual<br />
Editar<br />
Aceptar Cancelar<br />
Canal Títulos Favoritos Agregar<br />
... ...<br />
Sí<br />
2<br />
... Sí<br />
3 ...<br />
... Sí<br />
4 ...<br />
... Sí<br />
5 ...<br />
...<br />
Sí<br />
Favoritos<br />
6 ...<br />
... Sí<br />
7 ...<br />
...<br />
Títulos<br />
8 ...<br />
Sí<br />
... Sí<br />
9 ...<br />
Seleccione OK<br />
RETURN<br />
R Pág. ante. G Pág. sigui. B Y<br />
Seleccione<br />
Siguiente<br />
Seleccione el elemento que quiera editar.<br />
Seleccione el<br />
elemento que va<br />
a editar. (Títulos/<br />
Favoritos/Agregar)<br />
Siguiente<br />
Agregar<br />
Vaya a<br />
la página<br />
siguiente.<br />
Vuelva a la página<br />
anterior.<br />
• Títulos:<br />
Cambio del identificador de<br />
emisoras<br />
• Favoritos:<br />
Registra los canal<strong>es</strong> en la lista<br />
de favoritos.<br />
• Agregar:<br />
Agrega ó brinca canal<strong>es</strong><br />
Sólo digital<br />
Seleccione<br />
Las configuracion<strong>es</strong> se hacen<br />
automáticamente<br />
D<strong>es</strong>pués de finalizar la búsqueda, seleccione “Aceptar”<br />
(vea debajo de ).<br />
Todos los canal<strong>es</strong> memorizados previamente se borrarán.<br />
Edite<br />
Títulos<br />
Editar título del canal<br />
Canal<br />
80-101<br />
Títulos<br />
---<br />
Seleccione<br />
OK<br />
RETURN<br />
R G B Y<br />
ABC → abc<br />
Borrar<br />
Seleccione<br />
Cambie ó<br />
Establezca/<br />
Siguiente<br />
Títulos<br />
Seleccione o edite el identificador de emisora.<br />
(máximo de 7 caracter<strong>es</strong> disponibl<strong>es</strong>)<br />
Favoritos<br />
Configurar favorito 1/3<br />
1 26-1<br />
2<br />
Seleccione<br />
Siguiente<br />
Configurar favorito Seleccione el número.<br />
Agregar<br />
Pulse OK para seleccionar “Sí” (agregar) ó “No” (brincar)<br />
Mueva el cursor al número del canal<br />
Programa manual<br />
Editar<br />
Aceptar Cancelar<br />
Canal Títulos Favoritos Agregar<br />
... ...<br />
Sí<br />
2<br />
... Sí<br />
3 ...<br />
Seleccione “Aceptar”<br />
ma manual<br />
Aceptar Cancelar<br />
Títulos Favoritos Agregar<br />
... ...<br />
Sí<br />
Seleccione<br />
Pulse OK para<br />
sintonizar el canal<br />
Seleccione<br />
“Aceptar”<br />
Aceptar<br />
Edición y configuración de canal<strong>es</strong><br />
Funcion<strong>es</strong><br />
avanzadas<br />
Para cancelar la edición<br />
Programa manual<br />
Editar<br />
Aceptar Cancelar<br />
Favoritos Agregar<br />
Títulos<br />
... ...<br />
Sí<br />
2<br />
... Sí<br />
3 ...<br />
... Sí<br />
4 ...<br />
... Sí<br />
5 ...<br />
Canal<br />
Seleccione<br />
Siguiente<br />
Las modificacion<strong>es</strong> se perderán. ¿Continuar?<br />
Sí No<br />
Aceptar (retorno<br />
a “Ajuste ANT/<br />
Cable”)<br />
Seleccione “Si”<br />
Compruebe la intensidad de la señal si se encuentra interferencia ó se congela una imagen digital.<br />
Medidor de señal<br />
Si la señal <strong>es</strong> débil compruebe la antena.<br />
Canal<br />
1-1<br />
Si no encuentra ningún problema, consulte a su<br />
ó<br />
Seleccione conc<strong>es</strong>ionario local.<br />
el canal<br />
Intensidad de señal<br />
Aceptar<br />
Nota<br />
Actual 30%<br />
Nivel máximo 45%<br />
Intensidad de la señal<br />
No <strong>es</strong>tá disponible si se selecciona “Cable” en<br />
“Entrada ANT” (vea más arriba).<br />
Sólo <strong>es</strong> eficaz para los canal<strong>es</strong> digital<strong>es</strong>.<br />
Mientras <strong>es</strong>tá activado “Bloqueo” (pág. 36), si se selecciona “Ajuste ANT/Cable”, se visualizará “Ingr<strong>es</strong>ar contraseña”.<br />
39
CC/Subtítulos<br />
Visualice el menú<br />
■ Pulse para salir de<br />
la pantalla de menú<br />
Seleccione “CC/Subtítulos”<br />
Menú<br />
Siguiente<br />
VIERA Link<br />
Imagen<br />
Seleccione<br />
Audio<br />
Cronómetro<br />
Bloqueo<br />
Tarjeta SD<br />
CC/Subtítulos<br />
Ajuste<br />
40<br />
CC/Subtítulos<br />
Visualización<br />
de subtítulos<br />
La televisión incluye un decodificador incorporado capaz de proporcionar una visualización<br />
de texto del audio. El programa que <strong>es</strong>té siendo transmitido deberá tener información de<br />
subtítulos (CC). (pág. 45)<br />
■ Seleccione el elemento y <strong>es</strong>tablézcalo<br />
CC/Subtítulos<br />
Seleccione<br />
Modo Seleccione “Sí” (cuando no se<br />
Regr<strong>es</strong>o prefijados<br />
utilice “No”).<br />
Mode<br />
Sí<br />
Establezca<br />
Análogo<br />
CC1<br />
Análogo (Elija el servicio de subtítulos de las<br />
emision<strong>es</strong> analógicas.)<br />
Digital<br />
Ajust<strong>es</strong> digital<strong>es</strong><br />
Principal<br />
La configuración en “Análogo” ó “Digital”<br />
depende de la emisora.<br />
CC1-4:<br />
T1-4:<br />
Información relacionada con las imágen<strong>es</strong><br />
(Aparece en la parte inferior de la pantalla.)<br />
Información textual<br />
(Aparece en toda la pantalla.)<br />
Digital (El menú Subtítulos digital<strong>es</strong> le<br />
permite configurar la forma en que<br />
va a ver los subtítulos digital<strong>es</strong>.)<br />
Pr<strong>es</strong>ione para seleccionar la opción.<br />
“Principal”, “Secund.”, “Servicio 3”, “Servicio<br />
4”, “Servicio 5”, “Servicio 6”<br />
■ Para hacer configuracion<strong>es</strong> de visualización más a fondo en los programas digital<strong>es</strong><br />
Seleccione “Ajust<strong>es</strong> digital<strong>es</strong>” y pulse OK<br />
Seleccione el elemento y <strong>es</strong>tablézcalo.<br />
Ajust<strong>es</strong> digital<strong>es</strong><br />
Seleccione Tamaño: Tamaño del texto<br />
Tamaño Automático<br />
Letra: Fuente del texto<br />
Letra<br />
Automático<br />
Establezca<br />
Estilo: Estilo del texto (Elevado,<br />
Estilo<br />
Automático<br />
Deprimido, etc.)<br />
Frente Automático<br />
Frente: Color del texto<br />
Opacidad frontal Automático<br />
Opacidad frontal:<br />
Fondo Automático<br />
Opacidad del texto<br />
Opacidad trasera Automático<br />
Contorno Automático<br />
■ Para r<strong>es</strong>tablecer la configuración<br />
Seleccione “Regr<strong>es</strong>o prefijados” y pulse OK<br />
Fondo: Color de la caja de texto<br />
Opacidad trasera:<br />
Opacidad de la caja de texto<br />
Contorno: Color del contorno del texto<br />
(Identifique las opcion<strong>es</strong> de<br />
configuración en la pantalla.)
Títulos de entradas<br />
Visualice el menú<br />
Seleccione “Ajuste”<br />
Menú<br />
Siguiente<br />
VIERA Link<br />
Imagen<br />
Audio<br />
Cronómetro<br />
Bloqueo<br />
Tarjeta SD<br />
CC/Subtítulos<br />
Ajuste<br />
Seleccione<br />
■ Pulse para salir<br />
de la pantalla de<br />
menú<br />
Títulos de<br />
entradas<br />
Etiquetas de<br />
visualización<br />
de<br />
dispositivos<br />
externos<br />
Los dispositivos conectados a los terminal<strong>es</strong> de entrada externos se pueden etiquetar para identificarlos<br />
más fácilmente durante la selección de entrada. (En el modo de selección de entrada de la página 24 )<br />
■ Seleccione el terminal y la etiqueta del equipo externo<br />
Títulos de entradas<br />
Componente 1<br />
Componente 2<br />
HDMI 1<br />
HDMI 2<br />
Video 1<br />
Video 2<br />
JUEGO<br />
Etiqueta Terminal<br />
Video 1<br />
VCR<br />
[ejemplo]<br />
Seleccione “Aparatos conectados”<br />
Ajuste 1/2<br />
Modo de navegación<br />
Idioma<br />
Todos<br />
Reloj<br />
Ajuste ANT/Cable<br />
Aparatos conectados<br />
Anti retención de imag<br />
ó<br />
Seleccione<br />
Establezca<br />
Títulos de entradas<br />
Componente 1 G A A<br />
Selección<br />
Siguiente<br />
Seleccione<br />
Seleccione “Títulos de entradas”<br />
Aparatos conectados<br />
Títulos de entradas<br />
Siguiente<br />
Seleccione<br />
OK<br />
RETURN<br />
R G B Y<br />
ABC → abc<br />
Borrar<br />
Cambia el modo de entrada de alfabético a numérico<br />
Terminal<strong>es</strong>: Componente 1-2/HDMI 1-2/Video 1-2<br />
Etiqueta: [BLANCO] BRINCAR/VCR/DVD/CABLE/SATELITE/VGD/<br />
JUEGO/AUX/RECEPTOR/PC/Blu-ray/CAMARA/Grab de DVD/<br />
HOME THTR/MONITOR/MEDIA CTR/MEDIA EXT/OTROS<br />
* Si se selecciona “BRINCAR”, al pulsar el botón INPUT se omitirá la<br />
entrada.<br />
Cada título seleccionado se visualizará en la pantalla “Seleccionar<br />
entrada”. (pág. 24)<br />
Títulos de entradas<br />
CC/Subtítulos<br />
Funcion<strong>es</strong><br />
avanzadas<br />
41
Utilización del temporizador<br />
El televisor se puede encender/apagar automáticamente en la fecha y a la hora d<strong>es</strong>ignadas.<br />
El reloj deberá <strong>es</strong>tar pu<strong>es</strong>to en hora ant<strong>es</strong> de hacer los ajust<strong>es</strong> de la hora de encendido/apagado. (pág. 17)<br />
El cronómetro de apagado y el temporizador de encendido/apagado no funcionará si se <strong>es</strong>tablece<br />
“Autoencendido”. (pág. 28)<br />
Visualice el menú<br />
Seleccione “Cronómetro”<br />
Menú<br />
Siguiente<br />
42<br />
■ Pulse para salir<br />
de la pantalla de<br />
menú<br />
■ Para volver a la<br />
pantalla anterior<br />
Nota<br />
El televisor se apaga<br />
automáticamente<br />
d<strong>es</strong>pués de pasar 90<br />
minutos cuando se<br />
enciende mediante<br />
el Cronometro. Esto<br />
se cancelará si se<br />
selecciona Apagar ó<br />
se pr<strong>es</strong>iona una tecla.<br />
VIERA Link<br />
Imagen<br />
Audio<br />
Cronómetro<br />
Bloqueo<br />
Tarjeta SD<br />
CC/Subtítulos<br />
Seleccione<br />
Seleccione el temporizador que va a <strong>es</strong>tablecer<br />
Cronómetro<br />
Apagado<br />
Cronómetro 1<br />
Cronómetro 2<br />
Cronómetro 3<br />
Cronómetro 4<br />
Cronómetro 5<br />
Seleccione<br />
Siguiente<br />
Apagado Se apaga automáticamente.<br />
Cronómetro 1 Se enciende automáticamente.<br />
(Se pueden <strong>es</strong>tablecer 5 temporizador<strong>es</strong>.)<br />
Cronómetro 5<br />
~<br />
Establezca el temporizador<br />
■ Para <strong>es</strong>tablecer “Apagado” (Temporizador de apagado)<br />
Pulse para que la unidad se apague automáticamente d<strong>es</strong>pués de transcurrir un<br />
tiempo pr<strong>es</strong>eleccionado.<br />
Apagado<br />
Apagado (minutos)<br />
60<br />
Establezca<br />
0/30/60/90 (minutos)<br />
■ Para <strong>es</strong>tablecer “Cronómetro 1-5” (Temporizador de encendido/apagado)<br />
Seleccione el elemento y <strong>es</strong>tablézcalo.<br />
Seleccione<br />
Cronómetro 1<br />
Fijar temporizador<br />
Entradas<br />
Canal<br />
Día<br />
Encender<br />
Apagar<br />
Si<br />
TV<br />
10-3<br />
7/6[VIE]<br />
1:15 AM<br />
12:45 AM<br />
ó<br />
Establezca<br />
Borrar<br />
Fijar temporizador Ajuste del temporizador (Sí/No)<br />
Entradas Seleccionar las entradas<br />
Canal Seleccione el canal<br />
Día Seleccione el día<br />
DOM, LUN, MAR, MIE, JUE, VIE, SAB,<br />
(Visualiza la fecha futura más próxima)<br />
LUN-VIE, SAB-DOM, DIARIO, Cada DOM, Cada LUN,<br />
Cada MAR, Cada MIE, Cada JUE, Cada VIE, Cada SAB<br />
Encender<br />
Apagar<br />
AM/PM<br />
La hora de encendido.<br />
La hora de apagado.
Conexion<strong>es</strong> AV recomendadas<br />
Estos diagramas mu<strong>es</strong>tran nu<strong>es</strong>tras recomendacion<strong>es</strong> sobre cómo conectar el televisor a varios equipos.<br />
Para hacer otras conexion<strong>es</strong>, consulte las instruccion<strong>es</strong> de cada equipo y las <strong>es</strong>pecificacion<strong>es</strong>. Para<br />
obtener ayuda adicional, visite nu<strong>es</strong>tro sitio Web www.panasonic.com.<br />
Parte delantera de <strong>es</strong>ta unidad<br />
TV por<br />
cable<br />
Parte posterior de <strong>es</strong>ta unidad<br />
120 V CA 60 Hz<br />
■ Para ver imágen<strong>es</strong> de<br />
cámara de vídeo<br />
Cámara de vídeo<br />
Videograbadora<br />
Reproductor DVD.<br />
ó<br />
Receptor de<br />
televisión por cable<br />
ó<br />
ó<br />
VI<strong>DE</strong>O<br />
AUDIO<br />
Y<br />
PB<br />
PR<br />
L<br />
Cable de alimentación de CA<br />
(Conecte d<strong>es</strong>pués de haber<br />
terminado todas las demás<br />
conexion<strong>es</strong>.)<br />
HDMI 1 HDMI 2<br />
Y<br />
S VI<strong>DE</strong>O<br />
PB<br />
PR<br />
L L<br />
ó<br />
R<br />
R R<br />
COMPONENT VI<strong>DE</strong>O IN 1<br />
1 IN 2<br />
Conexion<strong>es</strong> AV recomendadas<br />
Utilización del temporizador<br />
Cable óptico<br />
digital de audio<br />
OPTICAL<br />
IN<br />
■ Grabadora DVD/<br />
Videograbadora<br />
Amplificador<br />
B<br />
Cable HDMI-<br />
DVI conversión<br />
+ Cable de<br />
audio*<br />
ó<br />
Conecte<br />
con<br />
A ó B<br />
A<br />
Cable<br />
HDMI<br />
Funcion<strong>es</strong><br />
avanzadas<br />
■ Para <strong>es</strong>cuchar<br />
la televisión por<br />
altavoc<strong>es</strong><br />
■ Para ver DVDs<br />
Reproductor DVD<br />
Receptor digital<br />
multimedia<br />
■ Para ver imágen<strong>es</strong> de<br />
video digital<strong>es</strong><br />
Reproductor<br />
DVD o Receptor<br />
digital multimedia<br />
(sólo dispositivos<br />
compatibl<strong>es</strong> con HDMI)<br />
* Consulte las pág. 26-27 para hacer la instalación cuando use un cable de audio analógico externo con un cable<br />
HDMI a DVI.<br />
43
Lista de clasificacion<strong>es</strong> para el bloqueo<br />
La tecnología “V-chip” le permite bloquear canal<strong>es</strong> ó programas según calificacion<strong>es</strong> <strong>es</strong>tándar<br />
<strong>es</strong>tablecidas por la industria del entretenimiento. (pág. 37)<br />
■ GRÁFICA <strong>DE</strong> CLASIFICACIONES <strong>DE</strong> PELÍCULAS PARA LOS EEUU (MPAA)<br />
No<br />
CONTIENE PROGRAMAS SIN RESTRICCIONES Y PROGRAMAS NA (NO APLICABLES). Las películas no<br />
tienen r<strong>es</strong>triccion<strong>es</strong> ó las r<strong>es</strong>triccion<strong>es</strong> no son aplicabl<strong>es</strong>.<br />
G PÚBLICO EN GENERAL. Se admiten a todos los públicos.<br />
PG SE SUGIERE LA SUPERVISIÓN <strong>DE</strong> LOS PADRES. Algún material puede no ser apropiado para los niños.<br />
PG-13 SE RECOMIENDA ENCARECIDAMENTE LA SUPERVISIÓN <strong>DE</strong> LOS PADRES. Algún material puede no ser apropiado para los niños menor<strong>es</strong> de 13 años.<br />
R RESTRINGIDAS. Los jóven<strong>es</strong> menor<strong>es</strong> de 17 años y los niños nec<strong>es</strong>itan <strong>es</strong>tar acompañados de sus padr<strong>es</strong> ó una persona adulta que los supervise.<br />
NC-17 NO SE ADMITE AL PÚBLICO MENOR <strong>DE</strong> 17 AÑOS.<br />
X ADULTOS SOLAMENTE.<br />
■ GRÁFICA <strong>DE</strong> CLASIFICACIONES <strong>DE</strong> PROGRAMAS <strong>DE</strong> TV PARA LOS EEUU (U. S. TV)<br />
Grupo Clasificación<br />
basado en basada en<br />
Posibl<strong>es</strong> seleccion<strong>es</strong><br />
edad edad<br />
de contenido<br />
D<strong>es</strong>cripción<br />
NR (Si<br />
TV-NR<br />
Viewable (Visible)<br />
clasificación)<br />
No clasificado.<br />
• Blocked (Bloqueado)<br />
TV-Y<br />
Viewable (Visible)<br />
Todos los niños. Los temas y elementos en <strong>es</strong>te programa <strong>es</strong>tán<br />
<strong>es</strong>pecialmente diseñados para un público infantil, incluyendo niños<br />
• Blocked (Bloqueado)<br />
de 2-6 años.<br />
Youth<br />
FV (Bloquear FV)<br />
Dirigido a niños mayor<strong>es</strong>. Los temas y elementos en <strong>es</strong>te<br />
TV-Y7<br />
Viewable (Visible)<br />
programa pueden incluir ligera violencia física ó cómica, ó puede<br />
Blocked (Bloqueado)<br />
asustar a niños menor<strong>es</strong> de 7 años.<br />
TV-G<br />
Viewable (Visible)<br />
Audiencia General. Contiene poca ó nada de violencia, nada de lenguaje<br />
Blocked (Bloqueado)<br />
fuerte, y poco ó nada de diálogo ó situacion<strong>es</strong> con contenido sexual.<br />
TV-PG<br />
D,L,S,V (Todas seleccionadas) Guía de los padr<strong>es</strong> sugerida. El programa puede contener lenguaje obsceno<br />
Guidance<br />
Cualquier combinación de D, L, S, V infrecuente, violencia limitada, diálogos ó situacion<strong>es</strong> sexualmente sug<strong>es</strong>tivas.<br />
TV-14<br />
D,L,S,V (Todas seleccionadas) Advertencia a los padr<strong>es</strong>. Este programa puede contener temas sofisticados,<br />
Cualquier combinación de D, L, S, V contenido sexual, lenguaje inapropiado, y violencia más intensa.<br />
TV-MA<br />
L,S,V (Todas seleccionadas) Sólo audiencia Madura. Este programa puede contener temas para<br />
• Cualquier combinación de L, S, V adultos, lenguaje profano, violencia gráfica y contenido sexual explícito.<br />
FV: FANTASIA/ CARICATURAS CON VIOLENCIA V: VIOLENCIA S: SEXO L: LENGUAJE OFENSIVO D: DIALOGO CON CONTENIDO SEXUAL<br />
44<br />
■ GRÁFICA <strong>DE</strong> CLASIFICACIONES PARA INGLÉS <strong>DE</strong> CANADÁ (C. E. L. R)<br />
E<br />
Exenta - La programación exenta incluye: noticias, deport<strong>es</strong>, documental<strong>es</strong> y otros programas de información,<br />
entrevistas, vídeos musical<strong>es</strong> y programas de variedad<strong>es</strong>.<br />
C Programación para niños menor<strong>es</strong> de 8 años. Sin lenguaje ofensivo, d<strong>es</strong>nudos ni contenido sexual.<br />
C8+<br />
Programación considerada generalmente aceptable para niños de 8 años y menos. Sin blasfemias, d<strong>es</strong>nudos ni<br />
contenido sexual.<br />
G Programación general para todos los públicos.<br />
PG Se sugiere la supervisión de los padr<strong>es</strong>. Algún material puede no ser apropiado para los niños.<br />
14+<br />
La programación contiene temas que pueden no ser apropiados para el público menor de 14 años. A los padr<strong>es</strong> se<br />
l<strong>es</strong> avisa que no deben dejar ver <strong>es</strong>tos programas a los niños ni a los jóven<strong>es</strong> menor<strong>es</strong> de 14 años.<br />
18+ Mayor<strong>es</strong> de 18 años. Programación limitada a los adultos. Contiene <strong>es</strong>cenas de violencia constante ó de exc<strong>es</strong>iva violencia.<br />
■ GRÁFICA <strong>DE</strong> CLASIFICACIONES PARA FRANCÉS <strong>DE</strong> CANADÁ (C. F. L. R)<br />
E Exenta - La programación exenta.<br />
G<br />
General - Programación para público de todas las edad<strong>es</strong>. No contiene violencia, ó el contenido de la misma <strong>es</strong><br />
mínimo ó se mu<strong>es</strong>tra apropiadamente.<br />
8 ans+<br />
8+ General - No se recomienda para los niños pequeños. La programación <strong>es</strong> para un público diverso, pero<br />
contiene violencia de vez en cuando. Se recomienda la supervisión de adultos.<br />
La programación tal vez no sea adecuada para niños menor<strong>es</strong> de 13 años. Contiene pocas <strong>es</strong>cenas de violencia ó<br />
13 ans+ una ó más <strong>es</strong>cenas suficientemente violentas como para afectarlos.<br />
Se recomienda encarecidamente la supervisión de personas adultas.<br />
16 ans+<br />
La programación puede que no sea apropiada para menor<strong>es</strong> de 16 años. Contiene frecuent<strong>es</strong> <strong>es</strong>cenas de<br />
violencia ó de mucha violencia.<br />
18 ans+ Programación limitada a los adultos. Contiene <strong>es</strong>cenas de violencia constante ó de mucha violencia.<br />
Precaución<br />
El sistema V-Chip que se utiliza en <strong>es</strong>te aparato <strong>es</strong> capaz de bloquear los programas “NR” (no clasificados, no<br />
aplicabl<strong>es</strong> y ninguno) de acuerdo con las normas de la FCC indicadas en la Sección 15.120(e)(2). Si se elige la<br />
opción de bloqueo de programas “NR”, “podrán producirse r<strong>es</strong>ultados in<strong>es</strong>perados y posiblemente confusos, y<br />
usted tal vez no pueda recibir anuncios de emergencia ó ninguno de los tipos de programación siguient<strong>es</strong>”.<br />
• Anuncios de emergencia (mensaj<strong>es</strong> EAS, avisos del tiempo y otros)<br />
• Programas local<strong>es</strong> • Noticias • Política • Anuncios de servicios públicos • Religión • Deport<strong>es</strong> • Tiempo
Información técnica<br />
Subtítulos (CC)<br />
Para ver los CC de las emision<strong>es</strong> digital<strong>es</strong>, <strong>es</strong>tablezca la relación de aspecto en COMP. (si <strong>es</strong>tá viendo con H-<br />
LLENO, JUSTO, ACERC o 4:3 faltarán caracter<strong>es</strong>).<br />
Los CC se pueden visualizar en el televisor si el receptor (receptor digital multimedia o receptor de satélite) tiene<br />
los CC encendidos usando la conexión de componente o HDMI al televisor.<br />
Si los CC <strong>es</strong>tá encendidos en el receptor y el televisor cuando la señal <strong>es</strong> 480i (excepto para la conexión HDMI),<br />
los CC puede que se superpongan en el televisor.<br />
Si un programa digital <strong>es</strong>tá saliendo en el formato analógico, los CC también saldrán en el formato analógico.<br />
Si la grabadora o el monitor de salida <strong>es</strong>tán conectados al televisor, los CC nec<strong>es</strong>itarán configurarse en la<br />
grabadora o en el monitor de salida.<br />
Relación de aspecto (FORMAT)<br />
Pulse el botón “FORMAT” para pasar por los modos de aspecto.<br />
Esto le permite elegir el aspecto dependiendo del formato de la señal recibida y sus preferencias. (pág. 20)<br />
(ej.: en el caso de una imagen 4:3)<br />
COMP JUSTO<br />
COMP<br />
JUSTO<br />
Amplía horizontalmente la imagen 4:3 hasta los bord<strong>es</strong> Alarga para justificar la imagen 4:3 a las cuatro <strong>es</strong>quinas<br />
lateral<strong>es</strong> de la pantalla.<br />
de la pantalla.<br />
(Recomendada para la imagen anamórfica)<br />
(Recomendada para la emisión de televisión normal)<br />
H-LLENO 4:3<br />
H-LLENO<br />
Amplía horizontalmente la imagen 4:3 hasta los bord<strong>es</strong><br />
lateral<strong>es</strong> de la pantalla. Los bord<strong>es</strong> lateral<strong>es</strong> de la imagen se<br />
recortan.<br />
ACERC<br />
ACERC<br />
Amplía la imagen 4:3 para que ocupe toda la pantalla.<br />
(Recomendada para Letter Box)<br />
Barra lateral<br />
Estándar<br />
(Tenga en cuenta que puede quedar una “Retención de imagen”<br />
de la barra lateral debido a que se mu<strong>es</strong>tra durante mucho<br />
tiempo.)<br />
Nota<br />
480i (4:3), 480i (16:9), 480p (4:3), 480p (16:9):<br />
COMP, JUSTO, 4:3 ó ACERC<br />
1080p/1080i/720p: COMP, H-LLENO, JUSTO, 4:3 ó<br />
ACERC<br />
Ajuste acercamiento<br />
La posición y el tamaño vertical de la imagen se pueden ajustar en “ACERC”.<br />
Seleccione “Ajuste acercamiento” en el menú “Imagen”. (pág. 26-27)<br />
Posición V: Ajuste de posición vertical<br />
Tamaño V: Ajuste de tamaño vertical<br />
Información técnica<br />
Lista de clasificacion<strong>es</strong> para el bloqueo<br />
Preguntas<br />
frecuent<strong>es</strong>, etc.<br />
Para r<strong>es</strong>tablecer la relación de aspecto<br />
(OK)<br />
45
Información técnica<br />
Formato de datos para examinar tarjetas<br />
Foto:<br />
Imágen<strong>es</strong> fijas grabadas con cámaras digital<strong>es</strong> compatibl<strong>es</strong> con archivos JPEG de las normas<br />
DCF* y EXIF**<br />
Formato de datos: Baseline JPEG (Submu<strong>es</strong>treo: 4:4:4, 4:2:2 ó 4:2:0)<br />
Máximo número de archivos: 9.999<br />
R<strong>es</strong>olución de imagen: 160 x 120 a 10.000.000<br />
* DCF (Norma de diseño para sistemas de archivos de cámaras): Una norma de la Asociación de las Industrias de la Tecnología de la<br />
Información y la Electrónica del Japón. ** EXIF (Exchangeable Image File Format)<br />
Precaución<br />
Una imagen JPEG modificada con un PC no se puede visualizar.<br />
Los archivos parcialmente degradados tal vez puedan visualizarse con una r<strong>es</strong>olución reducida.<br />
Nota<br />
Estructura de carpetas vistas en PC<br />
DCIM<br />
100_P ANA<br />
P1000001.JPG<br />
P1000002.JPG<br />
P1000003.JPG<br />
P1000004.JPG<br />
Creada automáticamente<br />
Número de carpeta de 3 dígitos + Caracter<strong>es</strong> arbitrarios de 5 dígitos<br />
Caracter<strong>es</strong> arbitrarios de 4 dígitos + Número de archivo de 4 dígitos<br />
Caracter<strong>es</strong> que se pueden utilizar: 1-byte “a a z”, “A a Z”, “0 a 9” y “_”<br />
Los nombr<strong>es</strong> de carpetas y archivos pueden ser diferent<strong>es</strong> dependiendo de la cámara digital utilizada.<br />
Para conocer las tarjetas de memoria SD más apropiadas, confirme la información más reciente en el sitio Web siguiente.<br />
http://panasonic.jp/support/global/cs (En <strong>es</strong>te sitio sólo se emplea el idioma inglés.)<br />
Cuidados al manejar la tarjeta SD:<br />
No retire la tarjeta mientras la unidad <strong>es</strong>tá accediendo a los datos (<strong>es</strong>to puede dañar la tarjeta ó la unidad).<br />
No toque las terminal<strong>es</strong> de la parte posterior de la tarjeta SD.<br />
No ejerza sobre la tarjeta una pr<strong>es</strong>ión fuerte ni la golpee.<br />
Inserte la tarjeta en el sentido correcto (de lo contrario, la tarjeta podría dañarse).<br />
La interferencia eléctrica, la electricidad <strong>es</strong>tática ó el funcionamiento erróneo pueden dañar los datos ó la tarjeta.<br />
Haga una copia de seguridad de los datos grabados a intervalos regular<strong>es</strong> por si <strong>es</strong>tos se deterioran ó se dañan,<br />
ó por si la unidad funciona de forma errática. (<strong>Panasonic</strong> no acepta ninguna r<strong>es</strong>ponsabilidad por el deterioro ó daño que<br />
puedan sufrir los datos grabados.)<br />
Mensaje<br />
Mensaj<strong>es</strong> de advertencia de tarjeta SD<br />
Significado/Acción<br />
Ranura Tarjeta SD <strong>es</strong>tá vacía La tarjeta no <strong>es</strong>tá insertada.<br />
No existen fotos La tarjeta no tiene datos ó <strong>es</strong>te tipo de datos no <strong>es</strong> compatible.<br />
No lect. de archivo<br />
El archivo <strong>es</strong>tá <strong>es</strong>tropeado o no se puede leer.<br />
La unidad no soporta el formato.<br />
46
(Continuación)<br />
VIERA Link “HDAVI Control TM ”<br />
Las conexion<strong>es</strong> HDMI para algunos equipos <strong>Panasonic</strong> le permiten hacer interfaz automáticamente. (pág. 30)<br />
Esta función puede no funcionar normalmente dependiendo de la condición del equipo.<br />
Con <strong>es</strong>ta función activada, aunque el televisor <strong>es</strong>té en el modo de <strong>es</strong>pera, el equipo podrá ser controlado por otros mandos a distancia.<br />
Cuando empieza la reproducción puede que no se disponga de imagen ni sonido durante los primeros segundos.<br />
Cuando se cambia el modo de entrada puede que no se disponga de imagen ni sonido durante los primeros segundos.<br />
Cuando se ajuste el volúmen del equipo se visualizará la función del volúmen.<br />
Si conecta la misma clase de equipo al mismo tiempo (por ejemplo: una DIGA a HDMI 1/otra DIGA a HDMI 2),<br />
VIERA Link <strong>es</strong>tará disponible para el terminal que tiene el número más pequeño.<br />
Si conecta el equipo que tiene la función “HDAVI Control 2 ó posterior” al televisor con un cable HDMI, el sonido procedente del<br />
terminal DIGITAL AUDIO OUT podrá salir como sonido ambiental multicanal.<br />
“HDAVI Control 4” <strong>es</strong> la norma más reciente (válida a partir de Diciembre de 2008) para el equipo compatible con HDAVI Control.<br />
Esta norma <strong>es</strong> compatible con el equipo HDAVI convencional.<br />
Conexión HDMI<br />
HDMI (interfaz multimedia de alta definición) le permite disfrutar de imágen<strong>es</strong> digital<strong>es</strong> de alta definición y de sonido de alta<br />
calidad conectando el televisor y los dispositivos.<br />
El equipo compatible con HDMI (*1) que tenga un terminal de salida HDMI ó DVI, como, por ejemplo, un receptor digital multimedia<br />
ó un reproductor DVD, podrá ser conectado al terminal HDMI utilizando un cable que cumpla con HDMI (función completa).<br />
HDMI <strong>es</strong> la primera interfaz AV completamente digital del mundo para el consumidor que cumple con un <strong>es</strong>tándar de no compr<strong>es</strong>ión.<br />
Si el dispositivo externo sólo tiene una salida DVI, conecte al terminal HDMI mediante un cable adaptador DVI a HDMI (*2).<br />
Cuando se utiliza el cable adaptador DVI a HDMI, conecte el cable de audio al terminal de entrada de audio.<br />
Los ajust<strong>es</strong> de audio se pueden hacer en la pantalla del menú “Entrada HDMI 1” ó “Entrada HDMI 2”. (pág. 26)<br />
Frecuencias de mu<strong>es</strong>treo de la señal de audio aplicable (L.PCM): 48 kHz, 44,1 kHz, 32 kHz<br />
(*1): El logotipo HDMI se visualiza en un equipo compatible con HDMI.<br />
(*2): Pregunte en el <strong>es</strong>tablecimiento del vendedor de equipos digital<strong>es</strong> local.<br />
Precaución<br />
No se asume el funcionamiento con un PC.<br />
Todas las señal<strong>es</strong> se reformatean ant<strong>es</strong> de visualizarse en la pantalla.<br />
Si el equipo conectado tiene una función de ajuste de relación de aspecto, ajuste la relación de aspecto a “16:9”.<br />
Estos conector<strong>es</strong> HDMI son de “tipo A”.<br />
Estos conector<strong>es</strong> HDMI son compatibl<strong>es</strong> con la protección de los derechos de autor de HDCP (protección de contenido digital<br />
de elevado ancho de banda).<br />
Un dispositivo que no tenga terminal de salida digital podrá conectarse al terminal de entrada de “COMPONENT”, “S VI<strong>DE</strong>O” ó<br />
“VI<strong>DE</strong>O” para recibir señal<strong>es</strong> analógicas.<br />
El terminal de entrada HDMI sólo puede utilizarse con las señal<strong>es</strong> de imagen siguient<strong>es</strong>: 480i, 480p, 720p, 1080i y 1080p.<br />
Procure que concuerde con el ajuste de salida del dispositivo digital.<br />
Para conocer detall<strong>es</strong> de las señal<strong>es</strong> HDMI aplicabl<strong>es</strong>, consulte la pág. 48.<br />
Terminal<strong>es</strong> DIGITAL AUDIO OUT<br />
Puede disfrutar de su equipo de cine para casa conectando un decodificador Dolby Digital (5.1 canal<strong>es</strong>) y un amplificador “Multi<br />
Canal” a los terminal<strong>es</strong> DIGITAL AUDIO OUT.<br />
Precaución<br />
Dependiendo de su reproductor DVD y del software DVD-Audio, la función de protección del copyright tal vez se active y<br />
apague la salida óptica.<br />
Cuando se seleccione un canal ATSC, la salida procedente de la toma DIGITAL AUDIO OUT será Dolby Digital.<br />
Cuando se seleccione un canal NTSC, la salida será PCM.<br />
Modo<br />
Vívido:<br />
Provee un contraste y una nitidez de imagen realzados para ver programas en una habitación bien iluminada.<br />
Estándar:<br />
Recomendado para ver bajo condicion<strong>es</strong> normal<strong>es</strong> en una habitación con iluminación atenuada.<br />
Cinema:<br />
Para ver películas en una habitación oscura. Proporciona una imagen suave, como la del cine.<br />
Usuario (Fotografico): Personaliza cada elemento según sus preferencias.<br />
La foto se visualiza en el menú Jpeg.<br />
Información técnica<br />
Preguntas<br />
frecuent<strong>es</strong>, etc.<br />
47
Información técnica (Continuación)<br />
Relación de aspecto: 4:3<br />
Tamaño 1 Tamaño 2<br />
Tamaño H<br />
La anchura se reducirá en ambos lados para<br />
reducir el ruido.<br />
Relación de aspecto: COMP/ JUSTO/ (H-LLENO/ ACERC)<br />
Tamaño 1 Tamaño 2 La anchura aumentará en ambos lados para<br />
reducir el ruido.<br />
Vea las páginas 26-27 para obtener más información<br />
Barra lateral 4:3<br />
No visualice una imagen en el modo 4:3 durante un periodo de tiempo<br />
prolongado porque <strong>es</strong>to podrá ser la causa de que quede una “Retención de<br />
imagen’’ en los panel<strong>es</strong> lateral<strong>es</strong> a ambos lados del campo de visualización.<br />
Para reducir el ri<strong>es</strong>go de que se produzca el efecto de “Retención de imagen’’,<br />
ilumine los panel<strong>es</strong> lateral<strong>es</strong>.<br />
Vea las páginas 28-29 para obtener más información<br />
Los panel<strong>es</strong> lateral<strong>es</strong> pueden d<strong>es</strong>tellar (en blanco y negro alternativamente)<br />
dependiendo de la imagen que <strong>es</strong>té siendo mostrada en la pantalla. Si se utiliza<br />
el modo de cine se reducirá el parpadeo (Vea más abajo).<br />
Panel<strong>es</strong> lateral<strong>es</strong><br />
Visualización<br />
en el<br />
modo 4:3<br />
Retención de imagen<br />
Barra vertical en movimiento.<br />
Barra vertical en movimiento.: D<strong>es</strong>plaza una barra vertical blanca de izquierda a derecha en una pantalla<br />
negra para impedir la “Retención de imagen”.<br />
Pulse cualquier tecla, a excepción de la tecla POWER, para volver a la pantalla anterior.<br />
Volverá a la pantalla anterior si no utiliza ninguna tecla durante 15 minutos.<br />
Vea las páginas 28-29 para obtener más información<br />
[Barra vertical en movimiento]<br />
Señal de entrada que puede visualizarse<br />
* Marca: Señal de entrada aplicable para componente (Y, PB, PR) HDMI<br />
Frecuencia<br />
horizontal (kHz)<br />
Frecuencia<br />
vertical(Hz)<br />
COMPONENT<br />
HDMI<br />
525 (480)/60i 15,73 59,94 * *<br />
525 (480)/60p 31,47 59,94 * *<br />
750 (720)/60p 45,00 59,94 * *<br />
1.125 (1.080)/60i 33,75 59,94 * *<br />
1.125 (1.080)/60p 67,43 59,94 *<br />
1.125 (1.080)/60p 67,50 60,00 *<br />
1.125 (1.080)/24p 26,97 23,98 *<br />
1.125 (1.080)/24p 27,00 24,00 *<br />
Nota<br />
Las señal<strong>es</strong> que no sean las mostradas arriba pueden no visualizarse correctamente.<br />
Las señal<strong>es</strong> de arriba son reformateadas para poder verlas de forma óptima en su pantalla.<br />
48
Preguntas<br />
frecuent<strong>es</strong>, etc.<br />
Cuidados y limpieza<br />
D<strong>es</strong>enchufe primero la clavija del cable de alimentación de CA del toma de corriente.<br />
Panel de la pantalla<br />
Limpie suavemente la superficie del panel utilizando un paño suave.<br />
Si la superficie <strong>es</strong>tá muy sucia, empape un paño blando y sin pelusa en una solución de agua y jabón líquido suave de los<br />
empleados para lavar vajillas (1 parte de jabón por cada 100 part<strong>es</strong> de agua) y luego <strong>es</strong>cúrralo para quitar el exc<strong>es</strong>o de agua,<br />
frote uniformemente con un paño seco del mismo tipo hasta que la superficie quede completamente seca.<br />
No raye ó golpee la superficie del panel con sus uñas u otros objetos duros ya que la superficie puede dañarse. Además, evite<br />
el contacto con sustancias volátil<strong>es</strong> tal<strong>es</strong> como rociador<strong>es</strong> de insecticida, disolvent<strong>es</strong> y diluyent<strong>es</strong> de pintura, de lo contrario<br />
puede verse afectada la calidad de la superficie.<br />
Mueble<br />
Si el mueble se ensucia, limpie con un paño suave y seco.<br />
Si la caja <strong>es</strong>tá muy sucia, empape el paño en una solución de agua y jabón líquido suave de los empleados para lavar vajillas y<br />
luego <strong>es</strong>cúrralo para quitar el agua. Utilice el paño para limpiar el mueble y seque frotando con un paño seco.<br />
No permita que el jabón líquido suave de los empleados para lavar vajillas toque directamente la superficie del TV de plasma.<br />
Si las gotas de agua entran en el interior del aparato, pueden surgir problemas en el funcionamiento.<br />
Evite el contacto con sustancias volátil<strong>es</strong> tal<strong>es</strong> como rociador<strong>es</strong> de insecticida, disolvent<strong>es</strong> y diluyent<strong>es</strong> de pintura debido a que<br />
puede verse afectada la superficie del mueble y puede d<strong>es</strong>prenderse el rev<strong>es</strong>timiento. Tampoco deje la superficie por mucho<br />
tiempo en contacto con artículos de caucho ó PVC.<br />
Ped<strong>es</strong>tal<br />
Limpieza<br />
Limpie las superfici<strong>es</strong> pasando un paño blando y seco. Si la unidad <strong>es</strong>tá muy sucia, límpiela con un paño<br />
empapado en agua a la que se haya añadido una pequeña cantidad de jabón líquido suave de los empleados para<br />
lavar vajillas y luego pase un paño seco. No utilice productos tal<strong>es</strong> como disolvent<strong>es</strong>, diluyente ó cera del hogar<br />
para la limpieza ya que pueden dañar el rev<strong>es</strong>timiento de la superficie.<br />
(Si utiliza un paño con tratamiento químico, siga las instruccion<strong>es</strong> que vienen con el paño.)<br />
No pegue cinta adh<strong>es</strong>iva ó etiquetas ya que pueden ensuciar la superficie del ped<strong>es</strong>tal. No permita el contacto<br />
durante mucho tiempo con productos de goma, vinilo ó similar<strong>es</strong>. (Hacerlo puede causar deterioros.)<br />
Cuidados y limpieza<br />
Información técnica<br />
49
Preguntas frecuent<strong>es</strong><br />
Ant<strong>es</strong> de solicitar reparacion<strong>es</strong> ó ayuda, siga las indicacion<strong>es</strong> siguient<strong>es</strong> para solucionar el problema.<br />
Si el problema persiste, póngase en contacto con su conc<strong>es</strong>ionario de <strong>Panasonic</strong> ó con el centro de servicio de<br />
<strong>Panasonic</strong> local para solicitar ayuda.<br />
Para obtener ayuda adicional, póngase en contacto con nu<strong>es</strong>tro sitio Web en www.panasonic.com/contactinfo<br />
Puntos blancos<br />
ó imágen<strong>es</strong> con<br />
sombra (ruido)<br />
50<br />
Compruebe la posición, la orientación<br />
y la conexión de la antena.<br />
Interferencia ó<br />
canal<strong>es</strong> digital<strong>es</strong><br />
congelados<br />
(sonido intermitente)<br />
Cambie la orientación de la antena<br />
para los canal<strong>es</strong> digital<strong>es</strong>.<br />
Compruebe “Medidor de señal”<br />
(pág. 39). Si la señal <strong>es</strong> débil,<br />
compruebe la antena y consulte a<br />
su conc<strong>es</strong>ionario local.<br />
El mando a distancia<br />
no funciona<br />
¿Están instaladas correctamente<br />
las pilas? (pág. 8)<br />
¿Son nuevas las pilas?<br />
La imagen se ve distorsionada<br />
cuando el equipo se conecta a<br />
través de HDMI<br />
¿Está conectado correctamente el cable<br />
HDMI? (pág. 31, 43)<br />
Apague el televisor y el equipo y luego<br />
vuelva a encenderlos.<br />
Compruebe una señal de entrada<br />
procedente del equipo. (pág. 48)<br />
Utilice un dispositivo que cumpla con la<br />
norma EIA/CEA-861/861B.<br />
Cuando el canal se cambia en un<br />
STB que <strong>es</strong>tá conectado con HDMI,<br />
“HDMI” se puede mostrar en la parte<br />
superior izquierda de la pantalla<br />
Esto no <strong>es</strong> un fallo.<br />
La grabación no empieza<br />
inmediatamente<br />
Verifique los ajust<strong>es</strong> de la grabadora.<br />
Para conocer detall<strong>es</strong>, lea el manual de la<br />
grabadora.
Si hay un problema con su televisor, consulte la tabla de abajo para determinar los síntomas, y luego efectúe la<br />
comprobación sugerida. Si <strong>es</strong>o no r<strong>es</strong>uelve el problema, póngase en contacto con su conc<strong>es</strong>ionario <strong>Panasonic</strong>,<br />
indicándole el número del modelo y el número de serie del televisor (ambos situados en la parte posterior del televisor).<br />
Imagen<br />
Sonido<br />
Problemas<br />
“Pr<strong>es</strong>ione cualquier<br />
botón para regr<strong>es</strong>ar” se<br />
mueve en la pantalla<br />
Algunos puntos pueden<br />
permanecer brillant<strong>es</strong> o<br />
oscuros<br />
Imagen d<strong>es</strong>ordenada y<br />
ruidosa<br />
No se puede visualizar<br />
imagen<br />
Sólo se visualizan puntos<br />
en lugar de imágen<strong>es</strong><br />
No se produce imagen<br />
ni sonido<br />
No se produce sonido<br />
El sonido <strong>es</strong> extraño<br />
Medidas correctivas<br />
La función para impedir la imagen remanente <strong>es</strong>tá<br />
•<br />
activada. (No <strong>es</strong> un síntoma de fallo.)<br />
•<br />
durante cierto tiempo en el modo SD.<br />
• “Retención de imagen” (pág. 7)<br />
El salvapantallas <strong>es</strong>tá activado si el televisor no funciona<br />
El panel de plasma <strong>es</strong>tá formado por unos pocos millon<strong>es</strong> de píxel<strong>es</strong>, y se<br />
•<br />
fabrica con una tecnología avanzada que emplea un complicado proc<strong>es</strong>o.<br />
No obstante, algunas vec<strong>es</strong> puede haber unos pocos píxel<strong>es</strong> brillant<strong>es</strong><br />
u oscuros. Estos píxel<strong>es</strong> no indican que un panel <strong>es</strong>té defectuoso, y no<br />
causarán ningún impacto sobre el funcionamiento del televisor.<br />
Compruebe los productos eléctricos cercanos<br />
•(sistemas de encendido de automóvil<strong>es</strong> o motocicletas,<br />
lámparas fluor<strong>es</strong>cent<strong>es</strong>, etc.)<br />
Compruebe el menú Imagen (pág. 26)<br />
• Compruebe los cabl<strong>es</strong> de antena.<br />
• ¿Está encendido el televisor?<br />
•<br />
Verifique las conexion<strong>es</strong> de los cabl<strong>es</strong>. (pág. 11-14)<br />
Verifique que se haya seleccionado la entrada correcta. (pág. 24)<br />
Compruebe los ajust<strong>es</strong> de los canal<strong>es</strong>. (pág. 38)<br />
¿Está el cable de alimentación de CA enchufado en la toma de corriente?<br />
Compruebe el menú Imagen (pág. 26) y el volúmen.<br />
Verifique las conexion<strong>es</strong> de los cabl<strong>es</strong> AV. (pág. 11-14)<br />
Verifique que se haya seleccionado la entrada correcta. (pág. 24)<br />
Aparece un cuadro negro Cambie los ajust<strong>es</strong> de los subtítulos (CC). (pág. 40)<br />
•<br />
Se oye un sonido d<strong>es</strong>conocido<br />
1- Sonidos procedent<strong>es</strong><br />
de la caja del televisor<br />
2- Sonido de runruneo<br />
3- Sonido tic/clic<br />
4- Sonido de zumbido<br />
¿Están conectados correctamente los cabl<strong>es</strong> de los altavoc<strong>es</strong>? (pág. 43)<br />
¿Está activo “Silenciamiento del sonido”? (pág. 15)<br />
¿Está ajustado al mínimo el volúmen?<br />
¿Está “Altavoc<strong>es</strong> de TV” en “No”? (pág. 26)<br />
Cambie los ajust<strong>es</strong> “SPA”. (pág. 19)<br />
Compruebe los ajust<strong>es</strong> “Entrada HDMI 1” ó “Entrada<br />
•<br />
HDMI 2”. (pág. 26)<br />
Ponga “SPA” en “Estéreo” ó “Mono”.<br />
Compruebe el dispositivo HDMI conectado a la unidad.<br />
Ponga el ajuste de audio del dispositivo HDMI en “Linear PCM.”<br />
Si la conexión de sonido digital tiene un problema,<br />
•<br />
seleccione la conexión de sonido analógico.<br />
1- Los cambios en la temperatura y en la humedad de la habitación pueden ser<br />
la causa de que la caja del televisor se expanda o contraiga produciendo un<br />
ruido metálico. Esto no indica que el funcionamiento sea defectuoso.<br />
2- El televisor puede tener un ventilador que produce un suave runruneo.<br />
Esto no indica que el funcionamiento sea defectuoso.<br />
3- Cuando se enciende el televisor se activa un componente eléctrico del mismo que<br />
produce un sonido tic/clic. Esto no indica que el funcionamiento sea defectuoso.<br />
4- Los circuitos eléctricos <strong>es</strong>tán activos mientras <strong>es</strong>tá encendido el<br />
televisor. Esto no indica que el funcionamiento sea defectuoso.<br />
Preguntas frecuent<strong>es</strong><br />
Preguntas<br />
frecuent<strong>es</strong>, etc.<br />
51
Especificacion<strong>es</strong><br />
Alimentación<br />
120 V CA, 60 Hz<br />
<strong>TC</strong>-<strong>P42C1</strong><br />
<strong>TC</strong>-P50C1<br />
Consumo<br />
Máximo 283 W 387 W<br />
Condición de <strong>es</strong>pera 0,3 W 0,3 W<br />
Panel de pantalla de<br />
plasma<br />
Método de<br />
accionamiento<br />
Relación de aspecto 16:9<br />
Tamaño de pantalla<br />
visible<br />
(An. × Al. × Diagonal)<br />
(Número de píxel<strong>es</strong>)<br />
Tipo de CA<br />
Clase 42” (41,6 pulgadas medidas<br />
diagonalmente)<br />
921 mm × 518 mm × 1.057 mm<br />
(36,2 ” × 20,4 ” × 41,6 ”)<br />
786.432 (1.024 (An.) × 768 (Al.))<br />
[3.072 × 768 puntos]<br />
Clase 50” (49,9 pulgadas medidas<br />
diagonalmente)<br />
1.106 mm × 622 mm × 1.269 mm<br />
(43,5 ” × 24,4 ” × 49,9 ”)<br />
1.049.088 (1.366 (An.) × 768 (Al.))<br />
[4.098 × 768 puntos]<br />
Sonido<br />
Salida de audio 20 W [ 10 W + 10 W ] ( 10 % de distorsión armónica total )<br />
Capacidad de recepción de<br />
canal<strong>es</strong> (Digital/Análogo)<br />
Condicion<strong>es</strong> de<br />
funcionamiento<br />
Terminal<strong>es</strong> de conexión<br />
VI<strong>DE</strong>O IN 1<br />
VI<strong>DE</strong>O IN 2<br />
COMPONENT<br />
IN 1-2<br />
HDMI 1-2<br />
Ranura de tarjeta<br />
DIGITAL AUDIO OUT<br />
CARACTERÍSTICAS<br />
Dimension<strong>es</strong><br />
(An. × AI. × Prof.) Masa<br />
Incluyendo ped<strong>es</strong>tal<br />
Televisor solamente<br />
VHF/ UHF: 2 - 69, CATV: 1 - 135<br />
Temperatura:<br />
Humedad:<br />
32 °F – 104 °F (0 °C – 40 °C)<br />
20 % – 80 % RH (sin condensación)<br />
VI<strong>DE</strong>O: Tipo RCA PIN × 1 1,0 V [p-p] (75 Ω)<br />
S-VI<strong>DE</strong>O: Mini DIN de 4 contactos Y: 1,0 V [p-p] (75 Ω) C: 0,286 V [p-p] (75 Ω)<br />
AUDIO L-R: Tipo RCA PIN × 2 0,5 V [rms]<br />
VI<strong>DE</strong>O: Tipo RCA PIN × 1 1,0 V [p-p] (75 Ω)<br />
AUDIO L-R: Tipo RCA PIN × 2 0,5 V [rms]<br />
Y: 1,0 V [p-p] (incluyendo sincronización)<br />
PB, PR: ±0,35 V [p-p]<br />
AUDIO L-R: Tipo RCA PIN × 2 0,5 V [rms]<br />
Conector tipo A × 2<br />
• Este televisor soporta la función “HDAVI Control 4”.<br />
1 ranura de tarjeta SD<br />
PCM / Dolby Digital, Fibra óptica<br />
FILTRO Y/C 3D<br />
Subtítulos<br />
V-Chip<br />
Visualizador de Fotos HDAVI Control 4<br />
1.029 mm × 709 mm × 327 mm<br />
(40,6 ” × 28,0 ” × 12,9 ”)<br />
1.029 mm × 661 mm × 94 mm (106 mm)<br />
(40,6 ” × 26,1 ” × 3,8 ” (4,2 ”))<br />
1.218 mm × 822 mm × 387 mm<br />
(48,0 ” × 32,4 ” × 15,3 ”)<br />
Incluyendo ped<strong>es</strong>tal 61,8 lb. (28,0 ) 79,4 lb. (36,0 )<br />
Televisor solamente 57,4 lb. (26,0 ) 75,0 lb. (34,0 )<br />
[<strong>TC</strong>-<strong>P42C1</strong>]<br />
709 mm (28,0 ”)<br />
661 mm (26,1 ”)<br />
1.029 mm (40,6 ”)<br />
106 mm (4,2 ”)<br />
94 mm<br />
(3,8 ”)<br />
1.218 mm × 769 mm × 94 mm (106 mm)<br />
(48,0 ” × 30,3 ” × 3,8 ” (4,2 ”))<br />
[<strong>TC</strong>-P50C1]<br />
822 mm (32,4 ”)<br />
769 mm (30,3 ”)<br />
1.218 mm (48,0 ”)<br />
106 mm (4,2 ”)<br />
94 mm<br />
(3,8 ”)<br />
52<br />
Nota<br />
456 mm<br />
(18,0 ”)<br />
327 mm (12,9 ”)<br />
456 mm<br />
(18,0 ”)<br />
El diseño y las <strong>es</strong>pecificacion<strong>es</strong> <strong>es</strong>tán sujetos a cambios sin previo aviso. La masa y dimension<strong>es</strong> son<br />
aproximadas.<br />
387 mm (15,3 ”)
Preguntas<br />
frecuent<strong>es</strong>, etc.<br />
Nota<br />
Especificacion<strong>es</strong><br />
53
Nota
Nota
Nota
Manuel d’utilisation<br />
Téléviseur à plasma HD 720p de 42/50 po<br />
(41,6/49,9 po en diagonale)<br />
Modèl<strong>es</strong><br />
<strong>TC</strong>-<strong>P42C1</strong><br />
<strong>TC</strong>-P50C1<br />
Guide de mise en<br />
route rapide<br />
(Reportez-vous aux pag<strong>es</strong> 8 à 18.)<br />
Pour obtenir de l’assistance (États-Unis/Porto Rico), appelez le:<br />
1-877-95-VIERA (958-4372)<br />
ou bien consultez notre site www.panasonic.com/contactinfo<br />
Pour obtenir de l’assistance (Canada), appelez le:<br />
1-866-330-0014<br />
ou bien consultez notre site www.vieraconcierge.ca<br />
TM<br />
Français<br />
Avant d’utiliser l’appareil, lire attentivement le présent manuel et le conserver pour référence ultérieure.<br />
L<strong>es</strong> imag<strong>es</strong> montré<strong>es</strong> dans le présent manuel n’y sont qu’à d<strong>es</strong> fins d’illustration.<br />
TQB2AA0809-3
Transformez votre salon en salle de cinéma!<br />
Le multimédia à son meilleur!<br />
HDMl, le logo HDMI et High-Definition<br />
Multimedia Interface sont d<strong>es</strong> marqu<strong>es</strong><br />
de commerce ou d<strong>es</strong> marqu<strong>es</strong><br />
déposé<strong>es</strong> de<br />
HDMI Licensing LLC.<br />
La fonction VIERA Link <strong>es</strong>t une<br />
marque de commerce de <strong>Panasonic</strong><br />
Corporation.<br />
Le logo SDHC <strong>es</strong>t une marque de<br />
commerce.<br />
2<br />
La fonction HDAVI Control <strong>es</strong>t une<br />
marque de commerce de <strong>Panasonic</strong><br />
Corporation.<br />
Fabriqué sous licence de Dolby Laboratori<strong>es</strong>.<br />
DOLBY et le symbole double D sont<br />
d<strong>es</strong> marqu<strong>es</strong> de commerce de Dolby<br />
Laboratori<strong>es</strong>.
Une grande polyvalence multimédia<br />
Table d<strong>es</strong> matièr<strong>es</strong><br />
À lire attentivement<br />
M<strong>es</strong>ur<strong>es</strong> de sécurité ····································· 4<br />
Remarqu<strong>es</strong> ·················································· 7<br />
Magnétoscope Décodeur<br />
Amplificateur<br />
chaîne cinéma<br />
maison<br />
Enregistreur DVD/<br />
Blu-ray Disc TM<br />
Carte mémoire SD<br />
Caméscope<br />
Ce produit <strong>es</strong>t conforme aux norm<strong>es</strong><br />
ENERGY STAR dans le mode « Usage à<br />
domicile » lequel permet d<strong>es</strong> économi<strong>es</strong><br />
d’énergie. Toute modification du paramétrage<br />
du mode « Usage à domicile » ou d<strong>es</strong> autr<strong>es</strong><br />
paramétrag<strong>es</strong> par défaut pourrait entraîner<br />
une consommation d’énergie dépassant l<strong>es</strong><br />
norm<strong>es</strong> ENERGY STAR.<br />
Guide de mise en route rapide<br />
Acc<strong>es</strong>soir<strong>es</strong>/Acc<strong>es</strong>soire en option ··· 8<br />
Connexion de base ·························11<br />
Emplacement d<strong>es</strong> command<strong>es</strong> ····· 15<br />
Réglage initial ································ 16<br />
Pour un grand plaisir télévisuel<br />
Fonctions de base<br />
Lecteur DVD/<br />
Visionnement de la télévision ···················· 19<br />
Blu-ray Disc TM Utilisation d<strong>es</strong> fonctions VIERA TOOLS ···· 21<br />
Affichage depuis une carte SD ·················· 22<br />
Visionnement de band<strong>es</strong> vidéo et de DVD ·· 24<br />
Fonctions avancé<strong>es</strong><br />
Utilisation d<strong>es</strong> fonctions d<strong>es</strong> menus<br />
(image, son, etc.) ······································· 26<br />
VIERA Link TM “HDAVI Control TM ” ················ 30<br />
Blocage ······················································ 36<br />
Programmation et édition d<strong>es</strong> canaux ······· 38<br />
Sous-titr<strong>es</strong> ·················································· 40<br />
Ident. pris<strong>es</strong> ··············································· 41<br />
Minuterie ···················································· 42<br />
Connexions AV recommandé<strong>es</strong> ················· 43<br />
Foire aux qu<strong>es</strong>tions et généralités<br />
Liste d<strong>es</strong> classifications aux fins de<br />
blocage ······················································ 44<br />
Informations techniqu<strong>es</strong> ····························· 45<br />
Entretien et nettoyage ································ 49<br />
Foire aux qu<strong>es</strong>tions···································· 50<br />
Spécifications ············································· 52<br />
Garantie limitée ·········································· 53<br />
Guide de mise<br />
en route rapide<br />
Visionnement Fonctions avancé<strong>es</strong> FAQ, etc.<br />
3
M<strong>es</strong>ur<strong>es</strong> de sécurité<br />
ATTENTION<br />
Risque de secousse<br />
électrique Ne pas ouvrir<br />
AVERTISSEMENT: Pour réduire l<strong>es</strong> risqu<strong>es</strong> de secousse électrique, ne pas retirer<br />
le couvercle ni le panneau arrière. Cet appareil ne contient aucune pièce qui puisse<br />
être réparée par l’utilisateur; l’entretien doit être effectué par du personnel qualifié.<br />
Le symbole de l’éclair, inscrit dans un triangle équilatéral, a<br />
pour objet d’appeler l’attention de l’utilisateur sur la présence,<br />
à l’intérieur du produit, de pièc<strong>es</strong> non isolé<strong>es</strong> porté<strong>es</strong> à une<br />
“tension dangereuse” qui peut avoir une amplitude suffisante<br />
pour provoquer une secousse électrique.<br />
Le symbole du point d’exclamation, inscrit dans un<br />
triangle équilatéral, a pour objet d’appeler l’attention<br />
de l’utilisateur sur la présence, dans la documentation<br />
accompagnant le produit, d’important<strong>es</strong> instructions<br />
concernant son mode opératoire et son entretien.<br />
AVERTISSEMENT: Pour éviter tout dommage pouvant entraîner un incendie ou une secousse électrique,<br />
n’exposez pas l’appareil à la pluie ou à l’humidité.<br />
Ne placez aucun récipient contenant de l’eau (vase de fleur, tasse, bouteille de produit de<br />
beauté, etc.) sur l’appareil (ou sur une étagère le dominant).<br />
1) Lisez c<strong>es</strong> instructions.<br />
2) Conservez c<strong>es</strong> instructions.<br />
3) Tenez compte de tous l<strong>es</strong> avertissements.<br />
4) Suivez tout<strong>es</strong> l<strong>es</strong> instructions.<br />
5) N’utilisez pas cet appareil près de l’eau.<br />
6) Nettoyez l’appareil uniquement avec un chiffon sec.<br />
7) Ne bloquez pas l<strong>es</strong> orific<strong>es</strong> de ventilation. Installez<br />
l’appareil en r<strong>es</strong>pectant l<strong>es</strong> instructions du fabricant.<br />
8) N’installez pas l’appareil près d’une source de chaleur telle qu’un<br />
radiateur, un registre de chaleur, une cuisinière ou un autre<br />
appareil (y compris un amplificateur) qui produit de la chaleur.<br />
9) N’invalidez pas l<strong>es</strong> caractéristiqu<strong>es</strong> de sécurité de la fiche<br />
polarisée ou avec mise à la terre. Une fiche polarisée possède<br />
deux lam<strong>es</strong> dont une <strong>es</strong>t plus large que l’autre. Une fiche avec<br />
mise à la terre possède deux lam<strong>es</strong> plus une troisième lame<br />
pour la mise à la terre. La lame large ou la lame de mise à la<br />
terre sont conçu<strong>es</strong> pour d<strong>es</strong> raisons de sécurité. Si la fiche<br />
fournie ne peut pas être branchée dans votre prise secteur,<br />
consultez un électricien pour faire remplacer la prise.<br />
10) Protégez le cordon d’alimentation et empêchez qu’il soit<br />
piétiné ou pincé, en particulier au niveau d<strong>es</strong> fich<strong>es</strong>, de la<br />
prise secteur murale et de la sortie de l’appareil.<br />
Consign<strong>es</strong> de sécurité important<strong>es</strong><br />
Avis de la FCC:<br />
11) Utilisez uniquement d<strong>es</strong> dispositifs auxiliair<strong>es</strong>/acc<strong>es</strong>soir<strong>es</strong><br />
spécifiés par le fabricant.<br />
12) Utilisez uniquement un chariot, socle,<br />
trépied, support ou table spécifié par<br />
le fabricant ou vendu avec l’appareil.<br />
Si vous utilisez un chariot, fait<strong>es</strong> très<br />
attention lors du déplacement de<br />
l’ensemble chariot-appareil pour éviter<br />
toute bl<strong>es</strong>sure provenant d’une chute<br />
de l’appareil.<br />
13) Débranchez cet appareil pendant un orage ou quand il ne<br />
doit pas être utilisé pendant une période prolongée.<br />
14) Pour toute réparation, consultez un personnel qualifié.<br />
L’appareil doit être réparé s’il a été endommagé de<br />
n’importe quelle façon, comme quand, par exemple, le<br />
cordon d’alimentation fourni ou la fiche sont endommagés,<br />
si un liquide a coulé dans l’appareil ou un objet <strong>es</strong>t tombé<br />
à l’intérieur, si l’appareil a été exposé à la pluie ou à<br />
l’humidité, s’il ne fonctionne pas normalement ou <strong>es</strong>t tombé.<br />
15) Pour éviter toute secousse électrique, assurez-vous<br />
que la broche de mise à la terre de la fiche du cordon<br />
d’alimentation <strong>es</strong>t correctement branchée.<br />
Cet équipement a été t<strong>es</strong>té et déclaré conforme aux limitations d’un appareil numérique de Classe B, d’après la section 15 d<strong>es</strong><br />
norm<strong>es</strong> FCC. C<strong>es</strong> limitations sont conçu<strong>es</strong> pour offrir un niveau de protection raisonnable contre l<strong>es</strong> interférenc<strong>es</strong> nuisibl<strong>es</strong> dans<br />
une zone résidentielle. Cet équipement produit, utilise et peut émettre une énergie de fréquence radio et, s’il n’<strong>es</strong>t pas installé ni<br />
utilisé conformément aux instructions, il risque de causer d<strong>es</strong> interférenc<strong>es</strong> nuisibl<strong>es</strong> aux communications radio. Il n’y a toutefois<br />
aucune garantie que d<strong>es</strong> interférenc<strong>es</strong> ne se produisent pas dans une installation en particulier. Si cet équipement cause d<strong>es</strong><br />
interférenc<strong>es</strong> gênant<strong>es</strong> pour la réception radio ou télévision, ce qui peut être aisément déterminé en l’éteignant puis en le<br />
rallumant, I’utilisateur <strong>es</strong>t invité à prendre l’une ou l’autr<strong>es</strong> d<strong>es</strong> m<strong>es</strong>ur<strong>es</strong> correctiv<strong>es</strong> suivant<strong>es</strong>:<br />
• Réorientez ou déplacez l’antenne de réception.<br />
• Augmentez la distance entre l’équipement et le récepteur.<br />
• Branchez l’équipement dans une prise située sur un autre circuit que celui auquel <strong>es</strong>t relié le récepteur.<br />
• Si vous avez b<strong>es</strong>oin d’aide, consultez le centre de service technique <strong>Panasonic</strong> ou un technicien radio-télévision expérimenté.<br />
Précautions FCC:<br />
Pour assurer une compatibilité continue, suivez l<strong>es</strong> instructions de ce manuel et utilisez uniquement un câble d’interface blindé<br />
lors de la connexion du téléviseur à d<strong>es</strong> appareils périphériqu<strong>es</strong>. Tout changement ou modification non expr<strong>es</strong>sément approuvée<br />
par la partie r<strong>es</strong>ponsable peut causer d<strong>es</strong> interférenc<strong>es</strong> nuisibl<strong>es</strong> et peut annuler l’autorité de l’utilisateur d’utiliser l’appareil.<br />
R<strong>es</strong>ponsable:<br />
Contact:<br />
Courriel:<br />
<strong>Panasonic</strong> Corporation of North America<br />
One <strong>Panasonic</strong> Way, Secaucus, NJ 07094<br />
<strong>Panasonic</strong> Consumer Electronics Company<br />
1-877-95-VIERA (958-4372)<br />
consumerproducts@panasonic.com<br />
4<br />
Note pour le Canada:<br />
Pour l<strong>es</strong> modèl<strong>es</strong> <strong>TC</strong>-<strong>P42C1</strong> et <strong>TC</strong>-P50C1<br />
Cet appareil numérique de Classe B <strong>es</strong>t conforme à la norme NMB-003 du Canada.
AVERTISSEMENT/MISE EN GAR<strong>DE</strong><br />
AVERTISSEMENT<br />
Cet appareil comporte d<strong>es</strong> petit<strong>es</strong> pièc<strong>es</strong> pouvant présenter<br />
d<strong>es</strong> risqu<strong>es</strong> d’étouffement dans l’éventualité où ell<strong>es</strong> seraient<br />
avalé<strong>es</strong>. Rangez-l<strong>es</strong> hors de la portée d<strong>es</strong> enfants.<br />
Jetez l<strong>es</strong> petit<strong>es</strong> pièc<strong>es</strong> inutil<strong>es</strong>, ainsi que tout autre objet<br />
inutile, y compris l<strong>es</strong> matériaux d’emballage et l<strong>es</strong> sacs/<br />
feuill<strong>es</strong> en plastique, afin d’éviter tout risque de suffocation.<br />
Installation<br />
Une installation inadéquate peut causer la chute de l’appareil ce qui<br />
<strong>es</strong>t susceptible de causer d<strong>es</strong> bl<strong>es</strong>sur<strong>es</strong> grav<strong>es</strong> voire mortell<strong>es</strong>. Afin de<br />
prévenir de tels risqu<strong>es</strong>, prenez l<strong>es</strong> précautions décrit<strong>es</strong> ci-d<strong>es</strong>sous.<br />
Le téléviseur à plasma doit être installé à l’aide du support<br />
ou piéd<strong>es</strong>tal et de la quincaillerie recommandés par le<br />
fabricant conformément aux instructions d’installation<br />
Le téléviseur à plasma doit être utilisé avec l<strong>es</strong> acc<strong>es</strong>soir<strong>es</strong><br />
en option suivants uniquement.<br />
L’utilisation avec tout autre type d’acc<strong>es</strong>soire peut causer<br />
l’instabilité de l’ensemble. L'acc<strong>es</strong>soire suivant <strong>es</strong>t fabriqué<br />
par <strong>Panasonic</strong> Corporation.<br />
• Support de montage mural (en biais) : TY-WK4P1RW<br />
Assurez-vous que l’installation <strong>es</strong>t faite par un technicien<br />
qualifié.<br />
Pour installer ou retirer le téléviseur, il faut le concours de<br />
deux personn<strong>es</strong>.<br />
Certains supports ne sont pas faits pour être installés<br />
sur d<strong>es</strong> murs supportés par d<strong>es</strong> poteaux d’acier ou d<strong>es</strong><br />
blocs de ciment.<br />
Demandez à votre détaillant ou à un entrepreneur autorisé<br />
d’installer correctement l<strong>es</strong> supports de montage au mur.<br />
Ne placez pas l’écran plasma sur d<strong>es</strong> surfac<strong>es</strong> incliné<strong>es</strong><br />
ou instabl<strong>es</strong>.<br />
Le téléviseur à plasma risquerait de tomber ou de basculer.<br />
N’installez pas le téléviseur à plasma sur un support non<br />
recommandé.<br />
N’installez pas le téléviseur sur un meuble pouvant servir<br />
de marchepied, tel un bureau à tiroirs.<br />
Ne grimpez pas et ne permettez pas aux enfants de<br />
grimper sur le téléviseur<br />
Le téléviseur devrait être installé là où il ne peut être ni<br />
poussé, tiré ou basculé.<br />
Prenez soin de disposer l<strong>es</strong> câbl<strong>es</strong> ou l<strong>es</strong> cordons d’alimentation de<br />
façon à ce qu’ils ne puissent être tirés ou agrippés par d<strong>es</strong> enfants.<br />
Ne placez pas d’objets sur le téléviseur à plasma.<br />
Si vous renversez de l’eau sur le téléviseur ou si d<strong>es</strong> objets y<br />
pénètrent, un court-circuit risque de se produire et d’entraîner un<br />
incendie ou une électrocution. Si d<strong>es</strong> corps étrangers pénètrent<br />
dans le téléviseur, contactez votre revendeur <strong>Panasonic</strong>.<br />
Cordon d’alimentation<br />
Pour prévenir l<strong>es</strong> risqu<strong>es</strong> d’incendie ou d’électrocution:<br />
Le téléviseur à plasma a été conçu pour fonctionner avec<br />
une alimentation de 120 V c.a., 60 Hz. Insérez la fiche du<br />
cordon d’alimentation bien à fond dans la prise.<br />
Si la fiche n’<strong>es</strong>t pas insérée bien à fond, un dégagement de<br />
chaleur pouvant entraîner un incendie pourrait se produire.<br />
Le cordon d’alimentation ne doit être utilisé qu’avec cet appareil.<br />
N’utilisez aucun autre cordon d’alimentation que celui<br />
fourni avec ce téléviseur.<br />
Ne manipulez pas le cordon d’alimentation avec d<strong>es</strong><br />
mains mouillé<strong>es</strong>.<br />
Ne fait<strong>es</strong> rien qui puisse endommager le cordon d’alimentation.<br />
Pour débrancher le câble d’alimentation, tirez-le par la<br />
fiche et non par le câble.<br />
N’utilisez pas le cordon d’alimentation s’il <strong>es</strong>t endommagé.<br />
Remplacez-le ou communiquez avec votre centre de service<br />
agréé <strong>Panasonic</strong>.<br />
Manipulation du cordon d’alimentation<br />
Insérez la fiche du cordon d’alimentation bien à fond dans la prise.<br />
(Si la fiche n’<strong>es</strong>t pas insérée bien à fond, un dégagement de chaleur<br />
pouvant entraîner un incendie pourrait se produire.)<br />
Assurez-vous de l’accès facile à la fiche.<br />
Assurez-vous que la lame pour la mise à la terre <strong>es</strong>t<br />
insérée bien à fond afin de prévenir tout choc électrique.<br />
• Un appareil de classe 1 peut être branché dans une prise<br />
secteur avec une protection pour mise à la terre.<br />
Ne manipulez pas la fiche du cordon d’alimentation avec l<strong>es</strong><br />
mains mouillé<strong>es</strong>. (Ceci pourrait causer un choc électrique.)<br />
N’utilisez aucun autre cordon d’alimentation que celui fourni<br />
avec ce téléviseur. (Ceci pourrait causer un choc électrique.)<br />
N’endommagez pas le cordon d’alimentation. (Un cordon d’alimentation<br />
endommagé pourrait causer un incendie ou un choc électrique.)<br />
• Ne déplacez jamais le téléviseur lorsque le cordon <strong>es</strong>t<br />
branché dans une prise secteur.<br />
• Ne placez aucun objet lourd sur le cordon et ne le placez<br />
pas à proximité d’une source de chaleur intense.<br />
• Évitez de torsader, de plier exc<strong>es</strong>sivement ou d’étirer le cordon.<br />
• Ne tirez pas sur le cordon. Tenez le cordon par sa fiche lors<br />
de son débranchement.<br />
• N’utilisez jamais un cordon d’alimentation avec sa fiche<br />
endommagée ou une prise murale endommagée.<br />
En cas d’anomalie de fonctionnement<br />
Si une anomalie se produit (absence d’image ou de son par exemple), ou si de<br />
la fumée ou une odeur anormale se dégage du téléviseur à plasma, débranchez<br />
immédiatement la fiche du cordon d’alimentation de la prise secteur.<br />
Si vous continuez à utiliser le téléviseur à plasma dans cet état, vous risquez de provoquer<br />
un incendie ou d’endommager l’appareil. Adr<strong>es</strong>sez-vous à un centre de service agréé<br />
<strong>Panasonic</strong> pour l<strong>es</strong> réparations. Il <strong>es</strong>t recommandé de toujours faire réparer un téléviseur<br />
par un technicien qualifié en raison de la tension élevée de l’appareil.<br />
Si de l’eau ou d<strong>es</strong> objets pénètrent dans le téléviseur, si<br />
l’appareil <strong>es</strong>t échappé, ou si le coffret <strong>es</strong>t abîmé, débranchez<br />
immédiatement la fiche du cordon d’alimentation.<br />
Un court-circuit pourrait se produire et entraîner un incendie. Pour toute<br />
réparation, adr<strong>es</strong>sez-vous à un centre de service agréé <strong>Panasonic</strong>.<br />
MISE EN GAR<strong>DE</strong><br />
Ne couvrez pas l<strong>es</strong> trous de ventilation.<br />
Sinon, le téléviseur à plasma risquerait de surchauffer, ce qui<br />
pourrait causer un incendie ou abîmer le téléviseur à plasma.<br />
Laissez un <strong>es</strong>pace de 3 15/16 po (10 cm) ou plus au d<strong>es</strong>sus, à la gauche<br />
et la droite de l’appareil, ainsi qu’un <strong>es</strong>pace de 2 3/4 po (7 cm) à l’arrière.<br />
Si vous utilisez le piéd<strong>es</strong>tal, n’encombrez pas l’<strong>es</strong>pace entre<br />
l’écran et le piéd<strong>es</strong>tal d’objets pouvant nuire à la ventilation.<br />
Déplacement du téléviseur à plasma<br />
Veillez à débrancher tous l<strong>es</strong> câbl<strong>es</strong> avant de déplacer le téléviseur à plasma.<br />
Si vous déplacez le téléviseur alors que d<strong>es</strong> câbl<strong>es</strong> sont encore connectés, vous<br />
risquez d’endommager l<strong>es</strong> câbl<strong>es</strong> et d’entraîner un incendie ou une électrocution.<br />
Par m<strong>es</strong>ure de précaution, débranchez la fiche d’alimentation de la<br />
prise secteur avant d’entreprendre d<strong>es</strong> travaux de nettoyage.<br />
Ne transportez le téléviseur à plasma qu’en position debout<br />
Le transport de l’appareil avec son panneau d’affichage faisant face<br />
vers le haut ou vers le bas peut endommager l<strong>es</strong> circuits intern<strong>es</strong>.<br />
5
M<strong>es</strong>ur<strong>es</strong> de sécurité (Suite)<br />
Nettoyez régulièrement le câble d’alimentation afin que la<br />
poussière ne s’y accumule pas.<br />
Si de la poussière devait s’accumuler sur la fiche du cordon<br />
d’alimentation, l’humidité produite risquerait de détériorer<br />
l’isolation et d’entraîner un incendie. Débranchez le cordon<br />
d’alimentation de la prise secteur et <strong>es</strong>suyez-le avec un<br />
chiffon sec.<br />
Ce téléviseur à plasma émet d<strong>es</strong> rayons infraroug<strong>es</strong>,<br />
par conséquent il peut perturber l<strong>es</strong> autr<strong>es</strong> appareils de<br />
communication. Installez votre capteur infrarouge dans un<br />
endroit à l’abri de la lumière directe ou indirecte du téléviseur<br />
à plasma.<br />
Le téléviseur consomme une certaine quantité de courant<br />
électrique tant que le cordon d’alimentation <strong>es</strong>t branché à<br />
la prise secteur.<br />
Le panneau d’affichage <strong>es</strong>t fait de verre; évitez d’y appliquer<br />
une forte pr<strong>es</strong>sion et protégez-le contre l<strong>es</strong> chocs.<br />
Cela pourrait provoquer d<strong>es</strong> dommag<strong>es</strong> et entraîner un<br />
risque de bl<strong>es</strong>sure.<br />
Le téléviseur <strong>es</strong>t très lourd et devrait être transporté par<br />
au moins 2 personn<strong>es</strong>. Afin d’éviter que l’appareil bascule<br />
ou tombe, tenez-le comme indiqué à l’illustration; sa chute<br />
pourrait entraîner un risque de bl<strong>es</strong>sur<strong>es</strong>.<br />
AVERTISSEMENT<br />
Avis de sécurité CEA pour l<strong>es</strong> enfants : l<strong>es</strong> écrans plats ne sont pas toujours installés sur d<strong>es</strong> supports de<br />
montage appropriés ou selon l<strong>es</strong> recommandations du fabricant. L<strong>es</strong> écrans plats qui sont installés sur d<strong>es</strong><br />
commod<strong>es</strong>, bibliothèqu<strong>es</strong>, étagèr<strong>es</strong>, bureaux, haut-parleurs, coffr<strong>es</strong> ou chariots peuvent tomber et causer<br />
d<strong>es</strong> bl<strong>es</strong>sur<strong>es</strong> grav<strong>es</strong>, voire mortell<strong>es</strong>.<br />
L’industrie d<strong>es</strong> produits électroniqu<strong>es</strong> de consommation (dont <strong>Panasonic</strong> <strong>es</strong>t membre) s’<strong>es</strong>t engagée à<br />
rendre le divertissement à la maison agréable et sécuritaire. Afin de prévenir l<strong>es</strong> risqu<strong>es</strong> d’accident, suivez<br />
l<strong>es</strong> conseils de sécurité suivants :<br />
OPTEZ POUR LA SÉCURITÉ :<br />
• Il n’existe pas de guide unique. Suivez l<strong>es</strong> recommandations du fabricant pour l’installation et l’emploi<br />
sécuritaire de votre écran plat.<br />
• Lisez attentivement le manuel de l’utilisateur et assurez-vous de bien comprendre l<strong>es</strong> instructions pour<br />
une utilisation appropriée de ce produit.<br />
• Ne permettez pas aux enfants de grimper sur le mobilier et l<strong>es</strong> téléviseurs ou de jouer avec ceux-ci.<br />
• N’installez pas d’écran plat sur un meuble pouvant servir de marchepied tel un bureau à tiroirs.<br />
• Gardez à l’<strong>es</strong>prit que l<strong>es</strong> enfants peuvent s’exciter lorsqu’ils regardent la télévision, surtout sur d<strong>es</strong><br />
écrans plats « plus grands que nature ». Le téléviseur devrait être installé là où il ne peut être poussé,<br />
tiré ou basculé.<br />
• Prenez soin de disposer l<strong>es</strong> câbl<strong>es</strong> ou l<strong>es</strong> cordons d’alimentation de façon à ce qu’ils ne puissent être<br />
tirés ou agrippés par d<strong>es</strong> enfants.<br />
SUPPORT MURAUX : SI VOUS DÉCI<strong>DE</strong>Z <strong>DE</strong> FIXER VOTRE TÉLÉVISEUR À UN SUPPORT MURAL,<br />
IL FAUT TOUJOURS :<br />
• Utiliser un support mural recommandé par le fabricant du téléviseur ou homologué par un organisme<br />
indépendant (tel que UL, ACNOR, ETL).<br />
• Suivre l<strong>es</strong> instructions fourni<strong>es</strong> par l<strong>es</strong> fabricants du téléviseur et du support mural.<br />
• Communiquer avec votre détaillant et se renseigner sur une installation faite par un prof<strong>es</strong>sionnel si<br />
vous avez d<strong>es</strong> dout<strong>es</strong> sur votre capacité à installer votre téléviseur à écran plat de façon sécuritaire.<br />
• S’assurer que le mur sur lequel vous installez le support <strong>es</strong>t en m<strong>es</strong>ure de l’accepter. Certains supports<br />
ne sont pas faits pour être installés sur d<strong>es</strong> murs supportés par d<strong>es</strong> poteaux d’acier ou d<strong>es</strong> blocs de<br />
ciment. En cas de doute, communiquez avec un installateur prof<strong>es</strong>sionnel.<br />
• Pour installer ou retirer le téléviseur, il faut le concours de deux personn<strong>es</strong>. L<strong>es</strong> téléviseurs à écran plat<br />
peuvent être très lourds.<br />
<strong>Panasonic</strong> recommande qu’un technicien qualifié procède à toute<br />
installation murale. Pour plus de détails, reportez-vous à la page 5.<br />
6
Remarqu<strong>es</strong><br />
Ne pas afficher une image fixe pendant une période prolongée<br />
Cela peut causer la rétention de l’image à l’écran (un phénomène appelé “rémanence”). Cela n’<strong>es</strong>t pas considéré<br />
comme étant une défectuosité et n’<strong>es</strong>t donc pas couvert par la garantie.<br />
12<br />
Afin de prévenir la rémanence, l’économiseur d’écran <strong>es</strong>t<br />
4 : 3<br />
automatiquement activé après quelqu<strong>es</strong> minut<strong>es</strong> d’inactivité<br />
(si aucun signal n’<strong>es</strong>t acheminé ou aucune opération<br />
effectuée). (p. 51)<br />
Imag<strong>es</strong> fix<strong>es</strong> typiqu<strong>es</strong><br />
Numéro de canal et autr<strong>es</strong> logos<br />
Image affichée au format 4:3 Photo sur carte SD<br />
Jeu vidéo Image d’un ordinateur<br />
■ Positionnement du téléviseur<br />
Ne pas placer le téléviseur dans un endroit où il serait exposé aux rayons solair<strong>es</strong> directs ou tout autre éclairage<br />
intense (y compris l<strong>es</strong> reflets).<br />
Certains typ<strong>es</strong> de lamp<strong>es</strong> fluor<strong>es</strong>cent<strong>es</strong> peuvent réduire le rayon d’action de la télécommande.<br />
7
Acc<strong>es</strong>soir<strong>es</strong>/Acc<strong>es</strong>soire en option<br />
Vérifiez que l<strong>es</strong> acc<strong>es</strong>soir<strong>es</strong> et l<strong>es</strong> éléments ci-d<strong>es</strong>sous sont bien inclus en cochant leur case.<br />
Acc<strong>es</strong>soir<strong>es</strong><br />
Acc<strong>es</strong>soir<strong>es</strong><br />
Télécommande<br />
N2QAYB000321<br />
Pil<strong>es</strong> pour la<br />
télécommande (2)<br />
Format AA<br />
Cordon d’alimentation<br />
Piéd<strong>es</strong>tal Montage (p. 9)<br />
TBLX0088<br />
(<strong>TC</strong>-<strong>P42C1</strong>)<br />
TBLX0089<br />
(<strong>TC</strong>-P50C1)<br />
Chiffon de nettoyage<br />
Manuel d’utilisation<br />
Conciergerie Viera et instructions de base pour téléviseur HD<br />
Acc<strong>es</strong>soire en option<br />
Support de montage mural<br />
(en biais)<br />
TY-WK4P1RW<br />
Remarqu<strong>es</strong><br />
Afin de maintenir le haut rendement et le fonctionnement sûr de<br />
l’appareil, confiez au revendeur ou à un entrepreneur agréé la tâche de<br />
fixer le support de montage mural.<br />
Lisez attentivement l<strong>es</strong> instructions accompagnant la base ou le piéd<strong>es</strong>tal<br />
du téléviseur et assurez-vous de prendre tout<strong>es</strong> l<strong>es</strong> m<strong>es</strong>ur<strong>es</strong> qui<br />
s’imposent pour éviter que l’appareil ne bascule.<br />
Manipulez le téléviseur avec le plus grand soin lors de son installation;<br />
un choc ou d<strong>es</strong> tensions indu<strong>es</strong> pourrait provoquer la fissuration du<br />
panneau.<br />
Mise en place d<strong>es</strong> pil<strong>es</strong> de la télécommande<br />
8<br />
Crochet<br />
Ouvrez.<br />
R<strong>es</strong>pectez la polarité<br />
(+ ou -).<br />
Refermez.<br />
Mis<strong>es</strong> en garde<br />
L’installation incorrecte d<strong>es</strong> pil<strong>es</strong> peut<br />
entraîner une fuite de l’électrolyte<br />
provoquant la corrosion de la<br />
télécommande.<br />
• N’utilisez pas à la fois une pile neuve et<br />
une pile usagée.<br />
•<br />
N’utilisez pas en même temps deux<br />
typ<strong>es</strong> de pil<strong>es</strong> (par exemple, une pile au<br />
carbone zinc et une pile alcaline).<br />
• N’utilisez pas de pil<strong>es</strong> rechargeabl<strong>es</strong> (Ni-Cd).<br />
Ne démontez pas et ne chauffez pas<br />
l<strong>es</strong> pil<strong>es</strong> usagé<strong>es</strong>.
Fixation du téléviseur sur le piéd<strong>es</strong>tal<br />
■Montage du piéd<strong>es</strong>tal<br />
Fixez de manière sécuritaire avec l<strong>es</strong> vis de montage A . (4 vis au total)<br />
Serrez l<strong>es</strong> vis à fond.<br />
Montant<br />
R<br />
■Installation<br />
A<br />
L Montant<br />
Base<br />
Avant<br />
Effectuez le montage sur une surface horizontale et à niveau.<br />
Serrez l<strong>es</strong> vis à fond.<br />
B<br />
Flèche<br />
repère<br />
Vue du d<strong>es</strong>sous<br />
Côté arrière<br />
Trou d’installation<br />
pour piéd<strong>es</strong>tal<br />
Montant<br />
Acc<strong>es</strong>soir<strong>es</strong><br />
Vis de montage<br />
(4 de chaque)<br />
A<br />
B<br />
M5 x 18 (argent)<br />
M5 x 25 (noir)<br />
Montants (2)<br />
L<br />
“ L ” ou “ R ” <strong>es</strong>t imprimé au<br />
bas d<strong>es</strong> montants.<br />
Base (1)<br />
R<br />
Guide de mise<br />
en route rapide<br />
Acc<strong>es</strong>soir<strong>es</strong>/Acc<strong>es</strong>soire en option<br />
Montant<br />
Base<br />
• Fixez de manière sécuritaire avec l<strong>es</strong> vis de montage B .<br />
(4 vis au total)<br />
Avertissement<br />
Ne démontez ni ne modifiez le piéd<strong>es</strong>tal.<br />
Cela pourrait faire basculer l’appareil et l’endommager ou bl<strong>es</strong>ser quelqu’un.<br />
Mis<strong>es</strong> en garde<br />
N’utilisez pas d’autr<strong>es</strong> téléviseurs et écrans que ceux compris dans l’emballage.<br />
Sinon, I’appareil pourrait tomber et être abîmé, ce qui pourrait causer d<strong>es</strong> bl<strong>es</strong>sur<strong>es</strong>.<br />
N’utilisez pas le piéd<strong>es</strong>tal s’il <strong>es</strong>t tordu ou endommagé.<br />
Si vous utilisez le piéd<strong>es</strong>tal alors qu’il <strong>es</strong>t rompu, il risque d’être endommagé encore davantage, et vous risqueriez<br />
de vous bl<strong>es</strong>ser. Adr<strong>es</strong>sez-vous dès que possible à votre revendeur <strong>Panasonic</strong>.<br />
Lors de I’installation, veillez à bien serrer tout<strong>es</strong> l<strong>es</strong> vis.<br />
Si vous ne serrez pas suffisamment l<strong>es</strong> vis lors du montage, Ie piéd<strong>es</strong>tal ne sera pas assez solide pour supporter<br />
le téléviseur à plasma, et il risquerait de tomber et d’être endommagé, ce qui pourrait causer d<strong>es</strong> bl<strong>es</strong>sur<strong>es</strong>.<br />
9
Acc<strong>es</strong>soir<strong>es</strong>/Acc<strong>es</strong>soire en option (Suite)<br />
Raccordement du cordon d’alimentation secteur<br />
Pour verrouiller<br />
Pour retirer<br />
Insérez la fiche à fond,<br />
jusqu’à ce que l<strong>es</strong><br />
languett<strong>es</strong> se mettent<br />
en place d<strong>es</strong> deux côtés<br />
avec un léger bruit sec.<br />
Appuyez sur l<strong>es</strong><br />
deux languett<strong>es</strong>,<br />
puis tirez le cordon<br />
d’alimentation du<br />
téléviseur vers le bas.<br />
Connexion<br />
Borne d’antenne Pris<strong>es</strong> Borne HDMI<br />
rouge<br />
bleu<br />
vert<br />
vert<br />
Serrez la vis à fond.<br />
Appariez l<strong>es</strong> fich<strong>es</strong> et l<strong>es</strong> pris<strong>es</strong> de<br />
même couleur.<br />
Insérez à fond.<br />
Insérez à fond.<br />
10
Connexion de base<br />
Exemple 1<br />
Téléviseur<br />
Raccordement aux born<strong>es</strong> d’antenne et à un câblosélecteur<br />
Signal de<br />
câblodistribution<br />
Raccordement à une antenne de télévision<br />
Signal de<br />
câblodistribution<br />
Antenne VHF/UHF<br />
ou<br />
Antenne VHF/UHF<br />
Antenne VHF/UHF<br />
NTSC (National Television System Committee):<br />
Télédiffusion traditionnelle<br />
ATSC (Advanced Television Systems Committee):<br />
Norm<strong>es</strong> pour la télévision numérique, y compris la télévision haute<br />
définition (TVHD), la télévision à définition standard (TVDS), la<br />
distribution de donné<strong>es</strong>, le rendu ambiophonique multicanal et la<br />
télévision interactive.<br />
120 V c.a.,<br />
60 Hz<br />
Guide de mise<br />
en route rapide<br />
(En l’absence de<br />
câblosélecteur)<br />
ou<br />
Panneau arrière du<br />
téléviseur<br />
* Reportez-vous à la<br />
page 10 (raccordement<br />
du câble AV)<br />
VI<strong>DE</strong>O<br />
Y<br />
PB<br />
PR<br />
L<br />
H<br />
Cordon d’alimentation<br />
(Ne branchez le<br />
cordon qu’après avoir<br />
fait tous l<strong>es</strong> autr<strong>es</strong><br />
raccordements.)<br />
Connexion de base (Antenne + Télé)<br />
Acc<strong>es</strong>soir<strong>es</strong>/Acc<strong>es</strong>soire en option<br />
AUDIO<br />
R<br />
ANT IN<br />
Câblosélecteur<br />
ANT OUT<br />
Câblosélecteur/Câblodistribution<br />
Il <strong>es</strong>t néc<strong>es</strong>saire d’être abonné à un service de câblodistribution pour<br />
capter l<strong>es</strong> émissions diffusé<strong>es</strong> sur le câble.<br />
Avec un câblosélecteur, syntonisez le canal 3 ou 4 pour la câblodistribution standard.<br />
L’abonnement à un service de câblodistribution à haute définition permet de<br />
capter d<strong>es</strong> émissions haute définition. La connexion pour la réception à haute<br />
définition peut se faire au moyen d’un câble HDMI ou composante vidéo. (p. 14)<br />
Pour regarder l<strong>es</strong> émissions à haute définition, sélectionnez l’entrée vidéo<br />
appropriée. (p. 24)<br />
Remarqu<strong>es</strong><br />
Tous l<strong>es</strong> câbl<strong>es</strong> et appareils auxiliair<strong>es</strong> illustrés dans ce manuel ne sont pas fournis avec le téléviseur.<br />
Pour de plus ampl<strong>es</strong> détails sur la connexion d<strong>es</strong> appareils auxiliair<strong>es</strong>, veuillez vous reporter au manuel afférent à<br />
chaque appareil en qu<strong>es</strong>tion.<br />
Lorsque vous débranchez le cordon d’alimentation, assurez-vous de le débrancher d’abord de la prise secteur.<br />
Pour de plus ampl<strong>es</strong> renseignements, visitez: www.panasonic.ca<br />
11
Connexion de base (Suite)<br />
Exemple 2<br />
Raccordement d’un enregistreur DVD (ou magnétoscope) (pour enregistrement/lecture)<br />
Téléviseur<br />
Appareil AV<br />
(ex.: enregistreur DVD<br />
ou magnétoscope)<br />
Antenne VHF/UHF<br />
Enregistreur DVD<br />
Si la source possède une résolution plus élevée<br />
(480p/720p/1080i/1080p), la connexion peut se faire au<br />
moyen d’un câble composante vidéo ou HDMI. (p. 14)<br />
Magnétoscope<br />
La connexion peut être faite au moyen d’un câble RF<br />
et d’un câble composite vidéo/S-Vidéo. (p. 14)<br />
Raccordement aux born<strong>es</strong> d’antenne et à un enregistreur DVD ou à un magnétoscope<br />
Antenne VHF/UHF<br />
120 V c.a.,<br />
60 Hz<br />
Panneau arrière<br />
du téléviseur<br />
* Reportez-vous<br />
à la page 10<br />
(raccordement<br />
du câble AV)<br />
Cordon<br />
d’alimentation<br />
HDMI 1 HDMI 2<br />
B<br />
A<br />
Y<br />
Y<br />
S VI<strong>DE</strong>O<br />
PB<br />
PB<br />
C<br />
VI<strong>DE</strong>O<br />
PR<br />
L<br />
PR<br />
L L<br />
AUDIO<br />
R<br />
R<br />
R<br />
COMPONENT VI<strong>DE</strong>O IN 1<br />
1 IN 2<br />
D<br />
ANT IN<br />
ANT OUT<br />
12<br />
Appareil AV<br />
(ex.: enregistreur DVD ou magnétoscope)<br />
(avec syntonisateur télé)<br />
Raccordement du téléviseur à un appareil<br />
auxiliaire audio-vidéo<br />
Consultez A – D à la page 14
Exemple 3<br />
Raccordement d’un enregistreur DVD (ou magnétoscope) et d’un récepteur de télévision par satellite<br />
Téléviseur<br />
Enregistreur DVD<br />
ou<br />
magnétoscope<br />
Récepteur de<br />
télévision<br />
par satellite<br />
Antenne VHF/UHF<br />
L’abonnement à un service de<br />
télévision par satellite permet<br />
de capter d<strong>es</strong> émissions haute<br />
définition. La connexion peut<br />
se faire au moyen d’un câble<br />
composante vidéo ou HDMI. (p. 14)<br />
Raccordement aux born<strong>es</strong> d’antenne et à un récepteur de<br />
télévision par satellite et à un enregistreur DVD ou à un magnétoscope<br />
Antenne VHF/UHF<br />
120 V c.a.,<br />
60 Hz<br />
Guide de mise<br />
en route rapide<br />
ANT IN<br />
ANT IN<br />
Récepteur de télévision<br />
par satellite<br />
Remarque<br />
ANT OUT<br />
Panneau arrière<br />
du téléviseur<br />
Enregistreur DVD ou magnétoscope<br />
(avec syntonisateur télé)<br />
VI<strong>DE</strong>O<br />
AUDIO<br />
Y<br />
PB<br />
PR<br />
L<br />
B<br />
* Reportez-vous<br />
à la page 10<br />
(raccordement<br />
du câble AV)<br />
HDMI 1 HDMI 2<br />
Y<br />
S VI<strong>DE</strong>O<br />
PB<br />
PR<br />
L L<br />
R<br />
R<br />
R<br />
COMPONENT VI<strong>DE</strong>O IN 1<br />
1 IN 2<br />
Pour de plus ampl<strong>es</strong> détails sur la connexion d<strong>es</strong> appareils auxiliair<strong>es</strong>, veuillez vous reporter au manuel afférent à<br />
chaque appareil en qu<strong>es</strong>tion.<br />
D<br />
Cordon<br />
d’alimentation<br />
A<br />
C<br />
Raccordement du téléviseur à un<br />
appareil auxiliaire audio-vidéo<br />
Consultez A – D à la page 14<br />
Connexion de base (Télé + Enregistreur DVD ou Magnétoscope + Récepteur de télévision par satellite)<br />
(Télé + Enregistreur DVD ou Magnétoscope)<br />
13
Connexion de base (Suite)<br />
A Born<strong>es</strong> HDMI<br />
Raccordements de câbl<strong>es</strong> AV<br />
Haute définition Définition standard<br />
HDMI 1 HDMI 2<br />
HDMI<br />
AV OUT<br />
Appareil AV<br />
ex.: Lecteur Blu-ray<br />
Disc TM<br />
La connexion aux born<strong>es</strong> HDMI permet l’obtention d’une image numérique haute définition et un son de haute qualité.<br />
La connexion HDMI <strong>es</strong>t néc<strong>es</strong>saire pour un signal 1080p.<br />
Pour “Connexions VIERA Link”, consultez la page 31.<br />
B Pris<strong>es</strong> COMPONENT<br />
Y<br />
vert<br />
PB<br />
P<br />
bleu<br />
bleu bleu<br />
Appareil AV<br />
PR<br />
VI<strong>DE</strong>O<br />
PR<br />
P<br />
rouge<br />
rouge<br />
L<br />
rouge<br />
ex.: Lecteur Blu-ray<br />
L<br />
AUDIO<br />
AUDIO<br />
blanc<br />
Disc TM<br />
blanc blanc<br />
OUT<br />
R<br />
R<br />
rouge<br />
COMPONENT<br />
rouge<br />
1 IN 2<br />
rouge<br />
Il <strong>es</strong>t aussi possible de connecter un enregistreur aux pris<strong>es</strong> COMPOSITE ou S VI<strong>DE</strong>O. (voir ci-d<strong>es</strong>sous)<br />
C Pris<strong>es</strong> S VI<strong>DE</strong>O<br />
PB<br />
PR<br />
L L<br />
S VI<strong>DE</strong>O<br />
R R<br />
ENT VI<strong>DE</strong>O IN 1<br />
D Pris<strong>es</strong> COMPOSITE<br />
PB<br />
PR<br />
L L<br />
R R<br />
ENT VI<strong>DE</strong>O IN 1<br />
2<br />
blanc<br />
rouge<br />
jaune<br />
blanc<br />
rouge<br />
vert<br />
blanc<br />
rouge<br />
jaune<br />
blanc<br />
rouge<br />
vert<br />
Y<br />
PB<br />
L<br />
blanc<br />
R<br />
rouge<br />
jaune<br />
L<br />
blanc<br />
R<br />
rouge<br />
COMPONENT<br />
VI<strong>DE</strong>O OUT<br />
S VI<strong>DE</strong>O<br />
OUT<br />
AUDIO<br />
OUT<br />
COMPOSITE<br />
OUT<br />
Appareil AV<br />
ex.: enregistreur DVD<br />
ou<br />
ex.: magnétoscope<br />
Appareil AV<br />
ex.: enregistreur DVD<br />
ou<br />
ex.: magnétoscope<br />
L’entrée S-Vidéo aura la priorité sur l’entrée vidéo composite lors de la connexion d’un câble S-Vidéo.<br />
Raccordez un câble S-Vidéo ou vidéo.<br />
La connexion aux pris<strong>es</strong> S VI<strong>DE</strong>O permet l’obtention d’une image de meilleure qualité qu’avec une<br />
connexion aux pris<strong>es</strong> de signal composite.<br />
14<br />
Remarqu<strong>es</strong><br />
Certain<strong>es</strong> émissions contiennent un signal de protection d<strong>es</strong> droits d’auteur afin d’interdire leur enregistrement.<br />
Lorsque l’écran du programme antipiratage s’affiche, ne connectez pas un autre écran de télévision par le<br />
truchement d’un magnétoscope. L<strong>es</strong> signaux vidéo acheminés via un magnétoscope peuvent être affectés par l<strong>es</strong><br />
dispositifs antipiratage et l<strong>es</strong> imag<strong>es</strong> affiché<strong>es</strong> sur le téléviseur seront distordu<strong>es</strong>.<br />
Pour de plus ampl<strong>es</strong> détails sur la connexion d<strong>es</strong> appareils auxiliair<strong>es</strong>, veuillez vous reporter au manuel afférent à chaque appareil en qu<strong>es</strong>tion.
Emplacement d<strong>es</strong> command<strong>es</strong><br />
Panneau avant du téléviseur<br />
Emplacement d<strong>es</strong> command<strong>es</strong>/voyants<br />
Panneau arrière du téléviseur<br />
Fente de carte SD<br />
Sélectionne<br />
l<strong>es</strong> canaux en<br />
séquence.<br />
Touche<br />
POWER<br />
Met le téléviseur en marche ou en<br />
mode attente<br />
Change le mode d’entrée (p. 24)<br />
Menu VIERA Link (p. 34-35)<br />
Affichage du sous-menu (p. 19, 28)<br />
Touch<strong>es</strong> de couleur (pour divers<strong>es</strong><br />
fonctions) (pour d<strong>es</strong> exempl<strong>es</strong>,<br />
reportez-vous aux pag<strong>es</strong> 18, 22, 35)<br />
Réglage du volume<br />
Capteur de signal de<br />
télécommande Tenez-vous<br />
à moins de 7 m (23 pi) à<br />
l’avant du téléviseur.<br />
Active/désactive la fonction sourdine<br />
Sélectionne le format d’image<br />
(p. 20, 45)<br />
Commute sur le canal ou le mode<br />
d’entrée affiché précédemment<br />
Opérations sur l<strong>es</strong> appareils extern<strong>es</strong><br />
(p. 35)<br />
Réglage du<br />
volume<br />
Affiche le menu<br />
principal<br />
Voyant d’alimentation (en marche:<br />
rouge ; hors marche: éteint)<br />
Capteur de C.A.T.S.<br />
Plasma C.A.T.S. (Contrast<br />
Automatic Tracking System). (p. 26)<br />
Remarqu<strong>es</strong><br />
Tant que le cordon d’alimentation <strong>es</strong>t branché, le téléviseur consomme un peu d’énergie.<br />
Ne placer aucun objet entre le capteur de signal de la télécommande sur le téléviseur et la télécommande.<br />
Télécommande<br />
Pris<strong>es</strong> d’entrée vidéo 2<br />
Change le mode d’entrée<br />
Sélectionne l’entrée du menu et du sous-menu.<br />
Réglage d<strong>es</strong> sous-titr<strong>es</strong> (p. 19)<br />
Sélectionne le mode audio pour<br />
l’écoute de la télévision (p. 19)<br />
Quitte la fenêtre du menu<br />
Affiche le menu principal (p. 26)<br />
Affiche l<strong>es</strong> fonctions VIERA TOOLS<br />
(p. 21)<br />
Affichage depuis l<strong>es</strong> cart<strong>es</strong> SD<br />
(p. 22-23)<br />
Sélection/OK/Changement<br />
Retourne au menu précédent<br />
Sélectionne l<strong>es</strong> canaux en séquence<br />
Pour afficher ou retirer la bannière<br />
de canal (p. 20)<br />
Pour utiliser la fonction de liste de<br />
canaux favoris (p. 20)<br />
Pavé numérique pour sélectionner un<br />
canal (p. 19) ou appuyez pour saisir<br />
une entrée alphanumérique dans l<strong>es</strong><br />
menus (p. 18, 24, 34, 36, 38, 41, 42)<br />
Utiliser pour l<strong>es</strong> canaux numériqu<strong>es</strong><br />
(p. 19)<br />
Guide de mise<br />
en route rapide<br />
Emplacement d<strong>es</strong> command<strong>es</strong><br />
Connexion de base (Raccordements de câbl<strong>es</strong> AV)<br />
15
Réglage initial<br />
“Réglage initial” s’affiche uniquement lorsque le téléviseur <strong>es</strong>t mis en marche pour la première fois après que le<br />
cordon d’alimentation ait été branché dans la prise de courant et que “Contact auto” (p. 28-29) <strong>es</strong>t réglé sur “HF”.<br />
ou<br />
Appuyez sur la touche POWER pour mettre le<br />
téléviseur en marche<br />
ou<br />
(Télé)<br />
(Télécommande)<br />
* Ce réglage sera sauté par la suite si vous sélectionnez “Usage à domicile”.<br />
Sélectionnez la langue d’affichage.<br />
Language<br />
English<br />
Español<br />
Français<br />
sélection<br />
ok<br />
Assurez-vous de sélectionner le mode “Usage à domicile”.<br />
Fait<strong>es</strong> la sélection selon votre environnement visuel<br />
Usage à domicile Démonstration en magasin<br />
sélection<br />
Sélectionnez “Usage à domicile” lors de l’utilisation du<br />
téléviseur à la maison.<br />
Confirmez votre sélection (Usage à domicile) avant d’appuyer sur OK.<br />
ok<br />
■ Si vous sélectionnez “Démonstration en magasin” par erreur<br />
sous , l’écran de confirmation s’affichera.<br />
Sélectionner le mode de démonstration magasin?<br />
Oui<br />
Non<br />
Si vous sélectionnez “Oui”, le mode image se<br />
réinitialisera régulièrement à “Éclatant” et un m<strong>es</strong>sage<br />
de réinitialisation de l’image s’affichera.<br />
sélection<br />
ok<br />
Sélectionnez “Non” et retournez à l’écran précédent .<br />
Si vous sélectionnez “Oui”, l’écran passe en mode de démonstration en<br />
magasin.<br />
Pour afficher de nouveau l’écran “Fait<strong>es</strong> la sélection selon votre<br />
environnement visuel”, tel qu’illustré ci-d<strong>es</strong>sus, effectuez l<strong>es</strong> étap<strong>es</strong><br />
suivant<strong>es</strong> pour sélectionner “Usage à domicile”.<br />
• Appuyez et maintenez enfoncée la touche “POWER” sur le devant du<br />
panneau.<br />
• Débranchez le téléviseur et rebranchez-le.<br />
■ Appuyez pour<br />
quitter le menu<br />
d’écran<br />
■ Appuyez pour<br />
revenir à l’écran<br />
précédent<br />
16
Réglage de l’horloge<br />
Réglage initial<br />
Langue<br />
Horloge<br />
Réglage ANT/Câble<br />
Ident. pris<strong>es</strong><br />
suivant<br />
sélection<br />
Horloge<br />
Année<br />
Mois<br />
Jour<br />
Heure<br />
Minut<strong>es</strong><br />
2009<br />
1<br />
7<br />
10 AM<br />
10<br />
réglage<br />
sélection de<br />
rubrique<br />
Réglage automatique d<strong>es</strong> canaux<br />
Sélectionnez “Réglage ANT/Câble”<br />
Réglage initial<br />
Langue<br />
Horloge<br />
Réglage ANT/Câble<br />
Ident. pris<strong>es</strong><br />
Sélectionnez “Entrée ANT”<br />
Réglage ANT/Câble<br />
Entrée ANT Câble<br />
Program. auto<br />
suivant<br />
sélection<br />
réglage<br />
sélection<br />
Année: Sélectionnez l’année<br />
Mois: Sélectionnez le mois<br />
Jour: Sélectionnez la<br />
journée<br />
Heure: Réglez l<strong>es</strong> chiffr<strong>es</strong><br />
d<strong>es</strong> heur<strong>es</strong><br />
Minut<strong>es</strong>: Réglez l<strong>es</strong> chiffr<strong>es</strong><br />
d<strong>es</strong> minut<strong>es</strong><br />
Entrée ANT<br />
Câble: Câble<br />
Antenne: Antenne<br />
Non utilisé: ne pas<br />
syntoniser<br />
allez à<br />
Guide de mise<br />
en route rapide<br />
Réglage initial<br />
■ Appuyez pour<br />
quitter le menu<br />
d’écran.<br />
Remarque<br />
Pour modifier<br />
la configuration<br />
ultérieurement<br />
(Langue, Horloge,<br />
Réglage ANT/Câble,<br />
Ident. pris<strong>es</strong>), allez à<br />
l’écran Menu<br />
(p. 28)<br />
Sélectionnez “Non utilisé” lorsqu’aucun câble n’<strong>es</strong>t branché à la prise d’antenne/<br />
câble.<br />
Idéal lorsqu’un câblosélecteur/récepteur satellite <strong>es</strong>t connecté à une prise<br />
d’entrée du téléviseur.<br />
Prévient la syntonisation accidentelle d’un signal non disponible.<br />
Sélectionnez “Program. auto”<br />
Réglage ANT/Câble<br />
Entrée ANT Câble<br />
Program. auto<br />
suivant<br />
sélection<br />
17
Réglage initial (Suite)<br />
Sélectionnez le mode de balayage d<strong>es</strong> canaux<br />
(Tous l<strong>es</strong> canaux/Analogique seulement/Numérique seulement)<br />
Program. auto<br />
Tous l<strong>es</strong> canaux<br />
Analogique seulement<br />
Numérique seulement<br />
ok<br />
sélection<br />
Program. auto<br />
Progrès<br />
32%<br />
Nombre de canaux analogiqu<strong>es</strong><br />
Nombre de canaux numériqu<strong>es</strong> 0<br />
Appuyer sur RETURN pour quitter<br />
RETURN<br />
Démarrez le balayage d<strong>es</strong> canaux.<br />
L<strong>es</strong> canaux pouvant être reçus (analogiqu<strong>es</strong> et<br />
numériqu<strong>es</strong>) sont automatiquement sélectionnés.<br />
Tous l<strong>es</strong> canaux:<br />
Balaie l<strong>es</strong> canaux analogiqu<strong>es</strong> et<br />
numériqu<strong>es</strong><br />
Analogique seulement: Ne balaie que l<strong>es</strong> canaux analogiqu<strong>es</strong>.<br />
Numérique seulement: Ne balaie que l<strong>es</strong> canaux numériqu<strong>es</strong>.<br />
18<br />
■ Appuyez pour<br />
quitter le menu<br />
d’écran.<br />
Remarque<br />
À propos d<strong>es</strong> systèm<strong>es</strong><br />
de télédiffusion<br />
Analogique (NTSC):<br />
Téléviseur<br />
traditionnel<br />
Numérique (ATSC):<br />
Nouveau<br />
programme<br />
qui permet le<br />
visionnement d’un<br />
plus grand nombre<br />
de canaux offrant<br />
une image et un<br />
son de haute<br />
qualité<br />
manuelle<br />
Vérifiez l<strong>es</strong> canaux sélectionnés<br />
Appliquer Annuler<br />
Sigle Favoris Ajouter<br />
... ...<br />
Oui<br />
... ...<br />
Oui<br />
... ...<br />
Oui<br />
sélectionnez<br />
“Appliquer”<br />
ok<br />
L<strong>es</strong> canaux ne seront pas mis en mémoire si vous ne cliquez pas sur “OK” après<br />
avoir sélectionné “Appliquer”.<br />
Si vous n’effectuez aucune opération dans un délai de 60 second<strong>es</strong>, le canal<br />
sera sauvegardé et la programmation manuelle se fermera automatiquement.<br />
Si vous effectuez le balayage plus de 2 fois, l<strong>es</strong> canaux précédemment mis en<br />
mémoire seront supprimés.<br />
Réglage de l’identification d<strong>es</strong> appareils extern<strong>es</strong><br />
Réglage initial<br />
Langue<br />
Horloge<br />
Réglage ANT/Câble<br />
Ident. pris<strong>es</strong><br />
Ident. pris<strong>es</strong><br />
Composant 1<br />
Composant 2<br />
HDMI 1<br />
HDMI 2<br />
Vidéo 1<br />
Vidéo 2<br />
ou<br />
suivant<br />
sélection<br />
sélection<br />
réglage<br />
Vidéo 1<br />
Vidéo 2<br />
sélection<br />
OK<br />
RETURN<br />
G A A<br />
R G B Y<br />
ABC → 123<br />
Supprimer<br />
Fait passer le mode d’entrée<br />
d’alphabétique à numérique<br />
Identification: [ESPACE] OMETTRE/MAGNÉTO/DVD/CÂBLE/SATELLITE/DVR/<br />
JEU/AUX/RÉCEPTEUR/ORDINATEUR/Blu-ray/AP.PHOTO/ENR.<br />
DVD/CINÉMA M./MONITEUR/CENTRE M/PASSER.M/AUTRE
Visionnement de la télévision<br />
Connectez le téléviseur à un câblosélecteur/câblodistribution, décodeur, récepteur satellite ou câble d’antenne (p. 11-14)<br />
Visionnement de la télévision et autr<strong>es</strong> fonctions<br />
Écoute de la<br />
voie SAP<br />
(Programme<br />
audio<br />
secondaire)<br />
Sous-titr<strong>es</strong><br />
Appuyez sur la touche POWER<br />
ou<br />
(Télé)<br />
Syntonisez un canal<br />
haut<br />
bas<br />
ou<br />
Remarque<br />
Si le mode de commande télé n’<strong>es</strong>t<br />
pas sélectionné, appuyez sur et<br />
sélectionnez Télé. (p. 24)<br />
■ Pour entrer directement le<br />
numéro du canal numérique<br />
Lors de la syntonisation d’un<br />
canal numérique, appuyez sur<br />
la touche pour entrer le nombre<br />
secondaire pour un numéro de<br />
canal composé.<br />
Exemple: canal 15-1:<br />
(Télé)<br />
Remarqu<strong>es</strong><br />
R<strong>es</strong>électionnez “Câble” ou “Antenne” sous “Entrée ANT” de “Réglage ANT/Câble”<br />
pour basculer entre la réception par câble et par antenne. (p. 17, 39)<br />
Le numéro de canal et le niveau de volume r<strong>es</strong>tent l<strong>es</strong> mêm<strong>es</strong>, même après avoir<br />
mis le téléviseur hors tension.<br />
■ Sélectionnez le mode audio pour l’écoute de la télévision<br />
Mode numérique<br />
Appuyez sur SAP pour sélectionner la plage audio suivante (si disponible) lors<br />
de la réception d’un canal numérique.<br />
Voie audio 1 de 2<br />
(Anglais)<br />
Mode analogique<br />
Appuyez sur la touche SAP pour sélectionner le mode audio désiré.<br />
• Chaque pr<strong>es</strong>sion de la touche SAP change le mode audio. (Stéréo/SAP/Mono)<br />
■ Activez ou désactivez l<strong>es</strong> sous-titr<strong>es</strong><br />
CC EF<br />
CC HF<br />
Guide de mise<br />
en route rapide Visionnement Visionnement de la télévision<br />
Réglage initial<br />
Affichage du<br />
sous-menu<br />
■ Appuyez sur SUB MENU pour afficher l’écran du sous-menu. (p. 28)<br />
Ce menu comporte d<strong>es</strong> raccourcis pour l<strong>es</strong> divers<strong>es</strong> fonctions pratiqu<strong>es</strong>.<br />
SUB<br />
MENU<br />
Réglage du sous-menu<br />
Mode balayage de canal<br />
Tous<br />
Réglage favoris<br />
Modification de sigle<br />
Fréquencemètre<br />
19
Visionnement de la télévision (Suite)<br />
■ Autr<strong>es</strong> fonctions util<strong>es</strong> (Exécutez après )<br />
Rappel d<strong>es</strong><br />
informations<br />
Changement<br />
du format<br />
d’image<br />
■ Affichez ou retirez la bannière de canal.<br />
Canal<br />
Horloge<br />
15-2 THE NEWS<br />
12:30 PM<br />
ABC-HD CC SAP TV-G 1080i Standard 4:3 30<br />
Indicatif du<br />
canal<br />
Indication<br />
SAP<br />
Résolution<br />
du signal<br />
Mode<br />
d’image<br />
Temps r<strong>es</strong>tant de la<br />
minuterie-sommeil<br />
Sous-titr<strong>es</strong> Classification<br />
Format d’image<br />
■ Appuyez sur FORMAT pour faire défiler l<strong>es</strong> divers formats d’imag<strong>es</strong> disponibl<strong>es</strong>. (p. 45)<br />
• 480i, 480p: PLEIN/CADRAGE/4:3/ZOOM<br />
• 1080p, 1080i, 720p: PLEIN/H-LARGE/CADRAGE/4:3/ZOOM<br />
Affichage<br />
d<strong>es</strong> canaux<br />
favoris<br />
■ Favoris<br />
L<strong>es</strong> numéros de canal enregistrés dans Favoris s’affichent sur l’écran de<br />
syntonisation de favoris. Sélectionnez la station de diffusion désirée avec le<br />
curseur ou au moyen d<strong>es</strong> touch<strong>es</strong> numériqu<strong>es</strong>. (voir ci-d<strong>es</strong>sous)<br />
Fonction de favoris<br />
■Réglage de la fonction de favoris<br />
Affichez le sous-menu.<br />
1<br />
SUB<br />
MENU<br />
■Utilisation de la fonction de favoris<br />
1<br />
Affichez “Canaux favoris”<br />
2<br />
3<br />
Sélectionnez “Réglage favoris”<br />
Réglage du sous-menu<br />
Mode balayage de canal<br />
Tous<br />
Réglage favoris<br />
Modification de sigle<br />
Fréquencemètre<br />
Réglez le canal affiché<br />
Réglage favoris 1/3<br />
1 26-1<br />
2<br />
3<br />
4<br />
5<br />
ou<br />
Suppr<strong>es</strong>sion d’un canal favori<br />
Réglage favoris 1/3<br />
1 26-1<br />
2<br />
3<br />
4<br />
5<br />
sélection<br />
ok<br />
sélectionnez le<br />
numéro sur la liste<br />
sauvegardez le<br />
canal affiché<br />
sélectionnez le<br />
numéro sur la liste<br />
(pour sauvegarder le<br />
canal sans appuyer<br />
sur OK)<br />
sélection<br />
suppr<strong>es</strong>sion<br />
(en tenant enfoncé)<br />
2<br />
3<br />
Sélectionnez le canal<br />
Canaux favoris 1/3<br />
1 26-1<br />
2<br />
3<br />
4<br />
5<br />
Réglez le canal favori<br />
Canaux favoris 1/3<br />
1 26-1<br />
2<br />
3<br />
4<br />
5<br />
■Pour changer de page<br />
ok<br />
sélection<br />
ou<br />
Appuyez plusieurs fois pour changer<br />
de page (1/3, 2/3, 3/3 ou quitter)<br />
Page suivante/précédente<br />
20
Utilisation d<strong>es</strong> fonctions VIERA TOOLS<br />
Accédez facilement aux menus l<strong>es</strong> plus utilisés avec la touche VIERA TOOLS qui permet d’afficher c<strong>es</strong><br />
menus comme d<strong>es</strong> raccourcis à l’écran.<br />
Contrairement aux menus traditionnels, vous pouvez bénéficier d’une utilisation, d’une lecture et d’une<br />
configuration plus rapid<strong>es</strong>.<br />
Affichez l<strong>es</strong> fonctions VIERA TOOLS<br />
Sélectionnez une rubrique<br />
sélection<br />
suivant<br />
■ Appuyez pour<br />
quitter le menu<br />
d’écran<br />
■ Appuyez pour<br />
revenir à l’écran<br />
précédent<br />
Blocage<br />
Affichage du menu “VIERA Link” (p. 34-35)<br />
Démarrage du diaporama (p. 22-23)<br />
Réglage de “Sommeil” (minuterie-sommeil) (p. 42)<br />
Affichage du menu “Blocage” (p. 36)<br />
Visionnement Utilisation d<strong>es</strong> fonctions VIERA TOOLS<br />
Visionnement de la télévision<br />
21
Diaporama<br />
Affichage depuis une carte SD<br />
Vous pouvez afficher l<strong>es</strong> photos pris<strong>es</strong> avec un appareil photo numérique ou un caméscope numérique et<br />
sauvegardé<strong>es</strong> sur une carte SD. (L<strong>es</strong> imag<strong>es</strong> sur d<strong>es</strong> supports d’enregistrement autr<strong>es</strong> qu’une carte SD<br />
pourraient ne pas être reproduit<strong>es</strong> adéquatement.)<br />
Introduisez la carte SD<br />
* Ce paramétrage sera sauté la prochaine fois à moins que vous ne sélectionniez “Régler ultérieurement”.<br />
Réglez “Réglage pour carte SD” et sélectionnez “Lecture immédiate de carte SD”<br />
Le menu “Réglage pour carte SD” apparaît automatiquement chaque fois qu’une<br />
carte SD <strong>es</strong>t insérée pour la première fois.<br />
sélection<br />
Réglage pour carte SD<br />
Lecture auto de carte SD<br />
Visualiseur de photos<br />
Régler ultérieurement<br />
Lecture immédiate de carte SD<br />
Diaporama: Un diaporama démarrera<br />
automatiquement la prochaine fois.<br />
changement Imagette: Le menu du visualiseur de photos sera<br />
affiché automatiquement à l’avenir.<br />
Régler ultérieurement: Le menu “Réglage pour carte SD”<br />
réglage<br />
sera affiché à plusieurs repris<strong>es</strong>.<br />
HF:<br />
La lecture peut être effectuée<br />
manuellement.<br />
■ Opérations manuell<strong>es</strong> (“Lecture auto de carte SD” <strong>es</strong>t sur “Non”)<br />
Affichez “Visualiseur de photos” Démarrez le diaporama<br />
sélection<br />
suivant<br />
22<br />
■ Appuyez pour<br />
quitter le menu<br />
d’écran<br />
■ Appuyez pour<br />
revenir à l’écran<br />
précédent<br />
Sélectionnez l<strong>es</strong> donné<strong>es</strong> à visualiser<br />
Visualiseur de photos<br />
Total 50<br />
Nom<br />
pana0001<br />
Date<br />
03/04/2009<br />
Taille<br />
1600×1200<br />
Pivot.<br />
Préc.<br />
R<br />
Accès en cours<br />
G<br />
Diaporama<br />
Suivant<br />
RETURN<br />
B Y<br />
Affichage sous forme d’imagett<strong>es</strong><br />
pana0001 pana0002 pana0003 pana0004<br />
pana0005 pana0006 pana0007 pana0008<br />
pana0009 pana0010 pana0011 pana0012<br />
D<strong>es</strong> informations sur la photo<br />
sélectionnée s’affichent.<br />
Nom: Le numéro de l’image ou le<br />
nom du fichier s’affiche.<br />
Date: La date à laquelle l’image a été<br />
enregistrée s’affiche.<br />
Taille: La résolution de l’image<br />
s’affiche.<br />
Nombre total d’imag<strong>es</strong><br />
Remarque<br />
Zone de navigation<br />
Pivot.<br />
Préc.<br />
R<br />
Accès en cours<br />
G<br />
Diaporama<br />
sélection<br />
visionnement<br />
Suivant<br />
RETURN<br />
B Y<br />
(vers diaporama)<br />
État actuel (Pendant<br />
l’accès aux donné<strong>es</strong>)<br />
Préc.<br />
R<br />
Accès en cours<br />
G<br />
Une image<br />
Pause<br />
Suivant<br />
RETURN<br />
B Y<br />
(vers visionnement<br />
d’une image)<br />
Selon le format JPEG, le contenu “Information” peut ne pas s’afficher correctement.<br />
Pour plus de détails, reportez-vous à la page 46 (Format d<strong>es</strong> donné<strong>es</strong> sur carte mémoire SD).<br />
Visionnez<br />
Pivot.<br />
Préc.<br />
R G<br />
Diaporama<br />
Suivant<br />
RETURN<br />
B Y<br />
Affichage d<strong>es</strong> photos une à la fois<br />
Zone de navigation<br />
Photo précédente<br />
Rotation sur 90 degrés<br />
(sens anti-horaire)<br />
Photo suivante<br />
Rotation sur 90 degrés (sens horaire)<br />
Pour afficher/cacher la zone de<br />
navigation
Insertion de la carte Retrait de la carte<br />
Côté étiquette<br />
Carte SD<br />
Introduisez jusqu’à<br />
ce qu’un déclic se<br />
fasse entendre.<br />
Appuyez légèrement<br />
sur la carte SD, puis<br />
relâchez.<br />
Cart<strong>es</strong> compatibl<strong>es</strong> (capacité maximum): Carte SDHC (16 Go), carte SD (2 Go), carte miniSD (1 Go)<br />
(avec adaptateur pour carte miniSD)<br />
Pour l<strong>es</strong> mis<strong>es</strong> en garde et détails qui figurent sur l<strong>es</strong> cart<strong>es</strong> SD, reportez-vous à la page 46.<br />
Réglage<br />
d<strong>es</strong><br />
imag<strong>es</strong><br />
fix<strong>es</strong><br />
À l’étape ou ■Ajustez l’image<br />
Affichez “Réglage d<strong>es</strong> imag<strong>es</strong> fix<strong>es</strong>”<br />
Sélectionnez une rubrique<br />
Réglage d<strong>es</strong> imag<strong>es</strong> fix<strong>es</strong><br />
Image<br />
Réglage du diaporama<br />
Effectuez le<br />
réglage<br />
■Réglage du diaporama<br />
Réglage du diaporama<br />
Vit<strong>es</strong>se<br />
Rapide<br />
Reprise<br />
EF<br />
Vit<strong>es</strong>se<br />
Reprise<br />
Remarque<br />
sélection<br />
réglage<br />
sélection<br />
réglage<br />
Image 1/2<br />
Rétablir défaut<br />
Mode<br />
Éclatant<br />
Contraste 0<br />
Brillance 0<br />
Couleur 0<br />
Nuanc<strong>es</strong> 0<br />
Netteté 0<br />
Menu Image (p. 26)<br />
sélection<br />
réglage<br />
Dans le mode diaporama, il <strong>es</strong>t possible de fixer la durée d’affichage de chaque<br />
image. (Très rapide/Rapide/Moyenne/Lente/Très lente)<br />
Activez (EF) ou désactivez (HF) la fonction de reprise du diaporama.<br />
Pour interrompre à mi-chemin<br />
Appuyez sur<br />
Visionnement Affichage depuis une carte SD<br />
VISUALISEUR VIERA<br />
Le visualiseur VIERA <strong>es</strong>t une fonction qui permet de visionner facilement d<strong>es</strong> imag<strong>es</strong> fix<strong>es</strong> et animé<strong>es</strong> sur le<br />
téléviseur VIERA en insérant tout simplement une carte SD dans la fente pour carte SD sur le téléviseur VIERA.<br />
23
Visionnement de band<strong>es</strong> vidéo et de DVD<br />
Si un appareil compatible <strong>es</strong>t connecté au téléviseur, il sera possible de visionner d<strong>es</strong> imag<strong>es</strong> vidéo et d<strong>es</strong><br />
disqu<strong>es</strong> DVD au moyen de l’écran du téléviseur.<br />
Sélection d’entrée<br />
Il <strong>es</strong>t possible de choisir l’appareil auxiliaire auquel accéder.<br />
Appareil(s) raccordé(s) en marche<br />
Affichez le menu “Sélection d’entrée”<br />
Sélectionnez le mode d’entrée<br />
Sélection d'entrée<br />
1 Télé<br />
2 Composant 1<br />
3 Composant 2<br />
4 HDMI 1<br />
5 HDMI 2<br />
6 Vidéo 1<br />
7 Vidéo 2<br />
HDMI 1<br />
JEU<br />
AUX<br />
(exemple)<br />
Prise<br />
Identification<br />
(exemple)<br />
ou<br />
sélection<br />
confirmation<br />
Appuyez sur la touche<br />
numérique corr<strong>es</strong>pondante de la<br />
télécommande pour sélectionner<br />
l’entrée désirée.<br />
Appuyez sur la flèche vers le haut/<br />
bas pour sélectionner la source<br />
désirée, puis appuyez sur OK.<br />
Pendant la sélection, si aucune<br />
action n’<strong>es</strong>t effectuée pendant<br />
plusieurs second<strong>es</strong>, le menu<br />
“Sélection d’entrée” disparaît.<br />
La borne et l’identification<br />
de l’appareil raccordé sont<br />
affiché<strong>es</strong>.<br />
Pour sélectionner une<br />
identification à chacune d<strong>es</strong><br />
pris<strong>es</strong>, consultez la page 41.<br />
Remarqu<strong>es</strong><br />
L’identification d<strong>es</strong> pris<strong>es</strong> apparaît à l’écran “Sélection d’entrée” si “Ident. pris<strong>es</strong>” <strong>es</strong>t<br />
réglé à la page 41.<br />
Reportez-vous à la page 41 pour plus de détails sur l<strong>es</strong> identifications d<strong>es</strong> pris<strong>es</strong>.<br />
Pilotez l’appareil raccordé en utilisant la télécommande<br />
de celui-ci<br />
■ Pour revenir à<br />
l’image de la<br />
télévision<br />
Remarque<br />
Pour plus de détails, reportez-vous au manuel de l’appareil raccordé.<br />
24
Réglage de la fonction VIERA Link TM<br />
Si un appareil doté de la fonction “HDAVI Control” <strong>es</strong>t connecté au téléviseur au moyen d’un<br />
câble HDMI, il <strong>es</strong>t possible de tirer profit d’un plus grand nombre de fonctions pratiqu<strong>es</strong>.<br />
Reportez-vous aux pag<strong>es</strong> 30-35. Avant de pouvoir utiliser c<strong>es</strong> fonctions, il faut régler “VIERA<br />
Link” à “EF” comme suit.<br />
Affichez le menu<br />
Sélectionnez “Réglage”<br />
Menu<br />
sélection<br />
■Appuyez pour<br />
quitter le menu<br />
d’écran.<br />
■ Appuyez pour<br />
revenir à l’écran<br />
précédent<br />
VIERA Link<br />
Image<br />
Blocage<br />
Carte SD<br />
Sous-titr<strong>es</strong><br />
Réglage<br />
suivant<br />
Sélectionnez “Réglage VIERA Link”<br />
Réglage 2/2<br />
Réglage VIERA Link<br />
Économie d'énergie<br />
Réglage évolué<br />
À propos<br />
Sélectionnez “VIERA Link”<br />
Réglage VIERA Link<br />
VIERA Link<br />
EF<br />
Lien-En marche Oui<br />
Lien-Hors mar. Oui<br />
Veille économique<br />
Non<br />
Attente contact auto<br />
H-P initiaux<br />
Non<br />
Télé<br />
Sélectionnez “EF”<br />
(Par défaut, le réglage <strong>es</strong>t<br />
sur “EF”)<br />
sélection<br />
suivant<br />
sélection<br />
changement<br />
Maintenant, il <strong>es</strong>t possible de régler chaque fonction “VIERA Link” selon<br />
vos préférenc<strong>es</strong> (p. 32-35).<br />
Visionnement Visionnement de band<strong>es</strong> vidéo et de DVD<br />
Remarqu<strong>es</strong><br />
Si aucun périphérique HDMI n’<strong>es</strong>t connecté ou si un périphérique HDMI<br />
standard (sans la fonction VIERA Link) <strong>es</strong>t utilisé, réglez sur “HF”.<br />
Pour de plus ampl<strong>es</strong> détails sur la connexion d<strong>es</strong> appareils auxiliair<strong>es</strong>, veuillez<br />
vous reporter au manuel afférent à chaque appareil en qu<strong>es</strong>tion.<br />
25
Utilisation d<strong>es</strong> fonctions d<strong>es</strong> menus<br />
Divers menus vous permettent d’effectuer l<strong>es</strong> paramétrag<strong>es</strong> de l’image,<br />
du son et d’autr<strong>es</strong> fonctions selon vos préférenc<strong>es</strong>.<br />
Affichez le menu<br />
■ Liste de menus<br />
Menu<br />
VIERA<br />
Link<br />
Option<br />
Contrôle VIERA Link,<br />
Sortie H-P<br />
Affiche l<strong>es</strong> fonctions pouvant être<br />
paramétré<strong>es</strong> (varient selon le signal<br />
d’entrée)<br />
Sélectionnez un menu<br />
Menu<br />
sélection<br />
Rétablir défaut<br />
Mode<br />
Contraste, Brillance,<br />
Couleur, Nuanc<strong>es</strong>, Netteté<br />
VIERA Link<br />
Image<br />
Audio<br />
Minuterie<br />
Blocage<br />
Carte SD<br />
Sous-titr<strong>es</strong><br />
Réglage<br />
suivant<br />
Image<br />
Temp. couleur<br />
C.A.T.S.<br />
Réducteur<br />
Réglag<strong>es</strong> zoom<br />
Filtre 3D Y/C<br />
■ Appuyez pour<br />
quitter le menu<br />
d’écran<br />
■ Appuyez pour<br />
revenir à l’écran<br />
précédent<br />
Sélectionnez une rubrique<br />
Image 1/2<br />
Rétablir défaut<br />
Mode<br />
Éclatant<br />
Contraste 0<br />
Brillance 0<br />
Couleur 0<br />
Nuanc<strong>es</strong> 0<br />
Netteté 0<br />
(Exemple: menu Image)<br />
Fait<strong>es</strong> le réglage ou la<br />
sélection<br />
Image 1/2<br />
Rétablir défaut<br />
Mode<br />
Éclatant<br />
Contraste 0<br />
Brillance 0<br />
Couleur 0<br />
Nuanc<strong>es</strong> 0<br />
Netteté 0<br />
(Exemple: menu Image)<br />
sélection<br />
réglage<br />
ou<br />
sélection<br />
Audio<br />
Image évoluée<br />
Codeur couleur<br />
Réducteur MPEG<br />
Niveau du noir<br />
Format H<br />
Rétablir défaut<br />
Grav<strong>es</strong><br />
Aigus<br />
Équilibre<br />
Audio évolué<br />
Son ambio<br />
Égaliseur volume<br />
Haut-parleurs télé<br />
Entrée HDMI 1<br />
Entrée HDMI 2<br />
Minuterie Sommeil, Minuterie 1-5<br />
Blocage<br />
Carte<br />
SD<br />
Carte SD<br />
Soustitr<strong>es</strong><br />
Sous-titr<strong>es</strong><br />
26
Réglag<strong>es</strong>/Paramètr<strong>es</strong> (choix)<br />
[Contrôle VIERA Link]<br />
Sélectionne l’appareil et permet de piloter l<strong>es</strong> fonctions. (Enregistreur/Cinéma maison/Lecteur/Caméscope/LUMIX) (p. 34-35)<br />
[Sortie H-P]<br />
Sélectionne la sortie audio. (Cinéma maison/Télé) (p. 34-35)<br />
• Le menu VIERA Link <strong>es</strong>t acc<strong>es</strong>sible sur pr<strong>es</strong>sion de la touche VIERA Link de la télécommande. (p. 34)<br />
Rétablit tous l<strong>es</strong> réglag<strong>es</strong> par défaut pour l<strong>es</strong> réglag<strong>es</strong> d’image, sauf pour le réglage “Image évoluée”<br />
Rétablir défaut<br />
Mode de base de l’image (Éclatant/Standard/Cinéma/Person.) (p. 47) Mode Éclatant<br />
Ajuste la couleur, la brillance, etc. pour chaque mode image selon vos<br />
préférenc<strong>es</strong>.<br />
• Plage de l’affichage<br />
Contraste/Brillance/Couleur/Netteté: 0 - 100<br />
Nuanc<strong>es</strong>: -50 - +50<br />
Contraste +20<br />
Brillance 0<br />
Couleur 0<br />
Sélectionne un niveau de couleur parmi l<strong>es</strong> rubriqu<strong>es</strong> Bleu (froid), Norm. (normalisation) ou Rouge (chaud).<br />
(Bleu/Norm./Rouge)<br />
Nuanc<strong>es</strong> 0<br />
Netteté 0<br />
Temp. couleur<br />
Ajuste la luminosité et la gradation selon l<strong>es</strong> conditions d’éclairage ambiant<strong>es</strong>. (HF/EF) C.A.T.S. Non<br />
Réduit le bruit d<strong>es</strong> canaux, appelé habituellement “neige”. Mettez hors service lors de la réception d’un signal fort. (HF/EF) Réducteur HF<br />
Ajuste l’alignement vertical et la taille lorsque le format <strong>es</strong>t réglé sur “ZOOM” (p. 45)<br />
Réglag<strong>es</strong> zoom<br />
Réduit le bruit et le décalage d<strong>es</strong> couleurs de l’image. (EF/HF) Filtre 3D Y/C EF<br />
Sélectionne la résolution d’image d<strong>es</strong> composants ou appareils connectés. (HD/DS)<br />
DS: définition standard HD: haute définition<br />
• Seul le signal 480p <strong>es</strong>t accepté; le signal de télévision ordinaire (NTSC) n’<strong>es</strong>t pas disponible. Codeur couleur DS<br />
Réduit le bruit de certains signaux numériqu<strong>es</strong> sur support DVD, décodeur, etc. (EF/HF) Réducteur MPEG HF<br />
Choisit Foncé ou Clair. Ce réglage fonctionne uniquement pour l<strong>es</strong> signaux d’entrée. (Foncé/Clair) Niveau du noir Clair<br />
Ajuste la plage d’affichage horizontal afin de réduire le bruit sur l<strong>es</strong> deux cotés de l’image. (Format 1/Format 2)<br />
Format 2: Ajuste la grandeur de l’image en fonction du format d’image pour réduire le bruit. (p. 48)<br />
Réinitialise l<strong>es</strong> réglag<strong>es</strong> d<strong>es</strong> grav<strong>es</strong>, aigus et équilibre aux réglag<strong>es</strong> par défaut.<br />
Bleu<br />
Format H Format 1<br />
Rétablir défaut<br />
Augmente ou diminue la réponse d<strong>es</strong> grav<strong>es</strong>. Grav<strong>es</strong> 0<br />
Augmente ou diminue la réponse d<strong>es</strong> aigus. Aigus 0<br />
Accentue le volume d<strong>es</strong> haut-parleurs gauche/droit. Équilibre 0<br />
Améliore la réponse sonore lors de l’écoute d’un programme stéréo. (EF/HF) Son ambio HF<br />
Réduit l’écart entre l<strong>es</strong> niveaux de volume après la mise en circuit d’une source externe. Égaliseur volume 0<br />
Commute l<strong>es</strong> haut-parleurs hors circuit quand d<strong>es</strong> enceint<strong>es</strong> extern<strong>es</strong> sont utilisé<strong>es</strong>. (EF/HF)<br />
• “Son ambio” et “Égaliseur volume” ne peuvent fonctionner si “HF” <strong>es</strong>t sélectionné. Haut-parleurs télé EF<br />
Le réglage par défaut de la connexion HDMI <strong>es</strong>t “Numérique” (signal d’entrée numérique).<br />
Entrée HDMI 1 Numéri.<br />
Sélectionne la prise d’entrée audio lorsqu’un câble DVI <strong>es</strong>t raccordé (signal d’entrée analogique).<br />
Entrée HDMI 2 Numéri.<br />
(Numéri./Composant 1/Composant 2/Vidéo 1/Vidéo 2)<br />
Il <strong>es</strong>t possible de régler la minuterie de manière que le téléviseur se mette en ou hors marche à l’heure<br />
désirée. (p. 42)<br />
Verrouille l<strong>es</strong> canaux et programm<strong>es</strong> (p. 36)<br />
Utilisation d<strong>es</strong> fonctions d<strong>es</strong> menus<br />
(image, son, etc.)<br />
Fonctions avancé<strong>es</strong><br />
Affiche l<strong>es</strong> donné<strong>es</strong> de la carte SD (p. 22-23)<br />
Carte SD<br />
Affiche l<strong>es</strong> sous-titr<strong>es</strong>. (p. 40)<br />
Sous-titr<strong>es</strong><br />
Dans le mode AV, l<strong>es</strong> menus Audio et Réglage comportent un plus petit nombre d’options.<br />
27
Utilisation d<strong>es</strong> fonctions d<strong>es</strong> menus<br />
Divers menus vous permettent d’effectuer l<strong>es</strong> paramétrag<strong>es</strong> de l’image,<br />
du son et d’autr<strong>es</strong> fonctions selon vos préférenc<strong>es</strong>.<br />
Affichez le menu<br />
■ Liste de menus<br />
Menu<br />
Option<br />
Mode balayage de canal<br />
■ Appuyez pour<br />
quitter le menu<br />
d’écran<br />
■ Appuyez pour<br />
revenir à l’écran<br />
précédent<br />
Affiche l<strong>es</strong> fonctions pouvant être<br />
paramétré<strong>es</strong> (varient selon le signal d’entrée).<br />
Sélectionnez “Réglage”<br />
Menu<br />
VIERA Link<br />
Image<br />
Audio<br />
Minuterie<br />
Blocage<br />
Carte SD<br />
Sous-titr<strong>es</strong><br />
Réglage<br />
Sélectionnez une rubrique<br />
Réglage 1/2<br />
Mode balayage de canal<br />
Tous<br />
Langue<br />
Horloge<br />
Réglage ANT/Câble<br />
Appareils raccordés<br />
Anti-rémanence image<br />
Affichez le sous-menu<br />
SUB<br />
MENU<br />
suivant<br />
sélection<br />
suivant<br />
sélection<br />
Réglage<br />
Langue<br />
Horloge<br />
Réglage ANT/Câble<br />
Appareils Anti-rémanence<br />
raccordés image<br />
Réglage VIERA Link<br />
Économie d’énergie<br />
ldent. pris<strong>es</strong><br />
Orbitor de pixel<br />
Temps (minut<strong>es</strong>)<br />
Barre latérale 4:3<br />
Barre de défilement<br />
VIERA Link<br />
Lien-En marche<br />
Lien-Hors mar.<br />
Veille économique<br />
Attente contact auto<br />
H-P initiaux<br />
Aucun signal<br />
pendant 10 minut<strong>es</strong><br />
Période d’inactivité<br />
de 3 heur<strong>es</strong><br />
28<br />
Sélectionnez une rubrique<br />
Réglage du sous-menu<br />
Mode balayage de canal<br />
Tous<br />
Réglage favoris<br />
Modification de sigle<br />
Fréquencemètre<br />
sélection<br />
réglage<br />
ou<br />
suivant<br />
Rétablir défaut<br />
■ Liste de sous-menus<br />
Menu<br />
Option<br />
Réglage du<br />
sous-menu<br />
Réglage évolué<br />
Contact auto<br />
Lecture auto de<br />
carte SD<br />
À propos<br />
Mode balayage de canal<br />
Réglage favoris<br />
Modification de sigle<br />
Fréquencemètre
(Suite)<br />
Réglag<strong>es</strong>/Paramètr<strong>es</strong> (choix)<br />
Sélectionne le mode de sélection d<strong>es</strong> canaux au moyen de la touche de syntonisation.<br />
Mode<br />
(Tous/Favoris/Numérique seulement/Analogique seulement)<br />
• Favoris: Seulement l<strong>es</strong> canaux programmés comme étant d<strong>es</strong> canaux favoris. (p. 20)<br />
Sélectionne la langue du menu à l’écran. (p. 16)<br />
Règle l’horloge. (p. 17)<br />
Programme l<strong>es</strong> canaux. (p. 39)<br />
balayage de canal<br />
Tous<br />
Langue<br />
Horloge<br />
Réglage ANT/Câble<br />
Sélectionne la borne et l’étiquette de l’appareil externe. (p. 41)<br />
Pour prévenir une “image rémanente” avec mouvement. (Automatique/Périodique)<br />
Automatique: Décale automatiquement l’image affichée.<br />
• Périodique: Décale l’image affichée selon l<strong>es</strong> réglag<strong>es</strong> en minut<strong>es</strong> (1/2/3/4) établis dans le menu “Temps (minut<strong>es</strong>)”.<br />
Orbitor<br />
Règle la durée du réglage “Orbitor de pixel-Périodique”. (1/2/3/4) Temps (minut<strong>es</strong>) 4<br />
Accentue la luminosité de la barre d’affichage. (HF/Faible/Moyen/Fort) (mode 4:3 seulement)<br />
• Afin de prévenir le risque de rémanence, il <strong>es</strong>t recommandé de régler la luminosité à “Fort”. (p. 48) Barre latérale 4:3 Fort<br />
Appuyez sur “OK” pour lancer le “défilement” horizontal à l’écran (p. 48)<br />
Barre de défilement<br />
Pilote l<strong>es</strong> fonctions d<strong>es</strong> appareils connectés aux born<strong>es</strong> HDMI (p. 32) (EF/HF)<br />
• “Lien-Hors mar.”, “Lien-En marche”, “Veille économique”, “Attente contact auto” et “H-P initiaux” ne<br />
peuvent être sélectionnés si “Non” <strong>es</strong>t sélectionné.<br />
VIERA Link EF<br />
Active “Lien-En marche” d<strong>es</strong> équipements connectés aux pris<strong>es</strong> HDMI. (p. 32) (Oui/Non) Lien-En marche Oui<br />
de pixel Automatique<br />
Active “Lien-Hors mar.” d<strong>es</strong> équipements connectés aux pris<strong>es</strong> HDMI. (p. 32) (Oui/Non) Lien-Hors mar. Oui<br />
Pour régler “Veille économique” sur l<strong>es</strong> appareils HDMI. (p. 32) (Non/Oui)<br />
Pour régler “Attente contact auto” sur l<strong>es</strong> appareils à connexion HDMI. (p. 32)<br />
(Non/Oui (avec avertisseur)/Oui (sans avertisseur))<br />
Veille économique<br />
Non<br />
Attente contact auto<br />
Non<br />
Sélectionne l<strong>es</strong> haut-parleurs par défaut (p. 32) (Télé/Cinéma) H-P initiaux Télé<br />
Pour conserver l’énergie, le téléviseur <strong>es</strong>t mis hors marche automatiquement lors de l’absence de signal<br />
ou d’opération pendant plus de 10 minut<strong>es</strong>. (Activé/Désactivé)<br />
Remarqu<strong>es</strong><br />
signal pendant 10 minut<strong>es</strong><br />
Ne fonctionne pas lors du réglage de “Contact auto”, “Minuterie”, “mode SD”, “Blocage” ou d’un canal numérique.<br />
Activé<br />
• Le m<strong>es</strong>sage “Aucun signal pendant 10 minut<strong>es</strong> activé” sera affiché pendant environ 10 second<strong>es</strong> lorsque<br />
le téléviseur <strong>es</strong>t mis hors marche la première fois par le biais de “Aucun signal pendant 10 minut<strong>es</strong>”.<br />
Aucun<br />
• L<strong>es</strong> chiffr<strong>es</strong> “3”, “2”, “1” clignotent à l’affichage pour indiquer l<strong>es</strong> trois (3) minut<strong>es</strong> r<strong>es</strong>tant<strong>es</strong> avant la mise hors marche.<br />
Pour conserver l’énergie, le téléviseur <strong>es</strong>t mis hors marche automatiquement lorsqu’aucune touche de la<br />
télécommande ou du panneau avant n’<strong>es</strong>t appuyée pendant plus de 3 heur<strong>es</strong>. (Activé/Désactivé)<br />
Remarqu<strong>es</strong><br />
Ne fonctionne pas lors du réglage de “Contact auto” ou “Minuterie”.<br />
•<br />
•<br />
Période<br />
Le m<strong>es</strong>sage “Période d’inactivité de 3 heur<strong>es</strong> activée” sera affiché pendant environ 10 second<strong>es</strong> lorsque<br />
le téléviseur <strong>es</strong>t mis hors marche la première fois par le biais de “Période d’inactivité de 3 heur<strong>es</strong>”.<br />
L<strong>es</strong> chiffr<strong>es</strong> “3”, “2”, “1” clignotent à l’affichage pour indiquer l<strong>es</strong> trois (3) minut<strong>es</strong> r<strong>es</strong>tant<strong>es</strong> avant la mise hors marche.<br />
Met automatiquement le téléviseur en marche au moment de la mise en marche du câblosélecteur ou<br />
d’un équipement connecté. (HF/EF)<br />
Le cordon d’alimentation du téléviseur doit être branché dans cet équipement. Le téléviseur se met en<br />
marche chaque fois que l’alimentation <strong>es</strong>t rétablie.<br />
•<br />
Ni la minuterie-sommeil, ni la minuterie de mise en/hors marche différée, ni le réglage initial ne<br />
fonctionnent si “Contact auto” <strong>es</strong>t activé. (p. 42)<br />
Réglez sur “Imagette” ou “Diaporama” pour permettre la lecture automatique d’une carte SD.<br />
(Diaporama/Imagette/Régler ultérieurement/HF).<br />
Affiche l<strong>es</strong> renseignements sur le modèle du téléviseur et la licence d’utilisation du logiciel.<br />
La réinitialisation d<strong>es</strong> réglag<strong>es</strong> annule tout<strong>es</strong> l<strong>es</strong> options de l’écran “Réglage”, tell<strong>es</strong> que le réglage d<strong>es</strong> canaux. (p. 38)<br />
d'inactivité de 3 heur<strong>es</strong><br />
Désactivé<br />
Contact auto<br />
HF<br />
Lecture auto de carte SD<br />
Régler ultérieurement<br />
À propos<br />
Rétablir défaut<br />
Utilisation d<strong>es</strong> fonctions d<strong>es</strong> menus<br />
(image, son, etc.)<br />
Fonctions avancé<strong>es</strong><br />
Réglag<strong>es</strong>/Paramètr<strong>es</strong> (choix)<br />
Sélectionne le mode de sélection d<strong>es</strong> canaux au moyen de la touche de syntonisation<br />
(Tous/Favoris/Numérique seulement/Analogique seulement)<br />
Syntonise un d<strong>es</strong> canaux de la liste d<strong>es</strong> favoris. (p. 20)<br />
Modifie l’indicatif du canal. (p. 39)<br />
Permet de vérifier la puissance du signal dans le cas où il y aurait de l’interférence ou que l’image<br />
numérique deviendrait figée. (p. 39)<br />
29
VIERA Link TM “HDAVI Control TM ”<br />
Vous pouvez activer/désactiver simultanément tous l<strong>es</strong> appareils <strong>Panasonic</strong> compatibl<strong>es</strong> avec la fonction “HDAVI<br />
Control” au moyen d’une seule touche de la télécommande.<br />
Profitez d’une interopérabilité HDMI supplémentaire avec l<strong>es</strong> appareils <strong>Panasonic</strong> dotés de la fonction “HDAVI<br />
Control”.<br />
Ce téléviseur prend en charge la fonction VIERA Link “HDAVI Control 4”.<br />
L<strong>es</strong> connexions à certains appareils (enregistreur DVD DIGA, caméscope HD, chaîne cinéma maison avec<br />
enregistreur ou lecteur, amplificateur, etc.) au moyen de câbl<strong>es</strong> HDMI vous permettent une interface automatique.<br />
L<strong>es</strong> appareils avec fonction “HDAVI Control” permettent l<strong>es</strong> opérations suivant<strong>es</strong>:<br />
Version<br />
Opérations<br />
HDAVI Control ou ultérieur Commutation d’entrée automatique (p. 33)<br />
Lien-En marche (p. 33)<br />
Lien-Hors mar. (p. 33)<br />
H-P initiaux (p. 33)<br />
Lecture cinéma avec une seule touche (p. 33)<br />
• Contrôle d<strong>es</strong> haut-parleurs (p. 35)<br />
HDAVI Control 2 ou ultérieur • Fonction VIERA Link opérable uniquement avec la télécommande du<br />
téléviseur (P. 35)<br />
• Attente contact auto (pour appareil disponible seulement) (p. 33)<br />
HDAVI Control 3 ou ultérieur Informations de réglage (p. 33)<br />
• Fonction de synchronisation automatique (p.33)<br />
HDAVI Control 4 • Veille économique (avec mode de démarrage rapide) (p. 33)<br />
■ La première fois/Lors de l’ajout de nouvel équipement, de la reconnexion d’un appareil ou d’une<br />
modification de la configuration, mettez l’équipement puis l’appareil en marche.<br />
Sélectionnez le mode d’entrée HDMI 1 ou HDMI 2 (p. 24) et assurez-vous que l’image <strong>es</strong>t<br />
adéquatement affichée.<br />
La fonction VIERA Link “HDAVI Control”, basée sur l<strong>es</strong> fonctions de pilotage fourni<strong>es</strong> par HDMI qui <strong>es</strong>t une norme de<br />
l’industrie aussi connue sous le nom de HDMI CEC (Consumer Electronics Control/Comité d<strong>es</strong> télécommunications<br />
et de l’électronique), <strong>es</strong>t une fonction unique que nous avons développée et ajoutée à nos appareils. De ce fait, son<br />
pilotage avec l<strong>es</strong> appareils d’autr<strong>es</strong> fabricants qui prennent en charge HDMI CEC n’<strong>es</strong>t pas garanti.<br />
Reportez-vous aux manuels d’utilisation afférents aux appareils d’autr<strong>es</strong> fabricants qui prennent<br />
en charge la fonction VIERA Link.<br />
■ Câble HDMI<br />
L’utilisation de cette fonction requiert que la connexion soit faite avec un câble conforme à la norme HDMI. On ne<br />
peut utiliser un câble non conforme à la norme HDMI.<br />
Il <strong>es</strong>t recommandé d’utiliser le câble HDMI <strong>Panasonic</strong>. Numéro de pièce recommandé:<br />
RP-CDHF15 (1,5 m/4,9 pi), RP-CDHG15 (1,5 m/4,9 pi), RP-CDHF30 (3,0 m/9,8 pi),<br />
RP-CDHG30 (3,0 m/9,8 pi), RP-CDHG50 (5,0 m/16,4 pi)<br />
* Pour de plus ampl<strong>es</strong> détails sur la connexion d<strong>es</strong> appareils auxiliair<strong>es</strong>, veuillez vous reporter au manuel afférent à<br />
chaque appareil en qu<strong>es</strong>tion.<br />
30
Connexions VIERA Link TM<br />
Suivez l<strong>es</strong> indications d<strong>es</strong> schémas de connexion ci-d<strong>es</strong>sous pour la Si<br />
commande HDAVI d’un seul appareil AV, tel qu’un enregistreur DVD<br />
DIGA, ou une chaîne cinéma maison avec lecteur ou enregistreur DVD.<br />
Reportez-vous aux pag<strong>es</strong> 32 à 35 pour l<strong>es</strong> réglag<strong>es</strong> du menu de<br />
configuration et d<strong>es</strong> informations de command<strong>es</strong> supplémentair<strong>es</strong>.<br />
• L<strong>es</strong> câbl<strong>es</strong> optiqu<strong>es</strong> et(ou) HDMI sont vendus séparément.<br />
Remarque<br />
la connexion (ou le réglage) de l’appareil compatible avec<br />
HDAVI <strong>es</strong>t changée, mettez l’appareil hors tension puis à<br />
nouveau sous tension alors que tous l<strong>es</strong> équipements sont<br />
sous tension (sur cet appareil pour reconnaître correctement<br />
l’appareil raccordé) et vérifiez que l’enregistreur DVD ou la<br />
chaîne cinéma maison fonctionnne.<br />
La prise HDMI 1 <strong>es</strong>t recommandée.<br />
Si la connexion <strong>es</strong>t faite à la prise HDMI 2, réglez le mode d’entrée sur HDMI 2 (p. 24) avant d’effectuer la<br />
connexion à cette prise. Une fois la connexion faite, vérifiez l<strong>es</strong> fonctions de contrôle avec HDMI (p. 32-35).<br />
■ Raccordement à un enregistreur DVD DIGA, chaîne cinéma<br />
maison avec enregistreur ou lecteur DVD<br />
Pour enregistreur DVD DIGA: Raccordez avec un câble HDMI<br />
Pour une chaîne cinéma maison avec enregistreur ou lecteur DVD:<br />
Raccordez avec un câble HDMI et un câble audio.<br />
Si le câble audio n’<strong>es</strong>t pas raccordé, vous ne pouvez pas regarder l<strong>es</strong><br />
émissions de télévision via la chaîne cinéma maison.<br />
Panneau arrière de l’appareil<br />
Sortie audio numérique<br />
VI<strong>DE</strong>O<br />
Y<br />
PB<br />
PR<br />
L<br />
■ Raccordement de cet appareil<br />
à un enregistreur DVD et à un<br />
amplificateur audio-vidéo<br />
Lors de l’utilisation d’un amplificateur<br />
audio-vidéo avec “VIERA Link” et d’un<br />
enregistreur DVD DIGA compatible,<br />
utilisez une connexion en cascade, tel<br />
qu’indiqué ci-d<strong>es</strong>sous.<br />
HDMI 1 HDMI 2<br />
Y<br />
S VI<strong>DE</strong>O<br />
PB<br />
PR<br />
L<br />
L<br />
ou<br />
VIERA Link TM “HDAVI Control TM ”<br />
Enregistreur DVD<br />
DIGA avec fonction<br />
VIERA Link<br />
Câble HDMI<br />
HDMI<br />
(AV IN)<br />
HDMI<br />
(AV OUT)<br />
Amplificateur AV<br />
avec fonction<br />
VIERA Link<br />
AUDIO<br />
HDMI<br />
(AV OUT)<br />
Chaîne cinéma<br />
maison avec fonction<br />
VIERA Link<br />
ou<br />
R<br />
R R<br />
COMPONENT<br />
VI<strong>DE</strong>O IN 1<br />
1 IN<br />
2<br />
ou<br />
Caméscope HD<br />
avec fonction<br />
VIERA Link<br />
ou<br />
HDMI<br />
(AV OUT)<br />
LUMIX avec<br />
fonction<br />
VIERA Link<br />
ou<br />
HDMI<br />
(AV OUT)<br />
HDMI<br />
(AV OUT)<br />
Enregistreur DVD<br />
DIGA avec fonction<br />
VIERA Link<br />
Fonctions avancé<strong>es</strong><br />
Il <strong>es</strong>t possible d’utiliser un amplificateur AV et un enregisteur DVD DIGA avec cet appareil.<br />
Assurez-vous de raccorder l’amplificateur AV à cet appareil et à l’enregistreur DVD DIGA.<br />
■ Réglage de cet appareil après le raccordement<br />
Après avoir effectué l<strong>es</strong> raccordements indiqués ci-d<strong>es</strong>sus, réglez “VIERA Link” (sous “Réglage VIERA Link”) sur<br />
“EF” à l’aide du menu de configuration (p. 25, 32-33).<br />
Remarqu<strong>es</strong><br />
L<strong>es</strong> appareils HDMI individuels peuvent néc<strong>es</strong>siter d<strong>es</strong> réglag<strong>es</strong> de menu supplémentair<strong>es</strong> spécifiqu<strong>es</strong> à chaque<br />
modèle. Veuillez consulter l<strong>es</strong> manuels d’utilisation r<strong>es</strong>pectifs.<br />
Lorsque le signal audio <strong>es</strong>t acheminé depuis un autre appareil raccordé à cet appareil via HDMI au moyen de la<br />
prise de sortie DIGITAL AUDIO OUT de cet appareil, le système se commute sur la source audio sur 2 canaux.<br />
(Le raccordement à un amplificateur AV via HDMI permet d’obtenir un son de qualité supérieure.)<br />
Pour plus de détails sur le câble HDMI pour le raccordement d’un caméscope HD <strong>Panasonic</strong>, reportez-vous au<br />
manuel d’utilisation afférent à l’appareil utilisé.<br />
31
VIERA Link TM “HDAVI Control TM ”<br />
Affichez le menu<br />
Sélectionnez “Réglage”<br />
Menu<br />
VIERA Link<br />
Image<br />
Blocage<br />
Carte SD<br />
Sous-titr<strong>es</strong><br />
Réglage<br />
sélection<br />
suivant<br />
Sélectionnez “Réglage VIERA Link”<br />
Réglage 2/2<br />
Réglage VIERA Link<br />
Économie d'énergie<br />
Réglage évolué<br />
À propos<br />
Sélectionnez “VIERA Link”<br />
Réglage VIERA Link<br />
VIERA Link<br />
EF<br />
Lien-En marche Oui<br />
Lien-Hors mar. Oui<br />
Veille économique<br />
H-P initiaux<br />
Non<br />
Attente contact auto<br />
Non<br />
Télé<br />
sélection<br />
suivant<br />
sélection<br />
Commutation<br />
d’entrée<br />
automatique<br />
Lien-En<br />
marche<br />
Lien-Hors<br />
mar.<br />
Veille<br />
économique<br />
(pour “HDAVI<br />
Control 4”<br />
(avec mode de<br />
démarrage rapide))<br />
Attente<br />
contact auto<br />
(pour “HDAVI<br />
Control 2 ou<br />
ultérieur”)<br />
H-P initiaux<br />
Lecture<br />
cinéma avec<br />
une seule<br />
touche<br />
■ Appuyez pour<br />
quitter le menu<br />
d’écran<br />
■ Appuyez pour<br />
revenir à l’écran<br />
précédent<br />
Sélectionnez<br />
“EF”<br />
(Par défaut, le réglage <strong>es</strong>t<br />
sur “EF”)<br />
Sélectionnez l<strong>es</strong> réglag<strong>es</strong><br />
Réglage VIERA Link<br />
VIERA Link<br />
EF<br />
Lien-En marche Oui<br />
Lien-Hors mar. Oui<br />
Veille économique<br />
Non<br />
Attente contact auto<br />
Non<br />
H-P initiaux Télé<br />
changement<br />
sélection<br />
Informations<br />
de réglage<br />
(pour “HDAVI<br />
Control 3 ou<br />
ultérieur”)<br />
Effectuez le réglage<br />
32<br />
Réglage VIERA Link<br />
VIERA Link<br />
EF<br />
Lien-En marche Oui<br />
Lien-Hors mar. Oui<br />
Veille économique<br />
Non<br />
Attente contact auto<br />
H-P initiaux<br />
Non<br />
Cinéma<br />
changement<br />
Fonction de<br />
synchronisation<br />
automatique (pour<br />
“HDAVI Control 3 ou<br />
ultérieur”)
(Suite)<br />
Au début de la lecture avec l’enregistreur DVD ou chaîne cinéma maison avec enregistreur DVD ou lecteur DVD,<br />
l’entrée télé commute automatiquement sur l’entrée compatible avec l’appareil de lecture.<br />
Pour la chaîne cinéma maison avec enregisteur DVD, l<strong>es</strong> haut-parleurs commutent automatiquement sur la chaîne cinéma maison.<br />
Si l’appareil <strong>es</strong>t en mode d’enregistrement DVD, l’entrée télé commute automatiquement sur DVD et le menu d’enregistrement s’affiche.<br />
Lorsque “Oui” <strong>es</strong>t sélectionné (p. 29), le téléviseur <strong>es</strong>t automatiquement mis en marche et le mode d’entrée HDMI approprié <strong>es</strong>t<br />
sélectionné si un équipement compatible avec la fonction VIERA Link <strong>es</strong>t en marche et que le mode lecture a été sélectionné.<br />
Lorsque “Oui” <strong>es</strong>t sélectionné (p. 29) et que le téléviseur <strong>es</strong>t hors marche, tout l’équipement connecté compatible<br />
avec la fonction VIERA Link <strong>es</strong>t automatiquement mis hors marche.<br />
L’enregistreur DVD DIGA <strong>Panasonic</strong> n’<strong>es</strong>t pas mis hors marche s’il <strong>es</strong>t encore dans le mode enregistrement.<br />
Mise en garde: Le téléviseur demeure en marche même si tout l’équipement connecté compatible avec la fonction VIERA Link <strong>es</strong>t mis hors marche.<br />
État<br />
Lien-Hors mar. : Oui<br />
Veille économique : Oui<br />
L’appareil <strong>es</strong>t raccordé par un câble HDMI et prend en charge “HDAVI Control 4” (avec mode de démarrage rapide).<br />
Lorsque le téléviseur <strong>es</strong>t mis hors marche, tous l<strong>es</strong> appareils connectés, compatibl<strong>es</strong> avec VIERA Link, seront<br />
automatiquement mis en mode de veille économique dans l<strong>es</strong> conditions mentionné<strong>es</strong> plus haut.<br />
* Consommation minimale de courant de l’état de veille d<strong>es</strong> appareils.<br />
État<br />
Attente contact auto : Oui<br />
L’appareil <strong>es</strong>t raccordé par un câble HDMI et prend en charge ‘‘HDAVI Control 2 ou ultérieur’’ (pour appareil disponible seulement).<br />
[Exemple de situations pour l’activation]<br />
• Lors de la commutation de l’entrée à HDMI.<br />
• Lorsque le réglage “Cinéma maison” de la “Sortie H-P” <strong>es</strong>t modifié à “Télé”.<br />
L<strong>es</strong> appareils connectés, compatibl<strong>es</strong> avec VIERA Link, seront automatiquement mis hors marche lorsqu’ils ne sont pas utilisés.<br />
“Télé” <strong>es</strong>t la sélection par défaut. Pour établir l<strong>es</strong> enceint<strong>es</strong> de la chaîne cinéma maison comme haut-parleurs par<br />
défaut, sélectionnez “Cinéma” à la place de “Télé”. Le signal audio sera alors reproduit sur l<strong>es</strong> enceint<strong>es</strong> de la<br />
chaîne cinéma maison lorsque le téléviseur <strong>es</strong>t mis en marche.<br />
Si la touche “ONE TOUCH PLAY” de la télécommande pour l’équipement de la chaîne cinéma maison <strong>es</strong>t pr<strong>es</strong>sée,<br />
l<strong>es</strong> opérations suivant<strong>es</strong> sont automatiquement effectué<strong>es</strong> en séquence:<br />
La chaîne cinéma maison <strong>es</strong>t mise en marche et la lecture s’amorce.<br />
Le téléviseur s’allume et l’écran de lecture s’affiche.<br />
L’audio <strong>es</strong>t coupé sur le téléviseur et commute sur la chaîne cinéma maison.<br />
Certain<strong>es</strong> informations de réglage du téléviseur peuvent être acheminé<strong>es</strong> à chaque appareil (enregistreur/chaîne<br />
cinéma maison/lecteur) muni de la fonction “HDAVI Control 3 ou ultérieur” raccordé à un téléviseur par un câble HDMI.<br />
Donné<strong>es</strong> transmissibl<strong>es</strong> Enregistreur Chaîne cinéma maison Lecteur<br />
Réglage de la langue d<strong>es</strong> affichag<strong>es</strong> à l’écran<br />
(English/Español/Français)<br />
○ ○ ○<br />
Format de l’image à l’écran (16:9 fixe) ○ ○ ○<br />
Informations Sous-titr<strong>es</strong> (CC)<br />
(Mode/Type CC/Réglage numérique)<br />
○ --- ---<br />
Informations canal<br />
(Signal d’entrée/Liste de canaux/Informations sigle)<br />
○ --- ---<br />
Remarqu<strong>es</strong><br />
Il <strong>es</strong>t possible que toute l’information de langue de l’interface utilisateur graphique (IUG) puisse être réglée<br />
à partir d’un appareil doté de la fonction HDMI CEC raccordé au téléviseur par un câble HDMI. Selon d<strong>es</strong><br />
conditions de fonctionnement ou d<strong>es</strong> spécifications de chaque appareil, le réglage pourrait ne pas être appliqué.<br />
Pour plus de détails sur le fonctionnement d<strong>es</strong> appareils auxiliair<strong>es</strong>, reportez-vous aux manuels d’utilisation<br />
afférents à c<strong>es</strong> appareils.<br />
[Enregistreur]<br />
Il <strong>es</strong>t impossible d’utiliser d’autr<strong>es</strong> fonctions que celle de la touche de mise en/hors marche pendant la<br />
transmission de l’information télévisuelle. Lorsque cet appareil <strong>es</strong>t mis hors marche, la transmission <strong>es</strong>t<br />
interrompue (seulement pendant le traitement de Informations canal).<br />
VIERA Link TM “HDAVI Control TM ”<br />
Fonctions avancé<strong>es</strong><br />
Minimise le décalage entre l’image et le son lorsque le téléviseur <strong>es</strong>t raccordé à une chaîne cinéma maison ou un<br />
amplificateur <strong>Panasonic</strong>.<br />
33
VIERA Link TM “HDAVI Control TM ”<br />
Profitez d’un fonctionnement plus convivial avec la fonction “HDAVI Control” sous le menu<br />
“VIERA Link”. Pour plus de détails sur “HDAVI Control”, reportez-vous à la page 30.<br />
Affichez le menu VIERA Link<br />
ou<br />
Contrôle<br />
d<strong>es</strong> hautparleurs<br />
sélection<br />
suivant<br />
VIERA Link<br />
Sélectionnez une rubrique<br />
sélection<br />
Contrôle VIERA Link<br />
Enregistreur<br />
Sortie H-P<br />
Télé<br />
Effectuez la sélection<br />
■ Appuyez pour<br />
quitter le menu<br />
d’écran<br />
Contrôle VIERA Link<br />
Cinéma maison<br />
Sortie H-P<br />
Télé<br />
Effectuez le réglage<br />
changement<br />
Fonction<br />
VIERA Link<br />
opérable<br />
uniquement<br />
avec la<br />
télécommande<br />
du téléviseur<br />
(pour “HDAVI<br />
Control 2 ou<br />
ultérieur”)<br />
■ Appuyez pour<br />
revenir à l’écran<br />
précédent<br />
34
(Suite)<br />
Il <strong>es</strong>t possible de sélectionner soit l<strong>es</strong> enceint<strong>es</strong> de la chaîne cinéma maison soit l<strong>es</strong> haut-parleurs du téléviseur pour la sortie audio.<br />
Le contrôle du rendu sonore se fait au moyen de la télécommande du téléviseur.<br />
Cette fonction n’<strong>es</strong>t disponible que si un amplificateur ou une chaîne cinéma maison <strong>Panasonic</strong> <strong>es</strong>t utilisé.<br />
Sélectionnez “Sortie H-P”<br />
Sélectionnez “Cinéma maison” ou “Télé”<br />
Contrôle VIERA Link<br />
Sortie H-P<br />
Enregistreur<br />
Télé<br />
sélection<br />
changement<br />
■Cinéma maison: Réglage sur l’équipement<br />
Volume haut / bas<br />
Sourdine<br />
La sortie audio sur le téléviseur <strong>es</strong>t mise en sourdine.<br />
Lorsque l’équipement connecté <strong>es</strong>t mis hors<br />
marche, l<strong>es</strong> haut-parleurs du téléviseur sont activés.<br />
La sélection de “Cinéma maison” a pour effet de mettre<br />
l’équipement en marche s’il <strong>es</strong>t en mode de veille.<br />
■ Télé: L<strong>es</strong> haut-parleurs du téléviseur sont activés.<br />
Dans le menu VIERA Link, il <strong>es</strong>t possible de sélectionner d<strong>es</strong> appareils HDMI compatibl<strong>es</strong> connectés et d’y accéder<br />
rapidement. Continuez à utiliser la télécommande du téléviseur en prenant soin de l’orienter vers ce dernier.<br />
Sélectionnez “Contrôle VIERA Link”<br />
Sélectionnez l’équipement auquel vous voulez<br />
accéder.<br />
(Enregistreur/Cinéma maison/Lecteur/<br />
Caméscope/LUMIX)<br />
Contrôle VIERA Link<br />
Sortie H-P<br />
Enregistreur<br />
Télé<br />
sélection<br />
changement<br />
Vous ne pouvez sélectionner<br />
que l<strong>es</strong> rubriqu<strong>es</strong> disponibl<strong>es</strong>.<br />
En présence de plus d’un appareil du même type,<br />
le chiffre annexé au nom de l’appareil indique le<br />
nombre d’appareils. (ex. Enregistreur 1/Enregistreur 2/<br />
Enregistreur 3...)<br />
Le nombre d’appareils qui peuvent être raccordés<br />
<strong>es</strong>t trois pour l<strong>es</strong> enregistreurs, et un total de trois<br />
appareils pour Cinéma maison/Lecteur/Caméscope/<br />
LUMIX.<br />
Remarque<br />
Il existe une limite au nombre de connecteurs HDMI.<br />
Pilotez l<strong>es</strong> fonctions de l’équipement au moyen de la télécommande du téléviseur en prenant<br />
soin de l’orienter vers ce dernier.<br />
Pour faire fonctionner l’appareil, lire le manuel d’utilisation y afférant.<br />
■ Touch<strong>es</strong> disponibl<strong>es</strong> sur la télécommande<br />
Le fonctionnement varie selon l’appareil raccordé.<br />
Déplacement du curseur/Sélection<br />
Lecture<br />
VIERA Link TM “HDAVI Control TM ”<br />
Fonctions avancé<strong>es</strong><br />
SUB<br />
MENU<br />
Réglage/Accès<br />
Retour au menu précédent<br />
Affichage du menu de fonctions de<br />
l’équipement<br />
Disponible lorsque la fonction d<strong>es</strong><br />
touch<strong>es</strong> <strong>es</strong>t affichée<br />
Quitter<br />
Arrêt<br />
Recul/avance<br />
Saut Recul/avance<br />
Pause<br />
Sous-titr<strong>es</strong><br />
Canal haut/bas<br />
SAP (Sélectionner le mode audio)<br />
- 0-9 Sélection de canal secondaire numérique<br />
35
Blocage<br />
Il <strong>es</strong>t possible de bloquer la réception de certains canaux afin de prévenir que l<strong>es</strong> enfants ne soient<br />
exposés à un contenu inapproprié.<br />
Affichez le menu<br />
Sélectionnez “Blocage”<br />
Menu<br />
VIERA Link<br />
Image<br />
Audio<br />
Minuterie<br />
Blocage<br />
Carte SD<br />
Sous-titr<strong>es</strong><br />
Réglage<br />
suivant<br />
sélection<br />
Vous serez invité à saisir votre<br />
mot de passe chaque fois<br />
que vous afficherez le menu<br />
“Blocage”.<br />
Entrez votre mot de passe à 4 chiffr<strong>es</strong><br />
Un code à 4 chiffr<strong>es</strong> doit être saisi pour voir un programme bloqué ou pour changer<br />
l<strong>es</strong> paramètr<strong>es</strong> de classification.<br />
Mot de passe<br />
Entrer mot de passe.<br />
- - - -<br />
S’il s’agit de la saisie initiale<br />
du mot de passe, entrez le<br />
numéro à deux repris<strong>es</strong> pour<br />
l’enregistrer.<br />
RETURN<br />
36<br />
■ Appuyez pour quitter<br />
le menu d’écran<br />
Mise en garde<br />
Notez votre mot de passe<br />
dans le cas où vous<br />
l’oublieriez. (Si vous avez<br />
oublié votre mot de passe,<br />
communiquez avec votre<br />
détaillant <strong>Panasonic</strong>.)<br />
Remarque<br />
Lorsqu’un canal bloqué<br />
<strong>es</strong>t syntonisé, un m<strong>es</strong>sage<br />
s’affiche permettant de<br />
recevoir le canal après<br />
avoir entré votre mot de<br />
passe.<br />
Sélectionnez le mode de blocage<br />
Blocage<br />
Mode<br />
Canal<br />
Jeu<br />
Émission<br />
Modifier mot de passe<br />
HF<br />
HF<br />
HF<br />
HF<br />
Sélectionnez une rubrique<br />
Blocage<br />
Mode<br />
Canal<br />
Jeu<br />
Émission<br />
Modifier mot de passe<br />
Person.<br />
HF<br />
HF<br />
HF<br />
Effectuez le<br />
réglage<br />
réglage<br />
sélection<br />
sélection<br />
réglage<br />
HF:<br />
Tout:<br />
Déverrouillage d<strong>es</strong> fonctions<br />
de blocage de canaux, de jeux<br />
vidéo et de la programmation.<br />
Verrouillage de tous l<strong>es</strong><br />
signaux d’entrée sans égard<br />
au réglage d<strong>es</strong> paramètr<strong>es</strong> de<br />
blocage de canaux, de jeux<br />
vidéo et de la programmation.<br />
Person.: Verrouillage de signaux d’entrée<br />
établis par paramétrage du<br />
blocage de canaux, de jeux<br />
vidéo et de la programmation.<br />
L<strong>es</strong> fonctions de blocage de<br />
canaux (canal), de jeux vidéo<br />
(jeu) et de la programmation<br />
(émission) seront grisé<strong>es</strong> à<br />
moins que “Person.” n’ait été<br />
sélectionné sous “Mode”.
■ Pour sélectionner le canal ou la classification du programme à verrouiller<br />
Verrouillage<br />
de canal<br />
Sélectionnez jusqu’à 7 (1-7) canaux à bloquer. C<strong>es</strong> canaux seront bloqués quelle que soit la<br />
classification du programme.<br />
Sélectionnez “Mode”, puis “Person.”<br />
Sélectionnez le canal devant être bloqué<br />
Blocage canaux<br />
Mode<br />
Canal 1<br />
Canal 2<br />
Canal 3<br />
Canal 4<br />
Canal 5<br />
Person.<br />
3<br />
4<br />
-<br />
-<br />
-<br />
sélection<br />
réglage<br />
Pour bloquer/déverrouiller tous l<strong>es</strong> canaux:<br />
Sélectionnez “Mode”, puis “Tout” ou “HF”.<br />
Tout: Bloque tous l<strong>es</strong> canaux<br />
HF: Déverrouille tous l<strong>es</strong> canaux.<br />
Jeu<br />
Bloque l<strong>es</strong> canaux 3 et 4 ainsi que l<strong>es</strong> entré<strong>es</strong><br />
extern<strong>es</strong>.<br />
Sélectionnez “Jeu” à l’étape 5 , puis<br />
réglez sur “EF”.<br />
sélection<br />
réglage<br />
EF: Blocage<br />
HF: Déverrouillage<br />
Blocage de<br />
programme<br />
Modification<br />
du mot de<br />
passe<br />
■ Pour spécifier le niveau de classification<br />
La technologie puce anti-violence “V-chip” permet<br />
de verrouiller l<strong>es</strong> émissions à auditoire limité en<br />
fonction d<strong>es</strong> classifications de télévision.<br />
Sélectionnez “Mode”, puis “EF”.<br />
Blocage émission<br />
Mode<br />
MPAA<br />
U.S.TV<br />
C.E.L.R.<br />
C.F.L.R.<br />
EF<br />
HF<br />
HF<br />
HF<br />
HF<br />
réglage<br />
sélection<br />
Sélectionnez la catégorie de<br />
classification que vous désirez adopter.<br />
suivant<br />
Blocage émission<br />
Mode<br />
MPAA<br />
U.S.TV<br />
C.E.L.R.<br />
C.F.L.R.<br />
EF<br />
HF<br />
HF<br />
HF<br />
HF<br />
sélection<br />
MPAA: Classification d<strong>es</strong> films (États-Unis)<br />
U.S.TV: Classification d<strong>es</strong> émissions de télévision<br />
(États-Unis)<br />
C.E.L.R.:Classification (Canada)<br />
C.F.L.R.: Classification (Québec)<br />
■ Pour changer le mot de passe<br />
À l’étape , sélectionnez “Modifier mot<br />
de passe”, puis appuyez sur OK.<br />
Saisissez deux fois le nouveau mot de<br />
passe à 4 chiffr<strong>es</strong>.<br />
Sélectionnez la classification.<br />
sélection<br />
Exemple: classification “MPAA” (films aux États-Unis)<br />
NR Sans classification<br />
G Général: aucune limite d’âge<br />
PG Supervision parentale suggérée<br />
PG- Prudence d<strong>es</strong> parents conseillée: pour<br />
13 d<strong>es</strong> spectateurs de 13 ans ou moins<br />
R<br />
NC-<br />
17<br />
X<br />
Accès limité: l<strong>es</strong> personn<strong>es</strong> de moins de<br />
17 ans doivent être accompagné<strong>es</strong> par un<br />
adulte<br />
Accès interdit aux personn<strong>es</strong> de moins de<br />
17 ans<br />
Adult<strong>es</strong> seulement<br />
Pour de plus ampl<strong>es</strong> renseignements,<br />
reportez-vous à la page 44.<br />
Blocage<br />
Mode<br />
Canal<br />
Jeu<br />
Émission<br />
Modifier mot de passe<br />
HF<br />
HF<br />
HF<br />
HF<br />
Modifier mot de passe<br />
Entrer nouveau mot de passe.<br />
- - - -<br />
RETURN<br />
Blocage<br />
Fonctions avancé<strong>es</strong><br />
Remarqu<strong>es</strong><br />
Selon la disponibilité, ce téléviseur prend en charge le “Tableau de classification par région téléchargeable” (aux États-Unis seulement).<br />
La classification HF <strong>es</strong>t indépendante d<strong>es</strong> autr<strong>es</strong> classements.<br />
Si vous bloquez un niveau de classement basé sur un âge spécifique, la classification HF et tout autre<br />
classification plus r<strong>es</strong>trictive seront aussi bloqué<strong>es</strong>.<br />
37
Programmation et édition d<strong>es</strong> canaux<br />
L<strong>es</strong> paramètr<strong>es</strong> de canal actuels peuvent être modifiés en fonction de vos b<strong>es</strong>oins et<br />
d<strong>es</strong> conditions de réception.<br />
Affichez le menu<br />
Program.<br />
auto<br />
Programmation<br />
automatique<br />
Sélectionnez “Réglage”<br />
Menu<br />
VIERA Link<br />
Image<br />
Audio<br />
Minuterie<br />
Blocage<br />
Carte SD<br />
Sous-titr<strong>es</strong><br />
Réglage<br />
suivant<br />
sélection<br />
Sélectionnez “Réglage ANT/Câble”<br />
Réglage 1/2<br />
suivant<br />
Mode balayage de canal<br />
Tous<br />
Langue<br />
sélection<br />
Horloge<br />
Réglage ANT/Câble<br />
Appareils raccordés<br />
Anti-rémanence image<br />
Program.<br />
manuelle<br />
Programmation<br />
manuelle<br />
Rétablir défaut<br />
■ Appuyez pour<br />
quitter le menu<br />
d’écran<br />
Sélectionnez la fonction<br />
Réglage ANT/Câble<br />
Entrée ANT Câble<br />
Program. auto<br />
Program. manuelle<br />
Fréquencemètre<br />
suivant<br />
sélection<br />
Effectuez le réglage<br />
■Pour réinitialiser l<strong>es</strong> paramétrag<strong>es</strong> du menu Réglage<br />
Sélectionnez “Rétablir défaut” dans le menu<br />
Réglage ( ) puis appuyez sur OK<br />
Entrez votre code à 4 chiffr<strong>es</strong> au moyen d<strong>es</strong> touch<strong>es</strong> numériqu<strong>es</strong><br />
Sélectionnez “Oui” dans l’écran de confirmation, puis appuyez sur OK<br />
Fréquencemètre<br />
Vérification<br />
de la<br />
puissance<br />
du signal<br />
38
Recherche et ajout automatiqu<strong>es</strong> en mémoire d<strong>es</strong> canaux disponibl<strong>es</strong>.<br />
Sélectionnez “Entrée ANT”<br />
Sélectionnez le mode de balayage (p. 18)<br />
Sélectionnez Câble ou Antenne<br />
Program. auto<br />
Ou sélectionnez “Non utilisé” (p. 17).<br />
ok<br />
Tous l<strong>es</strong> canaux<br />
Sélectionnez “Program. auto”<br />
Analogique seulement<br />
Réglage ANT/Câble<br />
Entrée ANT Câble<br />
Program. auto<br />
Program. manuelle<br />
Fréquencemètre<br />
suivant<br />
sélection<br />
Utilisez cette procédure pour changer le réglage d<strong>es</strong> canaux<br />
captés ou pour changer l’affichage de canal.<br />
Utilisez-la aussi pour ajouter ou omettre manuellement d<strong>es</strong><br />
canaux dans la liste de canaux.<br />
Il <strong>es</strong>t possible de sélectionner un mode de syntonisation<br />
d<strong>es</strong> canaux (Numérique seulement/Analogique<br />
seulement) en “Mode balayage de canal” (p. 29).<br />
Sélectionnez “Modifier”<br />
Program. manuelle<br />
Modifier Appliquer Annuler<br />
Canal Sigle Favoris Ajouter<br />
... ...<br />
Oui<br />
2<br />
... Oui<br />
3 ...<br />
... Oui<br />
4 ...<br />
... Oui<br />
5 ...<br />
sélection<br />
suivant<br />
Sélectionnez la rubrique à modifier<br />
Program. manuelle<br />
Modifier Appliquer Annuler<br />
Canal Sigle Favoris Ajouter<br />
... ...<br />
Oui<br />
2<br />
... Oui<br />
3 ...<br />
... Oui<br />
4 ...<br />
... Oui<br />
5 ...<br />
...<br />
Oui<br />
Favoris<br />
...<br />
Oui<br />
6 ...<br />
... 7<br />
... Oui<br />
8 ...<br />
... Oui<br />
9 ...<br />
sélection<br />
Sigle<br />
OK<br />
RETURN<br />
R Page préc. G Page suiv. B Y<br />
Page<br />
suivante<br />
Page précédente<br />
Ajouter• Sigle:<br />
Modifie l’indicatif du canal.<br />
Annulation de la modification<br />
Program. manuelle<br />
Modifier Appliquer Annuler<br />
Canal Sigle Favoris Ajouter<br />
... ...<br />
Oui<br />
2<br />
... Oui<br />
3 ...<br />
... Oui<br />
4 ...<br />
... Oui<br />
5 ...<br />
Oui<br />
6<br />
sélectionnez<br />
l’élément à éditer<br />
(Sigle/Favoris/<br />
Ajouter)<br />
suivant<br />
• Favoris:<br />
Inscrit le canal sur la liste d<strong>es</strong><br />
canaux préférés.<br />
• Ajouter:<br />
Ajoute ou omet d<strong>es</strong> canaux.<br />
sélection<br />
suivant<br />
Numérique seulement<br />
sélection<br />
La programmation s’effectue automatiquement.<br />
Après le balayage, sélectionnez “Appliquer”.<br />
(voir ci-d<strong>es</strong>sous ).<br />
Tous l<strong>es</strong> canaux précédemment en mémoire sont effacés.<br />
Effectuez l<strong>es</strong> modifications<br />
Sigle<br />
Modification de sigle<br />
Canal<br />
80-101<br />
Sigle<br />
---<br />
sélection<br />
OK<br />
RETURN<br />
R G B Y<br />
ABC → abc<br />
Supprimer<br />
sélection<br />
modification ou<br />
réglage/<br />
suivant<br />
Sigle<br />
Sélectionnez ou renommez l’indicatif du canal.<br />
(maximum de 7 caractèr<strong>es</strong>)<br />
Favoris<br />
Réglage favoris 1/3<br />
1 26-1<br />
2<br />
3<br />
sélection<br />
suivant<br />
Réglage favoris Sélectionnez le numéro.<br />
Ajouter<br />
Appuyez sur OK pour sélectionner “Oui” (ajouter) ou “Non” (omettre)<br />
Déplacez le curseur sur le numéro de canal<br />
Program. manuelle<br />
Modifier Appliquer Annuler<br />
Canal Sigle Favoris Ajouter<br />
... ...<br />
Oui<br />
2<br />
... Oui<br />
3 ...<br />
Oui<br />
4<br />
manuelle<br />
Sélectionnez “Appliquer”<br />
Appliquer Annuler<br />
Sigle Favoris Ajouter<br />
... ...<br />
Oui<br />
Vérifiez la puissance du signal si l’image numérique <strong>es</strong>t brouillée ou figée.<br />
Fréquencemètre<br />
Canal<br />
Puissance du signal<br />
1-1<br />
Actuel 30%<br />
Niveau maximal 45%<br />
ou<br />
Puissance du signal<br />
sélection<br />
appuyez sur OK<br />
pour syntoniser le<br />
canal<br />
sélectionnez<br />
“Appliquer”<br />
L<strong>es</strong> modifications seront perdu<strong>es</strong>. Continuer?<br />
Oui Non ok<br />
(retour à “Réglage<br />
ANT/Câble”)<br />
sélectionnez “Oui”<br />
sélectionnez<br />
le canal<br />
ok<br />
Si le signal <strong>es</strong>t faible, vérifiez l’antenne. Si aucun<br />
problème n’<strong>es</strong>t détecté, communiquez avec votre<br />
détaillant <strong>Panasonic</strong>.<br />
Remarqu<strong>es</strong><br />
N’<strong>es</strong>t pas disponible si “Câble” <strong>es</strong>t sélectionné<br />
dans “Entrée ANT” (voir ci-d<strong>es</strong>sus).<br />
Ne s’applique qu’aux canaux numériqu<strong>es</strong>.<br />
Si le blocage (p. 36) <strong>es</strong>t activé et que le réglage “Réglage ANT/Câble” <strong>es</strong>t sélectionné, le m<strong>es</strong>sage “Entrer mot de passe.” s’affiche.<br />
ok<br />
Programmation et édition d<strong>es</strong> canaux<br />
Fonctions avancé<strong>es</strong><br />
39
Sous-titr<strong>es</strong><br />
Affichez le menu<br />
■ Appuyez pour<br />
quitter le menu<br />
d’écran<br />
Sélectionnez “Sous-titr<strong>es</strong>”<br />
Menu<br />
suivant<br />
VIERA Link<br />
Image<br />
sélection<br />
Audio<br />
Minuterie<br />
Blocage<br />
Carte SD<br />
Sous-titr<strong>es</strong><br />
Réglage<br />
Sous-titr<strong>es</strong><br />
Afficher l<strong>es</strong><br />
sous-titr<strong>es</strong><br />
Ce téléviseur comprend un décodeur intégré capable de faire apparaître une contrepartie visuelle de la partie audio.<br />
Le programme regardé doit intégrer d<strong>es</strong> sous-titr<strong>es</strong> codés (CC) afin que le téléviseur puisse l<strong>es</strong> afficher (p. 45)<br />
■ Sélectionnez une rubrique et effectuez le réglage<br />
Sous-titr<strong>es</strong><br />
sélection<br />
Mode Sélectionnez “EF” (ou “HF” pour ne<br />
Rétablir défaut<br />
pas l’utiliser).<br />
Mode<br />
HF<br />
réglage<br />
Analog.<br />
CC1<br />
Analog. (Permet de choisir le service de<br />
Numéri.<br />
Primaire<br />
sous-titr<strong>es</strong> de l’émission analogique.)<br />
Réglage numérique<br />
L<strong>es</strong> réglag<strong>es</strong> dans “Analog.” ou “Numéri.”<br />
sont déterminés par le télédiffuseur.<br />
CC1-4:<br />
T1-4:<br />
Informations concernant l<strong>es</strong> imag<strong>es</strong><br />
(Affichage au bas de l’écran)<br />
Informations textuell<strong>es</strong><br />
(Affichage plein écran)<br />
Numéri. (Le menu d<strong>es</strong> sous-titr<strong>es</strong> codés<br />
numériqu<strong>es</strong> vous permet de<br />
configurer la façon d’afficher l<strong>es</strong><br />
sous-titr<strong>es</strong> codés numériqu<strong>es</strong>.)<br />
Choisissez le réglage.<br />
“Primaire”, “Second.”, “Service 3”,<br />
“Service 4”, “Service 5”, “Service 6”<br />
■ Réglag<strong>es</strong> plus poussés de l’affichage pour l<strong>es</strong> émissions numériqu<strong>es</strong><br />
Sélectionnez “Réglage numérique”, puis appuyez sur OK<br />
Sélectionnez la rubrique, puis effectuez le réglage<br />
Réglage numérique<br />
sélection Format: Taille d<strong>es</strong> caractèr<strong>es</strong><br />
Format Automatique<br />
Police: Police de caractèr<strong>es</strong><br />
Police<br />
Automatique<br />
réglage<br />
Style: Style (En relief, Effet gravé, etc.)<br />
Style<br />
Automatique<br />
Avant-plan Automatique<br />
Opacité avant Automatique<br />
Arrière-plan Automatique<br />
Opacité arrière Automatique<br />
Contour Automatique<br />
■ Réinitialisation d<strong>es</strong> réglag<strong>es</strong><br />
Sélectionnez “Rétablir défaut”, puis appuyez sur OK<br />
Avant-plan: Couleur<br />
Opacité avant: Densité<br />
Arrière-plan: Couleur de la zone de texte<br />
Opacité arrière: Densité de la zone de texte<br />
Contour: Couleur du pourtour d<strong>es</strong><br />
caractèr<strong>es</strong><br />
(Sélectionnez parmi l<strong>es</strong> options à l’écran.)<br />
40
Ident. pris<strong>es</strong><br />
Affichez le menu<br />
Sélectionnez “Réglage”<br />
Menu<br />
suivant<br />
VIERA Link<br />
Image<br />
Audio<br />
Minuterie<br />
Blocage<br />
Carte SD<br />
Sous-titr<strong>es</strong><br />
Réglage<br />
sélection<br />
Sélectionnez “Appareils raccordés”<br />
Réglage 1/2<br />
suivant<br />
Mode balayage de canal<br />
Tous<br />
Langue<br />
sélection<br />
Horloge<br />
Réglage ANT/Câble<br />
Appareils raccordés<br />
Anti-rémanence image<br />
Ident. pris<strong>es</strong><br />
Sous-titr<strong>es</strong><br />
■ Appuyez pour<br />
quitter le menu<br />
d’écran<br />
Ident. pris<strong>es</strong><br />
Afficher<br />
l’identification<br />
d<strong>es</strong> appareils<br />
auxiliair<strong>es</strong><br />
Il <strong>es</strong>t possible de faire afficher l’identification d<strong>es</strong> appareils connectés aux pris<strong>es</strong><br />
d’entrée du téléviseur. (En sélectionnant le mode d’entrée de la page 24 )<br />
■ Sélectionnez la prise et l’identification de l’appareil auxiliaire<br />
Ident. pris<strong>es</strong><br />
Composant 1<br />
Composant 2<br />
HDMI 1<br />
HDMI 2<br />
Vidéo 1<br />
Vidéo 2<br />
Identification<br />
Vidéo 1<br />
MAGNÉTO<br />
[exemple]<br />
Sélectionnez “Ident. pris<strong>es</strong>”<br />
Appareils raccordés<br />
Ident. pris<strong>es</strong><br />
JEU<br />
Prise<br />
ou<br />
sélection<br />
réglage<br />
Ident. pris<strong>es</strong><br />
Composant 1<br />
sélection<br />
suivant<br />
sélection<br />
OK<br />
RETURN<br />
G A A<br />
R G B Y<br />
ABC → abc<br />
Supprimer<br />
Fait passer le mode d’entrée d’alphabétique à numérique<br />
Pris<strong>es</strong>: Composant 1-2/HDMI 1-2/Vidéo1-2<br />
Identification: [ESPACE] OMETTRE/MAGNÉTO/DVD/CÂBLE/<br />
SATELLITE/DVR/JEU/AUX/RÉCEPTEUR/ORDINATEUR/<br />
Blu-ray/AP.PHOTO/ENR. DVD/CINÉMA M./MONITEUR/<br />
CENTRE M/PASSER.M/AUTRE<br />
* Si “OMETTRE” <strong>es</strong>t sélectionné, le signal de cette prise <strong>es</strong>t sauté<br />
lors de la commutation au moyen de la touche INPUT.<br />
Chaque identification sélectionnée apparaît à l’écran “Sélection<br />
d’entrée” (p. 24).<br />
Fonctions avancé<strong>es</strong><br />
41
Minuterie<br />
Il <strong>es</strong>t possible de régler la minuterie de manière à ce que le téléviseur se mette en ou hors marche à l’heure désirée.<br />
L’horloge doit avoir été préalablement réglée avant de pouvoir réaliser l<strong>es</strong> réglag<strong>es</strong> de la minuterie en/hors marche. (p. 17)<br />
La minuterie-sommeil et la minuterie de mise en/hors marche différée ne peuvent fonctionner si la fonction de mise<br />
en marche automatique (p. 28) <strong>es</strong>t activée.<br />
Affichez le menu<br />
Sélectionnez “Minuterie”<br />
Menu<br />
suivant<br />
42<br />
■ Appuyez pour<br />
quitter le menu<br />
d’écran<br />
■ Appuyez pour<br />
revenir à l’écran<br />
précédent<br />
Remarque<br />
Le téléviseur se met<br />
automatiquement<br />
hors tension 90<br />
minut<strong>es</strong> après avoir<br />
été mis sous tension<br />
par la minuterie.<br />
Cela ne fonctionne<br />
pas si une heure de<br />
mise hors tension<br />
<strong>es</strong>t choisie ou si une<br />
touche <strong>es</strong>t pr<strong>es</strong>sée.<br />
VIERA Link<br />
Image<br />
Audio<br />
Minuterie<br />
Blocage<br />
Carte SD<br />
Sous-titr<strong>es</strong><br />
sélection<br />
Sélectionnez la minuterie à régler<br />
Minuterie<br />
Sommeil<br />
Minuterie 1<br />
Minuterie 2<br />
Minuterie 3<br />
Minuterie 4<br />
Minuterie 5<br />
sélection<br />
suivant<br />
Sommeil Mise hors marche automatique<br />
Minuterie 1 Mise en/hors marche automatique<br />
(5 minuteri<strong>es</strong> peuvent être réglé<strong>es</strong>.)<br />
Minuterie 5<br />
~<br />
Réglez la minuterie<br />
■ Pour régler “Sommeil” (Délai de mise hors marche)<br />
Appuyez pour régler l’appareil de sorte qu’il s’éteigne lui-même après une durée présélectionnée.<br />
0/30/60/90 (minut<strong>es</strong>)<br />
Sommeil<br />
Sommeil (minut<strong>es</strong>)<br />
60<br />
sélection<br />
■ Pour régler “Minuterie 1-5” (Minuterie de mise en/hors marche différée)<br />
Sélectionnez la rubrique, puis effectuez le réglage.<br />
sélection<br />
Minuterie 1<br />
Réglage minuterie<br />
Entré<strong>es</strong><br />
Canal<br />
Jour<br />
Heure début<br />
Heure fin<br />
EF<br />
Télé<br />
10-3<br />
7/6[VEN]<br />
1:15 AM<br />
12:45 AM<br />
ou<br />
réglage<br />
Effacer<br />
Réglage minuterie Réglage de la minuterie (EF/HF)<br />
Entré<strong>es</strong> Sélectionner l<strong>es</strong> sourc<strong>es</strong> du signal<br />
Canal Sélectionnez le canal<br />
Jour Sélectionnez le jour<br />
DIM, LUN, MAR, MER, JEU, VEN, SAM<br />
(La date la plus rapprochée s’affiche)<br />
LUN-VEN, SAM-DIM, QUOT, Tous DIM, Tous LUN,<br />
Tous MAR, Tous MER, Tous JEU, Tous VEN, Tous SAM<br />
Heure début<br />
Heure fin<br />
AM/PM<br />
L’heure de mise en marche<br />
L’heure de mise hors marche
Connexions AV recommandé<strong>es</strong><br />
C<strong>es</strong> schémas montrent nos recommandations quant à la façon de raccorder le téléviseur à divers appareils.<br />
Pour l<strong>es</strong> autr<strong>es</strong> raccordements, reportez-vous aux instructions de chaque appareil et aux spécifications.<br />
Pour obtenir de l’aide supplémentaire, visitez notre site Web à l’adr<strong>es</strong>se www.panasonic.ca<br />
Panneau avant du téléviseur<br />
Panneau arrière du téléviseur<br />
120 V c.a., 60 Hz<br />
Câble<br />
■ Pour visionner<br />
d<strong>es</strong> imag<strong>es</strong> sur un<br />
caméscope<br />
Caméscope<br />
Magnétoscope<br />
Lecteur DVD<br />
ou<br />
Câblosélecteur<br />
Câble audio<br />
numérique<br />
optique<br />
OPTICAL<br />
IN<br />
ou<br />
ou<br />
■ Enregistreur DVD/<br />
magnétoscope<br />
Amplificateur<br />
VI<strong>DE</strong>O<br />
AUDIO<br />
Y<br />
PB<br />
PR<br />
L<br />
HDMI 1 HDMI 2<br />
Y<br />
S VI<strong>DE</strong>O<br />
PB<br />
PR<br />
L L<br />
R<br />
R R<br />
COMPONENT VI<strong>DE</strong>O IN 1<br />
1 IN 2<br />
B<br />
Câble de<br />
conversion<br />
HDMI-DVI +<br />
Câble audio*<br />
Cordon d’alimentation<br />
(Ne branchez le cordon<br />
qu’après avoir fait tous l<strong>es</strong><br />
autr<strong>es</strong> raccordements.)<br />
ou<br />
ou<br />
Raccordez<br />
avec<br />
A ou B<br />
A<br />
Câble<br />
HDMI<br />
Connexions AV recommandé<strong>es</strong><br />
Minuterie<br />
Fonctions avancé<strong>es</strong><br />
■ Écoute sur d<strong>es</strong><br />
enceint<strong>es</strong> extern<strong>es</strong><br />
■ Pour visionner un DVD ■ Pour visionner une image<br />
Lecteur DVD/Décodeur vidéo numérique<br />
de télévision numérique Lecteur DVD ou décodeur<br />
(appareils HDMI compatibl<strong>es</strong><br />
seulement)<br />
* Reportez-vous aux pag<strong>es</strong> 26-27 pour le réglage au moyen d’un câble audio analogique avec un câble de<br />
conversion DVI-HDMI.<br />
43
44<br />
Liste d<strong>es</strong> classifications aux fins de blocage<br />
La puce antiviolence permet de bloquer la réception de canaux ou d’émissions en fonction de leur<br />
classification établie par l’industrie du divertissement. (p. 37)<br />
■ Tableau de classement FILMS É.-U.<br />
NR<br />
NE CONTIENT PAS <strong>DE</strong> CLASSEMENT (NON CLASSÉ) ET PROGRAMMES NA (NON APPLICABLES).<br />
Films qui n’ont pas été classés ou dont le classement n’<strong>es</strong>t pas applicable.<br />
G PUBLIC GÉNÉRAL. Autorisé à tous l<strong>es</strong> âg<strong>es</strong>.<br />
PG CONTRÔLE PARENTAL CONSEILLÉ. Certains programm<strong>es</strong> ne conviennent pas aux enfants.<br />
PG-13 MISE EN GAR<strong>DE</strong> IMPORTANTE <strong>DE</strong>S PARENTS. Certain<strong>es</strong> scèn<strong>es</strong> ne conviennent pas aux enfants de moins de 13 ans.<br />
R CONTRÔLÉ. L<strong>es</strong> enfants de moins de 17 ans doivent être accompagnés par un parent ou un gardien adulte.<br />
NC-17 INTERDIT AUX MOINS <strong>DE</strong> 17 ANS.<br />
X POUR ADULTE UNIQUEMENT.<br />
■ Tableau de classement ÉMIS.TÉLÉ É.-U.<br />
Groupe basé Classement<br />
sur l’âge basé sur l’âge<br />
Sélections possibl<strong>es</strong><br />
D<strong>es</strong>cription<br />
Sans visa<br />
(aucune TV-NR<br />
Non bloqué<br />
classification) • Bloqué<br />
Non classé.<br />
TV-Y<br />
Non bloqué<br />
Tous l<strong>es</strong> enfants. Le thème et le contenu de ce programme sont spécialement<br />
Bloqué<br />
conçus pour un public jeune, y compris l<strong>es</strong> enfants de 2-6 ans.<br />
Jeun<strong>es</strong>se<br />
Bloqué FV<br />
D<strong>es</strong>tiné aux enfants plus âgés. Le thème et le contenu de ce programme<br />
TV-Y7<br />
Non bloqué<br />
peuvent contenir d<strong>es</strong> éléments de violence légère ou comique, ou<br />
Bloqué<br />
peuvent effrayer l<strong>es</strong> enfants de moins de 7 ans.<br />
TV-G<br />
Non bloqué<br />
Public général. Programme contenant peu ou pas du tout de violence, pas<br />
Bloqué<br />
de mots grossiers et peu ou aucun dialogue ou situation d’ordre sexuel.<br />
D,L,S,V (Tout)<br />
Contrôle parental conseillé. Ce programme peut contenir de façon rare<br />
TV-PG • N’importe quelle d<strong>es</strong> mots grossiers, d<strong>es</strong> scèn<strong>es</strong> de violence limitée, certains dialogu<strong>es</strong> et<br />
combinaison de D, L, S, V situations sexuell<strong>es</strong> sugg<strong>es</strong>tiv<strong>es</strong>.<br />
Surveillance<br />
D, L,S,V (Tout) Mise en garde importante d<strong>es</strong> parents. Ce programme peut contenir d<strong>es</strong><br />
TV-14 • N’importe quelle thèm<strong>es</strong> sophistiqués, d<strong>es</strong> scèn<strong>es</strong> sexuell<strong>es</strong>, un langage grossier et d<strong>es</strong><br />
combinaison de D, L, S, V scèn<strong>es</strong> d’intense violence.<br />
L,S, V (Tout)<br />
TV-MA •<br />
N’importe quelle<br />
combinaison de L, S, V<br />
Public adulte uniquement. Ce programme peut contenir d<strong>es</strong> thèm<strong>es</strong><br />
pour adulte, un langage blasphématoire, de la violence et d<strong>es</strong> scèn<strong>es</strong><br />
sexuell<strong>es</strong> explicit<strong>es</strong>.<br />
FV: VIOLENCE FANTASTIQUE/<strong>DE</strong>SSIN ANIMÉ V: VIOLENCE S: SEXE L: LANGAGE AGRESSIF D: DIALOGUE À CONTENU SEXUEL<br />
■ Tableau de classement CANADA<br />
E<br />
Exempt - L<strong>es</strong> programm<strong>es</strong> exemptés comprennent: informations, programm<strong>es</strong> sportifs, documentair<strong>es</strong>, autr<strong>es</strong><br />
programm<strong>es</strong> d’information, causeri<strong>es</strong>, vidéo musical<strong>es</strong> et programm<strong>es</strong> de variété.<br />
C Programm<strong>es</strong> pour l<strong>es</strong> enfants de moins de 8 ans. Pas de langage offensif, de nudité, ni de contenu sexuel.<br />
C8+ Programme généralement considéré acceptable pour l<strong>es</strong> enfants de plus de 8 ans. Pas de blasphème, de nudité ni de contenu sexuel.<br />
G Programm<strong>es</strong> généraux, pour tout public.<br />
PG Contrôle parental conseillé. Certains programm<strong>es</strong> ne conviennent pas aux enfants.<br />
14+<br />
Programm<strong>es</strong> contenant d<strong>es</strong> thèm<strong>es</strong> ou un contenu qui peut ne pas convenir aux enfants de moins de 14 ans. L<strong>es</strong><br />
parents sont fortement mis en garde d’interdire leur accès aux jeun<strong>es</strong> adol<strong>es</strong>cents et aux enfants plus jeun<strong>es</strong>.<br />
18+ Programme réservé aux adult<strong>es</strong>. Contient d<strong>es</strong> scèn<strong>es</strong> constant<strong>es</strong> de violence ou d<strong>es</strong> scèn<strong>es</strong> d’extrême violence.<br />
■ Tableau de classement CANADA-QUÉBEC<br />
E Exempt - L<strong>es</strong> programm<strong>es</strong> exemptés.<br />
G<br />
Général - Programm<strong>es</strong> pour tout public et tous l<strong>es</strong> âg<strong>es</strong>. Ne contient pas de violence ou le contenu violent <strong>es</strong>t<br />
faible ou représenté de façon appropriée.<br />
8 ans+<br />
8+ Général - N’<strong>es</strong>t pas recommandé pour l<strong>es</strong> jeun<strong>es</strong> enfants. Programme d<strong>es</strong>tiné à un public jeune mais<br />
contenant occasionnellement d<strong>es</strong> scèn<strong>es</strong> de violence légère. Supervision par un adulte recommandée.<br />
13 ans+<br />
Programm<strong>es</strong> qui peuvent ne pas convenir aux enfants de moins de 13 ans - Contient quelqu<strong>es</strong> scèn<strong>es</strong> de violence<br />
ou une ou plusieurs scèn<strong>es</strong> violent<strong>es</strong> pouvant l<strong>es</strong> affecter. Supervision par un adulte fortement conseillée.<br />
16 ans+<br />
Programme pouvant ne pas convenir aux enfants de moins de 16 ans - Contient d<strong>es</strong> scèn<strong>es</strong> fréquent<strong>es</strong> de<br />
violence ou de violence intense.<br />
18 ans+ Programme réservé aux adult<strong>es</strong>. Contient d<strong>es</strong> scèn<strong>es</strong> constant<strong>es</strong> de violence ou d<strong>es</strong> scèn<strong>es</strong> d’extrême violence.<br />
Mis<strong>es</strong> en garde<br />
La puce antiviolence utilisée dans ce téléviseur <strong>es</strong>t capable de bloquer l<strong>es</strong> programm<strong>es</strong> sans “visa” (non classés, auxquels<br />
aucun classement ne s’applique et avec aucun classement) tels que définis par la section 15.120(e)(2) du Règlement FCC. Si<br />
l’option de blocage d<strong>es</strong> programm<strong>es</strong> sans “visa” <strong>es</strong>t choisie, “d<strong>es</strong> résultats inattendus et éventuellement confus peuvent être<br />
obtenus, il se peut même que vous ne puissiez pas recevoir l<strong>es</strong> bulletins d’urgence ni l<strong>es</strong> typ<strong>es</strong> de programm<strong>es</strong> suivants:”<br />
• Bulletins d’urgence (tels que d<strong>es</strong> m<strong>es</strong>sag<strong>es</strong> du réseau de radiodiffusion d’urgence, d<strong>es</strong> avertissements météorologiqu<strong>es</strong>, etc.)<br />
• Programme d’origine locale • Informations • Programm<strong>es</strong> politiqu<strong>es</strong> • Annonc<strong>es</strong> d<strong>es</strong> servic<strong>es</strong> publics<br />
• Programm<strong>es</strong> religieux • Programm<strong>es</strong> sportifs • Programm<strong>es</strong> météorologiqu<strong>es</strong>
Informations techniqu<strong>es</strong><br />
Sous-titr<strong>es</strong> (CC)<br />
Pour afficher l<strong>es</strong> sous-titr<strong>es</strong> d’une émission numérique, réglez le format de l’image sur PLEIN. (D<strong>es</strong> caractèr<strong>es</strong><br />
seront coupés si le format <strong>es</strong>t réglé sur H-LARGE, CADRAGE, ZOOM ou 4:3)<br />
L<strong>es</strong> sous-titr<strong>es</strong> peuvent être affichés à l’écran si l<strong>es</strong> sous-titr<strong>es</strong> sur le récepteur (soit un décodeur ou un récepteur de<br />
télévision par satellite) sont en service par l’entremise du raccordement à la prise composante ou HDMI du téléviseur.<br />
Si l<strong>es</strong> sous-titr<strong>es</strong> sont en service à la fois sur le récepteur et le téléviseur et que le signal <strong>es</strong>t de 480i (sauf avec<br />
une connexion HDMI), l<strong>es</strong> sous-titr<strong>es</strong> de chaque appareil se chevaucheront.<br />
Si une émission numérique <strong>es</strong>t acheminée en format analogique, l<strong>es</strong> donné<strong>es</strong> relativ<strong>es</strong> aux sous-titr<strong>es</strong> seront<br />
également en format analogique.<br />
Si un enregistreur ou un écran de sortie <strong>es</strong>t raccordé au téléviseur, l<strong>es</strong> sous-titr<strong>es</strong> doivent être mis en service soit<br />
sur l’enregistreur, soit sur l’écran de sortie.<br />
Format de l’image (FORMAT)<br />
Appuyez sur la touche FORMAT pour défiler parmi l<strong>es</strong> différents formats d’image. Cette fonction vous permet de<br />
choisir le format de l’image selon le signal reçu et vos préférenc<strong>es</strong>. (p. 20)<br />
(par exemple, dans le cas d’une image 4:3)<br />
PLEIN CADRAGE<br />
PLEIN<br />
CADRAGE<br />
Étire horizontalement l’image 4:3 de manière à l’étendre sur l<strong>es</strong> Étire l’image 4:3 horizontalement et verticalement de manière à<br />
deux côtés de l’écran.<br />
remplir l’écran.<br />
(Recommandé pour une image anamorphique.)<br />
(Recommandé pour l’image de télévision ordinaire.)<br />
H-LARGE 4:3<br />
H-LARGE<br />
Étire horizontalement l’image 4:3 de manière à l’étendre sur l<strong>es</strong><br />
deux côtés de l’écran. L<strong>es</strong> côtés de l’image sont rognés.<br />
ZOOM<br />
ZOOM<br />
Agrandit l’image 4:3 de manière qu’elle occupe tout l’écran.<br />
(Recommandé pour une image au format “boîte aux lettr<strong>es</strong>”.)<br />
Barre latérale d’affichage<br />
Ordinaire<br />
(Il <strong>es</strong>t à noter que l’affichage prolongé de la barre latérale peut<br />
provoquer un phénomène de rémanence.)<br />
Remarqu<strong>es</strong><br />
480i (4:3), 480i (16:9), 480p (4:3), 480p (16:9):<br />
PLEIN, CADRAGE, 4:3 ou ZOOM<br />
1080p/1080i/720p:<br />
PLEIN, H-LARGE, CADRAGE, 4:3 ou ZOOM<br />
Réglag<strong>es</strong> zoom<br />
La position verticale et la taille de l’image peuvent être ajusté<strong>es</strong> dans “ZOOM”.<br />
Dans le menu Image, sélectionnez “Réglag<strong>es</strong> zoom”. (p. 26-27)<br />
Position-V: Réglage de la position verticale.<br />
Format-V: Réglage de la taille verticale.<br />
Informations techniqu<strong>es</strong><br />
Liste d<strong>es</strong> classifications aux fins de blocage<br />
FAQ, etc.<br />
Pour réinitialiser le format d’image<br />
(OK)<br />
45
Informations techniqu<strong>es</strong><br />
Format d<strong>es</strong> donné<strong>es</strong> sur carte mémoire SD<br />
Photo:<br />
Imag<strong>es</strong> fix<strong>es</strong> enregistré<strong>es</strong> sur appareils photo numériqu<strong>es</strong> compatibl<strong>es</strong> avec l<strong>es</strong><br />
fichiers JPEG conform<strong>es</strong> aux norm<strong>es</strong> DCF* et EXIF**<br />
Format d<strong>es</strong> donné<strong>es</strong>: Ligne de base JPEG, (sous-échantillonnage: 4:4:4, 4:2:2 ou 4:2:0)<br />
Nombre maximum de fichiers: 9 999<br />
Résolution: 160 x 120 jusqu’à 10 000 000<br />
* DCF (règle pour le système de fichiers photos): norme de la Japan Electronics and Information Technology Industri<strong>es</strong> Association<br />
** EXIF (Exchangeable Image File Format)<br />
Mis<strong>es</strong> en garde<br />
Une image JPEG modifiée sur ordinateur peut ne pas s’afficher.<br />
L’affichage d’un fichier endommagé pourrait se faire à une résolution moindre.<br />
Remarqu<strong>es</strong><br />
Structure d<strong>es</strong> fichiers affichés sur un PC<br />
DCIM<br />
100_P ANA<br />
P1000001.JPG<br />
P1000002.JPG<br />
P1000003.JPG<br />
P1000004.JPG<br />
Créé automatiquement<br />
Numéro de dossier à 3 chiffr<strong>es</strong> + 5 caractèr<strong>es</strong> arbitrair<strong>es</strong><br />
4 caractèr<strong>es</strong> arbitrair<strong>es</strong> + numéro de fichier à 4 chiffr<strong>es</strong><br />
Caractèr<strong>es</strong> utilisabl<strong>es</strong>: 1 octet “a à z”, “A à Z”, “0 à 9,” et “_”<br />
L<strong>es</strong> noms de dossiers et de fichiers peuvent varier selon l’appareil photo utilisé.<br />
Pour l<strong>es</strong> renseignements l<strong>es</strong> plus récents sur l<strong>es</strong> cart<strong>es</strong> mémoire SD compatibl<strong>es</strong>, consultez le site Web suivant:<br />
http://panasonic.jp/support/global/cs (en anglais seulement).<br />
M<strong>es</strong>sage<br />
Précautions à prendre avec l<strong>es</strong> cart<strong>es</strong> SD:<br />
Ne retirez pas la carte pendant que l’appareil accède aux donné<strong>es</strong> (cela pourrait endommager la carte ou l’appareil).<br />
Ne touchez pas l<strong>es</strong> born<strong>es</strong> situé<strong>es</strong> au dos de la carte mémoire SD.<br />
Protégez la carte contre toute pr<strong>es</strong>sion ou impact.<br />
Introduisez la carte dans le bon sens (sinon, la carte pourrait être endommagée).<br />
La présence d’interférence électrique, d’électricité statique ou une opération impropre pourrait endommager l<strong>es</strong> donné<strong>es</strong> ou la carte.<br />
Fait<strong>es</strong> régulièrement une copie de sauvegarde d<strong>es</strong> donné<strong>es</strong> en prévision de l’éventualité où d<strong>es</strong> donné<strong>es</strong> seraient<br />
endommagé<strong>es</strong> ou que le fonctionnement de l’appareil deviendrait erratique.<br />
(<strong>Panasonic</strong> n’<strong>es</strong>t pas r<strong>es</strong>ponsable de toute détérioration ou tout endommagement d<strong>es</strong> donné<strong>es</strong>.)<br />
M<strong>es</strong>sag<strong>es</strong> d’avertissement concernant la carte SD<br />
Fente pour carte SD vide. Absence de carte.<br />
Signification<br />
Aucun<strong>es</strong> imag<strong>es</strong> fix<strong>es</strong> La carte ne contient aucune donnée ou ce type de donné<strong>es</strong> ne peut être pris en charge.<br />
Lecture imposs.<br />
Le fichier <strong>es</strong>t endommagé ou illisible.<br />
L’appareil ne prend pas en charge le format.<br />
46
(Suite)<br />
VIERA Link TM “HDAVI Control TM ”<br />
L<strong>es</strong> connexions HDMI à certains appareils <strong>Panasonic</strong> permettent un interfaçage automatique.(p. 30)<br />
Cette fonction pourrait ne pas fonctionner normalement selon l’état de l’équipement.<br />
Une fois cette fonction activée, même si le téléviseur <strong>es</strong>t en mode d’attente, l’appareil peut être opéré à l’aide de d’autr<strong>es</strong> télécommand<strong>es</strong>.<br />
Il <strong>es</strong>t possible que l’image et le son ne soient pas reproduits pendant quelqu<strong>es</strong> second<strong>es</strong> après le lancement de la lecture.<br />
Il <strong>es</strong>t possible que l’image et le son ne soient pas reproduits pendant quelqu<strong>es</strong> second<strong>es</strong> à la suite d’un changement du mode d’entrée.<br />
Le niveau de volume <strong>es</strong>t affiché lorsque le volume <strong>es</strong>t ajusté sur l’appareil externe.<br />
Si deux appareils d’un même type sont raccordés (par exemple un enregistreur DIGA à HDMI 1 et un autre enregistreur DIGA à<br />
HDMI 2), la fonction VIERA Link TM ne fonctionnera que pour l’appareil raccordé à la prise de numéro inférieur.<br />
Si un appareil ayant la fonction “HDAVI Control 2 ou ultérieur” <strong>es</strong>t raccordé au téléviseur au moyen d’un câble HDMI, le son<br />
provenant de la prise DIGITAL AUDIO OUT peut être acheminé comme rendu ambiophonique multicanal.<br />
“HDAVI Control 4” <strong>es</strong>t la nouvelle norme (en date de décembre 2008) pour l<strong>es</strong> appareils compatibl<strong>es</strong> avec HDAVI Control.<br />
Cette norme <strong>es</strong>t compatible avec l<strong>es</strong> appareils HDAVI classiqu<strong>es</strong>.<br />
Connexion HDMI<br />
L’interface multimédia haute définition (HDMI) vous permet de tirer profit d’imag<strong>es</strong> numériqu<strong>es</strong> haute définition et d’un son de<br />
haute qualité en connectant le téléviseur à d<strong>es</strong> appareils extern<strong>es</strong> compatibl<strong>es</strong>.<br />
Appareil HDMI (*1) doté d’une prise de sortie HDMI ou DVI, tel un décodeur de télévision numérique ou un lecteur DVD, peut être<br />
raccordé au connecteur HDMI à l’aide d’un câble HDMI.<br />
HDMI <strong>es</strong>t la toute première interface AV numérique intégrale grand public conforme à une norme sans compr<strong>es</strong>sion.<br />
Si l’appareil externe ne possède qu’une sortie DVI, connectez-le à la prise HDMI via un câble adaptateur DVI-HDMI (*2).<br />
Lorsqu’un câble adaptateur DVI-HDMI <strong>es</strong>t utilisé, connectez le câble à la prise d’entrée audio.<br />
L<strong>es</strong> réglag<strong>es</strong> audio peuvent être faits dans l’écran du menu “Entrée HDMI 1” ou “Entrée HDMI 2”. (p. 26)<br />
Fréquenc<strong>es</strong> d’échantillonnage du signal audio pouvant être pris<strong>es</strong> en charge (L.PCM): 48 kHz, 44,1 kHz, 32 kHz<br />
(*1): Le logo HDMI <strong>es</strong>t apposé sur tout appareil compatible avec HDMI.<br />
(*2): Disponible auprès d’un détaillant <strong>Panasonic</strong>.<br />
Mis<strong>es</strong> en garde<br />
Le fonctionnement adéquat avec un PC ne peut être assuré.<br />
Tout signal <strong>es</strong>t reformaté avant d’être affiché à l’écran.<br />
Si l’appareil externe possède une fonction de réglage du format d’image, sélectionnez le format “16:9”.<br />
C<strong>es</strong> connecteurs HDMI sont de “type A”.<br />
C<strong>es</strong> connecteurs HDMI sont compatibl<strong>es</strong> avec la protection de contenu numérique à large bande passante (HDCP – High-Bandwidth Digital Content Protection).<br />
Un appareil ne possédant pas de prise de sortie numérique peut être connecté à la prise d’entrée “COMPONENT”, “S VI<strong>DE</strong>O”<br />
ou “VI<strong>DE</strong>O” pour recevoir d<strong>es</strong> signaux analogiqu<strong>es</strong>.<br />
La prise d’entrée HDMI ne peut être utilisée qu’avec l<strong>es</strong> signaux vidéo aux formats suivants: 480i, 480p, 720p, 1080i, et 1080p.<br />
Il <strong>es</strong>t néc<strong>es</strong>saire que le réglage du signal de sortie de l’appareil numérique externe y corr<strong>es</strong>ponde.<br />
Pour de plus ampl<strong>es</strong> détails sur l<strong>es</strong> signaux pris en charge par HDMI, voir p. 48.<br />
Pris<strong>es</strong> de sortie DIGITAL AUDIO OUT<br />
Il <strong>es</strong>t possible de profiter d<strong>es</strong> atouts d’une chaîne cinéma maison en connectant un décodeur Dolby Digital (5.1 canaux) et un<br />
amplificateur multicanal aux pris<strong>es</strong> de sortie DIGITAL AUDIO OUT.<br />
Mis<strong>es</strong> en garde<br />
Selon le lecteur DVD utilisé et le type de logiciel DVD-Audio, la fonction de protection contre la copie peut se mettre en marche et<br />
désactiver la sortie optique.<br />
Quand un canal ATSC <strong>es</strong>t choisi, la sortie de la prise DIGITAL AUDIO OUT <strong>es</strong>t Dolby Digital. Quand un canal NTSC <strong>es</strong>t choisi, la<br />
sortie <strong>es</strong>t PCM.<br />
Informations techniqu<strong>es</strong><br />
Mode<br />
Éclatant: Accentue le contraste et la netteté de l’image pour un visionnement dans une pièce bien éclairée.<br />
Standard: Recommandé pour l<strong>es</strong> conditions de visionnement normal<strong>es</strong> avec un éclairage indirect de la pièce.<br />
Cinéma: Pour regarder un film dans une pièce sombre. Ce réglage offre une image douce, comme pour un film.<br />
Person. (Photo): Permet de personnaliser chaque item selon vos préférenc<strong>es</strong>.<br />
La photo <strong>es</strong>t affichée dans le menu JPEG.<br />
FAQ, etc.<br />
47
Informations techniqu<strong>es</strong> (Suite)<br />
Format d’image: 4:3<br />
Format 1 Format 2<br />
Format H<br />
La largeur de l’image sera réduite d<strong>es</strong> deux<br />
cotés pour diminuer le bruit.<br />
Format d’image: PLEIN/CADRAGE/(H-LARGE/ZOOM)<br />
Format 1 Format 2 La largeur de l’image sera agrandie d<strong>es</strong> deux<br />
cotés pour diminuer le bruit.<br />
Reportez-vous aux pag<strong>es</strong> 26-27 pour plus de détails<br />
Barre latérale 4:3<br />
N’affichez pas une image au format 4:3 pendant une période prolongée,<br />
car ceci peut produire d<strong>es</strong> imag<strong>es</strong> rémanent<strong>es</strong> sur l<strong>es</strong> band<strong>es</strong> latéral<strong>es</strong><br />
de l’affichage. Pour réduire le risque d’une telle image rémanente,<br />
modifiez la luminosité d<strong>es</strong> band<strong>es</strong> latéral<strong>es</strong>.<br />
Reportez-vous aux pag<strong>es</strong> 28-29 pour plus de détails.<br />
L<strong>es</strong> band<strong>es</strong> latéral<strong>es</strong> peuvent clignoter (noir/blanc en alternance) selon<br />
l’image. L’utilisation du mode Cinéma peut réduire ce clignotement (voir<br />
ci-d<strong>es</strong>sous).<br />
Band<strong>es</strong><br />
latéral<strong>es</strong><br />
Affichage<br />
4:3<br />
Imag<strong>es</strong><br />
rémanent<strong>es</strong><br />
Barre de défilement<br />
Barre de défilement: Pour prévenir une “image rémanente”, une barre de défilement blanche défile de<br />
gauche à droite sur un écran noir.<br />
Appuyez sur une touche autre que POWER pour revenir.<br />
L’écran précédent <strong>es</strong>t affiché si aucune touche n’<strong>es</strong>t utilisée pendant 15 minut<strong>es</strong>.<br />
Reportez-vous aux pag<strong>es</strong> 28-29 pour plus de détails.<br />
[Barre de défilement]<br />
Signaux d’entrée pouvant être affichés<br />
Le symbole*: identifie le signal d’entrée pour vidéo composante (Y, PB, PR) et HDMI.<br />
Fréquence<br />
horizontale (kHz)<br />
Fréquence<br />
verticale (Hz)<br />
Composant<strong>es</strong><br />
HDMI<br />
525 (480)/60i 15,73 59,94 * *<br />
525 (480)/60p 31,47 59,94 * *<br />
750 (720)/60p 45,00 59,94 * *<br />
1 125 (1 080)/60i 33,75 59,94 * *<br />
1 125 (1 080)/60p 67,43 59,94 *<br />
1 125 (1 080)/60p 67,50 60,00 *<br />
1 125 (1 080)/24p 26,97 23,98 *<br />
1 125 (1 080)/24p 27,00 24,00 *<br />
Remarqu<strong>es</strong><br />
L<strong>es</strong> signaux autr<strong>es</strong> que ceux indiqués ci-d<strong>es</strong>sus pourraient ne pas être affichés convenablement.<br />
L<strong>es</strong> signaux identifiés ci-d<strong>es</strong>sus sont reformatés de manière à assurer leur affichage optimal à l’écran.<br />
48
Entretien et nettoyage<br />
Débranchez d’abord le cordon d’alimentation de la prise de courant.<br />
Panneau d’affichage<br />
Essuyez soigneusement la surface du panneau en utilisant<br />
seulement un chiffon doux sans peluche.<br />
Si la surface <strong>es</strong>t particulièrement sale, trempez un chiffon doux non pelucheux dans un détergent liquide doux (1 part de<br />
détergent liquide pour 100 parts d’eau), puis <strong>es</strong>sorez le chiffon pour retirer l’excès de liquide. Utilisez ce chiffon pour <strong>es</strong>suyer la<br />
surface du panneau d’affichage, puis <strong>es</strong>suyez-la avec un chiffon sec du même type jusqu’à ce qu’elle soit complètement sèche.<br />
Ne rayez pas ou ne cognez pas la surface du panneau avec l<strong>es</strong> ongl<strong>es</strong> ou un objet rigide, sinon vous abîmerez la surface. En<br />
outre, évitez tout contact avec d<strong>es</strong> produits volatils tels que d<strong>es</strong> insecticid<strong>es</strong> à vaporiser, d<strong>es</strong> solvants ou d<strong>es</strong> diluants, sinon le<br />
fini de la surface sera abîmé.<br />
Coffret<br />
Si le coffret <strong>es</strong>t sale, <strong>es</strong>suyez-le avec un chiffon doux et sec.<br />
Si le coffret <strong>es</strong>t très sale, trempez le chiffon dans de l’eau additionnée d’un peu de détergent liquide doux, puis <strong>es</strong>sorez le<br />
chiffon bien à fond. Utilisez ce chiffon pour <strong>es</strong>suyer le coffret, puis <strong>es</strong>suyez-le avec un chiffon sec.<br />
Veillez à ce que le détergent liquide n’entre pas en contact direct avec la surface du téléviseur à plasma.<br />
Si d<strong>es</strong> goutt<strong>es</strong> d’eau pénètrent dans l’appareil, d<strong>es</strong> anomali<strong>es</strong> de fonctionnement se produiront.<br />
Évitez tout contact avec d<strong>es</strong> produits volatils tels que d<strong>es</strong> insecticid<strong>es</strong> à vaporiser, d<strong>es</strong> solvants ou d<strong>es</strong> diluants, sinon la<br />
surface du coffret pourra être abîmée ou le revêtement s’écaillera. En outre, ne laissez pas l’appareil trop longtemps en contact<br />
avec d<strong>es</strong> articl<strong>es</strong> en caoutchouc ou en PVC.<br />
Piéd<strong>es</strong>tal<br />
Nettoyage<br />
Essuyez l<strong>es</strong> surfac<strong>es</strong> avec un chiffon doux et sec. Si le piéd<strong>es</strong>tal <strong>es</strong>t très sale, nettoyez-le à l’aide d’un chiffon imprégné d’une<br />
solution légère de détergent liquide doux, puis <strong>es</strong>suyez avec un chiffon sec.<br />
N’utilisez pas de produits tels que d<strong>es</strong> solvants, d<strong>es</strong> diluants ou de la cire ménagère pour le nettoyage, car c<strong>es</strong> produits risquent<br />
d’abîmer le revêtement du piéd<strong>es</strong>tal. (Si vous utilisez un chiffon traité chimiquement, suivez la notice d’utilisation du chiffon.)<br />
Ne fixez pas de ruban adhésif ou d’étiquett<strong>es</strong>, car ils risquent de salir la surface du piéd<strong>es</strong>tal. Ne le laissez pas en contact<br />
prolongé avec d<strong>es</strong> produits en caoutchouc ou en vinyle ou similaire. (Ceci pourrait le détériorer.)<br />
Entretien et nettoyage<br />
Informations techniqu<strong>es</strong><br />
FAQ, etc.<br />
49
Foire aux qu<strong>es</strong>tions<br />
Avant de faire appel à un technicien, vérifiez l<strong>es</strong> problèm<strong>es</strong> et apportez l<strong>es</strong> corrections simpl<strong>es</strong> décrit<strong>es</strong> ci-d<strong>es</strong>sous.<br />
Si le problème devait persister, communiquez avec votre détaillant ou un centre de service <strong>Panasonic</strong> agréé. (p. 53)<br />
Pour une assistance supplémentaire, contactez-nous via le site Web à l’adr<strong>es</strong>se:<br />
www.panasonic.ca<br />
Points blancs ou<br />
imag<strong>es</strong> fantôm<strong>es</strong><br />
(bruit)<br />
50<br />
Vérifiez l’emplacement,<br />
l’orientation et la connexion de<br />
l’antenne.<br />
Interférence ou<br />
image de canaux<br />
numériqu<strong>es</strong> figée<br />
(son intermittent)<br />
Réorientez l’antenne pour l<strong>es</strong><br />
canaux numériqu<strong>es</strong>.<br />
Vérifiez le “Fréquencemètre”<br />
(p. 39). Si le signal <strong>es</strong>t faible,<br />
vérifiez l’antenne et communiquez<br />
avec votre détaillant <strong>Panasonic</strong>.<br />
La télécommande ne<br />
fonctionne pas<br />
L<strong>es</strong> pil<strong>es</strong> ont-ell<strong>es</strong> été mis<strong>es</strong> en<br />
place correctement? (p. 8)<br />
L<strong>es</strong> pil<strong>es</strong> sont-ell<strong>es</strong> neuv<strong>es</strong>?<br />
L<strong>es</strong> imag<strong>es</strong> d’un appareil<br />
auxiliaire sont anormal<strong>es</strong><br />
lorsque cet appareil <strong>es</strong>t<br />
raccordé via la prise HDMI<br />
Le câble HDMI <strong>es</strong>t-il correctement<br />
raccordé? (p. 31, 43)<br />
Éteignez le téléviseur et l’appareil, puis<br />
rallumez-l<strong>es</strong>.<br />
Vérifiez le signal d’entrée de l’appareil. (p. 48)<br />
Utilisez un appareil conforme à EIA/CEA-861/861B.<br />
Lorsque le canal <strong>es</strong>t changé au<br />
moyen du décodeur raccordé<br />
avec un câble HDMI, l’indication<br />
“HDMI” pourrait s’afficher dans le<br />
coin supérieur gauche de l’écran<br />
Ceci n’<strong>es</strong>t pas un signe d’un mauvais fonctionnement.<br />
L’enregistrement ne débute<br />
pas immédiatement<br />
Vérifiez l<strong>es</strong> réglag<strong>es</strong> de l’enregistreur. Pour<br />
plus de détails, reportez-vous au manuel<br />
d’utilisation afférent à l’enregistreur.
S’il y a d<strong>es</strong> problèm<strong>es</strong> de fonctionnement avec le téléviseur, veuillez vous reporter au tableau ci-d<strong>es</strong>sous afin de<br />
déterminer l<strong>es</strong> symptôm<strong>es</strong>, puis exécutez l<strong>es</strong> m<strong>es</strong>ur<strong>es</strong> suggéré<strong>es</strong>. Si cela ne résout pas le problème, veuillez noter<br />
l<strong>es</strong> numéros de modèle et de série et contactez un détaillant <strong>Panasonic</strong> local (l<strong>es</strong> deux numéros se trouvent sur la<br />
face arrière du téléviseur).<br />
Problème<br />
Le m<strong>es</strong>sage “Appuyer<br />
sur n’importe quelle<br />
touche pour revenir” se<br />
déplace sur l’écran<br />
Certains points<br />
demeurent brillants ou<br />
sombr<strong>es</strong><br />
M<strong>es</strong>ur<strong>es</strong> à prendre<br />
La fonction de prévention de rémanence <strong>es</strong>t activée.<br />
(Cela n’<strong>es</strong>t le signe d’aucune anomalie.)<br />
• L’économiseur d’écran <strong>es</strong>t activé après un certain délai<br />
d’inactivité dans le mode SD.<br />
• Consultez “Rémanence” (p. 7)<br />
Un écran à plasma <strong>es</strong>t composé de quelqu<strong>es</strong> millions de pixels et<br />
<strong>es</strong>t conçu selon une technologie avancée à procédé complexe.<br />
Certains pixels peuvent tout de même demeurer brillants ou<br />
sombr<strong>es</strong>. Ceci n’<strong>es</strong>t pas une indication que l’écran <strong>es</strong>t défectueux<br />
et n’aura aucun impact sur le fonctionnement du téléviseur.<br />
Écran<br />
Image chaotique,<br />
présence de bruit<br />
Aucune image ne peut<br />
être affichée<br />
Vérifiez l<strong>es</strong> appareils électriqu<strong>es</strong> (système de démarrage pour<br />
voiture/motocyclette, lampe fluor<strong>es</strong>cente) à proximité.<br />
Consultez le menu Image. (p. 26)<br />
Vérifiez le câblage. (p. 11-14)<br />
Vérifiez que la bonne prise d’entrée a été sélectionnée. (p. 24)<br />
Au lieu d’une image, seuls<br />
d<strong>es</strong> points sont affichés<br />
Vérifiez la syntonisation d<strong>es</strong> canaux. (p. 38)<br />
Vérifiez l<strong>es</strong> câbl<strong>es</strong> d’antenne.<br />
Ni image, ni son ne sont<br />
reproduits<br />
Une boîte noire s’affiche<br />
Aucun son n’<strong>es</strong>t entendu<br />
Le cordon d’alimentation a-t-il été branché?<br />
Le téléviseur <strong>es</strong>t-il en marche?<br />
Vérifiez le menu Image (p. 26) et le volume.<br />
Vérifiez l<strong>es</strong> raccordements du câble AV. (p. 11-14)<br />
Vérifiez que la bonne prise d’entrée a été sélectionnée. (p. 24)<br />
Modifiez l<strong>es</strong> réglag<strong>es</strong> pour l’affichage d<strong>es</strong> sous-titr<strong>es</strong>.<br />
(p. 40)<br />
L<strong>es</strong> câbl<strong>es</strong> d<strong>es</strong> enceint<strong>es</strong> sont-ils connectés correctement? (p. 43)<br />
La fonction “Sourdine” <strong>es</strong>t-elle activée? (p. 15)<br />
Le volume <strong>es</strong>t-il au niveau minimum?<br />
Est-ce que l<strong>es</strong> haut-parleurs sont en circuit ? (p. 26)<br />
Modifiez l<strong>es</strong> réglag<strong>es</strong> de la voie “SAP”. (p. 19)<br />
Vérifiez l<strong>es</strong> réglag<strong>es</strong> de “Entrée HDMI 1” et “Entrée HDMI 2”. (p. 26)<br />
Foire aux qu<strong>es</strong>tions<br />
Rendu sonore<br />
Le rendu sonore <strong>es</strong>t<br />
inhabituel<br />
Un son inconnu <strong>es</strong>t<br />
entendu<br />
1- Son venant du coffret<br />
2- Bruissement<br />
3- Clic/déclic<br />
4- Bourdonnement<br />
Établissez le réglage “SAP” sur “Stéréo” ou “Mono”.<br />
Vérifiez l’appareil HDMI connecté au téléviseur.<br />
Établissez le format audio de l’appareil HDMI à “PCM linéaire”.<br />
Si la connexion du signal audionumérique pose un<br />
problème, sélectionnez la connexion analogique.<br />
1- D<strong>es</strong> changements de température ou d’humidité dans la pièce peuvent<br />
causer une expansion ou un r<strong>es</strong>serrement du coffret du téléviseur et<br />
produire un son métallique. (Cela n’<strong>es</strong>t le signe d’aucune anomalie)<br />
2- Le téléviseur pourrait être équipé d’un ventilateur intégré<br />
produisant un bruissement. (Cela n’<strong>es</strong>t le signe d’aucune anomalie)<br />
3- Lorsque le téléviseur <strong>es</strong>t mis sous tension, un circuit électrique intégré au<br />
téléviseur émet un bruit de clic/déclic. (Cela n’<strong>es</strong>t le signe d’aucune anomalie)<br />
4- D<strong>es</strong> circuits électriqu<strong>es</strong> sont activés lorsque le téléviseur <strong>es</strong>t<br />
sous tension. (Cela n’<strong>es</strong>t le signe d’aucune anomalie)<br />
FAQ, etc.<br />
51
Spécifications<br />
Alimentation<br />
120 V c.a., 60 Hz<br />
<strong>TC</strong>-<strong>P42C1</strong><br />
<strong>TC</strong>-P50C1<br />
Consommation<br />
Panneau de l’écran<br />
à plasma<br />
Maximum 283 W 387 W<br />
En attente 0,3 W 0,3 W<br />
Méthode<br />
d’entraînement<br />
Format d’image 16:9<br />
Surface d’affichage<br />
(L × H × diagonale)<br />
(Nombre de pixels)<br />
Type c.a.<br />
42 po (41,6 po en diagonale) 50 po (49,9 po en diagonale)<br />
921 mm × 518 mm × 1 057 mm<br />
(36,2 po × 20,4 po × 41,6 po)<br />
786 432 (1 024 (L) × 768 (H))<br />
[3 072 × 768 points]<br />
1 106 mm × 622 mm × 1 269 mm<br />
(43,5 po × 24,4 po × 49,9 po)<br />
1 049 088 (1 366 (L) × 768 (H))<br />
[4 098 × 768 points]<br />
Son<br />
Sortie audio 20 W [10 W + 10 W ] (D.H.T. de 10 %)<br />
Nombre de canaux<br />
(numérique/analogique)<br />
Conditions de<br />
fonctionnement<br />
Pris<strong>es</strong> de connexion<br />
VI<strong>DE</strong>O IN 1<br />
VI<strong>DE</strong>O IN 2<br />
COMPONENT IN 1-2<br />
VHF/ UHF: 2 - 69, Câblodistribution: 1 - 135<br />
Température:<br />
Humidité :<br />
0 ° – 40 °C (32 °F – 104 °F)<br />
20 % – 80 % (sans condensation)<br />
VI<strong>DE</strong>O: Prise de type RCA × 1 1,0 V [c.-à-c.] (75 Ω)<br />
S-VI<strong>DE</strong>O: Mini DIN à 4 broch<strong>es</strong> Y: 1,0 V [c.-à-c.] (75 Ω) C: 0,286 V [c.-à-c.] (75 Ω)<br />
AUDIO L - R: Prise de type RCA × 2 0,5 V [eff.]<br />
VI<strong>DE</strong>O: Prise de type RCA × 1 1,0 V [c.-à-c.] (75 Ω)<br />
AUDIO L - R: Prise de type RCA × 2 0,5 V [eff.]<br />
Y: 1,0 V [c.-à-c.] (y compris la synchronisation)<br />
PB, PR: ± 0,35 V [c.-à-c.]<br />
AUDIO L-R: Prise de type RCA × 2 0,5 V [eff.]<br />
HDMI 1-2<br />
Connecteur HDMI de type A × 2<br />
• Ce téléviseur prend en charge la fonction “HDAVI Control 4”.<br />
Fente de carte Fente de carte SD × 1<br />
DIGITAL AUDIO OUT PCM / Dolby Digital, Fibre optique<br />
Particularités<br />
Dimensions<br />
(L × H × P)<br />
Masse<br />
Avec piéd<strong>es</strong>tal<br />
Téléviseur seulement<br />
FILTRE 3D Y/C<br />
SOUS-TITRES<br />
Puce antiviolence<br />
Visualiseur de photos HDAVI Control 4<br />
1 029 mm × 709 mm × 327 mm<br />
(40,6 po × 28,0 po × 12,9 po)<br />
1 029 mm × 661 mm × 94 mm (106 mm)<br />
(40,6 po × 26,1 po × 3,8 po (4,2 po))<br />
1 218 mm × 822 mm × 387 mm<br />
(48,0 po × 32,4 po × 15,3 po)<br />
Avec piéd<strong>es</strong>tal 28,0 (61,8 lb) 36,0 (79,4 lb)<br />
Téléviseur seulement 26,0 (57,4 lb) 34,0 (75,0 lb)<br />
Remarque<br />
[<strong>TC</strong>-<strong>P42C1</strong>]<br />
709 mm (28,0 po)<br />
661 mm (26,1 po)<br />
1 029 mm (40,6 po)<br />
456 mm<br />
(18,0 po)<br />
106 mm (4,2 po)<br />
94 mm<br />
(3,8 po)<br />
327 mm (12,9 po)<br />
1 218 mm × 769 mm × 94 mm (106 mm)<br />
(48,0 po × 30,3 po × 3,8 po (4,2 po))<br />
[<strong>TC</strong>-P50C1]<br />
1 218 mm (48,0 po)<br />
106 mm (4,2 po)<br />
94 mm<br />
(3,8 po)<br />
387 mm (15,3 po)<br />
L<strong>es</strong> spécifications peuvent être modifié<strong>es</strong> sans avis préalable. La masse et l<strong>es</strong> dimensions sont approximativ<strong>es</strong>.<br />
822 mm (32,4 po)<br />
769 mm (30,3 po)<br />
456 mm<br />
(18,0 po)<br />
52
Garantie limitée<br />
<strong>Panasonic</strong> Canada Inc.<br />
Certificat de garantie limitée <strong>Panasonic</strong><br />
<strong>Panasonic</strong> Canada Inc. garantit cet appareil contre tout vice de fabrication et accepte, le cas échéant, de remédier à<br />
toute défectuosité pendant la période indiquée ci-d<strong>es</strong>sous et commençant à partir de la date d’achat original.<br />
Téléviseurs Viera<br />
(42 po et plus)<br />
Téléviseurs Viera<br />
(moins de 42 po)<br />
Service à domicile<br />
Service en atelier<br />
Un (1) an, pièc<strong>es</strong> (panneau compris) et main-d’œuvre<br />
Un (1) an, pièc<strong>es</strong> (panneau compris) et main-d’œuvre<br />
Le service à domicile ne sera offert que dans l<strong>es</strong> régions acc<strong>es</strong>sibl<strong>es</strong> par rout<strong>es</strong> et situé<strong>es</strong> dans un rayon de 50 km<br />
d’un centre de service agréé <strong>Panasonic</strong>.<br />
LIMITATIONS ET EXCLUSIONS<br />
Cette garantie n’<strong>es</strong>t valide que pour l<strong>es</strong> appareils achetés au Canada et ne couvre pas l<strong>es</strong> dommag<strong>es</strong> résultant<br />
d’une installation incorrecte, d’un usage abusif ou impropre ainsi que ceux découlant d’un accident en transit ou de<br />
manipulation. De plus, si l’appareil a été altéré ou transformé de façon à modifier l’usage pour lequel il a été conçu<br />
ou utilisé à d<strong>es</strong> fins commercial<strong>es</strong>, cette garantie devient nulle et sans effet. L<strong>es</strong> pil<strong>es</strong> sèch<strong>es</strong> ne sont pas couvert<strong>es</strong><br />
sous cette garantie.<br />
Cette garantie <strong>es</strong>t octroyée à l’utilisateur original seulement. La facture ou autre preuve de la date d’achat original<br />
sera exigée pour toute réparation sous le couvert de cette garantie.<br />
CETTE GARANTIE LIMITÉE ET EXPRESSE REMPLACE TOUTE AUTRE GARANTIE, EXPRESSE OU IMPLICITE,<br />
INCLUANT LES GARANTIES IMPLICITES DU CARACTÈRE ADÉQUAT POUR LA COMMERCIALISATION ET UN<br />
USAGE PARTICULIER.<br />
PANASONIC N’AURA D’OBLIGATION EN AUCUNE CIRCONSTANCE POUR TOUT DOMMAGE DIRECT, INDIRECT<br />
OU CONSÉCUTIF.<br />
Certain<strong>es</strong> juridictions ne reconnaissent pas l<strong>es</strong> exclusions ou limitations de dommag<strong>es</strong> indirects ou consécutifs,<br />
ou l<strong>es</strong> exclusions de garanti<strong>es</strong> implicit<strong>es</strong>. Dans de tels cas, l<strong>es</strong> limitations stipulé<strong>es</strong> ci-d<strong>es</strong>sus peuvent ne pas être<br />
applicabl<strong>es</strong>.<br />
Le service à domicile exige un accès complet et facile au produit par le personnel du centre de service agréé et<br />
n’inclut pas le retrait ou la réinstallation d’un produit déjà installé. Si l’appareil doit être retiré pour fins de réparation,<br />
cela sera à l’entière discrétion du centre de service. Sous aucune considération, <strong>Panasonic</strong> Canada Inc. ou le centre<br />
de service ne pourra être tenu r<strong>es</strong>ponsable de tout dommage particulier ou indirect.<br />
RÉPARATION SOUS GARANTIE<br />
Pour de l’aide sur le fonctionnement de l’appareil, veuillez contacter notre service à la clientèle au :<br />
Ligne sans frais: 1-866-330-0014<br />
Lien courriel: www.vieraconcierge.ca<br />
Pour la réparation d<strong>es</strong> appareils, veuillez communiquer avec un agent du service à la clientèle de VIERA aux<br />
coordonné<strong>es</strong> précédemment mentionné<strong>es</strong>.<br />
Expédition de l’appareil à un centre de service<br />
Emballer soigneusement l’appareil, de préférence dans le carton d’origine, et l’expédier port payé et assuré au centre de service.<br />
Inclure la d<strong>es</strong>cription détaillée de la panne et la preuve de la date d’achat original.<br />
Garantie limitée<br />
Spécifications<br />
FAQ, etc.<br />
53
Nota
Nota
Consignation du numéro de série<br />
L<strong>es</strong> numéros de modèle et de série de ce produit se trouvent sur sa face arrière. Notez ce numéro de série dans l’<strong>es</strong>pace<br />
réservé à cet effet ci-d<strong>es</strong>sous et conservez ce manuel et votre facture comme preuve de votre achat, pour aider à identifier<br />
l’appareil en cas de perte ou de vol et pour recours à la garantie.<br />
Modèle<br />
Numéro de série<br />
<strong>Panasonic</strong> Consumer Electronics Company,<br />
Division of <strong>Panasonic</strong> Corporation of North America<br />
One <strong>Panasonic</strong> Way, Secaucus<br />
New Jersey 07094 U.S.A.<br />
<strong>Panasonic</strong> Canada Inc.<br />
5770 Ambler Drive<br />
Mississauga, Ontario<br />
L4W 2T3 CANADA<br />
© 2009 <strong>Panasonic</strong> Corporation of North America. Tous droits réservés.<br />
Imprimé aux ÉTATS-UNIS


