
Create successful ePaper yourself
Turn your PDF publications into a flip-book with our unique Google optimized e-Paper software.
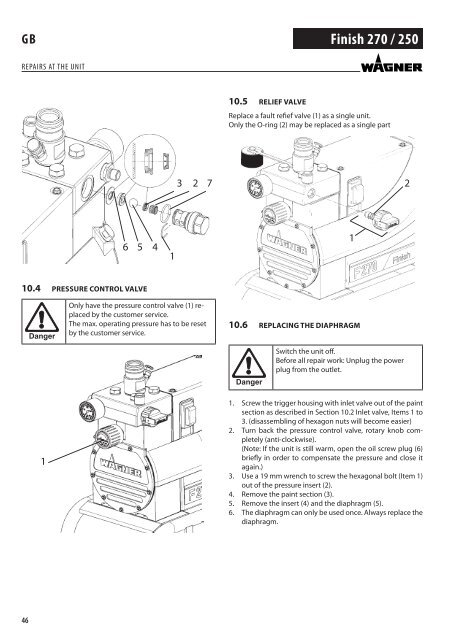
GB<strong>Finish</strong> <strong>270</strong> / <strong>250</strong>repairs at the unit10.5 RElIEf vAlvEReplace a fault refief valve (1) as a single unit.Only the O-ring (2) may be replaced as a single part3 2 726 5 41110.4 pRESSuRE CONTROl vAlvEOnly have the pressure control valve (1) replacedby the customer service.The max. operating pressure has to be resetby the customer service.10.6 REplACING ThE DIAphRAGmSwitch the unit off.Before all repair work: Unplug the powerplug from the outlet.11. Screw the trigger housing with inlet valve out of the paintsection as described in Section 10.2 Inlet valve, Items 1 to3. (disassembling of hexagon nuts will become easier)2. Turn back the pressure control valve, rotary knob completely(anti-clockwise).(Note: If the unit is still warm, open the oil screw plug (6)briefly in order to compensate the pressure and close itagain.)3. Use a 19 mm wrench to screw the hexagonal bolt (Item 1)out of the pressure insert (2).4. Remove the paint section (3).5. Remove the insert (4) and the diaphragm (5).6. The diaphragm can only be used once. Always replace thediaphragm.46