

Sony HT-NT3 - HT-NT3 Mode d'emploi Anglais
Sony HT-NT3 - HT-NT3 Mode d'emploi Anglais
Sony HT-NT3 - HT-NT3 Mode d'emploi Anglais

Create successful ePaper yourself
Turn your PDF publications into a flip-book with our unique Google optimized e-Paper software.
Listening/Viewing<br />
Enjoying video/sound<br />
from the connected<br />
devices<br />
Press INPUT +/–.<br />
You can also press HOME, then press<br />
/// repeatedly and to select<br />
the input you want.<br />
[TV]<br />
Device (TV, etc.) that is connected to the TV<br />
(DIGITAL IN) jack, or a TV compatible with the<br />
Audio Return Channel function that is<br />
connected to the HDMI OUT (ARC) jack<br />
[HDMI1]/[HDMI2]/[HDMI3]<br />
Device that is connected to the HDMI IN 1/2/3<br />
jack<br />
[Bluetooth Audio]<br />
“BT”<br />
BLUETOOTH device that supports A2DP<br />
[Analog]<br />
“ANALOG”<br />
Device (Digital media player, etc.) that is<br />
connected to the ANALOG IN jack<br />
[USB]<br />
USB device that is connected to the (USB)<br />
port<br />
[Screen mirroring]<br />
“SCR M”<br />
Screen mirroring-compatible device (page 19)<br />
[Home Network]<br />
“H.NET”<br />
Contents stored on a server (page 17)<br />
[Music Services]<br />
“M.SERV”<br />
Contents of music services offered on the<br />
Internet (page 18)<br />
Tip<br />
You can also press PAIRING and<br />
MIRRORING on the remote control to select<br />
[Bluetooth Audio] and [Screen mirroring]<br />
input respectively.<br />
Playing music/photo<br />
from a USB device<br />
You can play music/photo files on a<br />
connected USB device.<br />
For playable types of files, see “Playable<br />
types of files” (page 52).<br />
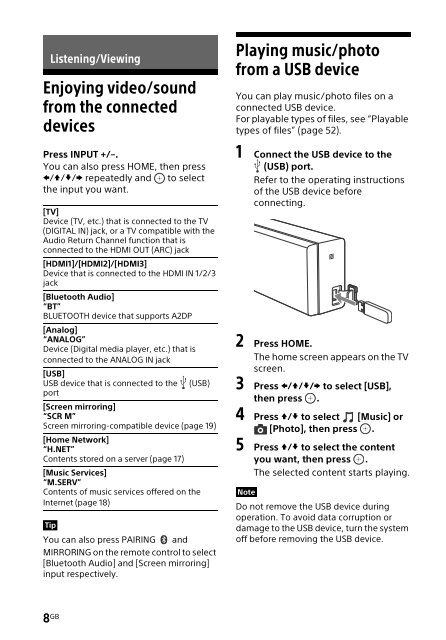
1 Connect the USB device to the<br />
(USB) port.<br />
Refer to the operating instructions<br />
of the USB device before<br />
connecting.<br />
2 Press HOME.<br />
The home screen appears on the TV<br />
screen.<br />
3 Press /// to select [USB],<br />
then press .<br />
4 Press / to select [Music] or<br />
[Photo], then press .<br />
5 Press / to select the content<br />
you want, then press .<br />
The selected content starts playing.<br />
Note<br />
Do not remove the USB device during<br />
operation. To avoid data corruption or<br />
damage to the USB device, turn the system<br />
off before removing the USB device.<br />
8 GB


