

Sony TA-VE800G - TA-VE800G Consignes d’utilisation Espagnol
Sony TA-VE800G - TA-VE800G Consignes d’utilisation Espagnol
Sony TA-VE800G - TA-VE800G Consignes d’utilisation Espagnol

You also want an ePaper? Increase the reach of your titles
YUMPU automatically turns print PDFs into web optimized ePapers that Google loves.
Basic Operations<br />
To monitor the recorded sound when recording to a 3-<br />
head cassette deck<br />
1 Click EXIT.<br />
2 Click FUNCTION in the main menu.<br />
3 Click <strong>TA</strong>PE.<br />
To stop recording<br />
Click on p of the recording unit.<br />
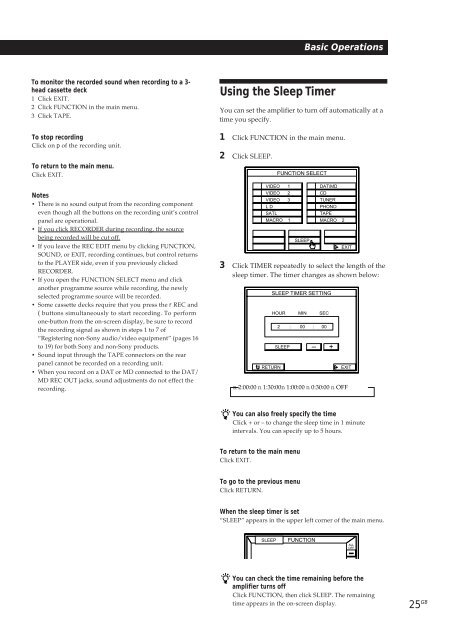
Using the Sleep Timer<br />
You can set the amplifier to turn off automatically at a<br />
time you specify.<br />
1 Click FUNCTION in the main menu.<br />
To return to the main menu.<br />
Click EXIT.<br />
2 Click SLEEP.<br />
FUNCTION SELECT<br />
Notes<br />
• There is no sound output from the recording component<br />
even though all the buttons on the recording unit’s control<br />
panel are operational.<br />
• If you click RECORDER during recording, the source<br />
being recorded will be cut off.<br />
• If you leave the REC EDIT menu by clicking FUNCTION,<br />
SOUND, or EXIT, recording continues, but control returns<br />
to the PLAYER side, even if you previously clicked<br />
RECORDER.<br />
• If you open the FUNCTION SELECT menu and click<br />
another programme source while recording, the newly<br />
selected programme source will be recorded.<br />
• Some cassette decks require that you press the r REC and<br />
( buttons simultaneously to start recording. To perform<br />
one-button from the on-screen display, be sure to record<br />
the recording signal as shown in steps 1 to 7 of<br />
“Registering non-<strong>Sony</strong> audio/video equipment” (pages 16<br />
to 19) for both <strong>Sony</strong> and non-<strong>Sony</strong> products.<br />
• Sound input through the <strong>TA</strong>PE connectors on the rear<br />
panel cannot be recorded on a recording unit.<br />
• When you record on a DAT or MD connected to the DAT/<br />
MD REC OUT jacks, sound adjustments do not effect the<br />
recording.<br />
VIDEO 1 DAT/MD<br />
VIDEO 2<br />
CD<br />
VIDEO 3<br />
TUNER<br />
L D<br />
PHONO<br />
SATL<br />
<strong>TA</strong>PE<br />
MACRO 1 MACRO 2<br />
RETURN<br />
SLEEP<br />
SLEEP TIMER SETTING<br />
HOUR<br />
MIN<br />
SEC<br />
2 : 00 : 00<br />
SLEEP – +<br />
EXIT<br />
3 Click TIMER repeatedly to select the length of the<br />
sleep timer. The timer changes as shown below:<br />
EXIT<br />
n 2:00:00 n 1:30:00n 1:00:00 n 0:30:00 n OFF<br />
You can also freely specify the time<br />
Click + or – to change the sleep time in 1 minute<br />
intervals. You can specify up to 5 hours.<br />
To return to the main menu<br />
Click EXIT.<br />
To go to the previous menu<br />
Click RETURN.<br />
When the sleep timer is set<br />
“SLEEP” appears in the upper left corner of the main menu.<br />
SLEEP<br />
FUNCTION<br />
ALL<br />
OFF<br />
You can check the time remaining before the<br />
amplifier turns off<br />
Click FUNCTION, then click SLEEP. The remaining<br />
time appears in the on-screen display.<br />
25 GB


