Create successful ePaper yourself
Turn your PDF publications into a flip-book with our unique Google optimized e-Paper software.
Fig. 150<br />
- Prepare the navigation lamps using parts 5.44 - 5.49.<br />
Figs. 151 and 152<br />
- Trim the lamp bracket supports 5.44 to fit on the wheelhouse<br />
roof. Glue the completed navigation lamps to the<br />
roof.<br />
- Run the wires initially through the roof, then inward and<br />
inside the wheelhouse.<br />
Figs. 153 and 154<br />
- Assemble the four searchlights 5.50, 5.51, install them on<br />
the roof, and run the wires down into the wheelhouse.<br />
- Glue the foghorn 5.52 in place.<br />
- Glue the split pin 5.53 in the wheelhouse roof, and splay<br />
the ends on the inside to secure it.<br />
- Fit an insulator 5.54 on the second split pin 5.53, and glue<br />
it in the roof in the same way.<br />
Fig. 155<br />
- Bevel the top end of the tube 5.55 as shown, and the bottom<br />
end of the tube 5.56.<br />
- Assemble the exhaust pipe from parts 5.55 - 5.57, and<br />
place the completed assembly on the forward hatch<br />
cover. Position the pipe in such a way that it projects on<br />
the underside, then glue the cap in place.<br />
- Drill the hole for the exhaust pipe brace 5.58. Glue the<br />
completed exhaust and the brace to the wheelhouse.<br />
- Glue the mushroom ventilators 5.59 in place.<br />
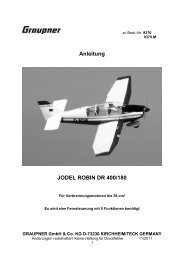
Fig. 156<br />
<strong>Le</strong> <strong>Courageux</strong><br />
- The component parts of the radar unit and rotational<br />
system.<br />
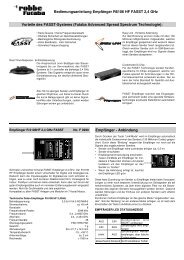
Fig. 157<br />
- Assemble the radar unit from parts 5.60 - 5.63; note that<br />
the antenna shaft 5.61 should only be glued to the reflector<br />
5.62, so that it is free to rotate.<br />
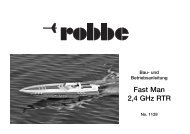
Fig. 158<br />
- Solder the suppressors to the radar motor 5.64, following<br />
the instructions supplied with the suppressor set 5.65.<br />
- Solder the power wires 5.66 to the motor terminals.<br />
- Fix the motor to the mounting plate 5.68 using the screws<br />
5.67.<br />
- Push the coupling sleeve 5.69 onto the motor shaft.<br />
Fig. 159<br />
- Place the completed radar unit on the wheelhouse roof,<br />
position it accurately and glue the radar base 5.63 to the<br />
roof.<br />
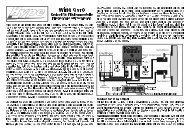
Fig. 160<br />
- Install the prepared radar motor assembly 5.64 - 5.69,<br />
couple it to the shaft 5.61 and secure it with the screws<br />
5.70.<br />
- We recommend that you connect a suitable power source<br />
(approx. 6 V) to check that the system works properly.<br />
Figs. 161 and 162<br />
Assembly and operating instructions<br />
- Glue the lamp sockets 5.71 to the lamp bases 5.72 and fit<br />
the bulbs 5.73.<br />
16<br />
No.<br />
1025<br />
- Glue the five prepared deck lamps to the wheelhouse,<br />
and run the wires down and into the wheelhouse.<br />
Fig. 163<br />
- Drill a 1.5 mm Ø hole as shown, and fit the screw-hook<br />
5.74 in it. Secure the hook from the underside with a little<br />
Stabilit-Express.<br />
- Glue the coaming strips 5.75 and 5.76 on top of the hatch<br />
cover.<br />
- Glue the stop-strip 5.77 in place, taking care to centre it<br />
accurately (see stated dimension).<br />
Fig. 164<br />
- Cut the transverse rail 5.78 to length, then screw the<br />
second screw-hook 5.74 into it as shown. Tie the rubber<br />
band 5.79 to the hook.<br />
Fig. 165<br />
- Glue the transverse rail 5.78 in the underside of the<br />
wheelhouse as shown.<br />
Fig. 166<br />
- Connect the rubber band to the lower screw-hook, and<br />
temporarily fit the wheelhouse on the boat.