Create successful ePaper yourself
Turn your PDF publications into a flip-book with our unique Google optimized e-Paper software.
After this selection the seconds field will flash. Basically the seconds<br />
are selected first, then the minutes and finally the hours - the<br />
display cursor will flash in the respective field. To increase the number,<br />
press key A (“UP”). To move on to the next field, press key B<br />
(“SEL”) and set the desired time as described above.<br />
If the previously-set race time is not to be changed, confirm by repeatedly<br />
pressing the key B (“SEL”) until the time display disappears.<br />
Once the time is input the display switches over to “Ready” mode<br />
and waits for the start signal.<br />
Press once on the “START” key on the Control Unit and place the<br />
vehicles on the connecting track section. Then press the start key<br />
once again. The starting sequence is initiated, and the overall time<br />
on the Lap Counter starts to count down.<br />
During and after a time race you can switch over to the individual<br />
cars by pressing key A. In the position indicator a vertical line will<br />
now be shown under the car selected. The following details will then<br />
be shown for the respective car on the display:<br />
• fastest lap time<br />
• time of the last lap<br />
• distance behind the leading vehicle in time and in laps<br />
• number of laps completed.<br />
When the overall time has elapsed, the race is over and an acoustic<br />
signal will be given and the positions of all cars will flash on the<br />
display. In the uppermost line “TIME” the overall time of the leading<br />
car will be shown.<br />
To stop a time race which is in progress, press key c (“ESC”) once<br />
while cars are running.<br />
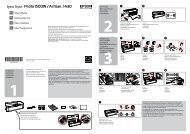
Display - time race<br />
Position Tower<br />
When the Lap Counter is used in conjunction with the Position<br />
Tower 30357, the time still to run is shown in the uppermost display<br />
segment. During the race this will count down to zero, until the race<br />
is finished by the leading car.<br />
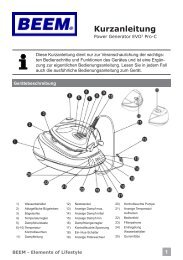
For a time race, a maximum time of 49:59’59’’ can be set. The<br />
hours are signalled by two dots in the display segment. When the<br />
hours have elapsed the minutes remaining are shown by the dot in<br />
the right-hand display segment. At the start of the final minute of the<br />
race, the display starts to count down to zero in seconds without<br />
a dot.<br />
hour indicator<br />
Minute indicator Second indicator<br />
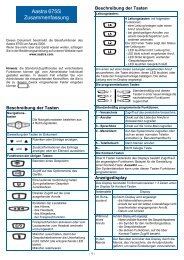
Display settings<br />
To improve legibility, the contrast of the display can be adjusted<br />
in 20 steps. For this, switch off the Control Unit. Now, while switching<br />
on the Control Unit, hold key A down until the indicator display<br />
changes to match the corresponding illustration. The uppermost line<br />
then shows the respective software version.<br />
The contrast of the display can be altered in max. 20 steps by<br />
using “CHA ” and “CHA “. To store the value selected, press<br />
key c (“SEL”).<br />
To improve legibility, the background brightness of the display can<br />
be adjusted in 20 steps. For this, switch off the Control Unit. Now,<br />
while switching on the Control Unit, hold key c (“ESC”) down until<br />
the indicator display changes to match the corresponding illustration.<br />
The uppermost line then shows the respective software version.<br />
The background brightness of the display can be altered in max. 20<br />
steps by using “CHA ” and “CHA “. To store the value selected,<br />
press key c (“SEL”).<br />
Reset function<br />
To reset all Lap Counter settings, while switching on the Control<br />
Unit, hold down key B of the Lap Counter. Hold the key down until<br />
the training display reappears. All data will then be reset to the factory<br />
settings. (see description)<br />
1<br />
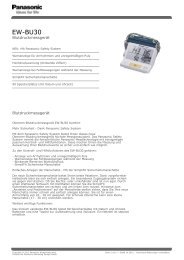
Maintenance and care<br />
To ensure a proper operation of the motor-racing circuit, all racetrack<br />
components should be regularly cleaned. Pull the plug prior<br />
to cleaning.<br />
1 Racetrack: Keep the track surface and track slots clean with a<br />
dry cloth. Do not use any solvents or chemicals for cleaning. When<br />
it is not in use, store the racetrack in a clean and dust-protected<br />
location, preferably in the original cardboard box.<br />
Troubleshooting<br />
Driving tips<br />
Troubleshooting:<br />
In case of any malfunctions, please check the following:<br />
• Has the connection to the power supply been established correctly?<br />
• Have transformer and speed controllers been connected<br />
correctly?<br />
• Are the track connections faultless?<br />
• Are the racetrack and track slots clean and free of any foreign<br />
objects?<br />
• Are the sliding contacts in order and do they make contact with<br />
the track slot?<br />
• Are the cars correctly coded to the according speed controller?<br />
• The track‘s current feed will be switched off automatically for 5<br />
seconds, if there is an electrical short circuit: this will be notified by<br />
audible and visual signals.<br />
• Are the cars placed on the track in running direction? In case of<br />
non-functioning push the running direction switch which is on the<br />
car´s bottom.<br />
note:<br />
During operation small car parts as spoilers or mirrors may get off or<br />
brake due to being original detailed parts of the car model. To avoid<br />
this it is possible to remove them before operation.<br />
Driving technique:<br />
• You can drive fast along the straight track but you should brake<br />
before the curve and then accelerate again when coming out of the<br />
curve.<br />
• Do not fasten or block the vehicles when the motor is running:<br />
overheating or damage to the motor could result otherwise.<br />
note: When using track systems which are not manufactured by<br />
Carrera the existing guide keel has to be replaced by the special<br />
guide keel (#85309). While using the Carrera crossing (#20587) or<br />
high banked curve 1/30° (#20574) slight driving noise might occur<br />
which is due to the full-scale genuineness and does not affect flawless<br />
operation.<br />
All Carrera spare parts are available in the webshop:<br />
carrera-toys.com<br />
Delivery exclusively to Germany, Austria, Netherlands, Belgium and<br />
Luxembourg.<br />
Technical specifications<br />
Output voltage: Toy transformer<br />
18 V 54 VA (Carrera DIGITAL 124)<br />
14,8 V 51,8 VA (Carrera DIGITAL 132)<br />
Electricity modes:<br />
1.) Operating mode = cars are operated via speed controllers<br />
2.) Idle mode = speed controllers not activated, no game<br />
3.) Stand-by mode = after approx. 20 minutes idle mode the<br />
connecting section switches to stand-by mode. LED flashes at<br />
long intervals. cuRREnT cOnSuMPTIOn < 1 watt / 1w<br />
By operating the speed controller the stand-by mode is finished,<br />
the racetrack returns to idle-mode again.<br />
4.) Off-state = power supply unit disconnected from mains supply<br />
This device is marked by “selective sort throught” symbol related to<br />
sort through domestic, electric and electronic, waste. This means<br />
the product must be treated by a specialized “sorting/collecting” system<br />
in accordance with European directive 2002/96/CE, to reduce<br />
the impact upon environment. For more precise information, please<br />
contact your local administration. Electronical product which are not<br />
going through special collecting, are potentially dangerous for environment<br />
and human health, because of dangerous substance.<br />
Output voltage: Toy transformer<br />
18 V 54 VA (Carrera DIGITAL 124)<br />
14,8 V 51,8 VA (Carrera DIGITAL 132)<br />
Electricity modes:<br />
1.) Operating mode = cars are operated via speed controllers<br />
2.) Idle mode = speed controllers not activated, no game<br />
3.) Stand-by mode = after approx. 20 minutes idle mode the<br />
connecting section switches to stand-by mode. LED flashes at<br />
long intervals. cuRREnT cOnSuMPTIOn < 1 watt / 1w<br />
By operating the speed controller the stand-by mode is finished,<br />
the racetrack returns to idle-mode again.<br />
4.) Off-state = power supply unit disconnected from mains supply<br />
9