
Create successful ePaper yourself
Turn your PDF publications into a flip-book with our unique Google optimized e-Paper software.
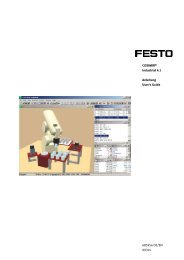
Familiarisation with the workspace<br />
10<br />
Numbe<br />
r<br />
Name Description<br />
1 Title bar Shows the name of the current project (Unnamed). If there are unsaved<br />
changes within the project, the project name is followed by a *.<br />
Next to the project name the application name and application version is<br />
shown (here Robotino View version 2.2.4).<br />
Default buttons to minimize, maximize and closing.<br />
2 Menu bar Menus to load/save, edit, view ...<br />
3 Tool bar Quickly accessible buttons to the function from the menus.<br />
Buttons to start and stop the simulation.<br />
Input box for Robotini's IP address and connect button (see Robotino tool bar<br />
114).<br />
<strong>Festo</strong> Logo with Link to the <strong>Festo</strong> homepage.<br />
4 Program<br />
selector<br />
5 Program<br />
workspace<br />
6 Function<br />
block<br />
library 11<br />
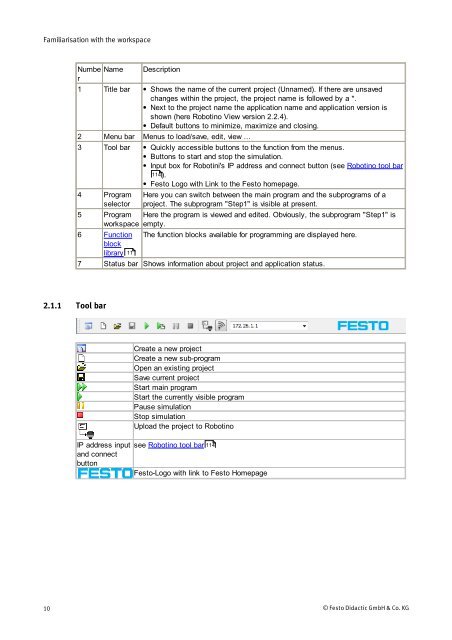
2.1.1 Tool bar<br />
Here you can switch between the main program and the subprograms of a<br />
project. The subprogram "Step1" is visible at present.<br />
Here the program is viewed and edited. Obviously, the subprogram "Step1" is<br />
empty.<br />
The function blocks available for programming are displayed here.<br />
7 Status bar Shows information about project and application status.<br />
IP address input<br />
and connect<br />
button<br />
Create a new project<br />
Create a new sub-program<br />
Open an existing project<br />
Save current project<br />
Start main program<br />
Start the currently visible program<br />
Pause simulation<br />
Stop simulation<br />
Upload the project to Robotino<br />
see Robotino tool bar<br />
114<br />
<strong>Festo</strong>-Logo with link to <strong>Festo</strong> Homepage<br />
© <strong>Festo</strong> <strong>Didactic</strong> GmbH & Co. KG