RCT2PC MANUAL FRONT COVER - Exent
RCT2PC MANUAL FRONT COVER - Exent
RCT2PC MANUAL FRONT COVER - Exent
Create successful ePaper yourself
Turn your PDF publications into a flip-book with our unique Google optimized e-Paper software.
<strong>RCT2PC</strong>_ManInt-new 8/23/02 9:59 AM Page 18<br />
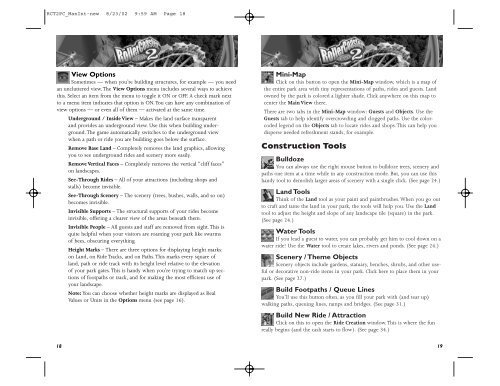
View Options<br />
Sometimes — when you’re building structures, for example — you need<br />
an uncluttered view. The View Options menu includes several ways to achieve<br />
this. Select an item from the menu to toggle it ON or OFF. A check mark next<br />
to a menu item indicates that option is ON.You can have any combination of<br />
view options — or even all of them — activated at the same time.<br />
Underground / Inside View – Makes the land surface transparent<br />
and provides an underground view. Use this when building underground.<br />
The game automatically switches to the underground view<br />
when a path or ride you are building goes below the surface.<br />
Remove Base Land – Completely removes the land graphics, allowing<br />
you to see underground rides and scenery more easily.<br />
Remove Vertical Faces – Completely removes the vertical “cliff faces”<br />
on landscapes.<br />
See-Through Rides – All of your attractions (including shops and<br />
stalls) become invisible.<br />
See-Through Scenery – The scenery (trees, bushes, walls, and so on)<br />
becomes invisible.<br />
Invisible Supports – The structural supports of your rides become<br />
invisible, offering a clearer view of the areas beneath them.<br />
Invisible People – All guests and staff are removed from sight. This is<br />
quite helpful when your visitors are roaming your park like swarms<br />
of bees, obscuring everything.<br />
Height Marks – There are three options for displaying height marks:<br />
on Land, on Ride Tracks, and on Paths. This marks every square of<br />
land, path or ride track with its height level relative to the elevation<br />
of your park gates. This is handy when you’re trying to match up sections<br />
of footpaths or track, and for making the most efficient use of<br />
your landscape.<br />
Note: You can choose whether height marks are displayed as Real<br />
Values or Units in the Options menu (see page 16).<br />
18<br />
Mini-Map<br />
Click on this button to open the Mini-Map window, which is a map of<br />
the entire park area with tiny representations of paths, rides and guests. Land<br />
owned by the park is colored a lighter shade. Click anywhere on this map to<br />
center the Main View there.<br />
There are two tabs in the Mini-Map window: Guests and Objects. Use the<br />
Guests tab to help identify overcrowding and clogged paths. Use the colorcoded<br />
legend on the Objects tab to locate rides and shops. This can help you<br />
disperse needed refreshment stands, for example.<br />
Construction Tools<br />
Bulldoze<br />
You can always use the right mouse button to bulldoze trees, scenery and<br />
paths one item at a time while in any construction mode. But, you can use this<br />
handy tool to demolish larger areas of scenery with a single click. (See page 24.)<br />
Land Tools<br />
Think of the Land tool as your paint and paintbrushes. When you go out<br />
to craft and tame the land in your park, the tools will help you. Use the Land<br />
tool to adjust the height and slope of any landscape tile (square) in the park.<br />
(See page 24.)<br />
Water Tools<br />
If you lead a guest to water, you can probably get him to cool down on a<br />
water ride! Use the Water tool to create lakes, rivers and ponds. (See page 24.)<br />
Scenery / Theme Objects<br />
Scenery objects include gardens, statuary, benches, shrubs, and other useful<br />
or decorative non-ride items in your park. Click here to place them in your<br />
park. (See page 27.)<br />
Build Footpaths / Queue Lines<br />
You’ll use this button often, as you fill your park with (and tear up)<br />
walking paths, queuing lines, ramps and bridges. (See page 31.)<br />
Build New Ride / Attraction<br />
Click on this to open the Ride Creation window. This is where the fun<br />
really begins (and the cash starts to flow). (See page 34.)<br />
19


