RCT2PC MANUAL FRONT COVER - Exent
RCT2PC MANUAL FRONT COVER - Exent
RCT2PC MANUAL FRONT COVER - Exent

You also want an ePaper? Increase the reach of your titles
YUMPU automatically turns print PDFs into web optimized ePapers that Google loves.
<strong>RCT2PC</strong>_ManInt-new 8/23/02 9:59 AM Page 28<br />
C. Gardens – Rock-bordered and filled with flowers, gardens come in a variety<br />
of colors, combinations and sizes. Once these are in place, you must pay to<br />
remove them.<br />
D. Fences and Walls – Fences, hedges and other<br />
TIP<br />
decorative boundaries are perfect for edging paths,<br />
rides and scenic gardens.These are always placed Many guests prefer to sit<br />
on the edge of a land square, and you can create<br />
when they eat. Provide a<br />
good supply of benches<br />
double walls (or fences) in adjacent squares. Since<br />
conveniently located near<br />
fences do not fill an entire square, you can often<br />
any collection of food stalls.<br />
place another item of scenery quite close to it.You<br />
get no refund when you remove these objects, nor do you pay a fee.<br />
E.Walls and Roofs – This tab contains walls and roofs that you can use to make<br />
decorative structures and buildings. The wall objects behave like the fences and<br />
walls described above. Roofs generally take up a whole square, and are designed<br />
to be put atop walls. (See “How to Place Elevated Scenery” on page 30.)<br />
F. Footpath Accessories – This tab includes such necessities as benches, litter<br />
bins and street lamps. These are vital to your park’s efficiency and cleanliness,<br />
and to the comfort of your guests.You can only build these accessories on footpaths<br />
— benches only on the flat footpath sections.You get no refund when<br />
you dismantle these objects, nor do you pay a fee.<br />
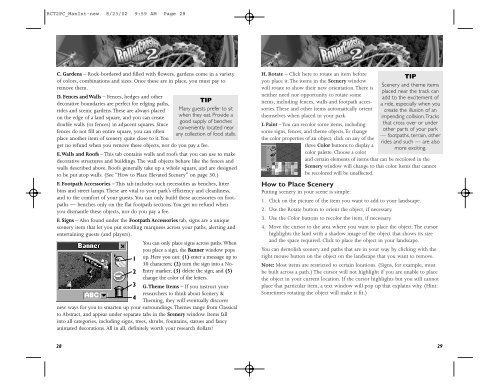
F. Signs – Also found under the Footpath Accessories tab, signs are a unique<br />
scenery item that let you put scrolling marquees across your paths, alerting and<br />
entertaining guests (and players).<br />
You can only place signs across paths.When<br />
you place a sign, the Banner window pops<br />
1 up. Here you can: (1) enter a message up to<br />
30 characters; (2) turn the sign into a No-<br />
2 Entry marker; (3) delete the sign; and (5)<br />
change the color of the letters.<br />
3 G.Theme Items – If you instruct your<br />
researchers to think about Scenery &<br />
4 Theming, they will eventually discover<br />
new ways for you to smarten up your surroundings.Themes range from Classical<br />
to Abstract, and appear under separate tabs in the Scenery window. Items fall<br />
into all categories, including signs, trees, shrubs, fountains, statues and fancy<br />
animated decorations. All in all, definitely worth your research dollars!<br />
28<br />
H. Rotate – Click here to rotate an item before<br />
you place it. The items in the Scenery window<br />
will rotate to show their new orientation. There is<br />
neither need nor opportunity to rotate some<br />
items, including fences, walls and footpath accessories.<br />
These and other items automatically orient<br />
themselves when placed in your park.<br />
I. Paint – You can recolor some items, including<br />
some signs, fences, and theme objects.To change<br />
the color properties of an object, click on any of the<br />
three Color buttons to display a<br />
color palette. Choose a color<br />
TIP<br />
Scenery and theme items<br />
placed near the track can<br />
add to the excitement of<br />
a ride, especially when you<br />
create the illusion of an<br />
impending collision.Tracks<br />
that cross over or under<br />
other parts of your park<br />
— footpaths, terrain, other<br />
rides and such — are also<br />
more exciting.<br />
and certain elements of items that can be recolored in the<br />
Scenery window will change to that color. Items that cannot<br />
be recolored will be unaffected.<br />
How to Place Scenery<br />
Putting scenery in your scene is simple:<br />
1. Click on the picture of the item you want to add to your landscape.<br />
2. Use the Rotate button to orient the object, if necessary.<br />
3. Use the Color buttons to recolor the item, if necessary.<br />
4. Move the cursor to the area where you want to place the object. The cursor<br />
highlights the land with a shadow image of the object that shows its size<br />
and the space required. Click to place the object in your landscape.<br />
You can demolish scenery and paths that are in your way by clicking with the<br />
right mouse button on the object on the landscape that you want to remove.<br />
Note: Most items are restricted to certain locations. (Signs, for example, must<br />
be built across a path.) The cursor will not highlight if you are unable to place<br />
the object in your current location. If the cursor highlights but you still cannot<br />
place that particular item, a text window will pop up that explains why. (Hint:<br />
Sometimes rotating the object will make it fit.)<br />
29