isel-CNC Machine - Bedienungsanleitungen / Manuals isel
isel-CNC Machine - Bedienungsanleitungen / Manuals isel
isel-CNC Machine - Bedienungsanleitungen / Manuals isel

You also want an ePaper? Increase the reach of your titles
YUMPU automatically turns print PDFs into web optimized ePapers that Google loves.
<strong>isel</strong>-<strong>CNC</strong> <strong>Machine</strong> CPV<br />
7.3 Starting Up the UPMV 4/12<br />
7.3.1 Base Address<br />
The communication of CPU and PC plug-in cards is carried out by data exchange within a<br />
defined address window of the adopted AT bus. This requires the active address range on the<br />
corresponding PC plug-in card to be set accordingly.<br />
To this aim, various address spaces are predefined for the appropriate application cards.<br />
For user applications, normally the address range from 300h to 36Fh is provided.<br />
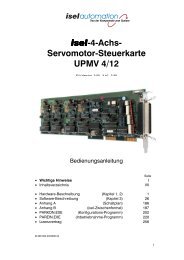
X1 - output connector<br />
J1 - base address jumper section<br />
J2 - interrupt jumper section<br />
The setting of the active address range on the UPMV 4/12 is carried out using the coding<br />
section J1. The following assignment is applicable:<br />
J1.1 J1.2 J1.3 J1.4 J1.5 J1.6 Base address<br />
(A9) (A8) (A7) (A6) (A5) (A4) set<br />
OFF OFF ON ON ON ON 300h - 31Fh<br />
OFF OFF ON ON ON OFF 310h - 31Fh<br />
OFF OFF ON ON OFF ON 320h - 32Fh<br />
OFF OFF ON ON OFF OFF 330h - 33Fh<br />
OFF OFF ON OFF ON ON 340h - 34Fh<br />
OFF OFF ON OFF ON OFF 350h - 35Fh<br />
OFF OFF ON OFF OFF ON 360h - 36Fh<br />
ON = Jumper plugged OFF = Jumper open Standard setting<br />
Please make sure that address ranges of different PC plug-in cards do not clash.<br />
7.3.2 Interrupt Source of the Servomotor Control Card<br />
Hardware Interrupt<br />
The driver software (motion module) to the servomotor control card requires a defined<br />
hardware interrupt during interpolation mode.<br />
To avoid double assignment of different PC cards, the UPMV 4/12 provides the choice from<br />
two interrupt sources. To this aim, activate one interrupt source and plug jumper J2 as<br />
indicated in the Table below.<br />
J2.1 IRQ10<br />
J2.2 IRQ11 (standard setting)<br />
J2.3 IRQ12 (cannot be used)<br />
J2.4 IRQ13 (cannot be used)<br />
28