TMC-7DSP/TMC-6DSP Color CCD Camera ... - Site ftp Elvitec
TMC-7DSP/TMC-6DSP Color CCD Camera ... - Site ftp Elvitec
TMC-7DSP/TMC-6DSP Color CCD Camera ... - Site ftp Elvitec

Create successful ePaper yourself
Turn your PDF publications into a flip-book with our unique Google optimized e-Paper software.
INSTALLATION<br />
2.2.2 (h) Attaching the Power Cable to the Connector<br />
The 12-pin connector is keyed and will only fit in one orientation. Rotate the connector while applying<br />
slight pressure until the keyways line up. Press the connector into place until firmly seated.<br />
The power cord may now be plugged into the 110V AC socket, and the camera powered up.<br />
2.2.3 Attaching the Video Output<br />
Most users utilize the BNC connector for video output from the camera. Connect the output from the<br />
camera to the input of your monitor, VCR or switching device. The input of the monitor should be<br />
balanced for 75Ω termination. Standard RG-59 type coaxial cable should carry a full video signal for up<br />
to 500 feet.<br />
Users wishing to output the video and input the power and sync to a camera over a single cable can use<br />
the PULNiX multi-conductor cables, such as the 12P-02, the KC-10, etc. The mini coaxial leads in<br />
PULNiX multi-conductor cables are designed for short runs of no longer than 100 feet.<br />
Note: Make sure that no extraneous wires are visible which could cause a short.<br />
2.2.4 Attaching the <strong>Camera</strong> Lens<br />
The <strong>TMC</strong>-<strong>7DSP</strong>/<strong>TMC</strong>-<strong>6DSP</strong> camera accepts 1/2" or larger format size C-mount lenses. To attach the C-<br />
mount lens to the camera, carefully engage the threads and rotate the lens clockwise until it firmly seats<br />
on the mounting ring. Do not force the lens if it does not seat properly. Please note that some lenses with<br />
extremely long flangebacks may exceed the mounting depth of the camera.<br />
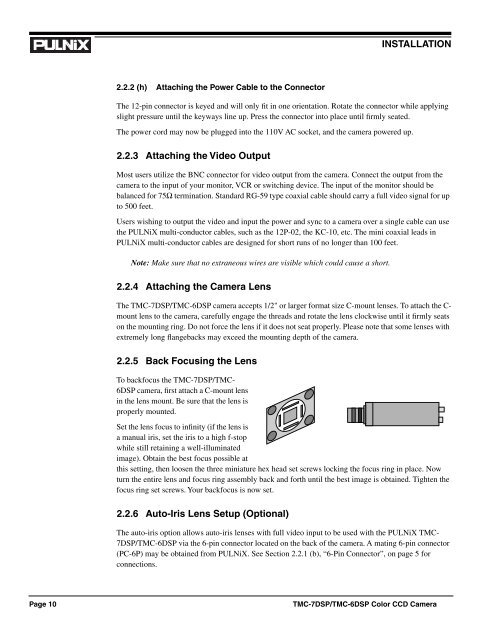
2.2.5 Back Focusing the Lens<br />
To backfocus the <strong>TMC</strong>-<strong>7DSP</strong>/<strong>TMC</strong>-<br />
<strong>6DSP</strong> camera, first attach a C-mount lens<br />
in the lens mount. Be sure that the lens is<br />
properly mounted.<br />
Back focus ring<br />
Set the lens focus to infinity (if the lens is<br />
a manual iris, set the iris to a high f-stop<br />
Back focus 2 ft.<br />
while still retaining a well-illuminated<br />
image). Obtain the best focus possible at<br />
this setting, then loosen the three miniature hex head set screws locking the focus ring in place. Now<br />
turn the entire lens and focus ring assembly back and forth until the best image is obtained. Tighten the<br />
focus ring set screws. Your backfocus is now set.<br />
2.2.6 Auto-Iris Lens Setup (Optional)<br />
The auto-iris option allows auto-iris lenses with full video input to be used with the PULNiX <strong>TMC</strong>-<br />
<strong>7DSP</strong>/<strong>TMC</strong>-<strong>6DSP</strong> via the 6-pin connector located on the back of the camera. A mating 6-pin connector<br />
(PC-6P) may be obtained from PULNiX. See Section 2.2.1 (b), “6-Pin Connector”, on page 5 for<br />
connections.<br />
Page 10<br />
<strong>TMC</strong>-<strong>7DSP</strong>/<strong>TMC</strong>-<strong>6DSP</strong> <strong>Color</strong> <strong>CCD</strong> <strong>Camera</strong>