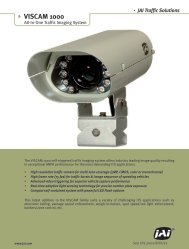
TMC-7DSP/TMC-6DSP Color CCD Camera ... - Site ftp Elvitec
TMC-7DSP/TMC-6DSP Color CCD Camera ... - Site ftp Elvitec
TMC-7DSP/TMC-6DSP Color CCD Camera ... - Site ftp Elvitec

You also want an ePaper? Increase the reach of your titles
YUMPU automatically turns print PDFs into web optimized ePapers that Google loves.
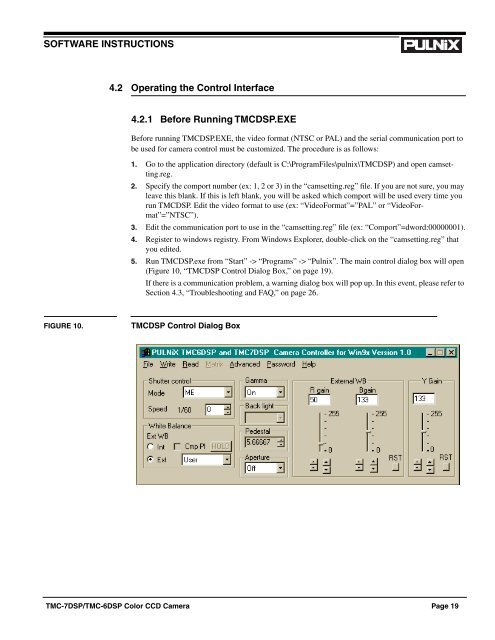
SOFTWARE INSTRUCTIONS<br />
4.2 Operating the Control Interface<br />
4.2.1 Before Running <strong>TMC</strong>DSP.EXE<br />
Before running <strong>TMC</strong>DSP.EXE, the video format (NTSC or PAL) and the serial communication port to<br />
be used for camera control must be customized. The procedure is as follows:<br />
1. Go to the application directory (default is C:\ProgramFiles\pulnix\<strong>TMC</strong>DSP) and open camsetting.reg.<br />
2. Specify the comport number (ex: 1, 2 or 3) in the “camsetting.reg” file. If you are not sure, you may<br />
leave this blank. If this is left blank, you will be asked which comport will be used every time you<br />
run <strong>TMC</strong>DSP. Edit the video format to use (ex: “VideoFormat”=”PAL” or “VideoFormat”=”NTSC”).<br />
3. Edit the communication port to use in the “camsetting.reg” file (ex: “Comport”=dword:00000001).<br />
4. Register to windows registry. From Windows Explorer, double-click on the “camsetting.reg” that<br />
you edited.<br />
5. Run <strong>TMC</strong>DSP.exe from “Start” -> “Programs” -> “Pulnix”. The main control dialog box will open<br />
(Figure 10, “<strong>TMC</strong>DSP Control Dialog Box,” on page 19).<br />
If there is a communication problem, a warning dialog box will pop up. In this event, please refer to<br />
Section 4.3, “Troubleshooting and FAQ,” on page 26.<br />
FIGURE 10.<br />
<strong>TMC</strong>DSP Control Dialog Box<br />
<strong>TMC</strong>-<strong>7DSP</strong>/<strong>TMC</strong>-<strong>6DSP</strong> <strong>Color</strong> <strong>CCD</strong> <strong>Camera</strong> Page 19