Installation Instructions - KACO new energy, Inc.
Installation Instructions - KACO new energy, Inc.
Installation Instructions - KACO new energy, Inc.

You also want an ePaper? Increase the reach of your titles
YUMPU automatically turns print PDFs into web optimized ePapers that Google loves.
Installing the Inverter<br />
Authorised electrician<br />
7 Installing the Inverter<br />
DANGER<br />
Lethal voltages are still present in the terminals and leads of the inverter even after the<br />
inverter has been switched off and disconnected.<br />
Severe injuries or death if the leads and terminals in the inverter are touched.<br />
Only authorised electricians who are approved by the supply grid operator may open and install the<br />
inverter.<br />
The inverter must be mounted in a fixed position before being connected electrically.<br />
› Observe all safety regulations and the currently applicable technical connection specifications of<br />
the responsible power supply company.<br />
› Disconnect the AC and DC sides.<br />
› Secure them against being inadvertently switched back on.<br />
› Assure that the AC and DC sides are completely voltage-free.<br />
› Connect the inverter only after the aforementioned steps have been taken.<br />
NOTICE<br />
Install the inverter in accordance with NEC, ANSI/NFPA 70.<br />
7.1 Opening the connection area<br />
Opening the connection area<br />
↻ You have mounted the inverter on the wall.<br />
1. Unscrew the four Torx screws from the front side of the connection cover.<br />
2. Pull down the connection cover.<br />
» Carry out the electrical connection.<br />
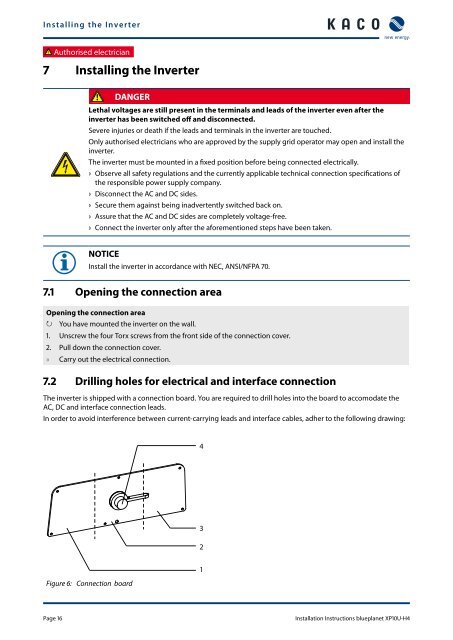
7.2 Drilling holes for electrical and interface connection<br />
The inverter is shipped with a connection board. You are required to drill holes into the board to accomodate the<br />
AC, DC and interface connection leads.<br />
In order to avoid interference between current-carrying leads and interface cables, adher to the following drawing:<br />
4<br />
3<br />
2<br />
Figure 6: Connection board<br />
1<br />
Page 16 <strong>Installation</strong> <strong>Instructions</strong> blueplanet XP10U-H4