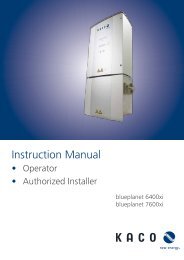
Installation Instructions - KACO new energy, Inc.
Installation Instructions - KACO new energy, Inc.
Installation Instructions - KACO new energy, Inc.

Create successful ePaper yourself
Turn your PDF publications into a flip-book with our unique Google optimized e-Paper software.
Installing the Inverter<br />
Authorised electrician<br />
NOTICE<br />
Different manufacturers interpret the standard on which the RS485 protocol is based in different<br />
ways. Note that the wire designations (- and +) for wires A and B can be different depending on the<br />
manufacturer.<br />
NOTICE<br />
Calculating efficiency by measuring the current and voltage values leads to unusable results due to<br />
the tolerances of the measurement devices. The sole purpose of these measured values is to monitor<br />
the basic operation of the system.<br />
Connecting the RS485 bus<br />
Maximum length of the RS485 wiring: 1,200 m under optimal conditions.<br />
Maximum number of connected bus devices: 31 inverters + 1 data monitoring unit.<br />
<br />
Use twisted, shielded data lines.<br />
Recommendation (using wire sleeves)<br />
– LI2YCYv (TP) black for laying cable outside and in the ground 2 x 2 x 0.5<br />
– LI2YCY (TP) grey for dry and moist spaces 2 x 2 x 0.5<br />
↻ Drill a hole for the RS485 connection cable into the connection board.<br />
1. Thread the connection cable through the hole.<br />
2. Connect the connection cable to the connection terminals provided (see figure 16 on page 23).<br />
3. Connect the following to all inverters and Kaco-proLOG as follows:<br />
– Wire A (-) with wire A (-) and<br />
– Wire B (+) with wire B (+) (see figure 17 on page 23)<br />
4. Activate the terminating resistor on the terminal unit.<br />
7.4.2 Connecting the remote control line for the power supply company<br />
This connection can be used in the future by your power supply company as an optional remote control line. When<br />
connecting, please observe the polarity (see figure 16 on page 23).<br />
Maximum contact load: 10-24 VDC, 10 mA.<br />
7.4.3 Connecting the S0 output<br />
An S0 pulse output is located on the communication board. Use this output to control accessories such as a large<br />
display, for example. The pulse rate of the output is adjustable.<br />
Connecting the S0 output<br />
↻ Drill a hole for the S0 connection cable into the connection board.<br />
1. Thread the connection cable through the hole.<br />
2. Connect the connection cable to the connection terminals.<br />
7.4.4 Connecting the Ethernet interface<br />
NOTICE<br />
Use a suitable category 5 network cable. The maximum length of a network segment is 100 m.<br />
Ensure that the cable is correctly assigned. The Ethernet connection of the inverter supports autosensing.<br />
You can use both crossed and 1:1 Ethernet connection cables.<br />
Page 24 <strong>Installation</strong> <strong>Instructions</strong> blueplanet XP10U-H4