UNIVERGE UC700 Client Getting Started Guide - NEC Corporation ...
UNIVERGE UC700 Client Getting Started Guide - NEC Corporation ...
UNIVERGE UC700 Client Getting Started Guide - NEC Corporation ...
Create successful ePaper yourself
Turn your PDF publications into a flip-book with our unique Google optimized e-Paper software.
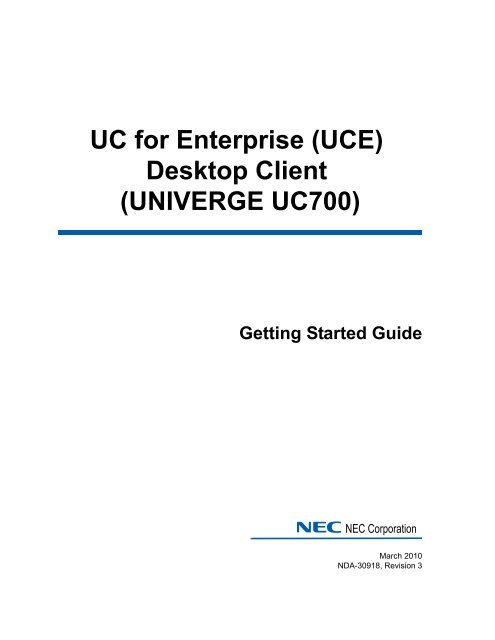
UC for Enterprise (UCE)<br />
Desktop <strong>Client</strong><br />
(<strong>UNIVERGE</strong> <strong>UC700</strong>)<br />
<strong>Getting</strong> <strong>Started</strong> <strong>Guide</strong><br />
<strong>NEC</strong> <strong>NEC</strong> <strong>Corporation</strong><br />
March 2010<br />
NDA-30918, Revision 3
Liability Disclaimer<br />
<strong>NEC</strong> <strong>Corporation</strong> reserves the right to change the specifications,<br />
functions, or features, at any time, without notice.<br />
<strong>NEC</strong> <strong>Corporation</strong> has prepared this document for the exclusive use of<br />
its employees and customers. The information contained herein is the<br />
property of <strong>NEC</strong> <strong>Corporation</strong> and shall not be reproduced without prior<br />
written approval from <strong>NEC</strong> <strong>Corporation</strong>.<br />
© 2010 <strong>NEC</strong> <strong>Corporation</strong><br />
Microsoft® Windows® is a registered<br />
trademark of Microsoft <strong>Corporation</strong>.<br />
All other brand or product names are or may be trademarks or<br />
registered trademarks of, and are used to identify products or services<br />
of, their respective owners.
i<br />
Contents<br />
Introduction 1-1<br />
<strong>UNIVERGE</strong> <strong>UC700</strong> <strong>Client</strong> Overview . . . . . . . . . . . . . . . . . . . . . . . . . . . . . . . . . 1-1<br />
How This <strong>Guide</strong> is Organized . . . . . . . . . . . . . . . . . . . . . . . . . . . . . . . . . . . . . . 1-1<br />
Installing <strong>UC700</strong> <strong>Client</strong> 2-1<br />
Using <strong>UC700</strong> <strong>Client</strong> 3-1<br />
Launching <strong>UC700</strong> <strong>Client</strong> . . . . . . . . . . . . . . . . . . . . . . . . . . . . . . . . . . . . . . . . . . 3-1<br />
Using <strong>UC700</strong> <strong>Client</strong> . . . . . . . . . . . . . . . . . . . . . . . . . . . . . . . . . . . . . . . . . . . . . . 3-5<br />
Adding a Contact . . . . . . . . . . . . . . . . . . . . . . . . . . . . . . . . . . . . . . . . . . . . . . . . 3-7<br />
Viewing Contact Information . . . . . . . . . . . . . . . . . . . . . . . . . . . . . . . . . . . . . . . 3-8<br />
Reaching a Contact . . . . . . . . . . . . . . . . . . . . . . . . . . . . . . . . . . . . . . . . . . . . . . 3-9<br />
Deleting a Contact . . . . . . . . . . . . . . . . . . . . . . . . . . . . . . . . . . . . . . . . . . . . . . 3-10<br />
Working with Groups . . . . . . . . . . . . . . . . . . . . . . . . . . . . . . . . . . . . . . . . . . . . 3-10<br />
Setting a Contact Alert. . . . . . . . . . . . . . . . . . . . . . . . . . . . . . . . . . . . . . . . . . . 3-15<br />
Removing Contact Alerts. . . . . . . . . . . . . . . . . . . . . . . . . . . . . . . . . . . . . . . . . 3-17<br />
Working with Active Call . . . . . . . . . . . . . . . . . . . . . . . . . . . . . . . . . . . . . . . . . 3-18<br />
Incoming Call. . . . . . . . . . . . . . . . . . . . . . . . . . . . . . . . . . . . . . . . . . . . . . . . . . 3-20<br />
Working with Communications Logs . . . . . . . . . . . . . . . . . . . . . . . . . . . . . . . . 3-21<br />
Working with Rules . . . . . . . . . . . . . . . . . . . . . . . . . . . . . . . . . . . . . . . . . . . . . 3-23<br />
Other Options . . . . . . . . . . . . . . . . . . . . . . . . . . . . . . . . . . . . . . . . . . . . . . . . . 3-28<br />
Using Calendar Link . . . . . . . . . . . . . . . . . . . . . . . . . . . . . . . . . . . . . . . . . . . . 3-29<br />
UCE Desktop <strong>Client</strong> (<strong>UNIVERGE</strong> <strong>UC700</strong>) <strong>Getting</strong> <strong>Started</strong> <strong>Guide</strong> - Revision 3
ii<br />
Contents<br />
UCE Desktop <strong>Client</strong> (<strong>UNIVERGE</strong> <strong>UC700</strong>) <strong>Getting</strong> <strong>Started</strong> <strong>Guide</strong> - Revision 3
iii<br />
Figures<br />
Figure Title Page<br />
2-1 <strong>UNIVERGE</strong> <strong>UC700</strong> <strong>Client</strong> Download. . . . . . . . . . . . . . . . . . . . . . . . . . . . 2-2<br />
2-2 <strong>UC700</strong> Installer Information . . . . . . . . . . . . . . . . . . . . . . . . . . . . . . . . . . . 2-3<br />
2-3 <strong>UC700</strong> - InstallShield Wizard - Install Interrupted . . . . . . . . . . . . . . . . . . 2-3<br />
2-4 <strong>UC700</strong> - InstallShield Wizard - Welcome. . . . . . . . . . . . . . . . . . . . . . . . . 2-4<br />
2-5 <strong>UC700</strong> - Custom Setup . . . . . . . . . . . . . . . . . . . . . . . . . . . . . . . . . . . . . . 2-5<br />
2-6 <strong>UC700</strong> - InstallShield Wizard - Ready to Install the Program . . . . . . . . . 2-6<br />
2-7 <strong>UC700</strong> - InstallShield Wizard - InstallShield Wizard Complete . . . . . . . . 2-7<br />
3-1 <strong>UC700</strong> <strong>Client</strong> System Tray Icon - Open . . . . . . . . . . . . . . . . . . . . . . . . . 3-1<br />
3-2 UC <strong>Client</strong> Login . . . . . . . . . . . . . . . . . . . . . . . . . . . . . . . . . . . . . . . . . . . . 3-3<br />
3-3 Initial <strong>UC700</strong> <strong>Client</strong> Menu . . . . . . . . . . . . . . . . . . . . . . . . . . . . . . . . . . . . 3-5<br />
3-4 Adding a Contact . . . . . . . . . . . . . . . . . . . . . . . . . . . . . . . . . . . . . . . . . . . 3-7<br />
3-5 Contact Information . . . . . . . . . . . . . . . . . . . . . . . . . . . . . . . . . . . . . . . . . 3-8<br />
3-6 Removing a Contact . . . . . . . . . . . . . . . . . . . . . . . . . . . . . . . . . . . . . . . 3-10<br />
3-7 Adding a Group . . . . . . . . . . . . . . . . . . . . . . . . . . . . . . . . . . . . . . . . . . . 3-11<br />
3-8 Create New Group. . . . . . . . . . . . . . . . . . . . . . . . . . . . . . . . . . . . . . . . . 3-11<br />
3-9 Newly Created Group Example . . . . . . . . . . . . . . . . . . . . . . . . . . . . . . . 3-12<br />
3-10 Adding Contact to Group . . . . . . . . . . . . . . . . . . . . . . . . . . . . . . . . . . . . 3-13<br />
3-11 My Contact and Group Lists Example . . . . . . . . . . . . . . . . . . . . . . . . . . 3-13<br />
3-12 Edit Existing Group . . . . . . . . . . . . . . . . . . . . . . . . . . . . . . . . . . . . . . . . 3-14<br />
3-13 Delete Existing Group . . . . . . . . . . . . . . . . . . . . . . . . . . . . . . . . . . . . . . 3-14<br />
3-14 Setting an Alert . . . . . . . . . . . . . . . . . . . . . . . . . . . . . . . . . . . . . . . . . . . 3-15<br />
3-15 Edit Contact Alert. . . . . . . . . . . . . . . . . . . . . . . . . . . . . . . . . . . . . . . . . . 3-16<br />
3-16 Removing an Alert . . . . . . . . . . . . . . . . . . . . . . . . . . . . . . . . . . . . . . . . . 3-17<br />
3-17 Active Call Window . . . . . . . . . . . . . . . . . . . . . . . . . . . . . . . . . . . . . . . . 3-18<br />
3-18 Incoming Call Pop-Up . . . . . . . . . . . . . . . . . . . . . . . . . . . . . . . . . . . . . . 3-20<br />
3-19 Communications Log . . . . . . . . . . . . . . . . . . . . . . . . . . . . . . . . . . . . . . . 3-21<br />
3-20 Options Main Menu . . . . . . . . . . . . . . . . . . . . . . . . . . . . . . . . . . . . . . . . 3-23<br />
3-21 Option Menu - Rules . . . . . . . . . . . . . . . . . . . . . . . . . . . . . . . . . . . . . . . 3-24<br />
3-22 Options - Rules - Groups Tab . . . . . . . . . . . . . . . . . . . . . . . . . . . . . . . . 3-25<br />
3-23 Create New Rule Group . . . . . . . . . . . . . . . . . . . . . . . . . . . . . . . . . . . . 3-25<br />
3-24 New Rule Groups Example . . . . . . . . . . . . . . . . . . . . . . . . . . . . . . . . . . 3-26<br />
3-25 Groups - Add People . . . . . . . . . . . . . . . . . . . . . . . . . . . . . . . . . . . . . . . 3-26<br />
3-26 Options - Rules . . . . . . . . . . . . . . . . . . . . . . . . . . . . . . . . . . . . . . . . . . . 3-27<br />
3-27 Outlook Option. . . . . . . . . . . . . . . . . . . . . . . . . . . . . . . . . . . . . . . . . . . . 3-30<br />
3-28 Calendar Link Status . . . . . . . . . . . . . . . . . . . . . . . . . . . . . . . . . . . . . . . 3-31<br />
UCE Desktop <strong>Client</strong> (<strong>UNIVERGE</strong> <strong>UC700</strong>) <strong>Getting</strong> <strong>Started</strong> <strong>Guide</strong> - Revision 3
iv<br />
Figures<br />
UCE Desktop <strong>Client</strong> (<strong>UNIVERGE</strong> <strong>UC700</strong>) <strong>Getting</strong> <strong>Started</strong> <strong>Guide</strong> - Revision 3
v<br />
Tables<br />
Table Title Page<br />
3-1 UC <strong>Client</strong> Menu Description . . . . . . . . . . . . . . . . . . . . . . . . . . . . . . . . . . 3-6<br />
3-2 Active Call Window Description . . . . . . . . . . . . . . . . . . . . . . . . . . . . . . . 3-18<br />
3-3 Communications Log Descriptions . . . . . . . . . . . . . . . . . . . . . . . . . . . . 3-21<br />
3-4 <strong>UC700</strong> <strong>Client</strong> Options . . . . . . . . . . . . . . . . . . . . . . . . . . . . . . . . . . . . . . 3-28<br />
UCE Desktop <strong>Client</strong> (<strong>UNIVERGE</strong> <strong>UC700</strong>) <strong>Getting</strong> <strong>Started</strong> <strong>Guide</strong> - Revision 3
vi<br />
Tables<br />
UCE Desktop <strong>Client</strong> (<strong>UNIVERGE</strong> <strong>UC700</strong>) <strong>Getting</strong> <strong>Started</strong> <strong>Guide</strong> - Revision 3
1-1<br />
1<br />
Introduction<br />
Chapter Topics<br />
The <strong>UNIVERGE</strong> <strong>UC700</strong> <strong>Client</strong> <strong>Getting</strong> <strong>Started</strong> <strong>Guide</strong> provides the<br />
information you need to install, configure and operate the <strong>UNIVERGE</strong><br />
<strong>UC700</strong> <strong>Client</strong>.<br />
The following topics are included in this chapter:<br />
• <strong>UNIVERGE</strong> <strong>UC700</strong> <strong>Client</strong> Overview<br />
• How This <strong>Guide</strong> is Organized<br />
<strong>UNIVERGE</strong> <strong>UC700</strong> <strong>Client</strong> Overview<br />
<strong>UNIVERGE</strong> <strong>UC700</strong> combines contacts, rich presence, communication<br />
history, instant messaging, call control, optional mobility, voice/video<br />
conferencing, and collaboration into one powerful, easy to manage<br />
solution. The <strong>UC700</strong> provides an intuitive interface that combines<br />
unified communications functionality in a single application. When<br />
integrating to the UM8500, voice messages may be seen, heard, and<br />
deleted from within the <strong>UC700</strong> communication history.<br />
Your presence and status may be easily shared with fellow <strong>UC700</strong> users<br />
along with UA5200 operators, MC530 mobility clients, and users of<br />
<strong>NEC</strong>'s soft phone, Dterm, MH250, and DT750/INASET phones.<br />
Based on your status, you may implement rules for groups of contacts<br />
so that people can reach you in the most effective and appropriate<br />
method possible.<br />
This guide will help you get started.<br />
How This <strong>Guide</strong> is Organized<br />
Chapter 1<br />
Introduction<br />
Chapter 2<br />
Installing <strong>UC700</strong> <strong>Client</strong><br />
Chapter 3<br />
Using <strong>UC700</strong> <strong>Client</strong><br />
This chapter provides an overview of the <strong>UC700</strong> <strong>Client</strong> application and<br />
the chapter layout of the <strong>UNIVERGE</strong> <strong>UC700</strong> <strong>Client</strong> <strong>Getting</strong> <strong>Started</strong><br />
<strong>Guide</strong>.<br />
This chapter provides the step-by-step procedures to install the <strong>UC700</strong><br />
<strong>Client</strong> software.<br />
This chapter provides the steps to launch and begin using the <strong>UC700</strong><br />
<strong>Client</strong> software following installation.<br />
UCE Desktop <strong>Client</strong> (<strong>UNIVERGE</strong> <strong>UC700</strong>) <strong>Getting</strong> <strong>Started</strong> <strong>Guide</strong> - Revision 3
1-2 Introduction<br />
UCE Desktop <strong>Client</strong> (<strong>UNIVERGE</strong> <strong>UC700</strong>) <strong>Getting</strong> <strong>Started</strong> <strong>Guide</strong> - Revision 3
2-1<br />
2<br />
Installing <strong>UC700</strong> <strong>Client</strong><br />
REFERENCE<br />
This chapter provides the step-by-step procedures to install the <strong>UC700</strong><br />
<strong>Client</strong> software.<br />
Refer to the <strong>UC700</strong> Desktop <strong>Client</strong> System Requirements listed in the <strong>UNIVERGE</strong><br />
<strong>UC700</strong> Installation <strong>Guide</strong> before installing the <strong>UC700</strong> <strong>Client</strong> software.<br />
UC <strong>Client</strong> must be installed on a Windows XP, Windows Vista, Windows Server<br />
2003, or Windows 7 machine..<br />
NOTE<br />
IMPORTANT<br />
If you install Outlook integration (installed by default unless you chose not to install)<br />
part of <strong>UC700</strong> installer, then Microsoft Outlook cannot be running while installing<br />
<strong>UC700</strong> <strong>Client</strong>.<br />
OAI applications, such as <strong>UC700</strong>, do not support Multiple Mylines.<br />
NOTE<br />
To install the <strong>UC700</strong> <strong>Client</strong>, do the following:<br />
Step 1<br />
Use the following syntax in the Address field of Internet Explorer to run<br />
the UC <strong>Client</strong> install:<br />
<br />
http:///uc700<br />
<br />
(Figure 2-1) displays.<br />
where is the name or IP<br />
address of your OW5000 server. This<br />
information will be provided to you by<br />
your system administrator.<br />
UCE Desktop <strong>Client</strong> (<strong>UNIVERGE</strong> <strong>UC700</strong>) <strong>Getting</strong> <strong>Started</strong> <strong>Guide</strong> - Revision 3
2-2 Installing <strong>UC700</strong> <strong>Client</strong><br />
Figure 2-1 <strong>UNIVERGE</strong> <strong>UC700</strong> <strong>Client</strong> Download<br />
Step 2<br />
Step 3<br />
Click Downloads.<br />
Click Download <strong>UC700</strong> Desktop <strong>Client</strong>.<br />
Step 4<br />
Step 5<br />
Click Save File when prompted to save the download.<br />
Click the uc700 setup.exe file to begin the installation process.<br />
IMPORTANT<br />
NOTE<br />
If .NET 3.5 Framework SP1 has not yet been installed on the machine (earlier<br />
versions of .NET are not required), a <strong>UC700</strong> Installer Information dialog box displays <br />
(Figure 2-2).<br />
Click the Download <strong>UC700</strong> <strong>Client</strong> for Microsoft Outlook link to install <strong>UC700</strong><br />
<strong>Client</strong> for use with Microsoft Outlook. Refer to the <strong>UC700</strong> on-line help for detailed<br />
information concerning this feature.<br />
UCE Desktop <strong>Client</strong> (<strong>UNIVERGE</strong> <strong>UC700</strong>) <strong>Getting</strong> <strong>Started</strong> <strong>Guide</strong> - Revision 3
Installing <strong>UC700</strong> <strong>Client</strong> 2-3<br />
Figure 2-2 <strong>UC700</strong> Installer Information<br />
Step 6<br />
Click OK. An InstallShield Wizard—Interrupted dialog box displays<br />
(Figure 2-3). If .NET 3.5 Framework SP1 is installed on your machine,<br />
skip to Step 9.<br />
Figure 2-3 <strong>UC700</strong> - InstallShield Wizard - Install Interrupted<br />
Step 7<br />
Step 8<br />
Click Finish.<br />
Download and install the Microsoft .NET 3.5 Framework SP1<br />
redistributable (dotnetfx35.exe) from http://www.microsoft.com before<br />
restarting the <strong>UC700</strong> <strong>Client</strong> install. A Preparing to Install screen displays<br />
briefly and then a <strong>UC700</strong> Welcome dialog box displays (Figure 2-4).<br />
UCE Desktop <strong>Client</strong> (<strong>UNIVERGE</strong> <strong>UC700</strong>) <strong>Getting</strong> <strong>Started</strong> <strong>Guide</strong> - Revision 3
2-4 Installing <strong>UC700</strong> <strong>Client</strong><br />
Figure 2-4 <strong>UC700</strong> - InstallShield Wizard - Welcome<br />
You do not need administrative rights to install, run, or upgrade this product.<br />
NOTE<br />
Step 9 Click Next. A <strong>UC700</strong> Custom Setup dialog box displays (Figure 2-5).<br />
UCE Desktop <strong>Client</strong> (<strong>UNIVERGE</strong> <strong>UC700</strong>) <strong>Getting</strong> <strong>Started</strong> <strong>Guide</strong> - Revision 3
Installing <strong>UC700</strong> <strong>Client</strong> 2-5<br />
Figure 2-5 <strong>UC700</strong> - Custom Setup<br />
Step 10<br />
Select the program features you want to install by clicking the icon next<br />
to a particular feature. Features are:<br />
—<strong>UC700</strong> Desktop <strong>Client</strong> for Windows - Use to install the feature<br />
components, and subfeature components, on a local hard drive that<br />
are required to run the <strong>UC700</strong>.<br />
—Outlook Status Integration - Use to install integration components<br />
for Microsoft Outlook, permitting you to automate your status through<br />
calendar events.<br />
—Language Pack Additions - Use to localize <strong>UC700</strong> for a specific<br />
language.<br />
To install the components to a different destination folder, click Change and select<br />
the new folder location.<br />
NOTE<br />
Step 11<br />
Click Next. A Ready to Install the Program dialog box displays <br />
(Figure 2-6).<br />
UCE Desktop <strong>Client</strong> (<strong>UNIVERGE</strong> <strong>UC700</strong>) <strong>Getting</strong> <strong>Started</strong> <strong>Guide</strong> - Revision 3
2-6 Installing <strong>UC700</strong> <strong>Client</strong><br />
Figure 2-6 <strong>UC700</strong> - InstallShield Wizard - Ready to Install the Program<br />
Step 12<br />
Click Install. A <strong>UC700</strong> <strong>Client</strong> Install Complete dialog box displays <br />
(Figure 2-7).<br />
UCE Desktop <strong>Client</strong> (<strong>UNIVERGE</strong> <strong>UC700</strong>) <strong>Getting</strong> <strong>Started</strong> <strong>Guide</strong> - Revision 3
Installing <strong>UC700</strong> <strong>Client</strong> 2-7<br />
Figure 2-7 <strong>UC700</strong> - InstallShield Wizard - InstallShield Wizard Complete<br />
Step 13<br />
Select Launch <strong>UC700</strong> and then click Finish.<br />
UCE Desktop <strong>Client</strong> (<strong>UNIVERGE</strong> <strong>UC700</strong>) <strong>Getting</strong> <strong>Started</strong> <strong>Guide</strong> - Revision 3
2-8 Installing <strong>UC700</strong> <strong>Client</strong><br />
UCE Desktop <strong>Client</strong> (<strong>UNIVERGE</strong> <strong>UC700</strong>) <strong>Getting</strong> <strong>Started</strong> <strong>Guide</strong> - Revision 3
3-1<br />
3<br />
Using <strong>UC700</strong> <strong>Client</strong><br />
Chapter Topics<br />
This chapter provides the steps to launch and use the <strong>UC700</strong> <strong>Client</strong><br />
software following installation.<br />
• Launching <strong>UC700</strong> <strong>Client</strong><br />
• Using <strong>UC700</strong> <strong>Client</strong><br />
Launching <strong>UC700</strong> <strong>Client</strong><br />
Use the following procedure to login to and start <strong>UC700</strong> <strong>Client</strong>.<br />
Step 1<br />
Right-click the <strong>UC700</strong> system tray icon and then select Login from the<br />
popup menu (Figure 3-1).<br />
<strong>UC700</strong> <strong>Client</strong> system tray icon indicators:<br />
NOTE<br />
Gray icon: Logged out<br />
Blue icon: Logged in<br />
Red icon (with phone): Missed calls<br />
Red icon (with audio indicator): Unopened voice mail<br />
Figure 3-1 <strong>UC700</strong> <strong>Client</strong> System Tray Icon - Open<br />
If the UC <strong>Client</strong> icon is not present in the System Tray of the Windows<br />
machine where the <strong>UC700</strong> <strong>Client</strong> is installed, follow this path: Start ><br />
Programs > <strong>NEC</strong> > <strong>UC700</strong>.<br />
Step 2<br />
Right-click the <strong>UC700</strong> system tray icon and then select Login from the<br />
popup menu. A UC <strong>Client</strong> Login dialog box displays (Figure 3-2).<br />
UCE Desktop <strong>Client</strong> (<strong>UNIVERGE</strong> <strong>UC700</strong>) <strong>Getting</strong> <strong>Started</strong> <strong>Guide</strong> - Revision 3
3-2 Using <strong>UC700</strong> <strong>Client</strong><br />
IMPORTANT<br />
If the version of your hardware, video card, and/or drivers cause the <strong>UC700</strong> to end<br />
unexpectedly, or if you are trying to get screen captures or present the <strong>UC700</strong> over<br />
collaboration tools but cannot properly capture/display the image of the client, you<br />
may execute the <strong>UC700</strong> application using the command line and pass it a parameter<br />
to disable transparency. Do the following:<br />
• Step 1. Locate your executable which, by default, is in the path: <br />
“C:\Documents and Settings\\Local Settings\Application<br />
Data\<strong>NEC</strong>\<strong>UC700</strong>\<strong>UC700</strong>.exe”. Note: Include the quotes.<br />
• Step 2. From the Windows Desktop, select Start > Run, then copy the path above followed<br />
by -xaml in the Run dialog box.<br />
<br />
Note: You can also find, and modify, the executable information by right-clicking the<br />
<strong>UC700</strong> Windows Desktop icon and selecting the Properties menu option. <br />
• Step 3. After the <strong>UC700</strong> window displays, click the Close button.<br />
<br />
Note: If the <strong>UC700</strong> is already logged in, you need to right-click the <strong>UC700</strong> <br />
icon located in the Windows notification area and select the Log Off menu<br />
option.<br />
• Step 4. Right-click the <strong>UC700</strong> icon again and clear the Use Transparency menu<br />
option.<br />
<br />
The <strong>UC700</strong> client should launch without transparency.<br />
UCE Desktop <strong>Client</strong> (<strong>UNIVERGE</strong> <strong>UC700</strong>) <strong>Getting</strong> <strong>Started</strong> <strong>Guide</strong> - Revision 3
Using <strong>UC700</strong> <strong>Client</strong> 3-3<br />
Figure 3-2 UC <strong>Client</strong> Login<br />
Step 3<br />
Enter the Username, Password, Server name, and then click Login.<br />
NOTE<br />
Do not check the Use SSL option unless instructed to do so by your system<br />
administrator. This encrypted link can only be used if the appropriate certificate was<br />
installed on the OW5000 server.<br />
It is highly recommended that the Remember Password and Automatically Login<br />
on Startup check boxes be selected at this time.<br />
NOTE<br />
Step 4<br />
Select the Start <strong>UC700</strong> on Windows start-up check box if you want the<br />
<strong>UC700</strong> application to run when Windows initially begins.<br />
UCE Desktop <strong>Client</strong> (<strong>UNIVERGE</strong> <strong>UC700</strong>) <strong>Getting</strong> <strong>Started</strong> <strong>Guide</strong> - Revision 3
3-4 Using <strong>UC700</strong> <strong>Client</strong><br />
NOTE<br />
The Username and Password values must match the Login ID and New<br />
Password values that were specified when the user was created in the OW5000<br />
Administrator's User Management function. The Server value must match the name<br />
of the machine where the <strong>UC700</strong> Server was installed, or the FQDN (Fully Qualified<br />
Domain Name) of the server.<br />
NOTE<br />
Select the Use Windows Authentication check box if you DO NOT want user<br />
credentials passed over the network during authentication, and DO NOT want to<br />
embed user names and passwords during database connection.<br />
The first time a user logs into the <strong>UC700</strong> <strong>Client</strong>, it can take 30 seconds or<br />
longer to load. An Initial UC <strong>Client</strong> Window displays (Figure 3-3).<br />
UCE Desktop <strong>Client</strong> (<strong>UNIVERGE</strong> <strong>UC700</strong>) <strong>Getting</strong> <strong>Started</strong> <strong>Guide</strong> - Revision 3
Using <strong>UC700</strong> <strong>Client</strong> 3-5<br />
Using <strong>UC700</strong> <strong>Client</strong><br />
This section describes the <strong>UC700</strong> <strong>Client</strong> window, explains how to create<br />
and modify contacts/groups, describes rules, and briefly explains the<br />
other options available to the <strong>UC700</strong> <strong>Client</strong> user.<br />
For additional information on using the <strong>Client</strong> software, refer to the OnLine Help<br />
system.<br />
REFERENCE<br />
After login, Figure 3-3 displays. This initial <strong>UC700</strong> <strong>Client</strong> menu consists<br />
of the elements listed and described in Table 3-1.<br />
Figure 3-3 Initial <strong>UC700</strong> <strong>Client</strong> Menu<br />
UCE Desktop <strong>Client</strong> (<strong>UNIVERGE</strong> <strong>UC700</strong>) <strong>Getting</strong> <strong>Started</strong> <strong>Guide</strong> - Revision 3
3-6 Using <strong>UC700</strong> <strong>Client</strong><br />
Table 3-1 UC <strong>Client</strong> Menu Description<br />
Item<br />
Description<br />
My Contacts - Use to display the Contact Lists.<br />
Show/Hide Call Control - Use to display or hide the Active Call<br />
feature.<br />
Communications Logs - Use to display a log of all calls and other<br />
communications you made and received.<br />
Preferences - Use to open the Options window allowing you to<br />
define and edit information such as contact preferences, changing<br />
your password, adding or editing status rules, IM settings, system<br />
settings, etc.<br />
Contact Image and Name - Identifies user.<br />
Note: Your system administrator must first upload and configure<br />
your contact image on the OW5000 server.<br />
Available - Use to change availability setting to one listed in the<br />
drop-down list. After you make the selection, the associated contact<br />
rules will then take effect.<br />
Search - Use to initiate a search for the name entered in the search<br />
field.<br />
Contacts - Use to filter a search on all categories, a corporate<br />
directory, external organizations, or personal contacts.<br />
Primary Extension - When the cursor rolls over a particular name<br />
in the Contact List, this icon displays. Rest the cursor over the icon<br />
to see the phone that will be dialed as the person's preferred<br />
telephone number. Use it to initiate a call to a person on the list.<br />
Note: This will display only if the contact has made the option<br />
available to you in their contact rules.<br />
Send Instant Message - When the cursor rolls over a particular<br />
name in the Contact List, this icon displays. Use it to send an instant<br />
message to a person on the list. Note: This will display only if the<br />
contact has an IM address and is currently logged in to an IMenabled<br />
application such as <strong>UC700</strong> or the MC530.<br />
Send E-mail - When the cursor rolls over a particular name in the<br />
Contact List, this icon displays. Use it to send an e-mail to a person<br />
on the list.Note: This will display only if the contact has an e-mail<br />
address entered into the system.<br />
A user will want to begin using <strong>UC700</strong> <strong>Client</strong> by adding contacts to the<br />
Contact List.<br />
UCE Desktop <strong>Client</strong> (<strong>UNIVERGE</strong> <strong>UC700</strong>) <strong>Getting</strong> <strong>Started</strong> <strong>Guide</strong> - Revision 3
Using <strong>UC700</strong> <strong>Client</strong> 3-7<br />
Adding a Contact<br />
Use the Contacts list for people with whom you frequently<br />
communicate. Though the information displayed for each person is no<br />
different than if you searched the database and found them, this list<br />
gives you quick accessibility to a person's presence and preferred<br />
contact information by allowing you to create contact groups that make<br />
sense to you. To add an individual to the My Contacts list:<br />
Step 1<br />
Step 2<br />
Enter an individual’s last name in the Search field. The Search Icon<br />
does not need to be clicked as Search is dynamic. Multiple contacts can<br />
be selected to be added to a buddy list from search.<br />
Right-click the desired name to be added, then select Add to My<br />
Contacts. See Figure 3-4.<br />
Figure 3-4 Adding a Contact<br />
The name is now listed in My Contacts. To query and add personal<br />
contacts to your contact list, you may right-click on the <strong>UC700</strong> tool tray<br />
icon to either import from Outlook, if you have Microsoft Outlook 2003 or<br />
2007 installed, or you may enter personal contacts individually. This can<br />
also be done using the context menus next to the My Contacts icon.<br />
<br />
Once entered, the personal contacts are available for you to query,<br />
UCE Desktop <strong>Client</strong> (<strong>UNIVERGE</strong> <strong>UC700</strong>) <strong>Getting</strong> <strong>Started</strong> <strong>Guide</strong> - Revision 3
3-8 Using <strong>UC700</strong> <strong>Client</strong><br />
contact, or organize into groups. When one of these people call you, the<br />
system will also find their name and insert the name into your<br />
communication history and screen pops on incoming calls.<br />
Viewing Contact Information<br />
Step 1<br />
To view additional information for a particular individual, click anywhere<br />
in the white space next to the contact’s name. Figure 3-5 displays.<br />
You may also view additional contact information, as shown in Figure 3-5, by rightclicking<br />
the contact’s name and clicking View Details.<br />
NOTE<br />
Figure 3-5 Contact Information<br />
Step 2<br />
To hide this additional information, click the white space next to the<br />
name once more, and the display will now only display the Contact List.<br />
You can toggle between the two displays using this method.<br />
The Presence buttons located to the left of each contact’s name<br />
indicates that particular contact’s status. The button that displays for<br />
the contact is dependent on the call rules for the device the contact<br />
selected to be their preferred contact method, and the status of the<br />
contact's call device.<br />
The buttons are:<br />
• Green The contact is available.<br />
UCE Desktop <strong>Client</strong> (<strong>UNIVERGE</strong> <strong>UC700</strong>) <strong>Getting</strong> <strong>Started</strong> <strong>Guide</strong> - Revision 3
Using <strong>UC700</strong> <strong>Client</strong> 3-9<br />
• Yellow<br />
• Red<br />
• Grey<br />
The contact is off-hook, logged out, has a status other than<br />
"Available", or has set their primary contact method to a<br />
device that is not controlled or observable by the OW5000<br />
presence engine such as an external number. The button<br />
becomes a pale yellow when the contact is off-hook.<br />
The contact is not available.<br />
The system is uncertain as to the availability of the<br />
contact.<br />
Examples: If the primary method of contact is Instant Messaging (IM), but<br />
the person is not logged in to their IM client, this primary method is<br />
not available so the presence color will be Red. <br />
<br />
If the primary contact method is a telephone and the phone is off<br />
hook, the color will be Yellow because the chances of reaching this<br />
person by that contact method are lower than if the phone was idle.<br />
Yellow is also used for external primary contact methods where it is<br />
unknown if the device is on or off hook.<br />
<br />
If the primary contact method is voice mail, the color will always be<br />
Red because no real time communication is possible at this time<br />
based on the person's contact rules.<br />
Reaching a Contact<br />
To reach a contact, follow the contact rule of the desired person and<br />
simply double-click in the white area.<br />
• If the person has set IM to be their primary contact method, the IM<br />
window will launch.<br />
• If the person has set a telephone number or voice mail as their<br />
primary contact method, your phone will go off hook in speaker mode<br />
and will ring this number.<br />
To see the list of contact methods selected by this user for their given<br />
status, left-click on their name. In this way, you can select other<br />
alternative methods in the order they were specified.<br />
If you want to override the person's rules for you in their given status,<br />
you may click on any of their contact methods from the Contact<br />
Information displayed in the right pane.<br />
UCE Desktop <strong>Client</strong> (<strong>UNIVERGE</strong> <strong>UC700</strong>) <strong>Getting</strong> <strong>Started</strong> <strong>Guide</strong> - Revision 3
3-10 Using <strong>UC700</strong> <strong>Client</strong><br />
Deleting a Contact<br />
To remove an individual from the My Contacts list:<br />
Step<br />
From My Contacts, right-click on the individual’s name to be removed,<br />
then select Remove from Group.<br />
Figure 3-6 Removing a Contact<br />
Working with Groups<br />
You can organize your frequently contacted people and organizations<br />
contacts into groups. This is a logical grouping you create to more easily<br />
find these entries. A contact can be in more than one contact group.<br />
UCE Desktop <strong>Client</strong> (<strong>UNIVERGE</strong> <strong>UC700</strong>) <strong>Getting</strong> <strong>Started</strong> <strong>Guide</strong> - Revision 3
Using <strong>UC700</strong> <strong>Client</strong> 3-11<br />
Figure 3-7 Adding a Group<br />
Step 1<br />
To add a new group, right-click the grey My Contacts bar (see<br />
Figure 3-7). Figure 3-8 displays.<br />
Figure 3-8 Create New Group<br />
Step 2<br />
Enter a group name and click Create. Figure 3-9 displays containing the<br />
newly created Group (in this example, Support).<br />
UCE Desktop <strong>Client</strong> (<strong>UNIVERGE</strong> <strong>UC700</strong>) <strong>Getting</strong> <strong>Started</strong> <strong>Guide</strong> - Revision 3
3-12 Using <strong>UC700</strong> <strong>Client</strong><br />
Figure 3-9 Newly Created Group Example<br />
Step 3<br />
To add contacts to a new or existing group, right-click the contact’s name<br />
(see Figure 3-10) and select Add to . Again, in this<br />
example, the group name is Support.<br />
UCE Desktop <strong>Client</strong> (<strong>UNIVERGE</strong> <strong>UC700</strong>) <strong>Getting</strong> <strong>Started</strong> <strong>Guide</strong> - Revision 3
Using <strong>UC700</strong> <strong>Client</strong> 3-13<br />
Figure 3-10 Adding Contact to Group<br />
—The individual will now be listed in both My Contacts and the newly<br />
created Support Group. See Figure 3-11.<br />
Figure 3-11 My Contact and Group Lists Example<br />
Step 4<br />
To rename an existing group, right-click the specific group and select<br />
Rename Group. Figure 3-12 displays.<br />
UCE Desktop <strong>Client</strong> (<strong>UNIVERGE</strong> <strong>UC700</strong>) <strong>Getting</strong> <strong>Started</strong> <strong>Guide</strong> - Revision 3
3-14 Using <strong>UC700</strong> <strong>Client</strong><br />
Figure 3-12 Edit Existing Group<br />
Step 5<br />
Step 6<br />
Enter a new name in the Group name field and click Edit.<br />
To delete a contact from a group, in the Contact List window, right-click<br />
on the contact you wish to remove, then click Remove from Group.<br />
This does NOT delete the contact from your directory, it only removes the contact<br />
from this group.<br />
NOTE<br />
Step 7 To delete an existing group, right-click the specific group. Figure 3-13<br />
displays.<br />
Figure 3-13 Delete Existing Group<br />
Step 8<br />
Confirm deletion by clicking Delete.<br />
UCE Desktop <strong>Client</strong> (<strong>UNIVERGE</strong> <strong>UC700</strong>) <strong>Getting</strong> <strong>Started</strong> <strong>Guide</strong> - Revision 3
Using <strong>UC700</strong> <strong>Client</strong> 3-15<br />
Setting a Contact Alert<br />
You can set an alert to notify you when a person becomes available. To<br />
set an alert, do the following (see Figure 3-14):<br />
Figure 3-14 Setting an Alert<br />
Step 1<br />
From My Contacts, right-click on the individual’s name, then select Set<br />
Alert. Figure 3-15 displays.<br />
UCE Desktop <strong>Client</strong> (<strong>UNIVERGE</strong> <strong>UC700</strong>) <strong>Getting</strong> <strong>Started</strong> <strong>Guide</strong> - Revision 3
3-16 Using <strong>UC700</strong> <strong>Client</strong><br />
Figure 3-15 Edit Contact Alert<br />
Step 2<br />
Select the desired alert notification by choosing the appropriate Tell me<br />
when this changes check box located next to an alert, then click OK.<br />
NOTE<br />
A contact’s alert status may be determined by selecting Preferences > General ><br />
Alerts, then selecting the applicable contact’s name and clicking Edit. The contact’s<br />
current alert status displays.<br />
UCE Desktop <strong>Client</strong> (<strong>UNIVERGE</strong> <strong>UC700</strong>) <strong>Getting</strong> <strong>Started</strong> <strong>Guide</strong> - Revision 3
Using <strong>UC700</strong> <strong>Client</strong> 3-17<br />
Removing Contact Alerts<br />
Selecting the Remove Alert option removes ALL current assigned alerts for the<br />
selected contact.<br />
IMPORTANT<br />
To remove all existing alerts for a contact, do the following (see <br />
Figure 3-16):<br />
Figure 3-16 Removing an Alert<br />
Step 1<br />
Step 2<br />
From My Contacts, right-click on the individual’s name, then select<br />
Remove Alert.<br />
Click OK.<br />
NOTE<br />
During this alert removal process, you will be able to select an alert notification by<br />
choosing the appropriate Tell me when this changes check box located next to an<br />
alert, then click OK.<br />
UCE Desktop <strong>Client</strong> (<strong>UNIVERGE</strong> <strong>UC700</strong>) <strong>Getting</strong> <strong>Started</strong> <strong>Guide</strong> - Revision 3
3-18 Using <strong>UC700</strong> <strong>Client</strong><br />
NOTE<br />
Working with Active Call<br />
When you initiate a call, the Active Call window () displays. Table 3-2<br />
describes the options available.<br />
If you click the Show/Hide Call Control icon while the Active Call window is open,<br />
the Active Call window closes.<br />
NOTE<br />
<strong>UC700</strong> call control can control multiple lines, i.e., it can control prime and sub-lines in<br />
<strong>UC700</strong> by using the menu to toggle between lines.<br />
Figure 3-17 Active Call Window<br />
Table 3-2 Active Call Window Description<br />
Item<br />
Description<br />
Blue Call Button - Indicates the call is active. This button displays<br />
the name and number of the contacted party. The drop-down arrow<br />
opens a menu with two options:<br />
• Remove from call - Removes the call from the conference, if<br />
applicable.<br />
• Send IM - Opens the Instant Messenger window for that caller so<br />
you can send an Instant Message.<br />
UCE Desktop <strong>Client</strong> (<strong>UNIVERGE</strong> <strong>UC700</strong>) <strong>Getting</strong> <strong>Started</strong> <strong>Guide</strong> - Revision 3
Using <strong>UC700</strong> <strong>Client</strong> 3-19<br />
Item<br />
Description<br />
Orange Call Button - Indicates the call is dialing in, is on hold, or is<br />
being dialed. This button displays the name of the party and the<br />
contact method. The drop-down arrow opens a menu with two<br />
options:<br />
• Remove from call - Removes the call from the conference, if<br />
applicable.<br />
• Send IM - Opens the Instant Messenger window for that caller so<br />
you can send an Instant Message.<br />
Hold - Use to place or remove a call on hold. This action works as<br />
a toggle.<br />
Transfer - Use to transfers a call to another line.<br />
Dial - Use to call a number not represented by a contact.<br />
Conference - Use to open the Conference Manager window.<br />
Communication Logs - Use to open the Communication Logs<br />
window.<br />
Video Conference - Use to open the Video Conference window.<br />
For more information concerning the Video Conference feature, see<br />
the <strong>UNIVERGE</strong> <strong>UC700</strong> Video Conferencing User <strong>Guide</strong> .<br />
End Call - Use to disconnect an active call.<br />
Video Conference is not available with <strong>UC700</strong> R1.<br />
NOTE<br />
UCE Desktop <strong>Client</strong> (<strong>UNIVERGE</strong> <strong>UC700</strong>) <strong>Getting</strong> <strong>Started</strong> <strong>Guide</strong> - Revision 3
3-20 Using <strong>UC700</strong> <strong>Client</strong><br />
Incoming Call<br />
When you receive an incoming message, the Incoming Call pop-up<br />
(Figure 3-18) displays on your screen. This pop-up displays even if<br />
<strong>UC700</strong> is closed.<br />
Figure 3-18 Incoming Call Pop-Up<br />
The Incoming Call pop-up consists of the following:<br />
• A phone dialing icon indicating the arrival of an incoming call.<br />
• The name of the person calling in, if known, and the number they are<br />
calling from.<br />
• Accept button - If you accept the call, the call connects, and the main<br />
view switches to the Active Call window. If you do not have <strong>UC700</strong><br />
open, <strong>UC700</strong> opens with the Active Call window displayed.<br />
• Voicemail button - Selecting this option sends the incoming call to<br />
your voice mail.<br />
• Send To button - Selecting this option displays a pop-up menu for<br />
selecting where you want to redirect the call.<br />
NOTE<br />
When sharing a Dterm phone, although one person may set a contact rule set to<br />
have their calls redirected, this redirection will not happen unless their last name<br />
comes alphabetically before all others sharing the phone as programmed by the<br />
administrator in the OW5000 database. This same rule applies to the name<br />
displayed on the Dterm phone on an incoming call.<br />
UCE Desktop <strong>Client</strong> (<strong>UNIVERGE</strong> <strong>UC700</strong>) <strong>Getting</strong> <strong>Started</strong> <strong>Guide</strong> - Revision 3
Using <strong>UC700</strong> <strong>Client</strong> 3-21<br />
Working with Communications Logs<br />
The Communication Logs (Figure 3-19) displays a log of all calls and<br />
other communications you have made and received.<br />
Figure 3-19 Communications Log<br />
Table 3-3 Communications Log Descriptions<br />
Icon<br />
Incoming Communication<br />
Description<br />
Outgoing Communication<br />
Missed Communication<br />
Instant Message<br />
Voice Mail<br />
<br />
You can access a history of calls and other communications from the<br />
Communications Logs by selecting the Communications Logs icon.<br />
The Communication Log can be filtered using either of the following<br />
methods:<br />
UCE Desktop <strong>Client</strong> (<strong>UNIVERGE</strong> <strong>UC700</strong>) <strong>Getting</strong> <strong>Started</strong> <strong>Guide</strong> - Revision 3
3-22 Using <strong>UC700</strong> <strong>Client</strong><br />
• Entering a search parameter, as shown below. Search is dynamic and<br />
there is no need to press the Search icon. Only those<br />
communications matching the parameter specified are listed.<br />
• Using the drop-down menu, as shown below, and selecting the filter<br />
desired. For example, creating a log that only lists Instant Messages.<br />
You can view additional information for each communication listed in the<br />
log by clicking the white space next to the specific contact (see Figure 3-<br />
19).<br />
Double-click a listed contact to return their call either based on their<br />
contact rules (if they are a corporate user), or based on the number<br />
from which they called (if they were a personal user). To see the list of<br />
contact methods selected by this user for their given status, click on<br />
their name. In this way, you can select other alternative methods in the<br />
order they were specified.<br />
If you have Voice Mail integration, and the caller left you a voice mail,<br />
you can click and play the voice mail through your computer’s speakers.<br />
The Communication Logs displays the following information:<br />
• Name of the caller, if known, or formatted phone number and<br />
Unknown or sender/recipient (inbound/outbound). If no name is<br />
known, you have the option to save this entry in your personal<br />
directory and provide a name that will also change any call log entries<br />
to now display that name.<br />
• The status of the caller/recipient along with their Presence button.<br />
• Date and time of the message.<br />
• Icons for communicating with the contact.<br />
UCE Desktop <strong>Client</strong> (<strong>UNIVERGE</strong> <strong>UC700</strong>) <strong>Getting</strong> <strong>Started</strong> <strong>Guide</strong> - Revision 3
Using <strong>UC700</strong> <strong>Client</strong> 3-23<br />
Working with Rules<br />
Contact rules route incoming calls to different devices based on your<br />
status and whom the call is from. For example, you can configure<br />
application so that when you are in a meeting and friends try to contact<br />
you, they are sent to your voice mail. You can set a different rule that<br />
routes other groups of individuals, such as our management, to your<br />
mobile device when you are in a meeting.<br />
To set the contact rules, do the following:<br />
Step 1 From the <strong>UC700</strong> <strong>Client</strong> Main Menu, select the Preferences icon.<br />
Figure 3-20 display.<br />
Figure 3-20 Options Main Menu<br />
UCE Desktop <strong>Client</strong> (<strong>UNIVERGE</strong> <strong>UC700</strong>) <strong>Getting</strong> <strong>Started</strong> <strong>Guide</strong> - Revision 3
3-24 Using <strong>UC700</strong> <strong>Client</strong><br />
Step 2 Select the Contact Rules icon. Figure 3-21 displays.<br />
Figure 3-21 Option Menu - Rules<br />
Step 3<br />
—From this window, you will be able to use any pre-existing status listed<br />
to indicate status a group will see when they attempt to contact you, or<br />
you can create a status of your own to meet you specific needs by<br />
clicking the Add button.<br />
Select the Groups tab. Figure 3-22 displays.<br />
UCE Desktop <strong>Client</strong> (<strong>UNIVERGE</strong> <strong>UC700</strong>) <strong>Getting</strong> <strong>Started</strong> <strong>Guide</strong> - Revision 3
Using <strong>UC700</strong> <strong>Client</strong> 3-25<br />
Figure 3-22 Options - Rules - Groups Tab<br />
Step 4<br />
Add a new group by clicking Add. Figure 3-23 displays.<br />
Figure 3-23 Create New Rule Group<br />
Step 5<br />
Enter a Rule Group Name and click Create. Figure 3-24 displays.<br />
UCE Desktop <strong>Client</strong> (<strong>UNIVERGE</strong> <strong>UC700</strong>) <strong>Getting</strong> <strong>Started</strong> <strong>Guide</strong> - Revision 3
3-26 Using <strong>UC700</strong> <strong>Client</strong><br />
Figure 3-24 New Rule Groups Example<br />
Step 6<br />
To add contacts to a particular group listed, highlight the group and click<br />
Edit. Figure 3-25 displays.<br />
Figure 3-25 Groups - Add People<br />
UCE Desktop <strong>Client</strong> (<strong>UNIVERGE</strong> <strong>UC700</strong>) <strong>Getting</strong> <strong>Started</strong> <strong>Guide</strong> - Revision 3
Using <strong>UC700</strong> <strong>Client</strong> 3-27<br />
Step 7<br />
Step 8<br />
Step 9<br />
Click Add and use the Search window to locate the contacts you want<br />
added to the group.<br />
When finished, click OK.<br />
Select the Rules tab, Figure 3-26 displays.<br />
Figure 3-26 Options - Rules<br />
Step 10<br />
Select a group from the Group field’s drop-down, then indicate the status<br />
the contacts of this particular group will see when they attempt to contact<br />
you.<br />
UCE Desktop <strong>Client</strong> (<strong>UNIVERGE</strong> <strong>UC700</strong>) <strong>Getting</strong> <strong>Started</strong> <strong>Guide</strong> - Revision 3
3-28 Using <strong>UC700</strong> <strong>Client</strong><br />
Step 11<br />
In the Contact Methods (in order) field, specify what method, and in<br />
what order, the members of this group will contact you (for example,<br />
Primary Extension, Instant Messaging, Voice Mail, etc.<br />
—Use the and icons to arrange the preferred contact<br />
preference order.<br />
IMPORTANT<br />
It is important to note that the contact methods used by one group, and the gem<br />
color seen by a particular group, can be entirely different from that of another group.<br />
For example, Group 1 may see your status as At Lunch with a contact method of<br />
voice mail and a red gem icon, while Group 2 may see your status as At Lunch and a<br />
contact method of Instant Messaging with a green gem icon.<br />
Other Options<br />
Table 3-4 provides a brief explanation of <strong>UC700</strong> <strong>Client</strong> options. These<br />
options are accessed by selecting the Preferences<br />
icon on the<br />
<strong>UC700</strong> <strong>Client</strong> Main Menu, then selecting the General, Contact Rules,<br />
Chat, or System icon.<br />
Table 3-4 <strong>UC700</strong> <strong>Client</strong> Options<br />
Option<br />
Description<br />
General<br />
Contact Rules<br />
Chat<br />
Use this menu to:<br />
• My Information: Enter or update your home telephone, home e-<br />
mail, and mobile phone information<br />
• Password: Change your password.<br />
• Alerts: Edit or delete contact alerts.<br />
• Themes: Select a preferred <strong>UC700</strong> theme (Black, Green, Red or<br />
Blue).<br />
<br />
Note: You must exit and restart <strong>UC700</strong> for the new theme to take<br />
effect.<br />
See “Working with Rules” on page 3-23 in this chapter.<br />
Use to configure the number of items displayed in the IM chat<br />
window for each user. Slide the Change Number of IMs in Log<br />
indicator left or right to decrease or increase the number of IMs to<br />
be stored.<br />
UCE Desktop <strong>Client</strong> (<strong>UNIVERGE</strong> <strong>UC700</strong>) <strong>Getting</strong> <strong>Started</strong> <strong>Guide</strong> - Revision 3
Using <strong>UC700</strong> <strong>Client</strong> 3-29<br />
Option<br />
Description<br />
System Shortcuts: Use this option to change the system default set<br />
for the shortcuts allocated within <strong>UC700</strong>. They<br />
are:<br />
<br />
Dial Default is Ctrl + D<br />
Release Default is Ctrl + R<br />
Answer Default is Ctrl + A<br />
Hold Default is Ctrl + H<br />
<br />
Note: You can designate the Shift key, the<br />
Control key or no key at all, to be the primary<br />
key for shortcuts by selecting an option from the<br />
Primary Key drop-down, then selecting the<br />
desired Secondary Key. The selection will<br />
display in the Chosen Key field. <br />
<br />
Select or clear the Dial Enabled check box.<br />
Outlook:<br />
Use this option to set which Availability status to<br />
use when your Outlook status is set as:<br />
<br />
Busy - System default is In a Meeting.<br />
Out of Office - System default is Out of Office.<br />
<br />
Also, use this window to delete all personal<br />
contacts from your Personal Contacts directory.<br />
Note:<br />
For information about the Calendar Link<br />
feature of this option, see Using Calendar<br />
Link.<br />
Idle Watcher:<br />
Use this option to set the idle watcher for your<br />
keyboard and mouse. You can set an inactivity<br />
timer to display a status of your choice when<br />
<strong>UC700</strong> detects your keyboard and mouse have<br />
been idle for the amount of time you specified.<br />
Use the slide indicator located in the Inactivity<br />
Timer (minutes) field to increase or decrease<br />
the minutes.<br />
About<br />
Displays the client and server versions for the <strong>UC700</strong>.<br />
Using Calendar Link<br />
Calendar Link coordinates your status setting between <strong>UC700</strong> and<br />
scheduled appointments in Microsoft Outlook. To use this feature, your<br />
system administrator must have installed the Microsoft Exchange<br />
Calendar Link integration on the server.<br />
UCE Desktop <strong>Client</strong> (<strong>UNIVERGE</strong> <strong>UC700</strong>) <strong>Getting</strong> <strong>Started</strong> <strong>Guide</strong> - Revision 3
3-30 Using <strong>UC700</strong> <strong>Client</strong><br />
Figure 3-27 Outlook Option<br />
When installed, Outlook displays a drop-down menu at the bottom of<br />
the Appointment window which you can use to specify your status in<br />
<strong>UC700</strong>, as shown in Figure 3-28.<br />
NOTE<br />
After Calendar Link is installed on the OW5000 server (see Figure 3-27), only events<br />
scheduled from that point on can change the status based on your preferences. In<br />
order for previously scheduled Busy or Out of Office appointments or events to<br />
change your status, you must open them again in Outlook and save them once<br />
more.<br />
UCE Desktop <strong>Client</strong> (<strong>UNIVERGE</strong> <strong>UC700</strong>) <strong>Getting</strong> <strong>Started</strong> <strong>Guide</strong> - Revision 3
Using <strong>UC700</strong> <strong>Client</strong> 3-31<br />
Figure 3-28 Calendar Link Status<br />
The default settings you configure in the <strong>UC700</strong> Outlook options screen<br />
determine the status that displays by default when your Outlook<br />
calendar event occurs. However, you can override these setting using<br />
the drop-down menu in Outlook. This is a convenient way to temporarily<br />
use alternate contact methods and rules to suit your needs.<br />
Example:<br />
Suppose you are in a scheduled meeting listed in your Outlook calendar<br />
and your Outlook status during the meeting is Busy. You've set your<br />
default preference in the <strong>UC700</strong> client to In A Meeting when your<br />
Outlook status is Busy and that associated contact rule usually routes<br />
calls to voice mail.<br />
Now suppose you are expecting an important call and want it routed<br />
instead to your wireless phone. You can use the Status drop-down<br />
menu in Outlook to specify a status/contact rule you've created, such as<br />
Away, that sends the call to your wireless.<br />
UCE Desktop <strong>Client</strong> (<strong>UNIVERGE</strong> <strong>UC700</strong>) <strong>Getting</strong> <strong>Started</strong> <strong>Guide</strong> - Revision 3
3-32 Using <strong>UC700</strong> <strong>Client</strong><br />
NOTE<br />
Status<br />
Use the Status drop-down (see Figure 3-28) to specify the status<br />
<strong>UC700</strong> users will see while you are in a scheduled meeting or<br />
appointment. This setting overrides the default setting you specified in<br />
the <strong>UC700</strong> client.<br />
If your Outlook event begins as an all-day event with a Free time setting, the <strong>UC700</strong><br />
status drop-down at the bottom of the form will be blank. <br />
If you then add a time or change the setting to Busy or Out of Office, your default<br />
<strong>UC700</strong> setting will be used unless you manually change the drop-down menu from<br />
the blank/default status.<br />
The selections available in this menu are taken directly from the <strong>UC700</strong><br />
client. To add, modify, or delete a status, you must do so from <strong>UC700</strong>.<br />
Expiration Method<br />
Use the Expiration drop-down to specify how long and under which<br />
conditions the <strong>UC700</strong> status you specified from Outlook remains in<br />
effect. Choose from one of the following options:<br />
• Auto Expire - When the scheduled Outlook meeting/activity ends,<br />
your status reverts to the default setting specified in the <strong>UC700</strong> client.<br />
• Resume on Activity - Your <strong>UC700</strong> status remains at the setting you<br />
specified using the Status drop-down menu in Outlook until the<br />
<strong>UC700</strong> client detects mouse or keyboard activity on your computer,<br />
even if the scheduled Outlook meeting/activity has not ended. This<br />
setting is useful if your meeting ends early or if you must leave before<br />
it is scheduled to end.<br />
• Auto Expire and Resume on Activity - Your <strong>UC700</strong> status remains<br />
at the setting you specified using the Status drop-down menu in<br />
Outlook until the scheduled Outlook meeting/activity has ended and<br />
the <strong>UC700</strong> client detects mouse or keyboard activity on your<br />
computer. This setting is useful if your meeting runs over its<br />
scheduled time or you are not able to return to your computer<br />
immediately after it ends.<br />
• Do Not Expire or Resume - Your <strong>UC700</strong> status remains at the<br />
setting you specified using the Status drop-down menu in Outlook<br />
until you manually change the status or specify a new expiration<br />
method.<br />
UCE Desktop <strong>Client</strong> (<strong>UNIVERGE</strong> <strong>UC700</strong>) <strong>Getting</strong> <strong>Started</strong> <strong>Guide</strong> - Revision 3
For additional information or support on this <strong>NEC</strong> <strong>Corporation</strong><br />
product, contact your <strong>NEC</strong> <strong>Corporation</strong> representative.
<strong>NEC</strong> <strong>NEC</strong> <strong>Corporation</strong><br />
UCE Desktop <strong>Client</strong> (<strong>UNIVERGE</strong> <strong>UC700</strong>) <strong>Getting</strong> <strong>Started</strong> <strong>Guide</strong><br />
NDA-30918, Revision 3


