
You also want an ePaper? Increase the reach of your titles
YUMPU automatically turns print PDFs into web optimized ePapers that Google loves.
English<br />
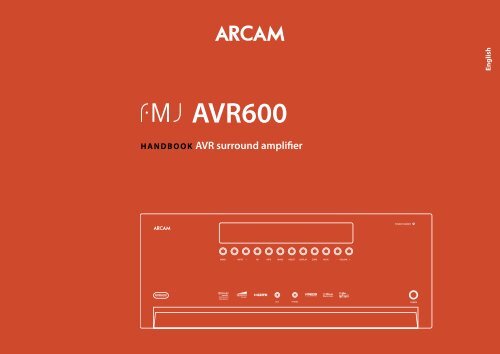
<strong>AVR600</strong><br />
Handbook AVR surround amplifier
safety<br />
guidelines<br />
<br />
<br />
<br />
<br />
<br />
<br />
CAUTION: To reduce the risk of electric shock, do not remove cover (or back). No user serviceable parts inside. Refer servicing to qualified<br />
service personnel.<br />
WARNING: To reduce the risk of fire or electric shock, do not expose this apparatus to rain or moisture.<br />
The lightning flash with an arrowhead symbol within an equilateral triangle, is intended to alert the user to the presence of<br />
uninsulated ‘dangerous voltage’ within the product’s enclosure that may be of sufficient magnitude to constitute a risk of electric<br />
shock to persons.<br />
The exclamation point within an equilateral triangle is intended to alert the user to the presence of important operating and<br />
maintenance (servicing) instructions in the literature accompanying the product.<br />
CAUTION: In Canada and the USA, to prevent electric shock, match the wide blade of the plug to the wide slot in the socket<br />
and insert the plug fully into the socket.<br />
Class II product<br />
This equipment is a Class II or double<br />
insulated electrical appliance. It has been<br />
designed in such a way that it does not<br />
require a safety connection to electrical<br />
earth (‘ground’ in the U.S.).<br />
Many of these items are common sense precautions but, for your own safety and to ensure that you do not damage the unit, we recommend that you read them.<br />
Important safety instructions<br />
This product is designed and manufactured to meet<br />
strict quality and safety standards. However, you should<br />
be aware of the following installation and operation<br />
precautions.<br />
1. Take heed of warnings and instructions<br />
You should read all the safety and operating instructions<br />
before operating this equipment. Retain this handbook<br />
for future reference and adhere to all warnings in the<br />
handbook or on the equipment.<br />
2. Water and moisture<br />
The presence of electricity near water can be dangerous.<br />
Do not use the equipment near water – for example next<br />
to a bathtub, washbowl, kitchen sink, in a wet basement<br />
or near a swimming pool, etc.<br />
3. Object or liquid entry<br />
Take care that objects do not fall and liquids are not<br />
spilled into the enclosure through any openings. Liquidfilled<br />
objects such as vases should not be placed on the<br />
equipment.<br />
4. Placing the equipment<br />
Only use a rack or shelf that is stable and strong enough<br />
to support the weight of this equipment.<br />
5. Ventilation<br />
Do not place the equipment on a bed, sofa, rug or<br />
similar soft surface, or in an enclosed bookcase or<br />
cabinet, since ventilation may be impeded.<br />
6. Heat<br />
Locate the equipment away from naked flames or heatproducing<br />
appliances such as radiators, stoves or other<br />
appliances that produce heat.<br />
7. Climate<br />
The equipment has been designed for use in moderate<br />
climates and in domestic situations. Unplug this<br />
equipment during lightning storms to prevent possible<br />
damage from a strike or mains surge.<br />
8. Cleaning<br />
Unplug the unit from the mains supply before cleaning.<br />
The case should normally only require a wipe with a soft,<br />
lint-free cloth. Do not use chemical solvents for cleaning.<br />
We do not advise the use of furniture cleaning sprays or<br />
polishes as they can cause permanent white marks.<br />
9. Power sources<br />
Only connect the equipment to a power supply of<br />
the type described in the operating instructions or as<br />
marked on the equipment.<br />
The primary method of isolating the equipment from<br />
the mains supply is to remove the mains plug. The<br />
equipment must be installed in a manner that makes<br />
disconnection possible.<br />
10. Power-cord protection<br />
Power supply cords should be routed so that they are not<br />
likely to be walked on or pinched by items placed upon<br />
or against them. Pay particular attention to the point<br />
where they exit from the equipment.<br />
E-2<br />
11. Power lines<br />
Locate any outdoor antenna/aerial away from power<br />
lines.<br />
12. Speaker connections<br />
Any speakers must be connected to the <strong>AVR600</strong> using<br />
class II wire (i.e. no connection to Earth should be<br />
made). Failure to observe this precaution may cause the<br />
unit to become damaged.<br />
13. Non-use periods<br />
If the equipment is not being used for an extended<br />
period, we recommend that you unplug the power cord<br />
of the equipment from the outlet, to save power.<br />
14. Abnormal smell<br />
If an abnormal smell or smoke is detected from the<br />
equipment, turn the power off immediately and unplug<br />
the equipment from the wall outlet. Contact your dealer<br />
and do not reconnect the equipment.<br />
15. Servicing<br />
You should not attempt to service the equipment.<br />
Contact your dealer to arrange servicing.<br />
16. Damage requiring service<br />
The equipment should be serviced by qualified service<br />
personnel when:<br />
A. the power-supply cord or the plug has been<br />
damaged, or<br />
B. objects have fallen into, or liquid has spilled into the<br />
equipment, or<br />
C. the equipment has been exposed to rain, or<br />
D. the equipment does not appear to operate normally<br />
or exhibits a marked change in performance, or<br />
E. the equipment has been dropped or the enclosure<br />
damaged.<br />
Safety compliance<br />
This equipment has been designed to meet the IEC/EN<br />
60065 international electrical safety standard.<br />
This device complies with Part 15 of the FCC Rules.<br />
Operation is subject to the following two conditions:<br />
(1) This device may not cause harmful interference, and<br />
(2) this device must accept any interference received,<br />
including interference that may cause undesired<br />
operation.
consignes<br />
de sécurité<br />
<br />
<br />
<br />
<br />
<br />
<br />
ATTENTION : afin de réduire les risques de choc électrique, n’ouvrez pas le boîtier de l’appareil. Les pièces internes ne sont pas réparables<br />
par l’utilisateur. Pour tout problème matériel, contactez des techniciens qualifiés.<br />
ATTENTION : afin de réduire les risques de choc électrique et d’incendie, veillez à ne pas exposer cet appareil à la pluie ou à<br />
l’humidité.<br />
Le triangle dans lequel figure le symbole d’un éclair alerte l’utilisateur de la présence, dans le boîtier de l’appareil, d’une tension<br />
dangereuse, non isolée et suffisamment importante pour représenter un risque de choc électrique.<br />
Le triangle dans lequel figure un point d’exclamation alerte l’utilisateur de la présence d’instructions de fonctionnement et de<br />
maintenance (réparation) importantes dans la documentation accompagnant le produit.<br />
Class II produit<br />
Ce produit est un appareil électrique à<br />
isolation double (appareil de classe II).<br />
Il a été conçu pour ne pas nécessiter de<br />
connexion de sécurité à la terre (ou à la<br />
masse).<br />
Bon nombre des consignes ci-dessous sont de simples précautions de bon sens. Nous vous recommandons toutefois de les lire pour votre propre sécurité et pour celle de l’appareil.<br />
Instructions de sécurité<br />
importantes<br />
Cet appareil a été conçu et fabriqué conformément aux<br />
normes de qualité et de sécurité les plus strictes. Vous<br />
devez cependant observer les précautions qui suivent<br />
lors de son installation et de son utilisation.<br />
1. Avertissements et consignes<br />
Il est impératif de lire les consignes de sécurité et<br />
d’utilisation avant de mettre cet appareil en marche.<br />
Conservez ce manuel pour vous y référer par la suite et<br />
respectez scrupuleusement les avertissements figurant<br />
dans ce manuel ou sur l’appareil lui-même.<br />
2. Eau et humidité<br />
L’installation d’un appareil électrique à proximité d’une<br />
source d’eau présente de sérieux risques. Il ne faut donc<br />
pas installer l’appareil près d’une baignoire, d’un lavabo,<br />
d’un évier, dans un sous-sol humide, près d’une piscine,<br />
etc.<br />
3. Chute d’objets ou infiltration de liquides<br />
Veillez à ne pas laisser tomber d’objets ni couler de<br />
liquides à travers les ouvertures de l’appareil et ne placez<br />
pas sur l’appareil d’objet contenant du liquide, tel qu’un<br />
vase par exemple.<br />
4. Placement de l’équipement<br />
Utilisez uniquement une étagère assez stable et solide pour<br />
supporter le poids de cet équipement.<br />
ATTENTION : au Canada et aux États-Unis, afin de prévenir tout choc électrique, aligner la plus grosse broche de la prise à la fente la plus<br />
large de la fiche et insérez entièrement la prise dans la fiche.<br />
5. Ventilation<br />
Évitez de placer l’appareil sur un lit, un canapé, un<br />
tapis ou une surface similaire instable ou dans une<br />
bibliothèque ou un meuble fermé. Ceci risquerait de<br />
nuire à la ventilation du système.<br />
6. Exposition à la chaleur<br />
Ne placez pas l’appareil à proximité d’une flamme nue<br />
ou de tout dispositif produisant de la chaleur : radiateur,<br />
poêle ou autre.<br />
7. Conditions climatiques<br />
L’appareil est conçu pour fonctionner dans des climats<br />
modérés. Déconnectez cet équipement pendant un<br />
orage pour éviter tous dommages possibles d’un impacte<br />
de la foudre ou de surtension.<br />
8. Nettoyage<br />
Mettez l’appareil hors-tension avant de le nettoyer.<br />
Pour l’entretien du boîtier, utilisez uniquement un<br />
chiffon doux, humide et non pelucheux. N’utilisez pas<br />
de solvant chimique.<br />
L’emploi d’aérosols ou de produits de nettoyage pour<br />
meubles est déconseillé, car le passage d’un chiffon<br />
humide risquerait de laisser des traces blanches et<br />
indélébiles.<br />
9. Alimentation secteur<br />
Branchez l’appareil uniquement sur une alimentation<br />
secteur du type mentionné dans le manuel d’utilisation<br />
ou indiqué sur l’appareil lui-même.<br />
Le principal moyen d’isoler l’appareil du secteur est<br />
d’utiliser l’interrupteur situé à l’arrière de l’appareil.<br />
Cet appareil doit être installé de façon à pouvoir être<br />
débranché si nécessaire.<br />
10. Protection des câbles d’alimentation secteur<br />
Veillez à ce que les câbles d’alimentation ne se trouvent<br />
pas dans un lieu de passage ou bloqués par d’autres<br />
objets. Cette règle s’applique plus particulièrement aux<br />
prises et câbles d’alimentation et à leurs points de sortie<br />
de l’appareil.<br />
11. Câbles haute tension<br />
Évitez de monter l’antenne extérieure de l’appareil à<br />
proximité de câbles haute tension.<br />
12. Branchement des haut-parleurs<br />
Tous les haut-parleurs doivent être connectés à<br />
l’<strong>AVR600</strong> avec du câble de classe II (aucune mise à la<br />
terre nécessaire). Le non-respect de cette précaution est<br />
susceptible d’endommager l’appareil.<br />
13. Périodes de non-utilisation<br />
Si l’appareil possède une fonction de mise en veille, un<br />
courant faible continuera de circuler lorsqu’il sera réglé<br />
sur ce mode. Débrancher le cordon secteur de la prise<br />
murale si l’appareil doit rester inutilisé pendant une<br />
période prolongée.<br />
14. Odeur suspecte<br />
Arrêtez et débranchez immédiatement l’appareil en cas<br />
d’émission de fumée ou d’odeur anormale. Contactez<br />
immédiatement votre revendeur.<br />
15. Service<br />
N’essayez jamais d’effectuer d’autres opérations que celles<br />
mentionnées dans ce manuel. Toute autre intervention<br />
doit être effectuée par un personnel qualifié.<br />
16. Entretien par des techniciens qualifiés<br />
L’appareil doit être entretenu par du personnel qualifié<br />
lorsque :<br />
A. la prise ou le câble d’alimentation a été endommagé,<br />
B. des objets sont tombés ou du liquide a coulé dans<br />
l’appareil,<br />
C. l’appareil a été exposé à la pluie,<br />
D. l’appareil présente des dysfonctionnements,<br />
E. l’appareil est tombé ou le boîtier a été endommagé.<br />
Respect des consignes de<br />
sécurité<br />
Cet appareil a été conçu pour répondre à la norme<br />
internationale de sécurité électrique EN60065.<br />
Cet appareil est conforme à la Section 15 des règles<br />
de la FCC. Son fonctionnement est soumis aux deux<br />
conditions suivantes :<br />
(1) ce produit ne risque pas de causer d’interférences<br />
nuisibles et (2) ce produit doit accepter toutes les<br />
interférences reçues, y compris celles qui risquent<br />
d’entraîner un fonctionnement indésirable.<br />
Français<br />
F-2 F-1
F-2
Contents<br />
Thank you and congratulations for purchasing your <strong>Arcam</strong> FMJ <strong>AVR600</strong> Receiver.<br />
safety guidelines.......................................E-2<br />
welcome......................................................E-3<br />
before you begin…...................................E-4<br />
rear panel connectors...............................E-7<br />
audio/video connections.........................E-8<br />
Connection guide................................................. E-12<br />
radio connectors..................................... E-14<br />
other connectors.................................... E-16<br />
speakers................................................... E-18<br />
operation.................................................. E-20<br />
front panel operation............................ E-22<br />
remote control........................................ E-23<br />
essential setup........................................ E-32<br />
auto speaker setup................................. E-33<br />
setup menus............................................ E-34<br />
decoding modes..................................... E-40<br />
Dolby volume......................................................... E-42<br />
tuner operation....................................... E-44<br />
network/usb operation......................... E-46<br />
external amplifiers................................. E-47<br />
multi-room set up................................... E-48<br />
Multi-room connection guide......................... E-49<br />
customising the CR102......................... E-50<br />
Command summary........................................... E-53<br />
Device codes........................................................... E-53<br />
trouble shooting...................................... E-54<br />
specifications........................................... E-56<br />
product guarantee................................. E-57<br />
<strong>Arcam</strong> has been producing specialist audio products of remarkable quality for over three<br />
decades and the new <strong>AVR600</strong> Receiver is the latest in a long line of award winning Hi-Fi. The<br />
design of the FMJ range draws upon all of <strong>Arcam</strong>’s experience as one of the UK’s most respected<br />
audio companies, to produce <strong>Arcam</strong>’s best performing range of products yet – designed and built<br />
to give you years of watching and listening enjoyment.<br />
This handbook is intended to give you a detailed guide to using the <strong>AVR600</strong> Receiver. It starts<br />
by giving advice on installation, moves on to describe how to use the product and finishes with<br />
additional information on the more advanced features. Use the contents list shown on this page<br />
to guide you to the section of interest.<br />
We hope that your FMJ receiver will give you years of trouble-free operation. In the unlikely<br />
event of any fault, or if you simply require further information about <strong>Arcam</strong> products, our<br />
network of dealers will be happy to help you. Further information can also be found on the<br />
<strong>Arcam</strong> website at www.arcam.co.uk.<br />
The FMJ development team<br />
welcome<br />
English<br />
device code tables......................................58<br />
Professional Installation?<br />
It may be that the <strong>AVR600</strong> has been installed and set up as part of your Hi-Fi installation by a qualified <strong>Arcam</strong><br />
dealer. In this case, you may wish to skip the sections of this handbook dealing with installation and setting up,<br />
and move directly to the sections dealing with using the unit. Use the Contents list to guide you to these sections.<br />
DIY setup?<br />
The <strong>AVR600</strong> is a powerful and sophisticated piece of AV equipment. If you are setting the unit up yourself,<br />
it is recommended that you read this handbook thoroughly before beginning. For instance, correct speaker<br />
configuration and placement is a key to getting the most out of your <strong>AVR600</strong> and making sure that all the<br />
elements of your system work in harmony.<br />
E-3
efore you<br />
begin…<br />
The <strong>AVR600</strong> is a high-quality and high-performance<br />
home-cinema processor and amplifier built to <strong>Arcam</strong>’s<br />
quality design and manufacturing standards. It<br />
combines digital processing with high-performance<br />
audio and video components to bring you an unrivalled<br />
home-entertainment centre.<br />
The <strong>AVR600</strong> allows switching and control of eight<br />
analogue and seven digital sources in addition to<br />
internal AM, FM and DAB radio or a SiriusConnect<br />
Home Tuner input – as well as networked and USB<br />
audio sources – making it an ideal hub for both homecinema<br />
and two-channel stereo systems.<br />
Since many of these source components are also capable<br />
of generating video signals, the <strong>AVR600</strong> includes<br />
broadcast-quality switching for HDMI, Composite,<br />
S-Video, RGB and Component video signals. There are<br />
audio and video outputs for PVR and VCR recording,<br />
as well as two digital outputs for digital recording of<br />
digitised audio sources. DVD-Audio and SACD can<br />
be connected via the multi-channel input. Control of<br />
the <strong>AVR600</strong> is either by front panel control buttons, IR<br />
remote control or RS232 port.<br />
The CR102 remote control supplied with the <strong>AVR600</strong><br />
is an eight-device ‘universal’ learning remote control<br />
which is simple to use, and once set up is able to control<br />
a complete system. It can be programmed using its vast<br />
internal code library to control CD and DVD players,<br />
PVRs, TVs and other devices.<br />
The installation of the <strong>AVR600</strong> in a listening room<br />
is an important process which requires care at every<br />
stage. For this reason, the installation information is<br />
very comprehensive and should be followed carefully to<br />
achieve an unrivalled level of performance.<br />
The <strong>AVR600</strong> receiver is designed to produce a level of<br />
performance that will truly bring music and movies<br />
to life.<br />
<br />
<br />
<br />
<br />
<br />
<br />
<br />
<br />
<br />
<br />
<br />
<br />
<br />
<br />
<br />
<br />
E-4
Placing the unit<br />
Power<br />
Interconnect cables<br />
Radio interference<br />
< Place the unit on a level, firm surface, avoiding<br />
direct sunlight and sources of heat or damp.<br />
< Do not place the <strong>AVR600</strong> on top of a power<br />
amplifier or other source of heat.<br />
< Do not place the amplifier in an enclosed space<br />
such as a bookcase or closed cabinet unless there is<br />
good provision for ventilation. The <strong>AVR600</strong> will run<br />
warm during normal operation.<br />
< Do not place any other component or item on top of<br />
the amplifier as this may obstruct airflow around the<br />
heat-sink, causing the amplifier to run hot. (The unit<br />
placed on top of the amplifier would become hot,<br />
too.)<br />
< Make sure the remote-control receiver on the front<br />
panel display is unobstructed, otherwise this will<br />
impair the use of the remote-control. If line-of-sight<br />
is impractical, a remote-control repeater can be used<br />
with the rear panel connector (see page 17).<br />
< Do not place your record deck on top of this<br />
unit. Record decks are very sensitive to the noise<br />
generated by mains power supplies which will be<br />
heard as a background ‘hum’ if the record deck is too<br />
close.<br />
The amplifier is supplied with a moulded mains plug<br />
already fitted to the lead. Check that the plug supplied<br />
fits your supply – should you require a new mains lead,<br />
please contact your <strong>Arcam</strong> dealer.<br />
If your mains supply voltage or mains plug is different,<br />
please contact your <strong>Arcam</strong> dealer immediately.<br />
The <strong>AVR600</strong> can be switched for operation between<br />
195–265V (switch position 230V) and 85–132V (switch<br />
position 115V).<br />
NOTE<br />
Ensure that the <strong>AVR600</strong> is switched off and the<br />
power lead removed before changing the position of<br />
the voltage range switch.<br />
Push the IEC plug end of the power cable into the<br />
socket on the back of the amplifier, making sure that it<br />
is pushed in firmly. Plug the other end of the cable into<br />
your mains socket and, if necessary, switch the socket<br />
on.<br />
The <strong>AVR600</strong> can be turned on using the power switch<br />
on the front panel. While switched on, the front panel<br />
LED will glow green.<br />
We recommend the use of high-quality screened cables<br />
that are designed for the particular application. Other<br />
cables will have different impedance characteristics<br />
that will degrade the performance of your system (for<br />
example, do not use cabling intended for video use to<br />
carry audio signals). All cables should be kept as short<br />
as is practically possible.<br />
It is good practice when connecting your equipment to<br />
make sure that the mains power-supply cabling is kept<br />
as far away as possible from your audio cables. Failure to<br />
do so may result in unwanted noise in the audio signals.<br />
For information on speaker cabling, please refer to the<br />
‘Speakers’ section, beginning on page 18.<br />
The <strong>AVR600</strong> is an audio device containing<br />
microprocessors and other digital electronics. It has<br />
been designed to very high standards of electromagnetic<br />
compatibility.<br />
This is a Class A product. In a domestic environment<br />
this product may cause radio interference, in which case<br />
the user may be required to take adequate measures.<br />
If the <strong>AVR600</strong> causes interference to radio or television<br />
reception (which can be determined by switching the<br />
<strong>AVR600</strong> off and on), the following measures should be<br />
taken:<br />
< Re-orient the receiving antenna or route the antenna<br />
cable of the affected receiver as far as possible from<br />
<strong>AVR600</strong> and its cabling.<br />
< Relocate the receiver with respect to the <strong>AVR600</strong>.<br />
< Connect the affected device and the <strong>AVR600</strong> to<br />
different mains outlets.<br />
If the problem persists, please contact your <strong>Arcam</strong><br />
dealer.<br />
English<br />
Standby power<br />
The <strong>AVR600</strong> can be switched into standby mode using<br />
the 2 button on the CR102 remote control. While in<br />
standby mode the front panel LED will glow red and<br />
power consumption is around 3 watts.<br />
While in Standby mode, it may be possible to hear a<br />
slight residual hum coming from the mains transformer<br />
inside the amplifier. This is perfectly normal. However,<br />
if the unit is to be left unused for an extended period,<br />
we recommend that you disconnect it from the mains<br />
supply to save power.<br />
E-5
Trademark acknowledgements<br />
<strong>Arcam</strong> is a registered trademark of A & R Cambridge Ltd.<br />
Dolby Volume<br />
Manufactured under license from Dolby<br />
Laboratories. Dolby and the double-D symbol<br />
are trademarks of Dolby Laboratories.<br />
Dolby True HD, Digital, Digital Plus,<br />
PL IIx<br />
Manufactured under license from Dolby<br />
Laboratories. Dolby, Pro Logic, and the<br />
double-D symbol are trademarks of Dolby<br />
Laboratories.<br />
DTS-HD Master Audio<br />
Manufactured under license under U.S. Patent<br />
#’s: 5,451,942; 5,956,674; 5,974,380; 5,978,762;<br />
6,226,616; 6,487,535; 7,212,872; 7,333,929;<br />
7,392,195; 7,272,567 & other U.S. and worldwide<br />
patents issued & pending. DTS is a registered<br />
trademark and the DTS logos, Symbol, DTS-HD<br />
and DTS-HD Master Audio are trademarks of<br />
DTS, Inc. © 1996-2008 DTS, Inc. All Rights<br />
Reserved.<br />
DTS-HD High Resolution Audio<br />
Manufactured under license under U.S. Patent<br />
#’s: 5,451,942; 5,956,674; 5,974,380; 5,978,762;<br />
6,226,616; 6,487,535; 7,212,872; 7,333,929 &<br />
other U.S. and worldwide patents issued &<br />
pending. DTS is a registered trademark and the<br />
DTS logos, Symbol, DTS-HD, DTS-HD High<br />
Resolution Audio and DTS-HD High Res Audio<br />
are trademarks of DTS, Inc. © 1996-2008 DTS,<br />
Inc. All Rights Reserved.<br />
DTS Digital Surround<br />
ES|Neo:6|96/24<br />
Manufactured under license under U.S. Patent<br />
#’s: 5,451,942; 5,956,674; 5,974,380; 5,978,762;<br />
6,226,616; 6,487,535; 7,003,467; 7,212,872 &<br />
other U.S. and worldwide patents issued &<br />
pending. DTS, DTS Digital Surround, ES, and<br />
Neo:6 are registered trademarks and the DTS<br />
logos, Symbol and DTS 96/24 are trademarks<br />
of DTS, Inc. © 1996-2008 DTS, Inc. All Rights<br />
Reserved.<br />
FLAC FLAC Decoder Copyright © 2000, 2001, 2002,<br />
2003, 2004, 2005, 2006, 2007, 2008 Josh Coalson<br />
Redistribution and use in source and binary<br />
forms, with or without modification, are<br />
permitted provided that the following conditions<br />
are met:<br />
- Redistributions of source code must retain the<br />
above copyright notice, this list of conditions<br />
and the following disclaimer.<br />
- Redistributions in binary form must<br />
reproduce the above copyright notice, this list of<br />
conditions and the following disclaimer in the<br />
documentation and/or other materials provided<br />
with the distribution.<br />
- Neither the name of the Xiph.org Foundation<br />
nor the names of its contributors may be used<br />
to endorse or promote products derived from<br />
this software without specific prior written<br />
permission.<br />
THIS SOFTWARE IS PROVIDED BY<br />
THE COPYRIGHT HOLDERS AND<br />
CONTRIBUTORS “AS IS” AND ANY EXPRESS<br />
OR IMPLIED WARRANTIES, INCLUDING,<br />
BUT NOT LIMITED TO, THE IMPLIED<br />
WARRANTIES OF MERCHANTABILITY AND<br />
FITNESS FOR A PARTICULAR PURPOSE<br />
ARE DISCLAIMED. IN NO EVENT SHALL<br />
THE FOUNDATION OR CONTRIBUTORS<br />
BE LIABLE FOR ANY DIRECT, INDIRECT,<br />
INCIDENTAL, SPECIAL, EXEMPLARY, OR<br />
CONSEQUENTIAL DAMAGES (INCLUDING,<br />
BUT NOT LIMITED TO, PROCUREMENT OF<br />
SUBSTITUTE GOODS OR SERVICES; LOSS<br />
OF USE, DATA, OR PROFITS; OR BUSINESS<br />
INTERRUPTION) HOWEVER CAUSED AND<br />
ON ANY THEORY OF LIABILITY, WHETHER<br />
IN CONTRACT, STRICT LIABILITY, OR<br />
TORT (INCLUDING NEGLIGENCE OR<br />
OTHERWISE) ARISING IN ANY WAY OUT<br />
OF THE USE OF THIS SOFTWARE, EVEN IF<br />
ADVISED OF THE POSSIBILITY OF SUCH<br />
DAMAGE.<br />
Ogg/Vorbis Ogg/Vorbis Decoder Copyright © 2002,<br />
Xiph.org Foundation<br />
Redistribution and use in source and binary<br />
forms, with or without modification, are<br />
permitted provided that the following conditions<br />
are met:<br />
- Redistributions of source code must retain the<br />
above copyright notice, this list of conditions<br />
and the following disclaimer.<br />
- Redistributions in binary form must<br />
reproduce the above copyright notice, this list of<br />
conditions and the following disclaimer in the<br />
documentation and/or other materials provided<br />
with the distribution.<br />
- Neither the name of the Xiph.org Foundation<br />
nor the names of its contributors may be used<br />
to endorse or promote products derived from<br />
this software without specific prior written<br />
permission.<br />
THIS SOFTWARE IS PROVIDED BY<br />
THE COPYRIGHT HOLDERS AND<br />
CONTRIBUTORS “AS IS” AND ANY EXPRESS<br />
OR IMPLIED WARRANTIES, INCLUDING,<br />
BUT NOT LIMITED TO, THE IMPLIED<br />
WARRANTIES OF MERCHANTABILITY AND<br />
FITNESS FOR A PARTICULAR PURPOSE<br />
ARE DISCLAIMED. IN NO EVENT SHALL<br />
THE FOUNDATION OR CONTRIBUTORS<br />
BE LIABLE FOR ANY DIRECT, INDIRECT,<br />
INCIDENTAL, SPECIAL, EXEMPLARY, OR<br />
CONSEQUENTIAL DAMAGES (INCLUDING,<br />
BUT NOT LIMITED TO, PROCUREMENT OF<br />
SUBSTITUTE GOODS OR SERVICES; LOSS<br />
OF USE, DATA, OR PROFITS; OR BUSINESS<br />
INTERRUPTION) HOWEVER CAUSED AND<br />
ON ANY THEORY OF LIABILITY, WHETHER<br />
IN CONTRACT, STRICT LIABILITY, OR<br />
TORT (INCLUDING NEGLIGENCE OR<br />
OTHERWISE) ARISING IN ANY WAY OUT<br />
OF THE USE OF THIS SOFTWARE, EVEN IF<br />
ADVISED OF THE POSSIBILITY OF SUCH<br />
DAMAGE.<br />
WMA &<br />
Microsoft<br />
DRM10<br />
vTuner<br />
MP3<br />
iPod<br />
Sirius<br />
This product is protected by certain intellectual<br />
property rights of Microsoft Corporation. Use<br />
or distribution of such technology outside of<br />
this product is prohibited without a license from<br />
Microsoft or an authorized Microsoft subsidiary<br />
Content providers are using the digital rights<br />
management technology for Windows Media<br />
contained in this device (“WM-DRM”) to<br />
protect the integrity of their content (“Secure<br />
Content”) so that their intellectual property,<br />
including copyright, in such content is not<br />
misappropriated. This device uses WM-DRM<br />
software to play Secure Content (“WM-DRM<br />
Software”). If the security of the WM-DRM<br />
Software in this device has been compromised,<br />
owners of Secure Content (“Secure Content<br />
Owners”) may request that Microsoft revoke<br />
the WM-DRM Software’s right to acquire<br />
new licenses to copy, display and/or play<br />
Secure Content. Revocation does not alter the<br />
WM-DRM Software’s ability to play unprotected<br />
content. A list of revoked WM-DRM Software<br />
is sent to your device whenever you download a<br />
license for Secure Content from the Internet or<br />
from a PC. Microsoft may, in conjunction with<br />
such license, also download revocation lists onto<br />
your device on behalf of Secure Content Owners.<br />
This product is protected by certain intellectual<br />
property rights of NEMS and BridgeCo. Use<br />
or distribution of such technology outside of<br />
this product is prohibited without a license<br />
from NEMS and BridgeCo or an authorized<br />
subsidiary.<br />
MPEG Layer-3 audio decoding technology<br />
licensed from Fraunhofer IIS and Thomson<br />
multimedia<br />
iPod is a trademark of Apple Inc., registered in<br />
the US and other countries.<br />
SiriusConnect, channel names and logos and<br />
related marks are trademarks of SIRIUS XM<br />
Radio Inc.<br />
AAC/AAC Plus<br />
aacPlus is a trademark of Coding Technologies.<br />
See www.codingtechnologies.com for more<br />
information.<br />
E-6
ear panel<br />
connectors<br />
Video connectors<br />
Component, S-Video and<br />
Composite connectors, see<br />
page 9.<br />
Zone 2 and 3 connectors, see<br />
page 9.<br />
Digital connectors<br />
Optical and electrical digital<br />
audio connectors, see page 9.<br />
Audio connectors<br />
Two-channel and multichannel,<br />
see page 10.<br />
Aerials, control and communication<br />
Sirius satellite radio, FM/AM/DAB radio, rLead/<br />
rDock, RS232, Network/USB, IR and trigger<br />
connectors, see page 14.<br />
English<br />
Voltage select<br />
Ensure the voltage selected<br />
matches your local power supply<br />
Power inlet<br />
Connect the correct mains<br />
cable here<br />
<br />
<br />
<br />
<br />
<br />
<br />
<br />
<br />
<br />
<br />
<br />
<br />
<br />
<br />
<br />
<br />
<br />
<br />
<br />
<br />
<br />
<br />
<br />
<br />
<br />
<br />
<br />
<br />
<br />
<br />
<br />
<br />
<br />
<br />
<br />
<br />
<br />
<br />
<br />
<br />
<br />
<br />
<br />
<br />
<br />
<br />
<br />
<br />
<br />
<br />
<br />
<br />
<br />
<br />
<br />
<br />
<br />
<br />
<br />
<br />
<br />
<br />
<br />
<br />
<br />
<br />
<br />
<br />
<br />
<br />
<br />
<br />
<br />
<br />
<br />
<br />
<br />
<br />
<br />
<br />
<br />
<br />
<br />
<br />
<br />
<br />
<br />
<br />
<br />
<br />
<br />
<br />
<br />
<br />
<br />
<br />
<br />
<br />
<br />
<br />
<br />
<br />
<br />
<br />
<br />
<br />
<br />
<br />
<br />
<br />
<br />
<br />
<br />
<br />
<br />
<br />
<br />
<br />
<br />
<br />
<br />
<br />
<br />
<br />
<br />
<br />
<br />
<br />
<br />
<br />
<br />
<br />
<br />
Speaker connectors<br />
For information, see page 18.<br />
<br />
HDMI<br />
For information, see page 8.<br />
NOTE<br />
Please read the ‘Placing the unit’, ‘Power’ and<br />
‘Interconnect cables’ sections on page 5 before<br />
connecting up your <strong>AVR600</strong> integrated amplifier!<br />
E-7
audio/video<br />
connections<br />
Important notes about Component/RGB<br />
video inputs and outputs<br />
< When you connect your devices to these<br />
connectors, take care to follow the letter/colour<br />
coding for each input. No damage will occur but<br />
incorrectly coloured or unstable pictures will<br />
result.<br />
< The Component video inputs have sufficient<br />
bandwidth for NTSC (525/60) or PAL (625/50)<br />
video and HDTV video signals.<br />
Before connecting your <strong>AVR600</strong> to your source<br />
components and speakers, please read through the<br />
next few pages which will explain all the input and<br />
output connectivity that is available. The ‘Speakers’<br />
section explains how to connect up your speakers to<br />
avoid damage to the amplifier and how to arrange your<br />
speakers for best performance.<br />
General<br />
The inputs are named to make it easier to reference<br />
connected devices (e.g. ‘DVD’ or ‘VCR’). They all have the<br />
same input circuit (with the exception of the ‘phono’<br />
input), so there is no reason why you should not connect<br />
a different device to any of the inputs. For example, if<br />
you had two DVD players and the AV input was not<br />
being used, then the second DVD player could be<br />
connected to the AV input.<br />
When connecting a video source, its audio must be<br />
connected to the corresponding sockets. For example,<br />
if you a had a satellite decoder plugged into a SAT video<br />
input, the audio must be connected to the SAT audio<br />
inputs!<br />
The hierarchy for video connections for best quality is<br />
as follows;<br />
< HDMI<br />
< Component/RGB<br />
< S-Video<br />
< Composite.<br />
You should connect as many of these as possible. The<br />
<strong>AVR600</strong> will automatically select the best quality<br />
connection for the source available. For any video source<br />
to be available in Zone 2 you must have an S-Video or<br />
Composite connection between <strong>AVR600</strong> and the source.<br />
Making connections<br />
< Wherever possible, connect both the analogue<br />
and digital outputs of digital sources. This enables<br />
use of a digital input for the main zone and the<br />
corresponding analogue input for recording onto an<br />
analogue tape deck, VCR or PVR, or for the Zone 2<br />
or 3 output.<br />
< Take care to place cables as far from any power<br />
supply cabling as is practicable, to reduce hum and<br />
other noise problems.<br />
<br />
<br />
HDMI connectors<br />
AV, SAT, DVD, VCR, PVR<br />
Connect the HDMI video outputs of your source equipment to these<br />
corresponding HDMI inputs.<br />
OUT 1<br />
Connect this output to the HDMI video input of your main zone display<br />
device.<br />
OUT 2<br />
Connect this output to the HDMI video input of your second display<br />
device or to another HDMI display device in a second living space. As<br />
the <strong>AVR600</strong> has only one processed video path, this signal will be a copy<br />
of the signal on Out 1.<br />
NOTE<br />
All Zone 1 analogue video outputs will be disabled if<br />
an HDMI digital video source is selected.<br />
E-8
Zone 3 connectors<br />
Z3 OUT<br />
Connect these analogue audio<br />
outputs to your Zone 3 equipment.<br />
See ‘Multi-room Setup’ on page 48<br />
for information.<br />
Component/RGB<br />
video connectors<br />
<br />
<br />
These inputs are suitable for<br />
<br />
connection to source devices<br />
which output Component (YUV<br />
or YPbPr) or RGB high quality<br />
analogue video signals. These<br />
signals are usually available from DVD players, set-top<br />
boxes or games consoles.<br />
If you are connecting up to an RGB source you will also<br />
need to connect the source’s Composite output to the<br />
<strong>AVR600</strong> Composite input to act as a video sync. The<br />
Composite signal should be on the same named input as<br />
the RGB signals.<br />
RGB video outputs on source equipment are often on<br />
SCART connectors. You will need to use a SCART to<br />
‘RGB+Sync on phono’ breakout cable, available from<br />
your <strong>Arcam</strong> dealer.<br />
AV, DVD, SAT, VCR, PVR<br />
Connect the Component video outputs of your source<br />
equipment to these inputs.<br />
OUT<br />
Connect this output to the Component video input of<br />
your display device.<br />
NOTE<br />
Analogue RGB video output is not available from<br />
the <strong>AVR600</strong>. The analogue three-wire high quality<br />
video output is always configured as Component<br />
video.<br />
<br />
<br />
<br />
<br />
<br />
<br />
<br />
<br />
<br />
<br />
<br />
<br />
<br />
<br />
<br />
<br />
<br />
<br />
<br />
<br />
Zone 2 connectors<br />
Z2 AUDIO OUT, Z2 VIDEO OUT<br />
Connect these analogue audio<br />
and video outputs to your<br />
Zone 2 equipment. See ‘Multiroom<br />
Setup’ on page 48 for<br />
information.<br />
S-Video and<br />
Composite<br />
connectors<br />
AV, DVD, SAT, VCR, PVR<br />
Connect these inputs to the<br />
S-Video and Composite outputs<br />
of your available source equipment.<br />
VCR OUT, PVR OUT,<br />
These are recording outputs. Connect these to the<br />
‘S-Video in’ or ‘Composite in’ sockets (usually labelled<br />
‘RECORD’) on your recording device.<br />
MAIN OUT<br />
Connect this output to the S-Video or Composite<br />
sockets on your primary Zone 1 display.<br />
<br />
<br />
<br />
<br />
<br />
<br />
<br />
<br />
<br />
Digital audio<br />
connectors<br />
TAPE, CD, AV, DVD, SAT, VCR, PVR<br />
Connect these inputs to the digital<br />
outputs of your available source<br />
equipment.<br />
<br />
OPTICAL, COAX<br />
<br />
Connect the optical or coaxial output<br />
to your digital recording device such as<br />
CD-R, digital VCR or Minidisc player.<br />
When a digital source is selected,<br />
the digital output will send an exact<br />
copy of the incoming digital signal. For example, for a<br />
5.1 digital source, the digital output will also be in 5.1<br />
format.<br />
When an analogue-only source is selected, this is<br />
digitized by the <strong>AVR600</strong> and routed to the digital<br />
outputs.<br />
These outputs are muted if a source is selected where the<br />
HDMI connection is used and is transmitting HD audio.<br />
The digital audio from the HDMI link will not be routed<br />
to these outputs.<br />
English<br />
NOTE<br />
When setting up the <strong>AVR600</strong> menus (later in this<br />
manual), you will need to select whether the threewire<br />
high quality video input is Component or RGB<br />
for each input. This is done on the ‘HQ Video In’<br />
line in the Input Config menu. Failure to do this can<br />
result in a green looking picture or a picture that is<br />
unstable.<br />
E-9
Phono<br />
This input can be connected<br />
directly to a record deck<br />
which has a direct output<br />
from a moving magnet (MM)<br />
cartridge.<br />
MCH input<br />
<br />
<br />
This multi-channel analogue<br />
audio input can be connected to<br />
<br />
<br />
a source device which outputs<br />
<br />
surround sound on its analogue<br />
outputs. Such devices typically<br />
<br />
<br />
include DVD-Audio and SACD<br />
<br />
players. This input does not<br />
pass through any of the audio<br />
processing in the <strong>AVR600</strong>,<br />
therefore functions such as<br />
speaker size and distance from<br />
the listening position should be copied from the <strong>AVR600</strong><br />
Setup menus into the Setup menus of your multi-channel<br />
source. Note however that speaker level trims are applied<br />
to the MCH input on the <strong>AVR600</strong>. Therefore speaker level<br />
trim settings on multichannel source equipment should be<br />
left unset at zero.<br />
<br />
<br />
<br />
<br />
<br />
<br />
<br />
<br />
<br />
<br />
<br />
<br />
<br />
<br />
<br />
<br />
<br />
<br />
<br />
<br />
<br />
<br />
<br />
Analogue audio<br />
inputs<br />
TAPE, CD, AV, DVD, SAT, VCR,<br />
PVR<br />
Connect the left and right<br />
inputs to the left and right<br />
outputs of your source<br />
equipment.<br />
Analogue record<br />
outputs<br />
VCR OUT, PVR OUT, TAPE OUT<br />
Connect the left and right<br />
outputs to the left and right<br />
input sockets of your cassette<br />
deck, PVR or VCR (usually labelled ‘RECORD’). The PVR<br />
and VCR connectors may be used for a second and third<br />
cassette deck. These outputs are fixed at full line level.<br />
Front panel AUX input<br />
<br />
<br />
The front panel AUX input can be<br />
used as an analogue or optical<br />
digital input.<br />
For analogue sources, use a stereo<br />
3.5mm lead; for digital sources<br />
use a 3.5mm optical lead. The<br />
front input is also used for the<br />
auto-setup microphone input.<br />
<br />
Front panel PHONES socket<br />
This socket accepts headphones with an impedance<br />
rating between 32Ω and 600Ω, fitted with a 3.5mm<br />
stereo jack plug. The headphone socket is always active,<br />
except when <strong>AVR600</strong> is muted.<br />
When the headphone jack is inserted, the speaker<br />
outputs and analogue pre-amplifier outputs are<br />
automatically muted.<br />
<br />
Analogue pre-amplifier outputs<br />
All pre-amplifier analogue outputs are buffered, have a<br />
low output impedance, are at line level and follow the<br />
Zone 1 volume control setting. They are able to drive<br />
long cables or several inputs in parallel if required.<br />
For more information on connecting speakers or<br />
additional power amplifiers, see page 18 and 47.<br />
E-10
E-11<br />
English
Connection guide<br />
DVD player<br />
The diagram shows how to make audio and video<br />
connections from a typical DVD player.<br />
The preferred video hook-up, in order of preference is:<br />
< use the HDMI connector (if HDMI output is<br />
provided by the player), otherwise connect the three<br />
Component or four RGB+Sync video connectors.<br />
< use the S-Video connection if HDMI or Component<br />
/RGB+Sync outputs are not provided by your player.<br />
< use the Composite connection if HDMI,<br />
Component/RGB+Sync or S-Video are not provided<br />
by your player.<br />
In each case, connect the video inputs labelled DVD on<br />
the <strong>AVR600</strong>.<br />
The preferred audio hook-up is using the coaxial digital<br />
connector (usually marked Digital audio out), in<br />
addition to the coaxial analogue outputs for left and<br />
right channels.<br />
<br />
<br />
<br />
<br />
<br />
<br />
<br />
<br />
<br />
<br />
<br />
<br />
<br />
<br />
<br />
<br />
<br />
<br />
<br />
<br />
<br />
<br />
<br />
<br />
<br />
<br />
<br />
<br />
<br />
<br />
<br />
<br />
<br />
<br />
<br />
<br />
<br />
<br />
<br />
<br />
<br />
<br />
<br />
<br />
<br />
<br />
<br />
<br />
<br />
<br />
<br />
<br />
<br />
<br />
<br />
<br />
<br />
<br />
<br />
<br />
<br />
<br />
<br />
<br />
<br />
<br />
<br />
<br />
<br />
<br />
<br />
<br />
<br />
<br />
<br />
<br />
<br />
<br />
<br />
<br />
<br />
<br />
<br />
<br />
<br />
<br />
<br />
<br />
<br />
<br />
<br />
<br />
<br />
<br />
<br />
<br />
<br />
<br />
<br />
<br />
<br />
<br />
<br />
<br />
<br />
<br />
<br />
<br />
<br />
<br />
<br />
<br />
<br />
<br />
<br />
<br />
<br />
<br />
<br />
<br />
<br />
<br />
<br />
<br />
<br />
<br />
<br />
<br />
<br />
<br />
<br />
<br />
In each case, use the audio inputs labelled DVD on the<br />
<strong>AVR600</strong>.<br />
Satellite receiver<br />
A satellite receiver is connected in the same way as<br />
a DVD player, with the same order of preference<br />
according to the outputs provided by the satellite<br />
receiver.<br />
In each case, use the inputs labelled SAT on the <strong>AVR600</strong>.<br />
Note that digital audio input from a satellite receiver<br />
sometimes requires a coaxial/TOSLINK (digital<br />
connector) interconnect cable, as some satellite receivers<br />
do not implement audio over HDMI properly or at all.<br />
CD player<br />
Connect the digital audio output (if provided by the CD<br />
player) to the digital CD input of the <strong>AVR600</strong>, using a<br />
high quality coaxial interconnect cable.<br />
Connect the right and left analogue audio outputs of<br />
the CD player to the analogue CD inputs of the <strong>AVR600</strong>,<br />
using a pair of high quality coaxial interconnect cables.<br />
<br />
<br />
<br />
<br />
<br />
<br />
<br />
<br />
<br />
<br />
<br />
<br />
<br />
<br />
<br />
<br />
<br />
<br />
<br />
<br />
E-12
Connecting an iPod using the <strong>Arcam</strong> rDock<br />
The combination of the <strong>AVR600</strong> and <strong>Arcam</strong>’s optional<br />
rDock or rLead accessory provides a great platform for<br />
your iPod.<br />
Connect the rDock as shown, power on the rDock, slot<br />
in your iPod and select iPod as the source.<br />
Navigating through music and podcasts on your iPod is<br />
simple using the CR102 remote, with text appearing on<br />
the <strong>AVR600</strong> display.<br />
More information is given in the rDock quick start<br />
guide (or rLead quick start guide) supplied with these<br />
accessory units.<br />
<br />
<br />
<br />
<br />
<br />
<br />
<br />
<br />
<br />
<br />
<br />
<br />
<br />
<br />
<br />
<br />
<br />
<br />
<br />
<br />
<br />
<br />
<br />
<br />
<br />
<br />
<br />
<br />
<br />
<br />
<br />
<br />
<br />
<br />
<br />
<br />
<br />
<br />
<br />
<br />
<br />
<br />
<br />
<br />
<br />
<br />
<br />
<br />
<br />
<br />
<br />
<br />
<br />
<br />
<br />
<br />
<br />
<br />
<br />
<br />
<br />
<br />
<br />
<br />
<br />
<br />
<br />
English<br />
<br />
<br />
E-13
adio<br />
connectors<br />
Aerial connectors<br />
The <strong>AVR600</strong> is fitted with an AM/FM receiver module<br />
and Sirius connector or a DAB/FM receiver, depending<br />
on the region where it was sold. The type of aerial you<br />
need depends on your listening preferences and the<br />
local conditions.<br />
Your <strong>AVR600</strong> is capable of superb radio reception, but<br />
only if it is receiving a good quality transmission signal.<br />
Try the aerials supplied with your unit. If you are in a<br />
medium to strong signal area, these should be adequate<br />
for good reception. In areas with poor signal strength,<br />
you may require a roof or loft mounted aerial.<br />
Contact your local <strong>Arcam</strong> dealer or aerial installation<br />
experts for advice about local reception conditions.<br />
<br />
<br />
<br />
<br />
<br />
<br />
<br />
<br />
<br />
<br />
<br />
<br />
<br />
<br />
<br />
DAB<br />
(where fitted)<br />
In strong signal areas,<br />
the DAB ‘T’ ribbon aerial<br />
supplied can be used with<br />
reasonable results. Mount<br />
the aerial as high up as<br />
possible on a wall.<br />
In the UK the ‘T’‐elements<br />
need to be positioned<br />
vertically for DAB<br />
reception since broadcasts<br />
are vertically polarised. In<br />
other localities, check with<br />
your <strong>Arcam</strong> dealer or try<br />
<br />
<br />
<br />
<br />
<br />
<br />
both horizontal and vertical positions for best<br />
<br />
reception.<br />
<br />
Try each usable wall of the room to see which<br />
<br />
gives best reception and use tacks or adhesive<br />
tape to secure the aerial in a ‘T’ shape, but note<br />
that no tacks should come into contact with the<br />
internal wire of the aerial.<br />
When installed and receiving<br />
DAB, check the signal<br />
strength by pressing the front<br />
panel or remote control’s INFO<br />
button until the signal quality<br />
indicator is displayed.<br />
In weak signal areas, a highgain,<br />
externally-mounted<br />
or roof-mounted aerial is<br />
desirable in order to receive<br />
the highest number of services.<br />
In Band III transmission areas<br />
(such as the UK), use a multielement<br />
Yagi aerial with the<br />
elements mounted vertically, as<br />
the transmissions are vertically<br />
polarised. If you are close to<br />
more than one transmitter, use<br />
an omnidirectional or folded<br />
dipole aerial.<br />
If the DAB services in your<br />
area are transmitted on L-band,<br />
then ask your dealer for advice<br />
for the best aerial to use.<br />
<br />
<br />
<br />
Sirius<br />
(where fitted)<br />
Sirius Satellite Radio is a<br />
subscription radio service<br />
<br />
available in North America.<br />
For more information, visit<br />
<br />
www.sirius.com or contact your<br />
dealer (USA and Canada only).<br />
The <strong>AVR600</strong> is designed for use<br />
with the ‘SiriusConnect Home<br />
Tuner’ package which should be connected via the<br />
<br />
cable<br />
supplied in that package to the Sirius socket.<br />
<br />
<br />
NOTE<br />
<br />
The <strong>AVR600</strong> provides power for the Sirius receiver,<br />
<br />
so an external power supply is not needed.<br />
<br />
<br />
<br />
<br />
<br />
E-14
English<br />
FM<br />
AM<br />
Connecting an aerial<br />
A suitable FM aerial must be<br />
connected to the <strong>AVR600</strong> before<br />
<br />
FM radio can be received.<br />
In strong signal areas, the FM<br />
<br />
ribbon aerial supplied can be<br />
used with reasonable results.<br />
Mount this as high up as<br />
possible on a wall with the top<br />
of the ‘T’‐elements positioned<br />
vertically or horizontally, depending on the reception in<br />
your area. Try each usable wall of the room to see which<br />
<br />
gives best reception and use tacks or adhesive tape to<br />
secure the aerial, but note that no tacks should come<br />
<br />
into contact with the internal wire of the aerial.<br />
<br />
When installed and receiving FM radio, check the signal<br />
strength by pressing the front panel or remote control’s<br />
<br />
INFO button until the signal indicator is displayed.<br />
In weak signal areas, or for optimal FM radio reception,<br />
a roof- or loft-mounted aerial is advised as this will give<br />
superior reception.<br />
In some areas, cable radio may be available or, in an<br />
apartment building, a distributed aerial system may<br />
be installed. In either of these cases you should have<br />
sockets in your home marked FM or VHF (do not use<br />
those marked TV); these should be connected to the FM<br />
coaxial connector on the rear of the <strong>AVR600</strong>.<br />
<br />
<br />
Connecting an aerial<br />
An AM aerial is required to<br />
receive AM/medium wave radio<br />
<br />
signals, so a simple loop aerial is<br />
supplied with the <strong>AVR600</strong>. Follow<br />
<br />
the assembly instructions in the<br />
diagram below.<br />
Make sure that the aerial is<br />
positioned well away from the<br />
<strong>AVR600</strong> itself, TVs, computers<br />
and other sources of RF ‘interference’. Rotate the aerial<br />
to discover which position gives the best reception.<br />
<br />
<br />
<br />
<br />
<br />
<br />
<br />
<br />
<br />
<br />
<br />
1. Release the tie-wrap and unwind the<br />
twisted lead. Fold the plastic stand<br />
forward through the loop frame.<br />
2. Push the tab into the open slot in the<br />
base of the stand. Press until the tab<br />
clicks home.<br />
3. Connect the lead wires to the AM socket<br />
at the rear of the <strong>AVR600</strong> (the wires are<br />
not polarised). Rotate the aerial’s stand<br />
until you obtain the best reception.<br />
E-15
other<br />
connectors<br />
<br />
<br />
<br />
<br />
Data connectors<br />
Network connectors<br />
<br />
USB connector<br />
<br />
<br />
<br />
<br />
<br />
<br />
<br />
<br />
<br />
<br />
<br />
<br />
<br />
<br />
<br />
<br />
<br />
<br />
<br />
<br />
rLead/rDock<br />
For use with an <strong>Arcam</strong> rLead or<br />
rDock accessory. See page 13 and<br />
the accessory documentation for<br />
details.<br />
RS232 serial connector<br />
Use with control devices having<br />
an RS232 serial port (for example,<br />
Crestron and AMX touch screen<br />
controllers). This connection<br />
is also used for upgrading the<br />
<strong>AVR600</strong>’s internal software.<br />
This section deals with installation of the unit into an<br />
existing home network. For information on how to use<br />
the <strong>AVR600</strong>’s network features, the USB socket, and for<br />
a list of supported file types, refer to page 46.<br />
Networking is a large subject and only the briefest<br />
guidelines are presented in this handbook. Please<br />
contact your <strong>Arcam</strong> dealer or specialist installer for<br />
more information about introducing the <strong>AVR600</strong> into<br />
your computer network.<br />
Ethernet <br />
If an Ethernet cable is connected, the <strong>AVR600</strong> will<br />
automatically attempt to connect to your network.<br />
You should use CAT5 cable plugged into the RJ45 socket<br />
labelled ETHERNET on the rear panel.<br />
If your network uses static IP<br />
addressing rather than DHCP,<br />
you will need to provide any<br />
gateway, DNS and proxy<br />
<br />
<br />
information. See page 39 for<br />
information on setting up the<br />
<br />
network.<br />
<br />
<br />
<br />
The <strong>AVR600</strong> can play files stored<br />
<br />
<br />
on a USB mass storage device,<br />
typically a pen drive, but any<br />
<br />
USB device that complies with<br />
<br />
the ‘mass storage device‘ class is<br />
<br />
compatible.<br />
<br />
The <strong>AVR600</strong> only supports the<br />
direct connection of USB devices<br />
and will not support devices<br />
connected through a hub. If<br />
regular access to the USB socket is required, you may<br />
find it convenient to use a USB extension lead.<br />
See page 46 for details of supported file types.<br />
<br />
<br />
<br />
<br />
<br />
<br />
<br />
<br />
<br />
<br />
<br />
<br />
<br />
<br />
<br />
E-16
English<br />
<br />
<br />
<br />
<br />
Trigger connectors<br />
<br />
The trigger connectors (Trig Z1, Trig Z2 and Trig Z3)<br />
provide an electrical signal whenever the <strong>AVR600</strong> is<br />
switched on and the relevant zone enabled.<br />
The trigger signal can be used<br />
<br />
to switch on and off compatible<br />
pieces of home entertainment<br />
equipment, for example, you<br />
<br />
could set up a trigger to turn<br />
<br />
on your television and DVD<br />
player whenever the <strong>AVR600</strong> was<br />
<br />
<br />
switched on.<br />
There are three trigger output<br />
sockets on the <strong>AVR600</strong>, each<br />
capable of outputting a 12V,<br />
70mA switching signal. The<br />
socket is designed for mono 3.5mm jacks: tip is the<br />
trigger output, sleeve is ground.<br />
<br />
<br />
TRIG Z3<br />
Use for remotely turning on and off power amps or<br />
source equipment for Zone 3. On = 12V, Off = 0V.<br />
NOTE<br />
Sockets with the prefix ‘Z2’ or ‘Z3’ refer to<br />
connections used in multi-room installation. For<br />
more information on these connectors, see page 48.<br />
Infra-red (IR) connectors<br />
<br />
<br />
<br />
<br />
<br />
<br />
<br />
<br />
<br />
<br />
<br />
<br />
<br />
The infra-red inputs (Z1 IR, Z2 IR<br />
and Z3 IR) allow the connection<br />
of external IR receivers, either<br />
when the <strong>AVR600</strong> front panel<br />
IR receiver is fully or partially<br />
obstructed or to allow the use<br />
of a remote control in Zone 2 or<br />
Zone 3.<br />
There are three IR inputs on the<br />
<strong>AVR600</strong>, each designed for stereo<br />
or mono 3.5mm jacks. Tip is the<br />
modulated signal, sleeve is ground.<br />
tip: Modulated signal<br />
sleeve: Ground<br />
Z3 IR<br />
This input is intended for use with an IR receiver in<br />
Zone 3 to allow remote control of <strong>AVR600</strong> from a third<br />
room.<br />
IR OUT<br />
This output is an electrical combination of the Z1 (or<br />
front panel) + Z2 + Z3 infra-red signals above. It can be<br />
used to drive external IR emitters or can be connected<br />
directly to other <strong>Arcam</strong> equipment which have an IR<br />
input. This function can be useful as an IR ‘repeater’<br />
so that someone in any of the zones can control the<br />
functions of a CD player in the main zone, for example.<br />
Tip is the modulated electrical IR signal, sleeve is<br />
ground.<br />
A supplier of infra-red receivers and emitter accessories<br />
and systems is Xantech. See www.xantech.com for<br />
more information, or ask your <strong>Arcam</strong> dealer.<br />
tip: Trigger output<br />
sleeve: Ground<br />
TRIG Z1<br />
Use for remotely turning on and off power amps or<br />
source equipment for Zone 1. On = 12V, Off = 0V.<br />
TRIG Z2<br />
Use for remotely turning on and off power amps or<br />
source equipment for Zone 2. On = 12V, Off = 0V.<br />
Z1 IR<br />
This input is intended for use with a local IR receiver<br />
when the front panel of the <strong>AVR600</strong> is blocked.<br />
Connecting an IR receiver to Z1 IR will disable to front<br />
panel IR receiver to prevent problems with multiple<br />
commands if the front panel IR receiver is only partially<br />
obstructed.<br />
Z2 IR<br />
This input is intended for use with an IR receiver in<br />
Zone 2 to allow remote control of <strong>AVR600</strong> from a<br />
second room.<br />
NOTE<br />
The IR inputs on the <strong>AVR600</strong> are designed for<br />
modulated signals. If the external IR receiver<br />
demodulates the IR signal, it will not work. Also<br />
the <strong>AVR600</strong> does not provide power for external<br />
receivers on the IR jack, therefore an external power<br />
source will be required.<br />
E-17
speakers<br />
The <strong>AVR600</strong> allows you to connect up to seven speakers<br />
and three active subwoofers in the main system. The<br />
output channels correspond to speakers installed in the<br />
front left, centre, front right, surround left, surround<br />
right, surround back left, surround back right and an<br />
active subwoofer.<br />
The configuration and placement of your speakers<br />
is very important. All speakers, with the exception of<br />
the subwoofer, should be arranged around your normal<br />
viewing/listening position. The subwoofer should be<br />
placed in a position which gives an even frequency<br />
response in all listening positions. Incorrect placement<br />
leads to bass boom in some areas. Often the only<br />
way to find a good position for your subwoofer is by<br />
experimentation. A good place to start experimenting<br />
is close to a wall but at least 1m away from any corners.<br />
You can also consult your subwoofer handbook for<br />
placement suggestions.<br />
Connecting speakers<br />
To connect each of the<br />
speakers, unscrew the<br />
corresponding terminals on<br />
the back of the <strong>AVR600</strong>, insert<br />
the speaker wires through<br />
<br />
the hole in each post and<br />
screw the terminals back<br />
<br />
up. Make sure that the red<br />
(positive/+) terminal of the<br />
<br />
speaker is connected to the<br />
red (positive/+) terminal on<br />
<br />
the back panel, and the black<br />
(negative/–) terminal of the<br />
<br />
speaker is connected to the<br />
black (negative/–) terminal on<br />
<br />
the back panel.<br />
It is important that no stray<br />
strands of wire from these<br />
connections are allowed to<br />
touch another cable or the<br />
product casing. Failure to<br />
ensure this can cause a short circuit and damage your<br />
<strong>AVR600</strong>.<br />
Do not over-tighten the loudspeaker terminals, or use a<br />
wrench, pliers, etc., as this could damage the terminals<br />
<br />
<br />
and this would not be covered under the product’s<br />
warranty.<br />
<br />
<br />
Speaker cables<br />
The speakers should be connected to the amplifier using<br />
good-quality, high-purity, low impedance copper cables.<br />
Cheap speaker cables should be avoided – they are a<br />
false economy and can significantly degrade the sound<br />
quality.<br />
The cable runs to the speakers should be as short as<br />
practicable. Connections to the speaker terminals<br />
should always be finger tight, whether using bare wires<br />
or spade connectors.<br />
<br />
<br />
Connecting subwoofers<br />
The <strong>AVR600</strong> also allows up to three<br />
<br />
<br />
active subwoofers to be connected<br />
<br />
<br />
to the SW1, SW2 or SW3 outputs.<br />
<br />
See your subwoofer handbook<br />
for the correct setting up and<br />
<br />
<br />
connection for your particular<br />
subwoofer.<br />
<br />
<br />
<br />
<br />
<br />
E-18
Centre<br />
The centre speaker allows for a more realistic<br />
reproduction of dialogue. The centre speaker<br />
should have a similar tonal balance to the front<br />
left and right speakers and be positioned at a<br />
similar height.<br />
Subwoofer<br />
A subwoofer will greatly improve the bass performance of<br />
your system. This is useful for reproducing special cinema<br />
effects, especially where a dedicated LFE (Low Frequency<br />
Effects) channel is available, as with many discs encoded<br />
with Dolby or DTS technologies.<br />
More than one subwoofer unit may be required for larger<br />
installations, particularly in rooms of a timber frame<br />
construction. Multiple subwoofers need care in placement<br />
because there may be cancellation effects between the<br />
units and you may require expert advice.<br />
English<br />
<br />
<br />
Front left and right<br />
Position your front left and right speakers to<br />
achieve a good stereo image for normal musical<br />
reproduction as well as for the multichannel<br />
modes. If they are placed too close together there<br />
will be a lack of spaciousness; if they are placed<br />
too far apart a stereo image will appear to have a<br />
large ‘hole’ in the middle and will be presented in<br />
two halves. If there is no practical alternative to<br />
placing the speakers widely apart, this effect can<br />
be overcome in music reproduction by using the<br />
centre sound extraction from the left and right<br />
speakers (see Dolby Pro Logic II Music mode).<br />
<br />
<br />
<br />
<br />
<br />
<br />
Surround left and right<br />
The surround left and right speakers reproduce<br />
the ambient sound and effects present in a<br />
multichannel home cinema system and should be<br />
installed slightly higher than the listener’s ears.<br />
Surround back left and right<br />
The surround back left and right speakers<br />
are used to add extra depth and better<br />
sound localisation and should be installed<br />
approximately one metre higher than the<br />
listener’s ears. Place the two surround<br />
back speakers such that there is an arc of<br />
approximately 150 degrees between each<br />
surround back speaker and the centre speaker.<br />
The surround back speakers should face the front<br />
of the room as shown in the diagram to provide<br />
the largest ‘sweet spot’.<br />
Single surround back centre speaker<br />
It is also possible to use a single surround back<br />
speaker positioned centrally behind the listening<br />
position instead of two. In this case connect it to the<br />
SBL speaker output. Follow the instructions in the<br />
‘Spkr Types’ section of the Setup Menus for how to<br />
configure the <strong>AVR600</strong> for this setup.<br />
E-19
operation<br />
Operating your <strong>AVR600</strong><br />
For information display we recommend you use the<br />
OSD (On-Screen Display) on your display device<br />
whenever possible.<br />
Switching on<br />
Press the front panel power button in. The power LED<br />
will glow orange, the front display shows the word<br />
‘ARCAM’, followed by the volume setting and the name of<br />
the selected input. After initialization is complete, the<br />
power LED changes colour to green.<br />
Please wait until the unit has finished initialising before<br />
operating the <strong>AVR600</strong>. It is recommended that if the<br />
unit is switched off, you should wait at least 10 seconds<br />
before switching the unit back on.<br />
Standby<br />
The <strong>AVR600</strong> has a standby mode which can be entered<br />
by pressing Standby on the remote control. When in<br />
standby mode, the display is blank and the power LED<br />
glows red.<br />
While in Standby mode, it may be possible to hear a<br />
slight residual hum coming from the mains transformer<br />
inside the amplifier. This is perfectly normal. However,<br />
if the unit is to be left unused for an extended period,<br />
we recommend that you disconnect it from the mains<br />
supply to save power.<br />
To switch on from standby<br />
Press the standby button on the remote control or any<br />
key on the front panel (other than the power button).<br />
Front panel display<br />
The <strong>AVR600</strong> is ready for use after about four seconds.<br />
The display window shows the currently selected source<br />
and the last selected information view setting (this<br />
information line can be changed using the INFO button).<br />
The active zones (Z1, Z2 or Z3) are highlighted – the<br />
example screen above shows that only Z1 (i.e. Zone1) is<br />
active. The current volume setting (70.0dB in the above<br />
example) is also displayed.<br />
Selecting a source<br />
To select a particular source, press the –input or<br />
input + buttons until that source is shown on the front<br />
panel display, or (if available) press the corresponding<br />
source button on the remote. The following sources are<br />
available:<br />
CD<br />
AV<br />
DVD<br />
SAT<br />
VCR<br />
PVR<br />
Phono<br />
Compact Disc player input<br />
Audio-Visual input<br />
DVD player input<br />
Satellite receiver input<br />
Video Cassette Recorder input<br />
Personal Video Recorder input<br />
Phono (MM cartridge) input<br />
MCH Selects MCH (multi-channel)<br />
analogue input<br />
TAPE Audio only tape deck input<br />
AUX Auxiliary (front panel) input<br />
AM/FM Internal tuner input<br />
DAB* Internal tuner input<br />
Net Internal (Ethernet) and external USB<br />
solid-state device (e.g. pen drive) input.<br />
Sirius* Requires an external receiver – see<br />
www.sirius.com for more information<br />
iPod Requires an iPod® and <strong>Arcam</strong> rDock<br />
or rLead.<br />
*These sources are market dependent and may not be<br />
available on your <strong>AVR600</strong><br />
Upon selecting a source, the <strong>AVR600</strong> will normally<br />
select an active digital input in preference to an analogue<br />
input. If you want to override the digital input and select<br />
the analogue input, press and hold the source button for<br />
at least two seconds. Some inputs (AM/FM, Phono, MCH,<br />
Sirius, iPod) do not have a digital input.<br />
The processing mode and Stereo Direct functions are<br />
remembered and recalled for each individual input.<br />
The MCH input is intended for direct analogue passthrough<br />
of DVD Audio or SACD sources. Apart from<br />
volume control and level trim, no processing modes<br />
are possible on this input, including <strong>AVR600</strong> bass<br />
management and delays. Please set bass management,<br />
speaker size and speaker delays in the source player. You<br />
can copy the distances and relative speaker levels from<br />
the Setup menus in the <strong>AVR600</strong>.<br />
Tape operation<br />
Three analogue audio outputs are provided for<br />
recording, VCR, PVR and Tape out. The selected analogue<br />
input are routed to each of these outputs.<br />
If the VCR input is selected, the VCR Out output<br />
is muted to prevent feedback loops in recording<br />
equipment. Similarly the PVR Out and Tape Out outputs<br />
are muted when their respective inputs are selected to<br />
prevent feedback.<br />
VCR operation<br />
Two outputs are provided for recording (Composite<br />
and S-Video only), VCR and PVR Out. The selected video<br />
input is routed to each of these outputs.<br />
Stereo Direct<br />
To listen to a pure analogue stereo input, press the<br />
Direct button. The Stereo Direct mode automatically<br />
bypasses all processing and any surround functions. In<br />
direct mode, digital processing is shut down to improve<br />
the sound quality and reduces digital noise with the<br />
<strong>AVR600</strong> to an absolute minimum.<br />
Note: when Stereo Direct mode is selected, no<br />
digital output is available and no bass management<br />
is performed, meaning that bass signals will not be<br />
redirected to a subwoofer.<br />
Volume control<br />
It is important to realise that the level of the volume<br />
indicator is not an accurate indication of the power<br />
delivered to your loudspeakers. The <strong>AVR600</strong> often<br />
delivers its full output power long before the volume<br />
control reaches its maximum position, particularly when<br />
listening to heavily recorded music. In comparison,<br />
some movie sound tracks can appear very quiet, as<br />
many directors like to keep maximum levels in reserve<br />
for special effect sequences.<br />
Headphones<br />
To use headphones with the <strong>AVR600</strong>, plug the<br />
headphones into the Phones socket in the centre of the<br />
front panel.<br />
When headphones are plugged into the front panel<br />
phones socket, the outputs for Zone 1 are muted and<br />
the audio will be down-mixed to two channels (2.0). The<br />
two-channel down-mix is required so that the centre<br />
channel and surround information can be heard via the<br />
headphones.<br />
E-20
Using Zone 2 and 3<br />
Extended front panel menu<br />
Updating firmware using a PC<br />
Zone 2 provides the option for the occupants of the<br />
master bedroom, conservatory, kitchen, etc. to view or<br />
listen to a different source at a different volume level<br />
from the main zone (Zone 1).<br />
Zone 3 provides for a third living space to have a copy of<br />
the audio signal in Zone 2 at a different volume level.<br />
Pressing the menu key and holding it for longer than<br />
four seconds will bring up the Extended Menu, allowing<br />
you to perform the following:<br />
Restore to factory defaults<br />
This option allows you to restore all settings on your<br />
<strong>AVR600</strong> to the defaults that it left the factory with. Note<br />
that this also erases any secure backups stored on the<br />
<strong>AVR600</strong>.<br />
Using a PC application (available on request from<br />
<strong>Arcam</strong>), you can update the firmware in your <strong>AVR600</strong><br />
using the back panel RS232 port connected to your PC.<br />
English<br />
Change remote code<br />
The default RC5 system code the <strong>AVR600</strong> responds to<br />
is 16. If required, for example due to another device in<br />
your system also using this RC5 system code, it can be<br />
changed to 19.<br />
E-21
front panel<br />
operation<br />
Mode<br />
Selects between Stereo and the available<br />
surround modes for the current source.<br />
Info<br />
Selects the information displayed on the<br />
lower left portion of the front panel.<br />
OK<br />
Used to enter selections made in the<br />
Setup menu. Also forces the analogue<br />
and digital video outputs to the default<br />
resolution: 480i (525-line NTSC) when<br />
pressed for more than 2 seconds.<br />
Direct<br />
Stereo Direct on/off. Provides a direct analogue path from<br />
the analogue inputs to the left and right front outputs.<br />
Switches off any surround processing modes and shuts<br />
down the DSP circuits for best stereo sound quality.<br />
Display<br />
This switches the display brightness<br />
between off/dim/bright.<br />
Zone<br />
Selects between Zone 1, Zone 2 and<br />
Zone 3 control.<br />
Mute<br />
Mutes all analogue audio outputs in the<br />
currently selected zone.<br />
Power / Standby LED<br />
This indicates the status of the receiver. When<br />
first turned on, the LED is orange, to indicate<br />
the <strong>AVR600</strong> is ‘initialising’. This changes to green<br />
when the <strong>AVR600</strong> is fully powered and ready.<br />
Red indicates the <strong>AVR600</strong> is in Standby mode.<br />
<br />
Input<br />
These buttons select the source<br />
connected to the corresponding<br />
input (or internal input)<br />
Unused sources can be prevented<br />
from being selected in the setup<br />
menu.<br />
<br />
<br />
<br />
<br />
<br />
<br />
<br />
<br />
<br />
<br />
Volume<br />
Adjusts the analogue output<br />
volume in the selected zone<br />
(line out, speakers and<br />
headphones).<br />
<br />
<br />
<br />
<br />
<br />
Power<br />
Switches the main power to the<br />
<strong>AVR600</strong> on and off.<br />
Once the unit is switched off,<br />
it should be left for at least ten<br />
seconds before switching on<br />
again.<br />
Menu<br />
Selects the Setup menus on the<br />
on-screen display (OSD).<br />
Aux<br />
Multi purpose auxiliary<br />
line level input,<br />
calibration microphone<br />
input and 3.5mm optical<br />
digital (SPDIF) input.<br />
Phones<br />
This socket accepts headphones<br />
with an impedance rating between<br />
32Ω and 600Ω, fitted with a<br />
3.5mm stereo jack plug.<br />
Remote control receiver. This is positioned behind<br />
the display window, above the MENU button on the<br />
front panel. Ensure the receiver is in a clear line of<br />
sight from the remote control for operation. If this is<br />
not possible, use a separate sensor connected to the<br />
Z1 IR input on the rear panel.<br />
E-22
emote<br />
control<br />
The CR102 universal remote<br />
controller<br />
The CR102 is a sophisticated ‘universal’ backlit remote<br />
control that can control up to eight devices. It is preprogrammed<br />
for use with the <strong>AVR600</strong> and many other<br />
<strong>Arcam</strong> products (FM/DAB tuners, CD players and DVD<br />
players).<br />
With its extensive built-in library of codes, it can also<br />
be used with thousands of third party audio-visual<br />
components – TVs, satellite and set-top boxes, PVRs,<br />
CD players, etc. See the list of codes at the back of this<br />
handbook, beginning on page 58.<br />
The CR102 is a ‘learning’ remote, so you can teach it<br />
almost any function from an old single-device remote.<br />
You can also program the CR102 to issue a sequence of<br />
commands (‘macros’) from a single button press.<br />
<br />
<br />
<br />
<br />
<br />
<br />
<br />
<br />
<br />
<br />
<br />
<br />
<br />
<br />
<br />
<br />
<br />
<br />
<br />
<br />
<br />
<br />
<br />
<br />
<br />
Inserting batteries into the<br />
remote control<br />
1. Open the battery compartment by pressing the<br />
button on the back of the handset.<br />
English<br />
<br />
<br />
<br />
<br />
<br />
<br />
<br />
2. Insert four ‘AAA’ batteries into the battery<br />
compartment – two facing the top of the unit,<br />
and two facing the end, as in the diagram.<br />
3. Lower the end cap onto the plastic locating plate<br />
in the handset. This acts as a hinge, and you<br />
can now push the end cap firmly into its locked<br />
position with a click.<br />
<br />
Using the remote control<br />
Please keep in mind the following when using the<br />
remote control:<br />
< Ensure there are no obstacles between the<br />
remote control and the remote sensor on the<br />
<strong>AVR600</strong>. The remote has a range of about 7<br />
metres. (If the remote sensor is obscured, the Z1<br />
IR remote control input jack on the rear panel is<br />
available. Please consult your dealer for further<br />
information.)<br />
< Remote operation may become unreliable if<br />
strong sunlight or fluorescent light is shining on<br />
the remote sensor of the <strong>AVR600</strong>.<br />
< Replace the batteries when you notice a<br />
reduction in the operating range of the remote<br />
control.<br />
<br />
<br />
<br />
<br />
<br />
<br />
<br />
<br />
<br />
<br />
<br />
<br />
<br />
Notes on batteries:<br />
< Incorrect use of batteries can result in hazards such<br />
as leakage and bursting.<br />
< Do not mix old and new batteries together.<br />
< Do not use non-identical batteries together –<br />
although they may look similar, different batteries<br />
may have different voltages.<br />
< Ensure the plus (+) and minus (-) ends of each<br />
battery match the indications in the battery<br />
compartment.<br />
< Remove batteries from equipment that is not going<br />
to be used for a month or more.<br />
< When disposing of used batteries, please comply<br />
with governmental or local regulations that apply in<br />
your country or area.<br />
E-23
Useful information<br />
Backlight<br />
A blue backlight comes on for five seconds whenever<br />
a key is pressed. This helps you use the handset in<br />
subdued lighting conditions. It may be possible to hear a<br />
quiet tone being emitted from the remote control when<br />
the backlight is on. This is perfectly normal.<br />
Power LED blinks<br />
Short blinks indicate a valid key press.<br />
Multiple short blinks convey information (such as a<br />
device code) or signal the beginning and successful<br />
completion of a programming sequence.<br />
Long blinks indicate an invalid key press or entry.<br />
The symbol ‘*’ is used in the manual to indicate a<br />
power LED blink.<br />
Timeouts and unassigned keys<br />
Time out – After 10 seconds the CR102 exits the<br />
programming state and returns to normal operation.<br />
Stuck key timeout – After any key is pressed<br />
continuously for 30 seconds, the CR102 stops sending<br />
IR transmission to conserve battery life. The CR102<br />
remains off until all keys are released.<br />
Unassigned keys – the CR102 ignores any unassigned<br />
key presses for a particular Device Mode and does not<br />
transmit IR.<br />
Low voltage indicator<br />
When the batteries are running down, the IR transmit<br />
indicator on the CD102 (the LED under the Power<br />
button) flashes five times whenever you press a button:<br />
* * * * *<br />
If this happens, please fit four new AAA alkaline<br />
batteries as soon as possible.<br />
Device Mode / Source keys<br />
As the CR102 can control your <strong>AVR600</strong> as well as a<br />
range of other equipment, many of the buttons have<br />
more than one function depending on the ‘device mode’<br />
selected on the remote control.<br />
The Device Mode keys (shown below) select the source<br />
on the <strong>AVR600</strong>. If one of these keys is pressed briefly,<br />
a command is transmitted to change the source on the<br />
<strong>AVR600</strong>. Also the functionality of the remote control<br />
changes to operate the selected source device. it’s like<br />
having eight different remotes in your hand!<br />
DVD<br />
SAT<br />
AV<br />
Tun<br />
AMP<br />
AUX<br />
PVR<br />
CD<br />
<br />
<br />
<br />
<br />
DVD player<br />
<br />
<br />
Satellite set-top box<br />
<br />
<br />
Audio-visual sound input (use with TV)<br />
DAB, Sirius, FM or AM tuner<br />
Controls the amplifier and setup features<br />
of the <strong>AVR600</strong><br />
Auxiliary input, or an iPod® via an<br />
<strong>Arcam</strong> rDock or rLead<br />
Personal Video Recorder (or Digital<br />
Video Recorder)<br />
Compact Disc player<br />
If you press and hold a Device Mode key for about four<br />
seconds, you change the Device Mode of the CR102<br />
without changing the signal source on the <strong>AVR600</strong>. This<br />
can also be done by pressing S followed by a Device<br />
Mode key (within two seconds). These two methods<br />
allow you to change which device the CR102 controls<br />
without also changing the <strong>AVR600</strong> source, allowing<br />
uninterrupted listening.<br />
Each Device Mode changes the behaviour of many<br />
of the CR102 keys to control the source device<br />
appropriately. For example:<br />
In CD mode 0 plays the previous CD track.<br />
In AV mode 0 issues the TV ‘channel down’ command.<br />
The CR102 remains in the last selected Device Mode<br />
so it is not necessary to press a Device Mode key before<br />
every command key if all you are doing is playing or<br />
skipping tracks on a CD, for example.<br />
Navigation keys<br />
The Navigation keys steer the cursor in Setup<br />
menus or on-screen menus. They also replicate<br />
<br />
the navigation functions of original remotes<br />
supplied with other home entertainment<br />
devices in your system.<br />
O confirms a setting.<br />
Volume control<br />
By default, the CR102 is set up so that the volume<br />
control buttons always control the volume of the<br />
<strong>AVR600</strong>, regardless of which Device Mode the remote<br />
is currently set for. This is known as volume ‘punch<br />
through’.<br />
For example, if you are listening to a CD, you will<br />
probably have the CR102 in CD Device Mode to control<br />
the CD player. You can use the volume controls on the<br />
remote directly to adjust the volume of the <strong>AVR600</strong><br />
without first having to press A to put the remote<br />
into AMP Device Mode. The volume buttons ‘punch<br />
through’ the CD Device Mode on the remote to the AMP<br />
Device Mode. Volume ‘punch through’ can be disabled<br />
individually for any Device Mode if desired.<br />
The CR102 complies with Part 15 of the<br />
FCC rules<br />
This equipment has been tested and found to<br />
comply with the limits for a class B digital device,<br />
pursuant to part 15 of the FCC Rules. These limits<br />
are designed to provide a reasonable protection<br />
against harmful interference in a residential<br />
installation. This equipment generates, uses, and can<br />
radiated radio frequency energy and if not installed<br />
and used in accordance with the instructions,<br />
may cause harmful interference to radio<br />
communications. However, there is no guarantee<br />
that interference will not occur in a particular<br />
installation. If this equipment does cause harmful<br />
interference to radio or television reception, which<br />
can be determined by turning the equipment off<br />
and on, the user is encouraged to try to correct<br />
the interference by one or more of the following<br />
measures:<br />
Reorient or relocate the receiving antenna.<br />
Increase the separation between the equipment and<br />
receiver.<br />
Connect the equipment into an outlet or a circuit<br />
different from that to which the receiver is<br />
connected.<br />
Consult the dealer or an experienced radio/TV<br />
technician for help.<br />
E-24
Controlling other devices<br />
Code blink-back<br />
Method 1 (Direct code setup)<br />
This section describes the simplest (preferred) way to<br />
program the CR102’s Device Mode keys to control the<br />
non-<strong>Arcam</strong> devices in your system.<br />
<br />
<br />
<br />
<br />
<br />
<br />
<br />
< Some of the modes are locked to <strong>Arcam</strong> operation but<br />
can be unlocked if required (see page 52).<br />
< A mode only controls <strong>Arcam</strong> equipment.<br />
DVD mode<br />
SAT mode<br />
AV mode<br />
TUN mode<br />
AUX mode<br />
VCR mode<br />
CD mode<br />
Locked<br />
Unlocked<br />
Unlocked<br />
Locked<br />
Locked<br />
Unlocked<br />
Locked<br />
Here is a specific example of how to program the a<br />
key to control an Addison television. The principles for<br />
controlling other devices are exactly the same.<br />
1. Make sure your device is switched on (not just on<br />
standby).<br />
2. Find the correct Device Code table (e.g. TV) for the<br />
type of device you want to control from the CR102.<br />
3. Find the row containing the codes for the<br />
manufacturer of your device (e.g. Addison) (page<br />
58). The most popular code is listed first.<br />
4. Press the appropriate Device Mode key (e.g. a) on<br />
the CR102.<br />
5. Press and hold S until the red Power LED blinks<br />
twice: * * (It actually blinks once when you press<br />
the key, then twice after about three seconds).<br />
6. Enter the first four-digit device code using the<br />
number keys. The power key blinks twice: * *.<br />
7. Aim the CR102 at the device and press P. If the<br />
device switches off, the setup is complete.<br />
8. Turn your device back on and test all the CR102’s<br />
functions to ensure they are working properly.<br />
9. Important! Write your device code down on the<br />
right hand side of the page so you can remember it if<br />
you ever reset the CR102.<br />
<br />
What if I still can’t control my device?<br />
< If your device doesn’t respond, repeat the above<br />
steps until one of the device codes listed for your<br />
brand works.<br />
< If none of the codes listed for your brand operates<br />
your device, or if your brand is not listed at all, try<br />
the Library Search Method described in the next<br />
section.<br />
Notes:<br />
< Some codes are quite similar. If your device does not<br />
respond or is not functioning properly with one of<br />
the codes, try another code listed under your brand.<br />
< If your device’s original remote control does not have<br />
a P (POWER) key, press $ instead of P when<br />
setting up your device.<br />
< Remember to press the corresponding device key<br />
before operating your device.<br />
< Many TVs do not switch on pressing P. Please try<br />
pressing a number key (‘channel select’) to switch<br />
your TV back on.<br />
< To search for the code for another device follow the<br />
instructions above, but press the appropriate device<br />
key instead of a during step 2.<br />
Method 2 (Library search)<br />
This section describes another way to program the<br />
CR102 to control third-party equipment.<br />
Library Search allows you to scan through all the<br />
codes contained in the CR102’s memory. It can take a<br />
lot longer than the previous method, so only use this<br />
method if:<br />
< Your device does not respond to the CR102 after you<br />
have tried all the codes listed for your brand.<br />
< Your brand is not listed at all in the Device Code<br />
tables.<br />
Example: To search for a TV code<br />
1. Switch your TV on (not standby) and aim the<br />
CR102 at it.<br />
2. Press a on your CR102.<br />
3. Press and hold S until the power LED blinks twice.<br />
4. Press 9 9 1. The power LED key blinks twice:<br />
* *.<br />
5. Press P.<br />
6. Aim the CR102 at your Television and press [<br />
repeatedly until your Television turns off.<br />
Every time you press [ the CR102 sends out a<br />
POWER signal from the next code contained in its<br />
memory. In the worst case, you may have to press this<br />
key up to 150 times, so patience is required! If you<br />
skip past a code, step back by pressing ]. Remember<br />
to keep pointing the CR102 at your Television while<br />
pressing this key.<br />
7. As soon as your television turns off, press S to<br />
store the code.<br />
Notes:<br />
< Many TVs do not switch on by pressing P. Try<br />
pressing a number key (‘channel select’) to switch<br />
your TV back on.<br />
< If you cannot control your Television properly,<br />
please continue the Search Method: you may be<br />
using the wrong code.<br />
< To search for the code for another device follow the<br />
instructions above, but press the appropriate Device<br />
Mode key instead of a during step 2.<br />
< If your device’s original remote control does not have<br />
a P (STANDBY) key, press $ instead during step 5.<br />
Once you have set up your CR102, you can blink back<br />
your device set-up codes for future reference.<br />
Example: To blink back your Television code<br />
1. Press the appropriate Device Mode key (e.g. a)<br />
once.<br />
2. Press and hold S until the red Power LED blinks<br />
twice * * (It actually blinks once when you press<br />
the key, then twice after about three seconds).<br />
3. Press 9 9 0. The P key blinks twice.<br />
4. For the first digit of your four-digit code, press 1 and<br />
count all the red blinks. If there are no blinks, the<br />
digit is ‘0’.<br />
5. For the second, third and fourth digits, repeat the<br />
previous step, pressing 2, 3, or 4 in order.<br />
Now you have the four-digit code.<br />
Make a note of the codes<br />
Write down the codes for your devices in the boxes<br />
below for future reference.<br />
1<br />
2<br />
3<br />
4<br />
5<br />
6<br />
7<br />
8<br />
Device<br />
Code<br />
English<br />
E-25
AMP Device Mode<br />
The A Device Mode button configures the CR102 to<br />
control the <strong>AVR600</strong>. Pressing this button does not affect<br />
the currently selected input on the <strong>AVR600</strong>.<br />
IMPORTANT: The CR102 must also be in AMP Device<br />
Mode to control the following sources: PHONO, MCH<br />
(multi-channel analogue), AUX, NET (optional network<br />
audio), USB, IPOD (for use with the optional <strong>Arcam</strong><br />
rLead or rDock).<br />
However to control the internal Tuner (AM/FM/DAB<br />
or Sirius if fitted) the CR102 must first be in Tun Device<br />
Mode (see later).<br />
The functionality of the CR102 is context sensitive for<br />
the internal sources and is described in the following<br />
table.<br />
P<br />
0 … 9<br />
PHONO<br />
E<br />
RPT<br />
r<br />
S<br />
AUX<br />
H<br />
NET<br />
e<br />
<br />
Single press – Toggles <strong>AVR600</strong> power<br />
between standby and on in the current zone<br />
(zone in which the command is received).<br />
Press and hold – Forces all <strong>AVR600</strong> zones<br />
into standby, regardless of which zone the<br />
command was received in.<br />
The number keys can be used for source<br />
selection (without changing the CR102<br />
Device Mode). Alternatively the Device<br />
Mode buttons can also be used with the<br />
SHIFT key.<br />
0 SAT (satellite) input<br />
1 PHONO input<br />
2 AV input<br />
3 TUNER input<br />
4 DVD input<br />
5 TAPE input<br />
6 VCR input<br />
7 CD input<br />
8 AUX (front panel) input<br />
9 MCH (multichannel) input<br />
Selects Tape input on the <strong>AVR600</strong><br />
SHIFT + E selects Phono input on the<br />
<strong>AVR600</strong><br />
(for iPod and NET sources)<br />
Modifies many keys (see individual key<br />
descriptions below).<br />
Selects MCH (multichannel) input on the<br />
<strong>AVR600</strong><br />
SHIFT + H selects AUX input on the <strong>AVR600</strong><br />
Selects iPOD input on the <strong>AVR600</strong><br />
SHIFT + e selects network (net) internal<br />
input on the <strong>AVR600</strong><br />
Navigate menus<br />
OK confirms a setting (equivalent to ‘Enter’<br />
or ‘Select’ on some remote controls)<br />
Press and hold OK to force the analogue<br />
and digital video outputs to the default<br />
resolution: 480i (525-line NTSC).<br />
Shift + < decreases the picture resolution.<br />
Shift + > increases the picture resolution.<br />
Shift + ' turns current zone (in which<br />
command is received) on<br />
Shift + , turns current zone (in which<br />
command is received) off.<br />
M<br />
U<br />
D<br />
@<br />
] [<br />
- +<br />
DIRECT<br />
)<br />
EQ<br />
$<br />
EFFECT<br />
&<br />
BASS<br />
(<br />
Trim<br />
!<br />
Cycles through the available surround and<br />
downmix modes.<br />
Displays the <strong>AVR600</strong> setup menu on the On<br />
Screen Display (see page 34).<br />
Cycles through the front panel display’s<br />
brightness options<br />
Toggles the mute function of the <strong>AVR600</strong><br />
(track control for iPod and NET sources)<br />
SHIFT + [ Follow Zone1 source.<br />
When the command is received in Zone2<br />
or Zone3, the source for that zone follows<br />
whatever input source is selected in Zone1<br />
Decrease (–) and increase (+) <strong>AVR600</strong><br />
volume<br />
Stereo direct on/off. Provides a direct<br />
analogue path from the analogue inputs to<br />
the left and right front outputs. Switches off<br />
any surround processing modes and shuts<br />
down the DSP circuits for the best stereo<br />
sound quality.<br />
Displays the room EQ settings menu<br />
(for iPod and NET sources)<br />
Calls up a pop-up (and front screen) to<br />
adjust the bass setting for a particular input.<br />
Brings up the speaker trim menu.<br />
Use the B, C, D and E navigation<br />
buttons. Press TRIM again to exit the speaker<br />
trim menu.<br />
As this is a temporary adjustment, these<br />
additional trim levels are reset to zero when<br />
the unit is turned off or the selected input is<br />
changed, but are retained if the unit is put<br />
into standby. These temporary trim levels<br />
are independent of the speaker levels found<br />
in the setup menu.<br />
sync<br />
#<br />
SUB<br />
%<br />
TREBLE<br />
h<br />
FAV+<br />
u<br />
FAVt<br />
HOME<br />
o<br />
INFO<br />
b<br />
Delays may be introduced into the video<br />
signal by video processing which causes<br />
a mismatch between the audio and video<br />
timing. You will notice this by speech sound<br />
being out of synchronization with the lip<br />
movements in the video.<br />
To compensate for this, you can adjust the<br />
lip sync delay. Press the sync button and<br />
use the D and E navigation buttons. Press<br />
again to exit the lip sync trim menu.<br />
Brings up the subwoofer trim menu. Use<br />
the D and E navigation buttons. Press Sub<br />
again to exit the sub trim menu<br />
Calls up a pop-up (and front screen) to<br />
adjust the treble setting for a particular<br />
input.<br />
(for iPod and NET sources)<br />
(for iPod and NET sources)<br />
(for iPod and NET sources)<br />
Cycles through the information displayed<br />
on the lower left portion of the front panel<br />
display.<br />
iPod commands<br />
The iPod interface is selected by pressing e in AMP<br />
Device Mode on the CR102. When connected to an<br />
iPod via an optional rLead/rDock, the keys below are<br />
used to navigate music files in AMP Device Mode.<br />
<br />
RPT<br />
r<br />
] [<br />
$<br />
&<br />
#<br />
Navigate the files on screen.<br />
OK selects/play the highlighted file.<br />
Toggles random (shuffle) play of the playlist<br />
on and off.<br />
SHIFT + r cycles through the repeat options<br />
Selects the previous/next track in the<br />
current playlist<br />
Begins or resumes playback at the currently<br />
highlighted track<br />
Toggles pause and playback of the current<br />
track<br />
Stops playback<br />
E-26
Network commands<br />
The <strong>AVR600</strong> Network client is selected by pressing S +<br />
e in AMP Device Mode on the CR102.<br />
When using the network client, the keys below are used<br />
to navigate music files in AMP Device Mode.<br />
<br />
RPT<br />
r<br />
] [<br />
EQ<br />
$<br />
EFFECT<br />
&<br />
SYNC<br />
#<br />
FAV+<br />
u<br />
t<br />
FAVt<br />
HOME<br />
o<br />
INFO<br />
b<br />
Navigate the files and menus on the screen.<br />
OK selects the highlighted file or enters the<br />
highlighted menu on the screen<br />
Toggles random (‘shuffle’) play of the playlist<br />
on and off<br />
SHIFT + r cycles through the repeat options<br />
Selects the previous/next track in the<br />
current playlist<br />
Begins or resumes playback at the currently<br />
highlighted track<br />
Toggles pause and playback of current<br />
track<br />
Stops playback<br />
Adds the currently displayed file or radio<br />
station to favourites list when using the<br />
network client<br />
Removes the currently displayed file or<br />
radio station from favourites list when<br />
using the network client<br />
Returns navigation to the top level of the<br />
music files structure (‘Home’)<br />
Cycles through the information displayed<br />
on the lower left portion of the front panel<br />
display<br />
<br />
TUN Device Mode<br />
The T Device Mode button configures the CR102 to<br />
control the tuner functions of the <strong>AVR600</strong>. Pressing this<br />
button also selects TUNER as the source.<br />
When switching to TUNER from a different source, the<br />
<strong>AVR600</strong> enters the last used tuner band, be it AM / FM<br />
/ DAB (if fitted) / Sirius (if fitted). Further presses of the<br />
TUN Device Mode button cycle through the available<br />
tuner bands.<br />
Further information on the tuner can be found in the<br />
‘Tuner Operation’ section on page 44.<br />
P<br />
0 … 9<br />
' ,<br />
< ><br />
O<br />
u<br />
t<br />
o<br />
(not used)<br />
Number keypad used to store and recall<br />
presets<br />
Allows selection of previously stored Tuner<br />
presets.<br />
AM/FM Tuner: allows frequency tuning.<br />
DAB/Sirius Tuner (where fitted): scrolls<br />
through the channel list.<br />
Selects (tunes to) the currently displayed<br />
preset, or selects the currently displayed<br />
DAB or Sirius channel (or category) when<br />
strolling through the channel (or genre) list.<br />
Page up to the previous 10 presets on<br />
screen<br />
Page down to the next 10 tuner presets on<br />
screen<br />
Delete the currently highlighted preset.<br />
<br />
DVD Device Mode<br />
The d Device Mode button configures the CR102 to<br />
control the DVD functions of <strong>Arcam</strong> DVD players,<br />
although this can be changed (see page 25). Pressing this<br />
button also selects DVD as the <strong>AVR600</strong> source.<br />
P<br />
0 … 9<br />
PHONO<br />
E<br />
RPT<br />
r<br />
S<br />
AUX<br />
H<br />
NET<br />
e<br />
<br />
M<br />
U<br />
D<br />
@<br />
]<br />
[<br />
Toggles power between standby and on<br />
Searches for and plays the track<br />
corresponding to the key pressed<br />
Selects Tape input on the <strong>AVR600</strong>.<br />
SHIFT + E selects PHONO input on the<br />
<strong>AVR600</strong><br />
Toggles random (‘shuffle’) play on and off.<br />
SHIFT + r cycles through the repeat<br />
options (track, disc, etc)<br />
Modifies many keys (see individual key<br />
descriptions, below)<br />
Selects multichannel (MCH) input on the<br />
<strong>AVR600</strong><br />
SHIFT + H selects AUX input on the<br />
<strong>AVR600</strong><br />
Selects iPod input on the <strong>AVR600</strong>.<br />
SHIFT + e selects network (NET) internal<br />
input on the <strong>AVR600</strong><br />
Navigate setup and DVD programme<br />
selection menus.<br />
OK confirms a setting (‘Enter’ or ‘Select’ on<br />
some remotes).<br />
Shift + B to switch on from standby<br />
Shift + C to switch to standby from on.<br />
Cycles through available surround sound<br />
modes.<br />
Shift + Mode changes the HDMI setting.<br />
Activates DVD player menu, if available.<br />
Cycles through the front panel display’s<br />
brightness options.<br />
SHIFT + D enables RPT A-B functionality<br />
Toggles the mute function.<br />
By default this key operates the <strong>AVR600</strong> Mute<br />
Press and release to skip back to the<br />
beginning of the current/previous track.<br />
Press and release to skip forwards to the<br />
beginning of the next track.<br />
- +<br />
)<br />
$<br />
&<br />
(<br />
TRIM<br />
!<br />
#<br />
%<br />
h<br />
FAV+<br />
u<br />
FAV-<br />
HOME<br />
o<br />
INFO<br />
b<br />
Decrease (–) and increase (+) <strong>AVR600</strong><br />
volume<br />
Fast rewind.<br />
Shift + 7 cycles through slow play<br />
backwards speeds<br />
Starts the playback of a DVD.<br />
Shift + 4 cycles through the Angle options<br />
on an <strong>Arcam</strong> DVD player.<br />
Pauses DVD play-back. Press 4 to restart<br />
playback.<br />
Shift + ; cycles through Zoom options.<br />
Fast forward.<br />
Shift + 8 cycles through slow forward<br />
speeds<br />
Ejects disc.<br />
SHIFT + ! displays speaker Trim menu on<br />
<strong>Arcam</strong> DVD players.<br />
Stop playback of a DVD<br />
Start recording (on products that have this<br />
feature).<br />
Displays Search menu with Title, Track and<br />
Time options.<br />
Displays Setup menu.<br />
Shift + SETUP displays programming screen<br />
on <strong>Arcam</strong> DVD players<br />
Displays Title menu.<br />
Shift + title clears bookmark, search and<br />
program display entries on <strong>Arcam</strong> DVD<br />
players<br />
Changes Audio decode format (Dolby<br />
Digital, DTS, etc.).<br />
Shift + o displays the ‘Memory’ function<br />
(Bookmarks)<br />
Cycles through DVD subtitle language<br />
options, if available.<br />
Shift + b displays STATUS INFO on<br />
<strong>Arcam</strong> DVD players<br />
English<br />
E-27
SAT Device Mode<br />
<br />
AV Device Mode<br />
The z Device Mode button configures the CR102<br />
to control the functions of a satellite receiver. You will<br />
need to configure this Device Mode to work with your<br />
equipment. Pressing this button also selects SAT as the<br />
<strong>AVR600</strong> source.<br />
The a Device Mode button configures the CR102 to<br />
control the functions of a television or other display<br />
device. You will need to configure this Device Mode to<br />
work with your equipment. Pressing this button also<br />
selects AV as the <strong>AVR600</strong> source.<br />
P<br />
Toggles power between standby and on<br />
(<br />
& Toggles pause of playback<br />
0 … 9<br />
Functions as original remote number key.<br />
!<br />
PHONO Selects Tape input on the <strong>AVR600</strong>.<br />
#<br />
E SHIFT + E selects PHONO input on the<br />
<strong>AVR600</strong><br />
TV/AV Toggles between the available inputs on<br />
%<br />
h<br />
r<br />
your satellite receiver<br />
u<br />
(RED)<br />
S<br />
Modifies many keys (see individual key<br />
descriptions, below)<br />
t<br />
(Green)<br />
AUX Selects multichannel (MCH) input on the<br />
H <strong>AVR600</strong>.<br />
o<br />
(Yellow)<br />
SHIFT + H selects AUX input on the<br />
<strong>AVR600</strong>.<br />
b<br />
(Blue)<br />
NET<br />
e<br />
Selects iPOD input on the <strong>AVR600</strong><br />
SHIFT + e selects network (net) internal<br />
input on the <strong>AVR600</strong><br />
Navigate menus.<br />
OK confirms a setting (equivalent to ‘Enter’<br />
or ‘Select’ on some remotes).<br />
M Controls Backup function, if available.<br />
U<br />
Performs same function as on original<br />
remote, if available.<br />
D<br />
On some Satellite and Cable set top boxes<br />
this key functions as the Guide key to open<br />
the EPG (Electronic Program Guide).<br />
@<br />
Toggles the mute function.<br />
By default this key operates the <strong>AVR600</strong> Mute<br />
]<br />
Channel down<br />
[<br />
Channel up<br />
- +<br />
Decrease (–) or increase (+) <strong>AVR600</strong> volume<br />
) Fast rewind<br />
$ Starts the playback<br />
Fast forward<br />
(not used)<br />
Stop playback<br />
Start recording<br />
(not used)<br />
Duplicates function of RED key for some<br />
Satellite and Cable set-top boxes<br />
Duplicates function of GREEN key for some<br />
Satellite and Cable set-top boxes<br />
Duplicates function of YELLOW key for some<br />
Satellite and Cable set-top boxes<br />
Duplicates function of BLUE key for some<br />
Satellite and Cable set-top boxes<br />
P<br />
Toggles power between standby and on.<br />
(Some TVs require you to use a number<br />
key to turn them on.)<br />
&<br />
(<br />
0 … 9<br />
Functions as original remote number key –<br />
usually for channel selection.<br />
!<br />
Phono Selects Tape input on the <strong>AVR600</strong>.<br />
#<br />
E SHIFT + E selects PHONO input on the<br />
%<br />
<strong>AVR600</strong>.<br />
h<br />
TV/AV Toggles between the available inputs on<br />
r<br />
your display device (e.g. TV/AV)<br />
u<br />
(RED)<br />
S<br />
Modifies many keys (see individual key<br />
descriptions, below)<br />
AUX<br />
H<br />
Selects multichannel (MCH) input on the<br />
<strong>AVR600</strong>.<br />
SHIFT + H selects AUX input on the<br />
<strong>AVR600</strong>.<br />
Navigate setup and programme selection<br />
menus.<br />
<br />
OK confirms a selection (equivalent to<br />
‘Enter’ or ‘Select’ on some remotes).<br />
M<br />
EXIT function on some models.<br />
U<br />
Functions as original remote key, if<br />
available.<br />
D<br />
Display INFO or OSD (On Screen Display)<br />
function, if available.<br />
@<br />
Toggles the mute function.<br />
By default this key operates the <strong>AVR600</strong><br />
Mute<br />
]<br />
Channel down<br />
[<br />
Channel up<br />
Decrease (–) and increase (+) <strong>AVR600</strong><br />
- + volume.<br />
)<br />
Toggles TEXT page on/off<br />
t<br />
(Green)<br />
o<br />
(Yellow)<br />
b<br />
(Blue)<br />
Turns Programme-In-Programme (PIP)<br />
on, if available<br />
Activates PIP move, if available<br />
Activates PIP swap, if available<br />
Activates PIP freeze, if available<br />
Activates PIP channel up, if available<br />
Activates PIP channel down, if available<br />
Duplicates function of RED key for Text TV<br />
Duplicates function of GREEN key for Text<br />
TV<br />
Duplicates function of YELLOW key for Text<br />
TV<br />
Duplicates function of BLUE key for Text<br />
TV<br />
E-28
PVR Device Mode<br />
The v Device Mode button configures the CR102<br />
to control the functions of a video recorder or similar<br />
device. You will need to configure this Device Mode to<br />
work with your equipment. Pressing this button also<br />
selects PVR as the <strong>AVR600</strong> source.<br />
<br />
VCR Device Mode<br />
The w Device Mode button configures the CR102<br />
to control the functions of a video recorder or similar<br />
device. You will need to configure this Device Mode to<br />
work with your equipment. Pressing this button also<br />
selects VCR as the <strong>AVR600</strong> source.<br />
English<br />
Toggles power between standby and on.<br />
P<br />
&<br />
$ Play<br />
0 … Functions as original remote number key.<br />
9 (<br />
Selects Tape input on <strong>AVR600</strong>.<br />
PHONO<br />
!<br />
SHIFT +<br />
E E selects PHONO input on the<br />
<strong>AVR600</strong>.<br />
#<br />
TV/AV Toggles between available inputs (e.g. AV1, %<br />
r<br />
AV2)<br />
h<br />
S<br />
Modifies many keys (see individual key<br />
descriptions, below)<br />
u<br />
(RED)<br />
Selects multichannel (MCH) input on<br />
AUX <strong>AVR600</strong>.<br />
H SHIFT + H selects AUX input on the<br />
<strong>AVR600</strong>.<br />
Selects iPOD input on <strong>AVR600</strong>.<br />
NET<br />
e<br />
SHIFT + e selects network (Net) internal<br />
input on the <strong>AVR600</strong>.<br />
Navigate setup and programme selection<br />
menus.<br />
<br />
OK is equivalent to ‘Enter’ or ‘Select’ on<br />
some remotes.<br />
M<br />
Operates the Exit function if the PVR uses<br />
this feature<br />
U<br />
Turns on the Menu function if the PVR<br />
uses this feature<br />
D Toggles display between TV and PVR<br />
@<br />
Toggles the mute function. By default this<br />
key operates the AMP Mute<br />
] Channel down<br />
[ Channel up<br />
- +<br />
Decrease (–) and increase (+) <strong>AVR600</strong><br />
volume<br />
) Fast rewind<br />
t<br />
(Green)<br />
o<br />
(Yellow)<br />
b<br />
(Blue)<br />
Toggles pause of playback<br />
Fast forward<br />
Operates the Favourites function if the PVR<br />
uses this feature.<br />
Stop playback<br />
Starts recording<br />
(not used)<br />
Duplicates function of Red key (if used)<br />
Duplicates function of Green key (if used)<br />
Duplicates function of Yellow key (if used)<br />
Duplicates function of Blue key (if used).<br />
P Toggles power between standby and on.<br />
&<br />
$ Play<br />
0 … Functions as original remote number key.<br />
9<br />
Selects Tape input on <strong>AVR600</strong>.<br />
(<br />
!<br />
PHONO<br />
E<br />
SHIFT + E selects PHONO input on the<br />
<strong>AVR600</strong>.<br />
#<br />
%<br />
TV/AV Toggles between available inputs (e.g. AV1,<br />
r<br />
AV2)<br />
h<br />
S<br />
Modifies many keys (see individual key<br />
descriptions, below)<br />
u<br />
(RED)<br />
AUX<br />
H<br />
Selects multichannel (MCH) input on<br />
<strong>AVR600</strong>.<br />
SHIFT + H selects AUX input on the<br />
<strong>AVR600</strong>.<br />
NET<br />
e<br />
Selects iPOD input on <strong>AVR600</strong>.<br />
SHIFT + e selects network (Net) internal<br />
input on the <strong>AVR600</strong>.<br />
Navigate setup and programme selection<br />
menus.<br />
<br />
OK is equivalent to ‘Enter’ or ‘Select’ on<br />
some remotes.<br />
M<br />
Operates the Exit function if the VCR uses<br />
this feature<br />
U<br />
Turns on the Menu function if the VCR<br />
uses this feature<br />
D Toggles display between TV and VCR<br />
@<br />
Toggles the mute function, if available.<br />
By default this key operates the AMP Mute<br />
] Channel down<br />
[ Channel up<br />
- +<br />
Decrease (–) and increase (+) amplifier<br />
volume<br />
) Fast rewind<br />
t<br />
(Green)<br />
o<br />
(Yellow)<br />
b<br />
(Blue)<br />
Toggles pause of playback<br />
Fast forward<br />
Ejects tape<br />
Stop playback<br />
Starts recording<br />
(not used)<br />
Duplicates function of Red key (if used)<br />
Duplicates function of Green key (if used)<br />
Duplicates function of Yellow key (if used)<br />
Duplicates function of Blue key (if used).<br />
E-29
CD Device Mode<br />
The c Device Mode button configures the CR102<br />
to control the CD functions of <strong>Arcam</strong> CD players,<br />
although this can be changed (see page 25). Pressing this<br />
button also selects CD as the <strong>AVR600</strong> source.<br />
P<br />
0 … 9<br />
PHONO<br />
E<br />
RPT<br />
r<br />
S<br />
AUX<br />
H<br />
NET<br />
e<br />
<br />
M<br />
U<br />
D<br />
@<br />
]<br />
[<br />
Toggles power between standby and on.<br />
Functions as original remote number key.<br />
Selects Tape input on the <strong>AVR600</strong>.<br />
SHIFT + E selects phono input on the<br />
<strong>AVR600</strong>.<br />
Toggles random (‘shuffle’) play on and off.<br />
SHIFT + r cycles through the repeat<br />
options (track, disc, etc.).<br />
Modifies many keys (see individual key<br />
descriptions, below)<br />
Selects multichannel (MCH) input on<br />
<strong>AVR600</strong>.<br />
SHIFT + H selects AUX input on the<br />
<strong>AVR600</strong>.<br />
Selects iPOD input on <strong>AVR600</strong>.<br />
SHIFT + e selects network (Net) internal<br />
input on the <strong>AVR600</strong>.<br />
Navigates track listings if supported by the<br />
player.<br />
OK selects the currently highlighted track if<br />
supported by the player<br />
Changes the time display modes on <strong>Arcam</strong><br />
CD player<br />
(not used)<br />
Cycles through the front panel display’s<br />
brightness options.<br />
SHIFT + D enables RPT A-B functionality if<br />
supported by the player.<br />
Toggles the mute function. By default this<br />
key operates the <strong>AVR600</strong> Mute.<br />
Press and release to skip back to the<br />
beginning of the current/previous track.<br />
Press and release to skip forwards to the<br />
beginning of the next track.<br />
- +<br />
)<br />
$ Play<br />
&<br />
(<br />
!<br />
#<br />
%<br />
h<br />
FAV+<br />
u<br />
FAVt<br />
Home<br />
o<br />
Info<br />
b<br />
Decrease (–) and increase (+) <strong>AVR600</strong><br />
volume.<br />
Fast rewind<br />
Toggles pause of playback<br />
Fast forward<br />
Open/close disc tray<br />
Stop playback<br />
Start recording (on products that have this<br />
feature)<br />
Scans first 10 seconds of each track on CD,<br />
if supported by the player (Audio search)<br />
Starts Program mode<br />
Clears programmed item<br />
(not used)<br />
(not used)<br />
E-30
E-31<br />
English
essential<br />
setup<br />
Before you use your <strong>AVR600</strong> it is essential that you<br />
enter some information into the Setup menus about<br />
your speaker configuration. This allows the <strong>AVR600</strong> to<br />
process any surround sound digital source to exactly<br />
match your system and give you the ultimate surround<br />
sound experience.<br />
There are three pieces of vital information which are<br />
outlined in the sections: ‘Speaker Types’, ‘Speaker<br />
Distances’ and ‘Speaker Levels’.<br />
The way you enter this information manually into the<br />
<strong>AVR600</strong> is given later in the ‘Setup Menus’ section<br />
on page 34. The settings can also be established<br />
automatically using the <strong>Arcam</strong> Auto Speaker Setup<br />
function. However it is important to understand why<br />
these speaker settings must be entered, which is why this<br />
section is presented first.<br />
Speaker types<br />
You need to set the type of speakers that you have<br />
connected to your <strong>AVR600</strong>:<br />
Large<br />
Small<br />
None<br />
capable of full frequency range reproduction<br />
not capable of full frequency range<br />
reproduction at the low frequency end<br />
speaker not present in your configuration<br />
The terms ‘Large’ and ‘Small’ do not necessarily relate to<br />
the physical size of your speakers. As a rule of thumb,<br />
if a speaker cannot reproduce a flat frequency response<br />
down to about 40Hz (and very few can!) it is often better<br />
to consider them as ‘Small’ for setup purposes of home<br />
cinema.<br />
When a speaker is set to ‘Small’, very low frequency<br />
sounds are redirected away from that speaker to a ‘Large’<br />
speaker or a subwoofer, which are far better suited to<br />
reproducing these low frequency sounds.<br />
Note that it is not possible to set all speakers to<br />
‘Small’ unless there is a subwoofer in your speaker<br />
configuration. If you do not have a subwoofer, you will<br />
be forced to set your front speakers to ‘Large’.<br />
(Advanced users may wish to automatically override the<br />
‘Small’ speaker setting for purely stereo music listening<br />
when not watching movies. This can be achieved in the<br />
‘Input Config.’ menu – see page 35.)<br />
Single Surround Back speaker<br />
If you have just one Surround Back speaker in your<br />
configuration instead of two, ensure it is connected to<br />
the SBL speaker connector and set Surr. Back L/R in<br />
the Spkr Types menu to either ‘1 Small’ or ‘1 Large’ as<br />
appropriate.<br />
Crossover frequency<br />
If you have set any speakers as being Small, then you will<br />
be required to set a value for the crossover frequency.<br />
This is the frequency below which signals are filtered<br />
away from these Small speakers and redirected to Large<br />
speakers or the subwoofer (if present). A frequency<br />
of 80Hz is often a good starting point, however you<br />
will probably have to experiment with different values<br />
to find the best value for your system or consult your<br />
speaker handbook.<br />
MCH sub level<br />
If a subwoofer is present, this setting allows for a 10dB<br />
compensation on the subwoofer output when using the<br />
MCH input as required by many DVD-A players with<br />
audio outputs.<br />
Use Surround Back channels<br />
If not used in the main zone, it is possible to assign the<br />
Surround Back channels to bi-amp the Front Left/Right<br />
channels or to provide an amplified output to Zone 2.<br />
Speaker Distances<br />
It is essential for the distance from each speaker to the<br />
listening position to be accurately measured and entered<br />
into the ‘Setup’ menu. This ensures that the sounds from<br />
the various speakers arrive at the listening position at<br />
the correct time to recreate a realistic surround effect.<br />
The distance can be entered in centimetres or inches.<br />
Speaker Levels<br />
Finally the levels of all the speakers in the system need<br />
to be adjusted to match each other at the listening<br />
position, again to create a proper surround effect. To<br />
help with this the <strong>AVR600</strong> can generate a test noise<br />
for each speaker which should be measured with a<br />
sound pressure level (SPL) meter. The meter should<br />
be set to ‘C’ weighting and slow response. The level<br />
of noise measured at the listening position from each<br />
speaker should be adjusted on the Speaker Trims page<br />
of the Setup menu so that the meter reads 75dB SPL.<br />
It does not matter what the system volume setting of<br />
the <strong>AVR600</strong> is before turning the test noise on as the<br />
volume setting is over-ridden for the duration of the<br />
speaker noise test.<br />
There are several basic SPL meters on the market at<br />
reasonable prices aimed at home cinema enthusiasts.<br />
Check your local technology store, search online or ask<br />
your dealer.<br />
If you do not have an SPL meter, you can try to adjust<br />
the noise level of each speaker by ear. In this case it is<br />
not possible to adjust the speakers to the absolute 75dB<br />
SPL volume level, but you should aim for all speakers<br />
sounding equally loud. Setting speaker test noise levels<br />
by ear is not recommended as it is very difficult to do<br />
accurately, but is often better than doing nothing at all!<br />
E-32
auto speaker<br />
setup<br />
There is a proprietary automatic loudspeaker setup<br />
function built into your <strong>AVR600</strong>. The <strong>Arcam</strong> Auto<br />
Speaker Setup function attempts to set all the essential<br />
speaker settings for all the speakers in your system.<br />
It also calculates room equalisation (Room EQ) filter<br />
values to remove some of the worst effects of resonant<br />
frequencies in the listening room.<br />
Your <strong>AVR600</strong> package is supplied with a calibration<br />
microphone, which should be inserted into the AUX jack<br />
socket on the front panel and positioned at the main<br />
listening position. This microphone picks up the special<br />
calibration tones generated by the speakers when Auto<br />
Speaker Setup is run. The <strong>AVR600</strong> then analyses the<br />
signal and computes:<br />
< which speakers are present,<br />
< speaker type,<br />
< speaker distance,<br />
< speaker level,<br />
< crossover frequency to the subwoofer (or large front<br />
speakers if no subwoofer is present),<br />
< problem resonant frequencies in the room which<br />
need control by filtering.<br />
It also warns if any of the speakers are too close to the<br />
microphone or if the measured tone is clipped.<br />
To help the system be as accurate as possible when<br />
performing Auto Speaker Setup, there are a few<br />
guidance rules that should be followed:<br />
< Minimise any background sounds in the listening<br />
room and other nearby rooms.<br />
< Close all windows and doors in the listening room.<br />
< Turn off all fans including air-conditioning systems.<br />
< If holding the microphone in the hand rather than<br />
mounting on a tripod or similar, keep your hand and<br />
fingers still to avoid generating ‘handling noise’.<br />
< Position the set up microphone pointing upwards at<br />
roughly head height in the normal listening position.<br />
It is not necessary to point the microphone directly<br />
at the speaker generating the test tone. (It helps if<br />
you are able to position the microphone exactly<br />
where your head would normally be for listening,<br />
with the microphone in direct unobstructed view of<br />
all speakers.)<br />
< If your system includes an active subwoofer, start<br />
by setting its output level / gain control to a value<br />
halfway between maximum and minimum.<br />
When activated, a calibration tone is played through<br />
each channel of the <strong>AVR600</strong> in turn, including the<br />
subwoofer channel. The calibration tone cycles round<br />
each of the speakers twice. If you do not have a full 7.1<br />
speaker configuration there will be periods of silence<br />
between some speaker channels. Follow the ‘progress’<br />
information on-screen.<br />
After all the channels have been measured, a summary<br />
of the speaker configuration will be displayed on-screen.<br />
You can then choose to accept the settings, re-measure<br />
your system again or cancel Auto Speaker Setup without<br />
storing the settings.<br />
The Auto Speaker Setup function is found within the<br />
Setup menus, see page 37. By default, Room EQ is not<br />
applied to any of the source inputs. You should enable<br />
Room EQ on inputs you think benefit from this feature,<br />
as required, by listening when playing typical source<br />
material through each input. This is enabled from within<br />
the Input Config menu.<br />
While room equalisation can help to reduce problems<br />
with listening room acoustics, it is usually far better<br />
to try to solve these problems with the room directly.<br />
Proper loudspeaker positioning, acoustic wall<br />
treatments and moving the listening position away from<br />
walls should produce far better results overall. However<br />
it may be difficult to do this in a home environment, so<br />
Room EQ is your next best choice.<br />
Problems<br />
We advise you to look over the reported measurements<br />
on the screen following Auto Speaker Setup for any<br />
obviously incorrect results, in particular to ensure the<br />
reported speakers match your configuration and that the<br />
speaker distances to the listening position appear look<br />
roughly correct. If the results are not what you expected<br />
re-run Auto Speaker Setup.<br />
The Auto Speaker Setup function is normally quite<br />
accurate but occasionally false results can be generated.<br />
Problems may be as a result of:<br />
< external sounds or rumbling / handling noises<br />
picked up by the microphone<br />
< sound reflections off hard surfaces (e.g. windows or<br />
walls) close to the listening position,<br />
< very strong acoustic resonances within the room.<br />
If you are still experiencing difficulties or you wish to<br />
have the most accurate results for ultimate surround<br />
performance, we recommend using the manual method<br />
of establishing speaker distances and levels.<br />
Using a subwoofer<br />
If your system includes an active subwoofer you may<br />
need to re-run Auto Speaker Setup with the subwoofer<br />
output level / gain control set to a higher or lower value,<br />
if the summary screen reports problems setting the<br />
subwoofer up.<br />
Auto Speaker Setup will attempt to choose a crossover<br />
frequency that allows the smoothest low frequency<br />
transition from the main speakers to the subwoofer.<br />
However if this does not produce pleasing results we<br />
recommend manually trying other crossover frequencies<br />
to find something more to your preference.<br />
See the next sections for information of how to enter or<br />
change speaker settings manually.<br />
English<br />
E-33
setup menus<br />
The Setup menus allow you to configure all aspects<br />
of your <strong>AVR600</strong>. The next few pages will go through<br />
the menu items and explain their function. The Setup<br />
menus will probably look quite daunting if you are new<br />
to setting up home cinema, but the majority of them<br />
need only be configured once when you first install the<br />
system (or if your system changes or you move house!)<br />
The only way to view the Setup menus is on your display<br />
device (TV or projector) using the on-screen display<br />
(OSD) capability of the <strong>AVR600</strong>. To view the OSD for<br />
the initial setting up, connect any of the video outputs<br />
to your display device. You do not need to have a video<br />
source connected to the <strong>AVR600</strong> video inputs.<br />
Entering Setup mode<br />
To enter the setup menu, press the menu button on the<br />
remote control or font panel. The front panel display<br />
shows ‘MENU’ and the setup menu (pictured right) is<br />
displayed.<br />
Unstable OSD menu or picture display?<br />
The default <strong>AVR600</strong> output video resolution when first<br />
powered up out of the box is 525-line/60Hz NTSC for<br />
analogue video and 480i/60 for digital video. This has<br />
been chosen as most display devices can synchronise<br />
to this automatically. This can be changed in the Video<br />
Outputs section of the Setup Menus.<br />
If the output resolution and frame rate is forced to a<br />
setting your display device does not support, the picture<br />
may become unstable or may not display at all. To reset<br />
the output video resolution and frame rate to the default<br />
values to restore the display, press and hold the OK<br />
button for three seconds.<br />
Menu panel<br />
The left-hand panel lists the setup<br />
screens available for adjustment. The<br />
selected menu is highlighted with a grey<br />
band.<br />
<br />
<br />
<br />
<br />
<br />
<br />
<br />
<br />
<br />
<br />
<br />
Navigating the setup menu<br />
<br />
<br />
… using the remote control<br />
The setup menu can be navigated by using the cursor<br />
(arrow) keys on the remote control. This is by far the<br />
easiest method.<br />
1. To enter the setup menu, press the menu button<br />
(which is located immediately under the navigation<br />
buttons).<br />
2. Use the B and C keys to navigate up and down<br />
the main section headings in the left-hand panel.<br />
3. Once you have the main section that you require<br />
highlighted, use the E key to enter the section.<br />
4. Use the B and C keys to navigate up and<br />
down the section settings in the left-hand panel.<br />
Some settings may be greyed out. These are either<br />
for information only (e.g. incoming sampling<br />
<br />
<br />
<br />
<br />
<br />
<br />
<br />
<br />
Help screen<br />
The lower right-hand panel gives a short<br />
help text for the feature being adjusted.<br />
Adjustment panel<br />
The upper right-hand panel lists the<br />
parameters you can change as a user.<br />
The selected line is highlighted with<br />
a black band. Lines that cannot be<br />
selected are greyed-out.<br />
<br />
<br />
<br />
<br />
<br />
<br />
<br />
<br />
<br />
Scroll bars<br />
These indicate the<br />
position of the<br />
displayed screen<br />
within longer menus.<br />
frequency) or are not currently selectable (e.g.<br />
network IP address when DHCP is used). Scroll bars<br />
on the sides of the right hand panel indicate your<br />
position in the settings list where there are more<br />
items than can be displayed at once.<br />
5. Pressing OK selects a setting to change it, pressing OK<br />
again de-selects the setting.<br />
6. At any time, press the menu button to exit the menu.<br />
Any changes to settings are saved.<br />
… using the keys on the front panel<br />
The <strong>AVR600</strong> front panel controls can be used to<br />
configure the unit. Follow the instructions for using the<br />
remote control, in this case using input– for left, input+<br />
for right, volume– for down and volume+ for up.<br />
E-34
Input Config.<br />
The audio and video settings on this page of the Setup<br />
menu can be tailored specifically and independently to<br />
the currently selected input.<br />
When a different input is selected on the Input line, all<br />
the input-specific settings for that input are displayed<br />
below it. These settings are applied to the named Input<br />
only and are stored in memory and recalled each time<br />
the unit is powered up and whenever that input is<br />
selected.<br />
Input – The currently selected input connectors to<br />
which the settings below relate.<br />
Name – The display name of the input. You can change<br />
the name of any input to more closely match your setup.<br />
For example, if you had two satellite receivers, you could<br />
connect the main receiver to the Sat audio and video<br />
input connectors and change the Name to ‘SAT 1’. You<br />
could then connect the second satellite receiver to the<br />
VCR audio and video input connectors, but change the<br />
VCR Name to ‘SAT 2’. It is then clearer to users of your<br />
<strong>AVR600</strong> which inputs they wish to select when scrolling<br />
though.<br />
Lip Sync – Each input can have its own setting<br />
to add a time delay between the audio and video<br />
signals to compensate for the sound and picture not<br />
being synchronised. This is normally required when<br />
video processing is used in the system for scaling or<br />
de-interlacing video. The range of lip sync delay is –5 to<br />
+220 milliseconds.<br />
The lip sync adjustment can only correct for delayed<br />
video. If the audio is late set lip sync to its minimum.<br />
Mode – Sets the initial audio decode mode for stereo<br />
sources on this input.<br />
< Last Mode recalls the last used setting for this<br />
input when a stereo source was applied. See section<br />
‘Multi-channel source modes’ on page 41 for more<br />
information.<br />
Ext. Mode – Sets the initial audio decode mode for<br />
multi-channel digital sources on this input.<br />
< Last Mode recalls the last used setting for this<br />
input when a stereo source was applied. See section<br />
‘Multi-channel source modes’ on page 41 for more<br />
information.<br />
Treble –<br />
Bass –<br />
These allow you to alter the bass and treble tone controls<br />
for all currently active speakers for each individual<br />
input. For example, if your PVR source sounds a little<br />
bass light, you can always correct for this by selecting<br />
PVR on the Input line at the top of this menu and add<br />
2 or 3dB to the Bass control. Then, whenever the PVR<br />
input is selected, the bass is automatically boosted for as<br />
long as that input is selected.<br />
Room EQ – When the Auto Speaker Setup function is<br />
run it also calculates Room Equalisation coefficients to<br />
remove some of the worst effects of resonant frequencies<br />
of the room at the listening position. By default Room<br />
EQ is not applied to any of the source inputs, however<br />
you can enable them on a per-input basis as you wish.<br />
< Not Calculated: (Information only) Auto Speaker<br />
Setup has not been run or has errors so cannot be<br />
selected.<br />
< On: Room EQ is applied to the current source.<br />
< Off: Room EQ is not applied to the current source.<br />
Input Trim – Sets the maximum analogue input<br />
signal level (sensitivity) on this input before the ADC<br />
(Analogue-to-Digital converter) signal path clips.<br />
Options are 0.5, 1, 2 and 4 volts RMS maximum input.<br />
The default is 2Vrms maximum.<br />
For example, analogue sources with low output levels<br />
may benefit by choosing the 1V maximum setting,<br />
or the 0.5V maximum setting if the source has a<br />
very low output. This helps maximise signal-to-noise<br />
performance of the <strong>AVR600</strong> and also helps keep the<br />
various analogue sources sounding about the same level<br />
for any given <strong>AVR600</strong> volume control setting.<br />
Dolby Volume –Dolby Volume is an intelligent system<br />
that improves the perceived audio frequency response<br />
at lower listening levels and corrects for volume<br />
inconsistencies between sources (e.g. a rock radio<br />
station and a DVD) and between programming (e.g. a<br />
TV show and advertisement breaks).<br />
< Off: (default) Dolby Volume is not applied to this<br />
input.<br />
< Cinema: enables Dolby Volume for this source and<br />
configures the input for audio which comes mostly<br />
from movie soundtracks.<br />
< Music: enables Dolby Volume for this source and<br />
configures the input for audio which comes from<br />
other sources (CD, TV, Satellite, Tuner, etc.).<br />
Dolby Leveller – This setting of Dolby Volume controls<br />
how closely quiet and loud sources and programme<br />
content are matched to each other, based on the<br />
ear’s perception of loudness. The range of values is<br />
0 (minimal levelling) to 10 (maximum levelling).<br />
The default setting is 9, however we recommend<br />
experimenting with lower values if all your source<br />
material is more closely matched in level. If the Volume<br />
Leveller function is set off, no level matching between<br />
sources and programme material is performed. Note<br />
however that turning the Dolby Leveller setting of Dolby<br />
Volume to ‘Off ’ is not the same as turning the entire<br />
function of Dolby Volume to ‘Off ’, as volume related<br />
frequency response processing is still active. See Dolby<br />
Volume on page 42 for more information.<br />
DV Calib. Offset – The Calibration Offset parameter of<br />
Dolby Volume allows you to compensate for speaker<br />
efficiencies and listening position. The default value<br />
is 0 and this should normally produce a good result<br />
when the <strong>AVR600</strong> speaker levels are set using a sound<br />
pressure level meter.<br />
See the Dolby Volume section on page 42 for further<br />
information on Calibration Offset.<br />
Surround EX – Sets how the <strong>AVR600</strong> should configure<br />
its decode mode when a Dolby Digital EX bitstream<br />
is received. Note that this setting only applies if you<br />
have Surround Back loudspeakers. You may wish to<br />
experiment with these two decode modes to see which<br />
you prefer with Dolby Digital EX encoded material.<br />
Options are Auto DD EX, Auto PLIIx and Manual.<br />
< Auto DD EX: When a Dolby Digital EX-flagged<br />
bitstream is detected, the decode mode<br />
automatically changes to Dolby Digital EX. This can<br />
be temporarily overridden by pressing the MODE<br />
button on the remote or front panel.<br />
< Auto PLIIx: When a Dolby Digital EX-flagged<br />
bitstream is detected, the decode mode<br />
automatically changes to Pro Logic IIx Movie. This<br />
can be temporarily overridden by pressing the MODE<br />
button on the remote or front panel.<br />
< Manual: The received Dolby Digital EX is treated<br />
as if it is an ordinary Dolby Digital stream in that it<br />
does not automatically select the EX or PLIIx decode<br />
modes. Instead, the previously used decode mode<br />
for a multi-channel digital source on this input is<br />
applied. However, either of the EX or PLIIx decode<br />
modes can be applied manually by pressing the<br />
MODE button.<br />
Stereo Mode – If you have configured your system to<br />
have a subwoofer, then you have the flexibility to<br />
choose how bass information is distributed between<br />
the front left/right speakers and the subwoofer when<br />
listening to stereo (two channel only) analogue and<br />
digital sources. Choose the option which gives you<br />
the most solid, even sounding bass. If you are using<br />
a subwoofer for stereo, please also see Sub Stereo<br />
below to set the level of the subwoofer. For best<br />
results test with a set-up disc or live programme<br />
material. This setting can be used to override your<br />
normal speaker settings in the Spkr Types menu<br />
whenever the <strong>AVR600</strong> plays stereo material. It is<br />
quite common to find that two channel stereo music<br />
listening is best done with a slightly different sub/<br />
speaker setting than for surround movies.<br />
< As Spkr Types: When an analogue or digital stereo<br />
source is played, your normal speaker configuration<br />
(as in Spkr Types menu) is used to reproduce the<br />
signal.<br />
< Left/Right: Full frequency stereo information. All<br />
audio is sent to the front left and right speakers only<br />
without any bass redirection. You can use this setting<br />
if you consider your front left/right speakers to be<br />
able to handle the full frequency range of music.<br />
If you have set your front left/right speaker size as<br />
Small in the Spkr Types setup page, you may wish<br />
to use this option to override the setting to Large<br />
for stereo music listening, if you have full frequency<br />
range left/right speakers.<br />
It can often be beneficial to set full frequency range<br />
speakers to Small in the Spkr Types setup page for<br />
use with movies, if you have a subwoofer in your<br />
system. Doing so may deliver more impact on<br />
movie soundtracks as subwoofers are designed to<br />
handle reproduction of high bass content. However<br />
you may find that for stereo music a better overall<br />
result is obtained by not using the subwoofer and<br />
effectively treating the front left/right speakers as<br />
Large.<br />
< Left/Right+Sub: Full frequency range stereo is fed to<br />
the front left and right speakers and extracted bass is<br />
sent to the subwoofer. In this case the low frequency<br />
information is effectively duplicated.<br />
< Sat+Sub: Use this setting if you really do have Small<br />
satellite front left and right speakers, or if you prefer<br />
the overall sound of bass being handled by the<br />
subwoofer. Full bass management is used so that<br />
analogue and digital stereo sources are fed to the<br />
DSP where the bass is filtered off front left and right<br />
and redirected to the subwoofer.<br />
NOTE<br />
The Stereo Mode function is not available when<br />
using an analogue source in Stereo Direct mode.<br />
English<br />
E-35
Sub Stereo – If Left/Right+Sub or Sat+Sub is selected in<br />
Stereo Mode above, this setting adjusts the level of the<br />
subwoofer when the source is two channel stereo.<br />
Brightness – Sets the video brightness for this input.<br />
This setting can be used to compensate for an overly<br />
dark or bright source picture on this input when<br />
compared with other video sources.<br />
Contrast – Sets the video contrast for this input. This<br />
setting can be used to compensate for too much or too<br />
little contrast in the source picture on this input when<br />
compared with other video sources.<br />
Colour – Sets the video colour saturation for this input.<br />
This setting can be used to compensate for too much or<br />
too little colour in the source picture on this input when<br />
compared with other video sources.<br />
Picture Mode – Sets how the video processor in the<br />
<strong>AVR600</strong> interprets the video on this input. Normally<br />
the video processor automatically detects the original<br />
source type and correctly sets either Video mode or<br />
Film mode processing. In the unlikely event that the<br />
video processor misinterprets the video type, resulting<br />
in subtle picture artefacts, the video processor can be<br />
manually forced into Video mode or Film mode. This<br />
function should normally be set to Auto.<br />
Edge Enhancement – Sharpens the picture from a<br />
source on this input.<br />
Mosquito N.R. – Removes haziness that sometimes appears<br />
around objects in a picture from a source on this input.<br />
Noise Reduction – Removes random noise within the<br />
picture from a source on this input.<br />
Block N.R. – Removes block artefacts in overly<br />
compressed digital video from a source on this input.<br />
Component Mode – Configures the current three-wire<br />
high quality analogue video input for component (YUV)<br />
video signals or RGB video signals. It is important<br />
to match the setting to the incoming video format<br />
otherwise the colours will be incorrect and the picture<br />
may be unstable.<br />
Options are Normal, RGsB and RGB+Sync.<br />
< Normal: (default) the three-wire input is configured<br />
for normal Component (YUV / YPbPr) analogue<br />
video.<br />
< RGsB: the three-wire input is configured for RGB<br />
analogue video with video ‘sync-on-green’.<br />
< RGB+Sync: the three wire input is configured for<br />
RGB analogue video, with the video sync signal on<br />
the composite input for the current named source.<br />
You should typically select RGB+Sync if you are using<br />
a standard SCART to 4-wire phono breakout cable to<br />
connect an RGB SCART source.<br />
NOTE: If RGB+Sync is selected, the S-Video and<br />
Composite inputs cannot be selected as video inputs for<br />
the current source.<br />
HDMI Audio – Selects whether you wish to enable or<br />
disable audio input over HDMI for this source. This<br />
option does not apply if you are not using this HDMI<br />
input. If you are not using HDMI for audio input on this<br />
source, selecting No will force the <strong>AVR600</strong> to only use<br />
the SPDIF digital input or analogue audio inputs.<br />
Options are Yes and No.<br />
< Yes: (default) the <strong>AVR600</strong> will use audio over HDMI<br />
if an HDMI signal is detected.<br />
< No: the <strong>AVR600</strong> will not use HDMI audio for this<br />
source, it will use SPDIF digital or analogue audio<br />
inputs instead.<br />
Video Source – Selects whether the video signal<br />
detection for this source is automatic or forced to a<br />
particular signal type. When a source is selected the<br />
<strong>AVR600</strong> looks for the highest quality video signal type<br />
that is connected in the order: HDMI – Component/<br />
RGB – S-Video – Composite.<br />
If the video input type is not HDMI, there will be a delay<br />
in detecting the type of video that is connected, resulting<br />
in longer switching times between sources. To speed<br />
up source switching times you can force the <strong>AVR600</strong> to<br />
look at only the specific video connection type you have<br />
for each source. Select from the list the video type you<br />
are using on this source.<br />
< Auto: (default) the <strong>AVR600</strong> scans through the<br />
various video input connectors/formats for the<br />
current source and selects the highest quality<br />
available for this source.<br />
< HDMI: the <strong>AVR600</strong> is forced to use the HDMI video<br />
input for this source.<br />
< Component: the <strong>AVR600</strong> is forced to use the<br />
Component/RGB video input for this source.<br />
< S-Video: the <strong>AVR600</strong> is forced to use the S-Video<br />
input for this source.<br />
< Composite: the <strong>AVR600</strong> is forced to use the<br />
Composite video input for this source.<br />
General Setup<br />
General information and system controls.<br />
Source Input – (Information only) The currently<br />
selected input to which the settings below relate.<br />
Incoming Format – (Information only) The format<br />
of the digital audio stream connected to this input, if<br />
present.<br />
Incoming Sample Rate – (Information only) The<br />
sample rate of the digital audio stream connected to this<br />
input, if present.<br />
Incoming Bit Rate – (Information only) The bit rate<br />
of the digital audio stream connected to this input, if<br />
present.<br />
Dialnorm – (Information only) If a Dolby Digital audio<br />
stream is connected to this input, this is the Dialogue<br />
Normalisation setting requested by the stream.<br />
Video Input – The currently selected video input. For<br />
inputs that have video connections (e.g. SAT, PVR etc),<br />
audio and video inputs normally switch over together.<br />
However, here you can temporarily select a different<br />
video source for the current audio source. This feature<br />
may be useful, for example, if you are watching a sports<br />
game on satellite but on this occasion wish to listen to<br />
the commentary on the radio instead. This temporary<br />
override is reset when the input source is changed so<br />
that the Video Input follows the Audio Input setting (or<br />
the setting in the Video Inputs menu, if applicable).<br />
Audio Compression – Allows selection of compression<br />
which is ideal for late night listening. The compression<br />
effect increases the volume of the quiet passages<br />
and decreases the volume of the louder passages.<br />
Compression only applies to some Dolby Digital and<br />
DTS soundtracks that support this function.<br />
< Off: (default) no audio compression is applied.<br />
< On: Audio compression is applied whenever a<br />
soundtrack supporting compression is received.<br />
< On / Auto: As for On above, except for Dolby<br />
TrueHD soundtracks which support an additional<br />
Auto on/off setting<br />
This setting applies to all inputs when a relevant digital<br />
audio stream is detected. It is stored in memory and<br />
recalled each time the unit is powered up.<br />
Balance – To alter the sound balance temporarily<br />
between front left and right speakers. You can alter<br />
the sound stage to either the left or the right by up to<br />
6dB. Note that it is not possible to shift the audio signal<br />
completely over to one channel. This function resets to<br />
equal left/right balance when the input is changed.<br />
PLII Dimension –<br />
PLII Centre Width –<br />
PLII Panorama –<br />
These allow the adjustment of the sound field for Dolby<br />
Pro Logic II Music mode decoding of two-channel<br />
sources. These setting apply to all inputs when PLII or<br />
PLIIx Music decoding is selected. The settings are stored<br />
in memory and recalled each time PLII or PLIIx Music<br />
mode is selected.<br />
< Dimension: Allows the user gradually to adjust the<br />
sound field either towards the front or towards the<br />
rear. Settings range from -3 to +3. We recommend<br />
Dimension is set to 0 for normal use.<br />
< Centre Width: Controls the centre image width.<br />
With Pro Logic decoding, dominant centre signals<br />
come only from the centre speaker. If no centre<br />
speaker is present, the decoder splits the centre<br />
signal equally to the left and right speakers to create<br />
a ‘phantom’ centre image. The Centre Width control<br />
allows variable adjustment of the centre image so<br />
it may be heard only from the centre speaker; only<br />
from the left/right speakers as a phantom image; or<br />
from all three front speakers to varying degrees. We<br />
recommend Centre Width is set to 3 for normal use.<br />
< Panorama: Extends the front centre image to<br />
include the surround speakers for an exciting ‘wraparound’<br />
effect with side-wall imaging.<br />
Digital Output Freq. – Sets the sampling frequency of<br />
the audio Analogue-to-Digital converter. This setting<br />
applies to all inputs when analogue audio is being<br />
processed (i.e. not Stereo Direct mode). It is stored in<br />
memory and recalled each time the unit is powered up.<br />
Volume Adjustment – Sets the step size of the volume<br />
control.<br />
< Normal: (default) volume control is in 1dB steps<br />
< Fine: volume control is in 0.5dB steps<br />
Maximum Volume – Limits the maximum volume<br />
setting the system can be turned up to in the main zone.<br />
This is a useful feature to prevent accidental overdriving<br />
of low power-handling speakers (for example). It is<br />
stored in memory and recalled each time the unit is<br />
powered up.<br />
Max On Volume – Limits the maximum volume the<br />
system operates in the main zone when it is switched<br />
on or comes out of Standby. The system comes on at<br />
this stored volume setting if the last used (possibly very<br />
E-36
loud) volume exceeds this value. It is stored in memory<br />
and recalled each time the unit is powered up.<br />
Audio In iPod – If you have an iPod connected to the<br />
<strong>AVR600</strong> using an <strong>Arcam</strong> rDock or rLead, this control<br />
allows you to set which audio input is used.<br />
Auto Setup<br />
Auto Speaker Setup of your loudspeakers and subwoofer<br />
(if present) is controlled by this menu. A full description<br />
of how Auto Speaker Setup works is given on page<br />
33. Remember to insert the calibration microphone<br />
into the AUX input on the front panel and position the<br />
microphone at the listening position before running<br />
Auto Setup.<br />
Run Auto Setup – Press OK (or O on the remote) to<br />
start Auto Speaker Setup. The process will generate test<br />
tones from the speakers and will typically take less than<br />
two minutes. The test tone generator will cycle round<br />
each speaker twice.<br />
Accept Setup – When Auto Speaker Setup has<br />
completed without errors you can choose to accept or<br />
reject the settings<br />
< No: The settings are not stored in memory.<br />
< Yes: All the speaker settings (speakers present, type,<br />
distance, level and crossover frequency) are stored<br />
in the relevant sections of the Setup Menu and<br />
overwrite any previous settings.<br />
Auto Setup Progress – Gives a summary of what Auto<br />
Speaker Setup is doing as it progresses, starting with<br />
which speaker is being tested.<br />
< Calculating EQ: Data gathered from each of the<br />
speakers is being processed.<br />
< Completed Error: A problem was detected with the<br />
speaker setup. See the descriptions for each of the<br />
individual speakers, below. Alternatively an invalid<br />
speaker configuration was detected.<br />
Front Left –<br />
Centre –<br />
Front Right –<br />
Surr. Right –<br />
Surr. Back Right –<br />
Surr. Back Left –<br />
Surr. Left –<br />
Subwoofer –<br />
If the above speakers are correctly detected as present in<br />
your speaker configuration, their size (Small or Large),<br />
distance from the listening position and trim level (dB)<br />
will be displayed. Note that size does not apply to the<br />
subwoofer. Otherwise one of the following messages will<br />
be displayed:<br />
< Not Present: A speaker was not detected on this<br />
channel.<br />
< Clipped: The test tone detected by the microphone<br />
was distorted or clipped. This could be because<br />
you have very sensitive speakers and they are<br />
very close to the listening position. However it is<br />
more likely that the detected signal was corrupted<br />
by microphone handling noise or other external<br />
sounds. Try running Auto Speaker Setup again.<br />
< Mic too close: The speaker is too close to the listening<br />
position to be able to calculate its distance. If possible,<br />
try moving the speaker slightly further away from the<br />
listening position and run Auto Speaker Setup again.<br />
Crossover Freq. – The frequency at which Auto Speaker<br />
Setup determined is the best point to filter low frequency<br />
sounds away from Small speakers and into the subwoofer<br />
(or Large speakers if a subwoofer is not present).<br />
Spkr Types<br />
Settings for the types of loudspeaker you have connected<br />
in your configuration. These settings are applied to all<br />
audio inputs and are stored in memory and recalled<br />
each time the unit is powered up.<br />
Front Left / Right –<br />
Centre –<br />
Surr. Left / Right –<br />
Surr. Back L / R –<br />
Here you set the type of speakers that you have<br />
connected to your <strong>AVR600</strong>:<br />
< Large: capable of full frequency range reproduction<br />
< Small: not capable of full frequency range<br />
reproduction at the low frequency end<br />
< None: speaker not present in your configuration<br />
< Subwoofer: Set whether a subwoofer is present or not.<br />
For Surr. Back L/R, the number before Large and Small<br />
in the dropdown options list is the number of Surround<br />
Back speakers in your configuration. If you only have<br />
one Surround Back speaker connect it to the SBL output.<br />
NOTE<br />
It is not possible to set all speakers to Small unless<br />
there is a subwoofer in your speaker configuration.<br />
If you do not have a subwoofer, you will be forced to<br />
set your front speakers to Large.<br />
Crossover Freq – This is the frequency at which<br />
loudspeakers set as Small start to redirect bass signals to<br />
the Subwoofer or Large speakers in your system. Small<br />
speakers redirect bass to the subwoofer, if present. The<br />
exception is the Centre speaker which, if Small, redirects<br />
its bass to front left/right provided that they themselves<br />
are Large. This is done to help keep Centre bass directly<br />
in front of the listening position.<br />
MCH Sub Levels – This setting controls the subwoofer<br />
level from an externally decoded multi-channel source<br />
(DVD-A, SACD, etc). Most DVD players require a<br />
+10dB compensation on the subwoofer channel to<br />
maintain the correct balance with the main channels.<br />
< +10dB comp.: for normal DVD players which output<br />
the analogue subwoofer channel at the low 0dBr<br />
level. Gain compensation of +10dB is added to the<br />
subwoofer channel of the MCH input in the <strong>AVR600</strong>.<br />
< No comp.: for DVD players which output the<br />
analogue subwoofer channel at the correct +10dBr<br />
level. No subwoofer gain compensation is needed<br />
on the subwoofer channel of the MCH input in the<br />
<strong>AVR600</strong>.<br />
Use Channels 6+7 for – If your main zone speaker<br />
set up does not include Surround Back Left and Right<br />
speakers, you can choose to use the Surround Back<br />
amplifier channels to Bi-Amp the Front Left and Right<br />
pair, or as a stereo power amplifier for Zone 2.<br />
Spkr Distance<br />
Calibration settings for the distances between the<br />
loudspeakers and the listening position.<br />
NOTE<br />
Speakers that are not present in your configuration<br />
will be greyed out.<br />
These settings are applied to all audio inputs and are<br />
stored in memory and recalled each time the unit is<br />
powered up.<br />
Units – Select whether you wish to measure distances in<br />
centimetres or inches.<br />
Front Left –<br />
Centre –<br />
Front Right –<br />
Surr. Right –<br />
Surr. Back Right –<br />
Surr. Back Left –<br />
Surr. Left –<br />
Subwoofer –<br />
As described in ‘essential setup’ on page 32, measure the<br />
distance from each loudspeaker in your system to your<br />
ear in the main listening position and enter the values.<br />
This allows the <strong>AVR600</strong> to calculate the correct relative<br />
delay for each loudspeaker.<br />
Spkr Levels<br />
Calibration settings for the test noise signal level<br />
through the loudspeakers and measured at the listening<br />
position.<br />
NOTE<br />
Speakers that are not present in your configuration<br />
will be greyed out.<br />
These settings are applied to all audio inputs and are<br />
stored in memory and recalled each time the unit is<br />
powered up.<br />
Use the B and C navigation buttons on the remote<br />
control to select the relevant speaker. Press O to<br />
enable/disable the calibration noise and the D and E<br />
navigation buttons to adjust the noise level from each<br />
speaker.<br />
Front Left –<br />
Centre –<br />
Front Right –<br />
Surr. Right –<br />
Surr. Back Right –<br />
Surr. Back Left –<br />
Surr. Left –<br />
Subwoofer –<br />
As described in ‘essential setup’ on page 32, adjust the<br />
level of the test noise from each speaker so that an SPL<br />
meter at the listening position measures 75dB SPL.<br />
English<br />
E-37
Video Inputs<br />
Settings to optionally assign a video source to each of<br />
the normally audio-only inputs.<br />
These settings are stored in memory and recalled each<br />
time the unit is powered up.<br />
Video Input Tape –<br />
Video Input CD –<br />
Video Input Aux –<br />
Video Input AM / FM –<br />
Video Input Phono –<br />
Video Input MCH –<br />
Video Input iPod –<br />
Video Input Net –<br />
Video In Digital Radio –<br />
The default for each of the audio inputs is ‘None’,<br />
however for example you could associate the satellite<br />
‘Sat’ video with AM, FM and Digital Radio audio if you<br />
wished. This way you could listen to the FM or AM or<br />
Digital Radio commentary of a sports game but have the<br />
pictures from the satellite coverage.<br />
Video Outputs<br />
The settings in this menu control the output resolution<br />
from the video processor in the <strong>AVR600</strong> as well as the<br />
operation of the two HDMI outputs.<br />
These settings are applied to all video inputs and are<br />
stored in memory and recalled each time the unit is<br />
powered up.<br />
NOTE<br />
Important points to remember:<br />
For analogue outputs<br />
The analogue output resolution should be chosen<br />
carefully; Composite and S-Video connections can<br />
only carry 480i (525-line NTSC) or 576i (625-line<br />
PAL) signals. If an output resolution higher than this<br />
is chosen in Out 1 Resolution, the Composite and<br />
S-Video main zone outputs will be disabled.<br />
You should also set the frame rate (50Hz Interlaced<br />
for PAL, 60Hz Interlaced for NTSC) and the<br />
aspect ratio (4:3 standard or 16:9 widescreen) to<br />
match your display device. Note that S-Video and<br />
Composite can only carry Interlaced video. If you<br />
select Progressive analogue video, Zone 1 S-Video<br />
and Composite outputs will be disabled.<br />
For HDMI outputs<br />
The output resolution, frame rate and display<br />
aspect ratio can be automatically determined by<br />
the <strong>AVR600</strong>. Alternatively these settings can be<br />
manually selected. If you have two HDMI display<br />
devices connected, you can also configure which of<br />
the two HDMI outputs takes priority.<br />
Zone 1 OSD – Selects whether the main zone pop-up<br />
OSD messages are On or Off. It is stored in memory and<br />
recalled each time the unit is powered up.<br />
< When On, all user adjustments that are made<br />
during the general use of the <strong>AVR600</strong> are displayed<br />
on screen as well as the front panel display. This<br />
includes the adjustment of volume, subwoofer level,<br />
lip sync, tone controls, etc. It is stored in memory<br />
and recalled each time the unit is powered up.<br />
< When Off, the above user adjustments will not<br />
appear on screen, only on the front panel display.<br />
This leaves the picture on your display device clear<br />
of pop-up text. However, regardless of this setting<br />
the Setup menus are always displayed on screen.<br />
Analogue Output – This setting controls the output<br />
resolution of the analogue video outputs of Zone 1.<br />
This applies to all Zone 1 analogue video outputs:<br />
Component, S-Video and Composite. This setting is<br />
only valid if neither of the HDMI outputs Out 1 or Out 2<br />
are being used at the time. See ‘Important points to<br />
remember’ above regarding analogue resolutions.<br />
The dropdown list shows all the resolutions that the<br />
<strong>AVR600</strong> video processor can output.<br />
Analogue Frame Rate – This setting controls the output<br />
frame rate of the analogue video outputs of Zone 1.<br />
This applies to all Zone 1 analogue video outputs:<br />
Component, S-Video and Composite. This setting is<br />
only valid if neither of the HDMI outputs Out 1 or Out 2<br />
are being used at the time. See the Note ‘Important<br />
points to remember’ regarding analogue frame rates.<br />
Display Type – Set the aspect ratio of your display<br />
device; 4:3 standard or 16:9 widescreen.<br />
Output Switching – This setting controls the operation<br />
of the two HDMI outputs.<br />
< Auto-Priority Out 1/Out 2 senses which display<br />
device is turned on and gives priority to the named<br />
output (Out 1 or Out 2) if both display devices are on<br />
at the same time. When both display devices are on<br />
at the same time, the output with the highest priority<br />
is used to configure the settings of the <strong>AVR600</strong> video<br />
processor.<br />
< Output 1 or Output 2: forces only the named HDMI<br />
output to be enabled.<br />
< Output 1 & 2: enables both HDMI outputs<br />
simultaneously. In order to do this however, the<br />
settings of the <strong>AVR600</strong> video processor are reduced<br />
down to the highest common set that can be<br />
supported by both display devices.<br />
Out 1 Resolution – This setting controls the output<br />
resolution of HDMI output Out 1. This setting is only<br />
valid if HDMI output Out 1 is the only active HDMI<br />
output at the time.<br />
< The dropdown list shows all the resolutions that the<br />
<strong>AVR600</strong> video processor can output. Resolutions<br />
that are not supported by the connected display<br />
device are greyed out and cannot be selected.<br />
< Preferred: sets the Out 1 resolution to be the<br />
preferred resolution that is requested by the display<br />
device. This is often the highest resolution the<br />
display device can receive.<br />
Out 1 Frame Rate – This setting controls the output<br />
frame rate of HDMI output Out 1. This setting is only<br />
valid if HDMI output Out 1 is the only active HDMI<br />
output at the time.<br />
< The dropdown list shows all the frame rates that the<br />
<strong>AVR600</strong> video processor can output. Frame rates<br />
that are not supported by the connected display<br />
device at the above resolution are greyed out and<br />
cannot be selected.<br />
< Auto sets the Out 1 frame rate to be the preferred<br />
frame rate that is requested by the display device for<br />
the currently used resolution.<br />
Lipsync 1 – (Information only) Displays how much lip<br />
sync is automatically applied to HDMI output Out 1 to<br />
compensate for video processing delays in the attached<br />
display device. Not all display devices support this<br />
function.<br />
Out 2 Resolution – This setting controls the output<br />
resolution of HDMI output Out 2. This setting is only<br />
valid if HDMI output Out 2 is the only active HDMI<br />
output at the time.<br />
< The dropdown list shows all the resolutions that the<br />
<strong>AVR600</strong> video processor can output. Resolutions<br />
that are not supported by the connected display<br />
device are greyed out and cannot be selected.<br />
< Preferred: sets the Out 2 resolution to be the<br />
preferred resolution that is requested by the display<br />
device. This is often the highest resolution the<br />
display device can receive.<br />
Out 2 Frame Rate – This setting controls the output<br />
frame rate of HDMI output Out 2. This setting is only<br />
valid if HDMI output Out 2 is the only active HDMI<br />
output at the time.<br />
< The dropdown list shows all the frame rates that the<br />
<strong>AVR600</strong> video processor can output. Frame rates<br />
that are not supported by the connected display<br />
device at the above resolution are greyed out and<br />
cannot be selected.<br />
< Auto: sets the Out 2 frame rate to be the preferred<br />
frame rate that is requested by the display device for<br />
the currently used resolution.<br />
Lipsync 2 – (Information only) Displays how much lip<br />
sync is automatically applied to HDMI output Out 2 to<br />
compensate for video processing delays in the attached<br />
display device. Not all display devices support this<br />
function.<br />
E-38
Out 1 & 2 Resolution – This setting controls the<br />
output resolution when both HDMI outputs are used<br />
simultaneously. This setting is only valid if Output<br />
Switching is set to Output 1 & 2.<br />
< The dropdown list shows all the resolutions that the<br />
<strong>AVR600</strong> video processor can output. Resolutions<br />
that are not supported by the connected display<br />
devices are greyed out and cannot be selected.<br />
< Best: sets the HDMI output to be the highest<br />
common resolution that is supported by both<br />
display devices.<br />
Out 1 & 2 Frame Rate – This setting controls the<br />
output frame rate when both HDMI outputs are used<br />
simultaneously. This setting is only valid if Output<br />
Switching is set to Output 1 & 2.<br />
< The dropdown list shows all the frame rates that the<br />
<strong>AVR600</strong> video processor can output. Frame rates<br />
that are not supported by the connected display<br />
devices at the above resolution are greyed out and<br />
cannot be selected.<br />
< Auto: sets the HDMI output to be the highest<br />
preferred common frame rate that is supported by<br />
both display devices for the above resolution.<br />
Lipsync 1 & 2 – (Information only) Displays how much<br />
lip sync is automatically applied to HDMI outputs Out 1<br />
and Out 2 simultaneously to compensate for video<br />
processing delays in the attached display devices. Not all<br />
display devices support this function.<br />
Mode<br />
Lists the decode and downmix options you wish to<br />
include when cycling through the options on the MODE<br />
button. Settings are Yes or No. The list is divided into<br />
two sections depending on the source audio type. See<br />
section ‘Multi-channel source modes’ on page 41 for<br />
more information on each processing a decoding mode.<br />
These settings are applied to all audio inputs and are<br />
stored in memory and recalled each time the unit is<br />
powered up.<br />
For Stereo sources:<br />
Dolby ProLogic –<br />
Dolby PLIIx Movie –<br />
Dolby PLIIx Music –<br />
Dolby PLIIx Matrix –<br />
Dolby PLIIx Game –<br />
Neo:6 Cinema –<br />
Neo:6 Music –<br />
The first section, ‘Stereo sources’ is the list of processing<br />
modes you wish to make available for stereo signals<br />
(analogue stereo, digital PCM stereo, Dolby 2.0, DTS<br />
2.0, etc). When a stereo signal is applied, each press of<br />
the MODE button cycles through the processing modes<br />
you have enabled in the ‘Stereo sources’ section. The<br />
unprocessed Stereo option is always available for stereo<br />
signals therefore it is not shown in the list.<br />
For Multi-channel sources:<br />
Stereo Downmix –<br />
Dolby Digital EX –<br />
Dolby PLIIx Movie –<br />
Dolby PLIIx Music –<br />
The second section, ‘Multi-channel sources’ is the list<br />
of processing modes you wish to make available for<br />
multi-channel digital signals (any Dolby or DTS digital<br />
stream that has more channels than stereo 2.0). When a<br />
multi-channel digital signal is applied, each press of the<br />
MODE button cycles through the processing modes you<br />
have enabled in the ‘Multi-channel sources’ section.<br />
Zone Settings<br />
Lists the volume and control settings for Zone 2 and<br />
Zone 3. These settings are applied to all audio inputs and<br />
are stored in memory and recalled each time the unit is<br />
powered up.<br />
Z2 Audio Input – Selects the analogue audio to be<br />
routed to Zone 2.<br />
Z2 Video Output – Selects the analogue video to be<br />
routed to Zone 2 for the current audio input.<br />
Zone 2 Volume – The current volume in Zone 2.<br />
Zone 2 Max. Vol – Limits the maximum volume setting<br />
the system can be turned up to in the Zone 2. This is a<br />
useful feature to prevent accidental overdriving of low<br />
power-handling speakers, for example.<br />
Zone 2 Fixed Vol – The Zone 2 volume control can be<br />
locked at the current value for use with an external<br />
amplifier with its own volume control in Zone 2.<br />
Zone 2 Max On Vol – Limits the maximum volume the<br />
system operates in the Zone 2 when it is switched on<br />
or comes out of Standby. The system comes on at this<br />
volume if the last used (possibly very loud) volume<br />
exceeds this value.<br />
Zone 3 Volume – The current volume in Zone 3.<br />
Zone 3 Max. Vol – Limits the maximum volume setting<br />
the system can be turned up to in the Zone 3. This is a<br />
useful feature to prevent accidental overdriving of low<br />
power-handling speakers (for example).<br />
Zone 3 Fixed Vol – The Zone 3 volume control can be<br />
locked at the current value for use with an external<br />
amplifier with its own volume control in Zone 3.<br />
Zone 3 Max On Vol – Limits the maximum volume the<br />
system operates in the Zone 3 when it is switched on<br />
or comes out of Standby. The system comes on at this<br />
volume if the last used (possibly very loud) volume<br />
exceeds this value.<br />
Standby – When a Standby command is received by an<br />
infra-red eye in Zone 2, this setting controls which parts<br />
of the <strong>AVR600</strong> to turn on and off:<br />
When Local Only, the Standby IR command only affects<br />
the zone it was received in (Zone2 or Zone3).<br />
When All Off, the Standby IR command affects the<br />
entire <strong>AVR600</strong> system in all zones.<br />
Network<br />
The <strong>AVR600</strong> is fitted with an network audio client which<br />
is capable of playing internet radio stations as well as<br />
stored music on a network storage device such as a PC,<br />
or on a USB flash drive.<br />
Use DHCP – Select if your network uses DHCP<br />
< No: To assign a fixed IP address manually.<br />
< Yes: To use network parameters given by the DHCP<br />
server.<br />
MAC address – (Information only) The unique address<br />
of the network card in your <strong>AVR600</strong>.<br />
IP Address – If not using DHCP, enter the IP address<br />
you have assigned to the <strong>AVR600</strong> for your network.<br />
Subnet Mask – If not using DHCP, enter the subnet<br />
mask for the <strong>AVR600</strong> on your network.<br />
Gateway – If not using DHCP, enter the IP address of<br />
the router the <strong>AVR600</strong> is connected to.<br />
Primary DNS – If not using DHCP, enter the Primary<br />
DNS IP address of your internet service provider.<br />
Alternate DNS – If not using DHCP, enter the Secondary<br />
DNS IP address of your internet service provider.<br />
Use Proxy – Select if you connect to the network via a<br />
Proxy Server.<br />
< No: If you connect directly onto the network.<br />
< Yes: If you connect to the network via a Proxy<br />
Server.<br />
Proxy Address – If connecting via a Proxy Server, enter<br />
its IP address.<br />
Proxy Port – If connecting via a Proxy Server, enter the<br />
port number to which the Proxy responds.<br />
English<br />
E-39
decoding<br />
modes<br />
Introduction<br />
Your <strong>AVR600</strong> receiver provides all the key decoding<br />
and processing modes for analogue and digital signals,<br />
including the latest high definition audio formats over<br />
HDMI.<br />
Modes for digital sources<br />
Digital recordings are usually encoded to include<br />
information about their format type. The <strong>AVR600</strong><br />
detects automatically the relevant format in a digital<br />
signal – such as Dolby TrueHD, Dolby Digital Plus,<br />
DTS-HD Master Audio, Dolby Digital, or DTS – and<br />
switches in the appropriate decoding.<br />
Modes for analogue sources<br />
Analogue recordings do not contain information about<br />
their encoding formats, so the desired mode – such as<br />
Dolby Pro Logic – needs to be selected manually.<br />
Mode memory<br />
Dolby Digital or DTS audio (including the high<br />
definition formats) can be output in two mix modes,<br />
selected using the mode button:<br />
< Surround (e.g., five main channels plus a subwoofer<br />
for a 5.1 source)<br />
< Stereo downmix.<br />
Two-channel audio, regardless of whether it is analogue<br />
or digital can also be output in two mix modes, selected<br />
using the mode button:<br />
< Surround (e.g., Dolby Pro Logic II Movie, Neo:6<br />
Music, etc.)<br />
< Stereo.<br />
The <strong>AVR600</strong> stores the settings for each source (except<br />
MCH). Thus the decoding mode for the following<br />
groups of source material can be stored independently:<br />
< Dolby Digital (multi-channel) and DTS source<br />
material<br />
< Two channel Dolby, PCM or Analogue source<br />
material<br />
Two-channel source modes<br />
The following decoding and surround modes are<br />
available for standard and high definition Dolby Digital<br />
2.0, DTS 2.0, PCM or analogue sources:<br />
Stereo<br />
Pro Logic II Movie<br />
Pro Logic II Music<br />
Pro Logic II Game<br />
Pro Logic IIx Movie<br />
Pro Logic IIx Music<br />
Pro Logic IIx Game<br />
Pro Logic<br />
Neo:6 Cinema<br />
Neo:6 Music<br />
NOTE<br />
Pro Logic IIx modes are only selectable when<br />
Surround Back speakers are present.<br />
Stereo<br />
In this mode the <strong>AVR600</strong> works as a conventional high<br />
quality audio amplifier. Note that if the subwoofer is<br />
enabled in stereo mode, then some processing of the<br />
signal will be carried out. To achieve ultimate sound<br />
quality with analogue sources, select the Stereo Direct<br />
function if an analogue connection is present.<br />
Dolby Pro Logic II<br />
Dolby Pro Logic II decoding is designed to produce fivechannel<br />
output from two-channel source material.<br />
There are three different modes available in Pro Logic II:<br />
‘Movie’, ‘Music’ and ‘Game’ modes, which are intended<br />
for use as their names suggest. Due to the different<br />
recording methods used for movies, music and video<br />
games, it is recommended that the correct decoding<br />
mode for your source material is used to obtain best<br />
results.<br />
< Movie mode: This is intended for use with<br />
‘cinematic’ material, which is mixed and monitored<br />
in a calibrated multi-channel environment. Movie<br />
mode is a ‘fixed’ mode that is designed to give a<br />
similar sound when listening using a home cinema<br />
system to that obtained in a cinema.<br />
< Music mode : Stereo music is not designed for<br />
surround processing, although good surround<br />
effects can be obtained through careful production.<br />
As the optimum decoding method varies according<br />
to the recording, Music mode allows the user<br />
adjustment of the processing characteristics.<br />
< Game mode: Video games today are extremely<br />
sophisticated, with dramatic 5.1 surround<br />
audio tracks. Game mode gives augmented bass<br />
management to capture the full effect of game<br />
sounds panned to the surrounds, ensuring the<br />
bass impact from purer surround effects are fully<br />
delivered to the subwoofer.<br />
Dolby Pro Logic IIx<br />
Dolby Pro Logic IIx is an extension of the Dolby Pro<br />
Logic matrix-decoding method. The decoder allows<br />
the processor to derive seven outputs from a two or<br />
multi-channel (up to 5.1 with EX) source to take better<br />
advantage of all amplifiers and speakers in a 7.1 setup.<br />
As with Pro Logic, there are three different modes<br />
available: Movie, Music and Game. Due to different<br />
recording methods used for movies and music, you<br />
should select the correct mode for your source material.<br />
Dolby Pro Logic<br />
Dolby Pro Logic is a legacy mode that is designed<br />
to produce a five-channel output from two-channel<br />
source material. It should be used only when the source<br />
material is encoded as Dolby Pro Logic; otherwise,<br />
we recommend the use of Dolby Pro Logic II. This is<br />
because Pro Logic processing on straight stereo sources<br />
can sound muffled and compressed.<br />
DTS Neo:6<br />
DTS Neo:6 provides up to six full-band channels of<br />
decoding from stereo material. The <strong>AVR600</strong> will derive<br />
separate channels corresponding to the standard home<br />
theatre layout.<br />
< Cinema : A movie mode designed to reproduce<br />
a movie theatre environment. Neo:6 technology<br />
allows various sound elements within a channel or<br />
channels to be steered separately, and in a way which<br />
follows the original presentation naturally.<br />
< Music : A music mode designed to produce a lively,<br />
high-integrity surround-effect from most twochannel<br />
music sources from all available speakers.<br />
Neo:6 music mode expands stereo recordings into<br />
the five or six-channel layout without diminishing<br />
the subtlety and integrity of the original stereo<br />
recording.<br />
E-40
Multi-channel source modes<br />
Digital multi-channel source material is normally<br />
provided as ‘5.1 audio’. The ‘5.1 channels’ comprise<br />
of: left, centre and right front speakers, two surround<br />
speakers and a low frequency effects (LFE) channel.<br />
Since the LFE channel is not a full range channel, it is<br />
referred to as ‘.1’.<br />
Surround systems decode and reproduce the 5.1<br />
channels directly. Dolby Digital EX and DTS-ES matrix<br />
enhanced decoding systems create one extra rear<br />
channel from information buried in the two surround<br />
signals of the 5.1 source. These EX and ES enhanced<br />
systems are sometimes referred to as ‘6.1’ systems. This<br />
extra surround back channel is normally reproduced<br />
through two separate loudspeakers, creating a ‘7.1’<br />
system.<br />
DTS-ES discrete is a true ‘6.1’ source, with six discretely<br />
encoded channels, plus the ‘.1’ LFE channel.<br />
Dolby Digital Plus, Dolby True-HD and DTS-HD are<br />
high-resolution surround formats found on Blu-Ray and<br />
HD-DVD discs<br />
Decoding modes<br />
The modes given in the following table are available for<br />
multi-channel digital sources.<br />
Special modes such as DTS-ES 6.1 discrete, Dolby<br />
Digital Plus, Dolby Tru-HD and DTS-HD are only<br />
available from the correct source material.<br />
High resolution audio sources<br />
Dolby True-HD<br />
Dolby Digital Plus<br />
DTS-HD Master Audio<br />
For Dolby Digital sources<br />
Dolby Digital 5.1<br />
Dolby Digital 5.1 Stereo<br />
Downmix<br />
Dolby Digital EX<br />
Dolby Digital 5.1 + Pro Logic<br />
IIx Movie<br />
Dolby Digital 5.1 + Pro Logic<br />
IIx Music<br />
Provides up to 7.1 full channel at 96kHz, 24bit resolution, with potentially no<br />
losses in the compression process. Data rates can be up to 18Mbps.<br />
Provides up to 7.1 discrete channels of audio with less compression than<br />
traditional Dolby Digital encoding. Data rates can be up to 6Mbps.<br />
Provides up to 7.1 full channel at 96kHz, 24bit resolution, with potentially no<br />
losses in the compression process. Data rates can be up to 24.5Mbps.<br />
The most commonly used sound format for DVD video, and is also the<br />
standard for US television. Dolby Digital 5.1 sources deliver sound with five<br />
discrete full-range channels; left, centre, right, surround left, surround right,<br />
plus a low frequency effects (LFE) channel.<br />
Provides a stereo downmix of the source material for use with headphones.<br />
This is an extension to Dolby Digital decoding that provides a 6-channel output<br />
from a 5-channel input. The extra channel is the centre-surround channel (for<br />
which the two surround back speakers are used), and is derived from the left<br />
and right surround channel information. This decode mode should be used<br />
only when the source material is ‘Surround EX’ encoded (which is normally<br />
indicated on the disc packaging and should be detected automatically by the<br />
<strong>AVR600</strong>), but may be used at other times if desired.<br />
This mode is used to derive information for the individual surround back<br />
channels from the surround channels, using the Pro Logic IIx Movie decoder.<br />
This mode is used to derive information for the individual surround back<br />
channels from the surround channels, using the Pro Logic IIx Music decoder.<br />
The controls for adjusting Pro Logic IIx Music in ‘General Setup’ can be used in<br />
this mode.<br />
English<br />
For DTS sources<br />
DTS 5.1<br />
Less common than the Dolby Digital format, but generally recognised within<br />
the audio industry as being of superior sound quality. DTS 5.1 delivers<br />
surround sound with five full range channels plus an LFE channel.<br />
Provides a stereo downmix of the source material for use with headphones.<br />
This is a 6.1 channel format based on DTS 5.1. It has the sixth channel matrix<br />
encoded into the surround left and surround right channels. The sixth channel<br />
is a surround centre channel and is directed to the surround back left and<br />
surround back right speakers.<br />
This is a true discrete 6.1 channel sound format (unlike DTS-ES Matrix).<br />
DTS-ES discrete mode operates only on sources with DTS-ES 6.1 discrete<br />
audio encoding.<br />
Provides up to 5.1 channels of audio at 96kHz, 24bit resolution for superior<br />
sound quality compared to standard DTS 5.1<br />
DTS 5.1 Stereo Downmix<br />
DTS-ES 6.1 Matrix<br />
DTS-ES 6.1 Discrete<br />
DTS96/24<br />
E-41
Dolby volume<br />
Dolby Volume is a sophisticated new<br />
technology that resolves the problem of<br />
different volume levels between programme content<br />
(e.g. a TV show and advert breaks) and between sources<br />
(e.g. a rock radio station and DVD, or between two<br />
TV stations). It lets the listener enjoy everything at the<br />
same preferred listening level without having to reach<br />
for the volume control to compensate for the different<br />
recording/output levels. This is the Volume Leveller<br />
function of Dolby Volume.<br />
Dolby Volume also works in conjunction with the<br />
<strong>AVR600</strong> volume control setting to compensate for<br />
the ear’s changing sensitivity at different frequencies<br />
depending on how loud the audio is. It is based on<br />
a model of how human hearing works. It properly<br />
balances low, mid and high frequencies to maintain all<br />
the nuances and impact of the original audio regardless<br />
of the actual selected playback volume level. This is the<br />
Volume Modeller function of Dolby Volume.<br />
Dolby Volume measures, analyses and maintains volume<br />
levels based on how people perceive sound. A variety of<br />
audio parameters are monitored including spectral- and<br />
time-based loudness to ensure that perceived dynamics,<br />
timbre and bass performance remain consistent at all<br />
volume levels.<br />
Dolby Volume also lets the listener control a<br />
programme’s dynamic range – the range between loud<br />
and quiet sounds. For example, with the volume turned<br />
down for late-night viewing, dynamic range can be<br />
adjusted so that speech remains clear and loud effects or<br />
music passages retain their impact without waking up<br />
the family.<br />
Settings<br />
Dolby Volume can be applied to any analogue or digital<br />
stereo source or any digital multi-channel source. It is<br />
not available in Stereo Direct or on the analogue multichannel<br />
input. Dolby Volume can even be applied to<br />
processing of stereo signals (e.g. PLII Music) or when<br />
down-mixing a digital multi-channel source (e.g. Dolby<br />
Digital 5.1 down to stereo).<br />
Dolby Volume can be enabled and configured separately<br />
for each audio input in the Input Config menu. The<br />
default is Off for ‘audiophile’ listening to analogue or<br />
digital stereo sources, however you may wish to enable<br />
Dolby Volume on some or all inputs to maintain the<br />
same perceived overall listening level between sources<br />
and frequency response regardless of the volume setting.<br />
There are two modes for Dolby Volume: ‘Cinema’ and<br />
‘Music’, which calibrate the system to match the type of<br />
audio material generally played on each input. Movie<br />
should be selected for sources which typically play<br />
movie soundtracks. Music should be selected for all<br />
other sources (CD, TV, Satellite, Tuner, etc). Most of the<br />
controlling parameters of Dolby Volume are automatic<br />
as they are dependent on analysis of the audio signal and<br />
the volume setting of the <strong>AVR600</strong>. However, the Volume<br />
Leveller and Calibration Offset controls (see below) can<br />
be adjusted to your preference.<br />
Volume Leveller<br />
The Volume Leveller function of Dolby Volume controls<br />
how closely quiet and loud sources and programme<br />
content are matched to each other, based on the<br />
ear’s perception of loudness. The range of values is 0<br />
(minimal levelling) to 10 (maximum levelling). The<br />
default setting is 9. If the Volume Leveller function<br />
is turned off, no level matching between sources and<br />
programme material is performed. This is not the<br />
same as turning Dolby Volume off as volume related<br />
frequency response processing is still active.<br />
When Dolby Volume is being applied to the current<br />
input, a Dolby Volume processing mode indicator is<br />
shown on the OSD and the front panel display.<br />
Calibration Offset<br />
The Calibration Offset parameter of Dolby Volume<br />
allows you to compensate for speaker efficiencies and<br />
listening position – effectively moving the reference<br />
listening level up or down the volume scale. The default<br />
value is 0 and this should normally produce a good<br />
result when the <strong>AVR600</strong> speaker levels are set using<br />
a sound pressure level meter at the listening position<br />
(75dB SPL, ‘C’ weighting, slow response).<br />
E-42
E-43<br />
English
tuner<br />
operation<br />
The <strong>AVR600</strong> is fitted with an internal AM/FM tuner.<br />
Depending on your location, it may also be fitted with a<br />
DAB tuner (Europe) or Sirius satellite radio connection<br />
(Americas). Sirius requires the purchase of the<br />
‘SiriusConnect Home Tuner’ kit and Sirius subscription<br />
– please visit www.sirius.com for details.<br />
This section deals with tuner operation, for information<br />
on setting up the tuner and installing aerials, see page<br />
14.<br />
When a tuner input is selected, the OSD shows a list<br />
of radio presets plus an information panel giving all<br />
available information about the current frequency (for<br />
AM and FM) or channel (for DAB or Sirius).<br />
The front panel will also give the same information,<br />
pressing the INFO key will cycle through the various<br />
items of information:<br />
AM<br />
• Processing mode (default)<br />
• Frequency<br />
• Signal strength<br />
FM<br />
• Processing mode (default)<br />
• Radiotext (if available; shows ‘No radiotext’ if none<br />
present)<br />
• Programme type (if available)<br />
• Signal strength<br />
DAB<br />
• Processing mode (default)<br />
• Radiotext (if available; shows ‘No radiotext’ if none<br />
present)<br />
• Programme type<br />
• Signal quality<br />
• Bit-rate of transmission<br />
Sirius<br />
• Processing mode (default)<br />
• Artist Name: Song Title<br />
• Composer (if available)<br />
• Category Name<br />
• Signal quality<br />
Tuning/Channel Selection<br />
When switching to the internal TUNER source, the<br />
<strong>AVR600</strong> enters the last used tuner band, be it AM / FM<br />
/ DAB (if fitted) / Sirius (if fitted). Repeatedly pressing<br />
T cycles through the available tuner bands on your<br />
<strong>AVR600</strong>.<br />
FM/AM analogue radio<br />
Frequency tuning on FM and AM radio is done using<br />
the < and > buttons on the CR102 remote control in<br />
TUN device mode. Individual presses move the frequency<br />
down and up one step. If you press and hold either of<br />
the tuning buttons for two seconds, the tuner scans to<br />
the next strong signal. You can stop a scan at any time by<br />
pressing one of the tuning buttons again.<br />
In Europe, the internal FM radio is capable of receiving<br />
RDS (Radio Data System) radiotext signals that are<br />
transmitted on some stations. The RDS information<br />
typically includes the radio station name, the music or<br />
speech genre as well as additional information related to<br />
the current programme. On music stations this is often<br />
information on the currently playing track.<br />
DAB digital radio<br />
If your <strong>AVR600</strong> is fitted with the optional DAB tuner<br />
you will need to scan for available stations before being<br />
able to listen to them.<br />
To scan for DAB stations, first select the DAB tuner then<br />
press and hold O until the display indicates scanning<br />
has started. The <strong>AVR600</strong> will then scan all the DAB<br />
radio frequencies and compile a list of the stations that<br />
are available.<br />
When the scan is complete, you can scroll through the<br />
station list using the < and > buttons on the CR102<br />
remote control. To listen to the currently displayed<br />
station press the O. If you do not press O within<br />
two seconds, the display will revert to displaying the<br />
currently playing station.<br />
Internet radio<br />
Please see the Network/USB Operation section on page<br />
46 for details of internet radio operation.<br />
Saving and selecting Presets<br />
Preset selection uses the B and C keys on the<br />
remote to browse and O to select the preset when the<br />
CR102 is in TUN device mode.<br />
Up to 99 presets can be stored and these can be from<br />
any band, for example Preset 1 could be an AM station,<br />
preset two a DAB station, etc. Pressing the OK key causes<br />
the next available preset number to be displayed, then<br />
pressing the OK key again stores the current frequency/<br />
channel in that preset. If a different preset number is<br />
required, press the B or C keys until the desired<br />
number is displayed before pressing the OK key for a<br />
second time.<br />
Deleting Presets<br />
When in tuner browse mode (using B and , to<br />
scroll through the presets), the yellow button on the<br />
CR102 remote is used to delete the currently highlighted<br />
(but not playing) station or frequency.<br />
Sirius satellite radio<br />
In this section it is assumed that you already have<br />
a ‘SiriusConnect Home Tuner’ kit and a Sirius<br />
subscription, and that the antenna is already correctly<br />
placed to receive Sirius broadcasts. Please visit<br />
www.sirius.com for more information.<br />
Add to your subscription<br />
Before being able to receive satellite radio broadcasts<br />
you will need to update your Sirius subscription to add<br />
the ID number of the Sirius receiver module in your<br />
<strong>AVR600</strong>. The Sirius ID can be found by switching to<br />
the Sirius source and selecting channel 0. The <strong>AVR600</strong><br />
displays the 12-digit number on the OSD and on the<br />
front panel display. You should make a note of this ID<br />
number, then select Sirius channel 184 while you apply<br />
this ID number to your account at www.sirius.com or<br />
by calling 1.888.539.SIRIUS (7474).<br />
Once your subscription is updated, a code is sent<br />
over Sirius channel 184. When this code is received<br />
the <strong>AVR600</strong> displays ‘SUBSCRIPTION UPDATED’. This<br />
display remains until cleared by pressing any button. The<br />
Sirius radio module is now fully operational.<br />
Please note that, depending on your subscription, some<br />
channels may not be available. If a channel is not part of<br />
your subscription package, you are invited to subscribe<br />
to the station - ‘CALL 888-539-SIRIUS To Subscribe’<br />
E-44
is displayed and audio is muted. If you have any queries<br />
about your subscription, please contact Sirius.<br />
Operation<br />
In addition to the channel and preset selection,<br />
previously mentioned, you can also cycle through the<br />
station categories (Rock, Pop, Country, etc.) using the<br />
] and [ keys. The first station in each category is<br />
displayed. You can then scroll through other stations in<br />
that particular category using the D or E buttons on<br />
the CR102 remote. On the OSD a star (‘ * ”) is shown<br />
before the category name to show you are scrolling<br />
through stations only in the current category. Press<br />
O to select the currently displayed station to listen to<br />
it otherwise the display times out and returns to the<br />
currently playing station information.<br />
Sirius errors<br />
If an invalid channel is selected, the <strong>AVR600</strong> displays<br />
‘INVALID CHANNEL’ and the channel reverts to the<br />
previous valid channel.<br />
If there is a loss of signal, the <strong>AVR600</strong> displays<br />
‘ACQUIRING SIGNAL’.<br />
If the antenna is disconnected, the <strong>AVR600</strong> displays<br />
‘ANTENNA ERROR’.<br />
During the channel map update, the message ‘Updating<br />
channels - xx%’ is displayed. Note that audio is<br />
muted until the update is complete. When complete, the<br />
<strong>AVR600</strong> retunes to the original channel and restores the<br />
audio.<br />
English<br />
Locking Channels<br />
The Sirius module in the <strong>AVR600</strong> has a parental lockout<br />
feature which allows you to assign a 4-digit code to any<br />
stations you do not wish to be generally available to<br />
users.<br />
Channels can be locked out individually by pressing and<br />
holding the MODE key. ‘Lock?’ also appears on the lower<br />
line of the On Screen Display. Pressing O confirms and<br />
applies the parental lock to the channel and the display<br />
returns to the channel name.<br />
If a locked channel is selected, the audio will be muted<br />
and the user prompted on the display to enter the<br />
unlocking code. ‘Unlock code :____’ is displayed.<br />
The default unlock code is 0000.<br />
If the code is entered correctly the audio for this channel<br />
unmutes. If the code is not entered correctly, the<br />
previously played channel is re-selected.<br />
To remove the parental lock from one of the locked<br />
channels (so that the unlocking code is no longer<br />
required to listen to them), navigate to the channel,<br />
select it and enter the unlocking code to unmute the<br />
channel. Press and hold the M key until the display<br />
shows ‘Unlock ?’. Press O to remove the lock from the<br />
channel.<br />
NOTE<br />
The locking code is reset to 0000 if a factory reset of<br />
the <strong>AVR600</strong> is performed.<br />
E-45
network/usb<br />
operation<br />
<br />
<br />
<br />
<br />
<br />
<br />
<br />
<br />
<br />
The <strong>AVR600</strong> is fitted with a<br />
network audio client which is<br />
capable of playing internet radio<br />
stations as well as stored music on<br />
a network storage device such as a<br />
PC, or from a USB flash drive.<br />
For information on installing the <strong>AVR600</strong> on your<br />
network, see page 16.<br />
The <strong>AVR600</strong> supports the following file formats:<br />
< MP3<br />
< WMA (Windows Media Audio)<br />
< WAV<br />
< FLAC (Free Lossless Audio CODEC)<br />
< MPEG-4 AAC (iTunes) with DRM10 support<br />
< Ogg Vorbis<br />
Favourites<br />
You can store tracks or radio stations in your ‘favourites’<br />
folder for easy access later. Once playing, pressing<br />
the FAV+ key adds the track to the ‘favourites’ folder.<br />
Pressing FAV- removes the track from the ‘favourites’<br />
folder (this key only has an effect if the track is in the<br />
favourites folder).<br />
Selecting the playback source<br />
Selecting the network client will allow playback of<br />
internet radio stations and stored music on a networked<br />
storage device or USB memory device.<br />
To select the network source the CR102 remote must<br />
first be in AMP device mode (press A). Then press S<br />
+ e on the remote to select the Network source. You<br />
can also cycle to it using the –INPUT / INPUT+ keys on the<br />
front panel.<br />
The ‘home’ page will display all available storage devices,<br />
as well as your ‘favourites’ folder. Navigate through these<br />
devices using the B, C, D and E keys. Folders that<br />
may contain playable files have a symbol, playable<br />
files have a symbol. Once you reach the track you wish<br />
to play, press OK or the 4 key.<br />
Once playing, pressing OK again or ; will pause the<br />
track.<br />
Pressing the / key skips forward one track. If the last<br />
track is reached the key is ignored.<br />
Pressing the 0 key skips back one track. If the first track<br />
is reached, the key is ignored.<br />
Pressing and holding the OK or < key for two seconds<br />
stops playback.<br />
Pressing the r key on the remote plays the tracks in<br />
the current folder in a random order.<br />
Pressing the R key on the remote repeats the current<br />
track, pressing it again repeats all the files in the current<br />
folder, pressing it again cancels the repeat function.<br />
USB playback<br />
Insert a USB device into the socket on the <strong>AVR600</strong> and<br />
select select the network client input. The USB device<br />
appears in the list of folders that can be navigated.<br />
Navigate to the music file and press the OK or 4 key.<br />
Internet radio stations<br />
Although you can manually enter the URL of an internet<br />
radio station, the <strong>AVR600</strong> uses the vTuner service<br />
to allow easy browsing of internet radio stations and<br />
podcasts. To set up this service for your <strong>AVR600</strong>, please<br />
visit www.arcamradio.co.uk<br />
There, you will be asked to enter the Media Access<br />
Controller (MAC) address which is the unique ID of<br />
your <strong>AVR600</strong>. This MAC address can be found in the<br />
network section of the setup menu.<br />
Once you have entered the MAC address, you can then<br />
browse stations and podcasts and set up groups of<br />
favourite stations. When you next connect your <strong>AVR600</strong><br />
to the internet, these groups will appear in the selection<br />
list.<br />
Pressing the INFO key will cycle what is shown on the<br />
lower right portion of the front panel display between:<br />
< Elapsed Time (default)<br />
< Processing mode<br />
< Album (if available)<br />
< Artist (if available)<br />
< File information (bitrate, type).<br />
NOTE<br />
For playback from a network device, the network<br />
device needs to running a universal plug and<br />
play (uPnP) service, such as Windows Media<br />
Player 11. This can be downloaded free of charge<br />
from www.microsoft.com or installed via the<br />
Windows update installer. Windows Vista has this<br />
functionality built in.<br />
Other free and paid-for uPnP services are available<br />
for other computer operating systems. Some<br />
network attached storage (NAS) systems include a<br />
built-in version of a uPnP service.<br />
iPod<br />
It is possible to connect an iPod<br />
to your <strong>AVR600</strong> using either the<br />
<br />
<strong>Arcam</strong> rLead or rDock accessories<br />
(please contact your dealer).<br />
<br />
Connect the 9-way plug into the<br />
socket marked ‘rLead/rDock’ and<br />
the audio leads to the AV input. If<br />
your iPod has video output and you<br />
are using the rDock, connect the<br />
<br />
composite and S-Video leads to the<br />
AV video inputs.<br />
<br />
<br />
To select the iPod input, press the e key on the remote<br />
while in AMP Device Mode, or cycle to it using the<br />
<br />
– input / input + keys on the front panel.<br />
<br />
<br />
<br />
<br />
<br />
<br />
<br />
E-46
external<br />
amplifiers<br />
English<br />
<br />
<br />
<br />
<br />
<br />
<br />
<br />
<br />
<br />
<br />
<br />
<br />
<br />
<br />
<br />
<br />
<br />
<br />
<br />
Analogue pre-amplifier outputs<br />
All pre-amplifier analogue outputs are buffered, have<br />
a low output impedance and are at line level. They are<br />
able to drive long cables or several inputs in parallel if<br />
required.<br />
R, L, C<br />
Connect these to the equivalent (Right, Left and Centre)<br />
front channels of your power amplifier.<br />
SW1<br />
Main subwoofer output. Connect this to the input of<br />
your active subwoofer, if present.<br />
SW2, SW3<br />
Subwoofer 2 and Subwoofer 3 auxiliary outputs. These<br />
are equivalent to SW1 but they allow the use of multiple<br />
subwoofers.<br />
SR, SL<br />
Surround Right and Surround Left outputs. Connect<br />
these to the Surround Right and Left power amplifier<br />
inputs.<br />
SBR, SBL<br />
Surround Back Right and Surround Back Left outputs<br />
(only used in 6.1 and 7.1 channel systems). Connect<br />
these to the Surround Back Right and Surround Back<br />
Left power amplifier inputs.<br />
For 6.1 channel speaker configurations, connect the<br />
single Surround Back power amplifier to the SBL output.<br />
E-47
multi-room<br />
set up<br />
The <strong>AVR600</strong> allows independent routing and control of<br />
analogue audio, Composite and S-Video to a separate set<br />
of equipment, typically used for a second living space,<br />
e.g., bedroom or lounge. The <strong>AVR600</strong> also allows a<br />
copy of the Zone 2 analogue audio to be routed to and<br />
controlled in a third living space, Zone 3.<br />
The connection guide on the following page shows how<br />
the <strong>AVR600</strong> is normally connected in a multi-room<br />
installation.<br />
Zone 2<br />
Zone 2 receives only signals obtained by the <strong>AVR600</strong><br />
from the analogue audio, Composite and S-Video<br />
inputs. The analogue inputs are required because there<br />
is no analogue-to-digital, digital-to-analogue or DSP<br />
processing available for Zone 2 signals – the <strong>AVR600</strong><br />
only converts video formats for Zone 1.<br />
For this reason, we recommend that in addition to any<br />
digital connections, the Composite and/or S-Video<br />
outputs from your source devices are connected to the<br />
<strong>AVR600</strong>.<br />
Video outputs<br />
The Z2 S-Video and/or Composite output connectors<br />
of the <strong>AVR600</strong> should be connected to the analogue<br />
video inputs (usually labelled S-Video In or<br />
Composite Video in) of the display device in Zone 2.<br />
If you wish to make an HDMI connection to Zone 2,<br />
you must accept the limitations of the <strong>AVR600</strong> video<br />
processing system.<br />
HDMI OUT 1 and OUT 2 both carry the same signals (as<br />
there is only one video processing engine) and are<br />
primarily intended for use in Zone 1. Full HDMI video<br />
functionality in Zone 2 can only be achieved if Zone 1 is<br />
not being used at the same time.<br />
If Zone 1 is being used at the same time as Zone 2,<br />
Zone 2 must follow the Zone 1 source selection if you<br />
wish to receive HDMI signals in Zone 2. Zone 2 must<br />
also be the same video resolution as Zone 1. If you wish<br />
to watch a different source in Zone 2 than is currently<br />
showing over HDMI in Zone 1, Zone 2 will be forced to<br />
use the analogue video connections into and out of the<br />
<strong>AVR600</strong>.<br />
Due to the complications of using HDMI in Zone 2<br />
we recommend the use of analogue video connections<br />
instead, particularly as it is not possible to apply audio<br />
lip sync to Zone 2 audio to compensate for video<br />
processing delays.<br />
Audio outputs<br />
The Z2 Out, R and L phono sockets should be connected<br />
to the analogue audio inputs (Usually labelled<br />
Analogue Audio in) of the Zone 2 display device, or<br />
to the inputs of an additional stereo power amplifier in<br />
Zone 2 (for example, the <strong>Arcam</strong> P38).<br />
Zone 3<br />
A line-level signal from the stereo analogue audio is<br />
available for Zone 3. This is a copy of the Zone 2 audio<br />
signal, but has its own independent volume control.<br />
Audio outputs<br />
The Z3 Out, R and L phono sockets should be connected<br />
to the inputs of an additional stereo power amplifier in<br />
Zone 3 (for example, the <strong>Arcam</strong> P38).<br />
Zone 2 and 3 control outputs<br />
The <strong>AVR600</strong> also allows remote control from Zones 2<br />
and 3.<br />
<br />
<br />
<br />
<br />
<br />
<br />
<br />
<br />
<br />
<br />
Z2 IR and Z3 IR<br />
This allows the <strong>AVR600</strong> to be<br />
controlled remotely from Zone 2<br />
or Zone 3 via Infra-red remote<br />
control. Connect a remote IR<br />
receiver in Zone 2 or Zone 3 to<br />
allow control of the <strong>AVR600</strong><br />
from these listening/viewing<br />
areas.<br />
For more information on remote<br />
IR receivers, see ‘Z1 IR’ on page<br />
17.<br />
TRIG Z2 and TRIG Z3<br />
<br />
<br />
This allows the <strong>AVR600</strong> to<br />
remotely switch on devices<br />
<br />
in Zone 2 or 3 when the<br />
appropriate Zone is selected.<br />
For example you could set your<br />
television in Zone 2 to switch on<br />
when ‘Zone 2’ is selected on <strong>AVR600</strong>.<br />
For more information on triggers, see ‘Trigger<br />
connectors’ on page 17. Please note that not all AV<br />
devices have this feature, nor are triggers essential for<br />
listening and viewing in a separate zone.<br />
E-48
Multi-room connection guide<br />
Zone 3 Zone 1<br />
Zone 2<br />
English<br />
<br />
<br />
<br />
<br />
<br />
<br />
<br />
<br />
<br />
<br />
<br />
<br />
<br />
<br />
<br />
<br />
<br />
<br />
<br />
<br />
<br />
<br />
<br />
<br />
<br />
<br />
<br />
<br />
<br />
<br />
<br />
<br />
<br />
<br />
<br />
<br />
<br />
<br />
<br />
<br />
<br />
<br />
<br />
<br />
<br />
<br />
<br />
<br />
<br />
<br />
<br />
<br />
<br />
<br />
<br />
<br />
<br />
<br />
<br />
<br />
<br />
<br />
<br />
<br />
<br />
<br />
<br />
<br />
<br />
<br />
<br />
<br />
<br />
<br />
<br />
<br />
<br />
<br />
<br />
<br />
<br />
<br />
<br />
<br />
<br />
<br />
<br />
<br />
<br />
<br />
<br />
<br />
<br />
<br />
<br />
<br />
<br />
<br />
<br />
<br />
<br />
<br />
<br />
<br />
<br />
<br />
<br />
<br />
<br />
<br />
<br />
<br />
<br />
<br />
<br />
<br />
<br />
<br />
<br />
<br />
<br />
<br />
<br />
<br />
<br />
<br />
<br />
<br />
<br />
<br />
<br />
<br />
<br />
<br />
<br />
<br />
<br />
<br />
E-49
customising<br />
the CR102<br />
Code Learning<br />
The CR102 comes with a complete library of<br />
preprogrammed codes. After you have set up the CR102<br />
for your device, you may find that there are one or more<br />
functions on your original remote which do not have a<br />
place on the CR102 keypad. For convenience, the CR102<br />
offers a Code Learning feature that allows you to copy<br />
up to 16 functions from an original remote control onto<br />
the CR102 keypad.<br />
Before you start, make sure that:<br />
< The original remote control is working correctly.<br />
< The remotes are not pointing at your device.<br />
< The remotes have new batteries.<br />
< The remotes are not in direct sunlight or under<br />
strong fluorescent lights.<br />
Learned functions are mode-dependent: You could<br />
theoretically assign up to eight different functions<br />
to a single key (the CR102 can handle a total of 16<br />
learned functions).<br />
Example: To copy the ‘text hold’ function<br />
from a TV remote onto the ( key of your<br />
CR102<br />
1. Place both remotes on a flat surface, 2 to 5cm apart,<br />
with the IR ports facing each other.<br />
2. On the CR102, press and hold S until the power<br />
LED blinks twice: * *.<br />
3. Press 9 7 5. The power LED blinks twice: *<br />
*.<br />
4. On the CR102, press the device key that matches the<br />
‘source’ device (e.g. if you’re learning a TV function,<br />
press a).<br />
5. On the CR102, press the key to which you want to<br />
assign the learned function (e.g. (). The device key<br />
blinks rapidly.<br />
6. On the original remote, press and hold the function<br />
key that you want to learn (e.g. Text Hold) until the<br />
CR102 device key blinks twice: * *.<br />
7. If you want to learn other functions from the same<br />
source device, simply repeat steps 5 and 6 pressing<br />
the next key you want to learn.<br />
8. To exit Code Learning mode, press and hold S<br />
until the device key blinks twice: * *.<br />
9. To use the learned function on the CR102, press the<br />
Device Mode key, followed by the function key.<br />
In this example, you’d press<br />
a followed by (<br />
Shifted Learning<br />
You can assign a learned function to a CR102 key<br />
without sacrificing its original function.<br />
You can assign Shifted Learning functions to any key<br />
except for: Device Mode keys (e.g. a), S, or number<br />
keys (0 to 9).<br />
1. To assign a Shifted Learning function, simply follow<br />
Code Learning steps in the previous section. During<br />
step 5, press S once before you press the key to<br />
which you want to assign the learned function.<br />
2. To access the shifted function, press S and then the<br />
target key.<br />
Important notes<br />
< Once you start a Code Learning session, you have<br />
approximately 10 seconds to conduct each step. Any<br />
longer, and a timeout means that you’ll have to start<br />
the process again.<br />
< The Learning feature is mode-specific – you can<br />
copy one feature per mode onto a key.<br />
< The CR102 can learn approximately 16 functions in<br />
total.<br />
< To replace a learned function, simply assign a new<br />
one to the same key.<br />
< Learned functions are retained when you change<br />
batteries.<br />
< If Code Learning fails, try altering the distance<br />
between the two remotes; make sure that the light in<br />
the area is not too bright.<br />
To delete a learned function<br />
1. Press and hold S until the power LED blinks twice:<br />
* *.<br />
2. Press 9 7 6. The power LED blinks twice: .<br />
3. Press a Device Mode key once. For example, if you<br />
want to delete one of your learned TV functions,<br />
press a.<br />
4. Press twice on the key you want to deassign. The<br />
handset blinks twice: * * to confirm.<br />
The original function of the CR102 is restored.<br />
To delete a Shifted Learned function:<br />
To delete a Shifted Learned function, press S before<br />
you press the key to be deassigned (during step 4 above).<br />
To delete ALL learned functions within a<br />
given Device Mode<br />
1. Press and hold S until the power LED blinks twice:<br />
* *.<br />
2. Press 9 7 6 – the power LED blinks twice: *<br />
*.<br />
3. Press the appropriate Device Mode key twice.<br />
E-50
Creating Macros<br />
You can program your CR102 to issue a sequence of<br />
commands when you press a single key. Any sequence of<br />
commands you regularly use can be reduced to a single<br />
key press for your convenience.<br />
For example, you might want to turn off your TV, VCR<br />
and Satellite at the same time.<br />
< A key programmed with a Macro is available in all<br />
modes; it will replace that key’s different functions<br />
for all modes.<br />
< A Macro can consist of up to eight key presses.<br />
Example: To assign a Macro to the h key<br />
1. Press and hold S until the power LED blinks twice:<br />
* *.<br />
2. Press 9 9 5.<br />
3. Press h (the Macro will be assigned to this key).<br />
4. Press a, P, w, P, z, P. (These are the Macro<br />
steps you wish to record.)<br />
5. To store the Macro, press and hold S until the<br />
power LED blinks twice: * *.<br />
Now, whenever you press h, the CR102 will toggle the<br />
power to your TV, VCR and Satellite.<br />
< The important word here is ‘toggle’. For example, if<br />
the TV and Satellite devices are currently on, but<br />
the VCR is off, pressing h will switch off the TV<br />
and Satellite and switch on the VCR (rather than<br />
switching all three devices on or off).<br />
< When using Macros, remember that you may need<br />
to change mode or use S, and that each key press<br />
(including changing modes and pressing S) counts<br />
as one of the Macro steps. You cannot use a Macro<br />
key within another Macro.<br />
< If the amount of memory storage for a particular<br />
Macro is exceeded, the power LED comes on for five<br />
seconds. You can, however, save the macro steps up<br />
to that point by pressing S, or you can cancel the<br />
Macro recording by pressing any other key.<br />
< The delay between key presses is recorded as part of<br />
the Macro. A delay of up to 30 seconds is permitted.<br />
Example: To deassign the Macro associated<br />
with the h key<br />
1. Press and hold S until the power LED blinks twice:<br />
* *.<br />
2. Press 9 9 5.<br />
3. Press h.<br />
4. Press and hold S until the power LED blinks twice:<br />
* *.<br />
Volume punch-through<br />
Volume punch-through means that, no matter which<br />
Device Mode is selected, the CR102 controls the<br />
<strong>AVR600</strong> volume. You don’t need to press A on your<br />
CR102; this feature is switched on by default.<br />
There are times, however, when you might want to<br />
control a device’s volume directly when in a specific<br />
Device Mode.<br />
Example: To cancel volume punch-through<br />
for a TV (AV mode)<br />
1. Press a once.<br />
2. Press and hold S until the power LED blinks twice:<br />
* *.<br />
3. Press 9 9 3.<br />
4. Press -. The power LED blinks four times.<br />
Now, while in TV (AV) mode, you will be able to control<br />
the volume or mute functions of your TV directly.<br />
To completely cancel all volume punchthrough<br />
settings<br />
1. Press and hold S until the power LED blinks twice:<br />
* *.<br />
2. Press 9 9 3.<br />
3. Press +. The power LED blinks four times * *<br />
* *.<br />
Now, whichever mode you’re in, you will have direct<br />
access to that device’s volume or mute functions,<br />
assuming they are available. You would need to switch to<br />
AMP mode to alter the <strong>AVR600</strong> volume.<br />
Example: To restore default volume punchthrough<br />
settings to all Device Modes<br />
1. Press and hold S until the power LED blinks twice:<br />
* *.<br />
2. Press 9 9 3.<br />
3. Press A. The power key LED blinks twice: * *.<br />
Key Mover<br />
Sometimes you might find that a key you use a lot for<br />
your system is in the ‘wrong’ place on the CR102 keypad<br />
for your comfort. It’s quite easy to reassign a favourite<br />
function to a more accessible key. It is even possible<br />
to move a function from one Device Mode to another<br />
Device Mode.<br />
Example: To assign the D function to the U<br />
key in SAT mode<br />
1. Press z.<br />
2. Press and hold S until the power LED blinks twice:<br />
* *.<br />
3. Press 9 9 4.<br />
4. Press the key you want to move (e.g. D)<br />
5. Press the key you want to move the key to (e.g. U).<br />
Now, pressing either D or U while in SAT Device<br />
Mode makes the CR102 transmit the D function.<br />
To completely swap over the functionality of the two<br />
keys to put the U functionality on the D key, repeat<br />
the above process again, but swap over the D and U<br />
key presses in the example.<br />
Note that the function that is copied over to the new key<br />
is always the original function of the old key.<br />
Restore a moved key<br />
To restore a key to its previous function, repeat the<br />
example above, pressing the key to be restored twice<br />
(copy it back to itself).<br />
Restore all moved keys for a Device Mode<br />
To restore all keys in a Device Mode to their original<br />
functional positions, repeat the example above, but press<br />
the relevant Device Mode key (e.g. A ) at points 1,4 and<br />
5 in the example.<br />
English<br />
E-51
Copy a key between Device Modes<br />
It is possible to copy functions between Device Modes.<br />
However, remember that button functions are Device<br />
Mode specific and therefore effectively ‘punch-through’<br />
to the original Device Mode when copied over.<br />
The following example copies the <strong>AVR600</strong> Direct<br />
function from the CR102 AMP device mode to the<br />
shifted function of the # button on AV Device Mode.<br />
1. Press and hold S until the power LED blinks twice:<br />
* *.<br />
2. Press 9 9 4.<br />
3. Press the Device Mode key of the function you want<br />
to move (e.g. A ).<br />
4. Press the function key you want to move (e.g. ) /<br />
DIRECT)<br />
5. Press the key of the Device Mode you want to copy<br />
the function to (e.g. a )<br />
6. Press the S button graphic<br />
7. Press the key you want to copy the function to (e.g.<br />
# )<br />
If you prefer to copy the key to the main function of the<br />
# button instead of the ‘shifted’ function, omit point 6<br />
in the above example.<br />
Mode Mover<br />
If your home entertainment setup contains devices of<br />
the same type (e.g. two TVs, perhaps from different<br />
manufacturers) you can still control both those devices<br />
with the CR102. You simply need to reassign an unused<br />
Device Mode key.<br />
NOTE<br />
Before using Mode Mover, make sure both the<br />
source and destination Device Mode keys are<br />
unlocked (see next section).<br />
Example: To use the z key to control a<br />
second TV<br />
1. Press and hold S until the power LED blinks twice:<br />
* *.<br />
3. Press 9 9 2.<br />
3. Press the Device Mode key for the type of device you<br />
want to control (e.g. for a TV, press a).<br />
4. Press the Device Mode key you want to use (e.g. z).<br />
5. Don’t forget to set up the CR102 to control the<br />
second device, using one of the methods on page 25.<br />
Note that volume punch-through is not applied to a<br />
Device Mode that has been copied using Mode Mover.<br />
However, <strong>AVR600</strong> volume punch-through functionality<br />
can be restored when you have used Mode Mover, by<br />
copying - , + and @ from the AMP Device Mode<br />
to the same physical buttons on the new moved Device<br />
Mode using the last example shown in Key Mover.<br />
To restore a moved Device Mode key to its<br />
original state<br />
1. Press and hold S until the power LED blinks twice:<br />
* *.<br />
2. Press 9 9 2.<br />
3. Press the Device Mode key you want to restore<br />
twice.<br />
Locking/Unlocking a specific<br />
Device Mode<br />
When you first unpack your CR102 and insert the<br />
batteries, for your convenience it is able to control<br />
certain <strong>Arcam</strong> components automatically (e.g. DVD<br />
players, Amplifiers, Tuners and CD Players). We achieve<br />
this by preprogramming specific <strong>Arcam</strong> device codes<br />
onto the relevant Device Mode keys, then locking<br />
the Device Modes so you don’t reprogram them<br />
inadvertently.<br />
If you want to override these locked default settings – to<br />
control a third-party DVD player, for example – you will<br />
first need to unlock DVD Mode before setting up the<br />
CR102 using one of the methods described at the start<br />
of this guide.<br />
Here are the factory default settings:<br />
Device Mode Default status Default <strong>Arcam</strong><br />
codes<br />
DVD Locked 0762<br />
SAT Unlocked 1205<br />
AV Unlocked 0586<br />
TUN Locked 2009<br />
AMP Locked 1242<br />
PVR Unlocked 1930<br />
VCR Unlocked 0111<br />
CD Locked 2010<br />
Alternative codes are available for multi-room solutions,<br />
or in the case of code clashes with other manufacturer’s<br />
products.<br />
For example:<br />
DVD (system code 12) 1655<br />
AMP (system code 19) 1954<br />
You will need to change the system code on the product<br />
you wish to control, as well as the CR102.<br />
To toggle a Device Mode lock setting:<br />
1. Press the Device Mode key you want to unlock (e.g.<br />
d)<br />
2. Press and hold S until the power LED blinks twice:<br />
* *.<br />
3. Press 9 8 2.<br />
< The power LED blinks twice when being locked, and<br />
blinks four times when being unlocked.<br />
< If you enter an invalid key sequence, the power<br />
LED gives one long blink and returns to normal<br />
operation.<br />
While the Device Mode key is locked, the Direct Code<br />
Setup and Move Mode functions are not available.<br />
NOTE<br />
The AMP Device Mode can only be used to control<br />
<strong>Arcam</strong> amplifiers like the <strong>AVR600</strong>, either on its<br />
default or alternative IR system codes.<br />
E-52
Mode key IR punch-through<br />
The Mode key IR punch-through default is ‘on’.<br />
Command summary<br />
Device codes<br />
Example: To set the Mode key IR punchthrough<br />
to AMP<br />
1. Press and hold S until the power LED blinks twice:<br />
* *.<br />
2. Press 9 7 1. The power LED blinks twice: *<br />
*.<br />
3. Press A to punch through IR from it.<br />
Now, whenever you press and release a Mode key, the<br />
IR data assigned to AMP is transmitted, no matter what<br />
the current mode is (i.e. it ‘punches through’ any other<br />
device).<br />
To cancel Mode key IR punch-through<br />
1. Press and hold S until the power LED blinks twice:<br />
* *.<br />
2. Press 9 7 1. The power LED blinks twice: *<br />
*.<br />
3. Press S until the power LED blinks twice: * *.<br />
Resetting the CR102<br />
Resetting the CR102 will erase all learned functions<br />
across all modes, as well as some other programmed<br />
functions like Macros. It will not reset the Device Mode<br />
keys; these will remain programmed to your choice of<br />
component.<br />
1. Press and hold S until the power LED blinks twice:<br />
* *.<br />
2. Press 9 8 0. The power LED blinks four times:<br />
* * * *.<br />
3. Press and hold S until the power LED blinks twice:<br />
* *.<br />
4. Press 9 9 3.<br />
5. Press A. The power key LED blinks twice: * *.<br />
6. Press and hold S until the power LED blinks twice:<br />
* *.<br />
7. Press 9 7 1. The power LED blinks twice: *<br />
*.<br />
8. Press A. The power key LED blinks twice: * *.<br />
Direct code setup<br />
(e.g. AV mode, NNNN=code number)<br />
a S * * NNNN * * P<br />
Library search<br />
(e.g. AV mode)<br />
a S 9 9 1 * * P [ until unit turns off<br />
S to save<br />
Code blink back<br />
a S 9 9 0 **<br />
1 count blinks for first N<br />
2 count blinks for second N<br />
3 count blinks for third N<br />
4 count blinks for fourth N<br />
Code learning<br />
(e.g. AV mode fast forward key)<br />
S * * 9 7 5 * * a ( * (many<br />
rapid blinks)<br />
(Press key on original remote that you wish to copy)<br />
* * S * *<br />
Delete a learned function<br />
(e.g. AV mode fast forward key)<br />
S * * 9 7 5 * * a ( ( * *<br />
Delete all learned functions with a device<br />
(e.g. AV mode)<br />
S * * 9 7 5 a a<br />
Creating macros<br />
(e.g. SRCH key)<br />
S * * 9 9 5 h a P w P z P S<br />
* *<br />
Deassign macro<br />
S * * 9 9 5 h S * *<br />
Key mover<br />
(e.g. SAT mode, DISP key to MENU key)<br />
z S * * 9 9 4 D U<br />
Mode mover<br />
(e.g. change SAT to TV(AV))<br />
S * * 9 9 2 a z<br />
Restore device mode<br />
(e.g. restore SAT)<br />
S * * 9 9 2 z z<br />
Locking/unlocking a mode<br />
(e.g. DVD mode)<br />
d S * * 9 8 2 * *<br />
(i.e. two blinks for lock)<br />
d S * * 9 8 2 * * * *<br />
(i.e. four blinks for unlock)<br />
Cancel all volume punch-through<br />
S * * 9 9 3 + * * * *<br />
Restore volume punch-through<br />
S * * 9 9 3 A * *<br />
Mode key IR punch-through<br />
S * * 9 7 1 * * A<br />
Cancel mode key IR punch-through<br />
S * * 9 7 1 * * S * *<br />
NOTE<br />
As elsewhere in this Handbook, a single ‘blink’ of<br />
the red LED behind the power button is indicated<br />
by the symbol *.<br />
The tables that begin on page 58 (in the final section of<br />
this Handbook) list the four-figure codes for different<br />
manufacturers’ devices.<br />
Use these when setting your CR102 up to control your<br />
devices, as described in Method 1 (see page 25).<br />
If more than one code number is listed, try the first<br />
number. If the results are unsatisfactory, continue trying<br />
the numbers for that manufacturer to get the best ‘fit’<br />
with the functionality required.<br />
If the manufacturer of your equipment is not listed, you<br />
can try Method 2, the Library Search (see page 25). This<br />
allows you to scan through every set of codes contained<br />
in the CR102’s memory.<br />
English<br />
E-53
troubleshooting<br />
Problem<br />
There are no lights on the unit<br />
The unit responds erratically<br />
or not at all to the remote<br />
control<br />
The front panel display is<br />
blank<br />
No picture is being produced<br />
There are bright edges or<br />
‘ghosts’ on the picture<br />
No sound is produced<br />
The sound is poor or distorted<br />
Check that...<br />
< the power cord is plugged into the <strong>AVR600</strong> and the mains socket it is<br />
plugged into is switched on.<br />
< the power button is pressed in.<br />
If a red LED is present, the <strong>AVR600</strong> is in standby mode. Press any button on the<br />
front panel or remote control.<br />
< there are fresh batteries in the remote control.<br />
< the front panel window is visible and you are pointing the remote control<br />
towards it.<br />
< the display hasn’t been turned off. Press the DISPLAY button on the front<br />
panel or remote control.<br />
< your viewing device is turned on and switched to display your <strong>AVR600</strong>. Test<br />
by pressing the MENU button on the <strong>AVR600</strong> or on the remote and look for<br />
the main menu screen on your display device.<br />
< the correct video input is selected on the <strong>AVR600</strong>.<br />
< the video source is on, is operating normally, and is in ‘play’ mode if<br />
appropriate.<br />
< you have the <strong>AVR600</strong> in a video resolution that is compatible with the<br />
connection you are using and with your display device. For example,<br />
composite video is only capable of carrying 480i and 576i resolutions. Test<br />
this by pressing and holding the OK key for more than two seconds to force<br />
480i / 576i output resolutions.<br />
< the cables used for analogue video connections are designed to carry video<br />
(i.e., they are 75Ω coaxial cables).<br />
< ensure the ‘sharpness’ control on your display device is switched off or set to<br />
near minimum.<br />
< for HDMI connections, try using a shorter cable or alternatively a different<br />
brand.<br />
< the correct input has been selected.<br />
< the source equipment is on, is operating normally and is in ‘play’ mode if<br />
appropriate.<br />
< the volume is turned up to a reasonable level and the <strong>AVR600</strong> is not in mute<br />
mode.<br />
< you have not excessively increased the input sensitivity (i.e. reduced the<br />
maximum input signal voltage) in the Input Config. menu if an analogue<br />
input is being used.<br />
< you have selected the correct size of speakers to suit your system in the setup<br />
menu.<br />
E-54
Problem<br />
Check that...<br />
Problem<br />
Check that...<br />
Sound only comes from some<br />
of the speakers<br />
Unable to select Dolby Digital<br />
or DTS decoding modes<br />
When playing a Dolby Digital<br />
DVD, the <strong>AVR600</strong> selects<br />
Dolby Pro Logic<br />
Hum on the analogue input<br />
< you have an appropriate surround source selected and playing.<br />
< the DVD disc is encoded in the appropriate format, and the correct format<br />
has been selected in the disc start menu of the DVD player (if applicable).<br />
< the DVD player has been set to output ‘bitstream’ audio on the digital<br />
output.<br />
< the display window indicates that the disc you are playing is a multichannel<br />
recording (you may need to press the INFO key several times until you get to<br />
the ‘incoming format’ display).<br />
< all the speakers are correctly connected to the speaker terminals and are<br />
secure.<br />
< you have not selected ‘Stereo’ as the decoding mode.<br />
< your speaker balance is correct.<br />
< you have configured the <strong>AVR600</strong> to include all the speakers in your system.<br />
The <strong>AVR600</strong> can only apply Dolby Digital and DTS decoding to sources which<br />
have been encoded in the same format.<br />
Check that:<br />
< digital source is selected and connected.<br />
< the source is playing appropriately encoded material.<br />
< the DVD disc is encoded in the appropriate format and that the correct<br />
format has been selected in the disc start menu of the DVD player (if<br />
applicable).<br />
< the DVD player has been set to output ‘bitstream’ audio on the digital<br />
output.<br />
< you have a digital connection from your DVD player.<br />
< sometimes Dolby Digital DVD discs contain material at either the beginning<br />
or the end of the main movie that is not in full 5.1 format, but in twochannel<br />
or Pro Logic decoding.<br />
< all cables are making a good connection. If necessary withdraw the cable<br />
from the connector and plug it fully in again (turn the power off before<br />
doing this).<br />
< the connections inside the source cable connector are not broken or badly<br />
soldered.<br />
< if the hum originates only when one particular source component is<br />
connected, that an aerial cable, or dish connection to this source is ground<br />
isolated. Contact your installation contractor.<br />
The source switching changes<br />
randomly or freezes on one<br />
source<br />
Volume is always too loud<br />
when I turn on<br />
When Zone 2 or 3 is put into<br />
standby, the main zone is also<br />
switched off<br />
When a USB memory device is<br />
connected, ‘USB’ is not shown<br />
in the network client’s list of<br />
folders<br />
If files on a USB memory<br />
device cannot be played:<br />
If files on a computer cannot<br />
be played<br />
If you cannot connect to a<br />
wired network<br />
If you cannot connect to a<br />
favourite internet radio station<br />
If the internet radio station<br />
sound quality is poor or<br />
broken<br />
< there are no static or impulse interference problems caused by nearby power<br />
equipment switching, e.g., heating or air conditioning control. Switch the<br />
<strong>AVR600</strong> off, wait ten seconds, then switch it on again to clear an operating<br />
problem. Contact your installer if the problem returns or persists.<br />
< there is no direct sunlight shining on the infra-red detector behind the front<br />
panel display.<br />
< the ‘max on volume’ setting is not set too high.<br />
< the ‘zone standby‘ setting in the setup menu is set to LOCAL.<br />
< a USB memory device is connected that conforms to the mass storage class.<br />
< a USB hub is not being used.<br />
< the USB device is formatted in FAT16 or FAT32.<br />
< the USB device does not have multiple partitions.<br />
< the files are in a compatible format.<br />
< the files are in a compatible format.<br />
< the computer is connected via a network and not USB – the <strong>AVR600</strong> USB<br />
port cannot be used for a direct connection to a computer<br />
< the Ethernet cable you are using is correctly connected between the <strong>AVR600</strong><br />
and the network hardware.<br />
< the network is set up for fixed IP addressing and you have the <strong>AVR600</strong> set to<br />
use DHCP.<br />
< the network is set up for DHCP and you have the <strong>AVR600</strong> set to use fixed IP<br />
addressing.<br />
< the station is still broadcasting or is not congested – try again later.<br />
< the radio station does not have a low bit rate (use the INFO key to find this or<br />
look on the OSD).<br />
< the network is not slow or congested.<br />
English<br />
There is radio or television<br />
reception interference<br />
< where the interference is coming from. Switch off each source component in<br />
turn, then any other equipment. Most electronic equipment does generate<br />
low levels of interference.<br />
< try re-arranging cabling from the nuisance source away from other cabling.<br />
< ensure that the cabling used is high quality, specified for its purpose, and is<br />
properly screened.<br />
< if the problem persists, contact your dealer.<br />
E-55
specifications<br />
Continuous power output (20Hz—20kHz at 0.05% THD), per channel<br />
2 channels driven 150W<br />
All channels driven<br />
120W<br />
THD at full rated power
product<br />
guarantee<br />
Worldwide Guarantee<br />
This entitles you to have the unit repaired free of charge, during the first two years after<br />
purchase, at any authorised <strong>Arcam</strong> distributor provided that it was originally purchased<br />
from an authorised <strong>Arcam</strong> dealer or distributor. This is extended by a further three years<br />
(five years total) on the return of your product registration card. The manufacturer can<br />
take no responsibility for defects arising from accident, misuse, abuse, wear and tear,<br />
neglect or through unauthorized adjustment and/or repair, neither can they accept<br />
responsibility for damage or loss occurring during transit to or from the person claiming<br />
under the guarantee.<br />
English<br />
The warranty covers:<br />
Parts and labour costs for two years (or five years total on return of your product<br />
registration card) from the purchase date. After two years (or five years total on return<br />
of your product registration card) you must pay for both parts and labour costs. The<br />
warranty does not cover transportation costs at any time.<br />
Claims under guarantee<br />
This equipment should be packed in the original packing and returned to the dealer from<br />
whom it was purchased, or failing this, directly to the <strong>Arcam</strong> distributor in the country of<br />
residence.<br />
It should be sent carriage prepaid by a reputable carrier – not by post. No responsibility<br />
can be accepted for the unit whilst in transit to the dealer or distributor and customers are<br />
therefore advised to insure the unit against loss or damage whilst in transit.<br />
For further details contact <strong>Arcam</strong> at:<br />
<strong>Arcam</strong> Customer Support Department,<br />
Pembroke Avenue, Waterbeach, CAMBRIDGE, CB25 9QR, England<br />
or via www.arcam.co.uk.<br />
Problems?<br />
If your <strong>Arcam</strong> dealer is unable to answer any query regarding this or any other <strong>Arcam</strong><br />
product please contact <strong>Arcam</strong> Customer Support at the above address and we will do our<br />
best to help you.<br />
On-line registration<br />
You can register your product on-line at www.arcam.co.uk.<br />
Correct disposal of this product<br />
This marking indicates that this<br />
product should not be disposed<br />
with other household waste<br />
throughout the EU.<br />
To prevent possible harm to the<br />
environment or human health from<br />
uncontrolled waste disposal and to<br />
conserve material resources, this product should be<br />
recycled responsibly.<br />
To dispose of your product, please use your local<br />
return and collection systems or contact the retailer<br />
where the product was purchased.<br />
E-57
device code<br />
tables<br />
TV<br />
888 0294<br />
A.R. Systems 0067 0382 0586<br />
0404 0485<br />
Accent 0039 0067 0586<br />
Acoustic Research 1299<br />
Acura 0039<br />
Adcom 0655<br />
Addison 0683 0138<br />
ADL 1247<br />
Admiral 0123 0193 0448<br />
0294<br />
Advent 0906<br />
Adyson 0247 0246<br />
AEA 0067 0586<br />
AEG 0636 1193<br />
Agashi 0246 0294 0247<br />
Aiko 0039 0067 0586<br />
0246 0065 0463<br />
0294 0247<br />
Aim 0067 0586 0783<br />
0238 0736<br />
Aiwa 1535<br />
Akai 0039 0632 0238<br />
0586 0067 0463<br />
0065 0783 0193<br />
0759 0744 0745<br />
0578 0510 0247<br />
0661 0246 0294<br />
0208 0407 0636<br />
1067 0503 1289<br />
1278<br />
Akashi 0890 0039<br />
Akiba 0485 0067 0586<br />
Akira 0448<br />
Akito 0067 0586<br />
Akura 0067 0294 0586<br />
0698 0039 0744<br />
Alaron 0246<br />
Alba 0039 0067 1067<br />
0586 0744 0448<br />
0400 0698 0246<br />
0193 0517 0473<br />
Alkos 0065<br />
All-Tel 0895<br />
Allorgan 0247<br />
Allstar 0067 0586<br />
Amplivision 0247 0400<br />
Amstrad 0039 0067 0294<br />
0463 0586 1067<br />
Anam 0067 0586 0039<br />
0680<br />
Anam National 0067 0586 0680<br />
Andersson 1193 1179<br />
Anglo 0039 0294<br />
Anitech 0039 0294 0067<br />
0586<br />
Ansonic 0400 0067 0586<br />
0039 0698 0404<br />
0193<br />
AOC 0039 0090 0123<br />
0138 0208<br />
Aolingpike 0294<br />
Apex Digital 1247<br />
Apollo 0503<br />
Arc en Ciel 0139<br />
<strong>Arcam</strong> 0246 0247<br />
Ardem 0516 0744 0067<br />
0663 0586<br />
Aristona 0586 0067<br />
Arthur Martin 0193<br />
ASA 0135 0376 0100<br />
Asberg 0067 0586<br />
Asora 0039<br />
Astra 0067 0586<br />
Asuka 0247 0246 0294<br />
ATD 0728<br />
Atlantic 0067 0586 0246<br />
Atori 0039<br />
Auchan 0193<br />
Audiosonic 0039 0067 0404<br />
0850 0139 0586<br />
0744 0745 0247<br />
0400 0294 0516<br />
Audioton 0247 0516 0400<br />
0294<br />
Audioworld 0728<br />
Aumark 0090<br />
Autovox 0247<br />
AWA 0039 0404 0067<br />
0586 0246 0636<br />
0247 0138 0294<br />
1406<br />
Axxent 0039<br />
Axxon 0744<br />
B&D 1247<br />
Baier 0906<br />
Baihe 0039 0294<br />
Baile 0039 0404 0691<br />
Baird 0139 0373 0247<br />
0238 1226<br />
Bang & Olufsen 0595<br />
BaoHuaShi 0294<br />
Baosheng 0039<br />
Barco 0193<br />
Basic Line 0039 0404 0067<br />
0193 0698 0586<br />
0247 0485 1067<br />
Bastide 0247<br />
Bauer 0039<br />
Baur 0039 0067 0542<br />
0225 0586 1535<br />
Bazin 0247<br />
Beaumark 0208<br />
Beijing 0039 0238 0256<br />
0294 0404 0512<br />
0691<br />
Beko 0400 0744 0065<br />
0516 0745 0067<br />
0448 1067 0586<br />
0636 0838<br />
Belson 1221<br />
Bennett 0586 0067<br />
Beon 0067 0586 0448<br />
Berthen 0698<br />
Best 0400<br />
Bestar 0067 0586 0400<br />
0404<br />
Bestar-Daewoo 0404<br />
Binatone 0247<br />
Black Diamond 0850 1067 0586<br />
0783 1193<br />
Black Strip 0065<br />
Blaupunkt 0225 0230 0357<br />
0485 0200<br />
Blue Sky 0067 0586 0698<br />
0744 1067 0517<br />
0745 1939 0485<br />
1221 0838 1393<br />
Boots 0247 0039<br />
Bosch 0357<br />
BPL 0067 0586 0926<br />
Brandt 0139 0655 0365<br />
0373 0590<br />
Brandt<br />
0365<br />
Electronique<br />
Brinkmann 0067 0586 0698<br />
0448 0516<br />
Brionvega 0067 0586<br />
Britannia 0246 0247<br />
Brother 0294<br />
Bruns 0516<br />
BSR 0193<br />
Bush 0039 1067 0067<br />
0744 0698 0193<br />
0404 0728 0294<br />
0517 0238 0247<br />
0586 0808 1289<br />
1278<br />
C-Tech 0926 0921<br />
Caihong 0039<br />
Caishi 0921<br />
Capsonic 0294<br />
Carad 0640 0067 0586<br />
0698 1067<br />
Carena 0485 0067 0586<br />
Carrefour 0100 0067 0586<br />
Carver 0200<br />
Cascade 0039 0067 0586<br />
Casio 0067 0586 0193<br />
Cathay 0067 0586<br />
CCE 0067 0247 0586<br />
Celestial 0850<br />
Centrex 0810 0921<br />
Centrum 1067<br />
Centurion 0067 0586<br />
CGE 0104 0448 0400<br />
0193<br />
Changcheng 0039 0294 0404<br />
0691<br />
Changfei 0039 0404<br />
Changfeng 0294 0783<br />
Changhai 0039<br />
Changhong 0850 0039 0294<br />
0538<br />
Chengdu 0039<br />
Ching Tai 0039<br />
Chun Yun 0039<br />
Chunfeng 0039 0294<br />
Chung Hsin 0138<br />
Chunsun 0039<br />
Cimline 0039<br />
Citizen 0090<br />
City 0039<br />
Clarivox 0067 0448 0586<br />
0100<br />
Clatronic 0067 0400 0744<br />
0294 0586 0247<br />
0039 0636 1193<br />
Clayton 1067<br />
CMS 0246<br />
CMS hightec 0247<br />
Cobolt 0921<br />
Concorde 0039<br />
Condor 0067 0400 0586<br />
0246 0039 0448<br />
0193 0294<br />
Conia 0784 0850<br />
Conrac 0838<br />
Conrad 0067 0586<br />
Conrowa 0039 0294 0728<br />
0783 1200<br />
Contec 0039 0246 0294<br />
0067 0586<br />
Continental 0139 0517<br />
Edison<br />
Cosmel 0039 0067 0586<br />
Crosley 0104 0193<br />
Crown 0039 0742 0067<br />
0400 0516 0586<br />
0448 0517 0744<br />
0636 0745 0238<br />
0683 1067<br />
CS Electronics 0246<br />
Curtis Mathes 0090 0123<br />
Cytronix 1328<br />
D-Vision 0067 0586<br />
Daewoo 0664 0691 0404<br />
1939 0529 0067<br />
0586 0039 0246<br />
0247 1167 0208<br />
0200 0910 0138<br />
0906 0895<br />
Dainichi 0246<br />
Dansai 0067 0586 0294<br />
0065 0246 0039<br />
0247 0238<br />
Dantax 0400 0516 0744<br />
0636 0745<br />
Datsura 0238<br />
Dawa 0039 0067 0586<br />
Daytek 0728 0736 1406<br />
Dayton 0039<br />
Daytron 0039 0404 0067<br />
0586<br />
Dayu 0404 0691<br />
de Graaf 0238 0578 0193<br />
DEC 0890 0921<br />
Decca 0067 0586 0247<br />
1167<br />
Deitron 0067 0586 0404<br />
Denko 0294<br />
Denver 0067 0586 0636<br />
1219 0617<br />
Desmet 0067 0586 0039<br />
Diamant 0067 0586<br />
Diamond 0294 0728 0039<br />
0855 0246 0890<br />
0850<br />
Digatron 0067 0586<br />
Digihome 1179<br />
Digiline 0067 0586 0135<br />
0698<br />
DigiLogic 0067 0586<br />
Digitex 0850<br />
Digitor 0067 0586<br />
DigiX 0910<br />
DiK 0067 0586<br />
Dixi 0039 0067 0586<br />
0247<br />
DL 0921 0810 0067<br />
0617 0895<br />
Domeos 0698<br />
Domland 0424<br />
Dongda 0039<br />
Donghai 0039<br />
Dream Vision 1734<br />
Drean 0067<br />
DSE 0850<br />
DTS 0039<br />
Dual 0247 0373 0067<br />
0586 0382 0424<br />
0193 1167 0661<br />
1179 1067<br />
Dual Tec 0247<br />
Dumont 0100 0247<br />
Dunai 0193<br />
Durabrand 0067 0586 0208<br />
Dux 0067 0586<br />
DVX 0921<br />
Dynatech 0247<br />
Dynatron 0067 0586<br />
e:max 0636<br />
Easy Living 1278 1289<br />
Ecco 0803 0736<br />
ECE 0067 0586<br />
Edison-Minerva 0517<br />
Elbe 0400 0193 0067<br />
0586 0640 0247<br />
Elcit 0193<br />
Electrograph 1785<br />
Elekta 0039 0067 0586<br />
0294<br />
Elfunk 1238 1067<br />
ELG 0067 0586<br />
Elin 0067 0246 0578<br />
0586 0135 0193<br />
0039<br />
Elite 0067 0586<br />
Elta 0039 0294 0246<br />
Emerson 0208 0744 0067<br />
0586 0100 1939<br />
0516 0400 0193<br />
0698<br />
Enzer 0783<br />
Erae 1401<br />
Erres 0067 0586<br />
ESC 0067 0586 0247<br />
Estèle 0193<br />
Ether 0039<br />
Etron 0039 0067 0586<br />
0193 0850<br />
Eurofeel 0294 0247<br />
EuroLine 0067<br />
Euroman 0246 0294 0067<br />
0586 0247 0400<br />
Europa 0067 0586<br />
Europhon 0067 0193 0247<br />
0586 0246<br />
Evesham 1278 1289<br />
Excel 0067 0586<br />
Expert 0193<br />
Exquisit 0067 0586<br />
Fagor 0067 0586<br />
FairTec 1221<br />
Family Life 0067 0586<br />
Feilang 0039<br />
Feilu 0039<br />
Feiyan 0294<br />
Feiyue 0039<br />
Fenner 0404 0039<br />
Ferguson 0067 0139 0655<br />
0365 0373 0590<br />
0586 0065 0683<br />
0138 0578 0473<br />
1067<br />
Fidelity 0193 0246 0542<br />
0067 0586 0294<br />
Filsai 0247<br />
Finlandia 0238 0376 0578<br />
0193 0373<br />
Finlux 0067 0135 0100<br />
0586 0744 0376<br />
0247 0193 0745<br />
0661 0522 0510<br />
0503 0448 0636<br />
0838<br />
Firstar 0039<br />
Firstline 0039 0067 0246<br />
0586 0247 0404<br />
0698 0744 0193<br />
1939 0238 1067<br />
1221 0838 1393<br />
1193 1401<br />
Fisher 0247 0238 0400<br />
0193<br />
Flint 0067 0485 0586<br />
0640 0294<br />
Force 1179<br />
Formenti 0067 0193 0586<br />
0516 0246<br />
Formenti-Phoenix0246<br />
Fortress 0123<br />
Fraba 0067 0586 0400<br />
Friac 0039 0067 0586<br />
0400 0529 0640<br />
Frontech 0193 0294 0247<br />
0039<br />
Fujimaro 0895<br />
Fujitsu 0713 0883 0247<br />
0193 0039 0382<br />
0067 0586<br />
Fujitsu General 0039 0247 0193<br />
Fujitsu Siemens 1328 1289 1278<br />
1193<br />
Funai 0698 0294<br />
Furi 0294<br />
Furichi 0890<br />
Futronic 0294 0890<br />
Future 0067 0586<br />
Galaxi 0067 0586 0193<br />
Galaxis 0400 0448 0067<br />
0586<br />
Galeria 0039<br />
Gateway 1785<br />
GBC 0193 0039 0404<br />
GE 0373 0208 0123<br />
0590 0139 0365<br />
0655<br />
Geant Casino 0193<br />
GEC 0067 0193 0247<br />
0586<br />
Geloso 0039 0193 0404<br />
General 0139<br />
General Electric 0373<br />
General Technic 0039<br />
Genesis 0039 0067 0586<br />
Genexxa 0193 0067 0586<br />
0039<br />
Gericom 0895 1328 1247<br />
0910<br />
Gevalt 1401<br />
Giant 0247<br />
Go Video 0090<br />
Goldfunk 0698<br />
Goldhand 0246<br />
GoldStar 0039 0067 0208<br />
0400 0407 0247<br />
0586 0246 0193<br />
0139 0636 0744<br />
0745 0485<br />
Gooding 0517<br />
Goodmans 0664 1289 1278<br />
0067 1067 0529<br />
0247 0586 0744<br />
0373 0698 1939<br />
0404 0294 0039<br />
0517 0065 0510<br />
0590 0365 0691<br />
0910 0617 1406<br />
Gorenje 0400<br />
Gradiente 0067 0683 0200<br />
0586<br />
Graetz 0193 0744 0067<br />
0586 1193<br />
Granada 0067 0586 0238<br />
0256 0247 0138<br />
0503 0365 0590<br />
0193 0373 0578<br />
Grandin 0067 0586 0039<br />
0193 0640 0744<br />
0745 0698 0404<br />
0485 1067 0895<br />
1221 0910<br />
Gronic 0247 0193<br />
Grundig 0225 0538 1401<br />
0067 0100 0517<br />
0586 0617 0473<br />
0736 0039 0400<br />
0208 1406 0373<br />
Grunkel 1193<br />
H&B 0838<br />
Haaz 0736<br />
Haier 0728 0921 0294<br />
Haihong 0039<br />
Haiyan 0294<br />
Halifax 0294 0246 0247<br />
Hallmark 0208<br />
Hammerstein 0294 0090<br />
Hampton 0246 0247<br />
Hankook 0208<br />
Hanseatic 0067 0586 0529<br />
0193 0691 0424<br />
0664 0400 0039<br />
0247 0407 0744<br />
0838 0516<br />
Hantarex 0039 0067 0586<br />
Hantor 0067 0586<br />
Harsper 0895<br />
Harwa 0803 1226 1299<br />
58
Harwood 0039 0067 0586<br />
0517<br />
Hauppauge 0067 0586<br />
Havermy 0123<br />
HCM 0039 0067 0586<br />
0247 0448 0294<br />
Hedzon 0586 0067<br />
helios 0895<br />
Hema 0247 0039<br />
Hifivox 0139<br />
Higashi 0246<br />
Highline 0294 0067 0586<br />
Hinari 0039 0238 0067<br />
0586 0193 0473<br />
0517 0294<br />
Hisawa 0485 0640 0744<br />
HISense 1393 0238 0039<br />
0538 0783 1200<br />
1238 0810 0586<br />
Hitachi 0193 0208 1255<br />
0039 0608 0135<br />
0138 0503 0373<br />
0247 0139 0511<br />
0529 0067 0538<br />
0586 0578 0664<br />
0774 1067 1167<br />
1200 0522 1511<br />
0542 0510 1606<br />
1179<br />
Hitachi Fujian 0138<br />
Hitsu 0039 0640 0485<br />
Höher 0744 0895<br />
Home Electronics 0636<br />
Hongmei 0039 0123 0294<br />
Hongyan 0294<br />
Hornyphon 0067 0586<br />
Hoshai 0485<br />
Hua Tun 0039<br />
Huafa 0039<br />
Huanghaimei 0039<br />
Huanghe 0039<br />
Huanglong 0039<br />
Huangshan 0039 0294<br />
Huanyu 0246 0404 0294<br />
Huaqiang 0294<br />
Huari 0294<br />
Hugoson 0920 1247<br />
Hygashi 0247 0246<br />
Hyper 0039 0246 0247<br />
Hypson 0067 0294 0586<br />
0744 0745 0247<br />
0485 1067 0698<br />
0516<br />
Hyundai 0067 0895 0586<br />
0736 0890 0783<br />
0906<br />
Iberia 0067 0586<br />
ICE 0247 0294 0067<br />
0039 0586 0246<br />
Ices 0246<br />
Ict 0067 1167 0586<br />
IISonic 1406<br />
Iiyama 1247 0920<br />
Imperial 0067 0104 0193<br />
0400 0448 0586<br />
Imperial Crown 0039 0294 0404<br />
0691<br />
Indiana 0067 0586<br />
InFocus 0782 1194<br />
Ingelen 0193 0517 0640<br />
0744<br />
Ingersoll 0039<br />
Inno Hit 0039 0067 0586<br />
0247 1193<br />
Innova 0067<br />
Innovation 0067 0586<br />
Innowert 0895 1328<br />
inotech 0803 0850<br />
Interactive 0067 0586 0542<br />
0357 0193 0400<br />
0139<br />
Interbuy 0039 0067 0294<br />
0542 0586<br />
Interfunk 0067 0193 0586<br />
0542 0357 0400<br />
0139 0230<br />
Internal 0067 0586 0529<br />
0404 1939<br />
International 0246<br />
Intervision 0067 0247 0485<br />
0294 0407 0516<br />
0400 0424 0517<br />
0193 0039 0586<br />
Irradio 0039 0067 0586<br />
IRT 0728<br />
Isukai 0067 0586 0485<br />
ITC 0247<br />
ITS 0067 0294 0246<br />
0039 0586<br />
ITT 0193 0510 0578<br />
0503 0376 0238<br />
0640<br />
ITT Nokia 0578 0193 0503<br />
0510 0376 0238<br />
0636 0640 0661<br />
ITV 0294 0067 0586<br />
0404<br />
IX 0907<br />
Jean 0039<br />
JEC 0065<br />
Jialicai 0039 0294<br />
Jinfeng 0238 0256<br />
Jinque 0039 0294<br />
Jinta 0039 0294<br />
Jinxing 0039 0586 0067<br />
0294 0728<br />
JMB 0067 0529 0664<br />
0404 0586 0473<br />
Jocel 0742<br />
Jubilee 0586<br />
Juhua 0294<br />
JVC 0683 0761 0538<br />
0636 0713 0448<br />
0123 0680<br />
Kaige 0039 0294<br />
Kaisui 0039 0246 0067<br />
0247 0586 0485<br />
Kambrook 0407<br />
Kamp 0246<br />
Kanghua 0926<br />
Kangli 0039 0294 0404<br />
0691<br />
Kangyi 0039 0294<br />
Kapsch 0193<br />
Karcher 0067 0586 0400<br />
0640 0193 0294<br />
0808 0744 0636<br />
Kathrein 0586 0067<br />
Kawasho 0246<br />
KB Aristocrat 0193<br />
Kendo 0067 0640 0586<br />
0193 0542 0400<br />
0407 1067 0516<br />
Kennedy 0193<br />
Kennex 1067<br />
Kenwood 0135<br />
Khind 0926 0736<br />
KIC 0247<br />
Kingsley 0246<br />
Kioto 0736 0586<br />
Kiton 0586 0067 0698<br />
KLL 0067<br />
Kneissel 0067 0400 0640<br />
0404 0529 0586<br />
Kolin 0138<br />
Kolster 0067 0586<br />
Kongque 0039 0294<br />
Konichi 0039<br />
Konka 0067 0586 0744<br />
0448 0617 0784<br />
Kontakt 0517<br />
Korpel 0067 0586<br />
Korting 0400<br />
Kosmos 0067 0586<br />
Kotron 0294<br />
Koyoda 0039<br />
Kreisen 0906<br />
KTV 0247<br />
Kuaile 0039 0294<br />
Kuba 0193<br />
Kuba Electronic 0193<br />
Kulun 0039<br />
Kunlun 0238 0256 0294<br />
0404 0691<br />
Kyoshu 0448 0294<br />
Kyoto 0193 0246 0247<br />
L&S Electronic 0895 0744<br />
LaSAT 0516 0400<br />
Lavis 1067 0067 0193<br />
Leader 0039<br />
Lecson 0067 0586<br />
Legend 0039<br />
Lenco 0067 0039 0193<br />
0404 0586 0617<br />
1067<br />
Lenoir 0039<br />
Levis Austria 0067 0586<br />
Lexsor 1226<br />
Leyco 0067 0294 0586<br />
LG 0067 0208 0400<br />
0039 0407 1295<br />
0586 0247 0744<br />
0246 0674 0193<br />
0090 0138 0636<br />
0139 0728 0745<br />
1667 1221<br />
Liesenk & Tter 0067 0357 0586<br />
Liesenkotter 0067 0357 0586<br />
Lifetec 0067 0039 0404<br />
0698 0542 1067<br />
1167 0586 0294<br />
0713 1278 1289<br />
0744<br />
Lloyd’s 0039<br />
Local Malaysia 0728<br />
TV<br />
Lodos 1067 1179<br />
Loewe 0542 0663 0820<br />
0067 0586 0400<br />
Logik 0090 0728 0803<br />
0039 0294 0910<br />
1247 1067<br />
Logix 0698<br />
Longjiang 0294<br />
Luma 0067 0193 0586<br />
0404 0039<br />
Lumatron 0067 0586 0193<br />
0247 0294<br />
Lux May 0067 0039 0586<br />
Luxor 1193 0510 0522<br />
0238 0578 0193<br />
0376 0503 1067<br />
0247 0661<br />
LXI 0208<br />
Madison 0067 0586<br />
Magnadyne 0193<br />
Magnafon 0246<br />
Magnavox 0067 0586 0736<br />
0810<br />
Magnum 0744 0067 0586<br />
0745 1319<br />
Mandor 0294<br />
Manesth 0067 0247 0586<br />
0294 0065 0193<br />
Manhattan 0067 0906 0586<br />
0698 1067 0193<br />
0808<br />
Marantz 0067 0586<br />
Mark 0067 0586 0247<br />
0246 0404 0039<br />
0744 0745<br />
Master’s 0529 0067<br />
Mastro 0810 0728<br />
Masuda 0039 0294 0067<br />
0247 0586<br />
Matsui 0039 0067 0586<br />
0065 0517 0238<br />
0247 0473 0463<br />
0485 0193 0225<br />
0365 0744 1067<br />
Matsushita 0680<br />
Matsuviama 0617<br />
Maxam 0294<br />
Maxdorf 0803<br />
Maxent 1785<br />
MCE 0039<br />
Meck 0921 0728<br />
Mediator 0067 0586<br />
Medion 0067 0698 0744<br />
1067 0838 0586<br />
0542 1167 0728<br />
1278 1289 0910<br />
1319<br />
Megas 0640<br />
Megatron 0208<br />
MEI 1067 0067 0586<br />
Meile 0294<br />
Melectronic 0039 0376 0067<br />
0542 0139 0373<br />
0193 0135 0247<br />
0404 0510 0522<br />
0246 0586 0664<br />
0225 0691 0744<br />
Memorex 0039 1067 0208<br />
0680 0090<br />
Memphis 0039<br />
Mercury 0067 0039 0586<br />
Mermaid 0067<br />
Merritt 0578 0193<br />
Metronic 0655<br />
Metz 0418 0477 0776<br />
1193 0225 0067<br />
0586 0617 0698<br />
1067 1563<br />
MGA 0208 0067 0586<br />
Micromaxx 0067 0586 0698<br />
1067 0838<br />
Microstar 0838<br />
MicroTEK 0850<br />
Mikomi 1179<br />
Minato 0067 0586<br />
Minerva 0100 0517 0225<br />
0138<br />
Minoka 0067 0586<br />
Mitsubishi 0138 0123 0542<br />
0067 0208 0586<br />
0238 1067<br />
Mitsuri General 0193<br />
Mivar 0246 0400 0639<br />
0247<br />
Monaco 0039<br />
Morgan’s 0067 0586<br />
Motorola 0123<br />
MTC 0090 0400 0542<br />
0193 0246<br />
MTlogic 0744<br />
Mudan 0039 0238 0256<br />
0294<br />
Multitec 0067 0586 0516<br />
0698 1067<br />
Multitech 0039 0246 0516<br />
0067 0247 0400<br />
0586 0294<br />
Murphy 0246 0193<br />
Musikland 0067 0586<br />
MyCom 1406 0208<br />
Myryad 0586 0067<br />
NAD 0208 0193<br />
Naiko 0067 0636 0586<br />
Nakimura 0404 0067 0586<br />
Nanbao 0039 0294<br />
Nansheng 0294<br />
Naonis 0193<br />
NAT 0256<br />
National 0256 0238 0538<br />
NEC 0200 0617 1200<br />
0208 0039 0485<br />
0404 0247 0067<br />
0586 0294 0538<br />
1734 0529 0683<br />
0691<br />
Neckermann 0067 0400 0586<br />
1535 0230 0193<br />
0357 0448 0247<br />
0542<br />
NEI 0067 0586 0193<br />
Neovia 0895 1401 0906<br />
1406<br />
Netsat 0067 0586<br />
Neufunk 0067 0039 0586<br />
0640 0744<br />
New Tech 0067 0039 0586<br />
0373 0247<br />
Newave 0039 0208 0123<br />
Nicamagic 0246<br />
Nikkai 0065 0067 0586<br />
0246 0247 0294<br />
0039<br />
Nikkei 0744<br />
Nikko 0208<br />
Nishi 0512<br />
Noblex 0067 0294 0512<br />
Nobliko 0100 0246<br />
Nogamatic 0139<br />
Nokia 0193 0503 0510<br />
0578 0636 0522<br />
0661 0238 0404<br />
0376 0640 0139<br />
Nordic 0247<br />
Nordmende 0139 0744 0921<br />
0373 0590 0225<br />
0067 0586 0365<br />
0193 1289 1278<br />
Norfolk 0193<br />
Normerel 0067 0586<br />
Novak 0067 0586<br />
Novatronic 0067 0135 0404<br />
0586<br />
NU-TEC 0485 0728<br />
Nurnberg 0193<br />
Oceanic 0193 0238 0503<br />
0578 0510<br />
Odeon 0294<br />
Okano 0400 0067 0586<br />
0294 0039<br />
Olidata 1406<br />
Omega 0294<br />
Omni 0810 0921 0728<br />
Onwa 0632 0463<br />
Opera 0067 0586<br />
Optimus 0680<br />
Optonica 0123<br />
Orbit 0067 0586<br />
Orion 0067 0473 0586<br />
0744 0039 0294<br />
0910 1226<br />
Orline 0067 0586<br />
Ormond 0698 1067 0067<br />
0586<br />
Osaki 0247 0294 0067<br />
0404 0586<br />
Osio 0067 0586<br />
Osume 0067 0586<br />
Otto Versand 1535 0067 0247<br />
0373 0123 0542<br />
0586 0225 0139<br />
0256 0039<br />
Pacific 0067 0586 1167<br />
0744 1067 0473<br />
Pael 0246<br />
Palladium 0400 0067 0448<br />
0744 1167 1535<br />
0230 0586 0357<br />
0193 0247<br />
Palsonic 0294 0803 0067<br />
0247 0407 0728<br />
0586 0448 0808<br />
1226<br />
Panama 0039 0247 0294<br />
0246 0067 0586<br />
Panasonic 0680 0256 0138<br />
1340 0067 0586<br />
0193 0238 0538<br />
0926 0578 0883<br />
0208 0090<br />
Panavision 0067 0586<br />
Panda 0039 0810 0238<br />
0256 0294 0736<br />
0921 0538 0728<br />
Papouw 0067 0586<br />
Pathe Cinema 0193 0246 0400<br />
Pathe Marconi 0139<br />
Pausa 0039<br />
Peng Sheng 0921<br />
Penney 0208 0090<br />
Perdio 0193 0067 0246<br />
0586<br />
Perfekt 0067 0586<br />
Philco 0067 0104 0448<br />
0586 0193 0400<br />
0511 0208<br />
Philex 0193<br />
Philharmonic 0247<br />
Philips 0067 0586 0373<br />
0208 0138 0404<br />
0802 0039 0230<br />
Phocus 1319 0744<br />
Phoenix 0067 0586 0400<br />
0516 0193 0246<br />
Phonola 0067 0586 0246<br />
Pilot 0586 0067 0742<br />
0736<br />
Pioneer 0790 0067 0139<br />
0200 0193 0586<br />
1290 0400 0373<br />
0516 0542<br />
Pionier 0400 0516<br />
Plantron 0067 0586 0294<br />
0039<br />
Playsonic 0744 0067 0247<br />
0745<br />
Polaroid 0895<br />
Policom 0139 0193 0100<br />
0104<br />
Poppy 0039<br />
Portland 0404 1939<br />
Powerpoint 0517 0067 0586<br />
0728<br />
Precision 0247<br />
Premier 0039 0294<br />
President 0890<br />
Prima 0039 0294 1299<br />
Princess 0728<br />
Prinston 1067<br />
Profex 0039 0193<br />
Profi 0039<br />
Profitronic 0067 0586<br />
Proline 0067 0586 0655<br />
0664 1406<br />
Prosonic 0067 0586 0400<br />
0404 0698 0744<br />
0246 0247<br />
Protech 0039 0067 0586<br />
0247 0294 0448<br />
0698 0193 0516<br />
1067<br />
Proton 0208 0039 0674<br />
Provision 0529 0067 0586<br />
1067 0744<br />
PVision 1221 0906<br />
Pye 0067 0586 0404<br />
Pymi 0039<br />
Qingdao 0238 0256 0294<br />
Quasar 0680 0895 0039<br />
Quelle 0067 1535 0100<br />
0104 0139 0542<br />
0247 0357 0135<br />
0698 0586 0225<br />
0230 0294 1067<br />
0376 0039<br />
R-Line 0067 0586 0193<br />
Radialva 0139 0193 0067<br />
0586<br />
Radiola 0067 0586 0247<br />
Radiomarelli 0067 0586<br />
RadioShack 0067 0586 0208<br />
Radiotone 0039 0067 0586<br />
0400 0448 0698<br />
0294 1067<br />
Rank 0100<br />
Rank Arena 0632 0783<br />
RBM 0100<br />
RCA 0090 0648 0123<br />
0655 0208 0590<br />
0365 0373 0783<br />
Realistic 0208<br />
Recor 0067 0448 0586<br />
Rectiligne 0067 0586<br />
Rediffusion 0578 0376<br />
Redstar 0067 0586<br />
Reflex 0067 0586 1067<br />
0698<br />
Relisys 0895 0906 0907<br />
1328<br />
Reoc 0744 0664 1939<br />
Revox 0067 0586 0400<br />
Rex 0193 0294<br />
59
TV (cont.)<br />
RFT 0400 0294 0067<br />
0586 0516<br />
Rhapsody 0246<br />
Ricoh 0067 0586<br />
Rinex 0803 0448<br />
Roadstar 0039 1067 0294<br />
0448 0067 0586<br />
0744 0698 1219<br />
Rodex 0067 0586<br />
Rover 0907<br />
Rowa 0067 0294 0728<br />
0039 0247 0742<br />
0246 0617 0586<br />
Royal Lux 0400 0365<br />
Rukopir 0586 0067<br />
Saba 0139 0655 0193<br />
0590 0365 0373<br />
0578 0680 0744<br />
Sagem 0640 0485 0860<br />
1343 0648<br />
Saige 0039<br />
Saisho 0039 0294 0247<br />
0193<br />
Saivod 0067 0586 1193<br />
0698 0742 1067<br />
Sakaï 0193<br />
Sakyno 0485<br />
Salora 0193 0578 0238<br />
0510<br />
Salsa 0365<br />
Sampo 1785 0039 0123<br />
0208 0680<br />
Samsung 0090 0648 0674<br />
0512 0617 0796<br />
0067 0208 0586<br />
1279 0039 0123<br />
1265 0247 0400<br />
0294 0246 0238<br />
0193 0256 0655<br />
Sandra 0246 0247<br />
Sanjian 0294<br />
Sansui 0067 0759 0586<br />
0736 0632 0485<br />
0783 1401<br />
Santon 0039<br />
Sanyo 0238 1238 0400<br />
0246 0247 0039<br />
0538 0193 0067<br />
0138 0586 0516<br />
0200<br />
Sanyuan 0039 0123<br />
Save 0067 0586<br />
SBR 0067 0586<br />
Schaub Lorenz 0578 0744 0636<br />
0516 0404 1221<br />
Schneider 0067 1167 0586<br />
0698 0424 0382<br />
0373 0247 1067<br />
0193 0744 1939<br />
0100<br />
Scotch 0208<br />
Scotland 0193<br />
Scott 1219 0208<br />
Sears 0208<br />
Seaway 0664<br />
Seelver 0586 1067 0067<br />
SEG 0067 0247 0586<br />
0294 1067 0698<br />
0517 0039 0193<br />
0664 0246 1193<br />
1939 0744<br />
SEI 1535 0193 0067<br />
0586<br />
Sei-Sinudyne 1535 0067 0586<br />
Seitech 1247<br />
Seleco 0193 0294 0376<br />
Sencora 0039<br />
Sentra 0065 0039<br />
Serie Dorada 0208<br />
Serino 0640 0485 0246<br />
0123<br />
Shancha 0294<br />
Shanghai 0039 0238 0256<br />
0294<br />
Sharp 0123 0039 1223<br />
1423 0683 0680<br />
0230 0790 1193<br />
Shen Ying 0039<br />
Shencai 0039 0294<br />
Sheng Chai 0039<br />
Sheng Chia 0039 0123<br />
Shenyang 0039 0294 0783<br />
Sherwood 0039<br />
Shintoshi 0067 0586<br />
Shivaki 0067 0586 0473<br />
0404 0208<br />
Show 0448 0039<br />
Siam 0067 0586<br />
Siarem 0193<br />
Siemens 0067 0225 0230<br />
0357 0586<br />
Siera 0067 0586 0617<br />
Siesta 0400<br />
Silva 0067 0586 0246<br />
Silver 0067 0485 0586<br />
0745 0193<br />
SilverCrest 1067 0067 0586<br />
Singer 0039 0067 0586<br />
0365 0193<br />
Sinotec 0803<br />
Sinudyne 0193 1535 0067<br />
0586<br />
Sky 0067 0910 0208<br />
0586<br />
SKY Brasil 0910<br />
Skymaster 0135<br />
Skysonic 0783<br />
Skyworth 0067 0586 0039<br />
0294 0728 0783<br />
Sliding 0895 0910<br />
SLX 0698<br />
Smaragd 0517<br />
Soemtron 0895 1328<br />
Solavox 0193 0578 0067<br />
0586<br />
Songba 0039<br />
Soniko 0067 0586<br />
Sonitron 0238 0400 0247<br />
Sonneclair 0067 0586<br />
Sonoko 0039 0067 0586<br />
0294 0247<br />
Sonolor 0193 0238 1535<br />
0578<br />
Sontec 0067 0586 0400<br />
0039<br />
Sony 1535 0104 1681<br />
0680 0683 1781<br />
0383 0067 0586<br />
0123 0200<br />
Sound & Vision 0404 0067 0586<br />
Soundesign 0208<br />
Soundwave 0067 0448 0586<br />
0745<br />
Sowa 0090 0256 0208<br />
Soyea 0803<br />
Spectra 0039<br />
Ssangyong 0039<br />
Staksonic 0039<br />
Standard 0039 0067 0247<br />
0586 1067 0404<br />
Starlite 0039 0193 0067<br />
0586 0294<br />
Stern 0193 0294<br />
Strato 0067 0586 0294<br />
0039<br />
Strong 1193 1179 1067<br />
0067 0586<br />
Stylandia 0247<br />
Sunic Line 0067 0586<br />
Sunkai 0485 0640 0067<br />
0586 0517 0895<br />
Sunstar 0067 0586 0039<br />
0294<br />
Sunwatt 0485<br />
Sunwood 0067 0586 0039<br />
Superla 0246 0247<br />
SuperScan 0123<br />
Supersonic 0238 0586 0728<br />
0294 0485<br />
SuperTech 0039 0246 0067<br />
0586<br />
Supra 0208 0404 0039<br />
Susumu 0365<br />
Sutron 0039<br />
SVA 0617 0895<br />
Swisstec 0910<br />
Sydney 0246 0247<br />
Synco 0090 0123 0208<br />
Sysline 0067 0586<br />
Sytong 0246<br />
T+A 0477<br />
Tacico 0208 0039<br />
Tai Yi 0039<br />
Taishan 0039 0404<br />
Tandberg 0139 0193<br />
Tandy 0123 0247 0193<br />
Targa 1401<br />
Tashiko 0247 0680 0200<br />
0246 0193<br />
Tatung 0039 0067 0586<br />
0090 0247 1401<br />
1289 1278 1221<br />
TCL 0736 0728<br />
TCM 0744 1319 0838<br />
Teac 0039 0728 0067<br />
0542 0294 1067<br />
0448 0586 0485<br />
0742 0698 0247<br />
0736 1939 0208<br />
0200 0744 1179<br />
1785<br />
TEC 0247 0039 0365<br />
0067 0586 0193<br />
Tech Line 0067 0586 0698<br />
1193<br />
Tech Lux 1219<br />
Technics 0680<br />
TechniSat 0067 0586 0193<br />
Technisson 0744 1319<br />
Technosonic 0067 0586<br />
Techwood 1193<br />
Tecnimagen 0586<br />
Teco 0039 0123 0208<br />
0294 0683<br />
Tedelex 0247 0448 0636<br />
0039 0736 0238<br />
0728 0617 0921<br />
0067 0586<br />
Teiron 0039<br />
Teknika 0090<br />
Tele System 0906<br />
Teleavia 0139 0373<br />
Telecor 0067 0586 0193<br />
0247 0424<br />
Telefunken 0655 0104 0590<br />
0139 0617 0365<br />
0728 0373 0742<br />
0850 0926 0784<br />
0067 0586 0516<br />
0744 0376<br />
Telefusion 0067 0586<br />
Telegazi 0067 0193 0294<br />
0586<br />
Telemeister 0067 0586<br />
Telesonic 0067 0586<br />
Telestar 0039 0067 0586<br />
Teletech 0039 0067 0586<br />
0698 1067<br />
Teleton 0247 0193<br />
Televideon 0193 0246<br />
Teleview 0067 0586<br />
Tempest 0039 0067 0586<br />
0294<br />
Tennessee 0067 0586<br />
Tensai 0067 0586 0247<br />
0039 0135 0404<br />
0407 0745 0193<br />
1067<br />
Tenson 0039<br />
Tesla 0067<br />
Tevion 1278 1328 0067<br />
1289 0586 0838<br />
0698 1167 0744<br />
1067 1319<br />
Texet 0246 0247 0404<br />
0039<br />
Thomson 0139 0655 0590<br />
0373 0365 0067<br />
0586 0246<br />
Thorn 0065 0138 0067<br />
0139 0104 0373<br />
1535 0529 0542<br />
0586 0365 0404<br />
0100<br />
Thorn-Ferguson 0138 0373 0139<br />
0365 0529 0065<br />
Tiane 0123<br />
Tiny 1226 1299<br />
TMK 0208<br />
Tobo 0039 0294<br />
Tokai 0067 0586 0698<br />
0193 0247 0404<br />
0039 1067<br />
Tokaido 1067<br />
Tokyo 0246 0065<br />
Tongguang 0294<br />
Tongtel 0810 0617<br />
Topline 1067 0698<br />
Toshiba 0538 0090 0680<br />
1538 0039 0065<br />
0123 1734 1194<br />
1319 0100 1295<br />
0744 0294 0247<br />
0139 0225 0648<br />
0674 0728 0067<br />
1193<br />
Towada 0247<br />
Toyoda 0039 0294<br />
Trakton 0039 0294 0247<br />
Trans Continens 0698 0247 1067<br />
0067 0586 0516<br />
TRANScontinents<br />
0895<br />
Transonic 0067 0728 0586<br />
0742 0485 0617<br />
0542 0294 0448<br />
0039<br />
Transtec 0246<br />
Triad 0067 0586<br />
Trident 0247<br />
Tristar 0294<br />
Triumph 0376 0586 0067<br />
Tuntex 0039<br />
TVTEXT 95 0586<br />
Uher 0067 0586 0404<br />
0448 0516 0400<br />
0510<br />
Ultravox 0404 0246 0193<br />
0067 0586<br />
Unic Line 0067 0586 0503<br />
0485<br />
United 0744 0067 0745<br />
0586 1067 0617<br />
Universal 0744 0067 0586<br />
Universum 0067 0376 0104<br />
0135 0225 0294<br />
0503 0400 0522<br />
0510 0230 0448<br />
0542 0100 0193<br />
0586 0357 1535<br />
0698 0247 0139<br />
0661 0039 1067<br />
0200 1193 1179<br />
0648<br />
Univox 0067 0586 0193<br />
Utax 0193<br />
V7 Videoseven 1785 0208 0910<br />
1406 1247<br />
Vestel 0067 0193 0247<br />
0586 0698 1067<br />
1193<br />
Vexa 0039 0067 0586<br />
Victor 0683 0680<br />
Videocon 0538<br />
Videologic 0246<br />
Videologique 0246 0247<br />
VideoSystem 0067 0586<br />
Videotechnic 0246 0247 0404<br />
Videoton 0193<br />
Vidtech 0208<br />
Viewpia 0906<br />
ViewSonic 1785<br />
Visiola 0246<br />
Vision 0067 0294 0586<br />
0247<br />
Vortec 0067 0586<br />
Voxson 0193 0208 0067<br />
0586 0448<br />
Waltham 0247 0448 0067<br />
0586 0698 0139<br />
1067 0193 0473<br />
Wards 0208<br />
Warumaia 0404 0691<br />
Watson 0067 1067 1278<br />
1289 0586 0193<br />
0039 0698 0424<br />
1406 0357<br />
Watt Radio 0193 0246<br />
Wega 0067 0586<br />
Wegavox 0039 0067 0586<br />
Weipai 0039<br />
Welltech 0744<br />
Weltblick 0067 0586 0247<br />
Westinghouse 0920<br />
Weston 0067 0586<br />
Wharfedale 0067 0926 0586<br />
White<br />
Westinghouse<br />
0067 0246 0586<br />
1939<br />
Windsor 0698 1067<br />
Windy Sam 0586<br />
Wintel 0744<br />
World-of-Vision 0910 0920 0895<br />
1319 1328 0907<br />
1247<br />
Worldview 0485<br />
X-View 1221<br />
Xenius 0664 0691<br />
Xiahua 0039 0294 0728<br />
0803<br />
Xianghai 0039<br />
Xiangyang 0294<br />
Xihu 0294<br />
Xingfu 0039<br />
Xinghai 0294<br />
Xingyu 0039<br />
XLogic 0728 0890<br />
Xoro 1226 1247<br />
Xrypton 0067 0586<br />
Yamaha 0680 1606<br />
Yamishi 0485 0067 0586<br />
0247<br />
Yingge 0039<br />
Yokan 0067 0586<br />
Yoko 0067 0247 0294<br />
0586 0039 0400<br />
0246<br />
Yonggu 0039<br />
Yousida 0039<br />
Yuhang 0039<br />
Zanussi 0247<br />
Zenith 1939 0208 1295<br />
Zhuhai 0039 0404<br />
Zonda 0728<br />
60
VCR<br />
Accent 0102<br />
Admiral 0078<br />
Adventura 0030<br />
Adyson 0102<br />
Aiko 0308<br />
Aim 0308 0672 0378<br />
Aiwa 0030 0378 0382<br />
0067 0772 1167<br />
0062<br />
Akai 0067 0136 0345<br />
0672 0382 0270<br />
0378<br />
Akashi 0102<br />
Akiba 0102<br />
Akura 0102<br />
Alba 0308 0102 0382<br />
0030 0345 0378<br />
0111<br />
Allorgan 0270<br />
Allstar 0111<br />
America Action 0308<br />
Amstrad 0030 0308 0102<br />
Anam 0067 0256 0270<br />
0308<br />
Anitech 0102<br />
Ansonic 0030<br />
Aristona 0111<br />
ASA 0067 0111<br />
Asha 0270<br />
Asuka 0102 0067 0111<br />
0030<br />
Audiosonic 0308<br />
Audiovox 0067 0308<br />
AVP 0382 0030<br />
AWA 0067 0308 0672<br />
0073<br />
Baird 0136 0308 0134<br />
0030<br />
Basic Line 0308 0102 0134<br />
Beaumark 0270<br />
Beko 0134<br />
Bell & Howell 0134<br />
Bestar 0308<br />
Black Diamond 0672 0308<br />
Black Panther 0308<br />
Blaupunkt 0256 1592 0111<br />
Blue Sky 0067 0378 0102<br />
0382 0308 0030<br />
0510 0672 1167<br />
Bondstec 0102<br />
Brandt 0350<br />
Brinkmann 0378<br />
Broksonic 0378<br />
Bush 0102 0308 0345<br />
0382 0030 0378<br />
0111 0672 0772<br />
Calix 0067<br />
Carena 0111<br />
Carrefour 0075<br />
Carver 0111<br />
Casio 0030<br />
Cathay 0308<br />
CCE 0102 0308<br />
CGE 0030<br />
Cimline 0102<br />
Cineral 0308<br />
CineVision 1167<br />
Citizen 0067 0308<br />
Clatronic 0102 0030<br />
Colt 0102<br />
Combitech 0382<br />
Condor 0308<br />
Craig 0067 0102 0270<br />
Crown 0067 0308 0102<br />
0510<br />
Cybernex 0270<br />
Cyrus 0111<br />
Daewoo 0308 0672 0667<br />
1167 0075 0378<br />
0382<br />
Dansai 0102 0308<br />
Dantax 0382<br />
Daytron 0308<br />
de Graaf 0072 0196 0111<br />
0134 0078<br />
Decca 0030 0111 0097<br />
0378 0382<br />
Deitron 0308<br />
Denko 0102<br />
Denon 0072<br />
Diamant 0067<br />
Diamond 0308<br />
Digitor 0672<br />
DSE 0672<br />
Dual 0111 0308 0030<br />
0378<br />
Dumont 0030 0111 0134<br />
Durabrand 0672<br />
Dynatech 0030<br />
Elbe 0308<br />
Elcatech 0102<br />
Electrohome 0067<br />
Electrophonic 0067<br />
Elin 0270<br />
Elsay 0102<br />
Elta 0102 0308<br />
Emerex 0062<br />
Emerson 0030 0102 0067<br />
0075 0073 1167<br />
0308<br />
ESC 0308 0270<br />
EuroLine 0378<br />
Ferguson 0350 0030 0308<br />
Fidelity 0030 0102 0270<br />
0462 0382<br />
Finlandia 0134 0111 0072<br />
0196 0030 0078<br />
0067 0073 0136<br />
0256<br />
Finlux 0030 0111 0134<br />
0072<br />
Firstline 0102 0378 0073<br />
0067 0075 0072<br />
0308 1167<br />
Fisher 0134<br />
Flint 0378<br />
Frontech 0102<br />
Fujitsu 0030<br />
Fujitsu General 0067<br />
Funai 0030<br />
Galaxi 0030<br />
Galaxis 0308<br />
Garrard 0030<br />
GE 0350 0078 0270<br />
GEC 0111<br />
General Electric 0067<br />
General Technic 0378<br />
Genexxa 0134<br />
Go Video 0462 1167<br />
Goldhand 0102<br />
GoldStar 0067 0510 0030<br />
1167<br />
Goodmans 0030 0102 0270<br />
0308 0067 0111<br />
0378 0667 0382<br />
0672<br />
GPX 0067<br />
Gradiente 0030<br />
Graetz 0134 0270<br />
Granada 0134 0078 0111<br />
0270 0067 0256<br />
0072 0030<br />
Grandin 0102 0067 0030<br />
0308<br />
Grundig 0270 0377 0111<br />
0256 0350 0378<br />
0102 0382 0772<br />
Haaz 0378<br />
Hanimex 0382<br />
Hanseatic 0067 0308 0111<br />
Harley Davidson 0030<br />
Harman/Kardon 0111<br />
Harwood 0102<br />
HCM 0102<br />
Hinari 0102 0382 0308<br />
0270<br />
Hisawa 0382<br />
Hischito 0075<br />
Hitachi 0072 0196 0030<br />
0270 0111 0134<br />
Höher 0308 0672<br />
Hornyphon 0111<br />
Hughes Network 0072<br />
Systems<br />
Hypson 0102 0308 0382<br />
0030 0067 0510<br />
Imperial 0030 0270<br />
Ingersoll 0270<br />
Inno Hit 0270 0308 0102<br />
Interbuy 0067 0102<br />
Interfunk 0111 0134<br />
Internal 0308 0667<br />
International 0308 0067<br />
Intervision 0030 0308 0067<br />
0378<br />
Irradio 0102 0067 0111<br />
1167<br />
ITT 0136 0134 0270<br />
ITT Nokia 0078<br />
ITV 0308 0067<br />
JMB 0382 0378<br />
Joyce 0030<br />
JVC 0097<br />
Kaisui 0102<br />
Kambrook 0067<br />
Karcher 0308<br />
KEC 0067 0308<br />
Kendo 0136 0345 0378<br />
0102 0067 0308<br />
Kenwood 0097<br />
KIC 0030<br />
Kioto 0378<br />
KLH 0102<br />
Kneissel 0382 0378 0067<br />
0308<br />
Kodak 0067<br />
Kolster 0378<br />
Korpel 0102<br />
Kyoto 0102<br />
Lenco 0308<br />
Leyco 0102<br />
LG 0067 0510 0030<br />
0308 1167<br />
Lifetec 0378<br />
Lloyd’s 0030<br />
Loewe 0111 1592 0256<br />
0067<br />
Logik 0270 0102 0136<br />
Lumatron 0308<br />
Lux May 0102<br />
Luxor 0136 0073 0102<br />
0134 0078 0345<br />
LXI 0067<br />
Magnasonic 0308<br />
Magnavox 0111 0030 0672<br />
Magnin 0270<br />
Magnum 0672<br />
Manesth 0102 0075 0111<br />
Marantz 0111<br />
Mark 0308 0030<br />
Marta 0067<br />
Mastec 0672<br />
Master’s 0308<br />
Matsui 0378 0067 0270<br />
0382 0030 0772<br />
Mediator 0111<br />
Medion 0378 0382<br />
Melectronic 0030 0067<br />
Memorex 0134 0030 0067<br />
0078 0378 0270<br />
Memphis 0102<br />
Metronic 0111<br />
Metz 1592 0377 0866<br />
0111 0256 0067<br />
MGA 0073 0270<br />
MGN Technology0270<br />
Micormay 0378<br />
Micromaxx 0378<br />
Migros 0030<br />
Minolta 0072<br />
Mitsubishi 0073 0097 0078<br />
0111 0510 0030<br />
0672<br />
Motorola 0078<br />
MTC 0270 0030<br />
Multitec 0067<br />
Multitech 0030 0102 0134<br />
Murphy 0030<br />
Myryad 0111<br />
NAD 0134<br />
Naiko 0672 0378<br />
National 0256 1592<br />
NEC 0097 0070 0134<br />
0067 0308 1167<br />
Neckermann 0111<br />
Nesco 0102 0030 0382<br />
Neufunk 0067<br />
Nikkai 0102 0308<br />
Nikko 0067<br />
Noblex 0270<br />
Nokia 0134 0136 0345<br />
0308 0270 0078<br />
0072 0111<br />
Nordmende 0350 0097<br />
NU-TEC 0378<br />
Oceanic 0030 0078 0136<br />
0111 0134<br />
Okano 0345 0378 0102<br />
0308<br />
Olympus 0256<br />
Onimax 0672<br />
Optimus 0067 0078 0134<br />
0462<br />
Orbit 0102<br />
Orion 0382 0378 0772<br />
Orson 0030<br />
Osaki 0030 0067 0102<br />
Osume 0102<br />
Otto Versand 0111<br />
Pace 0382<br />
Pacific 0030<br />
Palladium 0102 0345 0067<br />
0270 0378 0462<br />
Palsonic 0102 0030 0672<br />
Panasonic 0256 1592 0866<br />
Pathe Cinema 0073<br />
Penney 0067 0070 0072<br />
0270<br />
Pentax 0072<br />
Perdio 0030<br />
Philco 0102<br />
Philips 0111<br />
Phoenix 0308<br />
Phonola 0111<br />
Pilot 0067<br />
Pioneer 0097 0111 0072<br />
Portland 0308 0667<br />
Prinz 0030<br />
Profitronic 0111 0270<br />
Proline 0030 0308 0350<br />
0672<br />
Prosco 0308<br />
Prosonic 0308 0030<br />
Protech 0102 0111 0308<br />
Provision 0308<br />
Pye 0111 0030<br />
Quasar 0308<br />
Quelle 0111<br />
Radialva 0067 0102 0111<br />
0078<br />
Radiola 0111<br />
Radionette 1167 0067<br />
RadioShack 0030<br />
Radix 0067<br />
Randex 0067<br />
RCA 0136 0072 0078<br />
0350 0270<br />
Realistic 0030 0067 0078<br />
0134<br />
Reoc 0378 0667 0308<br />
RFT 0102<br />
Roadstar 0270 0102 0067<br />
0308 0772 0111<br />
Royal 0102<br />
Saba 0350 0308<br />
Saisho 0378<br />
Salora 0073 0136 0134<br />
Samsung 0270 0462 0075<br />
Sanky 0078<br />
Sansei 0078<br />
Sansui 0097 0030 0136<br />
0102 0378<br />
Sanyo 0134 0270 0078<br />
0097 0378<br />
Saville 0382 0308 0270<br />
SBR 0111<br />
ScanSonic 0270<br />
Schaub Lorenz 0134 0030 0136<br />
0345<br />
Schneider 0102 0030 0067<br />
0111 0308 0270<br />
1167 0072 0382<br />
0672<br />
Scott 0073 0075<br />
Sears 0030 0067 0072<br />
0134<br />
Seaway 0308<br />
SEG 0102 0270 0308<br />
0672 0111 0667<br />
SEI 0111<br />
Sei-Sinudyne 0111<br />
Seleco 0067<br />
Semivox 0075<br />
Semp 0075<br />
Sentra 0102<br />
Setron 0102<br />
Sharp 0078 0067 0599<br />
Shintom 0102 0134<br />
Shivaki 0067<br />
Shogun 0270<br />
Siemens 0067 0134 0111<br />
0350 0377<br />
Siera 0111<br />
Silva 0067<br />
Silver 0308<br />
SilverCrest 0672<br />
Singer 0378 0075 0102<br />
Sinudyne 0111 0382<br />
Smaragd 0378<br />
Sonneclair 0102<br />
Sonoko 0308<br />
Sonolor 0078<br />
Sontec 0067 0308<br />
Sonwa 0672<br />
Sony 0062 0030 0136<br />
Soundwave 0067 0378<br />
Ssangyong 0102<br />
Standard 0308<br />
Starlite 0067 0134<br />
Stern 0308<br />
STS 0072<br />
Sunkai 0378 0308<br />
Sunstar 0030<br />
Suntronic 0030<br />
Sunwood 0102<br />
Supra 0067 0270 0378<br />
0308<br />
Sylvania 0030 0073 0111<br />
Symphonic 0030 0102<br />
T+A 0256<br />
Tandberg 0308<br />
Tandy 0030 0134<br />
Tashiko 0030 0078 0270<br />
0111 0067<br />
Tatung 0030 0111 0078<br />
0073 0378 0382<br />
Tchibo 0378<br />
TCM 0378<br />
Teac 0102 0030 0308<br />
0672 0067 0111<br />
0667<br />
TEC 0308 0102<br />
Tech Line 0102<br />
Technics 0256<br />
TechniSat 0378<br />
Tedelex 0067 0378 0672<br />
Teknika 0030 0067<br />
Telefunken 0672 0350 0308<br />
Telestar 0067<br />
Teletech 0102 0308 0030<br />
Tenosal 0102<br />
Tensai 0030 0067 0102<br />
0308<br />
Tevion 0378 0672<br />
Texet 0308<br />
Thomas 0030<br />
Thomson 0350 0097 0308<br />
Thorn 0134 0067<br />
Thorn-Ferguson 0350<br />
TMK 0270<br />
Tokai 0102 0067 0134<br />
Tokiwa 0102<br />
Topline 0378<br />
Toshiba 0073 0075 0111<br />
0772 0382<br />
Totevision 0067 0270<br />
Towada 0102<br />
Tradex 0111<br />
Tredex 0308<br />
Triad 0308<br />
Uher 0067 0270<br />
Ultravox 0308<br />
Unitech 0270<br />
United 0378 0772<br />
United Quick Star0308<br />
Universum 0030 0111 0270<br />
0067 0136 0378<br />
0134<br />
Vector 0075<br />
Vector Research 0070<br />
Victor 0097<br />
Video Concepts 0070 0075<br />
Video Technic 0030<br />
Videosonic 0270<br />
Wards 0030 0072 0078<br />
0102 0111 0270<br />
Watson 0111 0382 0308<br />
0672<br />
Weltblick 0067<br />
Wharfedale 0672<br />
White<br />
0102 0308<br />
Westinghouse<br />
World 0378<br />
XR-1000 0030 0102<br />
Yamishi 0102 0308<br />
Yokan 0102<br />
Yoko 0067 0102 0270<br />
Yoshita 0102<br />
Zenith 0030 0667 1167<br />
ZX 0378 0382<br />
61
CBL<br />
ADB 1260 1299<br />
Amstrad 1252<br />
Auna 1299 1260<br />
Austar 0306<br />
Canal Plus 0473<br />
Comcrypt 0473<br />
Comtec 0049<br />
Contec 0049<br />
Daeryung 0507<br />
Fastweb 1660<br />
Filmnet 0473<br />
Foxtel 1252<br />
France Telecom 0847 1764<br />
freebox 1512<br />
Funai 0049<br />
General 0306<br />
Instrument<br />
Jerrold 0306 0049<br />
Macab 0847<br />
Madritel 1260<br />
MNet 0473 0049<br />
Motorola 0306 1136 1513<br />
Multichoice 0049 0473<br />
Nokia 1599<br />
Noos 0847 1654<br />
NTL 1090 1098<br />
Oak 0049<br />
Ono 1098<br />
Optus 0306 1090<br />
Pace 1098 1607 1090<br />
Philips 0847<br />
Sagem 0847 1654<br />
Samsung 1696<br />
Scientific Atlanta 0507<br />
Tele+1 0473<br />
Telepiu 0473<br />
Telewest 1098 1090<br />
Telsey 1660<br />
Thomson 1764 1612<br />
Trans PX 0306<br />
UPC 1612<br />
US Electronics 0306<br />
Visiopass 0847<br />
VIDAC<br />
Gateway 1302<br />
Hewlett Packard 1302<br />
Microsoft 1302<br />
Pinnacle Systems 1477<br />
Sony 1302<br />
CD<br />
Advantage 0062<br />
Aiwa 0187<br />
<strong>Arcam</strong> 0187 2010<br />
Audio Research 0187<br />
Audiolab 0187<br />
Audiomeca 0187<br />
Audioton 0187<br />
Balanced Audio 0187<br />
Technology<br />
Cairn 0187<br />
California Audio 0059 0333<br />
Labs<br />
Cambridge 0187<br />
Audio<br />
Carver 0187<br />
CCE 0187<br />
Copland 0423<br />
Cyrus 0187<br />
Denon 0033 0796 0656<br />
DKK 0030<br />
Dual 0033<br />
Dynaco 0187<br />
Elektra 0423<br />
Garrard 0423<br />
Genexxa 0030 0062<br />
Goldmund 0187<br />
Grundig 0187<br />
Harman/Kardon 0187<br />
Hitachi 0062<br />
JVC 0102<br />
Kenwood 0220 0656 0066<br />
Krell 0187<br />
Linn 0187<br />
Loewe 0187<br />
Magnavox 0187<br />
Marantz 0187 0656 0059<br />
Matsui 0187<br />
MCS 0059<br />
Memorex 0062<br />
Meridian 0187<br />
Micromega 0187<br />
Mission 0187<br />
Musical Fidelity 0423<br />
Myryad 0187<br />
NAD 0751 0030<br />
Naim 0187<br />
NSM 0187<br />
Onkyo 0131<br />
Optimus 0030 0062<br />
Orion 0423<br />
Panasonic 0333 0059<br />
Philips 0187 0656<br />
Pioneer 0062<br />
Primare 0187<br />
Proton 0187<br />
QED 0187<br />
Quad 0187<br />
Quasar 0059<br />
Radiola 0187<br />
Restek 0187<br />
Revox 0187<br />
Rotel 0187<br />
SAE 0187<br />
Sansui 0187<br />
Siemens 0187<br />
Simaudio 0187<br />
Sony 0030 0520 0187<br />
Tag McLaren 0187<br />
Tandy 0062<br />
Teac 0423<br />
Technics 0333 0059<br />
Thorens 0187<br />
Thule Audio 0187<br />
Traxdata 0656<br />
Universum 0187<br />
Victor 0102<br />
Wards 0187<br />
Yamaha 0066 0520 0062<br />
Zonda 0187<br />
TUNER<br />
AEG 1420<br />
AFK 1419<br />
Aiwa 0151 0219 1088<br />
1188 1288 1652<br />
Akai 0639 1250 1420<br />
All-Tel 1420<br />
Anam 0639<br />
<strong>Arcam</strong> 0219 1119 1219<br />
1299 1319 2009<br />
ASCOMTEC 1419<br />
Audiolab 1119 1219 1299<br />
1319 0219<br />
Audiosonic 1419<br />
Audiovox 1420<br />
Audioworld 1420<br />
Balanced Audio<br />
Technology<br />
1119 1219 1299<br />
1319 0219<br />
Bang & Olufsen 0829<br />
Basic Line 1584<br />
Belson 1419<br />
Blue Sky 1420<br />
Bose 1259 1385<br />
Bush 1119 1219 1299<br />
1319<br />
Cairn 0219<br />
Cambridge Audio 0219 1219<br />
Carver 0219 1119 1219<br />
CCE 1382<br />
Centrum 1250 1584 1419<br />
Classic 1382<br />
Clatronic 1250<br />
Copland 1119 1219 1299<br />
1319<br />
Denon 1390 1134<br />
Denver 1419<br />
Diamond 1420<br />
DK digital 1450<br />
DMTECH 1420<br />
Dual 1250 1420 1450<br />
Electro com paniet 1219<br />
Elta 1420<br />
Fisher 1831<br />
Genexxa 0216<br />
Goldmund 0219 1119 1219<br />
1299 1319<br />
Goodmans 0639 1229 1450<br />
1641 1419<br />
Grundig 1119 1219 1299<br />
1319 0219<br />
Hanseatic 1420<br />
Harman/Kardon 1334 1119 1219<br />
1299 1319 0219<br />
HCM 1420<br />
HE 1419<br />
Hitachi 1831 1250 1584<br />
Hiteker 1419<br />
Integra 0165 1350<br />
JVC 0104 1404 1229<br />
1525<br />
Kenwood 1057 1343 1599<br />
0216<br />
KLH 1420<br />
KXD 1419<br />
Lenoxx 1641<br />
Lenoxx Sound 1641<br />
LG 1323<br />
Linn 0219 1119 1219<br />
1299 1319<br />
Loewe 1119 1219 1299<br />
1319 0219<br />
Magnavox 0219 1119 1219<br />
1299<br />
Magnum 1641<br />
Marantz 0219 1119 1219<br />
1299 1319<br />
Mark 1119 1219 1299<br />
1319<br />
MBO 1382<br />
Medion 1450<br />
MEI 1420<br />
Melectronic 0639<br />
Meridian 1119 1219 1299<br />
1319<br />
Metz 1584<br />
Micromaxx 1450<br />
Micromega 1119 1219 1299<br />
1319 0219<br />
Mitsubishi 0206<br />
Mustek 1382<br />
Myryad 1219 1119 1299<br />
1319 0219<br />
NAD 0350 0639<br />
Naim 1119 1219 1299<br />
1319<br />
Nikkai 1419<br />
Nikko 0639<br />
Norcent 1419<br />
Okano 0639<br />
Onkyo 0165 1350<br />
Optimus 0216 1053<br />
Palladium 1250<br />
Panasonic 1548 1338 1339<br />
1793 1809 1795<br />
Philco 1420<br />
Philips 0219 1219 1299<br />
1119 1319<br />
Pioneer 1053 0216 1119<br />
1219 1299 1319<br />
1489<br />
Polk Audio 1319<br />
Proline 1420<br />
Proson 0639<br />
Provision 1419<br />
QONIX 1450<br />
Quad 1119 1219 1299<br />
1319<br />
Radiola 1119 1219 1299<br />
1319 0219<br />
Radionette 1664 1323<br />
RCA 1184 1420 1489<br />
Red Star 1419<br />
Restek 0219<br />
Revox 1119 1219 1299<br />
1319 0219 0216<br />
Revoy 1119 1219 1299<br />
1319<br />
Roadstar 1641<br />
Rotel 0823<br />
Saba 1184<br />
Samsung 1325 1229<br />
Sansui 0219 1119 0639<br />
Sanyo 1831<br />
Schneider 1420 1229 1250<br />
SEG 1584<br />
Sharp 0216 1664 1644<br />
Sherwood 0683<br />
Siemens 0639<br />
Silva Schneider 1323<br />
Sony 1188 1288 1888<br />
1789 1088 1688<br />
1752 1652 1142<br />
Soundwave 0639<br />
Sunfire 1343<br />
Sunstech 1450<br />
Tag McLaren 1219<br />
Teac 1229 0639 1420<br />
Technics 1338 1339 1793<br />
1548 1795<br />
Techwood 0639 1584<br />
Telefunken 1419<br />
Tevion 1641<br />
Thomson 1184 1384<br />
Thorens 1219 1119 1299<br />
1319 0219<br />
Toshiba 1602<br />
United 1420<br />
Universum 1250 0639 1420<br />
1119 1219 1299<br />
1319 0219<br />
Venturer 1420<br />
Victor 0104<br />
Voxson 1450<br />
Waitec 1382<br />
Wards 0219<br />
Wharfedale 0639 1420<br />
Yamaha 0206 1361 1306<br />
0216 0742<br />
Yukai 1382<br />
DVD<br />
3D LAB 0569<br />
4Kus 1188<br />
A-Trend 0744<br />
Acoustic Solutions 0760 0743 1258<br />
AEG 0818 0800 0820<br />
AFK 1258 1182<br />
Aim 0808 0702<br />
Airis 1254 1351 0702<br />
1035 1375<br />
Aiwa 0725 0899 0563<br />
Akai 0820 0809 0800<br />
0818 0725 1145<br />
0928 0746 0743<br />
0882 0735 1725<br />
1263<br />
Akashi 0868<br />
AKI 1035<br />
Akira 0808 1351<br />
Akura 1201 0928 1081<br />
1170<br />
Alba 0747 0743 0753<br />
0725 0760 0569<br />
0702 1170 1081<br />
1560 1725<br />
Alize 1181<br />
All-Tel 0820 1481 0865<br />
Amitech 0800 0880<br />
Amoi 0882<br />
Amoisonic 0865<br />
Amstrad 0743 1145 1181<br />
1601<br />
AMW 0902<br />
Ansonic 0789 0861<br />
Apex Digital 0702 0747 1034<br />
<strong>Arcam</strong> 0762<br />
Arena 0882<br />
Asono 1254<br />
ATACOM 1254<br />
Audiovox 0820 0747<br />
Audioworld 0820<br />
Audix 1134 1182<br />
Autovox 0743<br />
Auvio 0873<br />
Avious 1195<br />
AWA 0760 0902<br />
Axion 0760<br />
Base 1481<br />
Basic Line 0743<br />
Baze 1195 0928 0702<br />
BBK 0892 1254<br />
Bel Canto Design 1601<br />
Bellagio 0902<br />
Best Buy 0887<br />
Black Diamond 0743 0863<br />
Blaupunkt 0747<br />
Blu:sens 1263<br />
Blue Parade 0601<br />
Blue Sky 0743 0725 0702<br />
0873 0808 0681<br />
0820<br />
BNI 1351<br />
Boghe 1034<br />
Boman 0818 0928 1035<br />
Brainwave 0800 1145<br />
Brandt 0681 0581 0533<br />
Broksonic 0725 1449<br />
62
Bush 0743 0725 0863<br />
1725 0760 0861<br />
0747 0808 0546<br />
0848 0753 1195<br />
1466 1449 1513<br />
1170<br />
C-Tech 0798 1182<br />
Cambridge Audio 1139 0781<br />
Campomatic 1081<br />
Digital<br />
CAT 0819<br />
Celestial 0702<br />
cello 1760<br />
Centrex 0702 1034<br />
Centrum 0743 0819 0809<br />
1035<br />
CGV 0800 0781<br />
Cinea 0871<br />
Cineral 0760<br />
Cinetec 0743 0902<br />
CineVision 0899 0863<br />
Classic 0760 1760<br />
Clatronic 0818 0809 0848<br />
0702 1195 0705<br />
Clayton 0743<br />
Coby 0808 1137 0760<br />
1195 0882<br />
Codex 1263<br />
Conia 0702 0882 0546<br />
0865 1351<br />
Contel 0818<br />
Continental 0902 0861<br />
Edison<br />
Craig 0861<br />
Crown 0800 0681<br />
Crypto 1258<br />
Cybercom 0861<br />
CyberHome 0744 0846<br />
Cytron 0746 0681 0735<br />
0861 1377<br />
D-Vision 1145<br />
Daenyx 0902<br />
Daewoo 0800 0863 0899<br />
1513 0735 0744<br />
1466 0902 0808<br />
Dalton 1066<br />
Dansai 0800 1145 1725<br />
Dantax 0753 0725<br />
Daytek 0902 1035<br />
Dayton 0902<br />
DCE 0861<br />
DEC 0808 0848<br />
Decca 0800<br />
Denon 0520 0664 1664<br />
Denver 0808 0818 0928<br />
0848 1137 1351<br />
0702<br />
Denzel 0695<br />
Diamond 0681 0798 0781<br />
0808 0753 0820<br />
Digihome 0743<br />
DigiLogic 0743<br />
digiRED 0747<br />
Digitor 1035<br />
Digitrex 0702 1034<br />
DiK 0861<br />
Dinamic 0818<br />
DiViDo 0735<br />
DK digital 0861<br />
DMTECH 0820 1301<br />
Dragon 0861<br />
DSE 1760 0863 1182<br />
Dual 0861 0743 0695<br />
0681 0760 0809<br />
0820<br />
Durabrand 0861 0743<br />
DVX 0798<br />
E-Boda 0753<br />
E-Dem 1254<br />
e:max 1263 1351<br />
EagleTec 0744<br />
eBench 1182<br />
Eclipse 0753 0781<br />
Electrohome 0800<br />
Elfunk 0880 0743<br />
Elin 0800<br />
Ellion 0880 1451<br />
Elta 0800 0818 0820<br />
1145 1181 1263<br />
1081<br />
Eltax 1351<br />
Emerson 0621 0705 0735<br />
0899<br />
ENG 1601<br />
Enterprise 0621<br />
Enzer 0695<br />
EuroLine 0818 1145 1263<br />
0705<br />
Ferguson 0681 1760 0928<br />
0743<br />
Finlux 0771 0800 0621<br />
0702 0781 1195<br />
Fintec 0743<br />
Firstline 0899 0681 1560<br />
Fisher 0700<br />
Funai 0725 0705<br />
Gateway 1188<br />
GE 0747<br />
General Electric 0747<br />
Germatic 1081<br />
Global Link 1254<br />
Global Solutions 0798<br />
Global Sphère 0798<br />
Go Video 0774 1188 0899<br />
0863<br />
GoldStar 0621 0771<br />
Goodmans 0743 1034 0753<br />
0781 0760 0681<br />
0820 0848 0863<br />
1170 1760<br />
GP Audio 1170<br />
GPX 0681 0771<br />
Gradiente 0681<br />
Graetz 0695<br />
Gran Prix 0861<br />
Grandin 0746 0702<br />
Greenhill 0747<br />
Grundig 0725 0735 0805<br />
0569 0681 0820<br />
0743 0700 0753<br />
1725 1034 1760<br />
1466 1513<br />
Grunkel 0800 0861<br />
H&B 0848 0743 0871<br />
0880 1263 1451<br />
Haaz 0798 0781<br />
Haier 0873<br />
Hanseatic 0771 0820<br />
Harman/Kardon 0732<br />
HCM 0818<br />
HDT 0735<br />
HE 0760<br />
Henß 0743<br />
HiMAX 0887 0873<br />
Hitachi 0694 0725 0809<br />
0695 0603 0887<br />
0743<br />
Hiteker 0702<br />
Höher 0861 1034 1254<br />
Home Electronics 0760 0800<br />
Home Tech 1254<br />
Industries<br />
Hyundai 0880 1258<br />
Iekei 1137<br />
Ingelen 0818<br />
Inno Hit 0743<br />
Integra 0657<br />
Irradio 0771 1145 1254<br />
1263 0899 0800<br />
ISP 0725<br />
Jaton 0695<br />
JBL 0732<br />
JDB 0760<br />
JDV 1258<br />
Jeken 0808<br />
Jepssen 1213<br />
JMB 0725<br />
JNC 0702 1301<br />
JVC 0653 0588 1194<br />
0569 0533 0897<br />
jWIN 1081<br />
Kansai 1137<br />
Kansas<br />
1263 1560<br />
Technologies<br />
Kendo 0743 0861 0702<br />
1377<br />
Kennex 0800 0743 0928<br />
Kenwood 0564 0520<br />
KeyPlug 0800<br />
Kiiro 0800<br />
Kingavon 0848<br />
Kiss 0871 0695<br />
KLH 0820<br />
KLH Digital 0747<br />
Kodak 0848<br />
Koss 0681<br />
Kreisen 1451<br />
KXD 0887 1137 1351<br />
Lawson 0735 0746 0798<br />
Leiker 0902<br />
Lenco 0681 0800 0808<br />
0848 0743 0861<br />
1195<br />
Lenoir 1258<br />
Lenoxx 0868<br />
LG 0771 0601 0621<br />
1936 0899<br />
Lifetec 0681 0861 1377<br />
Limit 0746 0798<br />
LiteOn 1188<br />
Lodos 0743<br />
Loewe 0569 0771<br />
LogicLab 0798<br />
Logik 0743<br />
Logix 0735<br />
Lumatron 0735 1145 0771<br />
0863 1351 0743<br />
0760 0928<br />
Luxman 0603<br />
Luxor 1034 0743 1760<br />
0760<br />
Magnasonic 0681<br />
Magnavox 0533 0705 0848<br />
1170 0569 0743<br />
Magnex 0753 1195<br />
Magnum 1466<br />
Majestic 1137 1375<br />
Manhattan 0735 0743<br />
Marantz 0569<br />
Mark 0743 0725 1725<br />
Marquant 0800 1481<br />
Mastec 1036<br />
Matsui 0681 0743 0702<br />
0725 1760<br />
Maxdorf 0818<br />
Maxent 1377<br />
Maxim 0743<br />
Maya 1375<br />
MBO 0760<br />
MDS 0808<br />
Mecotek 0800<br />
Medion 0861 1377 0681<br />
0746 1375 0660<br />
1195 1036<br />
MEI 0820<br />
Memorex 0861<br />
Memory 0760 1081<br />
Metz 0601 0555 0743<br />
MiCO 0753 0781 1253<br />
Micromaxx 1725 0725 1377<br />
Micromedia 0533 0569<br />
Micromega 0569<br />
Microsoft 0552<br />
Microstar 0861<br />
Minax 0743<br />
Minerva 0735<br />
Minoka 0800 1145<br />
Minowa 1195<br />
Mintek 0747<br />
Mitsubishi 0743<br />
Mizuda 0848 0887 1481<br />
Monyka 0695<br />
MPX 0873<br />
Mustek 0760 1760<br />
Mx Onda 0681 0781 0753<br />
1253<br />
Mystral 0861<br />
NAD 0771<br />
Naiko 0800 1034<br />
NEC 0899 0621 0771<br />
Neovia 1301<br />
Nesa 0747<br />
Neufunk 0695<br />
Nevir 0861 0800<br />
Nintaus 1081<br />
Nordmende 0861<br />
Nowa 0873<br />
NU-TEC 0546 1258<br />
Omni 0808 0863 1134<br />
1258<br />
Onix 0868<br />
Onkyo 0657 0533<br />
Oopla 1188<br />
Oppo 1254<br />
Optim 0873<br />
Optimus 0601 0555<br />
Orava 0848<br />
Orbit 0902<br />
Orion 0725 1725 1036<br />
1263 1449 0928<br />
Oritron 0681<br />
P&B 0848 1481<br />
Pacific 0798 0820 0789<br />
0743 0861<br />
Packard Bell 0861<br />
Palladium 0725 0809<br />
Palsonic 0865 0702 0882<br />
Panasonic 0520 1864 1938<br />
Panda 0747 1137<br />
Papouw 0563<br />
peeKTON 1254 0928<br />
Philco 0753 0892 0818<br />
0820<br />
Philips 0569 0676 1370<br />
0705 0533 1188<br />
Philo 1375<br />
Phonotrend 1195<br />
Pioneer 0601 0661 1995<br />
0555 1601<br />
Plu2 0880<br />
Pointer 0800<br />
Polk Audio 0569<br />
Portland 0800<br />
Powerpoint 0902 1035<br />
Presidian 0705<br />
Prima 1258<br />
Prinz 0861<br />
Prism 1036 0861<br />
Pro2 1375<br />
ProCaster 1034<br />
Proline 0681 0702 0820<br />
1034 1513 0863<br />
Proscan 0552<br />
Proson 0743<br />
Prosonic 1137<br />
Provision 0848 1351 1137<br />
0760<br />
Pye 0676 0569<br />
QONIX 0808 1081<br />
Qwestar 0681<br />
Radionette 0771 0899 1936<br />
Raite 0695<br />
RCA 0552 0681 0820<br />
1995<br />
REC 0520<br />
Red Star 0789 0793 0800<br />
0818 0928 1137<br />
1375<br />
Relisys 1377<br />
Reoc 0798<br />
Revoy 0871<br />
Rex 0868<br />
Richmond 1263<br />
Rimax 1181<br />
Rio Audio 0899<br />
Roadstar 0743 0848 0760<br />
1081 0928 0863<br />
1257<br />
Rocksonic 0819<br />
Ronin 0902<br />
Rotel 0653 0588<br />
Rowa 0789 1034 0546<br />
0555 0747<br />
Rownsonic 0819 0753<br />
Saba 0681 0581<br />
Sabaki 0798<br />
Saivod 0789 0861 0800<br />
Salora 0771<br />
Sampo 1377<br />
Samsung 0603 0774 1962<br />
0520<br />
Sansui 0725 0746 0798<br />
0753 0800 0781<br />
1258 1725<br />
Sanyo 0700 0903 0725<br />
0820 0743<br />
Scan 0735 0865 0880<br />
ScanMagic 0760 1760<br />
ScanSonic 0887<br />
SCE 0819<br />
Schaub Lorenz 0818 1195 0800<br />
Schneider 0861 0809 0569<br />
0735 0818 0743<br />
0681 0899 0820<br />
0676<br />
Scientific Labs 0798 1182<br />
Scott 0681 0702 1066<br />
1263<br />
Seeltech 1254 1481<br />
SEG 0743 0695 0798<br />
0902 0793 1560<br />
Semp 0533<br />
Shanghai 0702<br />
Sharp 0660 1286 0743<br />
0725 1449<br />
Sherwood 0747 0771<br />
Shinco 0747<br />
Siemssen 1412<br />
Sigmatek 0887 1254<br />
Silva 0818 0928 0861<br />
Silva Schneider 0861 1936<br />
SilverCrest 1182<br />
Singer 0746 0753 0781<br />
0798<br />
Sinudyne 1170<br />
Sistemas 0702<br />
Skymaster 0760 0798<br />
Skyworth 0928<br />
Sliding 1145<br />
Slim Art 0800<br />
Slim Devices 0653 0563<br />
SM Electronic 0760 0798<br />
Smart 0735 0743<br />
Sonashi 0746 0861<br />
Sonic Blue 0899<br />
Soniko 0818<br />
Sony 0563 0894 1663<br />
0802 1100 2011<br />
1463 0603<br />
Sound Color 1263<br />
Soundmaster 0798<br />
Soundmax 0798<br />
Spectra 0902<br />
Standard 0681 0798 0818<br />
0861 0928<br />
Star Clusters 0798 1257 1182<br />
StarLogic 1035<br />
Starmedia 0848 1254 1035<br />
Strong 0743<br />
Sunfly 0887<br />
Sunkai 0800 0880<br />
Sunstech 0861<br />
Sunwood 0818<br />
SuperDigital 1217<br />
Supervision 0760 0798<br />
SVA 0702 0747<br />
Sylvania 0705 0660<br />
Symphonic 0705<br />
Synn 0798<br />
Tandberg 0743 1725<br />
Tangent 1351<br />
Targa 0771 1188 1257<br />
Tatung 0800<br />
Tchibo 0771<br />
TCM 0771<br />
Teac 0747 0771 0546<br />
0601 0798 0621<br />
0789 1036 0820<br />
1227 0863 1257<br />
1195 0705<br />
TEC 0928<br />
Technics 0520 1938<br />
Technika 0800 1145 0861<br />
1195<br />
Technosonic 1081 1145<br />
Techwood 0743 1560 0569<br />
Tedelex 1258<br />
Telefunken 0820 0819 0818<br />
1258<br />
Teletech 0743<br />
Tensai 0681 0800<br />
Tevion 0681 1066 1412<br />
0798 1257 0863<br />
1377 1760<br />
Theta Digital 0601<br />
Thomson 0581 0552<br />
Tokai 0695 0928 0818<br />
Tokiwa 0735 0746<br />
Tom-Tec 0819<br />
Top Suxess 1254<br />
Toshiba 0533 0725 1075<br />
1540<br />
TRANScontinents<br />
0902 0861 1195<br />
Transonic 0702 1195<br />
Tredex 0873<br />
Trio 0800<br />
TruVision 0887 1481<br />
TSM 1254<br />
TYT 0735<br />
Umax 1181<br />
United 0818 0760 0820<br />
1258 0702 1195<br />
0725 1145 0798<br />
1263 0743 1182<br />
0705<br />
Universal 0798<br />
Multimedia<br />
Universum 0771 0743 0621<br />
0809 1257 0820<br />
1560<br />
Uptek 0793<br />
upXus 1375<br />
Urban Concepts 0533<br />
Venturer 0820<br />
Vestel 0743 1560<br />
Vieta 0735<br />
Viewmaster 0892 1254<br />
Voxson 0760 0861<br />
VTrek 1258<br />
Waitec 1254<br />
Walkvision 0747<br />
Waltham 1560<br />
Welkin 0861<br />
Wellington 0743<br />
Weltstar 0743<br />
Wharfedale 0798 0753 0781<br />
Wilson 0861 1263<br />
Windy Sam 0603<br />
Wintech 1217<br />
Woxter 1181 1254<br />
XBox 0552<br />
XLogic 0800 0798 1258<br />
XMS 0818 0800<br />
Xoro 1213<br />
Yakumo 1034<br />
Yamada 1034 0902 1181<br />
1188<br />
Yamaha 0569 0520 0676<br />
Yamakawa 0695 0902 1134<br />
Yukai 0760<br />
Zenith 0533 0899 0621<br />
0771<br />
63
PVR<br />
@sat 1330<br />
@Sky 1364<br />
Amstrad 1205<br />
Arnion 1330<br />
ASCI 1364<br />
Astro 1130<br />
Aurora 1463<br />
Austar 1206<br />
B@ytronic 1442<br />
Brainwave 1244<br />
British Sky 1205<br />
Broadcasting<br />
BSkyB 1205<br />
Bush 1675<br />
CanalSatellite 1369<br />
Chess 1364<br />
CityCom 1206<br />
Comag 1442<br />
DigiFusion 1675<br />
DigiQuest 1330<br />
Dream Multimedia1267<br />
eMTech 1244<br />
Foxtel 1206 1386<br />
Galaxis 1206<br />
GbSAT 1244<br />
Gecco 1442<br />
General Satellite 1206<br />
Globo 1364 1442<br />
Hanseatic 1130<br />
HB 1244<br />
HDT 1189<br />
Hirschmann 1442<br />
Homecast 1244<br />
Humax 1206 1457 1705<br />
Hyundai 1189<br />
ID Digital 1206<br />
Imperial 1130 1364<br />
Interstar 1244<br />
Jaeger 1364<br />
Jepssen 1244<br />
Kathrein 1591<br />
Kongque 1330<br />
L&S Electronic 1364<br />
Maximum 1364<br />
Mediacom 1236<br />
Medion 1364 1442<br />
Multichoice 1463<br />
Neotion 1364<br />
Opentel 1442<br />
Orbis 1364 1442<br />
Orbitech 1130<br />
Pace 1205 1386 1453<br />
1880<br />
Panasonic 1334<br />
Pilotime 1369<br />
Pino 1364<br />
Premiere 1130 1206<br />
Rebox 1244<br />
Sagem 1283<br />
Samsung 1236<br />
Sat Control 1330<br />
Satplus 1130<br />
Schaub Lorenz 1244<br />
Schneider 1236<br />
Schwaiger 1364 1442<br />
Siemens 1364<br />
Sky 1205<br />
SKY Italia 1878 1880<br />
Sky XL 1442<br />
SKY+ 1205<br />
Skymaster 1364<br />
skyplus 1364 1442<br />
Stream 1878<br />
Strong 1189 1330<br />
Sunny 1330<br />
Systec 1364<br />
TechniSat 1130<br />
Technosat 1236<br />
Telestar 1130 1364<br />
Televes 1244 1330 1364<br />
Tevion 1364<br />
Thomson 1205 1930<br />
Topfield 1236 1575 1813<br />
TPS 1283<br />
UEC 1386<br />
Worldsat 1244<br />
XSat 1244<br />
Xtreme 1330<br />
Zehnder 1364 1442<br />
Zinwell 1206<br />
SAT<br />
@sat 1330<br />
@Sky 1364<br />
ABsat 1353 0743<br />
ADB 0672 0917 1289<br />
1397 1503 1521<br />
Adcom 0230<br />
Akai 0230<br />
Alba 0743 1314<br />
Allsat 0230 1047<br />
Allsonic 0399<br />
Alltech 0743<br />
Allvision 1262<br />
Alpha 0230<br />
Amitronica 0743<br />
Ampere 0162<br />
Amstrad 0877 1205 0743<br />
0162 1143<br />
Anglo 0743<br />
Ankaro 0399 0743 1309<br />
AntSat 1047<br />
Arcon 1309 0162 1105<br />
Armstrong 0230<br />
Arnion 1330<br />
ASA 0329<br />
Asat 0230<br />
ASCI 1364<br />
ASLF 0743<br />
AssCom 0883<br />
Aston 1159 1291<br />
Astra 0743<br />
Astratec 1773<br />
Astro 0163 0203 0399<br />
0688 1143 1129<br />
1130 0230<br />
Audioline 1459<br />
Aurora 0909 0672 1463<br />
Austar 1289 0672 0909<br />
1206<br />
Axil 1487<br />
Axis 1141 0399<br />
B@ytronic 1442<br />
Bentley Walker 1047<br />
Best 0399<br />
Big Sat 1487<br />
Black Diamond 1314<br />
Blaupunkt 0203<br />
Blue Sky 0743<br />
Blue Star 1309<br />
Boca 0162 1396 0743<br />
1262<br />
Boston 0162<br />
Brainwave 1244 0688 1702<br />
British Sky 0877 1205<br />
Broadcasting<br />
Broco 0743<br />
BSkyB 0877 1205<br />
BT 1326<br />
Bubu Sat 0743<br />
Bush 1501 1702 1675<br />
1773<br />
Canal Digital 1883 0883 0197<br />
1076<br />
Canal+ 0883 1883<br />
CanalSatellite 0883 1369 1883<br />
Centrex 1577<br />
CGV 1443<br />
Cherokee 1353<br />
Chesley 1577<br />
Chess 1364 0743 1656<br />
CityCom 1206 1262 0329<br />
0848 0534 1105<br />
Clatronic 1443<br />
CNS 1397<br />
Colombia 0162<br />
Columbia 0162<br />
Comag 0162 1396 1443<br />
1262 1442<br />
Condor 0399<br />
Connexions 0399<br />
Conrad 0399 0162<br />
Coship 1487<br />
Crown 1314<br />
Cyrus 0230<br />
D-box 1144 0753<br />
Daewoo 1326 0743 1773<br />
1141<br />
Deltasat 1105<br />
DGTEC 1272 1572<br />
Digatron 1324<br />
Digenius 0329 1191<br />
DigiFusion 1675 1773<br />
Diginet 1577<br />
DigiQuest 1487 1330<br />
DigiSat 1262<br />
Digisky 1487<br />
Digital+ 1883<br />
DigitAll World 1257<br />
DiPro 1577 1503 1397<br />
DirecTV 0129 0886<br />
Distratel 1313<br />
Distrisat 0230<br />
DMT 1105<br />
DNT 0230<br />
Dream Multimedia 1267<br />
DStv 0672 0909<br />
Dune 0399<br />
Durabrand 1314<br />
Echostar 1230 0640 0197<br />
0883 0743 1353<br />
1503 1439 1797<br />
Einhell 0162 0743<br />
Elap 0743 1159 1597<br />
Elsat 0743<br />
Elta 0230 0399<br />
Emme Esse 0399<br />
eMTech 1244<br />
Engel 1047 0743 1281<br />
EuroLine 1281<br />
Europa 0230<br />
Europhon 0329 0162<br />
Eurosat 1597<br />
Eurosky 0162 0329 0399<br />
Eurostar 0848<br />
Eutelsat 0743<br />
Eycos 1309<br />
Fenner 0743 0399<br />
Ferguson 1321 0741 1773<br />
Flair Mate 0743<br />
FMD 1281 1487 1443<br />
Force 1224<br />
Fortec Star 1047<br />
Foxtel 1386 0909 0750<br />
1206 1192<br />
Fracarro 0155<br />
Freecom 0203<br />
FTEmaximal 0399 0743<br />
Fuba 1831 0399 0203<br />
1191 0329 1281<br />
Fugionkyo 0155<br />
Galaxis 1141 1206 0883<br />
0399 0909<br />
Gardiner 0848<br />
Garnet 1105<br />
GbSAT 1244<br />
Gecco 1442 1303<br />
General Satellite 1206<br />
Globo 1281 1656 1442<br />
1459 1364<br />
GOD Digital 0230<br />
Gold Box 0883<br />
Gold Vision 1047<br />
Golden Interstar 1313<br />
Goodmans 1314<br />
Gradiente 0917<br />
Grundig 0203 0877 1321<br />
0909 0883<br />
H&B 1577<br />
Hanseatic 1129 1130<br />
Hänsel & Gretel 0162<br />
Hauppauge 1324 1702<br />
HB 1244<br />
HDT 1189<br />
HE@D 1309<br />
Hills 1262<br />
Hirschmann 1141 1143 0203<br />
0329 1262 0399<br />
0155 1442<br />
Hitachi 1314<br />
HNE 1262 0162<br />
Homecast 1244<br />
Humax 1206 1457 1705<br />
1255 1773<br />
Huth 0162 1047 1105<br />
Hyundai 1189 1105<br />
iCan 1397<br />
ID Digital 1206<br />
Imperial 1459 1364 1129<br />
1130 1225 1227<br />
0230 1702<br />
International 0162<br />
Interstar 1047 1244<br />
iotronic 0162<br />
ITT Nokia 0753<br />
Jadeworld 0672<br />
Jaeger 1364<br />
Jepssen 1244<br />
K-SAT 0743<br />
Kamm 0743<br />
Kaon 1330<br />
KaTelco 1141<br />
Kathrein 0534 1597 0510<br />
1591 0688 0203<br />
0230 0743 0848<br />
1353 1446<br />
Kennex 0155<br />
Kenwood 0883<br />
Key West 0162<br />
Kongque 1330<br />
Kreiling 0688<br />
Kreiselmeyer 0203<br />
Kyostar 0162<br />
L&S Electronic 0399 0162 1364<br />
Labgear 1326<br />
LaSAT 0399 0162 0329<br />
Lenco 0743 0399<br />
Lennox 0399<br />
Lenoxx 1641<br />
Lexus 0230<br />
LG 1444 1105<br />
Lifesat 0162 0399 0329<br />
0743<br />
Lodos 1314<br />
Logik 1314<br />
Logix 1047 1105<br />
Lorenzen 0329 1324 1191<br />
0162<br />
Lupus 0399<br />
Macab 0883<br />
Madritel 0672<br />
Manata 0743 0162<br />
Manhattan 1047<br />
Marantz 0230<br />
Maspro 0743 0203<br />
Matsui 0203 1773<br />
Maximum 1105 1364<br />
MDS 1255<br />
Mediabox 0883<br />
Mediacom 1236<br />
MediaSat 0883<br />
Medion 1262 0329 0743<br />
0162 1105 1442<br />
1656 1364 0399<br />
Medison 0743<br />
Mega 0230<br />
Melectronic 0848<br />
Metronic 0743 1309 1313<br />
0848 0162<br />
Metz 0203<br />
Micro 0743 1324<br />
Micro electronic 0743<br />
Micro Technology 0743<br />
Micromaxx 0329 0399<br />
Microstar 1105<br />
Microtec 0743<br />
Morgan’s 0230 0743 0162<br />
1439<br />
Motorola 0886<br />
Multichoice 0672 0909 1463<br />
Myryad 0230<br />
Mysat 0743<br />
Neotion 1364<br />
Netgem 1352<br />
Netsat 0917 0129<br />
Neuf TV 1352<br />
Neuhaus 0743<br />
Neuling 1262<br />
Neusat 0743 1309<br />
Neveling 1191<br />
NextWave 1047<br />
Nikko 0743 0753 0230<br />
Nokia 1144 1253 1053<br />
0753 0883 1753<br />
Nordmende 1641<br />
Nova 0909<br />
OctalTV 1324<br />
Opentel 1262 1442<br />
Optex 1313 0743 1641<br />
Optus 0909 0883<br />
Orbis 1364 1442<br />
Orbitech 1129 1130 0230<br />
P/Sat 1262<br />
Pace 0877 0917 1205<br />
1386 1880 0271<br />
1353 0821 0750<br />
0230 0883 1453<br />
Pacific 1314<br />
Packard Bell 1141<br />
Palcom 0329 1191 1439<br />
Panasat 0909<br />
Panasonic 0877 1334 1434<br />
Panda 0203<br />
Patriot 0162<br />
peeKTON 1487<br />
Philips 0230 1144 0883<br />
0129 0163 0848<br />
1702 0203 1459<br />
Phoenix 1303<br />
Phonotrend 1047 1230<br />
Pilotime 1369<br />
Pino 1364<br />
Pioneer 0883 1338 0382<br />
Portland 1326<br />
Power Sky 1309<br />
Preisner 0162 1143 1396<br />
Premiere 0883 1144 0753<br />
1141 1206 1225<br />
1130 0688<br />
Primacom 1141<br />
QNS 1397 1434<br />
Quadral 0399 1353<br />
Quelle 0329<br />
Radiola 0230<br />
Radix 1143<br />
RCA 1321<br />
Rebox 1244<br />
Red Star 0399<br />
Regal 1281<br />
RFT 0230<br />
Roadstar 0743 0883<br />
Rover 0743 0399<br />
Rownsonic 1597<br />
S-ZWO 1237<br />
SAB 1281<br />
Sagem 1144 1283 1720<br />
Samsung 1273 1600 1488<br />
1047 1236 0883<br />
Sat Control 1330<br />
Sat Team 0743<br />
SAT+ 1439<br />
Satec 0743<br />
Satelco 0399<br />
Satplus 1130<br />
Schaub Lorenz 1244<br />
Schneider 1281 1236<br />
Schwaiger 0534 1364 1487<br />
1442 1141 0162<br />
1105<br />
SCS 0329<br />
Sedea Electronique 0155 0162 1313<br />
1656 1309<br />
SEG 1281 0399 1656<br />
1105<br />
Serino 0640<br />
Servimat 1641<br />
ServiSat 1281 0743<br />
Sherwood 1641<br />
Siemens 0203 1459 1364<br />
Silva 0329<br />
Skantin 0743<br />
SKR 0743<br />
Sky 0129 0877 0886<br />
0917 1205 0741<br />
SKY Brasil 0672 0917<br />
SKY Italia 1878 1880<br />
Sky XL 1442 1281<br />
SKY+ 1205<br />
Skymaster 0743 1439 1230<br />
1105 1641 1364<br />
Skymax 0230<br />
skyplus 1262 1364 1442<br />
SkySat 0743<br />
SL 0162 1702<br />
SM Electronic 0743 1230 1105<br />
64
Smart 1303 0162 0329<br />
1143 1262 0743<br />
1443<br />
Soniq 1597<br />
Sony 0877 1588 0312<br />
0883<br />
SR 0162<br />
Star Sat 0162<br />
Starland 0743<br />
Stream 1878<br />
Strong 0155 1397 1439<br />
1656 0399 0909<br />
0883 1189 1330<br />
1503 1314<br />
Sunny 1330<br />
Sunny Sound 0399<br />
Sunsat 0743<br />
Sunstar 0399 0162 0672<br />
Supermax 1313<br />
Systec 0162 1364<br />
Tarbs 1255<br />
TBoston 1487<br />
Teac 1257 1255 1352<br />
Tecatel 1230<br />
TechniSat 1129 1130 1225<br />
1227 0230 1352<br />
Technomate 1313<br />
Technosat 1236<br />
Technosonic 1702<br />
Technotrend 1459<br />
Technowelt 0162<br />
Techsan 1047<br />
Techwood 1314 1656<br />
tekComm 1047<br />
Tele System 1281 1439 1641<br />
1831<br />
Tele System 1641<br />
Electronic<br />
TeleClub 1397<br />
Telecom 0743<br />
Telestar 1129 1130 0230<br />
1281 1364 1656<br />
Televes 0162 1244 1330<br />
1364 1439<br />
Televisa 0917<br />
Telewire 1262<br />
Tevion 1364 1702 0743<br />
1439 1597<br />
Thomson 0741 0877 1321<br />
1930 0743 1205<br />
0883 1076<br />
Tiny 1702<br />
Tioko 0162<br />
Tokai 0230<br />
Tonna 1641 0743<br />
Topfield 1236 1237 1575<br />
1813<br />
TPS 1283<br />
Triax 0230 0743 0883<br />
1281 1326 1321<br />
0162 1129 1143<br />
1257 1656<br />
Trio 1105<br />
TT-micro 1459<br />
Turnsat 0743<br />
Twinner 0162 0743<br />
UEC 0909 1192 1386<br />
Unimax 1577<br />
Unisat 0230 0162<br />
United 1281<br />
Universum 0203 0329 1129<br />
Van Hunen 1191 0329<br />
Variosat 0203<br />
Vega 0399<br />
Ventana 0230<br />
Vestel 1281<br />
VH-Sat 1191 0329<br />
Viasat 1353 1053<br />
Visionic 0155 1309<br />
Visiosat 0743 1159 1487<br />
Vivid 1192<br />
VTech 0848<br />
Wavelength 1262 1443<br />
Wharfedale 1314<br />
Winbox 1831<br />
Wisi 0203 0329 0162<br />
Worldsat 1503 1244 1281<br />
XMS 1105<br />
Xrypton 0399<br />
XSat 0743 1244 0877<br />
1353<br />
Xtreme 1330<br />
YES 0917<br />
Yess 1577<br />
Zehnder 1281 1262 1364<br />
1442 1105 1443<br />
0534 0848 0399<br />
Zenith 0886<br />
Zeta Technology 0230<br />
Zinwell 1206<br />
Zodiac 1831<br />
65
A&R Cambridge Ltd, Pembroke Avenue, Waterbeach, CAMBRIDGE CB25 9QR, England<br />
SH215E Issue 2 P/N: 4301-7333+0