Fizmo Manual.pdf - Ugo Audio
Fizmo Manual.pdf - Ugo Audio
Fizmo Manual.pdf - Ugo Audio

You also want an ePaper? Increase the reach of your titles
YUMPU automatically turns print PDFs into web optimized ePapers that Google loves.
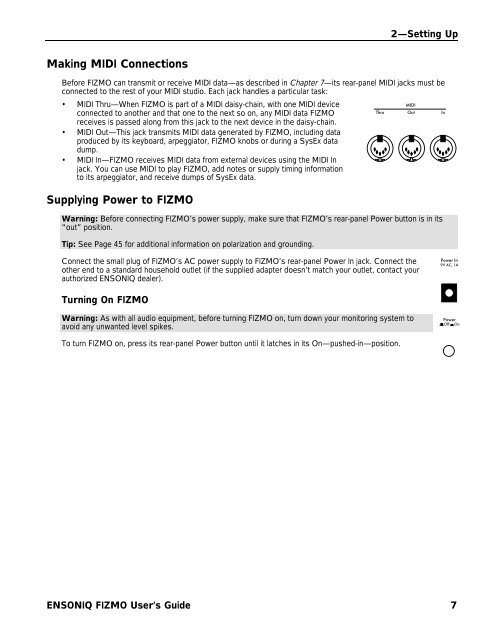
2—Setting Up<br />
Making MIDI Connections<br />
Before FIZMO can transmit or receive MIDI data—as described in Chapter 7—its rear-panel MIDI jacks must be<br />
connected to the rest of your MIDI studio. Each jack handles a particular task:<br />
• MIDI Thru—When FIZMO is part of a MIDI daisy-chain, with one MIDI device<br />
connected to another and that one to the next so on, any MIDI data FIZMO<br />
receives is passed along from this jack to the next device in the daisy-chain.<br />
• MIDI Out—This jack transmits MIDI data generated by FIZMO, including data<br />
produced by its keyboard, arpeggiator, FIZMO knobs or during a SysEx data<br />
dump.<br />
• MIDI In—FIZMO receives MIDI data from external devices using the MIDI In<br />
jack. You can use MIDI to play FIZMO, add notes or supply timing information<br />
to its arpeggiator, and receive dumps of SysEx data.<br />
MIDI<br />
Thru Out In<br />
Supplying Power to FIZMO<br />
Warning: Before connecting FIZMO’s power supply, make sure that FIZMO’s rear-panel Power button is in its<br />
“out” position.<br />
Tip: See Page 45 for additional information on polarization and grounding.<br />
Connect the small plug of FIZMO’s AC power supply to FIZMO’s rear-panel Power In jack. Connect the<br />
other end to a standard household outlet (if the supplied adapter doesn’t match your outlet, contact your<br />
authorized ENSONIQ dealer).<br />
Power In<br />
9V AC, 1A<br />
Turning On FIZMO<br />
Warning: As with all audio equipment, before turning FIZMO on, turn down your monitoring system to<br />
avoid any unwanted level spikes.<br />
Power<br />
Off On<br />
To turn FIZMO on, press its rear-panel Power button until it latches in its On—pushed-in—position.<br />
ENSONIQ FIZMO User’s Guide 7