Adding and Formatting Slides, Notes, and Handouts
Adding and Formatting Slides, Notes, and Handouts
Adding and Formatting Slides, Notes, and Handouts

Create successful ePaper yourself
Turn your PDF publications into a flip-book with our unique Google optimized e-Paper software.
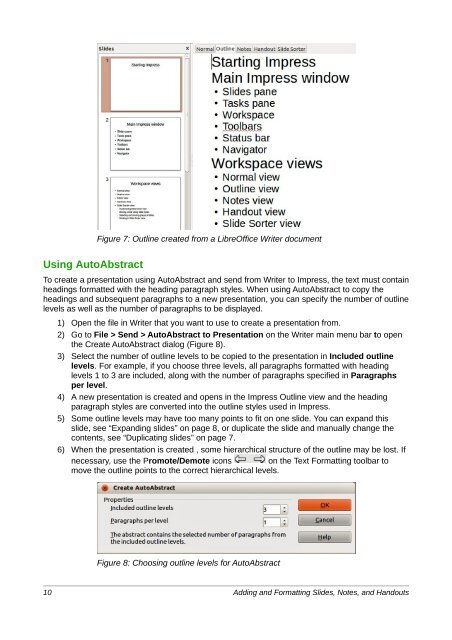
Figure 7: Outline created from a LibreOffice Writer document<br />
Using AutoAbstract<br />
To create a presentation using AutoAbstract <strong>and</strong> send from Writer to Impress, the text must contain<br />
headings formatted with the heading paragraph styles. When using AutoAbstract to copy the<br />
headings <strong>and</strong> subsequent paragraphs to a new presentation, you can specify the number of outline<br />
levels as well as the number of paragraphs to be displayed.<br />
1) Open the file in Writer that you want to use to create a presentation from.<br />
2) Go to File > Send > AutoAbstract to Presentation on the Writer main menu bar to open<br />
the Create AutoAbstract dialog (Figure 8).<br />
3) Select the number of outline levels to be copied to the presentation in Included outline<br />
levels. For example, if you choose three levels, all paragraphs formatted with heading<br />
levels 1 to 3 are included, along with the number of paragraphs specified in Paragraphs<br />
per level.<br />
4) A new presentation is created <strong>and</strong> opens in the Impress Outline view <strong>and</strong> the heading<br />
paragraph styles are converted into the outline styles used in Impress.<br />
5) Some outline levels may have too many points to fit on one slide. You can exp<strong>and</strong> this<br />
slide, see “Exp<strong>and</strong>ing slides” on page 8, or duplicate the slide <strong>and</strong> manually change the<br />
contents, see “Duplicating slides” on page 7.<br />
6) When the presentation is created , some hierarchical structure of the outline may be lost. If<br />
necessary, use the Promote/Demote icons on the Text <strong>Formatting</strong> toolbar to<br />
move the outline points to the correct hierarchical levels.<br />
Figure 8: Choosing outline levels for AutoAbstract<br />
10 <strong>Adding</strong> <strong>and</strong> <strong>Formatting</strong> <strong>Slides</strong>, <strong>Notes</strong>, <strong>and</strong> H<strong>and</strong>outs