Adding and Formatting Slides, Notes, and Handouts
Adding and Formatting Slides, Notes, and Handouts
Adding and Formatting Slides, Notes, and Handouts

Create successful ePaper yourself
Turn your PDF publications into a flip-book with our unique Google optimized e-Paper software.
Renaming slides<br />
Renaming a slide is as follows:<br />
1) Click on the Normal tab or Slide Sorter tab in the Workspace or go to View > Normal or<br />
View > Slide Sorter on the main menu bar.<br />
2) In Normal view, right-click on the slide in the <strong>Slides</strong> pane or Workspace <strong>and</strong> select Slide ><br />
Rename Slide from the context menu.<br />
3) In Slide Sorter view, right-click on the slide <strong>and</strong> select Rename Slide from the context<br />
menu.<br />
4) In the Rename Slide dialog (Figure 4), type a new name for the slide <strong>and</strong> click OK.<br />
Exp<strong>and</strong>ing slides<br />
Occasionally you may have a slide with too many points to fit in the space available. Instead of<br />
reducing the font size or using other methods to squeeze more text onto the slide, it is better to<br />
subdivide the contents of the slide into two or more slides.<br />
As mentioned in “Duplicating slides” on page 7, you can duplicate the slide <strong>and</strong> manually split the<br />
points. Alternatively the contents of a slide can be exp<strong>and</strong>ed as follows:<br />
1) If necessary, duplicate the slide in case of error <strong>and</strong> you want to redo expansion of the<br />
slide.<br />
2) Select Insert > Exp<strong>and</strong> Slide from the main menu to create a new slide for each highest<br />
level of the outline. The outline text becomes the title of each new slide. Outline points<br />
below the top level on the original slide are moved up one level in the new slides.<br />
3) If required, repeat steps 2 <strong>and</strong> 3 on any slide where level 2 entries of the outline exist, to<br />
exp<strong>and</strong> those as well.<br />
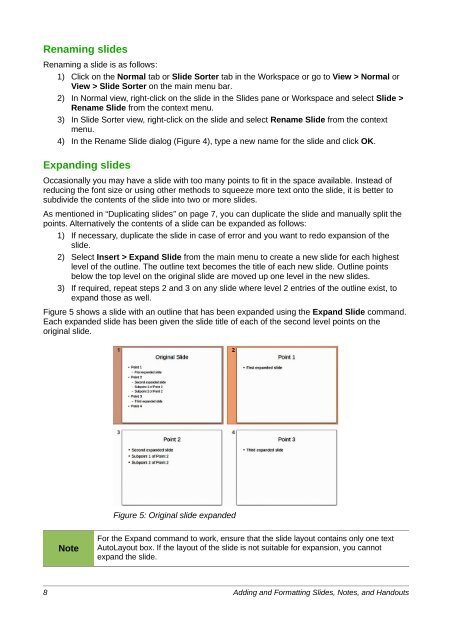
Figure 5 shows a slide with an outline that has been exp<strong>and</strong>ed using the Exp<strong>and</strong> Slide comm<strong>and</strong>.<br />
Each exp<strong>and</strong>ed slide has been given the slide title of each of the second level points on the<br />
original slide.<br />
Figure 5: Original slide exp<strong>and</strong>ed<br />
Note<br />
For the Exp<strong>and</strong> comm<strong>and</strong> to work, ensure that the slide layout contains only one text<br />
AutoLayout box. If the layout of the slide is not suitable for expansion, you cannot<br />
exp<strong>and</strong> the slide.<br />
8 <strong>Adding</strong> <strong>and</strong> <strong>Formatting</strong> <strong>Slides</strong>, <strong>Notes</strong>, <strong>and</strong> H<strong>and</strong>outs