Adding and Formatting Slides, Notes, and Handouts
Adding and Formatting Slides, Notes, and Handouts
Adding and Formatting Slides, Notes, and Handouts
Create successful ePaper yourself
Turn your PDF publications into a flip-book with our unique Google optimized e-Paper software.
<strong>Formatting</strong> slides or page area<br />
Note<br />
Any changes to the page format (size, margins, orientation, <strong>and</strong> so on) apply to all<br />
slides in the presentation. You can only define one page style in Impress, whereas in<br />
Writer or Calc you can define more than one page style. You can change the<br />
background of individual slides, see “Changing slide background” on page 13.<br />
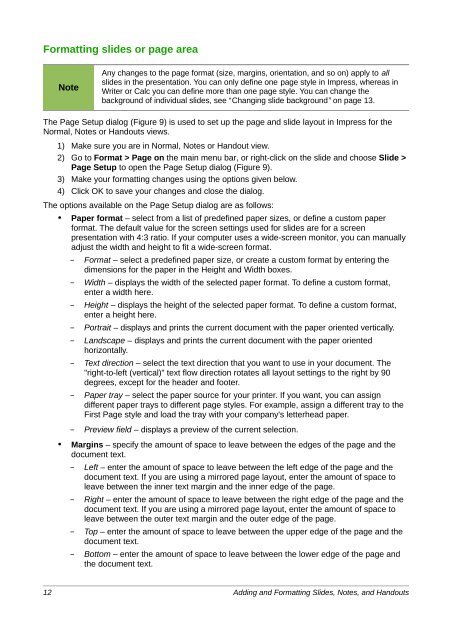
The Page Setup dialog (Figure 9) is used to set up the page <strong>and</strong> slide layout in Impress for the<br />
Normal, <strong>Notes</strong> or H<strong>and</strong>outs views.<br />
1) Make sure you are in Normal, <strong>Notes</strong> or H<strong>and</strong>out view.<br />
2) Go to Format > Page on the main menu bar, or right-click on the slide <strong>and</strong> choose Slide ><br />
Page Setup to open the Page Setup dialog (Figure 9).<br />
3) Make your formatting changes using the options given below.<br />
4) Click OK to save your changes <strong>and</strong> close the dialog.<br />
The options available on the Page Setup dialog are as follows:<br />
• Paper format – select from a list of predefined paper sizes, or define a custom paper<br />
format. The default value for the screen settings used for slides are for a screen<br />
presentation with 4:3 ratio. If your computer uses a wide-screen monitor, you can manually<br />
adjust the width <strong>and</strong> height to fit a wide-screen format.<br />
– Format – select a predefined paper size, or create a custom format by entering the<br />
dimensions for the paper in the Height <strong>and</strong> Width boxes.<br />
– Width – displays the width of the selected paper format. To define a custom format,<br />
enter a width here.<br />
– Height – displays the height of the selected paper format. To define a custom format,<br />
enter a height here.<br />
– Portrait – displays <strong>and</strong> prints the current document with the paper oriented vertically.<br />
– L<strong>and</strong>scape – displays <strong>and</strong> prints the current document with the paper oriented<br />
horizontally.<br />
– Text direction – select the text direction that you want to use in your document. The<br />
"right-to-left (vertical)" text flow direction rotates all layout settings to the right by 90<br />
degrees, except for the header <strong>and</strong> footer.<br />
– Paper tray – select the paper source for your printer. If you want, you can assign<br />
different paper trays to different page styles. For example, assign a different tray to the<br />
First Page style <strong>and</strong> load the tray with your company's letterhead paper.<br />
– Preview field – displays a preview of the current selection.<br />
• Margins – specify the amount of space to leave between the edges of the page <strong>and</strong> the<br />
document text.<br />
– Left – enter the amount of space to leave between the left edge of the page <strong>and</strong> the<br />
document text. If you are using a mirrored page layout, enter the amount of space to<br />
leave between the inner text margin <strong>and</strong> the inner edge of the page.<br />
– Right – enter the amount of space to leave between the right edge of the page <strong>and</strong> the<br />
document text. If you are using a mirrored page layout, enter the amount of space to<br />
leave between the outer text margin <strong>and</strong> the outer edge of the page.<br />
– Top – enter the amount of space to leave between the upper edge of the page <strong>and</strong> the<br />
document text.<br />
– Bottom – enter the amount of space to leave between the lower edge of the page <strong>and</strong><br />
the document text.<br />
12 <strong>Adding</strong> <strong>and</strong> <strong>Formatting</strong> <strong>Slides</strong>, <strong>Notes</strong>, <strong>and</strong> H<strong>and</strong>outs


