EndNote X6 (Word 2010) - The University of Auckland Library
EndNote X6 (Word 2010) - The University of Auckland Library
EndNote X6 (Word 2010) - The University of Auckland Library

You also want an ePaper? Increase the reach of your titles
YUMPU automatically turns print PDFs into web optimized ePapers that Google loves.
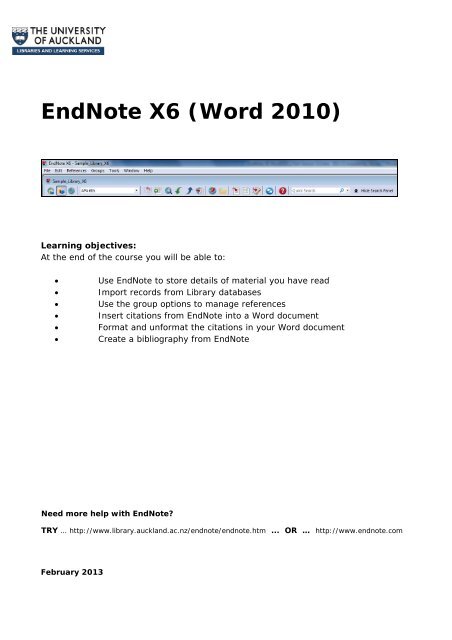
<strong>EndNote</strong> <strong>X6</strong> (<strong>Word</strong> <strong>2010</strong>)<br />
Learning objectives:<br />
At the end <strong>of</strong> the course you will be able to:<br />
<br />
<br />
<br />
<br />
<br />
<br />
Use <strong>EndNote</strong> to store details <strong>of</strong> material you have read<br />
Import records from <strong>Library</strong> databases<br />
Use the group options to manage references<br />
Insert citations from <strong>EndNote</strong> into a <strong>Word</strong> document<br />
Format and unformat the citations in your <strong>Word</strong> document<br />
Create a bibliography from <strong>EndNote</strong><br />
Need more help with <strong>EndNote</strong><br />
TRY … http://www.library.auckland.ac.nz/endnote/endnote.htm ... OR … http://www.endnote.com<br />
February 2013
2<br />
Contents<br />
PART ONE .............................................................................................................................................................3<br />
What is <strong>EndNote</strong> .................................................................................................................................................3<br />
Manually Enter a Reference .................................................................................................................................4<br />
Accessing Records from the Catalogue ................................................................................................................5<br />
Use Groups to Manage your References ..............................................................................................................7<br />
Work with References ..........................................................................................................................................8<br />
Search your <strong>Library</strong> ...............................................................................................................................................9<br />
Track and Rate your References ...........................................................................................................................9<br />
<strong>EndNote</strong> and Micros<strong>of</strong>t <strong>Word</strong> ........................................................................................................................... 10<br />
Select a Style ...................................................................................................................................................... 10<br />
Insert Citations .................................................................................................................................................. 11<br />
Edit Citations...................................................................................................................................................... 13<br />
Back‐up your <strong>EndNote</strong> <strong>Library</strong> ........................................................................................................................... 15<br />
How to get <strong>EndNote</strong> & Help .............................................................................................................................. 16<br />
PART TWO ......................................................................................................................................................... 17<br />
Direct Export results from a Database .............................................................................................................. 17<br />
Add a File Attachment ....................................................................................................................................... 18<br />
Work with PDFs ............................................................................................................................................. 19<br />
Import Records using a Filter ............................................................................................................................ 20<br />
Importing another <strong>EndNote</strong> <strong>Library</strong> .............................................................................................................. 21<br />
Importing References from PDF files ............................................................................................................. 22<br />
Use Groups to Manage your References ........................................................................................................... 22<br />
Format the Reference List ................................................................................................................................. 23<br />
Unformat and Reformat a Document ............................................................................................................... 23<br />
Create Bibliographies: general, subject and annotated .................................................................................... 26<br />
<strong>University</strong> <strong>of</strong> <strong>Auckland</strong> <strong>Library</strong> – <strong>EndNote</strong> <strong>X6</strong> October 2012
3<br />
PART ONE<br />
What is <strong>EndNote</strong><br />
<strong>EndNote</strong> is a specialised database program for storing and managing bibliographic references. It allows you<br />
to copy references from <strong>Library</strong> catalogues and bibliographic databases. You can add your own notes,<br />
rankings, subject headings, and useful quotations to the references. <strong>The</strong> references can be sorted and<br />
searched, and incorporated automatically into papers for publication. <strong>EndNote</strong> makes writing academic<br />
papers easier, not only by saving you time, but also by ensuring your references are cited consistently.<br />
<strong>EndNote</strong> <strong>Library</strong><br />
<strong>EndNote</strong> Terminology<br />
An <strong>EndNote</strong> file is called a library. It is a database containing a separate record for each reference.<br />
Each record is made up <strong>of</strong> several fields containing specific pieces <strong>of</strong> information.<br />
To create a new library:<br />
1. Open the <strong>EndNote</strong> programme from the menu:<br />
Start >> Programs >> <strong>EndNote</strong> >> <strong>EndNote</strong> Program (if you get a screen pop‐up asking you to create<br />
an <strong>EndNote</strong> Web account – click cancel)<br />
2. Click the image next to the option Create a new <strong>EndNote</strong> library. <strong>EndNote</strong> will present a dialog box<br />
to name and save the file.<br />
3. Enter a name for your new library in the File name area.<br />
4. Click Save. In this tutorial your library should be saved to the Desktop.<br />
5. <strong>The</strong> new file is an empty <strong>EndNote</strong> library, showing “0 out <strong>of</strong> 0 references.”<br />
<strong>University</strong> <strong>of</strong> <strong>Auckland</strong> <strong>Library</strong> – <strong>EndNote</strong> <strong>X6</strong> October 2012
4<br />
One <strong>Library</strong><br />
While it is possible to keep more than one library, it is recommended that you only have one library. If you<br />
insert references from different libraries into the same <strong>Word</strong> document there can be problems with<br />
formatting and reference double‐ups. You can use the groups, notes and search features <strong>of</strong> <strong>EndNote</strong> to<br />
effectively manage a large library. Some fields in a reference can have about 10‐12 pages <strong>of</strong> text, e.g. you<br />
can have 10 pages <strong>of</strong> your own research notes in addition to all the other information about the reference.<br />
Manually Enter a Reference<br />
To input reference information manually:<br />
1. References >> New Reference<br />
2. A blank New Reference appears.<br />
3. Choose the Reference Type from the drop‐down<br />
box<br />
4. Enter the reference from this sample cover page:<br />
Reed Books<br />
<strong>Auckland</strong>, N.Z. 2015<br />
<strong>The</strong> Reference Type box is at the top <strong>of</strong> every new reference, indicating<br />
the type <strong>of</strong> reference being entered. Journal Article is usually the<br />
default reference type, but you can select any other type from the<br />
drop‐down list.<br />
Use the Enter key to create a new line in a field, e.g. for another author.<br />
Use the Tab key to move down the fields.<br />
Use the Shift+Tab keys to move back up the fields.<br />
Once all data has been entered close the reference window (CTRL+W). <strong>EndNote</strong> will ask if you want to save<br />
the information, click yes. <strong>The</strong> new reference will now display in your library.<br />
If you need to make changes to a reference after you have closed it, open the reference, make the changes,<br />
close the window and click yes in the pop‐up box to save the changes.<br />
<strong>University</strong> <strong>of</strong> <strong>Auckland</strong> <strong>Library</strong> – <strong>EndNote</strong> <strong>X6</strong> October 2012
5<br />
Names<br />
• <strong>The</strong>re are several ways to enter author (or editor) names, either:<br />
First Middle Last<br />
e.g. D H Erwin<br />
OR<br />
Last, First Middle<br />
e.g. Erwin, D H<br />
• Only one author name can be entered per line. Press Enter to get another line.<br />
• If you are entering initials instead <strong>of</strong> full names, make sure there is a space between each initial.<br />
• If your author is a corporate body e.g. Manukau City Council you must put a comma after the last<br />
part <strong>of</strong> the author name e.g. Manukau City Council, If you omit the comma then <strong>EndNote</strong> will<br />
interpret this as an individual author and output it as e.g. Council, M.C.<br />
• As you enter author names you may notice that some appear in red. Any text that appears in red is<br />
part <strong>of</strong> a term list. <strong>The</strong>se are used to help with data entry by suggesting terms as you type.<br />
• For further information on entering names, including authors with suffixes and corporate authors<br />
that already include a comma in their name, consult Chapter 4 <strong>of</strong> the full <strong>EndNote</strong> manual:<br />
http://endnote.com/if/online‐user‐manual<br />
Formatting Text in a single <strong>EndNote</strong> Reference<br />
<strong>The</strong> general rule is that you do not format your references with bold, italics, underlining or punctuation.<br />
<strong>EndNote</strong> does all <strong>of</strong> that formatting automatically. <strong>The</strong> reference style you select for your document governs<br />
the style <strong>of</strong> in‐text citations and bibliography.<br />
<strong>The</strong>re are some occasions, eg; entering scientific names ‐ Southern royal albatrosses (Diomedea<br />
epomophora), where you may need to format a piece <strong>of</strong> text. In these situations you can use the formatting<br />
options at the top <strong>of</strong> the reference window.<br />
Accessing Records from the Catalogue<br />
<strong>The</strong>re are two ways to get results from the <strong>Library</strong> Catalogue into Endnote:<br />
Option 1: Use the Online Search Method (searching within Endnote)<br />
Currently the most reliable method <strong>of</strong> getting results from the <strong>Library</strong> Catalogue into <strong>EndNote</strong> is to use the<br />
Online Search method.<br />
Before starting any Online Search make sure your library is displaying in the<br />
Online Mode. To select the Online Mode click on the picture <strong>of</strong> the globe at the<br />
top left <strong>of</strong> the library window.<br />
Step 1: Search for References<br />
1. Tools >> Online Search<br />
2. Select U <strong>Auckland</strong> from the list <strong>of</strong> connection files and click Choose.<br />
<strong>EndNote</strong> has now established a link into the <strong>Library</strong> Catalogue and the <strong>EndNote</strong> search tab will show<br />
‘Search Remote <strong>Library</strong>’.<br />
3. Enter the search term e.g. egyptian tombs into the first search box<br />
<strong>University</strong> <strong>of</strong> <strong>Auckland</strong> <strong>Library</strong> – <strong>EndNote</strong> <strong>X6</strong> October 2012
6<br />
4. Change the Author option to Any Field and click Search.<br />
5. <strong>EndNote</strong> will search the <strong>Library</strong> Catalogue and display the references that match your search term.<br />
Step 2: Retrieve References<br />
1. You will now be given the option to retrieve the references.<br />
2. Retrieve all the references from the search by clicking OK. <strong>The</strong> references will be downloaded and<br />
will appear in the Retrieved References window.<br />
NB: If your result set is too large you can choose just to retrieve a section <strong>of</strong> the results OR click<br />
Cancel to return to the search screen and add further terms to your search.<br />
Step 3: Save References<br />
1. Review the retrieved references. <strong>The</strong>se references are not actually part <strong>of</strong> your <strong>EndNote</strong> library yet.<br />
If you closed <strong>EndNote</strong> now they would not be saved.<br />
2. Select the references you want to save. If you want to save only a sub‐set, hold down the Ctrl key<br />
and click on the individual references.<br />
3. <strong>The</strong> selected references can be copied into your <strong>EndNote</strong> library by clicking References >> Copy<br />
References To>> choose your library name.<br />
IMPORTANT: To view and use your <strong>EndNote</strong> <strong>Library</strong> you need to now change from Online Mode to<br />
Integrated Mode. A pop‐up box will ask if you want to discard the online references, if you have<br />
finished copying references, click OK.<br />
Option 2: Export from <strong>Library</strong> Search (not recommended – please check references for accuracy<br />
after exporting)<br />
1. Open <strong>Library</strong> Search<br />
2. Enter the search term coastal erosion into the search box<br />
3. Add the first five items on the results list to your My <strong>Library</strong> account<br />
4. Go to your My <strong>Library</strong> account and select all items<br />
5. Select Push to Endnote from the Select How to Save menu (*note: these items should directly export<br />
into your Endnote account)<br />
<strong>University</strong> <strong>of</strong> <strong>Auckland</strong> <strong>Library</strong> – <strong>EndNote</strong> <strong>X6</strong> October 2012
7<br />
Use Groups to Manage your References<br />
Groups are displayed in the left column <strong>of</strong> your library. <strong>The</strong> groups: All References, Unfiled and Trash will<br />
always show. Some groups will appear only when you have used certain <strong>EndNote</strong> functions, e.g. Search<br />
Results, Copied References.<br />
You can also create up to 500 <strong>of</strong> your own custom groups to help manage your references. Custom Groups<br />
are like folders. References are only included in a group if you add them.<br />
Creating a Group<br />
1. From the Groups menu select Create Group<br />
2. A box will appear under the My Groups heading. Type your group name in here e.g. egyptian tombs<br />
Adding References to a Group<br />
1. In All References select the reference(s) you want included in the new group.<br />
2. From the Groups menu select Add References To >> egyptian tombs<br />
Removing References from a Group<br />
1. In a group select the reference(s) to be removed<br />
2. From the Groups menu select Remove References From Group<br />
Deleting a Group<br />
1. Click on the group name in the left column to display the group you want to delete<br />
2. From the Groups menu select Delete Group.<br />
You can add a single reference to more than one group. Adding a reference to a group does not remove it<br />
from your main library (All References). This means you can remove a reference from a group but it will still<br />
be included in your main library (All References). If you delete a reference from your library (All References),<br />
it will be removed from all groups and permanently deleted.<br />
<strong>University</strong> <strong>of</strong> <strong>Auckland</strong> <strong>Library</strong> – <strong>EndNote</strong> <strong>X6</strong> October 2012
8<br />
Work with References<br />
Each row in the main window represents a single reference. Each reference in the library contains the<br />
citation details, author, title, journal title, etc.<br />
Re‐order the list <strong>of</strong> references by clicking on the title <strong>of</strong> the<br />
column you want the references sorted by, eg: author, year.<br />
Adjust the column widths by dragging<br />
the bar between column headings.<br />
To delete a reference from your library click on the reference and then go to<br />
References >> Move References to Trash<br />
Changing the Fields Displayed in the <strong>Library</strong> Window<br />
By default, <strong>EndNote</strong> displays the Read/Unread Status, File Attachments, Author, Year, Title, Rating,<br />
Journal/Secondary Title, Last Updated, and Ref Type for each reference. You can display up to ten fields.<br />
To change the columns displayed in the library window:<br />
1. From the Edit menu, choose Preferences.<br />
2. Select Display Fields from the list on the<br />
left side <strong>of</strong> the preferences window.<br />
3. Select the columns to display. By default,<br />
<strong>EndNote</strong> will use the generic field name as<br />
the column title; you may use different text<br />
as the column title by entering that text in<br />
the "Heading" text box corresponding to<br />
each column.<br />
4. Click OK to confirm your selection.<br />
<strong>University</strong> <strong>of</strong> <strong>Auckland</strong> <strong>Library</strong> – <strong>EndNote</strong> <strong>X6</strong> October 2012
9<br />
Search your <strong>Library</strong><br />
As your <strong>Library</strong> increases you will need to be able to easily search for specific references. <strong>The</strong>re are two<br />
search functions available in <strong>EndNote</strong> which search across both your references and the text <strong>of</strong> any<br />
attachments you have saved within your <strong>Library</strong>.<br />
Quick Search<br />
In <strong>EndNote</strong> at the end <strong>of</strong> the toolbar there is a Quick Search box. Enter your search word(s) in the box and<br />
press Enter. <strong>The</strong> results will be displayed. To view all references in your library again select References >><br />
Show All References<br />
Search Tab<br />
If you want more search options then you need to use the Search Tab. Above the references in your library<br />
you should see a preview pane. Choose a search option, and enter some key‐words to search.<br />
T<br />
To search for text within<br />
PDFs choose the Any Field +<br />
PDF with notes from the<br />
drop‐down menu.<br />
To search on word variations use the asterisk for a wildcard e.g. to<br />
search for all variations <strong>of</strong> the word free search for free*<br />
Track and Rate your References<br />
<strong>EndNote</strong> has several options for tracking your references.<br />
Read or Unread Status<br />
To change the status <strong>of</strong> references to ‘read’ or ‘unread’:<br />
<br />
<br />
From your library, double‐click on a reference to open.<br />
Click the Mark as Read/Unread icon to change the status <strong>of</strong> your<br />
reference.<br />
Note: <strong>EndNote</strong> automatically marks a reference as read when you view it in the<br />
reference window. You can change Read/Unread preferences by going to Edit ><br />
Preferences > Read/Unread.<br />
<strong>University</strong> <strong>of</strong> <strong>Auckland</strong> <strong>Library</strong> – <strong>EndNote</strong> <strong>X6</strong> October 2012
10<br />
Rating your References<br />
To rate your references:<br />
<br />
<br />
From your library, double‐click on a reference to open.<br />
Apply a rating to your references in the main reference window by clicking on each star<br />
directly.<br />
Note: You can search by rating by selecting the ‘Rating’ option from the Search Field list.<br />
<strong>EndNote</strong> and Micros<strong>of</strong>t <strong>Word</strong><br />
<strong>EndNote</strong> and Micros<strong>of</strong>t <strong>Word</strong><br />
Cite While You Write<br />
<strong>The</strong> <strong>EndNote</strong> Cite While You Write (CWYW) functions allow you to easily and quickly cite references and<br />
create a document with properly formatted citations and bibliography. <strong>The</strong>se Cite While You Write functions<br />
are available from the <strong>EndNote</strong> tab on the Micros<strong>of</strong>t <strong>Word</strong> ribbon.<br />
<strong>EndNote</strong> Citation Styles<br />
Before creating your document in MS <strong>Word</strong> you need to select a reference style. Styles are used to<br />
determine the format for your citations and references. Styles are typically for specific journals, though they<br />
can also be based on more general style guides such as the Chicago Manual <strong>of</strong> Style or the MLA Handbook.<br />
<strong>EndNote</strong> provides hundreds <strong>of</strong> preconfigured styles. You should always check with your supervisor or<br />
department as to which style to use. In rare cases you may need to make minor alterations to the style you<br />
have chosen if it does not quite fit your requirements. Consult the full <strong>EndNote</strong> manual for instructions on<br />
editing a style.<br />
Select a Style<br />
<strong>EndNote</strong> contains many referencing styles for you to<br />
choose from. If you are unsure which style to use, ask<br />
your lecturer, tutor or supervisor.<br />
To choose a style:<br />
1. Edit >> Output Styles >> Open Style Manager<br />
2. <strong>The</strong> <strong>EndNote</strong> Styles box will display<br />
3. Select the style you want by clicking in the<br />
tick‐box beside it. For example we will select<br />
the APA 6th style. You can select more than<br />
<strong>University</strong> <strong>of</strong> <strong>Auckland</strong> <strong>Library</strong> – <strong>EndNote</strong> <strong>X6</strong> October 2012
11<br />
one style.<br />
4. Click on the cross to close the <strong>EndNote</strong> Styles<br />
box.<br />
<strong>The</strong> style currently used in your <strong>EndNote</strong> library is<br />
displayed at the top <strong>of</strong> the screen. <strong>The</strong> default style is<br />
usually the Annotated style.<br />
To select the style you have just chosen click on the<br />
drop‐down option. Click on the style you want, e.g.<br />
APA 6 th .<br />
Your style is now selected and all citations and reference lists will be formatted by the rules<br />
governing the style. If you need to change the style for any reason, then simply repeat the steps<br />
above.<br />
Note: If the style you want does not show in the list <strong>of</strong> options you may need to go to the <strong>EndNote</strong> website<br />
and download a style. Further information on this can be found in Chapter 17 <strong>of</strong> the full <strong>EndNote</strong> manual.<br />
Saving Additional Styles<br />
If the style you want does not show in the list <strong>of</strong> options you may need to go to the <strong>EndNote</strong> website<br />
(http://endnote.com/downloads/styles) to download a style. Save the style file in a folder (eg:<br />
endnotex5styles) in one <strong>of</strong> the following locations :<br />
C:\Documents and Settings\[User Name]\My Documents\ (for Windows XP)<br />
C:\Users\[User Name]\ Documents\ (for Windows Vista or Windows 7).<br />
You will need to make sure the <strong>EndNote</strong> folder locations match where you are saving the styles. In <strong>EndNote</strong><br />
select Edit > Preferences > Folder Locations to check the locations.<br />
Insert Citations<br />
Inserting Citations from MS <strong>Word</strong><br />
In your document type the following quote:<br />
“Residents <strong>of</strong> Great Barrier Island have mixed reactions to the<br />
possibility <strong>of</strong> mining on the island.”<br />
At this point we need to insert a citation for this quote. <strong>The</strong> reference<br />
we wish to insert is the Great Barrier Island reference that we<br />
entered earlier.<br />
To insert the citation from MS <strong>Word</strong>:<br />
1. Choose the <strong>EndNote</strong> tab >> Insert Citation >> Find Citation<br />
2. <strong>The</strong> <strong>EndNote</strong> Find Citations box will appear so you can search<br />
for your reference.<br />
<strong>University</strong> <strong>of</strong> <strong>Auckland</strong> <strong>Library</strong> – <strong>EndNote</strong> <strong>X6</strong> October 2012
12<br />
3. Type the author’s name, e.g.<br />
Brownlee<br />
4. Click Find<br />
If you can’t remember the name <strong>of</strong> the first author, you could enter<br />
in the name(s) <strong>of</strong> other authors, or keywords from the title or other<br />
relevant fields. It is also possible to select text in your MS <strong>Word</strong><br />
document and then choose the ‘Find Citation’ option to find the<br />
selected text.<br />
5. Select the appropriate reference and click Insert at the bottom <strong>of</strong> the box.<br />
6. <strong>The</strong> citation should now appear in your document.<br />
<strong>The</strong> <strong>EndNote</strong> Find Citations dialog box will show the finds that resulted from your search.<br />
<br />
<br />
<br />
If your search resulted in more than one find, you will need to select the correct reference citation for the<br />
idea you are currently citing.<br />
If no finds were found, you will need to try again.<br />
Note that if you do not have the <strong>EndNote</strong> s<strong>of</strong>tware (and your library) open, no finds will be generated<br />
from this procedure; ensure that both are open before attempting to find citations.<br />
Inserting Citations from <strong>EndNote</strong><br />
1. Type another sentence in your word document. Position your cursor at the end <strong>of</strong> this sentence and<br />
type a space. At this point we wish to insert two references.<br />
2. From Micros<strong>of</strong>t <strong>Word</strong> you use the <strong>EndNote</strong> tab >> Go To <strong>EndNote</strong><br />
3. In your <strong>EndNote</strong> library locate and select two references. (If you want to insert more than one<br />
reference at the same point in your MS <strong>Word</strong> document at the same time, hold down the CTRL key<br />
when selecting your references.)<br />
4. Tools >> Cite While You Write<br />
(CWYW) >> Insert Selected Citation(s )<br />
5. <strong>The</strong> references appear in the text<br />
and in the list that is building at the<br />
end <strong>of</strong> the document.<br />
<strong>University</strong> <strong>of</strong> <strong>Auckland</strong> <strong>Library</strong> – <strong>EndNote</strong> <strong>X6</strong> October 2012
13<br />
Inserting Footnotes<br />
If you are using a footnote style, (e.g. Chicago A), you will need to insert a footnote in Micros<strong>of</strong>t <strong>Word</strong> prior<br />
to inserting references from Endnote.<br />
1. In <strong>Word</strong> <strong>2010</strong>, select References > Insert Footnote.<br />
2. From <strong>Word</strong>, select the <strong>EndNote</strong> Tab > Go to <strong>EndNote</strong>.<br />
3. Find and highlight the required reference in <strong>EndNote</strong>.<br />
4. Back in <strong>Word</strong>: position your cursor in the note. <strong>The</strong>n go to <strong>Word</strong>’s <strong>EndNote</strong> Tab, click Insert Citation<br />
Insert Selected Citation(s)<br />
Edit Citations<br />
<strong>The</strong> way your citations appear in the text <strong>of</strong> your document may not always be formatted as you require.<br />
Sometimes you may need to include a prefix, suffix, or page reference, or to exclude the year or author. For<br />
example the in‐text citation may be ‐ (Nugent, 1998) ‐ but you would prefer it too look like ‐ (Nugent, 1998,<br />
p. 1077) or … as reported by Nugent (1998, p.1077)<br />
<strong>EndNote</strong> has a specific function for editing citations. You must use this function to edit citations. If you try<br />
to change citations by manually typing or deleting in the <strong>Word</strong> document the changes will not be retained.<br />
<strong>The</strong> citations will soon revert to their original form.<br />
To make changes always follow these steps:<br />
1. Insert the citation in the document<br />
2. Place your cursor somewhere inside the citation to be formatted (it should turn grey)<br />
3. From the <strong>EndNote</strong> tab choose Edit and Manage Citation(s)<br />
4. <strong>The</strong> <strong>EndNote</strong> Edit and Manage Citation dialog box is displayed<br />
5. All references in the document are displayed in the top part <strong>of</strong> the pane. <strong>The</strong> reference you have<br />
chosen should be selected.<br />
6. Use the Edit Citation options in the Edit Citation pane to exclude the required information then click<br />
the OK button to confirm changes.<br />
<strong>University</strong> <strong>of</strong> <strong>Auckland</strong> <strong>Library</strong> – <strong>EndNote</strong> <strong>X6</strong> October 2012
14<br />
Exclude author & year options<br />
If you wish to remove the author or year from<br />
your citation, then use the formatting drop<br />
down box and select the appropriate option.<br />
Use these options when the author or year is<br />
already part <strong>of</strong> the sentence. For example:<br />
Cadman (1997) has stated …<br />
Pages option<br />
This option allows you to specify page(s) for<br />
citations, e.g for direct quotes. This option is<br />
only reliable for ‘footnote’ styles. For ‘authordate’<br />
type styles you can enter your page(s) into<br />
the ‘suffix’ field.<br />
Prefix option<br />
<strong>The</strong> prefix option allows you to add text to the beginning <strong>of</strong><br />
your citation such as ‘for example’, ‘as cited in’ etc. When<br />
you enter your text, ensure it is entered exactly as you wish<br />
it to appear and at the end <strong>of</strong> the text include a space<br />
(otherwise there will not be a space between your prefix<br />
and the citation).<br />
Suffix option<br />
<strong>The</strong> suffix option allows you to add text at the<br />
end <strong>of</strong> your citation such as page numbers. Type<br />
your text exactly as you wish it to appear,<br />
including spaces and punctuation.<br />
To include a page number in the in‐text citation,<br />
in the suffix box type the page number and the<br />
necessary punctuation, for example p. or pp and<br />
commas and full stops if required , p. 1077.<br />
Note: to correct details in a reference click on the Edit Reference item next to the incorrect reference. This<br />
will take you back to your Endnote <strong>Library</strong> where you can open the reference and correct it. <strong>The</strong>n close the<br />
reference to save the changes. To update the changes in your <strong>Library</strong> select Update from My <strong>Library</strong> using<br />
the Edit Reference drop down box.<br />
<strong>University</strong> <strong>of</strong> <strong>Auckland</strong> <strong>Library</strong> – <strong>EndNote</strong> <strong>X6</strong> October 2012
15<br />
Back‐up your <strong>EndNote</strong> <strong>Library</strong><br />
It is essential that you make a backup <strong>of</strong> your <strong>EndNote</strong> library in case disaster strikes! As well as saving a<br />
copy on the computer you are working on it would also be useful to save a copy on another disc or drive.<br />
You can use this copy to restore your lost or damaged <strong>EndNote</strong> <strong>Library</strong>. When backing up it is essential that<br />
you keep copies <strong>of</strong> both the .enl and the .data files. <strong>The</strong> .data folder contains attached files, terms lists and<br />
group information.<br />
Save a Copy<br />
You can save a copy <strong>of</strong> both your .enl file and its associated .data file to use as a backup or to send to<br />
someone using <strong>EndNote</strong>.<br />
1. Open the <strong>Library</strong> in <strong>EndNote</strong><br />
2. From the File menu, select Save a Copy<br />
3. Use the file dialog box to select where you want to save your back‐up copy.<br />
Save a Compressed Copy<br />
You can save your complete library (both the .enl and the .data file) to a single compressed file. <strong>The</strong> single<br />
file will be an .enlx file that you can restore (unzip) with Endnote.<br />
1. Open the library in Endnote<br />
2. From the File menu, select Compressed <strong>Library</strong><br />
3. Choose the appropriate Compressed <strong>Library</strong> options (see below) and then click Next.<br />
Choose to save a<br />
compressed library<br />
or save and then email a<br />
compressed library.<br />
Choose whether to<br />
compress the whole library,<br />
only the references you<br />
have highlighted in your<br />
library or a specific group <strong>of</strong><br />
references.<br />
Choose whether or not to<br />
keep the file attachments.<br />
NOTE: without file<br />
attachments libraries are<br />
much smaller in size and<br />
therefore easier to email to<br />
others.<br />
<strong>University</strong> <strong>of</strong> <strong>Auckland</strong> <strong>Library</strong> – <strong>EndNote</strong> <strong>X6</strong> October 2012
16<br />
How to get <strong>EndNote</strong> & Help<br />
<strong>The</strong> latest versions available at <strong>The</strong> <strong>University</strong> <strong>of</strong> <strong>Auckland</strong> are version <strong>X6</strong> for Mac and version <strong>X6</strong> for<br />
Windows.<br />
<strong>EndNote</strong> at the <strong>University</strong><br />
<strong>EndNote</strong> is installed on most <strong>University</strong> computers, in student computing laboratories and staff and graduate<br />
<strong>of</strong>fices, and in the <strong>Library</strong>. If <strong>EndNote</strong> is not installed on a computer that you are using please contact the IT<br />
support person for your department/faculty.<br />
<strong>EndNote</strong> at Home<br />
<br />
<br />
Students – <strong>EndNote</strong> <strong>X6</strong> is available to purchase on CD from the Kate Edgar Information Commons,<br />
the Grafton Information Commons, the Epsom Information Commons and the Tamaki Information<br />
Commons. <strong>The</strong> cost is $60.00.<br />
Staff ‐ Please contact computer support staff for you department/faculty if you wish to have<br />
<strong>EndNote</strong> installed at home.<br />
Installing or Upgrading <strong>EndNote</strong><br />
If you are upgrading your <strong>EndNote</strong> version, it is recommended that you uninstall earlier versions. Before you<br />
uninstall an earlier version, you must backup any styles, import filters and connection files that you don't<br />
want overwritten.<br />
If you are working on a word document using your <strong>EndNote</strong> library then you must un‐format the word<br />
document before upgrading your version <strong>of</strong> <strong>EndNote</strong>.<br />
Important Note: If you are collaborating or sharing <strong>EndNote</strong> files with a colleague you should all use the<br />
same version <strong>of</strong> <strong>EndNote</strong>.<br />
System Requirements<br />
Information about the system requirements and word processor compatibility for <strong>EndNote</strong> can be found on<br />
the following webpages for both Windows and Macintosh:<br />
http://endnote.com/en/requirements<br />
Help<br />
<br />
<br />
<br />
<br />
<strong>The</strong> <strong>Library</strong> Web Page: http://www.library.auckland.ac.nz/endnote/endnote.htm<br />
<strong>The</strong> <strong>of</strong>ficial <strong>EndNote</strong> Web Page: http://www.endnote.com<br />
<strong>EndNote</strong> contains a useful quick guide, which is available whenever you use your computer. You can find<br />
it via Start >> All Programs >> <strong>EndNote</strong> >> Getting Started Guide, or locate the .pdf file in the <strong>EndNote</strong><br />
folder on your C:\ drive. You will need Adobe Acrobat Reader to view the manual and it can be<br />
downloaded free from: http://www.adobe.com/support/downloads/<br />
<strong>The</strong> <strong>of</strong>ficial and more comprehensive 800 page <strong>EndNote</strong> manual is also available on the <strong>EndNote</strong> website:<br />
http://endnote.com/if/online‐user‐manual<br />
<strong>University</strong> <strong>of</strong> <strong>Auckland</strong> <strong>Library</strong> – <strong>EndNote</strong> <strong>X6</strong> October 2012
17<br />
PART TWO<br />
Direct Export results from a Database<br />
Direct export is the quickest and easiest method for getting references from a database into <strong>EndNote</strong>. Not<br />
all databases <strong>of</strong>fer a direct export option. To find out if a database supports direct export you can check any<br />
<strong>of</strong> the following:<br />
<br />
<br />
<br />
the help within a database<br />
information on the database Connect Page<br />
information in the full <strong>EndNote</strong> manual under ‘Appendix D: Direct Export Formats and Import<br />
Formats’.<br />
Example: Direct Export from the Medline Database:<br />
1. Open the Medline OvidSP<br />
Database.<br />
2. Search for chicken pox<br />
Tick the Full Text box, and<br />
un‐tick the Map<br />
Term to Subject Heading<br />
box.<br />
3. Select some <strong>of</strong> the results by ticking the box next to the result number<br />
4. Find the options above the first result and click Export<br />
5. From the Export To drop‐down menu choose <strong>EndNote</strong><br />
6. Select Complete Reference<br />
7. Click Export Citation(s)<br />
<strong>University</strong> <strong>of</strong> <strong>Auckland</strong> <strong>Library</strong> – <strong>EndNote</strong> <strong>X6</strong> October 2012
18<br />
In order to demonstrate another feature <strong>of</strong> <strong>EndNote</strong> you need to save one reference from the Medline database in<br />
PDF format:<br />
1. Return to the window displaying the Medline search results<br />
2. Find a reference with the option PDF Full Text and click on the link<br />
3. From the Adobe toolbar (not the web browser toolbar) click the Save icon.<br />
4. Rename the file (the default filename is a long sequence <strong>of</strong> letters and numbers) the author’s surname is a good<br />
choice for filename, and save the file to the desktop.<br />
5. You can then Log <strong>of</strong>f from Medline<br />
Add a File Attachment<br />
You can attach files with full‐text journal articles (e.g. PDFs) in your <strong>EndNote</strong> library. This allows you to<br />
conveniently store articles or notes and use <strong>EndNote</strong> as a file management tool as well.<br />
1. Select the reference you want to attach the file to.<br />
2. From the References menu select File Attachments >> Attach File.<br />
3. From the dialog box locate the file you saved earlier. At the bottom <strong>of</strong> the screen you will see this<br />
option:<br />
If this box is not ticked then the file will not be copied into <strong>EndNote</strong>. Only a file path to where the<br />
article is saved will be added to the reference.<br />
4. <strong>The</strong> file is attached to the reference in your <strong>EndNote</strong> <strong>Library</strong> and an icon will appear in the File<br />
Attachments field. Double‐clicking the icon will open the appropriate program for you to read the<br />
file.<br />
5. <strong>The</strong> original file that was saved earlier is now duplicated in your <strong>EndNote</strong> .data folder. <strong>The</strong> original<br />
file can now be deleted.<br />
When you insert a file into an <strong>EndNote</strong> reference, <strong>EndNote</strong> saves the file in a data folder in the same location<br />
as your <strong>EndNote</strong> library. <strong>The</strong> data folder will have the same name as your library, plus the .data file<br />
extension. For example if your library was named mylibrary.enl the folder where images are stored would be<br />
named mylibrary.data. If you need to delete a file from <strong>EndNote</strong>, open the <strong>EndNote</strong> reference, scroll to the<br />
File Attachments field, select the icon and press the Delete key on your keyboard. Warning: If you delete the<br />
file within the Reference, it is also deleted from the .data folder. Make a copy <strong>of</strong> the file before deleting it<br />
from a reference if you want to retain a copy.<br />
<strong>University</strong> <strong>of</strong> <strong>Auckland</strong> <strong>Library</strong> – <strong>EndNote</strong> <strong>X6</strong> October 2012
19<br />
Work with PDFs<br />
1. Highlight the reference and use the preview window on the right hand side <strong>of</strong> the screen.<br />
<br />
<br />
<br />
Use the Reference Tab to: change any reference details and add your own text to the Research<br />
Notes field.<br />
Use the Preview Tab to: see a preview <strong>of</strong> the citation.<br />
Use the Attached PDF Tab to: view the attached PDF. You can also Email, Print or Zoom etc. by<br />
using the appropriate buttons. To annotate PDFs using the “sticky note” feature from within<br />
Adobe Acrobat – click on the furthermost arrow on the options ribbon.<br />
2. Open the reference from the library window by double clicking on it, from here you can:<br />
<br />
<br />
<br />
Change any reference details and add your own text to the Research Notes field.<br />
View attached PDFs by opening the PDF from the file attachments field<br />
Annotate PDFs using the “sticky note” feature from within adobe acrobat<br />
Note: To save any changes made to a reference or to an attached PDF you must close the reference (Ctrl‐W).<br />
You will then be prompted to save.<br />
<strong>University</strong> <strong>of</strong> <strong>Auckland</strong> <strong>Library</strong> – <strong>EndNote</strong> <strong>X6</strong> October 2012
20<br />
Import Records using a Filter<br />
What is an Import Filter<br />
An import filter is a file used by <strong>EndNote</strong> to import references contained in a data file. A data file contains<br />
records captured or saved from a database. A filter instructs <strong>EndNote</strong> precisely how to interpret the<br />
information in the data file, and copies the information in each field to the corresponding field in <strong>EndNote</strong>.<br />
Each filter is unique to a specific database and its provider e.g. a filter for Medline from Ovid will be different<br />
to a filter for Medline from Ebsco.<br />
Using an import filter is a two‐part process<br />
1. Save references from the database<br />
into a file in an <strong>EndNote</strong> compatible<br />
format.<br />
2. <strong>The</strong> file is then imported into <strong>EndNote</strong><br />
using the appropriate import filter.<br />
Saving Additional Import Filters<br />
<strong>EndNote</strong> comes with hundreds <strong>of</strong> standard import filters that correspond with most <strong>of</strong> the <strong>Library</strong><br />
databases that don’t have a direct export option. In some cases the import filter you require may not be<br />
available in <strong>EndNote</strong>, these filters can be downloaded from the <strong>Library</strong> <strong>EndNote</strong> web page<br />
(http://www.library.auckland.ac.nz/endnote/endnote.htm).<br />
Save the filter file in a folder (eg: endnotex6filters)in one <strong>of</strong> the following locations :<br />
C:\Documents and Settings\[User Name]\My Documents\ (for Windows XP)<br />
C:\Users\[User Name]\ Documents\ (for Windows Vista or Windows 7).<br />
You will need to make sure the <strong>EndNote</strong> folder locations match where you are saving the filters. In<br />
<strong>EndNote</strong> select Edit > Preferences > Folder Locations to check the locations.<br />
Example: using a filter to transfer results from INNZ to <strong>EndNote</strong><br />
Part 1. Downloading References from INNZ : Index New Zealand<br />
1. <strong>The</strong> <strong>Library</strong> website >> Databases >> Browse A‐Z >> I >> Index New Zealand: INNZ<br />
2. Click Direct Connect, and Search for tuatara<br />
3. Find the Full Record Options section underneath the results<br />
4. Make the following selections and click Print/Save<br />
(You can tick the boxes next to each citation to save individual citations if you don’t want them all)<br />
<strong>University</strong> <strong>of</strong> <strong>Auckland</strong> <strong>Library</strong> – <strong>EndNote</strong> <strong>X6</strong> October 2012
21<br />
5. Use the internet browser options to save the results.<br />
6. Save the .txt file to your desktop. You may want to rename the file to make it easily identifiable.<br />
7. Click the back button to see the results in INNZ and then exit the database.<br />
8. You have now saved references from the database in an <strong>EndNote</strong> compatible format and you are<br />
ready to import those references into <strong>EndNote</strong>.<br />
Part 2. Importing Downloaded References into <strong>EndNote</strong><br />
1. Open <strong>EndNote</strong> (Start >> Programs >> <strong>EndNote</strong> >> <strong>EndNote</strong> Program) and open the library into<br />
which you want to import your references.<br />
2. File >> Import<br />
3. Click Choose File... to locate and open the<br />
file you saved above.<br />
4. Double‐click your file name, or highlight it<br />
and click the Open button, the file name<br />
is pasted into the box.<br />
5. Click the Import Option drop‐down menu<br />
and select the database you are importing from.<br />
If your chosen filter has not previously been used on <strong>EndNote</strong> it will not appear on the drop‐down<br />
list <strong>of</strong> filters. You can find it by choosing Other Filters from the Import Options list.<br />
6. In the Choose an Import Filter window scroll through the list <strong>of</strong> available filters and select INNZ.<br />
Once you have used an import filter <strong>EndNote</strong> retains that setting so the filter is ready for use next<br />
time and appears in the Import Options drop‐down list.<br />
7. Select an option from the Duplicates list. A reference is considered a duplicate if the Author, Year,<br />
Title, and Reference Type match a reference already in the library. You can choose to:<br />
a. Import All: Imports all references, including duplicates.<br />
b. Discard Duplicates: Imports all references except duplicates.<br />
c. Import into Duplicates <strong>Library</strong>: Duplicate references are imported into a library called FILE‐<br />
DUPL.ENL where "FILE" is the name <strong>of</strong> the library into which you are importing. Sometimes<br />
<strong>EndNote</strong> won’t detect duplicates because <strong>of</strong> minor variations or errors in citations, so you<br />
should always check your references after they have been imported.<br />
8. Click the Import button to import the file.<br />
When the import is complete, only the newly imported references will show in the <strong>Library</strong> window. This<br />
is an intermediate stage which gives you the opportunity to modify references as required before they<br />
are aggregated into the main library. At this stage you can check individual records to ensure the data<br />
has been imported into the correct fields, or add your own research notes.<br />
9. To view your complete library Click All References.<br />
Importing another <strong>EndNote</strong> <strong>Library</strong><br />
<strong>University</strong> <strong>of</strong> <strong>Auckland</strong> <strong>Library</strong> – <strong>EndNote</strong> <strong>X6</strong> October 2012
22<br />
If you can’t access your existing <strong>EndNote</strong> library and want to save references to <strong>EndNote</strong> you can create a<br />
new library for that day and then import it into your existing library later. You can also use this method if<br />
you want to import an <strong>EndNote</strong> library someone else has sent you into your library.<br />
1. File >> Import (This will open the Import dialog box).<br />
2. Click the Choose File button and find the library (.enl file) you wish to import.<br />
3. In the Import Option box select <strong>EndNote</strong> <strong>Library</strong> from the drop‐down menu<br />
4. In the Duplicates option select Discard Duplicates or Import into Duplicates <strong>Library</strong>.<br />
5. Leave the Text Translation option as No Translation.<br />
6. Press the Import button to import the other library into your own.<br />
Importing References from PDF files<br />
Endnote allows you to import PDF files, or folders <strong>of</strong> PDF files, directly into your Endnote <strong>Library</strong>. <strong>The</strong> import<br />
process automatically attaches the PDF to an Endnote reference and populates some <strong>of</strong> the reference fields.<br />
Please be aware that the amount <strong>of</strong> information that comes across depends on the age and source <strong>of</strong> the<br />
PDF and in some cases, particularly for older files, the import might not be successful.<br />
1. File>>Import (This will open the import dialog box)<br />
2. Click the Choose File (or Folder for a folder <strong>of</strong> PDFs) and navigate to your saved PDF document(s)<br />
3. In the Import Option box select PDF from the drop‐down menu<br />
4. In the Duplicates option select Discard Duplicates or Import into Duplicates <strong>Library</strong><br />
5. Leave the Text Translation as No Translation.<br />
6. Press the Import button to import the other library into your own.<br />
Use Groups to Manage your References<br />
<strong>The</strong> groups you can create fall into three categories;<br />
custom groups, smart groups and group sets.<br />
Group Sets<br />
<br />
Group Set<br />
Group Sets allow you to form a two‐tier<br />
hierarchy with your groups.<br />
<br />
<br />
Custom Group<br />
Smart Group<br />
Creating a Group Set<br />
1. From the Groups menu select Create Group Set.<br />
2. A box will appear in the left column. Type your group name in here, eg: Psychology 101<br />
Adding Custom Groups or Smart Groups to a Group Set<br />
1. Follow the steps above to create the Custom and/or Smart Group to be included in the Group Set.<br />
<strong>University</strong> <strong>of</strong> <strong>Auckland</strong> <strong>Library</strong> – <strong>EndNote</strong> <strong>X6</strong> October 2012
23<br />
2. Once created click and drag the name <strong>of</strong> the group you want onto the name <strong>of</strong> the set.<br />
Smart Groups<br />
Smart Groups are like rules in your email program. You set up a search and any time a reference is added to<br />
the library that meets the search parameters it is automatically added to the smart group.<br />
Smart Groups can be identified by the light‐bulb and magnifying glass icon next to the group.<br />
Creating a Smart Group<br />
1. Enter the search you want in the Search Pane<br />
2. Click on the Options button and choose Convert to Smart Group<br />
3. An option to name the Smart Group will appear in the left column, type your group name here.<br />
Format the Reference List<br />
Change the appearance <strong>of</strong> the reference list at the end <strong>of</strong> a document, eg: font or line spacing.<br />
1. In <strong>Word</strong>, choose the <strong>EndNote</strong> <strong>X6</strong> tab. Click on the arrow icon to the right <strong>of</strong> Bibliography<br />
2. Select the Layout tab, and use the options in this window to change the layout<br />
Choose the font and size you want<br />
your reference list to be displayed in.<br />
Choose whether or not you want a<br />
heading at the beginning <strong>of</strong> your<br />
reference list.<br />
Adjust the indents within a reference<br />
or the spacing between references.<br />
Unformat and Reformat a Document<br />
<strong>University</strong> <strong>of</strong> <strong>Auckland</strong> <strong>Library</strong> – <strong>EndNote</strong> <strong>X6</strong> October 2012
24<br />
<strong>The</strong>re are a number <strong>of</strong> reasons why you may need to unformat and reformat the <strong>EndNote</strong> citations in your<br />
document.<br />
<br />
<br />
<br />
<br />
If you need to work on multiple computers and they have different versions <strong>of</strong> <strong>Word</strong>, it is safest to<br />
save and open your document in an unformatted state.<br />
If you are working on a long document and need to change the referencing style it is best to<br />
unformat to remove the formatting from the old style before formatting in a new style.<br />
If you need to copy large sections <strong>of</strong> your document to another document – especially when<br />
compiling a thesis from separate chapters into one file – it is best to do this in an unformatted state.<br />
Some people prefer to work on an unformatted version <strong>of</strong> their document as it is <strong>of</strong>ten faster and<br />
they do not want to see their reference list as they work.<br />
Unformatting<br />
1 From the ribbon in Micros<strong>of</strong>t <strong>Word</strong>, choose the <strong>EndNote</strong> <strong>X6</strong> tab<br />
2 Select Convert Citations and Bibliography<br />
3 Four options will appear, select Convert to Unformatted Citations<br />
This is how your document<br />
will appear if you have<br />
instant formatting turned<br />
<strong>of</strong>f or wish to work with an<br />
unformatted document.<br />
Reformatting<br />
1 From the ribbon in Micros<strong>of</strong>t <strong>Word</strong>, choose the <strong>EndNote</strong> <strong>X6</strong> tab<br />
2 Make sure the style you want the document formatted in is showing in the Style window<br />
3 Select Update Citations and Bibliography<br />
It is possible to use this command on both formatted and unformatted documents. If your document is<br />
already formatted it will simply update it for you. If your document is unformatted then all citations will be<br />
formatted and a reference list created.<br />
This is the reformatted<br />
document using Numbered<br />
style.<br />
Mismatched Citations<br />
When <strong>EndNote</strong> formats your document it may have<br />
difficulties matching the unformatted citation in<br />
<strong>University</strong> <strong>of</strong> <strong>Auckland</strong> <strong>Library</strong> – <strong>EndNote</strong> <strong>X6</strong> October 2012
25<br />
your document with a specific citation in your library.<br />
If this occurs a dialog box will appear.<br />
Each ‘problem’ citation will be identified in turn,<br />
and you will have the following options:<br />
<br />
<br />
<strong>EndNote</strong> will provide suggestions for possible<br />
replacements. If one <strong>of</strong> these is suitable, select<br />
the citation in this window and press the Insert<br />
button ‐ the mismatched citation will be replaced.<br />
If none <strong>of</strong> <strong>EndNote</strong>’s suggestions is appropriate you can search your <strong>EndNote</strong> library from the dialog box<br />
that appears and find an alternative yourself. When you have found the relevant citation, select it and<br />
press the Insert button to replace the mismatched citation.<br />
If you do not wish to fix the problem at this stage, choose the Ignore button. This means that the citation<br />
you chose to ignore will not be formatted, however you can <strong>of</strong> course come back to it later.<br />
Generally, if <strong>EndNote</strong> cannot find a citation it is either because you have accidentally deleted it from your<br />
library, or have made an alteration to it that has resulted in <strong>EndNote</strong> being unable to identify it. If the former<br />
is the case you will need to re‐enter the citation. When you reformat your bibliography, <strong>EndNote</strong> still will not<br />
identify it but you will be able to locate it in your library and re‐insert the citation.<br />
Note that if you have used the indicators {and } for text other than <strong>EndNote</strong> citations, <strong>EndNote</strong> might bring<br />
up these instances – choose to ignore them.<br />
Unformatting and Reformatting when Compiling a <strong>The</strong>sis<br />
One <strong>of</strong> the most common reasons for using the unformatting and reformatting options is to combine<br />
multiple chapters into a single thesis document. Follow the steps below to ensure this is done smoothly.<br />
1. Unformat the separate chapters and temporarily remove any reference lists.<br />
<br />
<br />
<br />
Follow the instructions above to unformat a chapter.<br />
Save your chapter under a different name, eg: chapter1unformatted.doc.<br />
Repeat this process for all chapters.<br />
2. Insert your chapters into a single document.<br />
<br />
<br />
<br />
<br />
Open a document and create any preliminary pages (eg: title page, abstract). Position your cursor<br />
after the preliminary pages.<br />
From the Insert tab, in the Text group, click Object >> Text from File…<br />
Select the file you want to insert, eg: chapter1unformatted.doc, and click Insert<br />
Move your cursor to the start <strong>of</strong> the next section and follow the steps above to insert the other<br />
chapters.<br />
3. Reformat your document and recreate a reference list.<br />
<br />
<br />
Follow the instructions above to format the complete document and your reference list will be<br />
added to the end <strong>of</strong> the document.<br />
If you do not want your reference list at the end <strong>of</strong> your document, cut and paste it to the<br />
appropriate location.<br />
<strong>University</strong> <strong>of</strong> <strong>Auckland</strong> <strong>Library</strong> – <strong>EndNote</strong> <strong>X6</strong> October 2012
26<br />
For further information, book and attend a Student Learning Centre Course on compiling a thesis.<br />
Removing Field Codes (convert to Plain Text)<br />
When you insert citations into <strong>Word</strong>, they have ‘hidden codes’ attached to them. <strong>The</strong>se codes allow<br />
<strong>EndNote</strong> to format, un‐format, and re‐format citations. If you are going to submit your work to a publisher or<br />
any other situation where you are sending the document without attaching your library you must remove<br />
the field codes first.<br />
From the <strong>EndNote</strong> tab select Convert Citations and Bibliography. Three options will appear select Convert<br />
to Plain Text. This process will create a plain text copy <strong>of</strong> your document which you should then save under a<br />
new name. Note that this copy cannot be re‐formatted by <strong>EndNote</strong>. Any changes should be made on your<br />
original.<br />
Create Bibliographies: general, subject and annotated<br />
<strong>EndNote</strong> creates what is known as a ‘reference list’ at the end <strong>of</strong> your document i.e. a list <strong>of</strong> all works<br />
actually cited. Some disciplines require a bibliography as opposed to (or as well as) a reference list i.e. a list<br />
<strong>of</strong> all works consulted or read. <strong>The</strong>re are functions within <strong>EndNote</strong> that you can use to create different types<br />
<strong>of</strong> bibliographies.<br />
<strong>EndNote</strong> <strong>X6</strong> can create a general bibliography (i.e. a listing <strong>of</strong> a selection <strong>of</strong> references), a subject<br />
bibliography (i.e. listings under particular headings) or an annotated bibliography (i.e. a listing <strong>of</strong> references,<br />
each including an abstract).<br />
General Bibliography<br />
<strong>The</strong>re are many ways to create a general bibliography. One <strong>of</strong> the simplest is to use the Copy Formatted<br />
command.<br />
1. In <strong>EndNote</strong>, select the references you want to include in the bibliography<br />
2. Check that the appropriate style is displaying in the <strong>EndNote</strong> toolbar<br />
3. Edit >> Copy Formatted (or Ctrl+K)<br />
4. In MS <strong>Word</strong>, use the paste option (or Ctrl + v) to add the references to a document.<br />
Subject Bibliography<br />
Subject bibliographies consist <strong>of</strong> various listings under particular headings (such as keywords, authors, or<br />
publishers).<br />
<strong>University</strong> <strong>of</strong> <strong>Auckland</strong> <strong>Library</strong> – <strong>EndNote</strong> <strong>X6</strong> October 2012
27<br />
1. Choose the records in <strong>EndNote</strong> you want for a separate bibliography, perhaps a selected group instead<br />
<strong>of</strong> the whole library. Highlight your selected references and then click References >> Show Selected<br />
References.<br />
2. Select an appropriate style from the Style Manager .<br />
3. Tools >> Subject Bibliography.<br />
4. <strong>The</strong> Subject Fields window displays a list <strong>of</strong> all the<br />
different fields that a reference can have.<br />
5. Select the field (or fields) that you want to sort your<br />
bibliography by, eg: keywords.<br />
6. Once you have chosen your field click OK. A list will be<br />
displayed <strong>of</strong> the various terms found within this field<br />
and the number <strong>of</strong> references in your <strong>EndNote</strong> <strong>Library</strong><br />
containing each term.<br />
7. Select the terms to be included in the bibliography by<br />
holding down the Ctrl key as you click the terms you want, or click Select All to include them all.<br />
8. <strong>The</strong>n click OK and your subject bibliography is created in a new window. Use the Layout button at the<br />
top <strong>of</strong> the screen to change some features before saving or printing the bibliography.<br />
Annotated Bibliography<br />
Using the Annotated Style<br />
<strong>The</strong> simplest way to create an annotated<br />
bibliography using <strong>EndNote</strong> is to use the<br />
Annotated Style. This will display your<br />
results with the information from the<br />
Abstract Field under each reference.<br />
<strong>University</strong> <strong>of</strong> <strong>Auckland</strong> <strong>Library</strong> – <strong>EndNote</strong> <strong>X6</strong> October 2012