

1969 Camaro Firebird - Classic Auto Air
1969 Camaro Firebird - Classic Auto Air
1969 Camaro Firebird - Classic Auto Air

Create successful ePaper yourself
Turn your PDF publications into a flip-book with our unique Google optimized e-Paper software.
PAGE<br />
9<br />
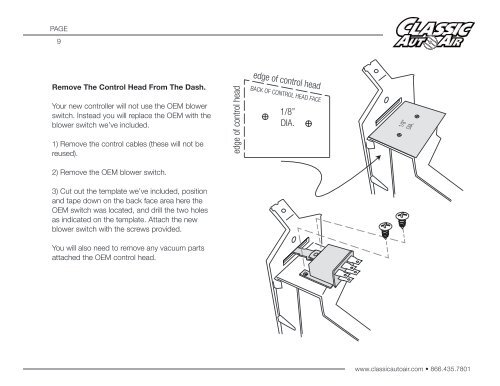
Remove The Control Head From The Dash.<br />
Your new controller will not use the OEM blower<br />
switch. Instead you will replace the OEM with the<br />
blower switch we’ve included.<br />
1) Remove the control cables (these will not be<br />
reused).<br />
edge of control head<br />
edge of control head<br />
BACK OF CONTROL HEAD FACE<br />
1/8”<br />
DIA.<br />
1/8”<br />
DIA.<br />
2) Remove the OEM blower switch.<br />
3) Cut out the template we’ve included, position<br />
and tape down on the back face area here the<br />
OEM switch was located, and drill the two holes<br />
as indicated on the template. Attach the new<br />
blower switch with the screws provided.<br />
You will also need to remove any vacuum parts<br />
attached the OEM control head.<br />
www.classicautoair.com • 866.435.7801


