Enhanced Password Protection Installation and Configuration Guide
Enhanced Password Protection Installation and Configuration Guide
Enhanced Password Protection Installation and Configuration Guide
- No tags were found...

You also want an ePaper? Increase the reach of your titles
YUMPU automatically turns print PDFs into web optimized ePapers that Google loves.
User Account Management<br />
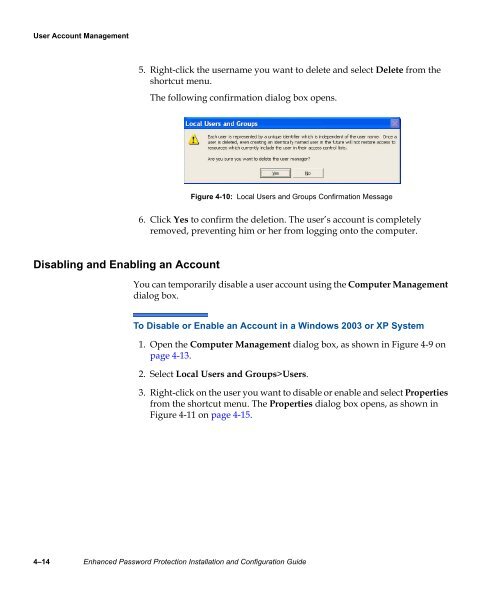
5. Right-click the username you want to delete <strong>and</strong> select Delete from the<br />
shortcut menu.<br />
The following confirmation dialog box opens.<br />
Figure 4-10: Local Users <strong>and</strong> Groups Confirmation Message<br />
6. Click Yes to confirm the deletion. The user’s account is completely<br />
removed, preventing him or her from logging onto the computer.<br />
Disabling <strong>and</strong> Enabling an Account<br />
You can temporarily disable a user account using the Computer Management<br />
dialog box.<br />
To Disable or Enable an Account in a Windows 2003 or XP System<br />
1. Open the Computer Management dialog box, as shown in Figure 4-9 on<br />
page 4-13.<br />
2. Select Local Users <strong>and</strong> Groups>Users.<br />
3. Right-click on the user you want to disable or enable <strong>and</strong> select Properties<br />
from the shortcut menu. The Properties dialog box opens, as shown in<br />
Figure 4-11 on page 4-15.<br />
4–14 <strong>Enhanced</strong> <strong>Password</strong> <strong>Protection</strong> <strong>Installation</strong> <strong>and</strong> <strong>Configuration</strong> <strong>Guide</strong>