HandNet Lite Manual - Security Technologies
HandNet Lite Manual - Security Technologies
HandNet Lite Manual - Security Technologies

Create successful ePaper yourself
Turn your PDF publications into a flip-book with our unique Google optimized e-Paper software.
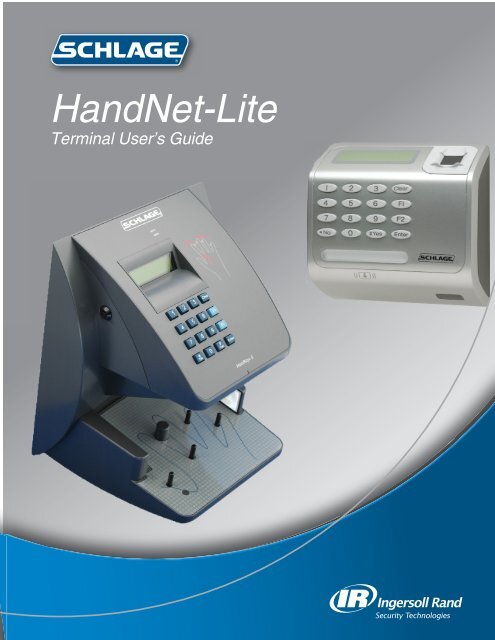
<strong>HandNet</strong>-<strong>Lite</strong><br />
Terminal User’s Guide
<br />
This equipment has been tested and found to comply with the limits for a Class B digital device, pursuant to part<br />
15 of the FCC Rules. These limits are designed to provide reasonable protection against harmful interference<br />
when the equipment is operated in a commercial environment. This equipment generates, uses, and can radiate<br />
radio frequency energy, and, if not installed and used in accordance with the Installation <strong>Manual</strong>, may cause<br />
harmful interference to radio communications. Operation of this equipment in a residential area is likely to cause<br />
harmful interference, in which case the user will be required to correct the interference at the user’s own expense.<br />
This Class A digital apparatus meets all requirements of the Canadian Interference-Causing Equipment<br />
Regulations.<br />
Cet appareil numerique de la classe A respecte toutes les exigences du Reglemente sure le materiel brouilleur du<br />
Canada.<br />
© 1998 through 2009 Schlage Biometrics, Inc. – ALL RIGHTS RESERVED<br />
Document Part Number: 70100-6210 – Revision 3 – June, 2009<br />
HandPunch is a trademark of Schlage Biometrics, Inc.<br />
The trademarks used in this <strong>Manual</strong> are the property of the trademark holders. The use of these trademarks in<br />
this <strong>Manual</strong> should not be regarded as infringing upon or affecting the validity of any of these trademarks.<br />
Schlage Biometrics, Inc. reserves the right to change, without notice, product offerings or specifications.<br />
No part of this publication may be reproduced in any form without the express written permission from Schlage<br />
Biometrics, Inc.
Contents<br />
Getting Started..................................................................................................... 1<br />
What <strong>HandNet</strong> <strong>Lite</strong> Does..............................................................................................................................1<br />
<strong>HandNet</strong> <strong>Lite</strong> System Requirements.............................................................................................................1<br />
Starting <strong>HandNet</strong> <strong>Lite</strong>....................................................................................................................................1<br />
Logging into <strong>HandNet</strong> <strong>Lite</strong>.............................................................................................................................2<br />
Select Language...........................................................................................................................................2<br />
For Basic Topics............................................................................................................................................3<br />
For Groups of Topics on a Single Theme......................................................................................................3<br />
Marking a Topic to Return To.........................................................................................................................3<br />
What You Can Do On Each Tab....................................................................................................................5<br />
Getting Around with the Keyboard................................................................................................................5<br />
Status Tab............................................................................................................. 7<br />
Users Tab.............................................................................................................. 9<br />
List of Users..................................................................................................................................................9<br />
Enroll Users.................................................................................................................................................10<br />
Problems with User Enrollment...................................................................................................................10<br />
Adding a Special User.................................................................................................................................11<br />
Add a User..................................................................................................................................................11<br />
Edit a User..................................................................................................................................................12<br />
Delete a User..............................................................................................................................................12<br />
User Fields..................................................................................................................................................13<br />
Authority Levels...........................................................................................................................................14<br />
Process Deletes Button...............................................................................................................................15<br />
Log Tab................................................................................................................ 17<br />
Log Tab Fields.............................................................................................................................................17<br />
Reports Tab......................................................................................................... 19<br />
Generate a Report......................................................................................................................................19<br />
Users Report...............................................................................................................................................20<br />
Reader Report............................................................................................................................................21<br />
Alarms Tab.......................................................................................................... 23<br />
Alarms Fields..............................................................................................................................................23<br />
Settings Tab........................................................................................................ 25<br />
Settings Fields.............................................................................................................................................25<br />
Add a New Operator...................................................................................................................................26<br />
Edit an Operator..........................................................................................................................................27<br />
Delete an Operator......................................................................................................................................27<br />
Enable Automatic Windows Login...............................................................................................................27<br />
Disable Automatic Windows Login..............................................................................................................27<br />
i
Contents<br />
Configuration Tab............................................................................................... 29<br />
Add a Network.............................................................................................................................................29<br />
Edit a Network.............................................................................................................................................30<br />
Delete a Network.........................................................................................................................................30<br />
Connecting through a TCP/IP network........................................................................................................30<br />
Connecting through a serial port.................................................................................................................32<br />
If You’ve Been Using Readers Already........................................................................................................33<br />
Add a Reader..............................................................................................................................................33<br />
Edit a Reader..............................................................................................................................................34<br />
Delete a Reader..........................................................................................................................................34<br />
FingerKey Reader Edit Screen....................................................................................................................35<br />
HandKey Reader Edit Screen.....................................................................................................................37<br />
<strong>Security</strong> Settings Screen.............................................................................................................................40<br />
Edit <strong>Security</strong> Settings..................................................................................................................................40<br />
Fingerprint Settings Screen........................................................................................................................41<br />
Edit Fingerprint Settings..............................................................................................................................41<br />
Enabling a Secondary Finger Later............................................................................................................44<br />
Interpreting the Format Detail.....................................................................................................................44<br />
Add a Card Format......................................................................................................................................45<br />
Edit a Card Format......................................................................................................................................45<br />
Delete a Card Format..................................................................................................................................45<br />
Card Format Screen....................................................................................................................................46<br />
Card Format Structure................................................................................................................................47<br />
Set Up the Parity Bits..................................................................................................................................48<br />
Smart Card Tab................................................................................................... 49<br />
iCLASS Definition Screen...........................................................................................................................49<br />
Add an iCLASS Definition........................................................................................................................50<br />
Edit an iCLASS Definition........................................................................................................................50<br />
Delete an iCLASS Definition....................................................................................................................50<br />
iCLASS Definition Fields.............................................................................................................................50<br />
iCLASS Card Compression.........................................................................................................................51<br />
iCLASS Card Protection..............................................................................................................................52<br />
Resetting Old Card Keys.............................................................................................................................52<br />
Automatic Key Update.................................................................................................................................53<br />
Specify (protect) application areas .............................................................................................................54<br />
DESFire Definition Screen..........................................................................................................................55<br />
Add a DESFire Definition..........................................................................................................................55<br />
Edit a DESFire Definition..........................................................................................................................55<br />
Delete a DESFire Definition......................................................................................................................55<br />
DESFire Definition Fields...........................................................................................................................56<br />
DESFire Card Compression........................................................................................................................56<br />
Add a Mifare Standard Definition............................................................................................................57<br />
Edit a Mifare Standard Definition.............................................................................................................57<br />
Delete a Mifare Standard Definition.........................................................................................................57<br />
Mifare Standard Definition Screen .............................................................................................................58<br />
Mifare Standard Definition Fields...............................................................................................................58<br />
Mifare Standard Sector Fields ...................................................................................................................59<br />
Mifare Card Compression...........................................................................................................................60<br />
ii
<strong>HandNet</strong> <strong>Lite</strong> <strong>Manual</strong><br />
Access Tab.......................................................................................................... 61<br />
Add an Access Profile..............................................................................................................................61<br />
Edit an Access Profile.................................................................................................................................61<br />
Delete an Access Profile..........................................................................................................................62<br />
Database Tab...................................................................................................... 63<br />
Back Up the Database................................................................................................................................63<br />
Restore the Database.................................................................................................................................63<br />
Delete the Database...................................................................................................................................63<br />
Disconnect the Database............................................................................................................................64<br />
Reconnect the Database.............................................................................................................................64<br />
Finish Database Operations and Restart....................................................................................................64<br />
Appendix A......................................................................................................... 65<br />
Custom Splash Screen...............................................................................................................................66<br />
Index.................................................................................................................... 69<br />
iii
Getting Started<br />
Introduction<br />
What <strong>HandNet</strong><br />
<strong>Lite</strong> Does<br />
<strong>HandNet</strong> <strong>Lite</strong> lets you control and monitor many connected FingerKey and/or HandKey<br />
readers. In this one program, you can control who can use each reader and when. You<br />
can also monitor activity and alarms for all readers at once.<br />
<strong>HandNet</strong><br />
<strong>Lite</strong> System<br />
Requirements<br />
Operating System: Windows XP SP3, Vista, Windows Server 2003 SP1 or greater,<br />
Windows 2000 Professional or Server Editions SP4, and Windows 95 & 98.<br />
Screen Resolution: Screen resolution must be set to at least 1024 x 768; the <strong>HandNet</strong><br />
<strong>Lite</strong> window won’t fit on your screen if you use a lower resolution. The actual screen size<br />
is 1020 x 720, so if your screen resolution is 1024 x 768, your task bar must be on the top<br />
or bottom of the screen, and the task bar must be no more than two lines high; if the task<br />
bar is three lines or higher or if it is on the side of your screen, part of the <strong>HandNet</strong> <strong>Lite</strong><br />
window will run off the screen.<br />
Starting<br />
<strong>HandNet</strong> <strong>Lite</strong><br />
To start <strong>HandNet</strong> <strong>Lite</strong>, either double-click the <strong>HandNet</strong> <strong>Lite</strong> icon on your Windows desktop<br />
or click the Start menu on your Windows taskbar, highlight Programs, highlight Schlage<br />
Biometrics, highlight the <strong>HandNet</strong> <strong>Lite</strong> folder, and click <strong>HandNet</strong> <strong>Lite</strong>. The main window<br />
opens.<br />
1
Getting Started<br />
Logging into<br />
<strong>HandNet</strong> <strong>Lite</strong><br />
<strong>HandNet</strong> <strong>Lite</strong> requires you to log in before you can make any changes; this prevents<br />
unauthorized people from changing information. If you aren’t logged in, you can look at<br />
the current status of readers and get on-line help, but you can’t change any information or<br />
use any other options.<br />
1. Click Login on the Main window. You’ll see:<br />
2. Type your Login name and Password and click Accept.<br />
If this is a new system: Use a Login name of “1234” and a Password of “new.” (After<br />
logging in for the first time, you should add one or more new operators. See Managing<br />
Operators on page 26 for more information.)<br />
After initial setup: If you forget your Login name or Password, see your supervisor or<br />
security administrator.<br />
The login name and password are case sensitive. For example, the passwords new,<br />
New, and NEW are all different.<br />
After you are done using <strong>HandNet</strong> <strong>Lite</strong>, log out so unauthorized people won’t be able to<br />
use the program.<br />
Select<br />
Language<br />
After <strong>HandNet</strong>-lite version 2.3 is installed, the first time it is run the following screen<br />
will be presented so that the displayed language can be selected. If you do not see<br />
the special characters on your computer, use Control Panel, Regional and Language<br />
Settings, Advanced tab and select the desired character sets.<br />
This is the “Select Language” screen. Current language choices are English, French,<br />
Dutch, Simplified Chinese, Traditional Chinese, and Bahasa Indonesian.<br />
2
<strong>HandNet</strong> <strong>Lite</strong> <strong>Manual</strong><br />
Getting Help in <strong>HandNet</strong> <strong>Lite</strong><br />
The on-line help has the same information as this manual. To get help in <strong>HandNet</strong> <strong>Lite</strong>,<br />
click the Help button. Use the contents, index, or search tabs at the left of the help<br />
window to find any topic.<br />
For Basic<br />
Topics<br />
Click the Contents tab at the top of the left pane, click a book to open, and then click a<br />
topic. Not every topic is in the Contents though, so if you don’t find what you need, try the<br />
Index or Search tabs.<br />
For Groups of<br />
Topics on a<br />
Single Theme<br />
In addition to the contents you can also click on the pull-down list right under the<br />
Previous/Next buttons (in the bottom middle of the header). This list contains a number of<br />
important groups of topics. Once you are on one of these topics, the Next and Previous<br />
buttons work as well.<br />
Marking a Topic<br />
to Return To<br />
In the on-line help, to mark a topic that you want to come back to:<br />
1. Go to the topic that you want to mark.<br />
2. Click the Favorites tab at the top of the left pane.<br />
3. Click the Add button at the bottom of the pane. This adds the topic to your favorites list.<br />
To get back to any marked topic later:<br />
1. Click the Favorites tab at the top of the left pane of the help window.<br />
2. Double-click the topic.<br />
3
Getting Started<br />
Main <strong>HandNet</strong> <strong>Lite</strong> Window<br />
After you log into <strong>HandNet</strong> <strong>Lite</strong>, a number of additional tabs appear that let you get to the<br />
different parts of the program. Which tabs you see depends on which operator login you<br />
used. The screen below shows all of the options.<br />
4
<strong>HandNet</strong> <strong>Lite</strong> <strong>Manual</strong><br />
What You Can<br />
Do On Each<br />
Tab<br />
Each of the tabs are explained in further detail later in the following chapters.<br />
Status: The Status tab lists every reader in <strong>HandNet</strong> <strong>Lite</strong> and the network (group of<br />
readers) the reader is connected to. It gives information about each reader and the state<br />
of its connection. See page 7 for more information.<br />
Users: The Users tab lists every user that has been added to <strong>HandNet</strong> <strong>Lite</strong>, including the<br />
user’s name, ID, access profile (the group of readers the user has access to), authority<br />
level (which reader menus the user can program), and whether the user is enrolled; see<br />
page 9. You can add, change, or delete users through the buttons in this tab.<br />
Log: The Log window lists significant events at any connected reader. It doesn’t list user<br />
accesses, but it lists user additions and enrollment, alarm conditions, and so on. It also<br />
lists significant changes made in <strong>HandNet</strong> <strong>Lite</strong>. For each event you see the date and time,<br />
network and reader, user name and IDs, a brief description of what happened, and an<br />
icon showing the type of activity. See page 17 for more information.<br />
Reports: The Reports tab lets you generate reports on all of your users and all of your<br />
readers. See page 19 for more information<br />
Alarms: The Alarms tab shows a subset of what you see on the Log tab; this tab lists<br />
only those events that are classified as alarm conditions. These generally require<br />
immediate attention. See page 23 for more information.<br />
Settings: The Settings tab lets you change <strong>HandNet</strong> <strong>Lite</strong>’s login name and passwords. It<br />
also lets you choose the default Access Profile for users added at a reader, that is, which<br />
readers the user has access to. See page 25 for more information.<br />
Configuration: You may add, change, or delete networks and readers. The Configuration<br />
tab also allows you to create Wiegand output configurations which can be used for setting<br />
FingerKey output. See page 29 for more information.<br />
Smart card: The Smart Card tab is used to manage iCLASS, DESFire and MiFare cards.<br />
See page 49 for more information.<br />
Access: The Access tab lets you define access profiles. Access profiles control<br />
which readers different groups of people have access through. See page 61 for more<br />
information.<br />
Database: The Database Tab is used to backup, restore, delete, detach and attach the<br />
database. See page 63 for more information.<br />
Getting Around<br />
with the<br />
Keyboard<br />
To move from tab to tab: Press ctrl tab.<br />
To move from entry to entry with a tab: Press tab to move to the next entry, and shift<br />
tab to move to the previous entry.<br />
5
Getting Started<br />
6
Status Tab<br />
The Status tab lists every network and reader that has been configured in <strong>HandNet</strong> <strong>Lite</strong>.<br />
Figure 4-1: Status Tab<br />
Table 4-1: Reader Status<br />
Column<br />
Status Indicator (untitled)<br />
Network name<br />
Reader name<br />
Info<br />
Description<br />
Indicates the current status of the reader<br />
Name of the reader’s network<br />
Name of the reader<br />
Details about the status of the reader’s connection<br />
Click the heading of any row to sort the list by that heading. Click the heading again to<br />
reverse the sort order.<br />
Table 4-2: Reader Status Indicators<br />
Icon Description Additional Information<br />
Reader is<br />
communicating<br />
Reader is not enabled<br />
Reader is not<br />
communicating.<br />
• Click the green icon to display download and<br />
conditionally upload user choices.<br />
• If the reader is a FingerKey you will have a Download<br />
(Download from PC to the reader) choice.<br />
• If the reader is a HandKey you will have both a<br />
Download (from the PC to the reader) and Upload<br />
(from the reader to the PC) choices.<br />
• Readers must be first created (see create new reader)<br />
and then enabled (see enable reader).<br />
• The reader is not configured correctly, or is<br />
disconnected.<br />
• Click the red icon for further details.<br />
7
<br />
8
Users Tab<br />
The Users tab lists every user and is used to add or change users. Users are individuals<br />
who are enrolled in readers.<br />
List of Users<br />
Table 5-3: List of Users<br />
Column<br />
Description<br />
Unique ID ID by which the user is identified in the database<br />
Credential ID ID the user enters at the reader in order to gain access<br />
First Name User’s first name<br />
MI<br />
User’s middle initial<br />
Last Name User’s last name<br />
Access profile Access profile that is associated with the user (See page 61 for more<br />
information.)<br />
Authority Level • Authority level for the user.<br />
E<br />
• Zero (0) for most users, meaning the user can gain access through<br />
the reader, but not use the command menus in the reader to change<br />
settings. (See page 14 for more information.)<br />
• Indicates enrollment status<br />
• Zero (0) indicates that the user is not enrolled.<br />
• One (1) indicates that a HandKey template has been captured for the<br />
user<br />
• Two (2) indicates that a FingerKey template has been captured for the<br />
user<br />
• Three(3) indicates that HandKey and FingerKey templates have been<br />
captured for the user.<br />
Click the heading of any row to sort the list by that heading. Click the heading again to<br />
reverse the sort order.<br />
Clicking on a user row will display actions that can be performed for that user.<br />
9
Users Tab<br />
Enroll Users<br />
Users must be enrolled on a reader. For help enrolling users, see the reader’s manual.<br />
! NOTE<br />
A user may be added to <strong>HandNet</strong> <strong>Lite</strong> in one of two ways:<br />
• Enroll the user at a reader before entering the user in <strong>HandNet</strong> <strong>Lite</strong>. If the reader<br />
is connected, the user is automatically added to <strong>HandNet</strong> <strong>Lite</strong>. If users are enrolled<br />
in readers before they are connected to <strong>HandNet</strong> <strong>Lite</strong>, when the reader is initially<br />
connected to <strong>HandNet</strong> <strong>Lite</strong>, all users are imported then.<br />
If a user is enrolled first, the user ID in the reader (the Credential ID) is used in<br />
<strong>HandNet</strong> <strong>Lite</strong> for the user’s First name, Last name, and Unique ID (an identifier used<br />
only by <strong>HandNet</strong> <strong>Lite</strong> to help distinguish users with similar names). Edit these entries<br />
by selecting the user in the Users window and clicking the Edit selected user button;<br />
see Edit Fingerprint Settings page 41.<br />
• Enter the user in <strong>HandNet</strong> <strong>Lite</strong> before enrolling the user in a connected reader.<br />
Enter the user in the User edit window. See Add a User on page 11 for more<br />
information. The user will be listed as unenrolled in the Users window (denoted by<br />
a zero (0) in column E). See the User Fields table on page 13 for more information.<br />
When you enroll the user at a reader, <strong>HandNet</strong> <strong>Lite</strong> will import the finer template.<br />
When enrolling users at the reader, you must completely leave the reader’s command<br />
menus before <strong>HandNet</strong> <strong>Lite</strong> will detect the enrollments.<br />
Problems<br />
with User<br />
Enrollment<br />
Since bypassing finger or hand recognition gives you reduced security, it should only be<br />
used as a last resort. Try these options first:<br />
• The user might have placed the finger or hand badly during the initial enrollment.<br />
1. Remove the user from the reader.<br />
2. Instruct the user on correct finger or hand placement. Make sure the user is placing<br />
the right finger.<br />
3. Add the user again.<br />
This creates a new template for the user.<br />
• If using a FingerKey, Remove the user, and enroll the user again using different<br />
fingers. Try the thumb if other fingers don’t work<br />
• If the user has a mild disability that prevents consistent finger or hand placement,<br />
change the user’s reject level. See Biometric threshold on page 13 for more<br />
information. See the reader manual for instructions on how to set the appropriate<br />
reject setting for the user.<br />
If these options aren’t possible, or if you try them and they don’t work, then check the<br />
Verify on ID only (no biometric verification) box on the User edit screen. See Verify on ID<br />
only on page 14 for more information<br />
10
<strong>HandNet</strong> <strong>Lite</strong> <strong>Manual</strong><br />
Adding a<br />
Special User<br />
When using a FingerKey, if a user’s fingerprint cannot be scanned (for any reason), the<br />
user can be added as a special user. Special users are still required to place a finger on<br />
the scanner, but the scanner does not try to match a finger template.<br />
If a user has unrecognizable fingerprints, severe arthritis, or other conditions that keep<br />
the user’s finger from being recognized, you can give the user access without finger<br />
recognition. If you choose this, the reader still asks the user to place a finger on the<br />
reader so it won’t be apparent to others that finger recognition isn’t required, but the<br />
reader doesn’t check the finger template; it gives access regardless of whose finger is<br />
placed there.<br />
Add a User<br />
1. Click the Users tab.<br />
2. Click the Create new user button.<br />
3. Complete the fields on the screen. See the User Fields Table on page 13.<br />
4. Click the Accept Settings button.<br />
5. If the user has not been enrolled on a reader, do so now. See Enroll Users on page 10<br />
for more information.<br />
11
Users Tab<br />
Edit a User<br />
1. Click the Users tab.<br />
2. Click to select the name of the user you want to edit.<br />
3. Click the Edit selected user button.<br />
4. Complete the fields on the screen. See the User Fields table on page 13 for more<br />
information.<br />
5. Click the Accept Settings button..<br />
Delete a User<br />
1. Click the Users tab.<br />
2. Click to select the name of the user you want to delete.<br />
3. Click the Edit selected user button.<br />
4. Click the Delete user check box.<br />
5. Click the Accept Settings button.<br />
Note: You can also edit, delete, and enroll an existing user by clicking on that user listed on<br />
the User’s tab and selecting the desired action from the pop-up menu.<br />
12
<strong>HandNet</strong> <strong>Lite</strong> <strong>Manual</strong><br />
User Fields<br />
Table 5-4: User Fields<br />
Field Req’d Description<br />
Unique Identifier Yes • Up to 30 characters (any combination of letters,<br />
numbers, spaces, or special characters)<br />
• If user was added from the reader, will initially match<br />
credential ID in the reader but can be changed.<br />
First Name Yes • User’s first name<br />
• If user was added at the reader, will initially match the<br />
credential ID<br />
Middle Initial No • User’s middle initial<br />
Last Name Yes • User’s last name<br />
• If user was added at the reader, will initially match the<br />
credential ID<br />
Important Date No • Used to distinguish between users with similar names<br />
• Type a date directly into the entry box using the format<br />
Thursday, January 01, 2009<br />
• Click the drop-down button to select the date from a<br />
calendar.<br />
Credential ID Yes • User’s credential ID<br />
Biometric<br />
Threshold<br />
Yes<br />
• ID number from user’s card (when card readers are<br />
used) or the number a user enters manually at the<br />
reader. See the reader’s manual for help with designing<br />
an ID numbering system.<br />
• Controls how closely user’s finger or hand must match<br />
the stored template in order for access to be granted.<br />
• Reader default uses the Reject Threshold from the<br />
reader’s setup. See Reject Threshold on pages 36 and<br />
38 for more information. In most cases, Reader default<br />
is the appropriate choice.<br />
• To override the reader’s reject threshold, choose from<br />
values of 30-250 in the drop down list (common values<br />
of 250, 150, 75, 50, and 30 are singled out at the top).<br />
• Use a lower number for higher security.<br />
• Use a higher number if a user has trouble gaining<br />
access. See the reader’s manual for more information.<br />
Authority Level Yes • Determines what menus the user can access at the<br />
reader.<br />
• Each level gives access to all the lower levels.<br />
• See the Authority Levels table on page 14 for more<br />
information.<br />
Access Profile Yes • Controls which readers the user can use.<br />
• Always allows access to all readers.<br />
• Never blocks access to all readers.<br />
• Additional choices correspond to the profiles configured<br />
in the Access tab. See Access Tab on page 61 for more<br />
information.<br />
13
Users Tab<br />
Field Req’d Description<br />
Verify on ID only<br />
(no biometric<br />
verification)<br />
Use Second<br />
Finger as Duress<br />
Alarm (FingerKey<br />
only)<br />
No<br />
No<br />
• Check for users who fingerprints or hand cannot be<br />
scanned<br />
• Since bypassing finger or hand recognition gives you<br />
reduced security, only use this as a last resort. See<br />
Adding a Special User on page 11 for more information.<br />
• When checked, user’s second finger will be used as a<br />
duress indicator.<br />
Delete User No • Check to delete user from <strong>HandNet</strong> <strong>Lite</strong>.<br />
• User will be deleted from <strong>HandNet</strong> <strong>Lite</strong> and from all<br />
connected readers when you click the Accept button.<br />
Authority<br />
Levels<br />
Table 5-5: Authority Levels<br />
Authority Level<br />
Description<br />
(0) None: • Allows user to gain access through the reader, but not use the<br />
command menus in the reader to change the reader’s settings.<br />
• This choice is appropriate for most users.<br />
(1) Service: • Allows the master reader to display the status of all readers on<br />
the network.<br />
• Not relevant on readers that are not configured as a master.<br />
(2) Setup: • Allows user to control reader setup<br />
• See reader’s manual for more information.<br />
(3) Management: • Allows user to list all of the users in the reader<br />
• Allows master reader to send/acquire user databases to/from<br />
readers in a network.<br />
(4) Enrollment: • Allows user to add or remove users.<br />
(5) <strong>Security</strong>: • Allows user to modify security settings<br />
• See reader’s manual for more information.<br />
See the reader’s manual for information on directly changing settings through the reader.<br />
14
<strong>HandNet</strong> <strong>Lite</strong> <strong>Manual</strong><br />
Process<br />
Deletes Button<br />
When the Process Deletes button is pressed, <strong>HandNet</strong>-<strong>Lite</strong> looks for a RemoveUserXML.<br />
Xml file in the root directory of the C: Drive. If this file is found, any users listed in that file<br />
will be removed from Handnet-lite. Figure 3.1 provides a sample C:\RemoveUserXML.<br />
Xml file which would remove users with UserIDs of 1000, 1001, 1002, 1003, and 1004<br />
when the Process Deletes button is pressed.<br />
Figure 5-1: Example of RemoveUserXML.xml<br />
<br />
<br />
<br />
1000<br />
<br />
<br />
1001<br />
<br />
<br />
1002<br />
<br />
<br />
1003<br />
<br />
<br />
1004<br />
<br />
<br />
1005<br />
<br />
<br />
15
Users Tab<br />
16
Log Tab<br />
The Log tab lists events that occur in any connected reader. It also lists any changes<br />
made in <strong>HandNet</strong> <strong>Lite</strong>.<br />
Figure 6-1: Log Tab<br />
Log Tab Fields<br />
Table 6-6: Log Tab Fields<br />
Column<br />
Event type<br />
(untitled)<br />
Description<br />
One of the following icons:<br />
: Indicates a standard informational message.<br />
: Indicates that the condition is important and warrants further<br />
investigation. These conditions are also listed on the Alarms tab.<br />
Date/Time Shows the date and time when the event occurred. The date is listed in<br />
year-month-day order, and the time lists hours:minutes:seconds<br />
Network name Network name if activity occurred at a reader<br />
Reader name Reader name if activity occurred at a reader<br />
Unique ID User’s unique ID if event is associated with a particular user<br />
Credential ID User’s credential ID if event is associated with a particular user<br />
User name User’s name if message is event with a particular user<br />
Info<br />
Explanation of event<br />
Click the heading of any row to sort the list by that heading. Click the heading again to<br />
reverse the sort order.<br />
17
<br />
18
Reports Tab<br />
The Reports tab is used to generate and view reports on users and readers.<br />
Figure 7-1: Reports Tab<br />
Generate a<br />
Report<br />
1. Click the Reports tab.<br />
2. Click the drop-down list at the top of the reports tab and choose the report you want to<br />
generate.<br />
Table 7-7: Report Types<br />
Report Type<br />
Users Report<br />
Readers Report<br />
Description<br />
Lists key information about every user in the system<br />
Lists key information about every reader in the system<br />
3. To print or move around in the report, click the corresponding icon in the bar above the<br />
report window.<br />
Print<br />
Move from<br />
page to page<br />
Refresh report to<br />
reflect changes<br />
Export to Word,<br />
Excel, .pdf, etc.<br />
Search for text in<br />
the report<br />
Change the<br />
magnification<br />
19
Reports Tab<br />
Users Report<br />
The Users report lists the information for each user in the program.<br />
Table 7-8: Users Report<br />
Column Description<br />
Unique ID User’s Unique identifier<br />
Credential ID User’s credential ID (card or manual ID)<br />
Access Profile Access profile associated with the user<br />
Aut<br />
User’s authority level<br />
LastName • User’s last name<br />
• If you added the user at the reader and have not changed the name,<br />
user ID is listed<br />
FirstName • User’s first name<br />
• If you added the user at the reader and have not changed the name,<br />
user ID is listed<br />
MI<br />
User’s middle initial.<br />
20
<strong>HandNet</strong> <strong>Lite</strong> <strong>Manual</strong><br />
Reader Report<br />
The Reader report lists information for each reader in the program.<br />
Table 7-9: Reader Report<br />
Column Description<br />
Name Reader’s name<br />
Type<br />
Indicates whether the reader is a hand or fingerprint reader<br />
Address Reader’s address<br />
Network Network to which reader is connected<br />
S/N<br />
Reader’s internal serial number<br />
Enabled • true: program attempts to communicate with the reader<br />
• false: program does not attempt to communicate with the reader<br />
21
<br />
22
Alarms Tab<br />
The Alarms tab shows all alarms that have been recorded in the system. Alarms are also<br />
listed with the rest of the activity in the Log tab<br />
Figure 8-1: Alarms Tab<br />
Alarms Fields<br />
Table 8-10: Alarms Fields<br />
Column<br />
Description<br />
Date/Time Date and time when the alarm occurred. The date is listed in yearmonth-day<br />
order, and the time lists hours:minutes:seconds<br />
Network name Network name if alarm is associated with a particular reader<br />
Reader name Reader name if alarm is associated with a particular reader<br />
Unique ID User’s unique ID if alarm is associated with a particular user<br />
Credential ID User’s credential ID if alarm is associated with a particular user<br />
User name User’s name if alarm is associated with a particular user<br />
Info<br />
Description of alarm<br />
Click the heading of any row to sort the list by that heading. Click the heading again to<br />
reverse the sort order.<br />
23
<br />
24
Settings Tab<br />
The Settings tab allows you to set default settings and add operators to the system.<br />
Figure 9-1: Settings Tab<br />
Settings Fields<br />
Table 9-11: Settings Fields<br />
Setting<br />
Retain reader<br />
enrollments<br />
Access profile of<br />
reader enrollments<br />
Additional reader<br />
timeout<br />
Days to retain expired<br />
database entries<br />
Description<br />
This box is always checked and cannot be changed.<br />
• Access profile assigned to users by default when users are<br />
added at a reader before being added in the system.<br />
• Choices are Always, Never or any custom profiles created<br />
by an operator. See Access Tab on page 61 for more<br />
informaiton.<br />
• Additional time that is added globally to the command<br />
timeout.<br />
• Select additional time if command timeout errors are<br />
generated on the network. These errors would be displayed<br />
on the Alarms tab. See Alarms Tab on page 23 for more<br />
information.<br />
• Number of days expired database entries are retained<br />
• Choose default of 45 days initially. If database becomes too<br />
large, make this number smaller.<br />
25
Settings Tab<br />
Managing Operators<br />
Operators are individuals who can control the system. The level of control can be set<br />
individually for each operator.<br />
Add a New<br />
Operator<br />
1. Click the Settings tab.<br />
2. Click the Create new operator button.<br />
The Operator edit screen will appear:<br />
3. Click the Define automatic Windows login for this operator box to use Windows login<br />
information for this operator. See Enable Automatic Windows Login 27.<br />
4. Enter a login name in the operator login name box. This name is case sensitive.<br />
5. Enter the password and confirmation in the enter and confirm boxes. The password is<br />
case sensitive.<br />
6. Choose the operator allowed actions by clicking the corresponding check box(es).<br />
7. Choose the tabs to which the operator has access by clicking the corresponding check<br />
box(es).<br />
8. Click the Accept Settings button.<br />
26
<strong>HandNet</strong> <strong>Lite</strong> <strong>Manual</strong><br />
Edit an<br />
Operator<br />
1. Click the Settings tab.<br />
2. Select the operator you want to edit from the Edit operator selection drop-down box.<br />
3. Click Edit selected operator button.<br />
4. Edit the necessary settings. See Add a New Operator on page 26 for more information.<br />
5. Click the Accept Settings button.<br />
Delete an<br />
Operator<br />
1. Click the Settings tab.<br />
2. Select the operator you want to delete from the Edit operator selection drop-down box.<br />
3. Click the Delete this operator check box.<br />
4. Click the Accept Settings button.<br />
Enable<br />
Automatic<br />
Windows Login<br />
If you wish to allow automatic Windows login for <strong>HandNet</strong> <strong>Lite</strong>:<br />
1. Click the Main tab.<br />
2. Log off.<br />
3. Click to un-check the Force login prompt checkbox.<br />
4. Shut down <strong>HandNet</strong> <strong>Lite</strong>. The next time you start <strong>HandNet</strong> <strong>Lite</strong>, you will be<br />
automatically logged in.<br />
Disable<br />
Automatic<br />
Windows Login<br />
1. Click the Main tab<br />
2. Log off.<br />
3. Click to check the Force login prompt checkbox.<br />
4. Shut down <strong>HandNet</strong> <strong>Lite</strong>. The next time you start <strong>HandNet</strong> <strong>Lite</strong>, you will be prompted<br />
for login name and password.<br />
27
<br />
28
Configuration Tab<br />
The Configuration tab is used to add or edit networks, readers and card formats.<br />
Figure 10-1: Configuration Tab<br />
Managing Networks<br />
A network is a group of up to 32 daisy-chained readers connected though a single serial<br />
port using 2 wire RS485, a single reader connected to a computer with RS232, or a<br />
single TCP/IP (ethernet) reader. (See the reader manual for wiring and connection detail.)<br />
You control access to each reader separately using <strong>HandNet</strong> <strong>Lite</strong>, so having readers with<br />
unrelated purposes in one network is fine.<br />
There are two parts to setting up a network and readers: you must physically set the<br />
readers up and connect them to each other and to the computer, and you must add<br />
the network and readers in <strong>HandNet</strong> <strong>Lite</strong>. This manual only explains how to set up the<br />
network and readers in <strong>HandNet</strong> <strong>Lite</strong>. For help setting up and connecting the readers, see<br />
the manual that came with the readers.<br />
Add a Network<br />
1. Click the Configuration tab.<br />
2. Click the Create new network button<br />
3. Choose the Network type from the drop-down box. The remaining fields displayed will<br />
be determined by this selection.<br />
4. Complete the fields on the screen. See page 30 for TCP/IP network. See page 32 for<br />
Serial network.<br />
5. Click Accept settings.<br />
29
Configuration Tab<br />
Edit a Network<br />
1. Click the Configuration tab.<br />
2. Select the network you want to edit from the drop-down box.<br />
3. Click the Edit selected network button<br />
4. Complete the fields on the screen. See page 30 for TCP/IP network. See page 32 for<br />
Serial network.<br />
5. Click Accept settings.<br />
Delete a<br />
Network<br />
Only networks with no readers can be deleted.<br />
1. Click the Configuration tab.<br />
2. Select the network you want to delete from the drop-down box.<br />
3. Click the Edit selected network button<br />
4. Click the Delete this network check box.<br />
5. Click Accept settings.<br />
Connecting<br />
through a TCP/<br />
IP network<br />
To connect to a site through the network, you must have a TCP/IP network with static IP<br />
addresses. Your computer must have a network card and be connected to the network.<br />
If the network is faster than 10baseT, you must have a switching hub. To use TCP/IP,<br />
you must have either ordered readers with the Ethernet option enabled or purchased an<br />
Ethernet upgrade.<br />
Figure 10-2: Edit a TCP/IP Network<br />
Table 10-12: TCP/IP Network Fields<br />
Field Req’d Description<br />
Network Name Yes • Name of the network<br />
• Any combination of letters, numbers, spaces, and<br />
special characters, up to 30 characters long<br />
Description No Brief description of the network<br />
30
<strong>HandNet</strong> <strong>Lite</strong> <strong>Manual</strong><br />
Field Req’d Description<br />
Enabled No • Must be checked for <strong>HandNet</strong> <strong>Lite</strong> to communicate with<br />
the network and monitor any readers connected to it.<br />
Delete This<br />
Network<br />
No<br />
• Generally you would only uncheck this if you were in<br />
the process of setting up or reconfiguring the network<br />
and didn’t want the program to try to communicate<br />
• Having the Enabled box checked if the network isn’t<br />
really connected to <strong>HandNet</strong> <strong>Lite</strong> causes the program<br />
to slow down significantly. Make sure that this is only<br />
checked if the network is actually set up and connected<br />
• Check to delete this network and remove it from the<br />
Schlage Biometrics network selection list. If there are<br />
no readers in the network, it will be deleted when you<br />
click Accept settings.<br />
• You can’t delete a network with readers on it<br />
Network Type Yes • Choose Serial port or TCP/IP<br />
• The remaining fields will be determined by this<br />
selection.<br />
IP address Yes • Only available if TCP/IP was chosen in the Network<br />
type field.<br />
• The IP address (xxx.xxx.xxx.xxx) of the reader<br />
• Must match the IP address set in the reader. See the<br />
reader manual for more information<br />
• Ask your network administrator for an appropriate<br />
address<br />
31
Configuration Tab<br />
Connecting<br />
through a serial<br />
port<br />
To connect to a site by running a cable from your computer to the reader, you must have<br />
a free serial port on your computer. See the reader manual for more on the requirements<br />
for the cable.<br />
Figure 10-3: Serial Network Edit Screen<br />
Table 10-13: Serial Network Fields<br />
Field Req’d Description<br />
Network Name Yes • Name of the network<br />
• Any combination of letters, numbers, spaces, and<br />
special characters, up to 30 characters long<br />
Description No • Brief description of the network<br />
Enabled No • Must be checked for the system to communicate with<br />
the network and monitor any readers connected to it.<br />
Delete This<br />
Network<br />
No<br />
• Uncheck when in the process of setting up or<br />
reconfiguring the network to keep the program from<br />
trying to communicate<br />
• If checked when the network is not really connected,<br />
the system will slow down significantly.<br />
• Check to delete this network and remove it from the<br />
network selection list.<br />
• You cannot delete a network with readers in it<br />
Network Type Yes • Choose Serial port or TCP/IP<br />
• The remaining fields will be determined by this<br />
selection.<br />
Comm Port Yes • Only available if Serial port was chosen in the Network<br />
type field.<br />
• Must match the serial port to which the reader is<br />
connected<br />
• Only the ports that are currently available on your<br />
computer are listed.<br />
32
<strong>HandNet</strong> <strong>Lite</strong> <strong>Manual</strong><br />
Field Req’d Description<br />
Baud Rate Yes • Only available if Serial port was chosen in the Network<br />
type filed.<br />
• Choose from values of 4800, 9600, 19200, 28800,<br />
38400, or 57600.<br />
• Choose 9600 initially. Increase the rate after a working<br />
connection has been established. Longer wire<br />
distances require lower rates.<br />
• Must match the rate set in all readers on the network.<br />
See the reader manual for more information.<br />
Managing Readers<br />
There are two parts to setting up readers: physically setting up the readers and<br />
connecting them to each other and to the computer, and adding the network and readers<br />
in <strong>HandNet</strong> <strong>Lite</strong>. This manual only explains adding the network and readers in <strong>HandNet</strong><br />
<strong>Lite</strong>. For help setting up and wiring readers, see the manual that came with the readers.<br />
Before you add readers, you must set up the network to which they are connected. See<br />
Add a Network on page 29 for more information.<br />
If You’ve Been<br />
Using Readers<br />
Already<br />
If you’ve been using readers without <strong>HandNet</strong> <strong>Lite</strong>, when you add the network and<br />
readers to the system, <strong>HandNet</strong> <strong>Lite</strong> automatically gets the users from the readers and<br />
adds them to the system; see How Users Are Enrolled and Added to <strong>HandNet</strong> <strong>Lite</strong> on<br />
page 39.<br />
Add a Reader<br />
1. Click the Configuration tab.<br />
1. Select the network in which the new reader will exist from the network drop-down box.<br />
2. Click the Create new reader button.<br />
3. Choose the Reader type from the drop-down box. The entries on the screen will differ<br />
depending on the reader type chosen.<br />
4. Fill in the entries on the Reader Edit screen. See page 35 for FingerKey. See page 37<br />
for HandKey.<br />
5. Click the Test reader button. If the reader is properly configured, the reader will be<br />
able to communicate.<br />
6. To change the security settings for the reader, click the <strong>Security</strong> settings button. See<br />
<strong>Security</strong> Settings Screen on page 40 for more information.<br />
7. If you are editing a FingerKey and want to edit the fingerprint settings, click the<br />
Fingerprint settings button. See Fingerprint Settings Screen on page 41 for more<br />
information.<br />
8. Click the Accept settings button.<br />
33
Configuration Tab<br />
Edit a Reader<br />
1. Click the Configuration tab.<br />
1. Select the network in which the reader you want to edit exists in the network dropdown<br />
box.<br />
2. Click the Edit selected reader button.<br />
3. The entries on the screen will differ depending on the reader type chosen.<br />
4. Fill in the entries on the Reader Edit screen. See page 35 for FingerKey. See page 37<br />
for HandKey.<br />
5. Click the Test reader button. If the reader is properly configured, the reader will be<br />
able to communicate.<br />
6. To change the security settings for the reader, click the <strong>Security</strong> settings button. See<br />
<strong>Security</strong> Settings Screen on page 40 for more information.<br />
7. If you are editing a FingerKey and want to edit the fingerprint settings, click the<br />
Fingerprint settings button. See Fingerprint Settings Screen on page 41 for more<br />
information.<br />
8. Click the Accept settings button.<br />
Delete a Reader<br />
1. Click the Configuration tab.<br />
1. Select the network in which the reader you want to delete exists in the network dropdown<br />
box.<br />
2. Click the Edit reader button.<br />
3. Click the Delete this reader check box.<br />
4. Click the Accept settings button.<br />
34
<strong>HandNet</strong> <strong>Lite</strong> <strong>Manual</strong><br />
FingerKey<br />
Reader Edit<br />
Screen<br />
Figure 10-4: FingerKey Reader Edit Screen<br />
Table 10-14: FingerKey Reader Fields<br />
Field Req’d Description<br />
Clone From No • Appears only after at least one reader has been<br />
configured.<br />
• Allows you copy the settings from another reader,<br />
including the underlying Fingerprint and <strong>Security</strong><br />
Settings.<br />
• If this option is chosen, all of the following fields will be<br />
populated automatically.<br />
Name Yes Any combination of letters, numbers, spaces, and<br />
special characters, up to 30 characters.<br />
Description No Briefly describe the reader.<br />
Network Yes • Select the network in which the reader exists.<br />
• Network must be set up before you can add the reader.<br />
See Add a Network on page 29 for more information.<br />
Address Yes • Must match the address set in the reader. See the<br />
reader’s manual for information on setting the address<br />
in the reader.<br />
• Field will be automatically populated with the first<br />
available address that hasn’t been used. Choose<br />
another number from the pull-down list if desired.<br />
• Changing the address on this screen does NOT<br />
change the address in the physical reader. If you<br />
change an address here, you must also change the<br />
address in the reader.<br />
ID Length No • If all user IDs are the same length, choose the number<br />
of digits here (any value from 1-25) so users don’t<br />
have to press enter after typing the ID at the reader.<br />
• If user IDs are different lengths, choose the longest<br />
number of digits. Users with the longest IDs will not<br />
have to press ENTER after typing the ID at the reader.<br />
• Entry does not affect the length of IDs on cards. It only<br />
affects IDs entered at the keypad.<br />
35
Configuration Tab<br />
Field Req’d Description<br />
Number of Tries Yes • Controls how many times the user can try to get<br />
access before the reader will block the user’s ID and<br />
not allow further tries.<br />
• Prevents someone from making repeated tries to gain<br />
access with someone else’s ID.<br />
• Normally 3 is a good setting.<br />
Reject threshold Yes • The lower this number is, the more closely the user’s<br />
finger must match the template of the finger stored in<br />
the FingerKey.<br />
• 30 (the lowest possible number) requires the<br />
fingerprint to match very closely; 250 (the highest<br />
possible number) will grant access if the finger match<br />
is close but not exactly the same.<br />
• 75 is good for most contexts. Choose a lower number<br />
if you have an especially high security situation.<br />
• If particular users have trouble placing their fingers<br />
consistently, you can override the reader’s setting<br />
for an individual user on the User edit screen in the<br />
Users window. See Edit a User on page 12 for more<br />
information.<br />
Ready String Yes • This text appears in the reader display when the<br />
reader is ready and waiting for the user to enter an ID.<br />
• Any combination of letters, numbers, spaces, and<br />
special characters, up to 20 characters<br />
Beeper On No • When checked, the reader beeps each time you press<br />
a button<br />
• In a high security setting, you might want the beeps<br />
off to make it harder for a casual observer to figure out<br />
how many digits are in the ID number.<br />
Emulate Card<br />
Reader<br />
Yes • FingerKey readers always emulate a card reader, so<br />
you can’t uncheck this box<br />
Facility Code Yes • Facility code that should be passed to the access<br />
control panel.<br />
• Numeric value from 0 (zero) to 65535<br />
Enabled No • Check if the reader is physically set up and ready to be<br />
used.<br />
• Checking the Enabled box if the reader is not really<br />
connected slows the program down significantly. Make<br />
sure this is only checked if the reader is actually set up<br />
and connected<br />
User capacity Yes • Will be filled in automatically by the reader.<br />
Delete This<br />
Reader<br />
No<br />
• Check ONLY to delete reader and remove it from the<br />
reader selection list.<br />
36
<strong>HandNet</strong> <strong>Lite</strong> <strong>Manual</strong><br />
HandKey<br />
Reader Edit<br />
Screen<br />
Figure 10-5: HandKey Reader Edit Screen<br />
Table 10-15: HandKey Reader Fields<br />
Field Req’d Description<br />
Clone From No • Appears only after at least one reader has been<br />
configured.<br />
• Allows you copy the settings from another reader,<br />
including the underlying Fingerprint and <strong>Security</strong><br />
Settings.<br />
• If this option is chosen, all of the following fields will be<br />
populated automatically.<br />
Name Yes Any combination of letters, numbers, spaces, and<br />
special characters, up to 30 characters.<br />
Description No Briefly describe the reader. You may leave this blank if<br />
you wish<br />
Network Yes • Select the network in which the reader exists.<br />
• Network must be set up before you can add the reader.<br />
See Add a Network on page 29 for more information.<br />
37
Configuration Tab<br />
Field Req’d Description<br />
Address Yes • Must match the address set in the reader. See the<br />
reader’s manual for information on setting the address<br />
in the reader.<br />
• Field will be automatically populated with the first<br />
available address that hasn’t been used.<br />
• Choose another number from the pull-down list if<br />
desired.<br />
• Changing the address on this screen does NOT<br />
change the address in the physical reader. If you<br />
change an address here, you must set the reader to<br />
the same address or the program won’t be able to<br />
communicate with the reader<br />
ID Length No • If all user IDs are the same length, choose the number<br />
of digits here (any value from 1-25) so users don’t<br />
have to press enter after typing the ID at the reader.<br />
• If user IDs are different lengths, choose the longest<br />
number of digits. Users with the longest IDs will not<br />
have to press ENTER after typing the ID at the reader.<br />
• Entry does not affect the length of IDs on cards. It only<br />
affects IDs entered at the keypad.<br />
Number of Tries Yes • Controls how many times the user can try to get<br />
access before the reader will block the user’s ID and<br />
not allow further tries.<br />
• Prevents someone from making repeated tries to gain<br />
access with someone else’s ID.<br />
• Normally 3 is a good setting.<br />
Reject threshold Yes • The lower this number is, the more closely the user’s<br />
finger must match the template of the finger stored in<br />
the FingerKey.<br />
• 30 (the lowest possible number) requires the<br />
fingerprint to match very closely; 250 (the highest<br />
possible number) will grant access if the finger match<br />
is close but not exactly the same.<br />
• 75 is good for most contexts. Choose a lower number<br />
if you have an especially high security situation.<br />
• If particular users have trouble placing their fingers<br />
consistently, you can override the reader’s setting<br />
for an individual user on the User edit screen in the<br />
Users window. See Edit a User on page 12 for more<br />
information.<br />
Ready String Yes • This text appears in the reader display when the<br />
reader is ready and waiting for the user to enter an ID.<br />
• Any combination of letters, numbers, spaces, and<br />
special characters, up to 20 characters<br />
38
<strong>HandNet</strong> <strong>Lite</strong> <strong>Manual</strong><br />
Field Req’d Description<br />
Beeper On No • When checked, the reader beeps each time you press<br />
a button<br />
Emulate Card<br />
Reader<br />
Yes<br />
• In a high security setting, you might want the beeps<br />
off to make it harder for a casual observer to figure out<br />
how many digits are in the ID number.<br />
• Controls the Output Mode of teh reader (Lock Output<br />
mode if unchecked, Card Reader Emulation Output if<br />
checked).<br />
Enabled No • Check if the reader is physically set up and ready to be<br />
used.<br />
• Checking the Enabled box if the reader is not really<br />
connected slows the program down significantly. Make<br />
sure this is only checked if the reader is actually set up<br />
and connected<br />
User capacity Yes • Contains the number of users the reader is capable<br />
of storing (this field is filled in after the Test Reader<br />
button is pressed)<br />
Delete This<br />
Reader<br />
No • Check ONLY to delete reader and remove it from the<br />
reader selection list.<br />
Duress alert No • If checked, duress activates AUX output<br />
enable<br />
Duress identifier No • This is the key which, when pressed, will generate the<br />
DURESS event.<br />
• Must be a digit 0 through 9. Other values will disable<br />
the duress feature.<br />
12 hour display No • If checked, displays terminal time in 12 hour format,<br />
otherwise 24 hour time format.<br />
Display system<br />
status<br />
No<br />
• If checked, the reader’s LCD will display system status<br />
on line 2. If unchecked, line 2 of the LCD will display<br />
the unit’s date and time.<br />
Log I/O events No • Currently ignored by HandKey units, I/O Events will<br />
always generate a DataLog<br />
Sync to PC clock No • The reader’s clock will be synchronized to this PC’s<br />
system time.<br />
Reader language<br />
type<br />
No • Selects the language used on the reader for LCD<br />
prompts.<br />
Reader date/time<br />
Format<br />
No<br />
• Selects the format that the reader will display date &<br />
time on the LCD display.<br />
39
Configuration Tab<br />
<strong>Security</strong><br />
Settings<br />
Screen<br />
The <strong>Security</strong> Settings Screen controls the passwords needed to access the menus in the<br />
reader.<br />
Figure 10-6: <strong>Security</strong> Settings Screen<br />
Generally the default passwords shown above are adequate since a user must be set<br />
up with the appropriate Authority level on the User edit screen in the Users window (see<br />
page 12 for more information), and the user must know how to get to these menus in the<br />
reader before the passwords below would do any good.<br />
Edit <strong>Security</strong><br />
Settings<br />
1. Click the Configuration tab.<br />
2. Select the network in which the reader you want to edit exists in the network dropdown<br />
box.<br />
3. Select the reader you want to edit from the reader drop-down box.<br />
4. Click the Edit selected reader button.<br />
5. Click the <strong>Security</strong> settings button.<br />
6. Edit the passwords. See the <strong>Security</strong> Settings Fields Table on page 40 for more<br />
information.<br />
7. Click the Accept settings button.<br />
Table 10-16: <strong>Security</strong> Settings Fields<br />
Field Req’d Description<br />
Service Yes Allows the master reader display the status of all readers<br />
on the network<br />
Setup Yes Controls reader setup including the reader’s address, ID<br />
length, auxiliary output settings, facility codes, network<br />
configuration, the duress indicator, etc. It also contains an<br />
option to upgrade the maximum number of users<br />
Management Yes Allows display of a list all of the users in the reader and lets<br />
the master reader send/acquire user databases to/from<br />
readers in a network<br />
Enrollment Yes Allows you to add or remove users<br />
<strong>Security</strong> Yes Allows you to customize user settings, control how closely<br />
user fingerprints must match templates, set the menu<br />
passwords, clear all the users from reader, etc<br />
For more detail on the reader menus, see the reader manual.<br />
40
<strong>HandNet</strong> <strong>Lite</strong> <strong>Manual</strong><br />
Fingerprint<br />
Settings<br />
Screen<br />
The Fingerprint Settings screen controls a number of the reader’s internal settings.<br />
Figure 10-7: Fingerprint Settings Screen<br />
Edit Fingerprint<br />
Settings<br />
1. Click the Configuration tab.<br />
2. Select the network in which the reader you want to edit exists in the network dropdown<br />
box.<br />
3. Select the reader you want to edit from the reader drop-down box.<br />
4. Click the Edit selected reader button.<br />
5. Click the Fingerprint settings button.<br />
6. Edit the necessary fields. See the Fingerprint Settings Fields table on page 41 for<br />
more information.<br />
7. Click the Accept settings button.<br />
Table 10-17: Fingerprint Settings Fields<br />
Field Req’d Description<br />
Secondary Finger<br />
Mode<br />
Yes<br />
• Disabled: reader collects only one finger for each user.<br />
• Alternate finger: Scan of second finger grants access<br />
exactly as the first does. If user cannot verify with one<br />
finger, the other enrolled finger can be used.<br />
• Duress finger: Scan of second finger grants access<br />
and triggers a duress alarm. (Accomplished by either<br />
sending an alternate facility code or with reverse parity,<br />
depending on how your access control panel is set up.)<br />
41
Configuration Tab<br />
Field Req’d Description<br />
Auto Resume<br />
Timeout<br />
Yes<br />
• Number of seconds that reader stays in idle mode after<br />
being set into idle mode by a host command.<br />
• Number between 60 and 65535<br />
• Default value is 300.<br />
• DO NOT change this setting unless advised to by<br />
technical support<br />
LED Control Yes • Determines what controls the reader’s LED display.<br />
• LED controlled internally: reader controls the LED<br />
display<br />
• LED controlled externally: access control panel control<br />
the LED display<br />
• For more information on setting up the LED control, see<br />
the reader’s manual.<br />
Beeper Control Yes • Determines what controls the reader’s beeper.<br />
• Beeper controlled internally: reader controls beeper<br />
• Beeper controlled externally: access control panel<br />
controls beeper<br />
• For more information on setting up the beeper control,<br />
see the manual that came with the readers.<br />
Reader Model Yes • Select the FingerKey model type from the drop down<br />
choices which are:<br />
iCLASS<br />
Configuration<br />
Mifare standard<br />
Configuration<br />
Yes<br />
Yes<br />
• DX-2000 - Select this if you are using a DX-2000 model<br />
FingerKey.<br />
• DX-2100 HID Prox - Select this if you are using a DX-<br />
2100 model FingerKey using HID Prox cards.<br />
• DX-2200 HID iClass - Select this if you are using a DX-<br />
2200 model FingerKey with HID iClass cards.<br />
• DX-2400 Philips Mifare Standard - Select this if you<br />
are using a DX-2400 model FingerKey with Mifare<br />
Standard cards and settings.<br />
• DX-2400 Philips Mifare DESFire - Select this if you are<br />
using a DX-2400 model FingerKey with Mifare DESFire<br />
cards and settings.<br />
• Choose None unless you are using iCLASS readers<br />
and cards.<br />
• If using iCLASS readers and cards, choose any<br />
iCLASS configuration that you’ve defined.<br />
• See Add an iCLASS Definition on page 50 for more<br />
information.<br />
• Choose None unless you are using Mifare Standard<br />
readers and cards.<br />
• If using Mifare Standard readers and cards, choose any<br />
Mifare Standard definition that you’ve defined.<br />
• See Add a Mifare Standard Definition on page 57 for<br />
more information.<br />
42
<strong>HandNet</strong> <strong>Lite</strong> <strong>Manual</strong><br />
Field Req’d Description<br />
DESFire<br />
Configuration<br />
Yes<br />
• Choose None unless you are using Mifare DESFire<br />
readers and cards.<br />
• If using Mifare DESFire readers and cards, choose any<br />
Mifare DESFire definition that you’ve defined.<br />
• See Add a DESFire Definition on page 55 for more<br />
information.<br />
Input Format 1-5 Yes • Card formats reader will accept from an internal or<br />
external card reader.<br />
• Choose either Wiegand or Magstripe formats but not<br />
both. Most companies use only one format. See the<br />
Card Formats table on page 65 for more information.<br />
• If you change from Wiegand to Magstripe format,<br />
or from Magstripe to Wiegand, you must reboot the<br />
reader. See the reader manual for further detail<br />
Output Format Yes • Format reader sends to the access control panel if you<br />
use an internal or external card reader.<br />
• Use Input Format: Passes through whatever format is<br />
received<br />
• None: Reader sends no output when the ID is entered<br />
with a card.<br />
• Formats 1-11: Choose one of the formats from the<br />
Card Formats table on page 65.<br />
Keypad Format Yes • Format the reader sends to the access control panel<br />
when a user enters his ID on the keypad instead of<br />
using a card.<br />
Action on ID<br />
Overflow<br />
Yes<br />
• None: Reader sends no output when the ID is entered<br />
with the keypad.<br />
• Formats 1-11: Choose one of the formats from the<br />
Card Formats table on page 65.<br />
• Indicates what reader sends to access panel when<br />
card ID is longer than maximum length permitted by<br />
selected formats.<br />
• Suppress Output: Reader sends no output<br />
• Substitute all 1 bits: All 1 (one) bits are sent instead of<br />
the ID that was entered<br />
• Substitute all 0 bits: All 0 (zero) bits are sent instead of<br />
the ID that was entered<br />
43
Configuration Tab<br />
Enabling a<br />
Secondary<br />
Finger Later<br />
Field Req’d Description<br />
Action on ID<br />
Unknown<br />
Action on<br />
Biometric Reject<br />
Yes<br />
Yes<br />
• Controls what the reader sends the access panel when<br />
ID is not recognized<br />
• Suppress Output: reader sends no output<br />
• Alternate Facility Code Value: reader sends facility code<br />
entered in the value entry, instead of the normal facility<br />
code<br />
• Increment/Decrement Facility Code Value: Reader<br />
sends facility code increased or decreased by the<br />
amount in the Value entry.<br />
• Toggle All Parity Bits: reader toggles the output parity<br />
bits.<br />
• Controls what the reader sends the access panel when<br />
a valid ID is entered but the finger doesn’t match the<br />
template.<br />
• Same four options here as for Action on ID Unknown<br />
Action on Duress Yes • Controls what the reader sends the access panel when<br />
a user places a duress finger<br />
• Same four options here as for Action on ID Unknown<br />
Value Yes • Number between 0 and 32767<br />
• Used when either Alternate Facility Code Value,<br />
Increment/Decrement Facility Code Value is chosen in<br />
the previous three fields<br />
• Enter a minus (-) sign before the number if you want to<br />
decrement the value.<br />
If users are enrolled with Seconday finger mode disabled, only one finger will be<br />
collected. If Secondary finger mode is later changed, all users need to be removed and<br />
re-enrolled in order to obtain a template for the second finger. The first finger will still<br />
function normally, but the second finger functionality will not be available until the user is<br />
re-enolled.<br />
Interpreting the<br />
Format Detail<br />
44<br />
In the explanation of the format detail, you’ll see an elaboration on the format that looks<br />
like this:<br />
1 2<br />
12345678901234567890123456<br />
PFFFFFFFFIIIIIIIIIIIIIIIIP<br />
EXXXXXXXXXXXX.............<br />
.............XXXXXXXXXXXXO<br />
The numbers at the top: Identify the bit numbers; this example has 26 bits.<br />
F: Indicates which bits contain the facility code; in this example, bits 2-9 have the<br />
facility code.<br />
I: Indicates which bits contain the ID; in this example, bits 10-25 contain the ID.P/E/<br />
O/X/.: P indicates a parity bit; the E under the first parity bit here indicates that<br />
this parity is even. The X’s following indicate which bits are used to determine that<br />
parity bit; the periods following indicate that those bits are not used in determining<br />
that parity bit; in this example, bits 2-13 are used to determine parity bit 1, and<br />
bits 14-26 do not affect this parity bit. The O under the second parity bit (bit 26)<br />
indicates this parity bit is odd; the preceding X’s indicate that bits 14-25 are used<br />
to determine this parity bit.<br />
For a list of available card formats, see the Card Formats table on page 65.
<strong>HandNet</strong> <strong>Lite</strong> <strong>Manual</strong><br />
Managing FingerKey Card Formats<br />
Most users don’t need to define additional formats; the predefined formats that we initially<br />
provide cover almost all situations. However, if you need some other Wiegand format, you<br />
can define any format that you want.<br />
We don’t recommend changing or deleting any of our standard card formats. If you<br />
need a format that is similar to one of our existing formats, choose to add a new format;<br />
there’s an option on the screen that lets you clone (copy) an existing format; you can then<br />
change the copy rather than changing the original.<br />
Add a Card<br />
Format<br />
1. Click the Configuration tab.<br />
2. Click the Create new card format button.<br />
3. Complete the fields on the screen. See the Card Format Fields table on page 46 for<br />
more information.<br />
4. Click the Accept settings button.<br />
Edit a Card<br />
Format<br />
1. Click the Configuration tab.<br />
2. Select the card format you want to edit from the drop-down box.<br />
3. Click the Edit selected card format button.<br />
4. Make changes to the fields on the screen. See the Card Format Fields table on page<br />
46 for more information.<br />
5. Click the Accept settings button.<br />
Delete a Card<br />
Format<br />
1. Click the Configuration tab.<br />
2. Select the card format you want to edit from the drop-down box.<br />
3. Click the Edit selected card format button.<br />
4. Click the delete check box.<br />
5. Click the Accept settings button.<br />
45
Configuration Tab<br />
Card Format<br />
Screen<br />
Figure 10-8: The Card Format Screen<br />
The appearance of this screen varies depending on what you choose. The width of the Bit<br />
Map section changes based on the length you define for the ID. The Parity sections at the<br />
bottom only appear if you indicate that there are parity bits<br />
Table 10-18: Card Format Fields<br />
Field Req’d Description<br />
Name Yes Name that clearly identifies the format<br />
Format Number Yes Internally generated number to identify the format.<br />
Cannot be changed.<br />
Length in Bits Yes Number of bits in the format. This is the total number of<br />
bits, not just the number of bits in the ID<br />
No of Parity Bits No If there are any parity bits, enter the number (1-4) here.<br />
For each parity bit specified here, a Parity section<br />
appears below<br />
Bit Map Yes Structure of the format and how each bit is used.<br />
To change how different bits are used, see Card Format<br />
Structure on page 47, and the Bit Map example on page<br />
47 for more information.<br />
Delete No Deletes the current format.<br />
Bits Direction Yes Forward: bits will be read in from left to right<br />
Reverse: bits will be read in from right to left<br />
Clone From No Only appears if you are creating a new format.<br />
Allows you to make a copy of an existing format.<br />
Entries on the screen will be set to match the settings for<br />
the format you choose.<br />
Input Restriction Yes Yes: only an exact format match will be accepted. Gives<br />
higher security since cards that are not issued by you will<br />
not be accepted.<br />
No: any input and parses will be accepted<br />
Digital Format Yes Leave this set to Binary unless you understand what BCD<br />
is and have a specific reason for choosing it<br />
46
<strong>HandNet</strong> <strong>Lite</strong> <strong>Manual</strong><br />
Figure 10-9: Bit Map Example<br />
P: parity bit<br />
E: even parity bit<br />
F: facility code<br />
Bits 2–5 contain<br />
the facility code.<br />
I: Bits containing the ID<br />
Bits 6–17 and 21–23<br />
hold the ID.<br />
S: site code<br />
Bit numbers<br />
This example has 24 bits.<br />
P: parity bit<br />
O: odd parity bit<br />
X: bits 2-11 are considered<br />
in determining this parity<br />
X: bits 11-23 are considered<br />
in determining this parity.<br />
Card Format<br />
Structure<br />
1. Under Structure, choose the type of bit you want to add from the drop-down box.<br />
• Credential ID • Site • All Zeros<br />
• Facility • Expiry • Do Not Care 1<br />
• Parity • Issue Code • Do Not Care 0<br />
• Company<br />
• All Ones<br />
To add parity bits, see Set Up the Parity Bits on page 48 for more information<br />
2. Choose the first bit you want to use for the structure from the Start bit drop-down box.<br />
3. Choose the number of sequential bits from the Length drop-down box.<br />
• For example, if bits 2-11 should contain the ID, select 2 from the Start Bit dropdown<br />
box, and 10 from the Length drop-down box.<br />
• If a particular structure is broken up, the structure will be added in multiple steps.<br />
For example, if you have a 15 bit ID, but that ID is contained in bits 2–6, 8–12,<br />
and 14–18, add the Credential ID three times: the first time with a Start Bit of 2<br />
and a Length of 5, the second time with a Start Bit of 8 and a Length of 5, and<br />
the third time with a Start Bit of 14 and a Length of 5.<br />
• Similarly, suppose a particular structure is scrambled. For example, suppose bit<br />
2-11 are used for the ID, but instead of being in order, bit 9 is the first bit of the<br />
ID, bit 3 is the second, etc. You would simply add this one bit at a time, starting<br />
with the first bit (bit 9), then the second, etc. Bits are considered in the order they<br />
appear in the structure list. (If you add bits in the wrong order, there’s no way to<br />
rearrange them. You must delete the incorrect bits and then add them again in the<br />
correct order.)<br />
• If the Start Bit is disabled, then you have used all available bits; if you want to<br />
change the function of an existing bit, you must delete the incorrect bits before<br />
you can add them elsewhere.<br />
4. Click Add Field.<br />
The bit numbers will be added in the corresponding columns in the structure table, and<br />
the bits will be reflected in the Bit Map representation above.<br />
5. To remove an incorrect bit, check the box next to the bit and then click the Clear<br />
Selection button.<br />
6. To clear (delete) the entire structure, click the Clear All button.<br />
47
Configuration Tab<br />
Set Up the<br />
Parity Bits<br />
1. Add the Parity Bit to the Structure<br />
a. Under Structure, choose Parity from the drop-down box.<br />
b. Choose the first bit you want to use for the parity bit from the Start bit drop-down<br />
box.<br />
c. Choose the number of sequential bits (usually 1) from the Length drop-down box.<br />
d. Click the Add Field button.<br />
2. Indicate whether that parity bit is even or odd<br />
a. Under Parity 1, choose Even or Odd from the drop-down box.<br />
b. Under Start Bit, choose the bit for which you want to identify parity from the dropdown<br />
box.<br />
c. Click Add Field.<br />
3. Identify which bits are considered to determine that parity bit<br />
a. Under Parity 1, choose Included<br />
b. Under Start Bit, choose the first bit that is used to determine this parity<br />
c. Under Length, indicate the number of bits to consider<br />
d. Click Add Field.<br />
e. If the bits to consider are broken up (for example, if you want to consider bits 2–10<br />
and bits 14–18), simply repeat this step to add the additional bits.<br />
48
Smart Card Tab<br />
The Smart Card tab is used only with FingerKeys. It is used to manage FingerKey<br />
iCLASS, DESFire and MiFare cards.<br />
Figure 11-1: Smart Card Tab<br />
Managing FingerKey iCLASS Definitions<br />
iCLASS<br />
Definition<br />
Screen<br />
Figure 11-2: iCLASS Definition Screen<br />
49
Smart Card Tab<br />
Add an iCLASS<br />
Definition<br />
1. Click the Smart Card tab.<br />
2. Click the Create new iCLASS button.<br />
3. Complete the fields on the screen. See the iCLASS Definition Fields table on page 50<br />
for more information.<br />
4. Click the Accept settings button.<br />
Edit an iCLASS<br />
Definition<br />
1. Click the Smart Card tab.<br />
2. Choose the iCLASS definition you want to edit from the drop-down box.<br />
3. Click the Edit selected iCLASS button.<br />
4. Complete the fields on the screen. See the iCLASS Definition Fields table on page 50<br />
for more information.<br />
5. Click the Accept settings button.<br />
Delete an<br />
iCLASS<br />
Definition<br />
1. Click the Smart Card tab.<br />
2. Choose the iCLASS definition you want to delete from the drop-down box.<br />
3. Click the Edit selected iCLASS button.<br />
4. Click the Delete this iCLASS definition check box.<br />
5. Click the Accept settings button.<br />
iCLASS<br />
Definition<br />
Fields<br />
Table 11-19: iClass Definition Fields<br />
Field Req’d Description<br />
iCLASS definition<br />
name<br />
Biometric template<br />
compression<br />
Enter “new” iClass<br />
key<br />
Confirm “new”<br />
iClass key<br />
Yes<br />
• Name of the iCLASS definition<br />
• Any name that distinguishes this definition from others<br />
• Controls the amount of compression of the finger<br />
template before it is written to the iCLASS card<br />
• Maximum compression should be used initially<br />
• See the iCLASS Card Compression table on page 51<br />
for more information<br />
• A password that encrypts the areas used by the<br />
readers on iCLASS cards<br />
• Protects the fingerprint data from being read if the<br />
same cards are used with other devices.<br />
• 16 hex digits (0–9 and A–F.)<br />
• A default key is used when a new iCLASS definition is<br />
defined. Can be used permanently if desired.<br />
• For increased security, change this key periodically.<br />
Confirmation of previous field<br />
50
<strong>HandNet</strong> <strong>Lite</strong> <strong>Manual</strong><br />
Field Req’d Description<br />
Enter “old” iClass<br />
key<br />
Automatic Key<br />
Update<br />
Specify (protect)<br />
application areas<br />
• Old reader key, usually populated automatically.<br />
• Required for the reader to change the key.<br />
• All cards should be updated each time the key is<br />
changed, to ensure they key is always up-to-date.<br />
• See Resetting Old Card Keys on page 52 for more<br />
information.<br />
• Indicates whether readers using this definition can<br />
automatically change the key on a card.<br />
• Defaults to Do Not Change. Whatever setting was<br />
previously entered will continue to be used. If you’re<br />
editing a previously created definition, click the<br />
button to see what the current settings are.<br />
• Options:<br />
• Do Not Change: Use the previously entered setting.<br />
• Disable Auto Key Update: Prevents the reader from<br />
changing a key.<br />
• Start Unlimited Auto Key Update: Any card with the<br />
old key will be automatically updated when used at<br />
the reader.<br />
• Start Limited Auto Key Update: Any card with the<br />
old key will be automatically updated at the reader,<br />
until the number of cards and/or date specified is<br />
reached.<br />
• See Automatic Key Update on page 53 for more<br />
information.<br />
• Only check this box if you are sharing the iCLASS card<br />
with another iCLASS device that does not automatically<br />
determine the template location on the card.<br />
• See iCLASS Card Protection on page 52 for more<br />
information.<br />
iCLASS Card<br />
Compression<br />
Table 11-20: iCLASS Card Compression<br />
Number of Enrolled Fingers<br />
1 2<br />
No Compression 854 bytes 1654 bytes<br />
Minimum Compression 566 1078<br />
Medium Compression 454 854<br />
Maximum Compression 310 566<br />
51
Smart Card Tab<br />
iCLASS Card<br />
Protection<br />
Figure 11-3: iCLASS Card Protection<br />
The grid on the right shows the protected blocks in red:<br />
! NOTE<br />
You can protect multiple areas simply by choosing new values for each of these entries.<br />
You can clear any protected area by choosing the application area and choosing<br />
Available for Reader’s Evaluation in the Select Protection drop down menu.<br />
When you protect blocks in even application areas (0, 2, 4, etc.), blocks are used from the<br />
left to the right, that is, starting at block 6 and working up; when you protect areas in odd<br />
application areas (1, 3, 5, etc.), blocks are used from right to left, that is, starting at 31<br />
and working down.<br />
If you protect both even and odd sections in any pair (for example, if you protect parts of<br />
both area 0 area 1), then the fingerprint reader can’t use that pair at all so the entire area<br />
is marked as protected.<br />
Programmed iCLASS cards require application area 0 to be blocked off. To do this, click<br />
Select Application Area and pick Application Area 0 from the drop down menu. Then click<br />
Select Protection and choose Protect 26 blocks.<br />
Resetting Old<br />
Card Keys<br />
To change the key for a previously used iCLASS card, the reader must know what the old<br />
key is—this prevents unauthorized people from converting other cards to work with your<br />
system. <strong>HandNet</strong> <strong>Lite</strong> keeps track of what the last key you used was, so most of the time,<br />
you don’t need to change this entry.<br />
For example, suppose you originally set the key to 1234123412341234 and then you<br />
entered a New Reader Key of 5678567856785678. <strong>HandNet</strong> <strong>Lite</strong> remembers the old key;<br />
it would automatically change cards to the new key if you set it to automatically update<br />
keys (see Automatic Key Update on page 53).<br />
However, suppose in January you set the key to 1234123412341234, in February change<br />
it to 5678567856785678, and in March change it again to 9ABC9ABC9ABC9ABC.<br />
Cards that got used during February would have been updated to 5678567856785678;<br />
cards that didn’t get used during February would still have January’s key of<br />
52
<strong>HandNet</strong> <strong>Lite</strong> <strong>Manual</strong><br />
1234123412341234. The reader can automatically update those cards with the most<br />
recent old key (5678567856785678), but it would no longer recognize the prior old key of<br />
1234123412341234. If you have a situation like this, to update the older cards, you must<br />
manually indicate what old key to use by checking the Reset Old Key checkbox and then<br />
entering the appropriate value in the old key entries.<br />
If you have an older card and know that one of several keys was used on it but aren’t sure<br />
which one, enter the various old keys in turn here, trying to update the card each time.<br />
You can avoid ever having to do this if you make sure that all cards get updated each time<br />
you change your key.<br />
Automatic Key<br />
Update<br />
Some administrators want any reader to update the key; other administrators prefer to<br />
only let selected readers update cards. For example, for top security, you might only let<br />
a non-networked reader in a security office update cards so that was the only place they<br />
could be updated. To do this, the administrator would create one iCLASS definition for<br />
the public readers (with Automatic Key Update unchecked), and another iClass definition<br />
(Automatic Key Update checked) for the administrative reader.<br />
If you disable automatic updates here, you can still manually update keys using the<br />
reader command menus.<br />
If you return to this screen, this entry defaults to Do Not Change; this means that<br />
whatever setting was previously entered will continue to be used. If you’re editing a<br />
previously created definition, click the button to see what the current settings are. (This<br />
button doesn’t do anything when creating a new definition.)<br />
Your choices are:<br />
Do Not Change: Use the previously entered setting.<br />
Disable Auto Key Update: This prevents the reader from ever changing a key. With this<br />
setting, to update cards, you would have to use a reader associated with another iCLASS<br />
definition that allowed updates, or you would have to manually update cards with the<br />
reader’s command menus.<br />
Start Unlimited Auto Key Update: If any card with the old key is used, this automatically<br />
updates the card to the new key. There’s no limit to the number of cards that can be<br />
updated, and no limit on the date range.<br />
Start Limited Auto Key Update: If any card is used that currently has this old key, this<br />
automatically updates the card to the new key until the number of cards and/or date<br />
specified in the following two entries is reached. For example, if you had 20 employees,<br />
you might set this to only automatically update 20 cards; once that was done, cards would<br />
not be automatically updated until you changed the key again. You could also specify a<br />
date; cards would then be automatically updated until that date, but would not be updated<br />
after that date.<br />
53
Smart Card Tab<br />
Specify<br />
(protect)<br />
application<br />
areas<br />
Only check this box if you are sharing the iCLASS card with another iCLASS device that<br />
doesn’t automatically determine the template location on the card. If fingerprint readers<br />
are the only iCLASS device that you use with your cards, or if you use other device that<br />
also automatically choose an available space to store information, then you don’t need to<br />
change this setting.<br />
For example, Schlage Biometrics hand readers always store their templates in blocks<br />
19–31 of area 1. If you were using the same iCLASS cards with both Schlage Biometrics<br />
hand readers and Schlage Biometrics fingerprint readers, you’d have to protect these<br />
blocks so a fingerprint template wouldn’t get written in this area; if it did, the hand reader<br />
would write a template over it.<br />
To protect these blocks, check the box by Specify (protect) application areas, click Select<br />
Application Area and pick Application Area 1 from the drop down menu, and click Select<br />
Protection and choose Protect 13 blocks from the menu:<br />
54
<strong>HandNet</strong> <strong>Lite</strong> <strong>Manual</strong><br />
Managing FingerKey DESFire Card Definitions<br />
DESFire<br />
Definition<br />
Screen<br />
Figure 11-4: DESFire Definition Screen<br />
Add a DESFire<br />
Definition<br />
1. Click the Smart Card tab.<br />
2. Click the Create new DESFire button.<br />
3. Complete the fields on the screen. See the DESFire Definition Fields table on page 56<br />
for more information.<br />
4. Click the Accept settings button.<br />
Edit a DESFire<br />
Definition<br />
1. Click the Smart Card tab.<br />
2. Choose the DESFire definition you want to edit from the drop-down box.<br />
3. Click the Edit selected DESFire button.<br />
4. Complete the fields on the screen. See the DESFire Definition Fields table on page 56<br />
for more information.<br />
5. Click the Accept settings button.<br />
Delete a<br />
DESFire<br />
Definition<br />
1. Click the Smart Card tab.<br />
2. Choose the DESFire definition you want to delete from the drop-down box.<br />
3. Click the Edit selected DESFire button.<br />
4. Click the Delete this DESFire definition check box.<br />
5. Click the Accept settings button.<br />
55
Smart Card Tab<br />
DESFire<br />
Definition<br />
Fields<br />
Table 11-21: DESFire Definition Fields<br />
Field Req’d Description<br />
DESFire definition<br />
name<br />
Biometric template<br />
compression<br />
DESFire<br />
communication<br />
Enter “new” user<br />
file key<br />
Enter “new”<br />
application master<br />
key<br />
Enter “new” PICC<br />
master key<br />
Enter “old” user file<br />
key<br />
Enter “old”<br />
application master<br />
key<br />
Enter “old” PICC<br />
master key<br />
Change automatic<br />
user file key<br />
update<br />
Yes<br />
Yes<br />
Yes<br />
Yes<br />
Yes<br />
Yes<br />
Yes<br />
Yes<br />
Yes<br />
Yes<br />
• Name of the DESFire definition<br />
• Any name that distinguishes this definition from others<br />
• Controls the amount of compression of the finger<br />
template before it is written to the DESFire card<br />
• Maximum compression should be used initially<br />
• See the DESFire Card Compression table on page 56<br />
for more information<br />
Select either Plain Text or DESFire ciphered<br />
• Check the box to edit these fields.<br />
• Key entered must be exactly the same in both boxes.<br />
• Check the box to edit these fields.<br />
• Key entered must be exactly the same in both boxes.<br />
• Check the box to edit these fields.<br />
• Key entered must be exactly the same in both boxes.<br />
• Check the box to edit these fields.<br />
• Key entered must be exactly the same in both boxes.<br />
• Check the box to edit these fields.<br />
• Key entered must be exactly the same in both boxes.<br />
• Check the box to edit these fields.<br />
• Key entered must be exactly the same in both boxes.<br />
The automatic user key update choices are:<br />
• Do not change<br />
• Disable auto key update<br />
• Start unlimited auto key update<br />
• Start limited auto key update (displays two additional<br />
fields)<br />
• With limited auto key update the operator can select<br />
the number of cards to be updated and/or the number<br />
of cards to automatically update.<br />
DESFire Card<br />
Compression<br />
Table 11-22: DESFire Card Compression<br />
Number of Enrolled Fingers<br />
1 2<br />
No Compression 854 bytes 1654 bytes<br />
Minimum Compression 566 1078<br />
Medium Compression 454 854<br />
Maximum Compression 310 566<br />
56
<strong>HandNet</strong> <strong>Lite</strong> <strong>Manual</strong><br />
Managing FingerKey Mifare Standard Card Formats<br />
Add a Mifare<br />
Standard<br />
Definition<br />
1. Click the Smart Card tab.<br />
2. Click the Create new Mifare button.<br />
3. Complete the fields on the screen. See the Mifare Standard Definition Fields table on<br />
page 58, and the Mifare Standard Sector Fields on page 59 for more information.<br />
4. Click the Accept settings button.<br />
Edit a Mifare<br />
Standard<br />
Definition<br />
1. Click the Smart Card tab.<br />
2. Choose the Mifare definition you want to edit from the drop-down box.<br />
3. Click the Edit selected Mifare button.<br />
4. Complete the fields on the screen. See the Mifare Standard Definition Fields table on<br />
page 58, and the Mifare Standard Sector Fields on page 59 for more information.<br />
5. Click the Accept settings button.<br />
Delete a Mifare<br />
Standard<br />
Definition<br />
1. Click the Smart Card tab.<br />
2. Choose the Mifare definition you want to delete from the drop-down box.<br />
3. Click the Edit selected Mifare button.<br />
4. Click the Delete this Mifare definition check box.<br />
5. Click the Accept settings button.<br />
57
Smart Card Tab<br />
Mifare Standard<br />
Definition<br />
Screen<br />
Figure 11-5: Mifare Standard Definition Screen<br />
Mifare<br />
Standard<br />
Definition<br />
Fields<br />
Table 11-23: Mifare Standard Definition Fields<br />
Field Req’d Description<br />
Mifare definition<br />
name<br />
Biometric template<br />
compression<br />
Enter “new” FP<br />
Read Only Key A<br />
Enter “new” FP<br />
Read Only Key B<br />
Enter “new” MAD<br />
Read/Write Key B<br />
Enter card issuer<br />
key AB<br />
Enter “old” FP<br />
Read Only Key A<br />
Enter “old” FP<br />
Read Only Key B<br />
Enter “old” MAD<br />
Read/Write Key B<br />
Yes<br />
Yes<br />
Yes<br />
Yes<br />
Yes<br />
Yes<br />
Yes<br />
Yes<br />
Yes<br />
• Name of the Mifare definition<br />
• Any name that distinguishes this definition from others<br />
• Controls the amount of compression of the finger<br />
template before it is written to the Mifare card<br />
• Maximum compression should be used initially<br />
• See the Mifare Card Compression table on page 60 for<br />
more information<br />
• Check the box to edit these fields<br />
• Key entered must be the same in both boxes<br />
• Check the box to edit these fields<br />
• Key entered must be the same in both boxes<br />
• Check the box to edit these fields<br />
• Key entered must be the same in both boxes<br />
• Check the box to edit these fields<br />
• Key entered must be the same in both boxes<br />
• Check the box to edit these fields<br />
• Key entered must be the same in both boxes<br />
• Check the box to edit these fields<br />
• Key entered must be the same in both boxes<br />
• Check the box to edit these fields<br />
• Key entered must be the same in both boxes<br />
58
<strong>HandNet</strong> <strong>Lite</strong> <strong>Manual</strong><br />
Field Req’d Description<br />
Change automatic<br />
key update<br />
Yes<br />
The automatic key update choices are:<br />
• Diable auto key update<br />
• Start unlimited auto key update<br />
• Start limited auto key update (displays two additional<br />
fields)<br />
Figure 11-6: Mifare Standard Sector Assignment Screen<br />
• With limited auto key update, the operator can<br />
select the number of cards to be updated and/or the<br />
number of cards to automatically update.<br />
Mifare<br />
Standard<br />
Sector Fields<br />
Table 11-24: Mifare Standard Sector Fields<br />
Field Req’d Description<br />
Read card sectors<br />
1K Card or 4K<br />
Card<br />
Yes<br />
• Select the desired FingerKey to use in reading an<br />
existing Mifare Standard card<br />
• Select a card read timeout in seconds<br />
• Click the Read card button and present the Mifare<br />
Standard card to the reader<br />
• The card characteristics will be displayed<br />
• Use either Automatic Sector Assignment or <strong>Manual</strong><br />
Sector Assignment to determine where the FingerKey<br />
will place the biometric template.<br />
• Allows you to tell <strong>HandNet</strong> <strong>Lite</strong> if the Mifare Standard<br />
cards you will be using have 1K or 4K capacity.<br />
• If you have used the Read card button described<br />
above, this will be filled in automatically.<br />
59
Smart Card Tab<br />
Field Req’d Description<br />
Two finger<br />
enrollment or One<br />
finger enrollment<br />
Use Mifare<br />
Application<br />
Directory (MAD)<br />
Automatic sector<br />
assignments<br />
<strong>Manual</strong> Sector<br />
Assignment<br />
Yes<br />
Yes<br />
• Allows for storage of either one or two fingerprint<br />
biometric templates on the card.<br />
• Allows for use of a MAD (Mifare Application Directory)<br />
on the card. A MAD is stored in sector 0 (and 16 if a 4K<br />
card) and tells devices how the sectors on the card are<br />
allocated.<br />
• If unchecked, then you can assign any card sectors to<br />
fingerprint template storage.<br />
• If Use Mifare Application Directory is checked, then<br />
clicking this button will instruct <strong>HandNet</strong> <strong>Lite</strong> to<br />
automatically assign the sectors on the card to be used<br />
for biometric template assignment (Schlage Biometrics<br />
Sector).<br />
• Allows you to manually assign the sectors for either<br />
biometric template assignment (Schlage Biometrics<br />
sector) or a free/available sector. You will need to<br />
assign sectors as Schlage Biometrics sectors until the<br />
percentage assigned is 100%.<br />
As you use either Automatic or <strong>Manual</strong> sector assignment the display in the Mifare sector<br />
assignments group will change showing you the current assignment.<br />
If your installation is currently using Mifare Standard cards with another device and you<br />
wish to add FingerKey biometrics to your existing cards you will wish to:<br />
a. Determine if your current cards are formatted to use a Mifare Application Directory.<br />
Contact your existing device manufacturer. You can attempt to use the “Read card<br />
sectors” button in <strong>HandNet</strong> lite to attempt to read an existing MAD on the card.<br />
b. If your current cards are not formatted to use a MAD, then you will need to<br />
determine which sectors your current device manufacturer uses on your card. It<br />
is normal that sector 0 will be used, but your current cards may also contain data<br />
in additional sectors. Check with your existing device manufacturer to determine<br />
which sectors on your cards are available and begin the Schlage Biometrics sector<br />
assignment at the first free sector.<br />
Once you are satisfied with the card definition, click the “Accept settings” button to record<br />
the definition. You will then need to go back to the “Configuration” tab, and for each<br />
FingerKey to use this Mifare Standard definition you will need to “Edit selected reader”,<br />
click “Fingerprint settings” and use the drop down for “Mifare standard configuration” and<br />
select the saved Mifare Standard Definition.<br />
It is important that each FingerKey be assigned the correct Mifare standard configuration<br />
setting.<br />
Mifare Card<br />
Compression<br />
Table 11-25: Mifare Card Compression<br />
Number of Enrolled Fingers<br />
1 2<br />
No Compression 854 bytes 1654 bytes<br />
Minimum Compression 566 1078<br />
Medium Compression 454 854<br />
Maximum Compression 310 566<br />
60
Access Tab<br />
The Access Tab is used to add or edit access profiles. Access profiles define which type<br />
of user can use each reader.<br />
For example, suppose your maintenance staff should have access to the maintenance<br />
rooms, your office staff should have access to the office, and your supervisors should<br />
have access to everything. You would create three access profiles: one for supervisors,<br />
one for office staff, and one for maintenance personnel. These profiles would identify<br />
which readers each group could use. After creating these profiles, whenever you added a<br />
user, you would identify which group the user was a part of, and the access profile for that<br />
group would automatically give the appropriate access.<br />
If you want all users to be able to use every reader, you don’t need to set up access<br />
profiles. <strong>HandNet</strong> <strong>Lite</strong> comes set up with an Always profile that lets users use any reader<br />
in the system. (It also has a Never profile that doesn’t let the user verify at any reader.)<br />
You can’t change or delete the Always or Never profile.<br />
Figure 12-1: Access Tab<br />
Add an Access<br />
Profile<br />
1. Click the Access tab.<br />
2. Click the Create access profile button.<br />
3. Enter the access profile name.<br />
4. Check the boxes next to the readers you want users with this access profile to be able<br />
to access.<br />
5. Click the Accept settings button.<br />
Edit an Access<br />
Profile<br />
1. Click the Access tab.<br />
2. Select the name of the access profile you want to edit from the drop-down box.<br />
3. Click the Edit access profile button.<br />
4. Edit the access profile name, if necessary.<br />
5. Check the boxes next to the readers you want users with this access profile to be able<br />
to access.<br />
6. Click the Accept settings button.<br />
61
Access Tab<br />
Delete an<br />
Access Profile<br />
1. Click the Access tab.<br />
2. Select the name of the access profile you want to delete from the drop-down box.<br />
3. Check the box next to Delete this access profile.<br />
4. Click the Accept settings button.<br />
Figure 12-2: Access Profile Edit Screen<br />
Table 12-26: Access Profile Fields<br />
Field Req’d Description<br />
Access profile<br />
name<br />
Check readers to<br />
be included in this<br />
access profile<br />
Delete this access<br />
profile<br />
Yes<br />
No<br />
No<br />
• Name of the access profile<br />
• Use a name that describes the group of users for which<br />
this access profile will be used.<br />
• Any combination of letters, numbers, spaces, and<br />
special characters up to 30 characters<br />
• Lists all the readers in the system<br />
• Check the box next to each reader you want users with<br />
this profile to be able to access.<br />
• Uncheck the box next to each reader you do not want<br />
users with this access profile to be able to access.<br />
• Check to delete this access profile and remove it from<br />
the access profile list.<br />
• Access profiles that are assigned to users cannot be<br />
deleted. To remove an access profile from a user, see<br />
Edit a User on page 12.<br />
• If you delete the profile that is the default profile for<br />
reader enrollments, the next profile in the list will be<br />
selected. To choose a different default profile, go to the<br />
Settings window and choose the correct profile; see<br />
Settings Fields on page 25 for more information..<br />
62
Database Tab<br />
The Database Tab is used to backup, restore, delete, detach and attach the database.<br />
Figure 13-1: Database Tab<br />
Back Up the<br />
Database<br />
The Backup database button is used to create a backup of the <strong>HandNet</strong>-lite database.<br />
The location of the backup will be displayed at the bottom of the screen:<br />
1. Click the Database tab.<br />
2. Click the Backup database button.<br />
3. If you have completed all database operations you want to perform at this time, click<br />
the Click here when Database operations are complete button. See Finish Database<br />
Operations and Restart on page 64 for more information.<br />
Restore the<br />
Database<br />
The Restore database button is used to restore a backup file of the database.<br />
1. Click the Database tab.<br />
2. Click the Restore database button.<br />
3. Select the backup file you want to use from the pop-up window and click the Open<br />
button.<br />
4. If you have completed all database operations you want to perform at this time, click<br />
the Click here when Database operations are complete button. See Finish Database<br />
Operations and Restart on page 64 for more information..<br />
Delete the<br />
Database<br />
The Delete database button is used to delete the working copy of the database.<br />
1. Click the Database tab.<br />
2. Click the Delete database button.<br />
3. Click the Yes button on the pop-up window.<br />
If you delete the database, you will lose all configuration and user information<br />
in the system. A new, empty database will replace the current database.<br />
4. If you have completed all database operations you want to perform at this time, click<br />
the Click here when Database operations are complete button. See Finish Database<br />
Operations and Restart on page 64 for more information..<br />
63
Database Tab<br />
Disconnect the<br />
Database<br />
The Disconnect database button is used to disconnect the database from the MS SQL<br />
Server Express database engine.<br />
1. Click the Database tab.<br />
2. Click the Disconnect database button.<br />
3. If you have completed all database operations you want to perform at this time, click<br />
the Click here when Database operations are complete button. See Finish Database<br />
Operations and Restart on page 64 for more information..<br />
Reconnect the<br />
Database<br />
The Connect database button is used to reconnect the database to the MS SQL Server<br />
Express database engine.<br />
1. Click the Database tab.<br />
2. Click the Reconnect database button.<br />
3. If you have completed all database operations you want to perform at this time, click<br />
the Click here when Database operations are complete button. See Finish Database<br />
Operations and Restart on page 64 for more information..<br />
Finish<br />
Database<br />
Operations and<br />
Restart<br />
Once you have completed all database operations you want to perform at this time, click<br />
the Click here when Database operations are complete button. This will cause <strong>HandNet</strong>lite<br />
to exit. When you restart <strong>HandNet</strong>-lite it will take the following actions:<br />
1. If a database is currently attached, <strong>HandNet</strong> <strong>Lite</strong> will use that database.<br />
2. If a database is not currently attached, but database files exist, <strong>HandNet</strong> <strong>Lite</strong> will<br />
reattach the database files and continue.<br />
3. If a database is not currently attached, and there is no database file, <strong>HandNet</strong> <strong>Lite</strong> will<br />
create a new database.<br />
64
Appendix A<br />
Table A-27: Card Formats<br />
Type Format Description Format detail<br />
Wiegand<br />
formats<br />
1 WC01<br />
26 bit:<br />
16 bit ID<br />
2 WC02<br />
32 bit:<br />
22 bit ID<br />
3 WC03<br />
34 bit:<br />
16 bit ID<br />
4 WC04<br />
34 bit:<br />
20 bit ID<br />
5 WC05<br />
34 bit:<br />
32 bit ID<br />
6 WC06<br />
35 bit:<br />
20 bit ID<br />
7 WC07<br />
37 bit:<br />
19 bit ID<br />
8 WC08<br />
37 bit:<br />
35 bit ID<br />
Facility code: 8 bits, bit 2-9<br />
ID: 16 bits, bit 10-25<br />
1 2<br />
12345678901234567890123456<br />
PFFFFFFFFIIIIIIIIIIIIIIIIP<br />
EXXXXXXXXXXXX.............<br />
.............XXXXXXXXXXXXO<br />
Facility code: 8 bits, bit 2-9<br />
ID: 22 bits, bit 10-31<br />
1 2 3<br />
12345678901234567890123456789012<br />
PFFFFFFFFIIIIIIIIIIIIIIIIIIIIIIP<br />
EXXXXXXXXXXXXXXX................<br />
................XXXXXXXXXXXXXXXO<br />
Facility code: 16 bits, bit 2-17<br />
ID: 16 bits, bit 18-33<br />
1 2 3<br />
1234567890123456789012345678901234<br />
PFFFFFFFFFFFFFFFFIIIIIIIIIIIIIIIIP<br />
EXXXXXXXXXXXXXXXX.................<br />
.................XXXXXXXXXXXXXXXXA<br />
Facility code: 12 bits, bit 2-13<br />
ID: 20 bits, bit 14-33<br />
1 2 3<br />
1234567890123456789012345678901234<br />
PFFFFFFFFFFFFIIIIIIIIIIIIIIIIIIIIP<br />
EXXXXXXXXXXXXXXXX.................<br />
.................XXXXXXXXXXXXXXXXO<br />
ID: 32 bits, bit 2-33<br />
1 2 3<br />
1234567890123456789012345678901234<br />
PIIIIIIIIIIIIIIIIIIIIIIIIIIIIIIIIP<br />
EXXXXXXXXXXXXXXXX.................<br />
.................XXXXXXXXXXXXXXXXO<br />
Facility code: 12 bits, bit 3-14<br />
ID: 20 bits, bit 15-34<br />
1 2 3<br />
12345678901234567890123456789012345<br />
PPFFFFFFFFFFFFIIIIIIIIIIIIIIIIIIIIP<br />
.EXX.XX.XX.XX.XX.XX.XX.XX.XX.XX.XX.<br />
.XX.XX.XX.XX.XX.XX.XX.XX.XX.XX.XX.O<br />
OXXXXXXXXXXXXXXXXXXXXXXXXXXXXXXXXXX<br />
Facility code: 16 bits, bit 2-17<br />
ID: 19 bits, bit 18-36<br />
1 2 3<br />
1234567890123456789012345678901234567<br />
PFFFFFFFFFFFFFFFFIIIIIIIIIIIIIIIIIIIP<br />
EXXXXXXXXXXXXXXXXXX..................<br />
..................XXXXXXXXXXXXXXXXXXO<br />
ID: 35 bits, bit 2-36<br />
1 2 3<br />
1234567890123456789012345678901234567<br />
PIIIIIIIIIIIIIIIIIIIIIIIIIIIIIIIIIIIP<br />
EXXXXXXXXXXXXXXXXXX..................<br />
..................XXXXXXXXXXXXXXXXXXO<br />
65
Appendix A<br />
Type Format Description Format detail<br />
MagStripe<br />
formats<br />
9 MS09 MAG1 ABA Track 2<br />
Input ID len 25<br />
Output min len 1<br />
Output max len 25<br />
Do trim leading zeroes<br />
Oriented right, no offset<br />
10 MS10 MAG2 ABA Track 2<br />
Input ID len 25<br />
Output min len 1<br />
Output max len 25<br />
Do trim leading zeroes<br />
Oriented left, no offset<br />
11 MS11 MAG3<br />
Octal 7<br />
12 MS12 MAG 6<br />
AT 5<br />
ABA Track 2<br />
Input ID len 7<br />
Output min len 1<br />
Output max len 25<br />
Do trim leading zeroes<br />
Oriented right, no offset<br />
MS11 MAG3 Octal 7 is the format used for FingerKeys<br />
with a ProxIF reader.<br />
ABA Track 2<br />
Input ID len 6<br />
Output min len 1<br />
Output max len 25<br />
Do trim leading zeroes<br />
Oriented left, offset 5<br />
While these are the most common formats, you can define any additional formats that<br />
you need; see Managing Card Formats starting on page 45 for more information.<br />
Custom Splash<br />
Screen<br />
1. Shut down <strong>HandNet</strong> <strong>Lite</strong><br />
2. Create a bitmap (.bmp) image that is 100 x 100 pixels.<br />
3. Save the image to the program directory: C:\Program Files\Schlage\<strong>HandNet</strong>_<strong>Lite</strong>\<br />
Splash100x100.bmp. This path may vary depending on your individual installation.<br />
4. Restart <strong>HandNet</strong> <strong>Lite</strong>. The image should appear on the splash screen.<br />
66
<strong>HandNet</strong> <strong>Lite</strong> <strong>Manual</strong><br />
67
<br />
68
Index<br />
Symbols<br />
1K Card or 4K Card 59<br />
12 hour display 39<br />
A<br />
Access<br />
Tab 61<br />
Access profile 9<br />
Access Profile 13, 20<br />
Add 61<br />
Delete 62<br />
Edit 61<br />
Fields 62<br />
Access profile name 62<br />
Access profile of reader enrollments 25<br />
Action on Biometric Reject 43<br />
Action on Duress 43<br />
Action on ID Overflow 43<br />
Action on ID Unknown 43<br />
Add<br />
Access Profile 61<br />
Card Format 45<br />
DESFire Definition 55<br />
iCLASS Definition 50<br />
Mifare Standard Definition 57<br />
Network 29<br />
Operator 26<br />
Reader 33<br />
Special Users 11<br />
Users 11<br />
Additional reader timeout 25<br />
Address 21, 35, 38<br />
Alarms<br />
Fields 23<br />
Tab 23<br />
Aut 20<br />
Authority Level 9, 13<br />
Authority Levels<br />
Table 14<br />
Automatic Key Update 51<br />
Automatic sector assignments 60<br />
Auto Resume Timeout 42<br />
B<br />
Backup<br />
Database 63<br />
Baud Rate 33<br />
Beeper Control 42<br />
Beeper On 36, 39<br />
Biometric template compression 50,<br />
56, 58<br />
Biometric Threshold 13<br />
Bit Map 46<br />
Example 47<br />
Bits Direction 46<br />
C<br />
Card Definitions<br />
DESFire<br />
Managing 55<br />
Card Format 65<br />
Add 45<br />
Delete 45<br />
Edit 45<br />
Fields 46<br />
Manage 45<br />
Screen 46<br />
Structure 47<br />
Change automatic key update 59<br />
Change automatic user file key update<br />
56<br />
Check readers to be included in this access<br />
profile 62<br />
Clone From 35, 37, 46<br />
Comm Port 32<br />
Compression<br />
iCLASS Card 51<br />
Configuration<br />
Tab 29<br />
Confirm new reader key 50<br />
Credential ID 9, 13, 17, 20, 23<br />
D<br />
Database<br />
Backup 63<br />
Delete 63<br />
Disconnect 64<br />
Reconnect 64<br />
Restore 63<br />
Tab 63<br />
Date/Time 17, 23<br />
Days to retain expired database entries<br />
25<br />
Definition<br />
iCLASS 49<br />
Delete 46<br />
Access Profile 62<br />
Card Format 45<br />
Database 63<br />
DESFire Definition 55<br />
iCLASS Definition 50<br />
Network 30<br />
Operator 27<br />
Reader 34<br />
Users 12<br />
Deleted<br />
Mifare Standard Definition 57<br />
Delete this access profile 62<br />
Delete This Network 31, 32<br />
Delete This Reader 36, 39<br />
Description 30, 32, 35, 37<br />
DESFire Card<br />
Managing Definitions 55<br />
DESFire Card Compression 56<br />
DESFire communication 56<br />
DESFire Definition<br />
Add 55<br />
Delete 55<br />
Edit 55<br />
Fields 56<br />
DESFire definition name 56<br />
Digital Format 46<br />
Disconnect<br />
Database 64<br />
Display system status 39<br />
Duress Alarm 14<br />
Duress alert enable 39<br />
E<br />
E 9<br />
Edit<br />
Access Profile 61<br />
Card Format 45<br />
DESFire Definition 55<br />
FingerKey Reader 35<br />
Fields 35<br />
Fingerprint Settings 41<br />
Handkey Reader 37<br />
iCLASS Definition 50<br />
Mifare Standard Definition 57<br />
Network 30<br />
Operator 27<br />
Reader 34<br />
<strong>Security</strong> Settings 40<br />
Users 12<br />
Emulate Card Reader 36, 39<br />
Enable<br />
Second Finger 44<br />
Enabled 21, 31, 32, 36, 39<br />
Enroll<br />
Users 10<br />
Enrollment 40<br />
Enter card issuer key AB 58<br />
Enter “new” application master key 56<br />
Enter “new” FP Read Only Key A 58<br />
Enter “new” FP Read Only Key B 58<br />
Enter “new” MAD Read/Write Key B 58<br />
Enter “new” PICC master key 56<br />
Enter “new” user file key 56<br />
Enter “old” application master key 56<br />
Enter “old” FP Read Only Key A 58<br />
Enter “old” FP Read Only Key B 58<br />
Enter “old” MAD Read/Write Key B 58<br />
Enter “old” PICC master key 56<br />
Enter “old” user file key 56<br />
Event type 17<br />
Example<br />
Bit Map 47<br />
69
Index<br />
F<br />
Facility Code 36<br />
Fields<br />
Access Profile 62<br />
Alarms 23<br />
Card Format 46<br />
DESFire Definition 56<br />
FingerKey Reader 35<br />
Fingerprint Settings 41<br />
HandKey Reader 37<br />
iCLASS Definition 50<br />
Log Tab 17<br />
Serial Network 32<br />
Settings 25<br />
TCP/IP Network 30<br />
Users 13<br />
Finger<br />
Enable Second 44<br />
Fingerprint Settings<br />
Edit 41<br />
Fields 41<br />
Screen 41<br />
Finish Database Operations and Restart<br />
64<br />
First Name 9, 13<br />
FirstName 20<br />
Format Detail<br />
Interpretation 44<br />
Format Number 46<br />
Formats<br />
Card 65<br />
MagStripe 66<br />
Wiegand 65<br />
G<br />
Generate<br />
Reports 19<br />
H<br />
HandKey Reader<br />
Fields 37<br />
Help 3<br />
I<br />
iCLASS<br />
Definition 49<br />
Manage 49<br />
iCLASS Card<br />
Compression 51<br />
Protection 52<br />
iCLASS Configuration 42<br />
iCLASS Definition<br />
Add 50<br />
Delete 50<br />
Edit 50<br />
Fields 50<br />
70<br />
iCLASS definition name 50<br />
ID Length 35, 38<br />
Important Date 13<br />
Info 17, 23<br />
Input Format 1-5 42<br />
Input Restriction 46<br />
Interpret<br />
Format Detail 44<br />
Introduction 1<br />
IP address 31<br />
K<br />
Keyboard Commands 5<br />
Keypad Format 43<br />
L<br />
Language 2<br />
Last Name 9, 13<br />
LastName 20<br />
LED Control 42<br />
Length in Bits 46<br />
List<br />
Users 9<br />
Log<br />
Tab 17<br />
Fields 17<br />
Login 2<br />
Log I/O events 39<br />
M<br />
MagStripe<br />
Formats 66<br />
MagStripe formats 66<br />
Main Tab 4<br />
Manage<br />
Card Formats 45<br />
iCLASS 49<br />
Management 40<br />
Managing<br />
DESFire Card Definitions 55<br />
Networks 29<br />
Operators 26<br />
Reader 33<br />
<strong>Manual</strong> Sector Assignment 60<br />
MI 9, 20<br />
Middle Initial 13<br />
Mifare Card Compression 60<br />
Mifare definition name 58<br />
Mifare Standard Definition<br />
Add 57<br />
Deleted 57<br />
Edit 57<br />
N<br />
Name 21, 35, 37, 46<br />
Network 21, 35, 37<br />
Add 29<br />
Delete 30<br />
Edit 30<br />
Managing 29<br />
Serial 32<br />
TCP/IP 30<br />
Network name 17, 23<br />
Network Name 30, 32<br />
Network Type 31, 32<br />
New reader key 50<br />
no biometric verification 14<br />
No of Parity Bits 46<br />
Number of Tries 36, 38<br />
O<br />
Operating System 1<br />
Operator<br />
Add 26<br />
Delete 27<br />
Edit 27<br />
Managing 26<br />
Output Format 42<br />
P<br />
Parity Bits<br />
Setup 48<br />
Password 2<br />
Problems<br />
User Enrollment 10<br />
Protection<br />
iCLASS Card 52<br />
R<br />
Read card sectors 59<br />
Reader<br />
Add 33<br />
Delete 34<br />
Edit 34<br />
FingerKey<br />
Edit 35<br />
Handkey<br />
Edit 37<br />
Managing 33<br />
Reports 21<br />
Reader date/time Format 39<br />
Reader language type 39<br />
Reader name 17, 23<br />
Reader Status 7<br />
Ready String 36, 38<br />
Reconnect<br />
Database 64<br />
Reject threshold 36, 38<br />
Reports
<strong>HandNet</strong> <strong>Lite</strong> <strong>Manual</strong><br />
Generate 19<br />
Reader 21<br />
Tab 19<br />
Types 19<br />
Users 20<br />
Requirements<br />
System 1<br />
Reset old key 51<br />
Restore<br />
Database 63<br />
Retain reader enrollments 25<br />
S<br />
Screen<br />
Card Format 46<br />
Fingerprint Settings 41<br />
<strong>Security</strong> Settings 40<br />
Screen Resolution 1<br />
Secondary Finger Mode 41<br />
Second Finger<br />
Enable 44<br />
<strong>Security</strong> 40<br />
<strong>Security</strong> Settings<br />
Edit 40<br />
Screen 40<br />
Serial<br />
Network 32<br />
Fields 32<br />
Service 40<br />
Settings<br />
Fields 25<br />
Tab 25<br />
Setup 40<br />
Parity Bits 48<br />
Smart Card<br />
Tab 49<br />
S/N 21<br />
Specify (protect) application areas 51<br />
Starting 1<br />
Status<br />
Reader 7<br />
Status Tab 7<br />
Structure<br />
Card Format 47<br />
Sync to PC clock 39<br />
System Requirements 1<br />
Status 7<br />
Users 9<br />
TCP/IP<br />
Network 30<br />
Fields 30<br />
Two finger enrollment or One finger<br />
enrollment 60<br />
Type 21<br />
U<br />
Unique ID 9, 17, 20, 23<br />
Unique Identifier 13<br />
Use Mifare Application Directory (MAD)<br />
60<br />
User capacity 36, 39<br />
User name 17, 23<br />
Users<br />
Add 11<br />
Delete 12<br />
Edit 12<br />
Enroll 10<br />
Problems 10<br />
Fields 13<br />
List 9<br />
Reports 20<br />
Special 11<br />
Tab 9<br />
Use Second Finger as Duress Alarm 14<br />
V<br />
Value 43<br />
Verify on ID only 14<br />
W<br />
Wiegand<br />
Formats 65<br />
Wiegand formats 65<br />
T<br />
Tab<br />
Access 61<br />
Alarms 23<br />
Configuration 29<br />
Database 63<br />
Log 17<br />
Main 4<br />
Reports 19<br />
Settings 25<br />
Smart Card 49<br />
71
Index<br />
72
Ingersoll Rand’s <strong>Security</strong> <strong>Technologies</strong> Sector is a leading global provider of products and services that<br />
make environments safe, secure, and productive. The Sector’s market-leading products include electronic<br />
and biometric access control systems; time and attendance and personnel scheduling systems; mechanical<br />
locks and portable security, door closures and exit devices, steel doors and frames, architectural hardware<br />
and technologies and services for global security markets.<br />
408.341.4110 www.schlage.com www.ingersollrand.com<br />
Schlage<br />
Biometric Solutions<br />
Ingersoll Rand <strong>Security</strong> <strong>Technologies</strong><br />
1520 Dell Avenue<br />
Campbell, CA 95008<br />
Office: 866-861-2480/512-712-1413 (international)<br />
Fax: 866-303-1794/408-341-4111<br />
E-mail: sbssupport@irco.com<br />
©2009 Ingersoll-Rand Company Limited P/N 70100-6210 Rev. 3.0 06/09