HandNet Lite Manual - Security Technologies
HandNet Lite Manual - Security Technologies
HandNet Lite Manual - Security Technologies

You also want an ePaper? Increase the reach of your titles
YUMPU automatically turns print PDFs into web optimized ePapers that Google loves.
<strong>HandNet</strong> <strong>Lite</strong> <strong>Manual</strong><br />
Field Req’d Description<br />
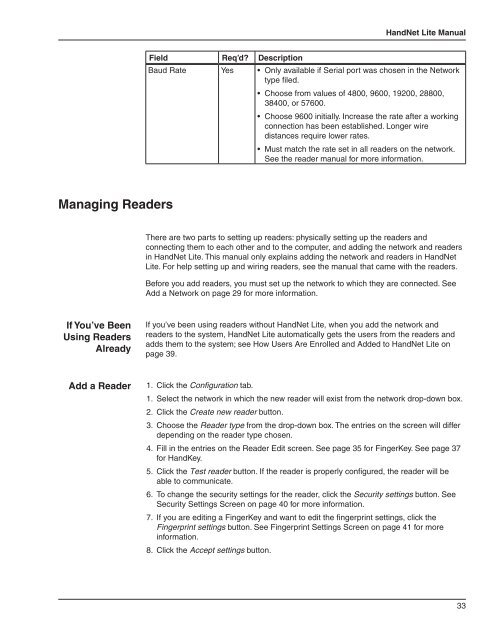
Baud Rate Yes • Only available if Serial port was chosen in the Network<br />
type filed.<br />
• Choose from values of 4800, 9600, 19200, 28800,<br />
38400, or 57600.<br />
• Choose 9600 initially. Increase the rate after a working<br />
connection has been established. Longer wire<br />
distances require lower rates.<br />
• Must match the rate set in all readers on the network.<br />
See the reader manual for more information.<br />
Managing Readers<br />
There are two parts to setting up readers: physically setting up the readers and<br />
connecting them to each other and to the computer, and adding the network and readers<br />
in <strong>HandNet</strong> <strong>Lite</strong>. This manual only explains adding the network and readers in <strong>HandNet</strong><br />
<strong>Lite</strong>. For help setting up and wiring readers, see the manual that came with the readers.<br />
Before you add readers, you must set up the network to which they are connected. See<br />
Add a Network on page 29 for more information.<br />
If You’ve Been<br />
Using Readers<br />
Already<br />
If you’ve been using readers without <strong>HandNet</strong> <strong>Lite</strong>, when you add the network and<br />
readers to the system, <strong>HandNet</strong> <strong>Lite</strong> automatically gets the users from the readers and<br />
adds them to the system; see How Users Are Enrolled and Added to <strong>HandNet</strong> <strong>Lite</strong> on<br />
page 39.<br />
Add a Reader<br />
1. Click the Configuration tab.<br />
1. Select the network in which the new reader will exist from the network drop-down box.<br />
2. Click the Create new reader button.<br />
3. Choose the Reader type from the drop-down box. The entries on the screen will differ<br />
depending on the reader type chosen.<br />
4. Fill in the entries on the Reader Edit screen. See page 35 for FingerKey. See page 37<br />
for HandKey.<br />
5. Click the Test reader button. If the reader is properly configured, the reader will be<br />
able to communicate.<br />
6. To change the security settings for the reader, click the <strong>Security</strong> settings button. See<br />
<strong>Security</strong> Settings Screen on page 40 for more information.<br />
7. If you are editing a FingerKey and want to edit the fingerprint settings, click the<br />
Fingerprint settings button. See Fingerprint Settings Screen on page 41 for more<br />
information.<br />
8. Click the Accept settings button.<br />
33