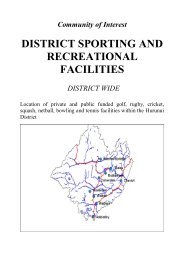
Project Hurunui Wind Construction and Project Overview
Project Hurunui Wind Construction and Project Overview
Project Hurunui Wind Construction and Project Overview

Create successful ePaper yourself
Turn your PDF publications into a flip-book with our unique Google optimized e-Paper software.
<strong>Project</strong> <strong>Hurunui</strong> <strong>Wind</strong> <strong>Construction</strong> Effects <strong>and</strong> Management Report<br />
comprise extensive earthworks with sidling cuts up to approximately 17m in height as<br />
shown on Photograph 5 in Appendix B.<br />
Once the route leaves the tight bend it continues to traverse the ridge in a sidling cut to the<br />
ridge top at a gradient of approximately 15%. From this location the route generally follows<br />
the ridge in a series of cuts <strong>and</strong> fills to join with Road A at Turbine A11 as shown on<br />
Photographs 6, 7 <strong>and</strong> 8 in Appendix B.<br />
Road A<br />
Road A is typically 6m wide (apart from the section between Turbines A11 <strong>and</strong> A9) <strong>and</strong><br />
generally runs along one of the two main project ridgelines running in a north-east to southwest<br />
direction. Road A begins in the northeast section of the site at turbine A11 <strong>and</strong><br />
terminates at the southwest section of the site at turbine A1.<br />
Road A runs along gentle to moderately undulating terrain in a series of moderate cuts <strong>and</strong><br />
fills from Turbine A11 to Turbine A8. The maximum gradient along this section is<br />
approximately 15% just prior to Turbine A8 with a corresponding maximum cut height of<br />
approximately 5m. Photograph 23 in Appendix B illustrates Road A between Turbines A9<br />
<strong>and</strong> A10 while the section just prior to Turbine A8 is shown on Photograph 13 in Appendix<br />
B.<br />
Between turbines A8 <strong>and</strong> A7 Road A generally descends following the ridgeline reaching a<br />
maximum gradient of about 13% prior to leveling out at Turbine A7. Beyond Turbine A7<br />
Road A descends at approximately 14% before rising along the ridgeline south towards<br />
Road C <strong>and</strong> Turbine A6. The section of Road A beyond Turbine A7 is illustrated on<br />
Photograph 14 in Appendix B.<br />
From Turbine A6 Road A descends gradually to turbine A2 generally following the broad<br />
ridgeline in minor cuts <strong>and</strong> fills. This section is shown on Photographs 15 to 20 in Appendix<br />
B.<br />
The final section of Road A from turbine A2 descends at a moderate gradient before rising<br />
sharply to turbine A1 which is located at the top of a steep sided knoll. In order to reach<br />
turbine A1 a box cut with a maximum cut height of approximately 7m will be required at a<br />
maximum gradient of approximately 20%. This section is illustrated on Photographs 21 <strong>and</strong><br />
22 in Appendix B.<br />
Road B<br />
Road B follows a secondary ridgeline which branches off from Road A between turbines A4<br />
<strong>and</strong> A3. Road B crosses the upper reaches of a gully, which will require a fill embankment<br />
<strong>and</strong> culvert, approximately 100m from its intersection with Road A. Road B descends at a<br />
moderate gradient reaching a maximum of 13% before leveling off to access Turbine B1.<br />
This section is shown on Photograph 24 in Appendix B. From Turbine B2 Road B<br />
descends for approximately 300m before climbing at a gradient of about 15% in a box cut<br />
with a maximum cut height of 5m over a distance of approximately 100m. The remaining<br />
section of Road B is relatively flat as it terminates at Turbine B1. Photograph 25 in<br />
Appendix B illustrates Road B at Turbine B1 while Photograph 26 shows Road B as viewed<br />
from Turbine A1. Road B is 6m wide.<br />
5C-1604.02<br />
February 2011 19