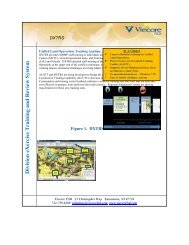
PDF Reader 7 Quick Reference Guide - Nuance
PDF Reader 7 Quick Reference Guide - Nuance
PDF Reader 7 Quick Reference Guide - Nuance

You also want an ePaper? Increase the reach of your titles
YUMPU automatically turns print PDFs into web optimized ePapers that Google loves.
Use Edit / Preferences / Forms to decide how forms will be displayed and<br />
function. Choose to have field values automatically calculated whenever<br />
the form contains numerical controls with calculations defined. Choose<br />
whether the focused form control should have a border or not and choose<br />
colors for the field highlighting – required fields can be given a different<br />
color. An auto-complete function can be defined to speed up repeated<br />
form filling.<br />
Returning the filled form<br />
To return a filled form, click its Submit button if it has one (this may<br />
require JavaScript to be enabled). Or save the form and send it via<br />
e-mail. Or print the whole filled form and send it by fax or post. Another<br />
option is to print the empty electronic form before filling it, then fill it in<br />
<strong>PDF</strong> <strong>Reader</strong>, place the empty form in your printer and print your<br />
responses onto it by choosing ‘Form fields only’ in the Print Content list<br />
box. If you receive the form as an active <strong>PDF</strong> and also on paper (maybe<br />
in color), you can fill the electronic form, put the form in your printer and<br />
print just your responses onto it as described above.<br />
Verifying signatures<br />
You may receive a document (not necessarily a form) containing a digital<br />
signature. You can verify the signature if the sender also sent you a<br />
security certificate file (extension .p7b, .p7c or .cer). Click inside the<br />
signature to verify it. A dialog box tells you whether or not:<br />
o the document has been modified since it was signed<br />
o the signature can be verified as authentic.<br />
Choose Trusted Identities in the Document menu to browse for certificate<br />
files. Once added, they allow verification. The dialog box displays<br />
certificate file information (name, issuer and expiry date) and lets you<br />
remove or export the files.<br />
Working with Portfolios<br />
A portfolio is a set of files grouped into a single <strong>PDF</strong> file. It can contain all<br />
file types and can have sub-folders. XPS files retain their file type when<br />
placed in a portfolio. <strong>PDF</strong> <strong>Reader</strong> can open portfolios and display the <strong>PDF</strong><br />
files inside it. It can also display MS Office files inside the portfolio<br />
window, providing the source program is available. After viewing a file,<br />
click Home to return to the portfolio (the close button shuts the whole<br />
portfolio).<br />
The portfolio interface uses Flash technology, so you will need a recent<br />
Flash media player on your system to gain the full benefit from it.<br />
First the interface displays document thumbnails and subfolders (if any).<br />
Double-click on a file to display it. Use the left and right arrows in the<br />
<strong>Nuance</strong> <strong>PDF</strong> <strong>Reader</strong> 7 <strong>Reference</strong> <strong>Guide</strong> 14